

Free tools Windows power users keep installed
One-click scans. No signup required.
iTechGuides is reader-supported. When you buy through links on our site, we may earn an affiliate commission. As an Amazon Associate I earn from qualifying purchases. Learn more
If you receive the “Windows could not automatically detect this network’s proxy settings” when you run network troubleshooter, use the options discussed in this guide to fix the problem.
Option 1: Check Automatic Proxy Setup
Windows 10 includes proxy setup within Windows settings. This is the first place to look.
Here are the steps:
- Right-click Window 10 start menu and click Settings.

- When Settings opens, click Network & Internet.

- Then click Proxy.

- Refer to the image below. For most settings: Automatically detect settings should be on. On the Manual proxy setup section, Use a proxy server should be off.
- If you are a home user, ensure that yours is set up as shown in the image. For office users, contact your network administrator.

If you made changes to the proxy setup above, check whether you can connect to the internet. But, your settings is exactly as shown above, try the next fix in this guide.
Option 2: Reset the Network Adapter
The next easy fix for “Windows could not automatically detect this network’s proxy settings” is to perform a network reset.
Popular on Amazon
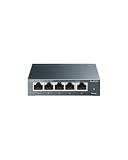
- 𝗢𝗻𝗲 𝗦𝘄𝗶𝘁𝗰𝗵 𝗠𝗮𝗱𝗲 𝘁𝗼 𝗘𝘅𝗽𝗮𝗻𝗱 𝗡𝗲𝘁𝘄𝗼𝗿𝗸: 5× 10/100/1000Mbps RJ45 Ports supporting Auto Negotiation and Auto MDI/MDIX.
- 𝗚𝗶𝗴𝗮𝗯𝗶𝘁 𝘁𝗵𝗮𝘁 𝗦𝗮𝘃𝗲𝘀 𝗘𝗻𝗲𝗿𝗴𝘆: Latest innovative energy-efficient technology greatly expands your network capacity with much less power consumption and helps save money.
- 𝗥𝗲𝗹𝗶𝗮𝗯𝗹𝗲 𝗮𝗻𝗱 𝗤𝘂𝗶𝗲𝘁: IEEE 802.3X flow control provides reliable data transfer and Fanless design ensures quiet operation.
- 𝗣𝗹𝘂𝗴 𝗮𝗻𝗱 𝗣𝗹𝗮𝘆: Easy setup with no software installation or configuration needed.
- 𝗔𝗱𝘃𝗮𝗻𝗰𝗲𝗱 𝗦𝗼𝗳𝘁𝘄𝗮𝗿𝗲 𝗙𝗲𝗮𝘁𝘂𝗿𝗲𝘀: Prioritize your traffic and guarantee high quality of video or voice data transmission with Port-based 802.1p/DSCP QoS and IGMP Snooping.
A reset will remove all network drivers and restore them to the original state. Unless your computer is infected by a malware or otherwise badly damaged, this should fix the problem and get you back on the internet!
Here are the steps:
- Follow the steps in Method 1 until you get to Network status.

- Then scroll down until you get to Network reset.

- Click Network reset.

- Then click Reset now. On the Network reset confirmation, click Yes.

After sometime your PC will restart. You will receive a shutdown notification prior the restart.

When the network reset is completed, try connecting to the internet. If the problem is still not resolved, try the next fix.
Quick wins for a faster PC:
Fix the driver behind crashes, sound loss and screen glitchesFind Drivers →Clear out junk files and repair common Windows errorsFree Scan →Also popular on Amazon

- GIGABIT ETHERNET PORTS: Features 5 x 1.0Gbps Ethernet ports for high-speed connectivity. Auto-negotiating ports detect the optimal speed for connected devices and work with existing Cat5e or Cat6 Ethernet cables.
- PLUG-AND-PLAY UNMANAGED NETWORK SWITCH: Simple plug-and-play setup with no software to install or configuration required.
- FLEXIBLE MOUNTING OPTIONS: Compact metal design supports desktop or wall-mount placement for versatile installation.
- SILENT & ENERGY-EFFICIENT OPERATION: Fanless design ensures silent performance, while IEEE 802.3az Energy Efficient Ethernet reduces power consumption without compromising high-speed network performance.
- REGIONAL COMPATIBILITY: Made for use in U.S. & CA only
Option 3: Run the Malware Removal Tool
If the last two fixes have not resolved “Windows could not automatically detect this network’s proxy settings” error then there may be more trouble!
My next fix is to Download and Run Microsoft’s Malicious Software Removal Tool (MSRT). Follow the last link for details.
Once you run the malware removal tool, reboot and check whether the problem is resolved. If it is still not fixed, then you need to repair, reset or restore Windows 10!
Also popular on Amazon

- 8 GIGABIT PORTS: Features 8 RJ45 ports supporting 10/100/1000 Mbps speeds, providing high-speed wired network connectivity for computers, printers, gaming consoles, and other Ethernet-enabled devices
- PLUG AND PLAY SETUP: No configuration required; simply connect the switch to your network devices and it is ready to use immediately, making network expansion quick and hassle-free
- FANLESS QUIET DESIGN: The fanless design ensures silent operation, making this switch suitable for noise-sensitive environments such as home offices, bedrooms, or conference rooms
- STURDY METAL CONSTRUCTION: Built with a durable metal housing and shielded ports that provide reliable performance, better heat dissipation, and protection against electromagnetic interference
- TRAFFIC OPTIMIZATION: Supports IEEE 802.3x flow control and advanced traffic optimization technology to reduce data bottlenecks and ensure smooth, efficient data transfer across your network
The last 3 recommended fixes is intended to repair or restore your operating system.
Here they are.
Option 4: Run the DISM and SFC Commands
This method resolves most Windows 10 problems. I suspect that whatever triggered “Windows could not automatically detect this network’s proxy settings” error, the commands below are likely to fix it!
- Search Command Prompt. Then right-click it and select Run as administrator.

- Respond Yes to the User Account Control prompt.

- At the Command Prompt, type the command below (preferably, copy and paste). Then press enter.
DISM.exe /Online /Cleanup-Image /Restorehealth

- Wait for the DISM command to complete. Then on the same command prompt type this command and press enter.
SFC /ScanNow
When the SFC command completes, restart your computer. If this does not fix “Windows could not automatically detect this network’s proxy settings” error, then try the last 2 fixes in this guide.
Also popular on Amazon

- GIGABIT ETHERNET PORTS: Features 24 x 1.0Gbps Ethernet ports for high-speed connectivity. Auto-negotiating ports detect the optimal speed for connected devices and work with existing Cat5e or Cat6 Ethernet cables.
- PLUG-AND-PLAY UNMANAGED NETWORK SWITCH: Simple plug-and-play setup with no software to install or configuration required.
- FLEXIBLE MOUNTING OPTIONS: Compact metal design supports desktop, wall-mount, or rack-mount placement for versatile installation.
- SILENT & ENERGY-EFFICIENT OPERATION: Fanless design ensures silent performance, while IEEE 802.3az Energy Efficient Ethernet reduces power consumption without compromising high-speed network performance.
- REGIONAL COMPATIBILITY: Made for use in U.S. & CA only
Option 5: Use System Restore
Most users that received “Windows could not automatically detect this network’s proxy settings” resolved it by performing a system restore.
Steps to restore Windows 10 to a previous restore point:
- Search Recovery. Then click Recovery options.
- On the Recovery settings, Advanced start-up section, click Restart now.

- When Windows 10 boots to recovery environment, click Troubleshoot.

- Then on the Troubleshoot screen, click Advanced options.

- On the Advanced options screen, click System Restore. Windows will take sometime to load the next screen.

- System Restore will then display all users on the computer. Select the user with administrative privilege to perform the restore. Then enter the password for the account you selected and click Continue.


- The system restore wizard will load. Click Next.

- Select a restore point and click Next.

- To initiate the restore, click Finish. Then to confirm the restore, click Yes.

When the restore completes, “Windows could not automatically detect this network’s proxy settings” should be resolved – assuming whatever caused the error happened after the restore point was created!
Also popular on Amazon

- GIGABIT ETHERNET PORTS: Features 5 x 1.0Gbps Ethernet ports for high-speed connectivity. Auto-negotiating ports detect the optimal speed for connected devices and work with existing Cat5e or Cat6 Ethernet cables.
- EASY SMART MANAGED NETWORK SWITCH: Intuitive software interface offers Easy Smart Managed Essentials capabilities to configure VLANs, prioritize traffic with QoS, monitor ports, and manage network security for small businesses.
- FLEXIBLE MOUNTING OPTIONS: Compact metal design supports desktop or wall-mount placement for versatile installation.
- SILENT & ENERGY-EFFICIENT OPERATION: Fanless design ensures silent performance, while IEEE 802.3az Energy Efficient Ethernet reduces power consumption without compromising high-speed network performance.
- REGIONAL COMPATIBILITY: Made for use in U.S. & CA only
If the error is not fixed then you may have to reset your PC.
Independent reader supportYour contribution helps us test, update, and keep practical guides available for everyone.Option 6: Reset Windows 10
When you reset your PC using the steps in this section, you will have to reinstall all your applications. Your data will not be lost. Please select your options carefully.
Steps to reset your PC.
- Whiled logged in to your computer, search for Recovery. Then click Recovery options.
- At Recovery options settings, on the Reset this PC section, click Get started.

- On the Chose an option page, select Keep my files.

- The reset process will commence. Wait…

- At the next prompt, click Next.

- Then, to start the Reset click Reset.

- Now wait for the Reset to complete.

When the reset completes, “Windows could not automatically detect this network’s proxy settings” should be fixed for good.
Conclusion
I am confident that one of the 6 fixes discussed in this guide has resolved this Windows 10 network problem for you. Kindly let me know the option that worked for you by responding to the “Was this page helpful?” question below.
Finally, if you want more Windows 10 fixes, visit our Windows 10 Fix It page.
Quick Recap
Product prices and availability are accurate as of the date/time indicated and are subject to change. Any price and availability information displayed on Amazon at the time of purchase will apply.


Muchísimas gracias, me sirvió muchísimo!. Pasé por todas las instancias previstas en estos artículos, pero el reset de network fue el paso que arregló mi problema de no encontrar la DNS.