This is a step-by-step guide to dual boot Ubuntu and Windows 10 on the same computer. Dual boot means to install Ubuntu and Windows 10 then use GRUB (Ubuntu boot manager) to select which Operating System to boot at any time.
What you need for the Dual Boot
- A computer with Windows 10 installed
- A USB stick with at least 3GB of free space
Step 1: Download Ubuntu
Follow the steps below to download Ubuntu Linux
- Open releases.ubuntu.com.
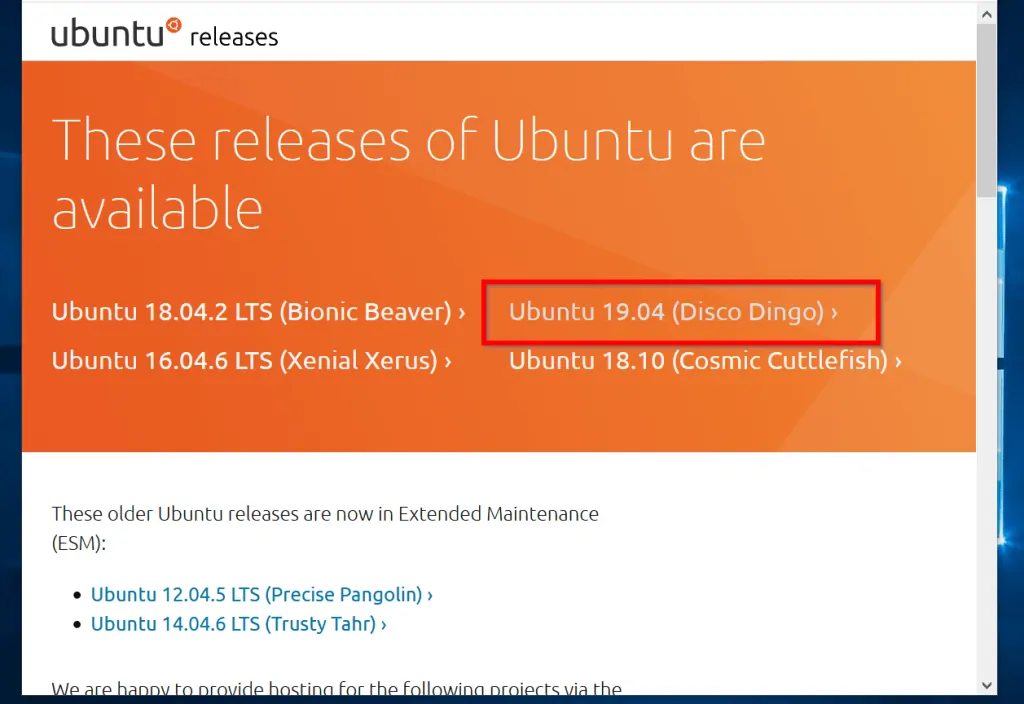
- Next, click on the version you wish to install. For this guide, I am downloading version 19.04.
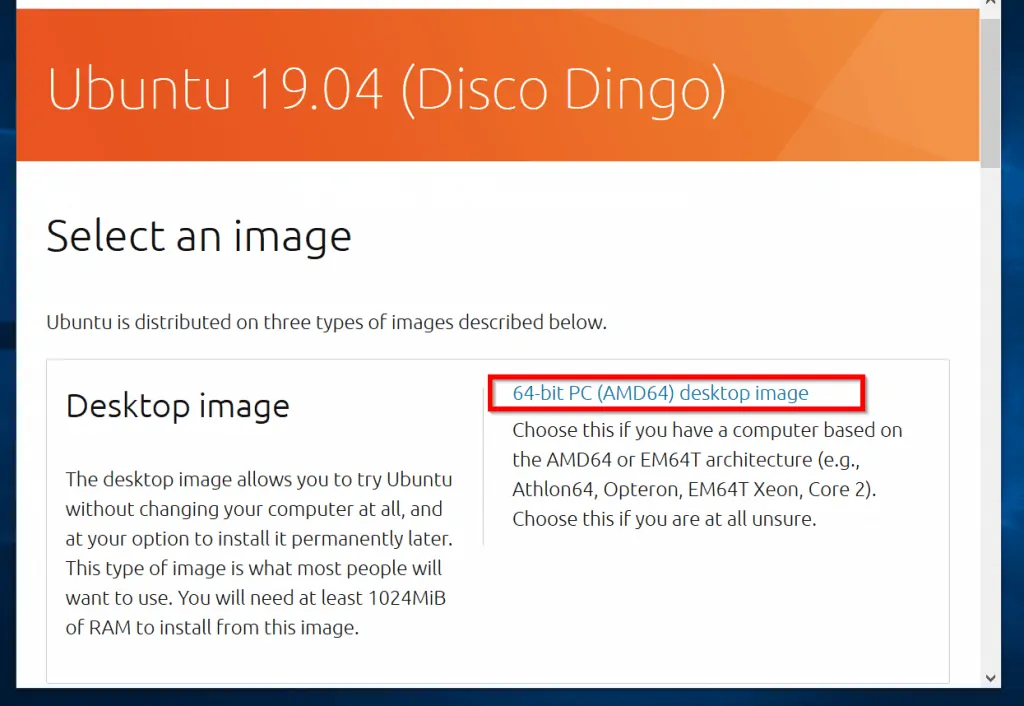
- When the above page loads, click the link to download the desktop image. Save the file on a USB stick.
While the download is going on, proceed to the next step. Depending on your internet speed, download may take up to an hour. When the download completes, save the ISO file to your computer.
Then follow these steps below to prepare Ubuntu to boot from a USB stick (or drive).
- Download Universal USB Installer
- Scroll down the page and click Download UUI.
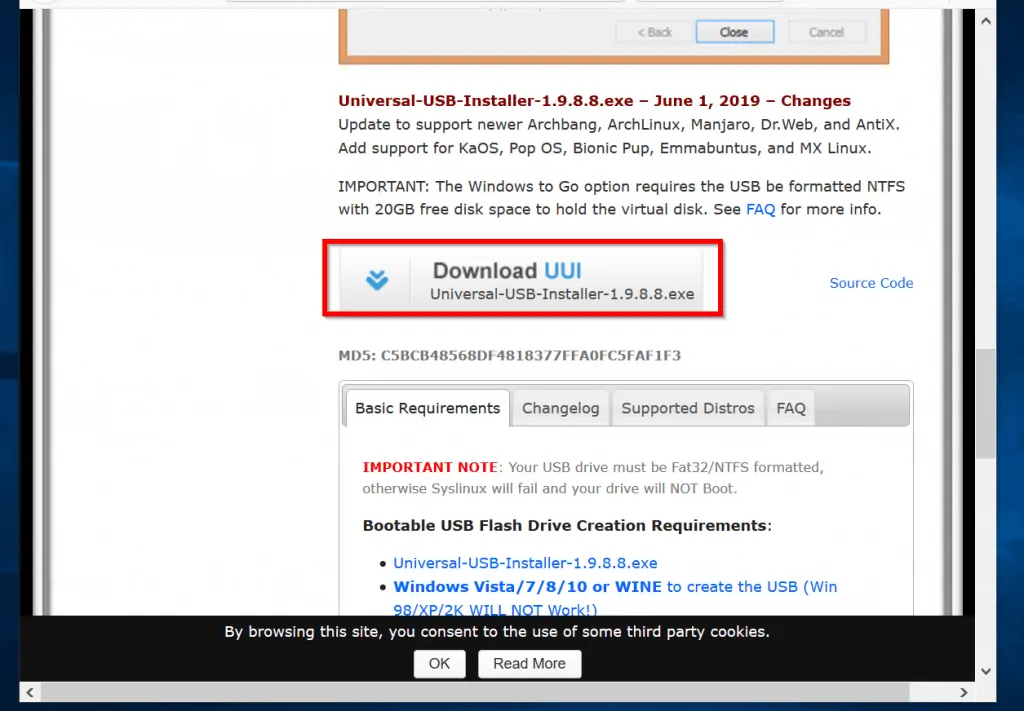
- Save the exe file to your computer
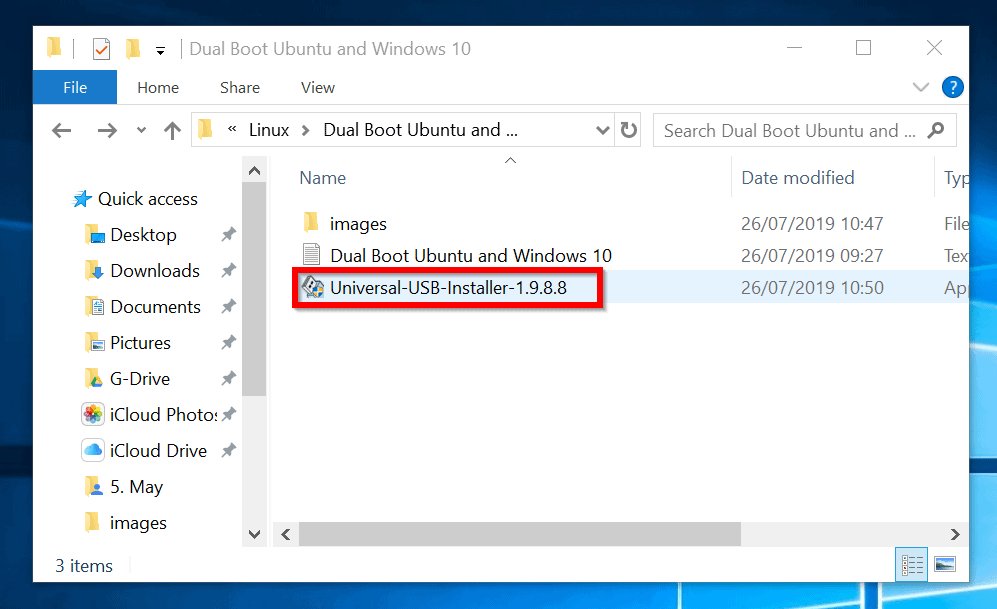
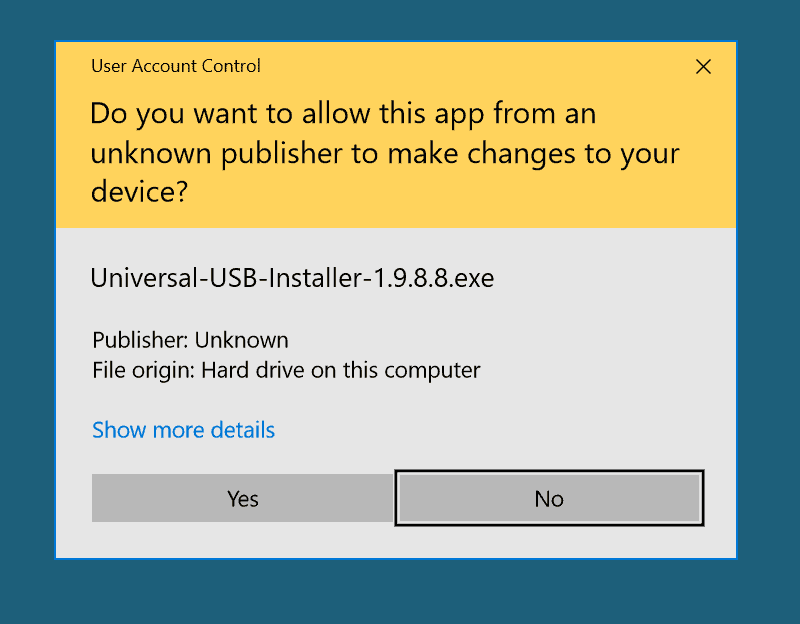
- Next, double-click the installer. Then click Yes to the User Acces Control dialogue.
- On the USB Installer setup click Agree.
- When the UUI loads, set it up as shown below. On Step 1, click the drop-down and select Ubuntu. Then on step 2, click browse, navigate to the location you saved the downloaded Ubuntu ISO image and click it. Finally, click the drop-down beneath Step 3 and select the USB drive you wish to use. To create the installer, click Create.
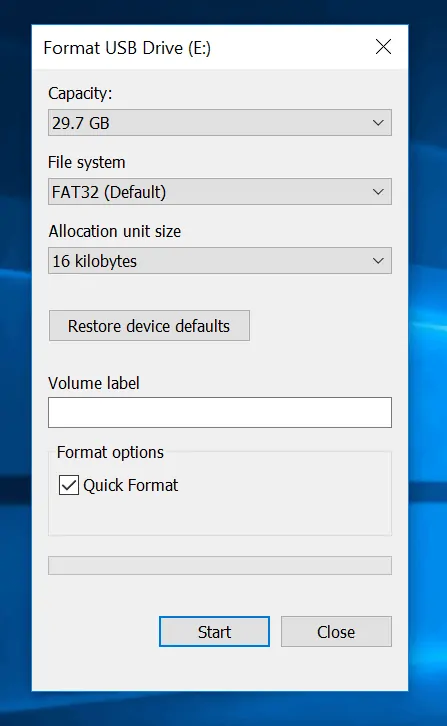
- When you click Create, the window below will pop up. Click Yes. The second image below will pop up. Wait for the USB stick preparation to complete.
- When the USB prep completes, click Close. Then proceed to the next step.
Step 2: Prepare Windows 10
This is a 2-step process
- Create a free space on the hard disk to install Ubuntu
- Disable Windows 10 secure boot (UEFI Secure Boot)
1. Create a free space
Before you dual boot Ubuntu and Windows 10, you need to create a free space in your hard drive. This is where you will install Ubuntu.
Follow the steps below to create a free space on Windows 10.
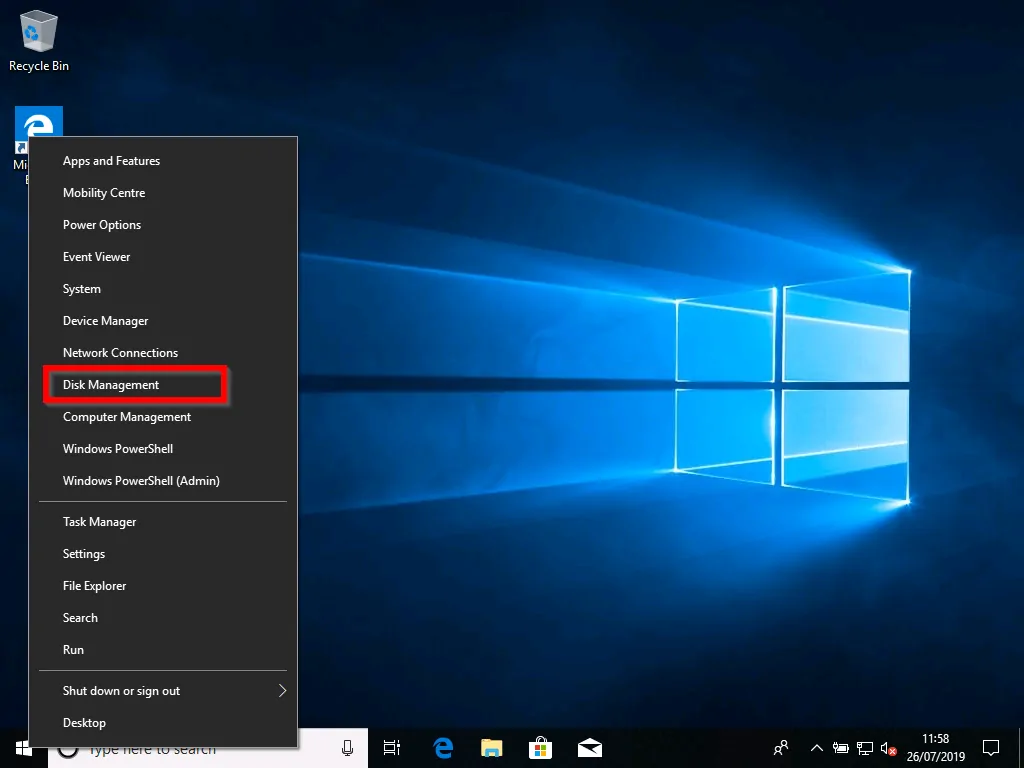
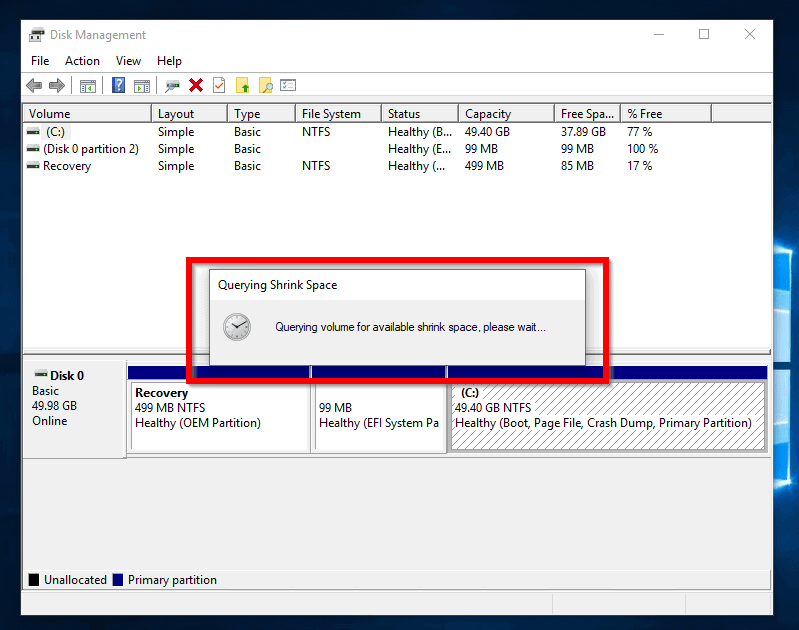
- Login to Windows 10. Then right-click the Widows logo and select Disk Management.
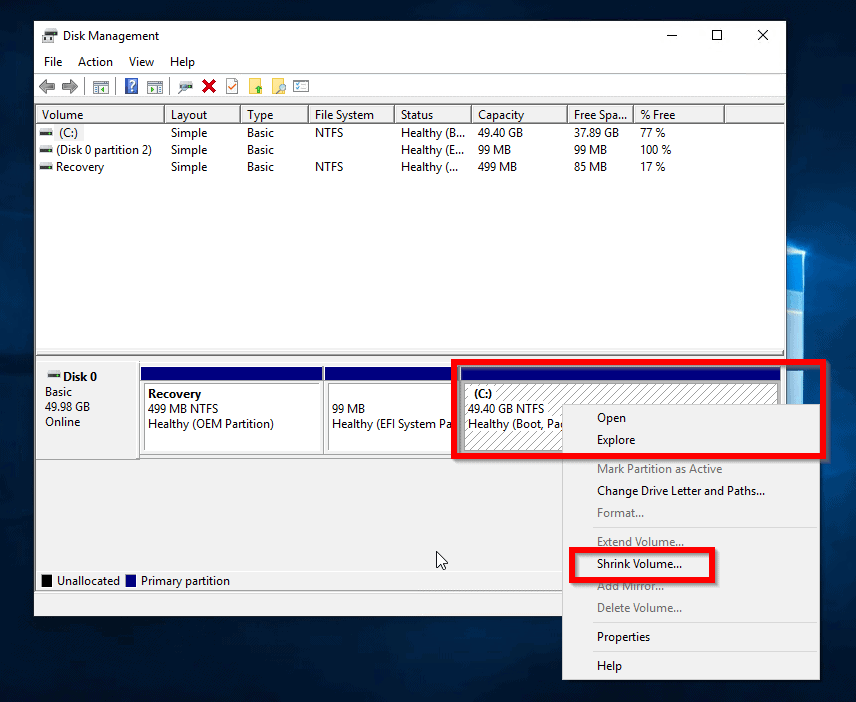
- When Disk Management loads, right-click drive C and select shrink volume. Wait for Disk Management to calculate available free space.
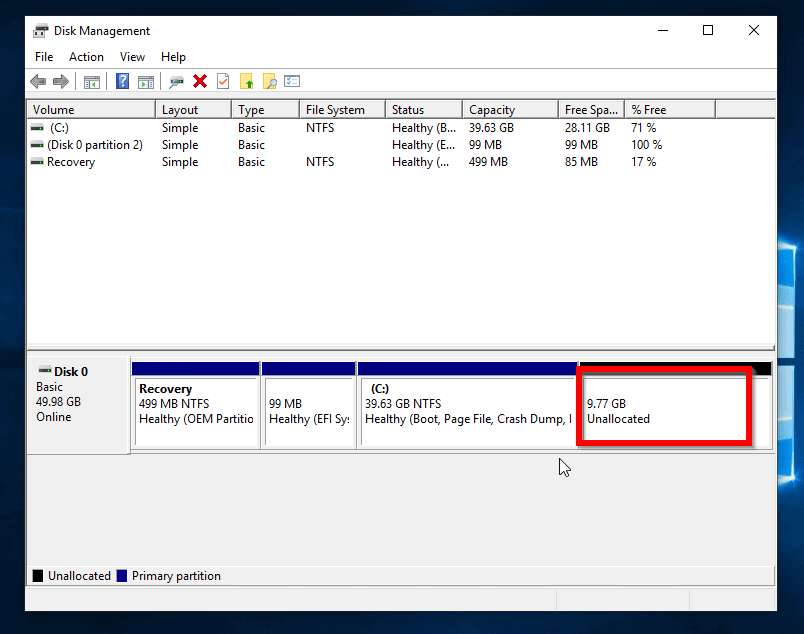
- When the option to shrink drive c loads, enter the value in the highlighted part of the image below.
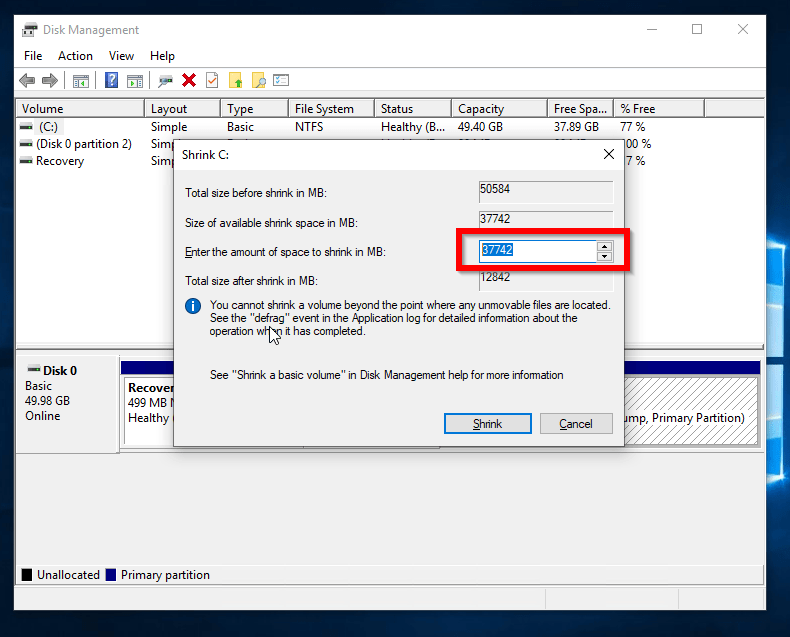
- When you have entered the value, click Shrink. When the drive Shrink competes you will have a free space. See the highlighted part of the image below.
2. Disable UEFI Secure Boot
Some hardware may not require this step. But it is recommended to enure that Ubuntu will boot.
There are risks associated with disabling Windows 10 secure boot. One risk is that your computer may become more prone to boot sector virus attack.
Here are the steps to disable secure boot:
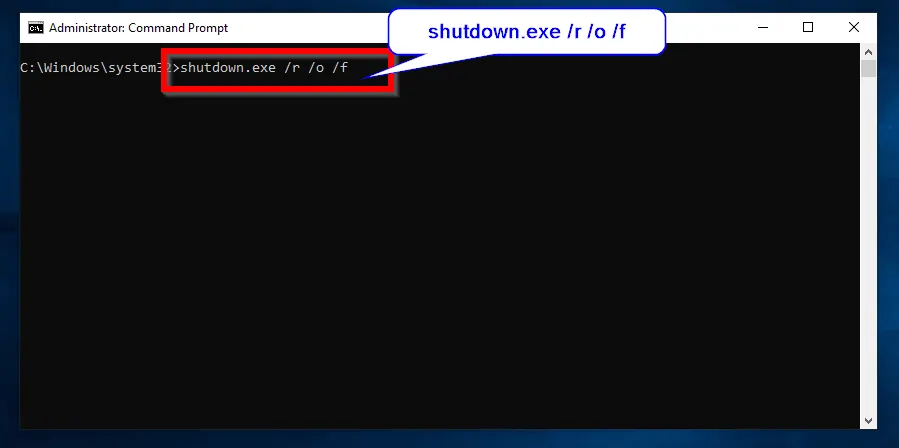
- From Windows 10, search for Command Prompt, right-click it and select Run as Administrator.
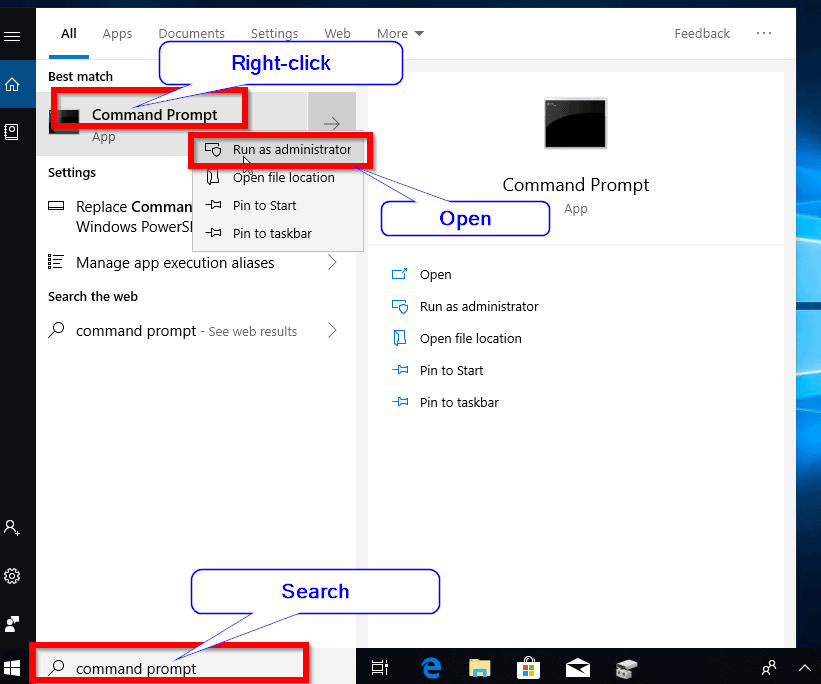
- When Command Prompt opens, type the command below. Then pres Enter.
shutdown.exe /r /o /f
- Windows 10 will restart into Advanced boot mode. See the image below.
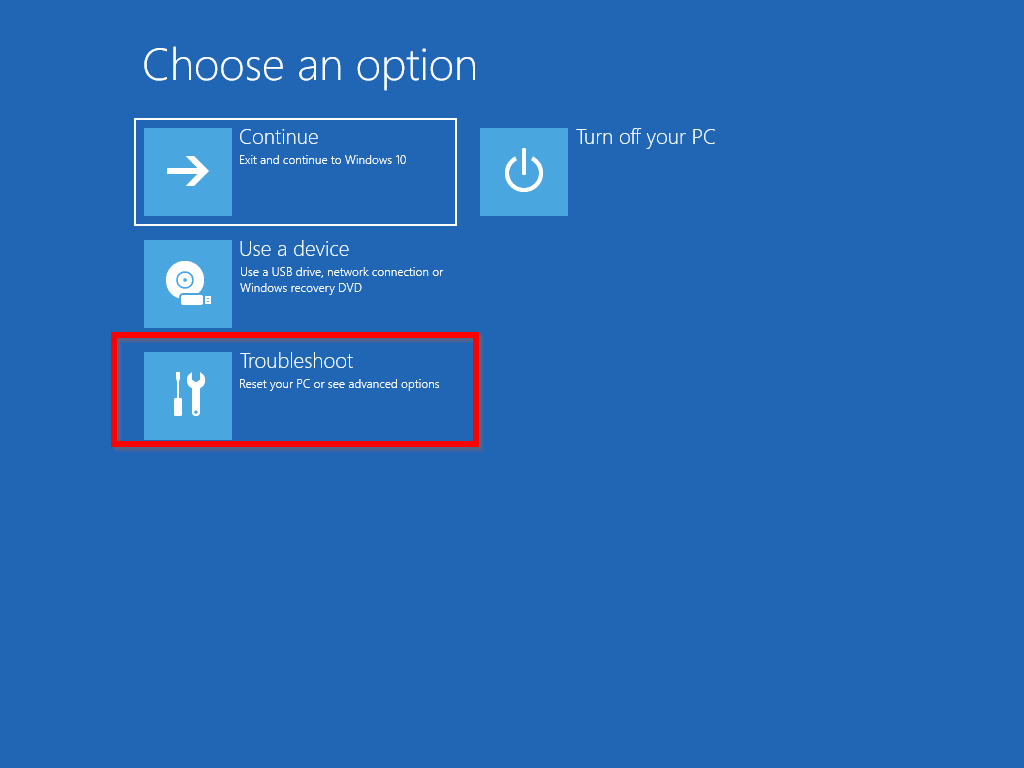
- Click Troubleshoot.
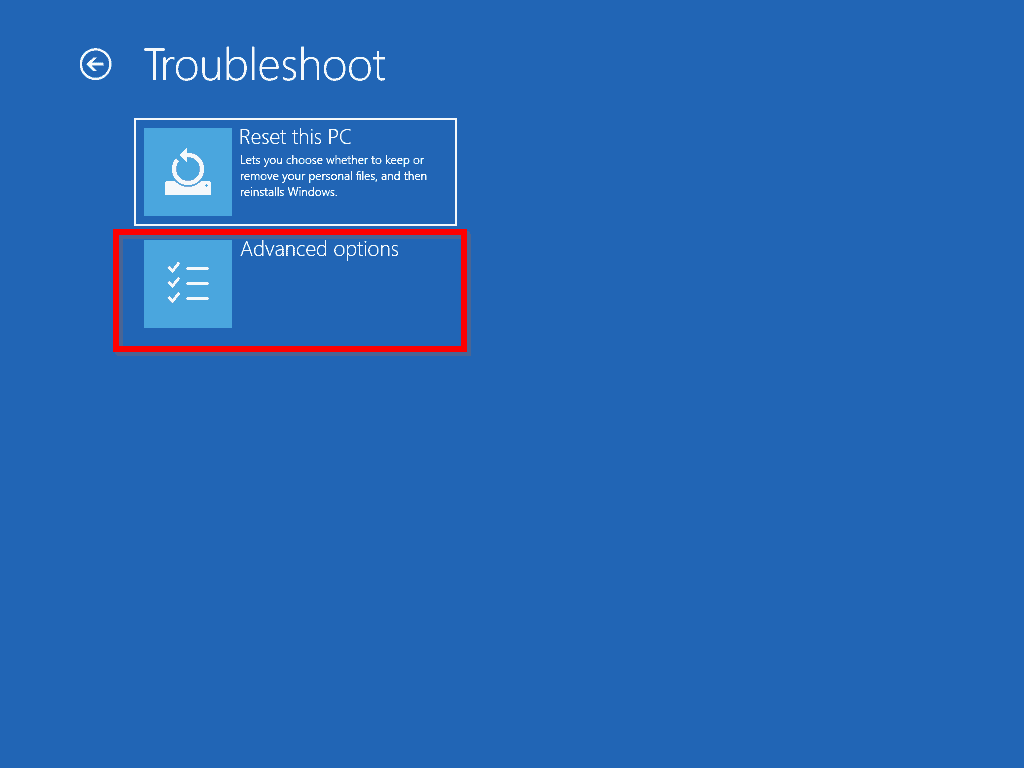
- Then click Advanced Options.

- Next, click UEFI Firmware Settings.

- Finally, click Restart. Your computer will boot to UEFI. Locate Secure Boot and disable it.
Step 3: Install Ubuntu
Now you are ready to install Ubuntu! This is the last step to dual boot Ubuntu and Windows 10.
Follow the steps below to install Ubuntu
- Still logged on to Windows 10, open command prompt as administrator. Then enter the command below and press enter.
shutdown.exe /r /o /f
- Your computer will reboot to advanced Windows 10 mode. See the image below:
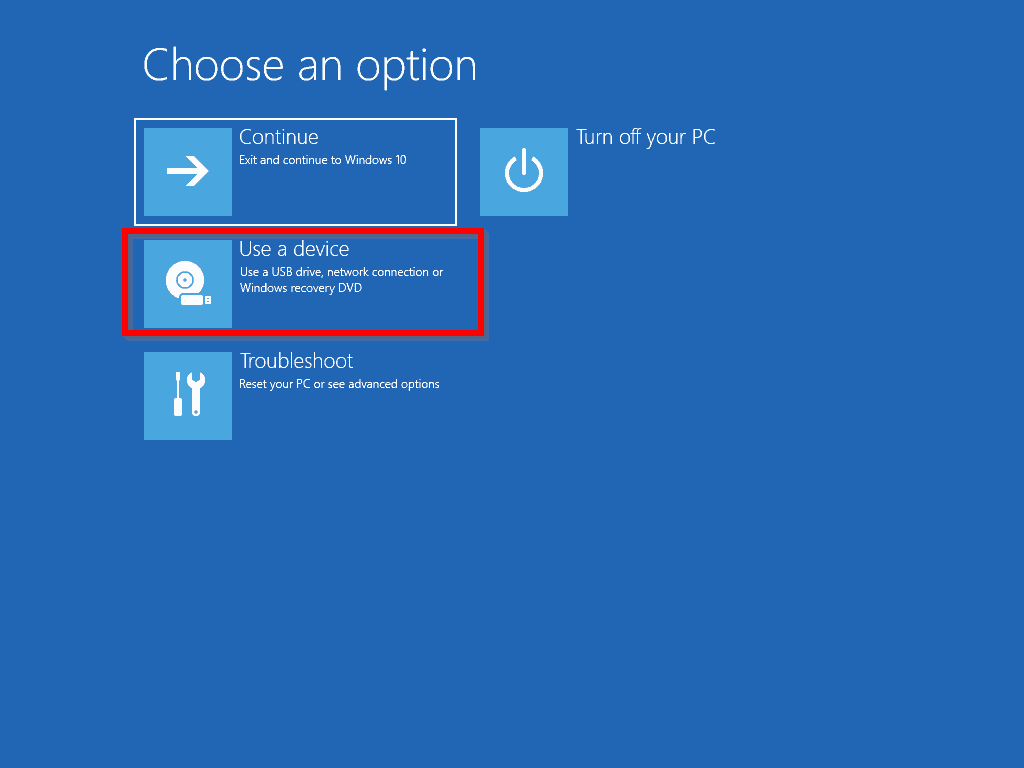
- Next, click Use a device.
Follow the steps to select the USB drive as your installation media. Then proceed with the installation as shown below.
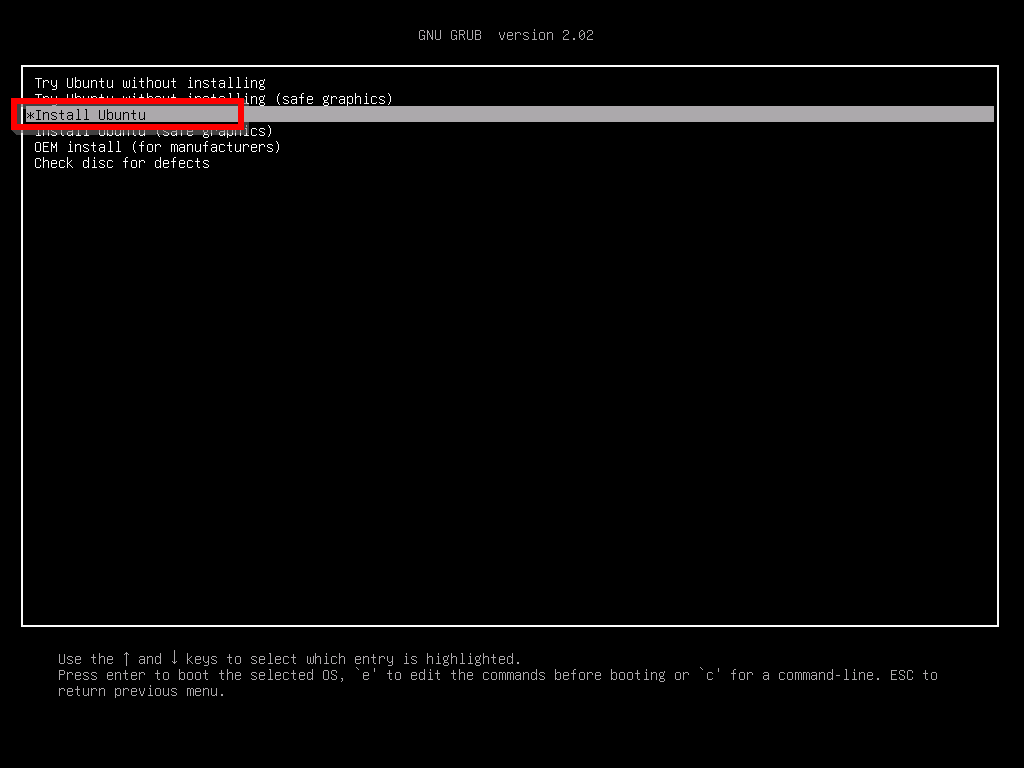
- When your PC boots into Ubuntu install, select Install Ubuntu. Then click Enter.
- Next, select your language. Then click continue.

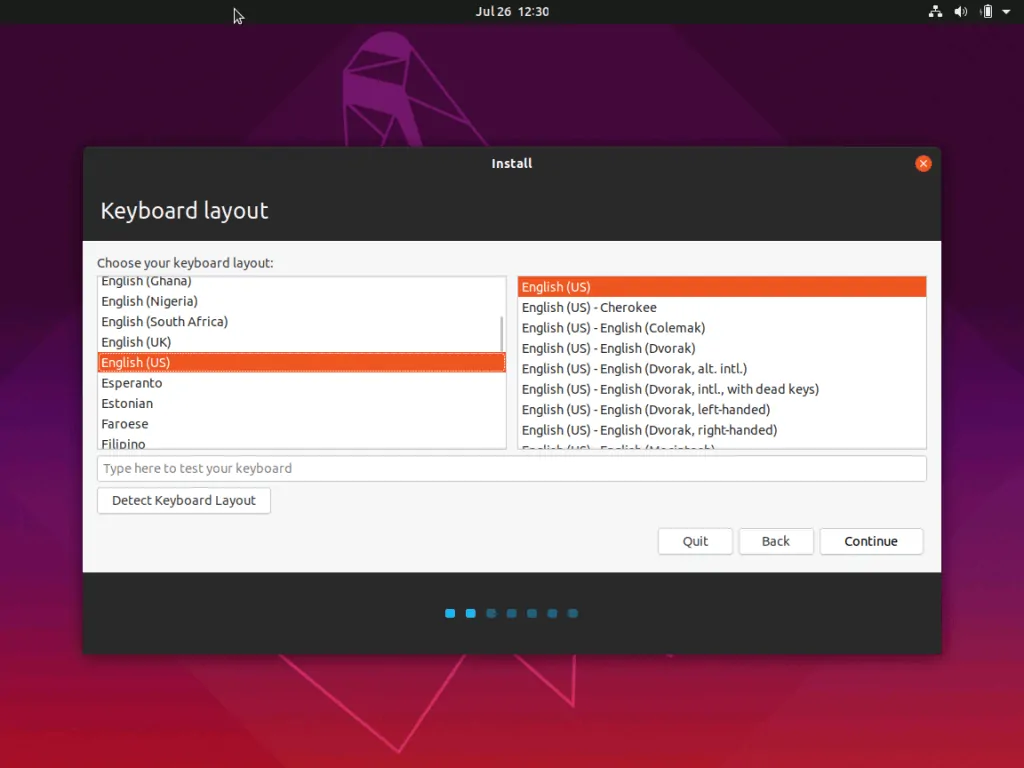
- Select your keyboard and click continue.
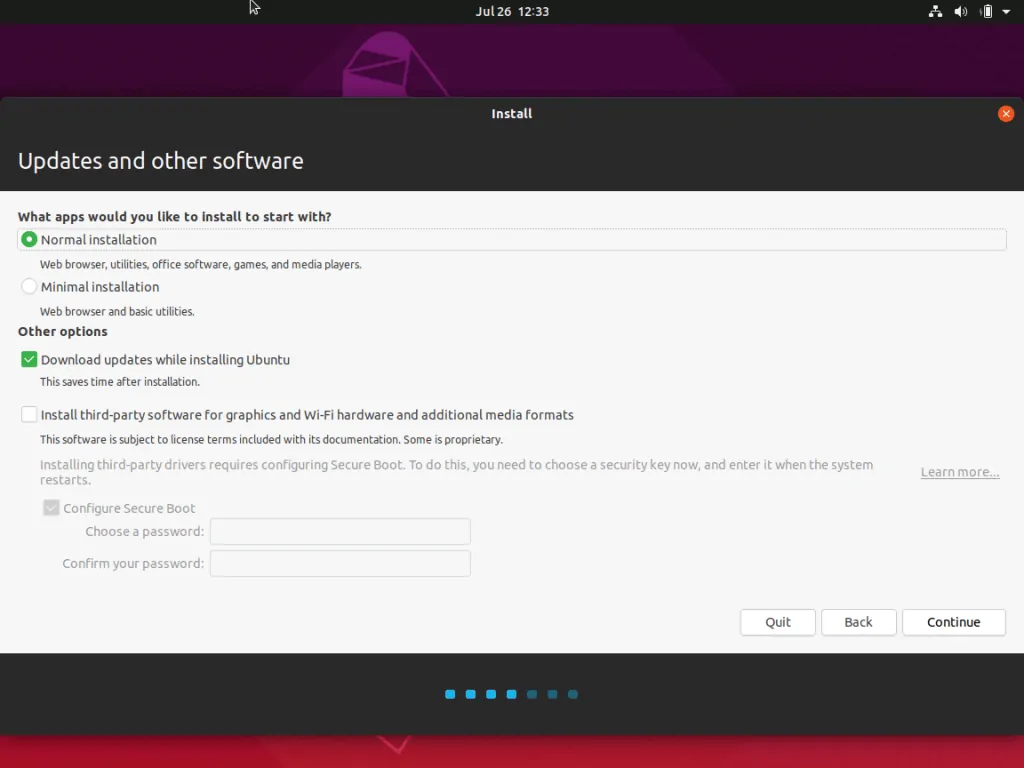
- On Updates and Other Software, click continue.
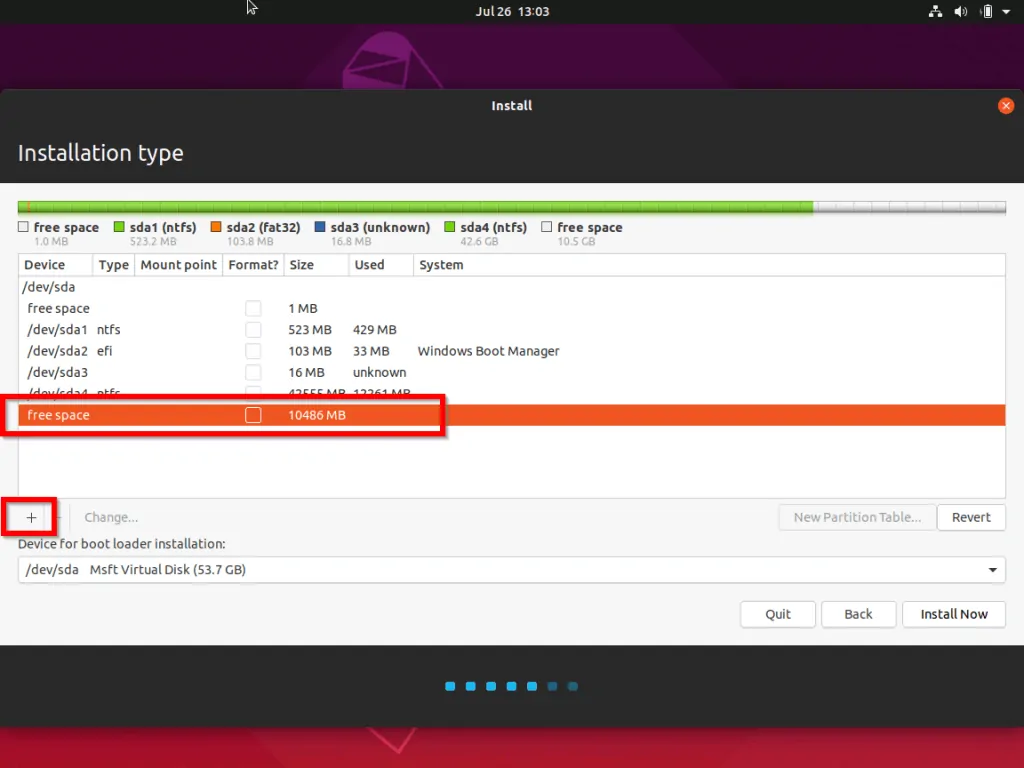
- On Installation type, select something else. Then click continue.
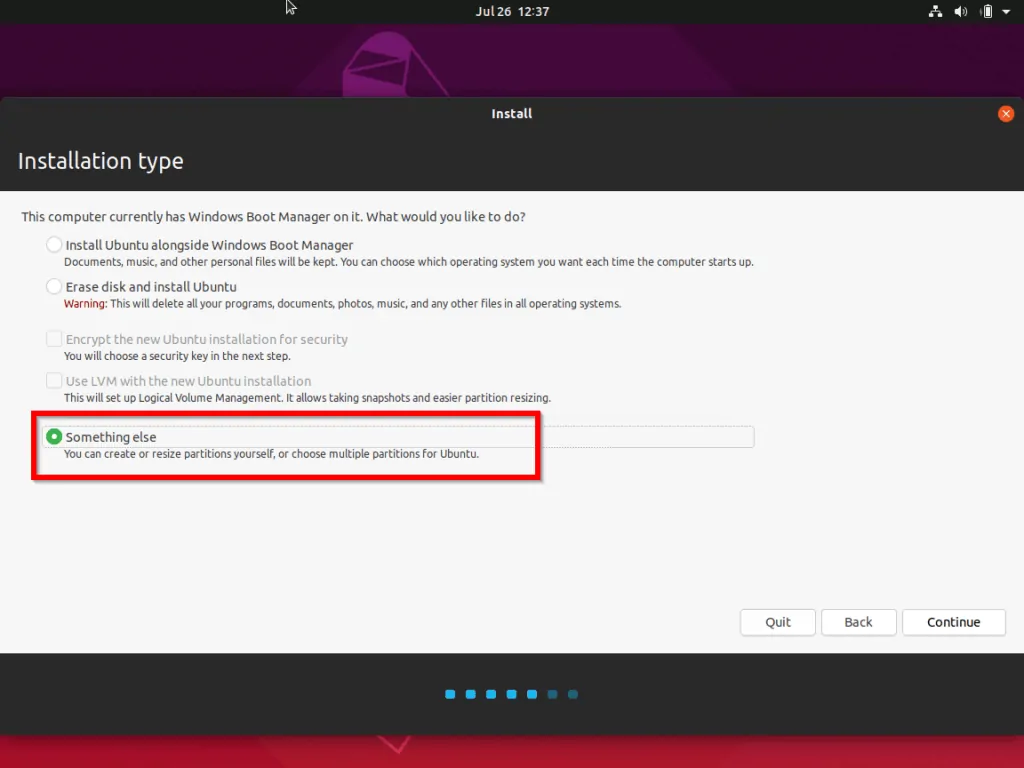
- On the Installation type page select the free, unformatted partition. Then click the + sign to add a partition and assign a root Mount point.
Ensure you select the space you created when you used Shrink in Disk Management. Selecting the wrong partition will erase your Windows 10 installation.
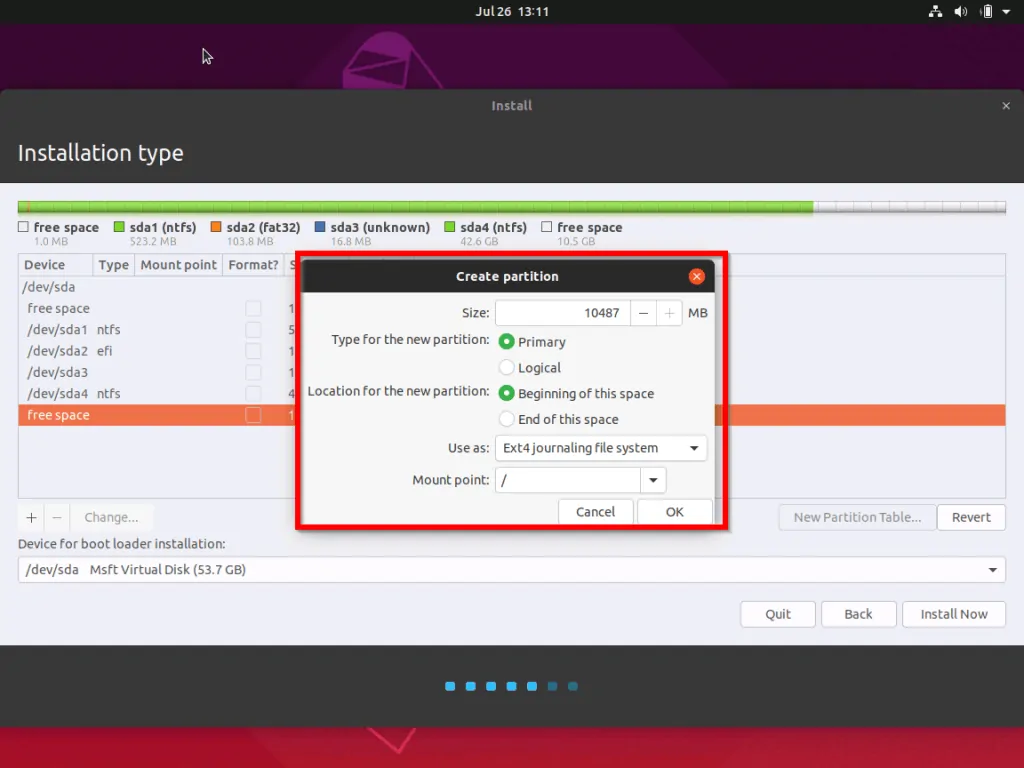
- When you click the + sign, the Create partition window will load. Configure it as shown below. Then click Ok.
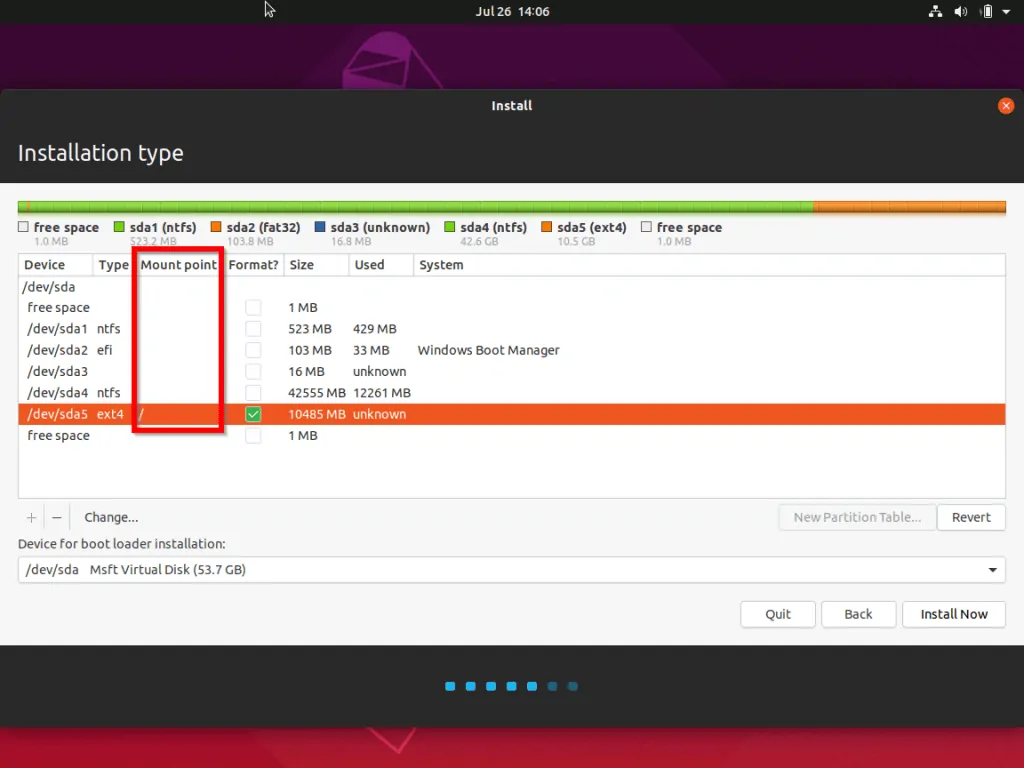
- The partition will be created and Mounted to root (/).
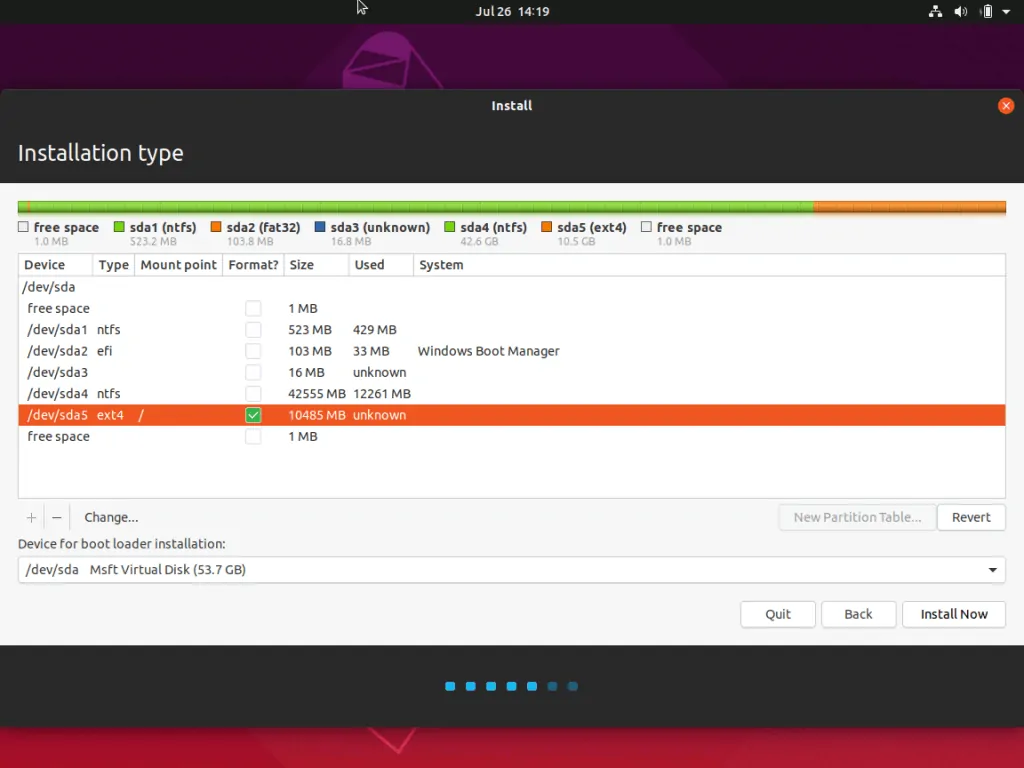
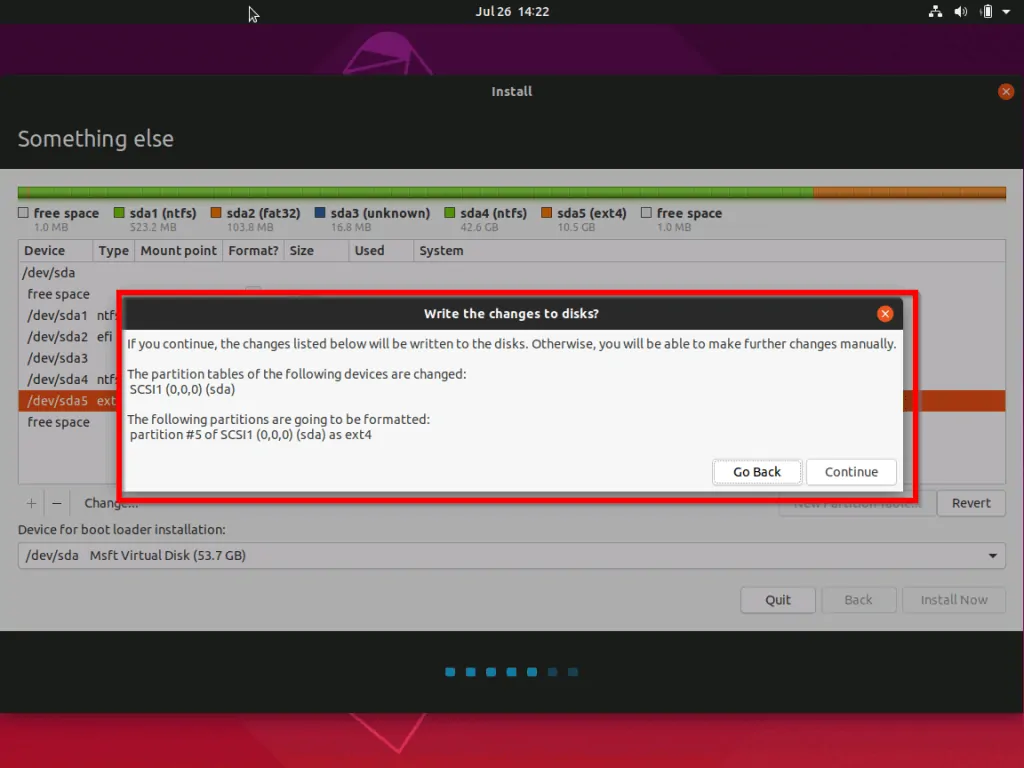
- Select the partition you created above, check the Format? column. Then click Install Now. On the Write changes to disk pop up, click Continue.
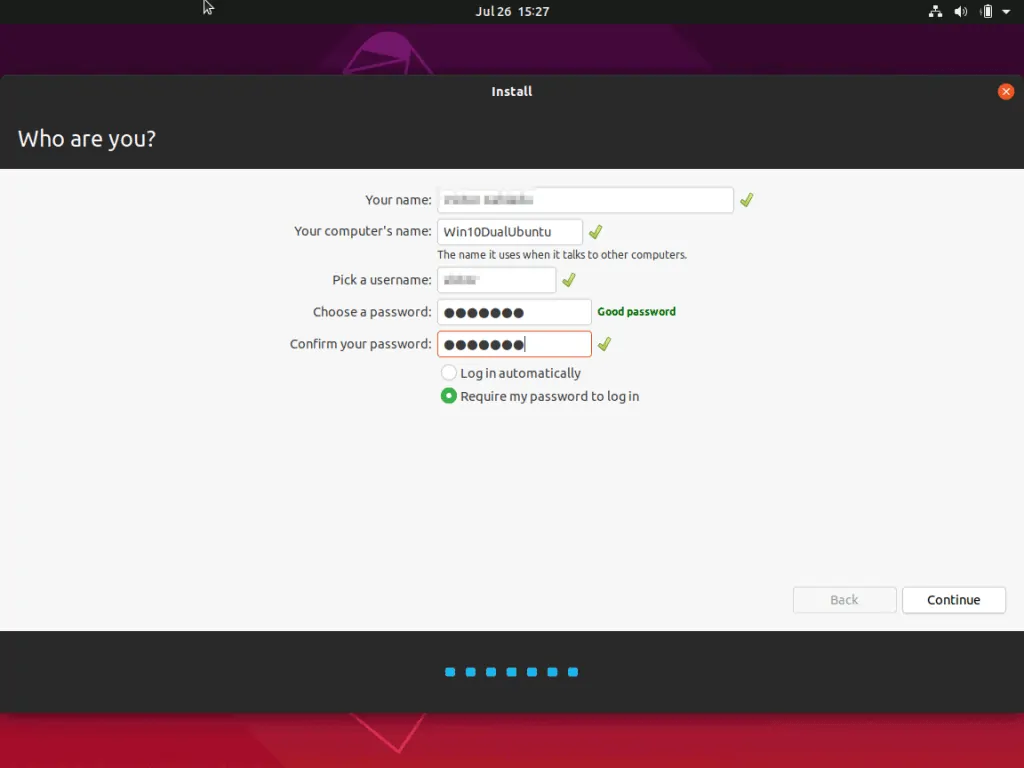
- Next, select your location. Then click Continue. On the next page, complete the details then click Continue.
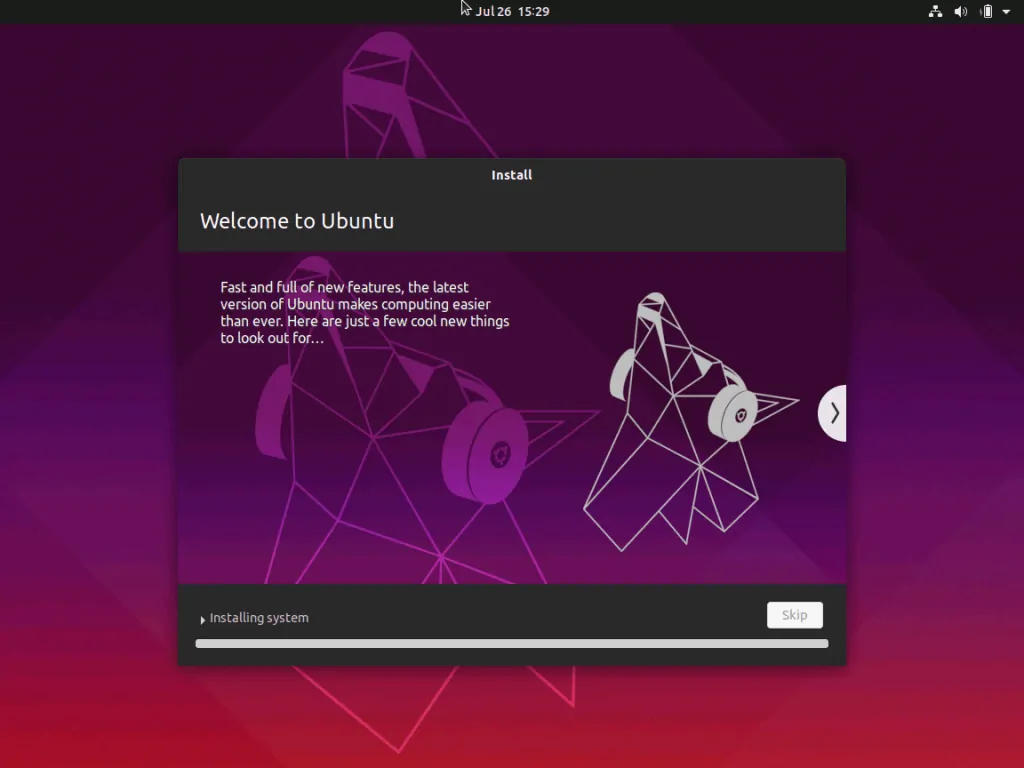
- Wait for Ubuntu installation to complete.
- When the installation completes, click Restart Now.

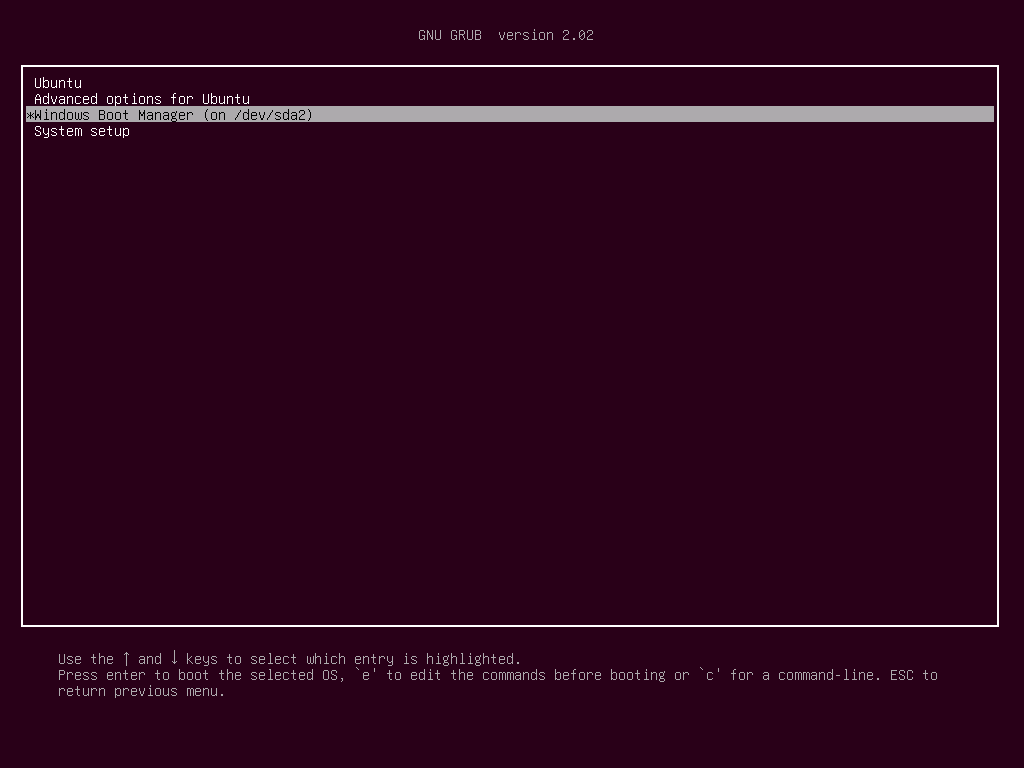
After the reboot, you will have the option to either boot to Ubuntu or Windows 10 (shown below as Windows Boot Manager).
Conclusion
I am confident that if you followed the steps in this guide, you have Ubuntu running side-by-side your Widnws 10 on the same PC!
We like to hear how you found the guide. The fastest way to share your thoughts is to respond to the “Was this page helpful?” question below.


Hi thank you for the guide.
Post installation of linux, after reboot, GNU Grub 2.04 appears.
I have tried to troubleshoot this and having issues. I can see linux and windows files with ls command in Grub, but cannot boot either OS.
Any suggestions/ useful links?
Would be much appreciated
Hi Spencer,
Did you follow the steps in this guide?
Great guide! Thank you.
For clarification: After disabling the Secure Boot, you need to “save changes and exit”. At least that’s how I did it on my dell Inspiron
Thanks. Glad you found the guide helpful.
This is a great explanation! Thanks so much!
I am a lil confused by one thing though. in the step that reads “When the option to shrink drive c loads, enter the value in the highlighted part of the image below”, the image shows that you are creating a 37742 MB partition. But below the screenshot, you write “You need at least 2GB (2000MB) to install Ubuntu but I recommend you enter 10000 (10GB)”.
I entered 37742 as was instructed.
Later in the article, a screenshot showing that the “free space” partition has 10487 MB. Mine is showing 39576 MB. I suspect this discrepancy is due to the fact that you entered 10000 MB while i entered 37742 MB.
Is this a correct assumption?
A few steps later, you say “When you click the + sign, the Create partition window will load. Configure it as shown below. Then click Ok.”
I will configure my partition as being 39576 MB in size, rather than the 10487 MB shown in your screenshot.
Is that a correct assumption?
Thanks for advice!
🙂
Hi Chrissie,
Sorry, I am responding very late to this – it gets busy for us sometimes! I am sorry if my screenshots caused you any confusion. Here are my responses to your concerns@:
1. In the step that reads “When the option to shrink drive c loads, enter the value in the highlighted part of the image below”, – in that image, I had 37742 MB. This is the entire free space available for me to shrink. I did not show the screenshot where I entered 10000 MB.
Please enter 10000 MB in the shrink volume space.
2. Later in the article, a screenshot showing that the “free space” partition has 10487 MB. Mine is showing 39576 MB. I suspect this discrepancy is due to the fact that you entered 10000 MB while i entered 37742 MB.
Yes, your assumption is correct. Like I said in 1. above, I entered 10000 as the shrink space but I did not show the screenshot.
I will find time to re-write the article completely and make it clearer.
Thanks for raising the issues.
OMG, thanks for such a neat explanation!
I mostly use W10, how can I boot W10 by default not Ubuntu?
This Itechguide may help – https://www.itechguides.com/how-to-change-boot-order-in-windows-10/