Wondering how to copy or move files with PowerShell?
Option 1: Copy a Single File with PowerShell
In this first section, I will teach you how to copy a single file with PowerShell. Whether you are copying a single file or all files in a folder – the PowerShell command has 2 parts.
In the first part of the command, you use the Get-ChildItem Cmdlet to list the file. Then, you pipe the output of the Get-ChildItem command to the Copy-Item Cmdlet.
How to List a File with Get-ChildItem
As I mentioned in the introduction of this section, before you copy a file with PowerShell, you have to first list it with Get-ChildItem.
In this example, I want to copy the file called “Byte Count Tool”, from its current folder to D:\G-Drive\Work Tools\Products Portal 2.
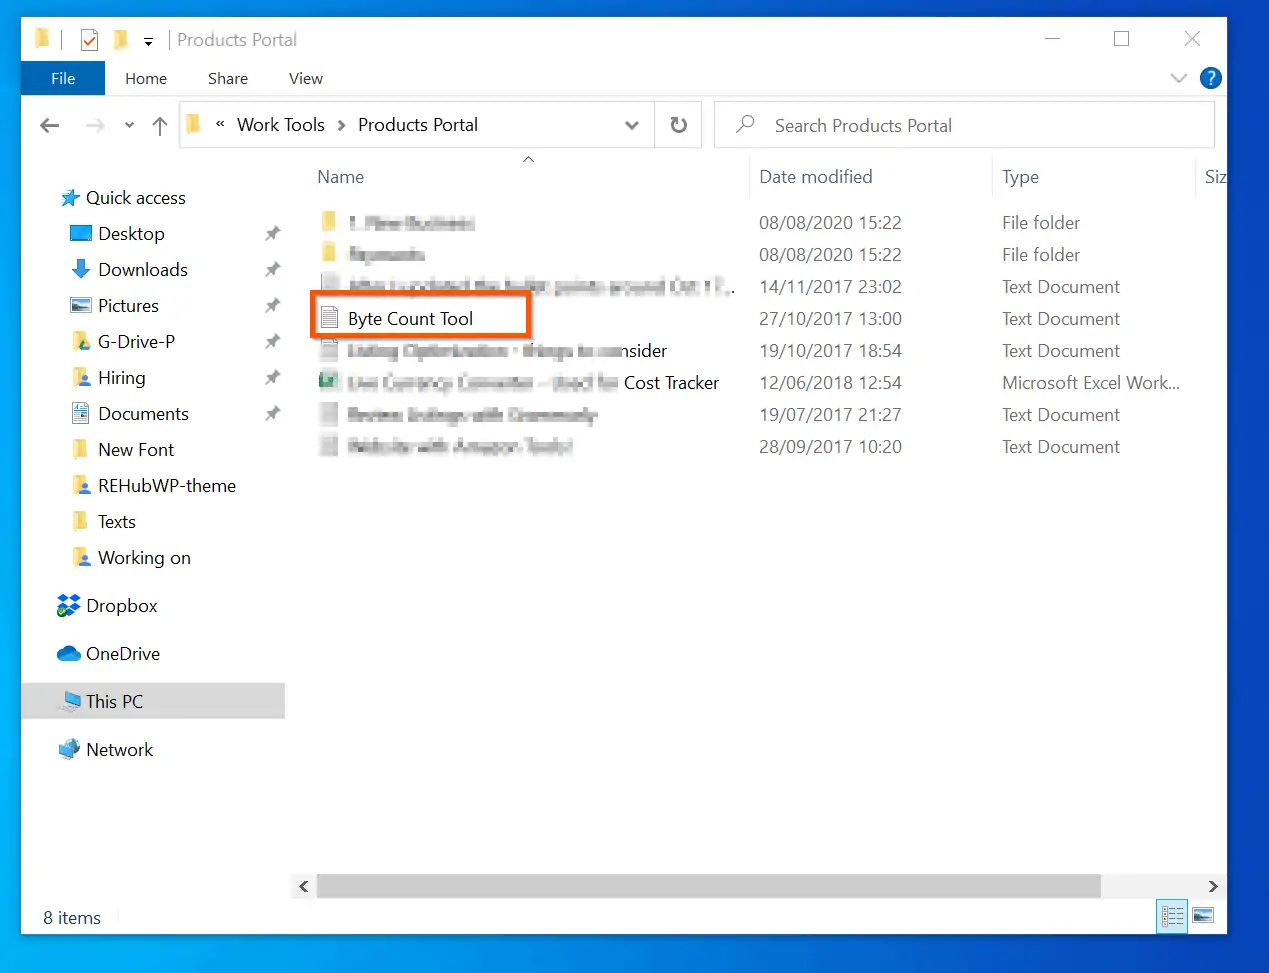
To list the text file, I will run the command below:
Get-ChildItem "D:\G-Drive\Work Tools\Products Portal\Byte Count Tool.txt"
The fastest way to run the command is to place a PowerShell prompt side-by-side the folder with the file. Then, enter Get-ChildItem in the PowerShell prompt – press the space bar key to add a space.
Next, drag the file from the folder into the PowerShell prompt.
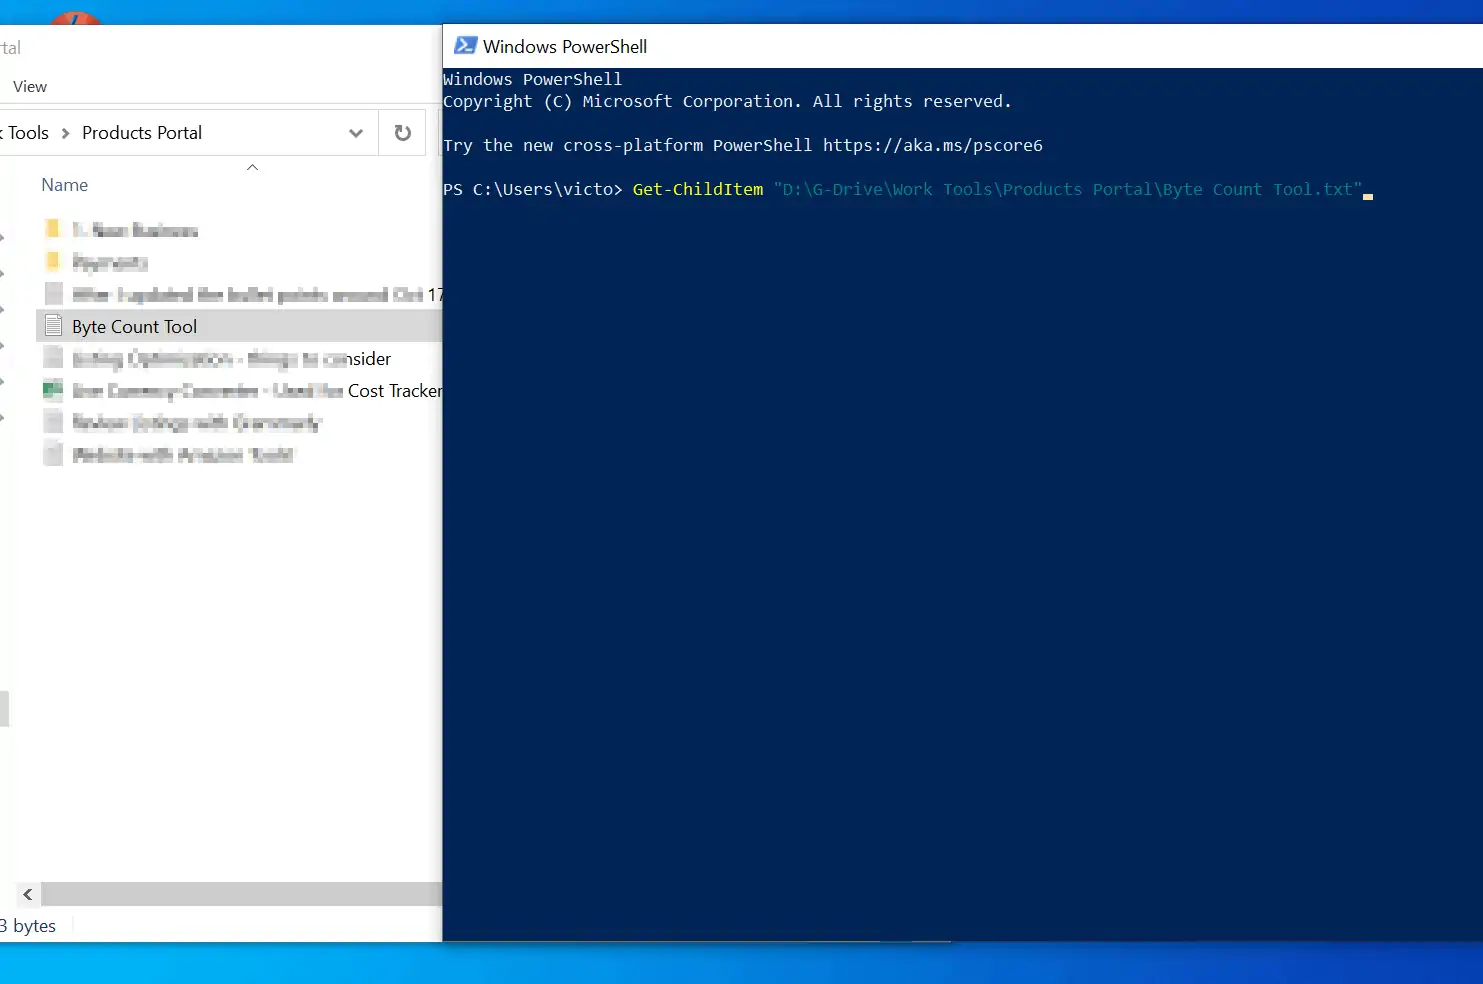
Finally, to list the file properties, with the PowerShell prompt open, press the enter key.

How to Pipe the Output of Get-ChildItem To Copy-Item
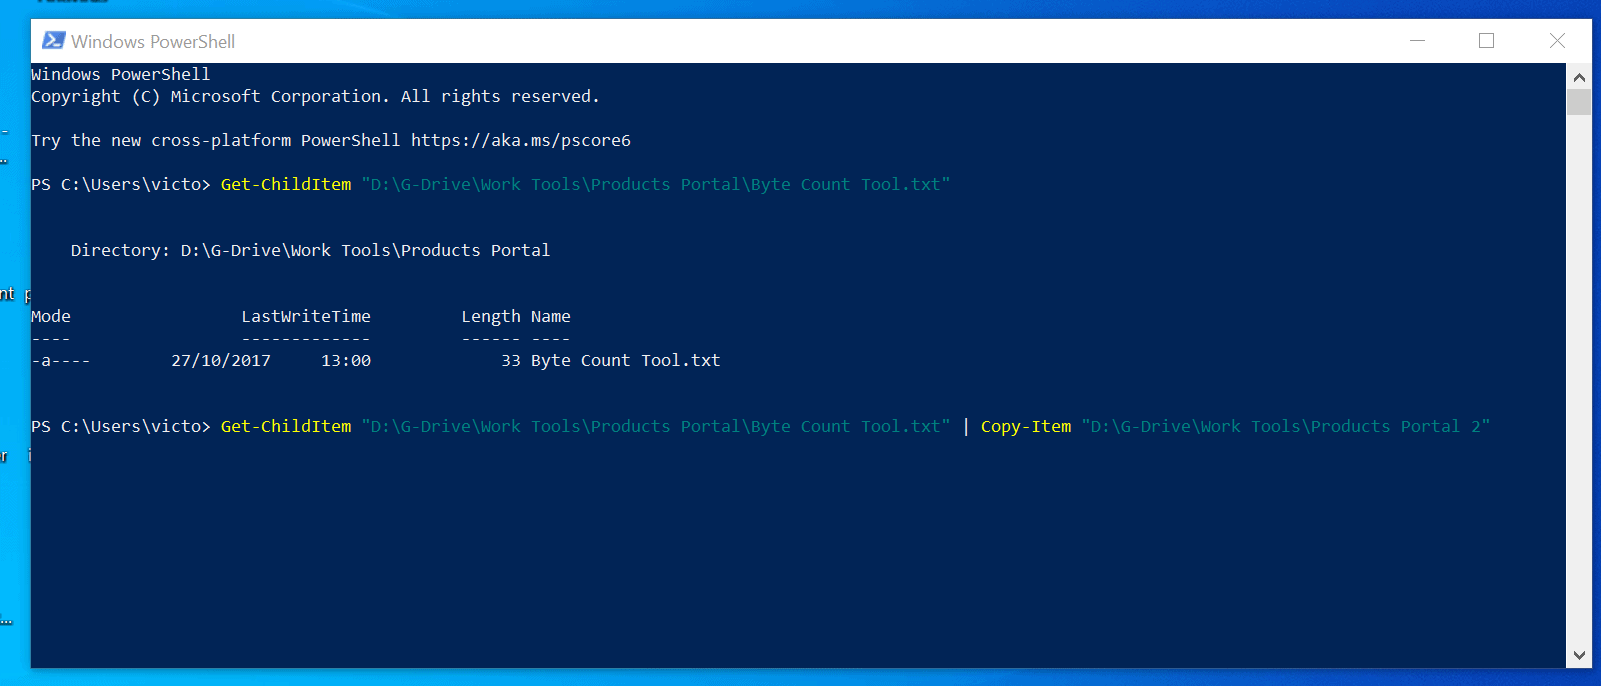
Once you have listed the properties of the file you want to copy, pipe it to the Copy-Item. Then, on the Copy-Item part of the command, specify the folder you want to copy the file to.
Here is the PowerShell command to copy a file:
Get-ChildItem "D:\G-Drive\Work Tools\Products Portal\Byte Count Tool.txt" | Copy-Item -Destination "D:\G-Drive\Work Tools\Products Portal 2"
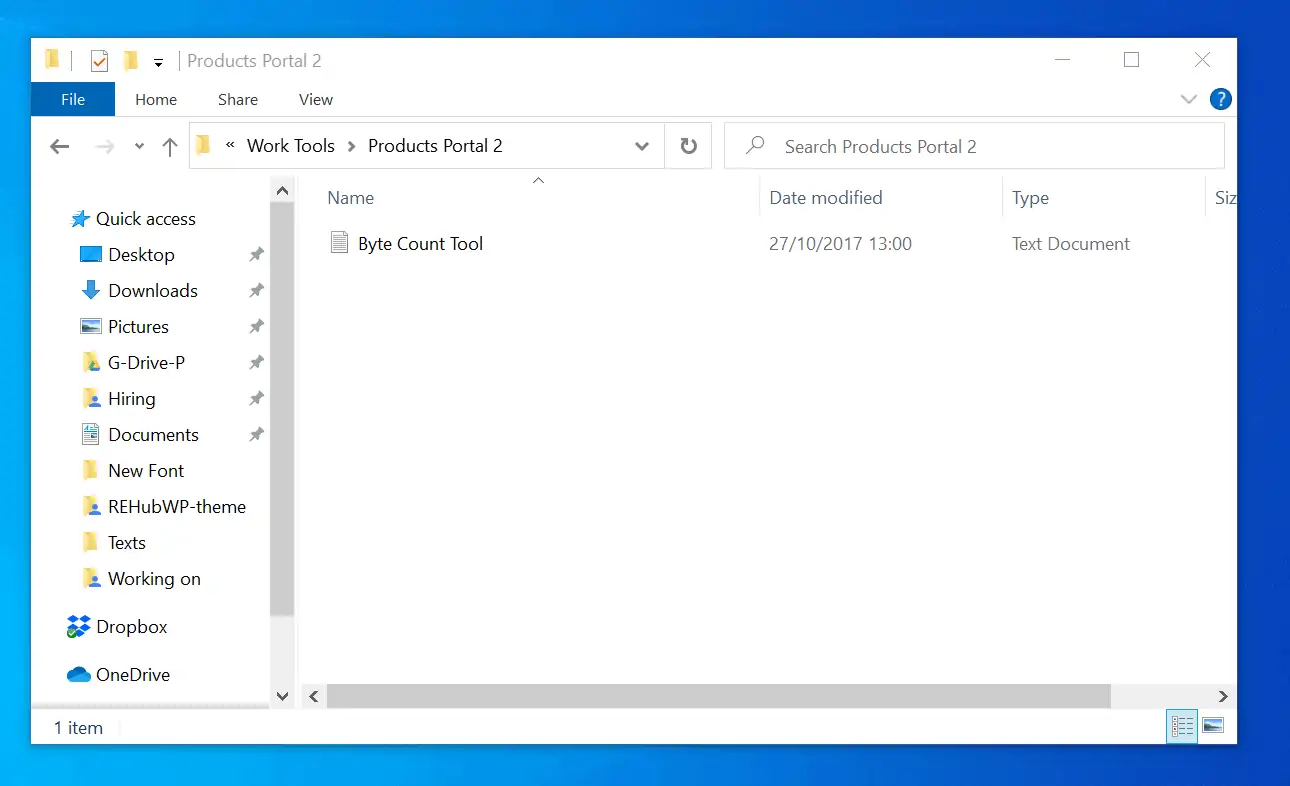
When you press enter, the command will execute – the file will be copied to the specified destination
Option 2: Copy All File Types in a Folder with PowerShell
In the last section of this guide, I showed you how to copy a single file with PowerShell. However, there may be situations where you need to copy all file types in a folder.
In this section, you will learn how to copy all files with a specific file extension from a folder to another folder. For example, you may want to copy all files with the “.log” file extension from C:\Windows to another folder.
This process is similar to copying a single file but it requires additional steps. Specifically, to copy more than one file with PowerShell, we have to create a simple script.
The first part of the script involves using the Get-ChildItem Cmdlet to list the files you want to copy. Then, in the second part of the script, you will use the ForEach loop to iterate through the list of files.
Finally, within the ForEach loop, you will include the Copy-Item Cmdlet to copy each of the files to your required destination.
To make it easy for you to understand the simple PowerShell script we are about to create, I will divide this section into two sub-sections.
How to List All File Types with Get-ChildItem
In this example, I want to copy all files with the “.log” file extension from C:\Windows to the D:\Log Files. However, as already hinted above, the first step is to use the Get-ChildItem Cmdlet to list all the files with “.log” file extension.
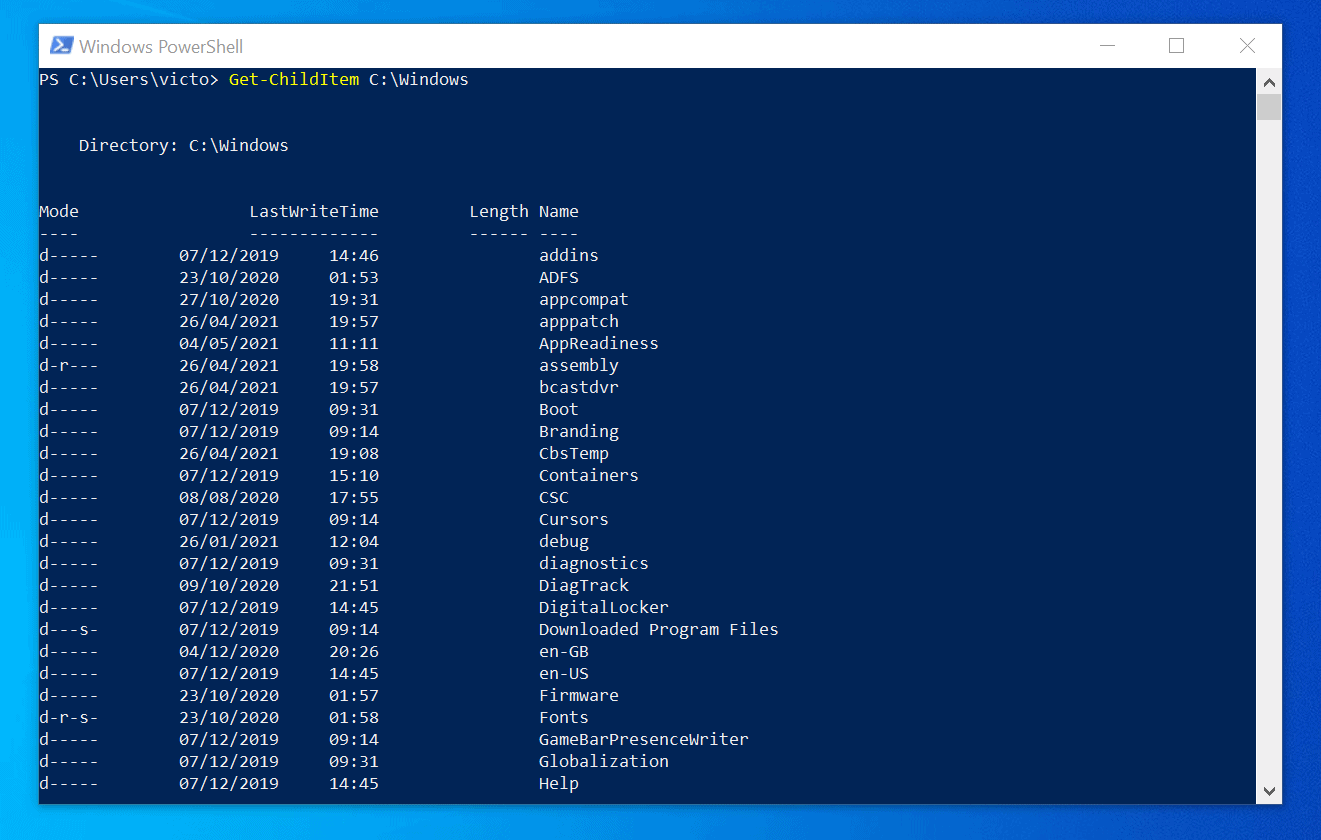
Once again, to make it easy for you to understand the final command, lets start from the basics. Firstly, lets list all files and folders in the source folder – with the command below:
Get-ChildItem C:\Windows
The last command displays both files and folders.
However, we want to use PowerShell to copy only files with the “.log” file extension. So, we will add another bit of command that will display these files alone.
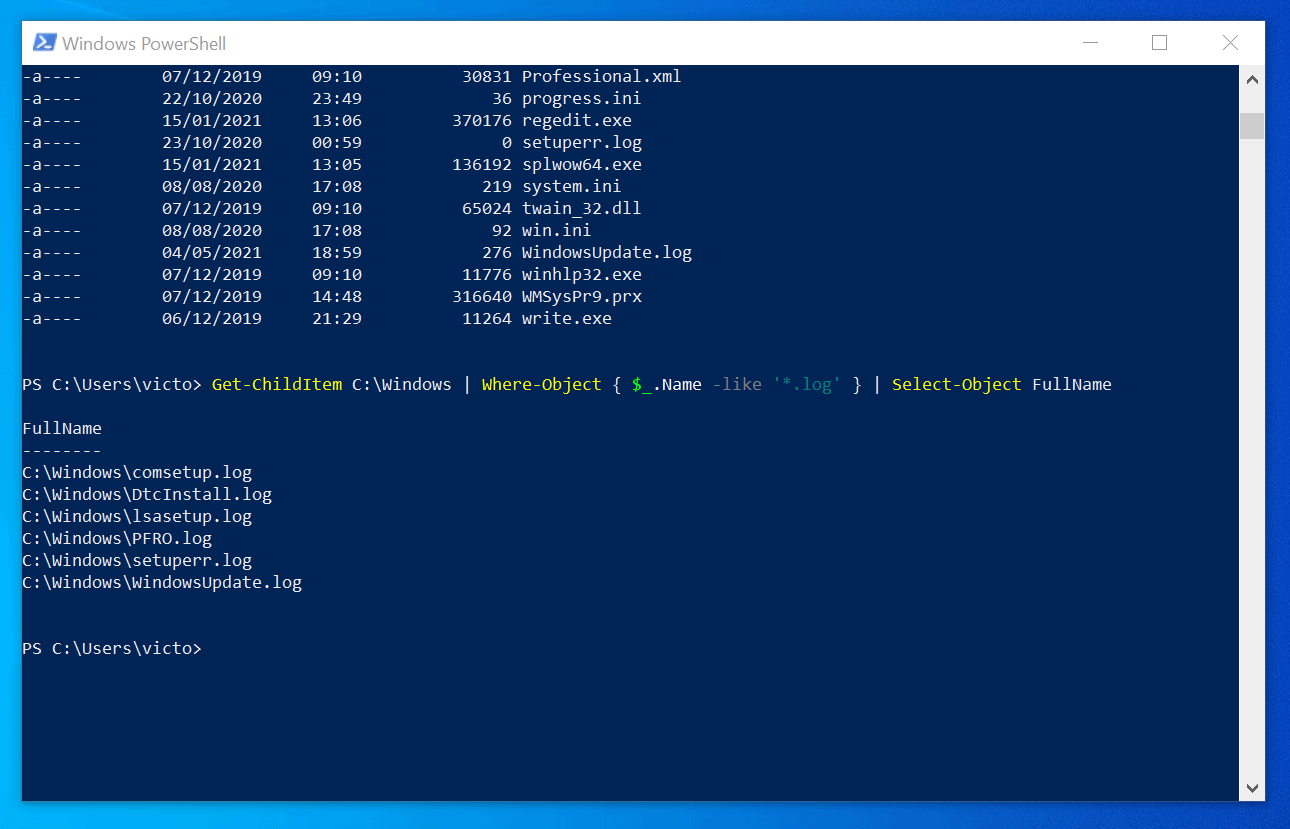
To achieve this objective, we will pipe the output of “Get-ChildItem C:\Windows” to a Where-Object command. Here is the command that does that trick.
Get-ChildItem C:\Windows | Where-Object { $_.Name -like '*.log' } | Select-Object FullName
Here is the result of the above command. We have eliminated all the other information – we now have just the files we need to copy. We are not done with this part though – before you proceed to the last part of creating the script, we need to add one more bit.
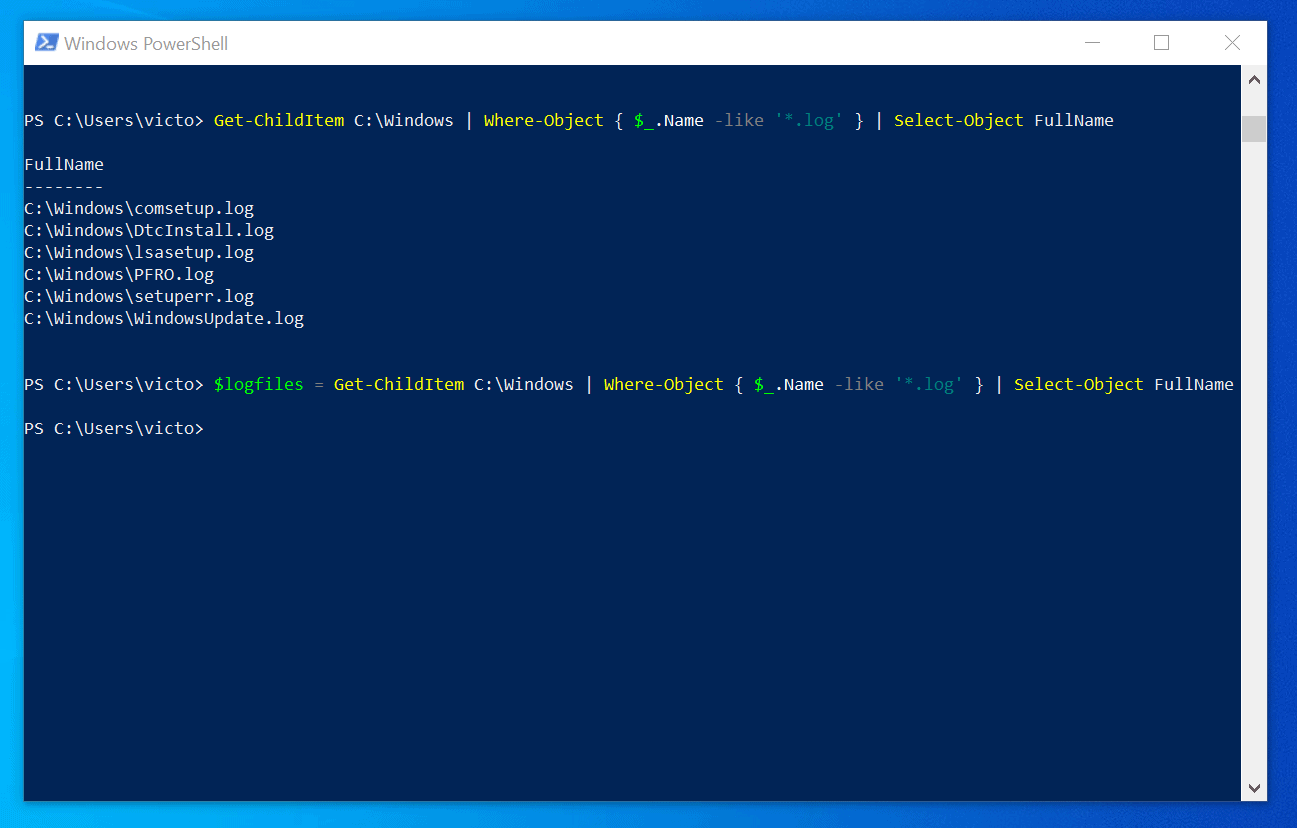
That bit is to add the last command to a variable – I will call the variable logfiles. Here is the command that does that job.
$logfiles = Get-ChildItem C:\Windows | Where-Object { $_.Name -like '*.log' } | Select-Object FullName
The only difference between this command and the last one is the “$logfiles =” bit. This tells PowerShell to save the output of “Get-ChildItem C:\Windows | Where-Object { $_.Name -like ‘*.log’ } | Select-Object FullName” – in a variable called logfiles.
Unlike the last command, if I now run the most recent command, it will not display any result. The reason for this is that the output is now saved in the variable instead of displaying it on the console.
How to Copy Multiple Files with PowerShell ForEach loop
In this last part of creating our script, we will introduce the magical ForEach loop. If you want to read more about the ForEach loop and its syntax, click ForEach loop.
In general, the syntax of a ForEach loop looks like this:
ForEach ($item in $collection) {Perform a task based on a powershell command}
So, if we apply this to our situation – bearing in mind that we want to copy all the files with the “.log” extension with PowerShell – our ForEach command will look like this:
ForEach ($logfile in $logfiles.FullName) {Copy-Item $logfile -Destination "D:\Log Files"}
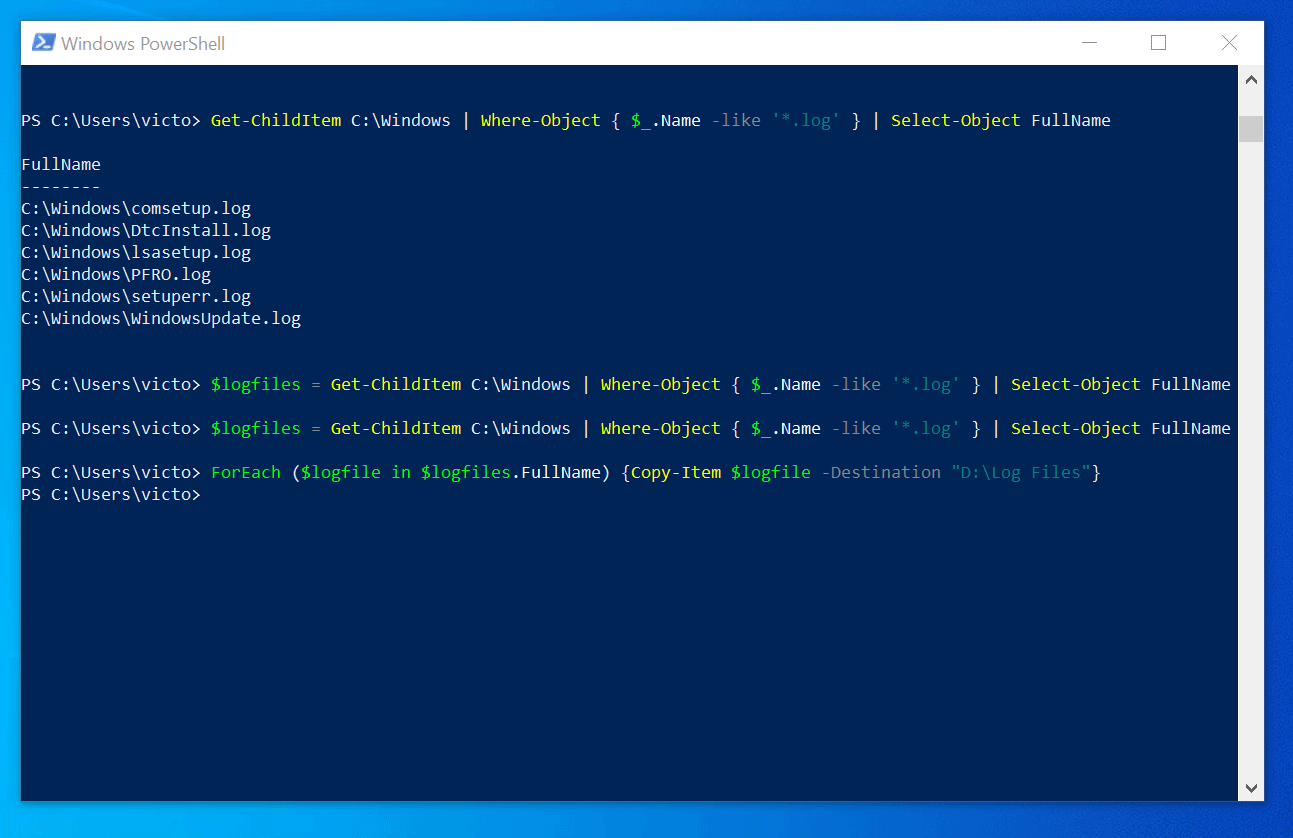
Finally, lets combine this last command with the Get-ChildItem from the last section. The final script will look like this:
$logfiles = Get-ChildItem C:\Windows | Where-Object { $_.Name -like '*.log' } | Select-Object FullName
ForEach ($logfile in $logfiles.FullName) {Copy-Item $logfile -Destination "D:\Log Files"}
If you copy the above commands into PowerShell ISE and save it, you have your script! However, you can still run the individual commands as shown in the screenshot below.
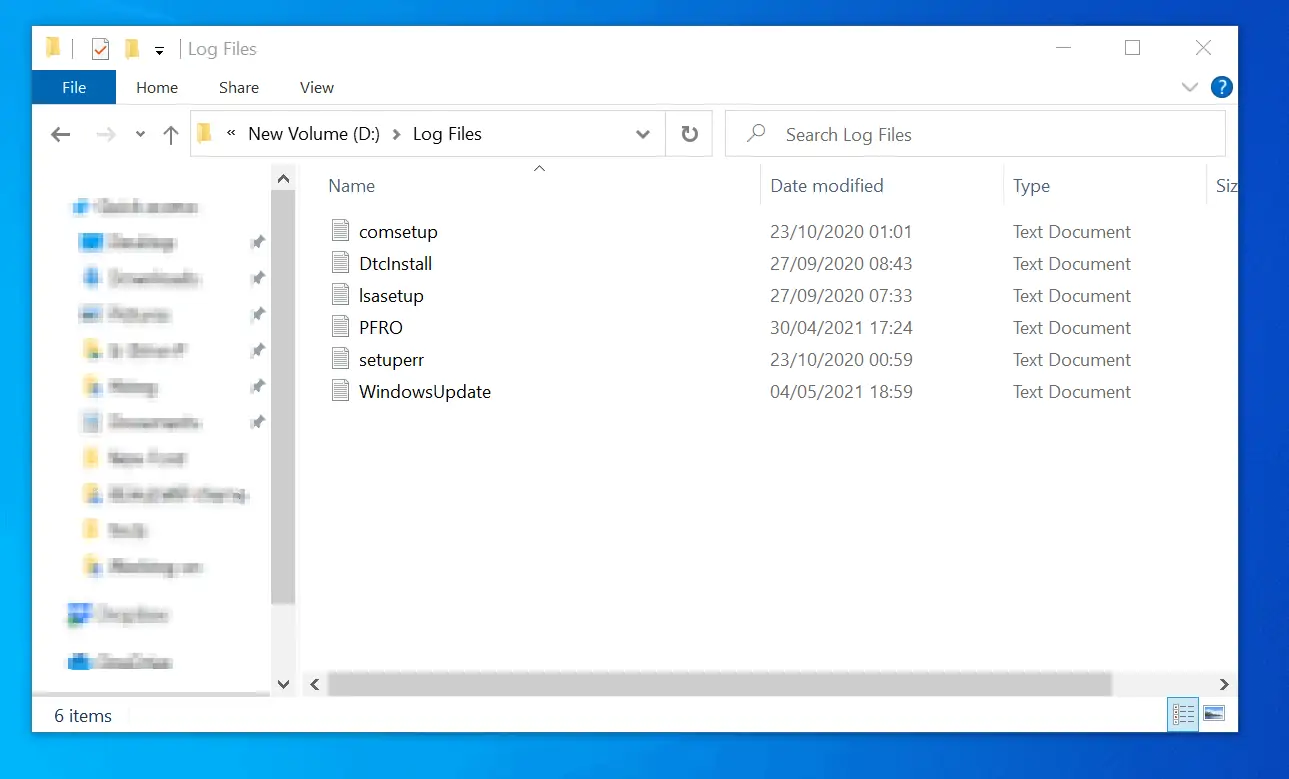
The above command runs and PowerShell returns to its prompt as if nothing happened. However, when you open the destination folder you specified in the ForEach loop bit of the command, the PowerShell command would have copied the files – see the screenshot below…
Option 3: Copy All File Types in a Folder and All Sub-Folders
So far, this guide has covered the steps to copy a single file with PowerShell. Furthermore, the guide has also covered steps to copy multiple files from a folder.
We have covered some great PowerShell file copy situations.
However, there are situations when you need to copy all files with a specific file extension from a folder and all its sub-folders.
If I continue with my last example, say I want to copy all files with the “.log” file extension from C:\Windows folder and all its sub-folders – I will simply modify the Get-ChildItem part of this command:
$logfiles = Get-ChildItem C:\Windows | Where-Object { $_.Name -like '*.log' } | Select-Object FullName
ForEach ($logfile in $logfiles.FullName) {Copy-Item $logfile -Destination "D:\Log Files"}
To get the Get-ChildItem command to list all files with the “.log” file extension in C:\Windows and all its sub-folders – I will add a Get-ChildItem command parameter called Recurse.
With this in mind, my new command will now look like this:
$logfiles = Get-ChildItem C:\Windows -Recurse | Where-Object { $_.Name -like '*.log' } | Select-Object FullName
ForEach ($logfile in $logfiles.FullName) {Copy-Item $logfile -Destination "D:\Log Files"}
To drive my point home, I will run the Get-ChildItem command without the “$logfiles =” bit. The command returns errors because I am trying to access files that I do not have permission to access.
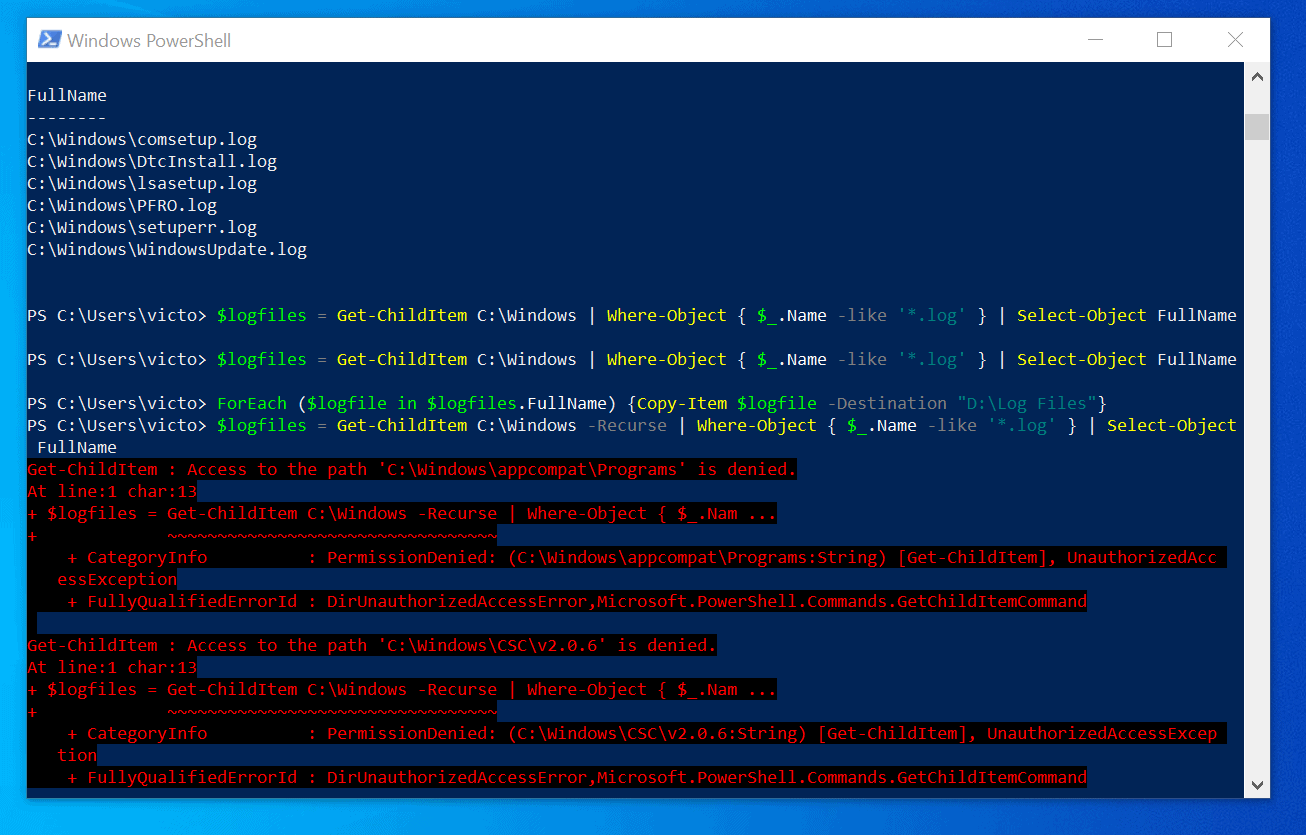
To fix this error, let me try opening PowerShell as administrator. Now, when I run the same command, it returns some results.
Unlike the last command that did not include the Recurse parameter, this command returns a lot more files. This is because the command returned all files in the top-level folder as well as files in all its sub-folders.

Finally, to copy all the files in a folder and all its sub-folders with PowerShell, run a command similar to the command below.
$logfiles = Get-ChildItem C:\Windows -Recurse | Where-Object { $_.Name -like '*.log' } | Select-Object FullName
ForEach ($logfile in $logfiles.FullName) {Copy-Item $logfile -Destination "D:\Log Files"}
$logfiles = Get-ChildItem C:\Windows -Recurse -ErrorAction SilentlyContinue | Where-Object { $_.Name -like '*.log' } | Select-Object FullName
ForEach ($logfile in $logfiles.FullName) {Copy-Item $logfile -Destination "D:\Log Files"}
Option 4: Move Files in PowerShell
Apart from Copying files, PowerShell can also Move files. The difference is that when you move a file, it is deleted from its source folder.
So, if copying and moving files are about the same, it means that you can use the same commands we have used in this guide with a slight modification.
To make it easy, I have listed all the commands covered in this guide so far. Then, for each command, I provide the move file equivalent of the command.
How to Move a Single File with PowerShell
The command to copy a single file in PowerShell is:
Get-ChildItem "D:\G-Drive\Work Tools\Products Portal\Byte Count Tool.txt" | Copy-Item -Destination "D:\G-Drive\Work Tools\Products Portal 2"
However, to move the file, use this command instead:
Get-ChildItem "D:\G-Drive\Work Tools\Products Portal\Byte Count Tool.txt" | Move-Item -Destination "D:\G-Drive\Work Tools\Products Portal 2"
How to Move All File Types in a Folder with PowerShell
As already discussed above, here are the commands to copy all file types in a folder.
$logfiles = Get-ChildItem C:\Windows | Where-Object { $_.Name -like '*.log' } | Select-Object FullName
ForEach ($logfile in $logfiles.FullName) {Copy-Item $logfile -Destination "D:\Log Files"}
On the other hand, to move the files, use this command instead.
$logfiles = Get-ChildItem C:\Windows | Where-Object { $_.Name -like '*.log' } | Select-Object FullName
ForEach ($logfile in $logfiles.FullName) {Move-Item $logfile -Destination "D:\Log Files"}
How to Move All File Types in a Folder and All Sub-Folders
Finally, the commands below copies all files in the source folder and all its sub-folders.
$logfiles = Get-ChildItem C:\Windows -Recurse -ErrorAction SilentlyContinue | Where-Object { $_.Name -like '*.log' } | Select-Object FullName
ForEach ($logfile in $logfiles.FullName) {Copy-Item $logfile -Destination "D:\Log Files"}
To move the files, use this command instead.
$logfiles = Get-ChildItem C:\Windows -Recurse -ErrorAction SilentlyContinue | Where-Object { $_.Name -like '*.log' } | Select-Object FullName
ForEach ($logfile in $logfiles.FullName) {Move-Item $logfile -Destination "D:\Log Files"}
I hope you found the methods to copy and move files with PowerShell discussed in this guide helpful.
If you found it helpful, kindly click Yes to “Was this page Helpful?” below.
Alternatively, in the rare instance that you found it difficult to follow the steps in the guide or you followed the steps, but things didn’t work as expected, please reply using the comments form below.
Finally, for more PowerShell tech Itechguides, visit our Windows PowerShell How-To guide page. You may also find our Work from Home page very helpful.


I read the book on Google books and wish to receive the full book too.
https://amzn.to/2RA4QbW
Interesting and usefull. Started my IT Support nob in a large corporate and welcome tools to manage devices remotely.
Zdenek