Do you want to install or uninstall the Zoom application on your Ubuntu computer? This guide illustrates multiple methods to accomplish that.
How To Install Zoom
There are two ways to install the Zoom application on your Ubuntu computer – you can install the app from the Ubuntu Software Center in the GUI or through the terminal. The following sub-sections demonstrate how to install the Zoom application via those means.
Option 1: Install Zoom Through the GUI
As stated above, you can install the Zoom application on your Ubuntu PC through the Ubuntu Software Center in the GUI. To accomplish that, observe the following procedures and screenshot images below.
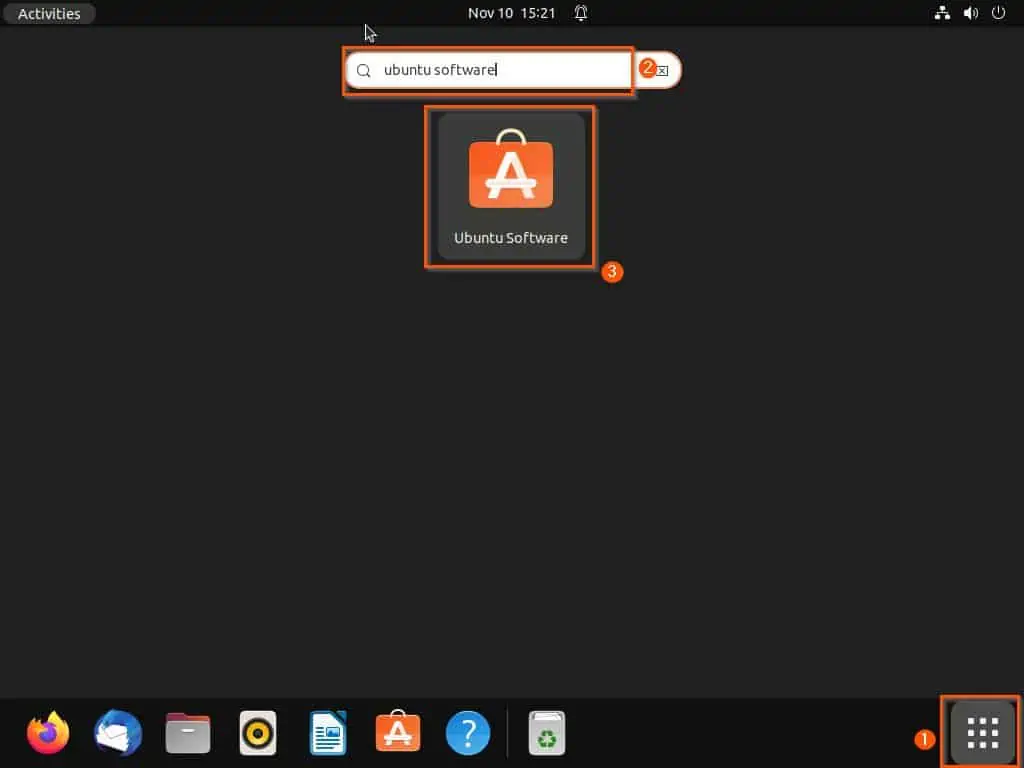
- On the Ubuntu taskbar, click the Show applications button. Next, type “ubuntu software” (without the quotes) in the search box, then select Ubuntu Software from the search result.
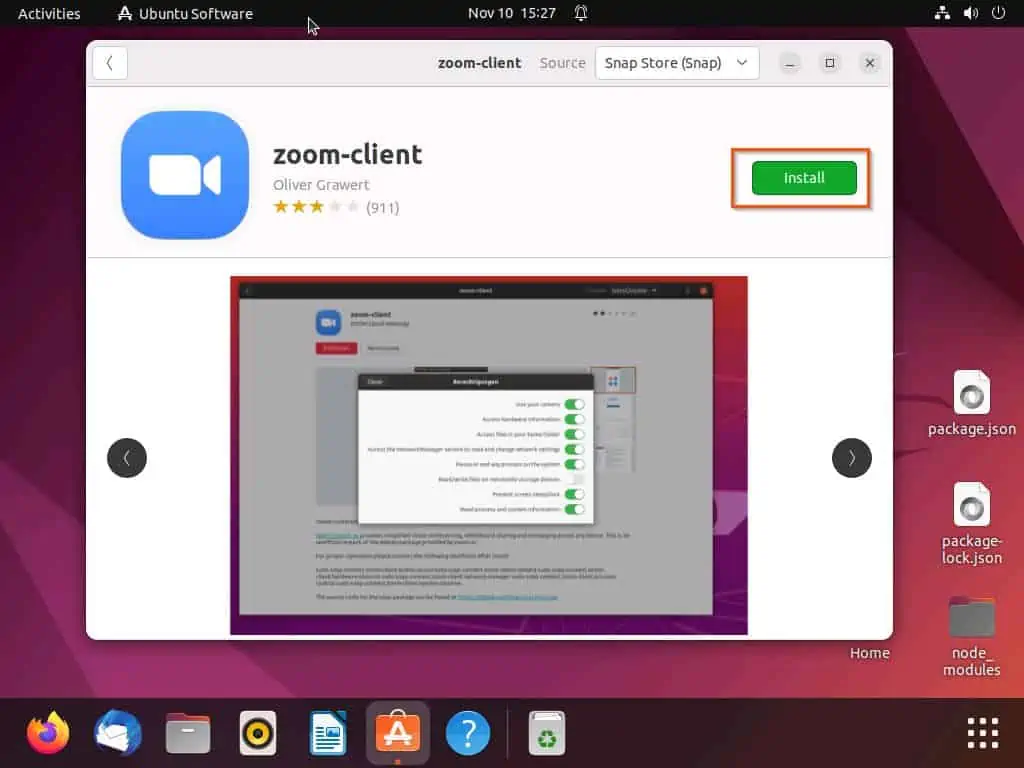
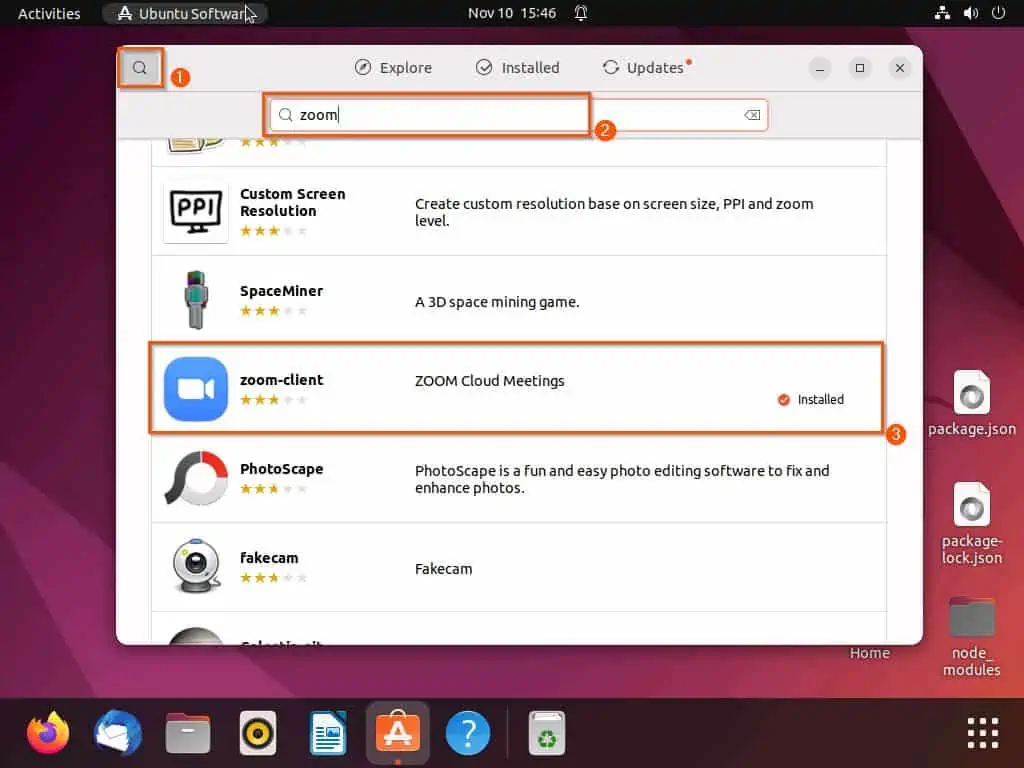
- In the Ubuntu Software Center, click the Search icon at the top left corner. Then, input “zoom” in the search box and select the zoom-client application from the search result.

- After doing that, click the green Install button. Then, input your computer password in the prompt that appears and click the Authenticate button – see the second screenshot below.

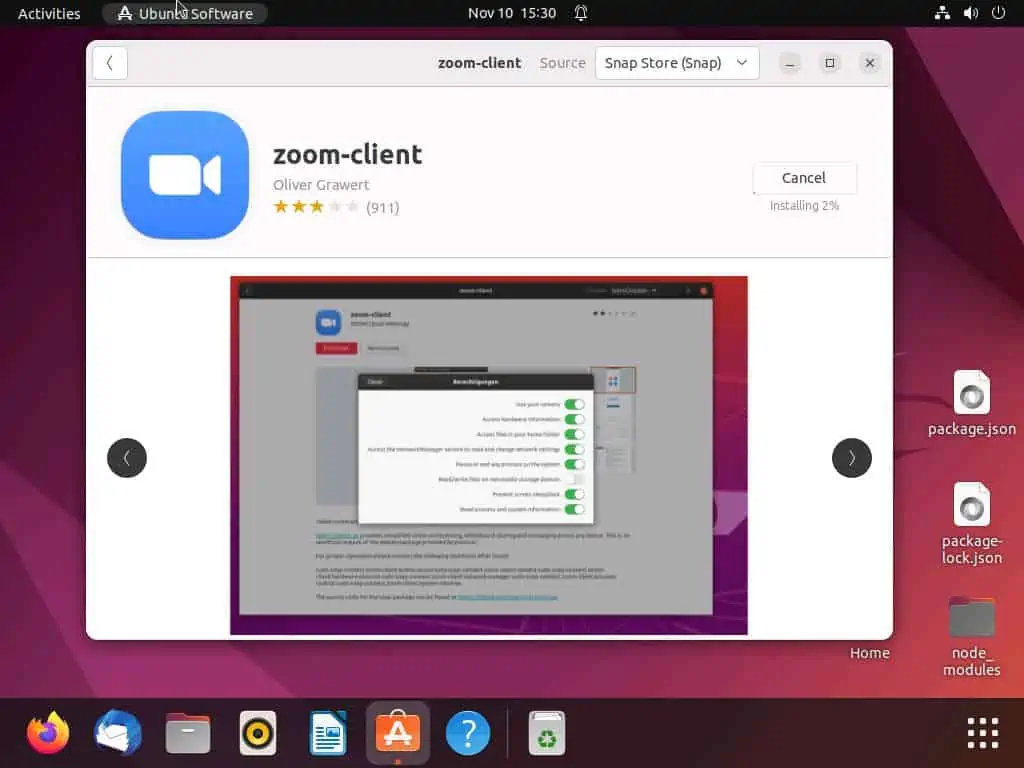
- Consequently, the Zoom application should start to install on your Ubuntu computer.
Option 2: Install Zoom via the Terminal
Using the snap command in the Ubuntu terminal, you can also install the Zoom application on your Ubuntu computer. The following steps and screenshots illustrate how to achieve that.
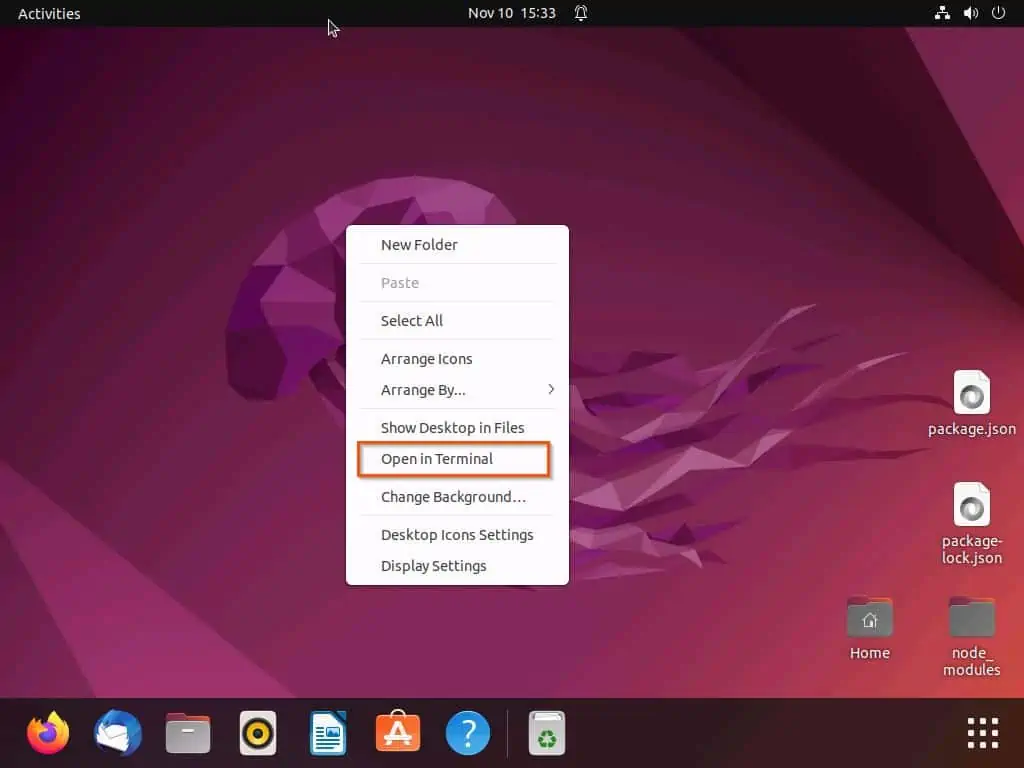
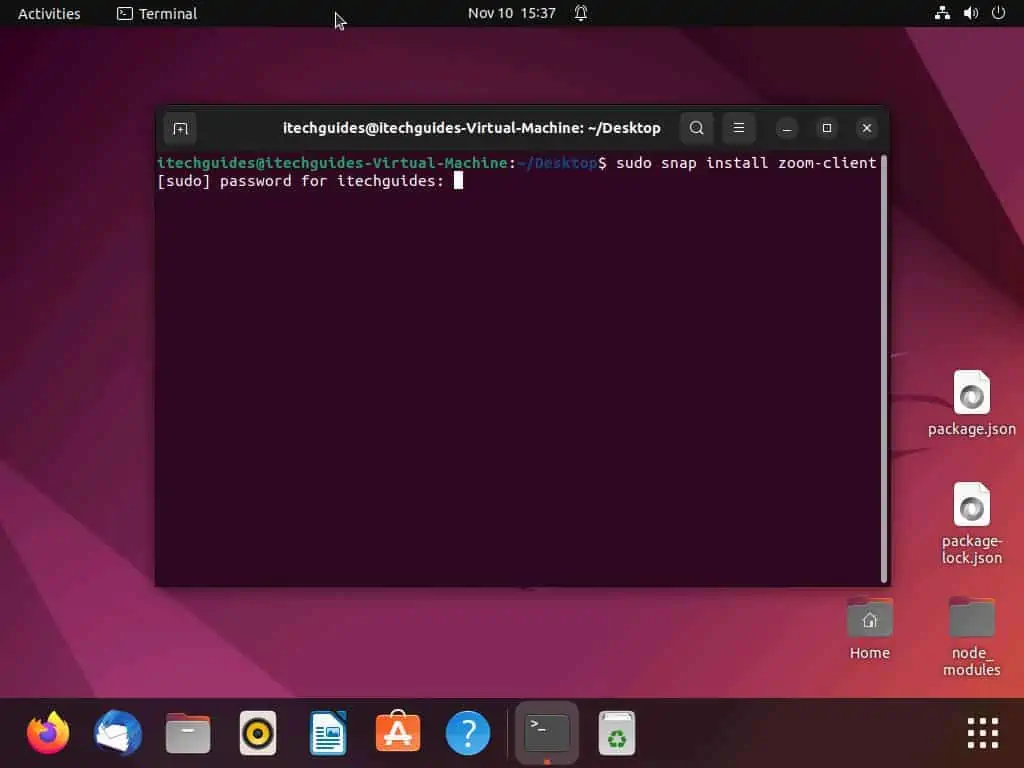
- Open the terminal in Ubuntu by right-clicking a free space on the desktop and left-clicking Open in Terminal from the displayed options. The Ctrl + Alt + T keyboard shortcut is an alternative to open the terminal in Ubuntu.
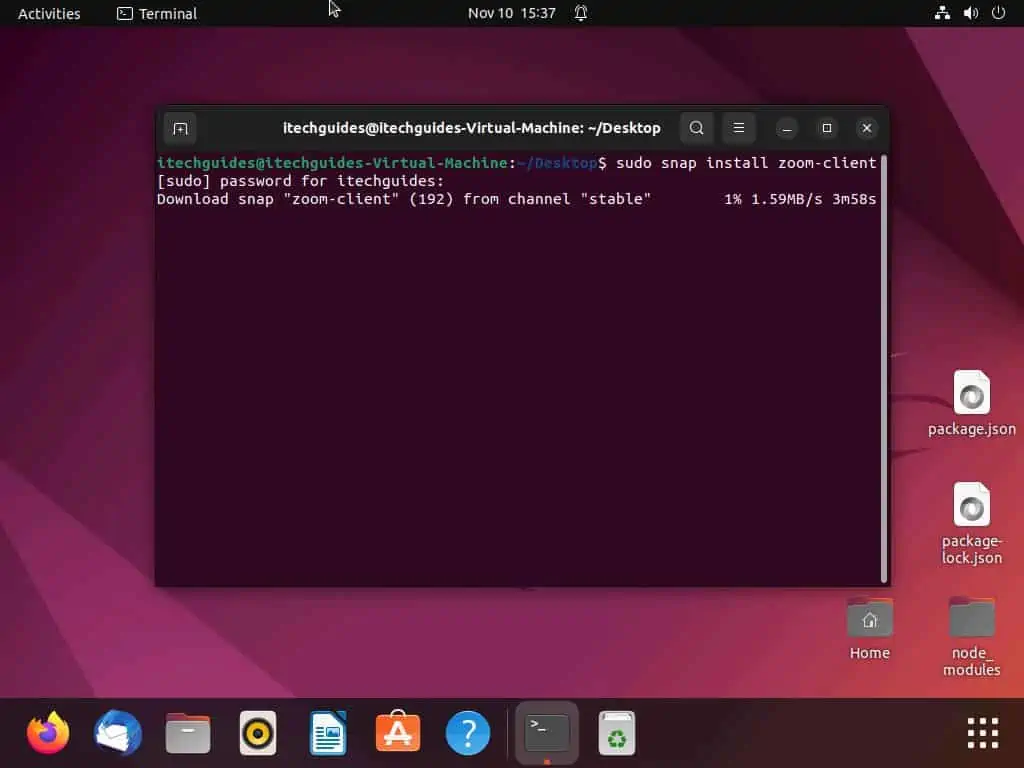
- In the Ubuntu terminal, execute the following command to start the installation of the Zoom application. Consequently, you will be asked to input your password – input the password and press the enter key to proceed.
sudo snap install zoom-client
- After doing that, Ubuntu will begin to install the Zoom application on your computer.
How to Uninstall Zoom
The same methods used to install the Zoom application on Ubuntu can also be used to uninstall the application. Therefore, you can uninstall the application on your Ubuntu computer through the Software Center in the GUI and the terminal.
In the following sub-sections, you will learn how to uninstall Zoom on your Ubuntu PC via those means.
Option 1: Uninstall Zoom Through the GUI
The following procedures demonstrate how to uninstall the Zoom application on your Ubuntu computer via the GUI (Graphical User Interface).
- On the Ubuntu taskbar, click the Show applications button. Next, type “ubuntu software” (without the quotes) in the search box, then select Ubuntu Software from the search result.
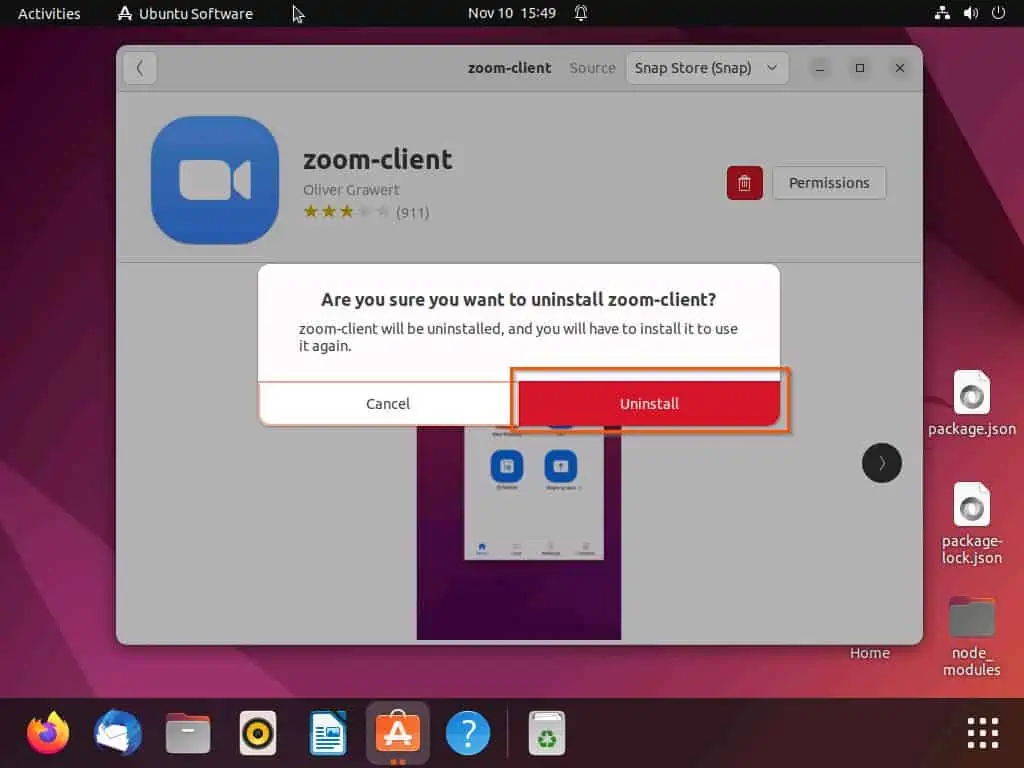
- At the top left corner of the Ubuntu Software Center, click the Search icon and type “zoom” in the search field. Then, select the zoom-client application from the search result.
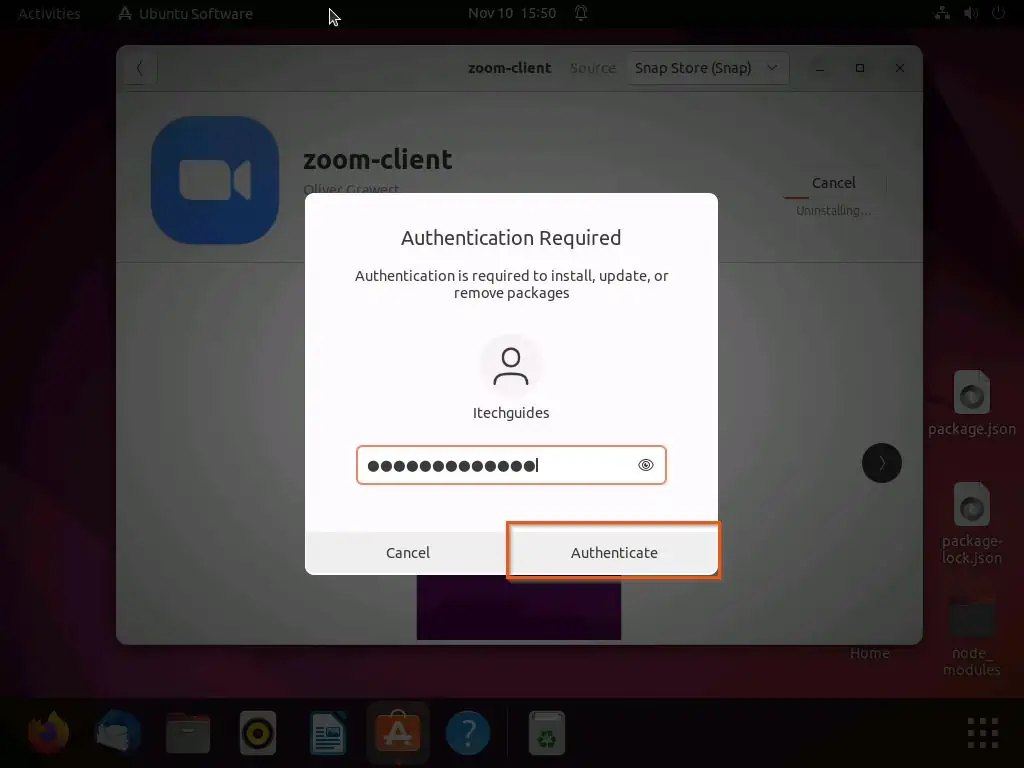
- Following that, click the red trash icon opposite Permissions. Next, click the red Uninstall button in the warning prompt that appears – see the second screenshot below.

- After doing that, you will be prompted to input your password for authentication – input your computer password, then click the Authenticate button to proceed. Hence, the Zoom application will begin to uninstall on your Ubuntu computer.
Option 2: Uninstall Zoom Through the Terminal
If you initially used the snap command to install Zoom on your Ubuntu PC through the terminal, you can uninstall the app using the same command. To do that, observe the subsequent procedures and screenshot images below.
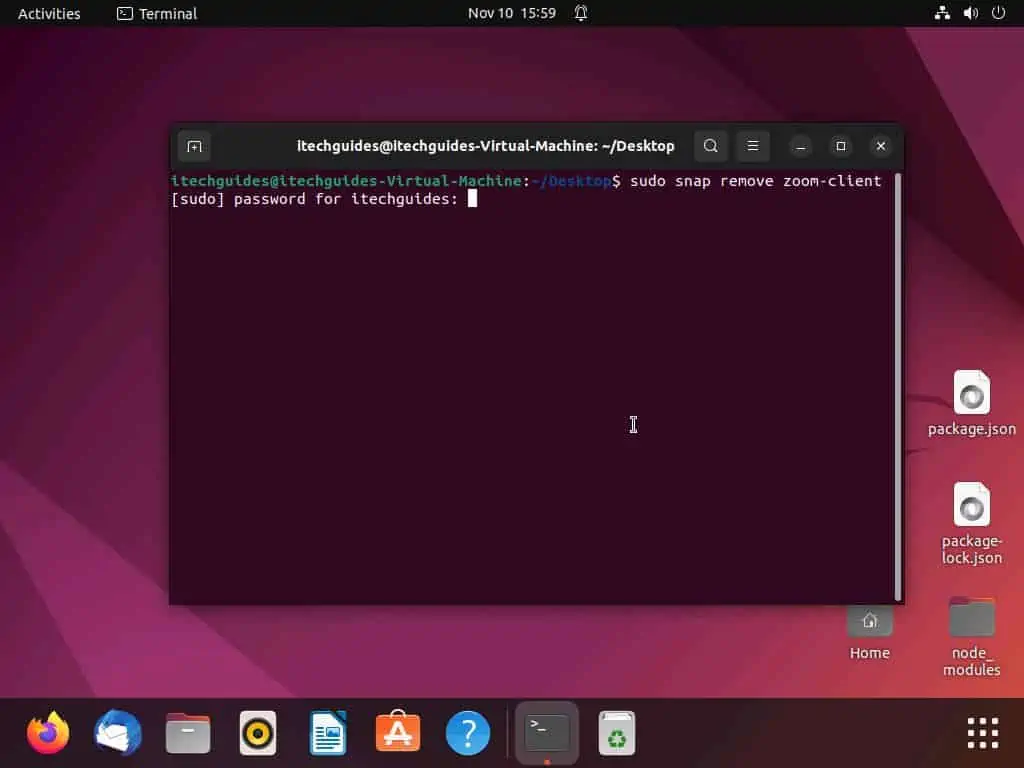
- On the Ubuntu desktop, click any free space and select Open in Terminal. You can also use the Ctrl + Alt + T keyboard shortcut as an alternative to open the terminal in Ubuntu.
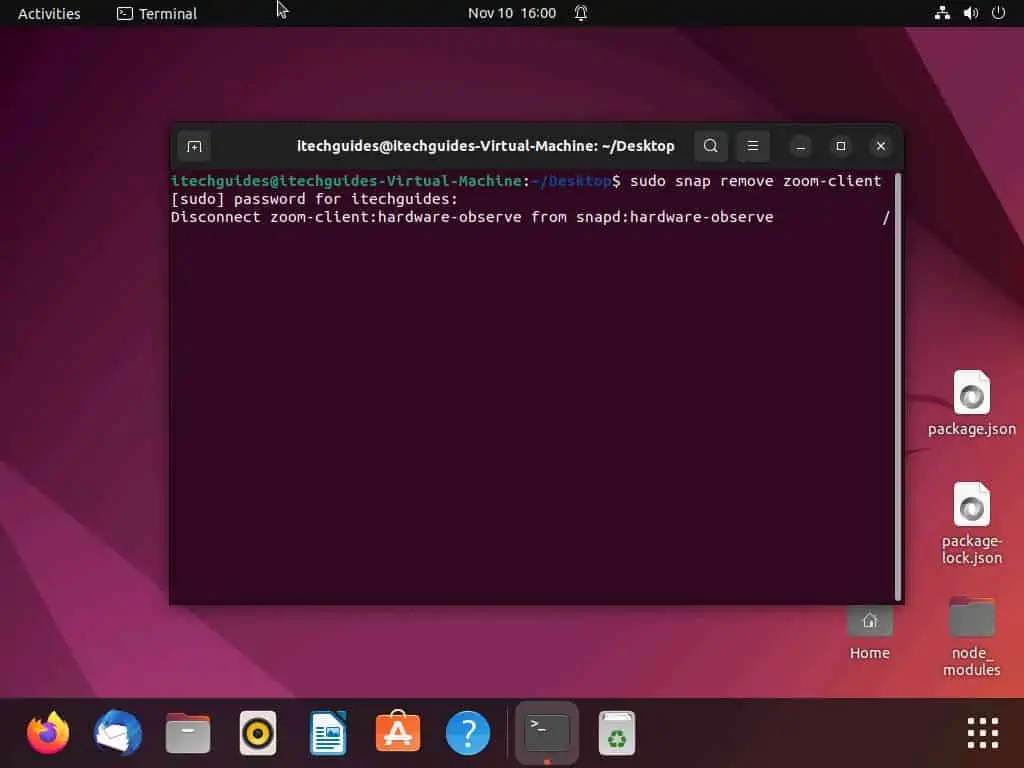
- After opening the terminal in Ubuntu, execute the command below to uninstall the Zoom application. Consequently, you will be prompted to input your password before proceeding – input your password and press the enter key to continue.
sudo snap remove zoom-client
- Following that, Ubuntu will begin to uninstall the Zoom application.
Frequently Asked Questions
Zoom is a well-known video-conferencing application available for multiple operating systems, including the Linux OS.
a) On the Ubuntu taskbar, click the Show applications button.
b) Next, type “ubuntu software” (without the quotes) in the search box, then select Ubuntu Software from the search result.
c) In the Ubuntu Software Center, click the Search icon at the top left corner.
d) Then, input “zoom” in the search box and select the zoom-client application from the search result.
e) After doing that, click the green Install button.
f) Following that, input your computer password in the prompt that appears and click the Authenticate button.
g) Consequently, the Zoom application should start to install on your Ubuntu computer.
The latest version of the Zoom application for Linux is Zoom version 5.12.6 (173), which was released on November 7, 2022.
Yes, the Zoom video-conferencing application is free on all operating systems, including the Ubuntu operating system.
No, the founder of the Zoom application is Eric Yuan.
Conclusion
Zoom is a free video-conferencing application that is available on various platforms, including the Ubuntu operating system. Gladly, this guide demonstrated multiple methods to install or uninstall the Zoom application on Ubuntu.
To be more specific, we learned how to perform these tasks through the Ubuntu Software Center in the GUI (Graphical User Interface). This guide also taught us how to install or uninstall Zoom on Ubuntu via the terminal.
I hope you found this Linux guide helpful. If you find it helpful, click on “Yes” beside the “Was this page helpful” question below.
You may also express your thoughts and opinions by using the “Leave a Comment” form at the bottom of this page.
Finally, visit our Linux how-to page to get more Linux guides.