Do you want to disable OneDrive on your Windows 11 PC but don’t know how? Read on, as this article features multiple methods to perform that task.
Option 1: Disable OneDrive by Preventing it From Starting Up
This section contains the steps needed to disable OneDrive in Windows 11 by preventing it from starting up automatically when you sign into Windows.
- Move your mouse to the rightmost part of the Windows 11 taskbar and click the OneDrive icon.

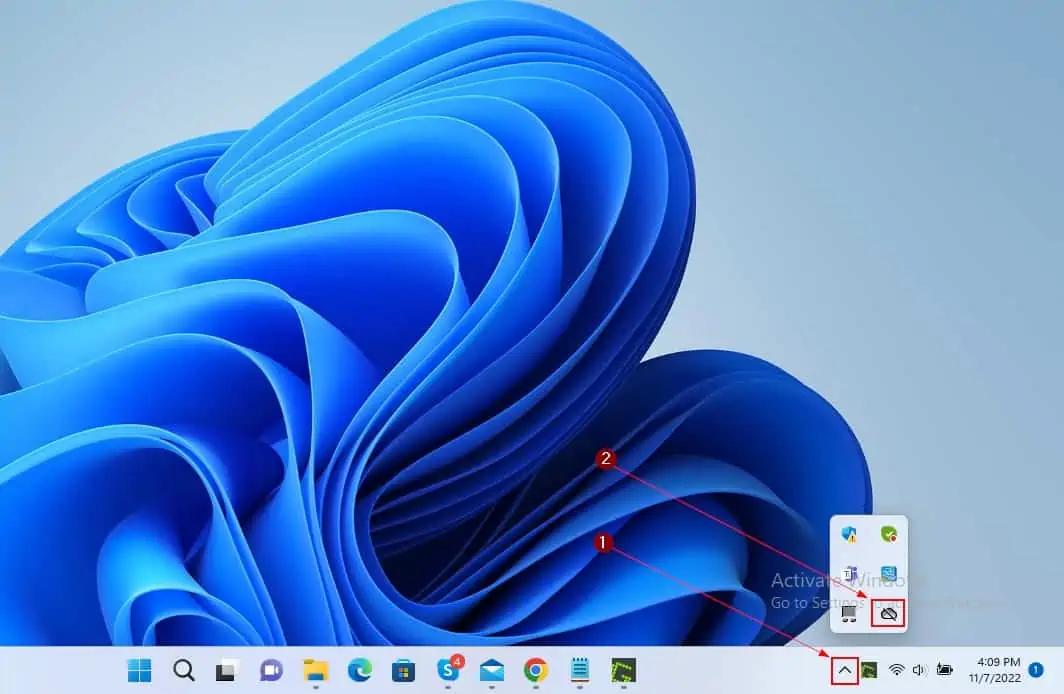
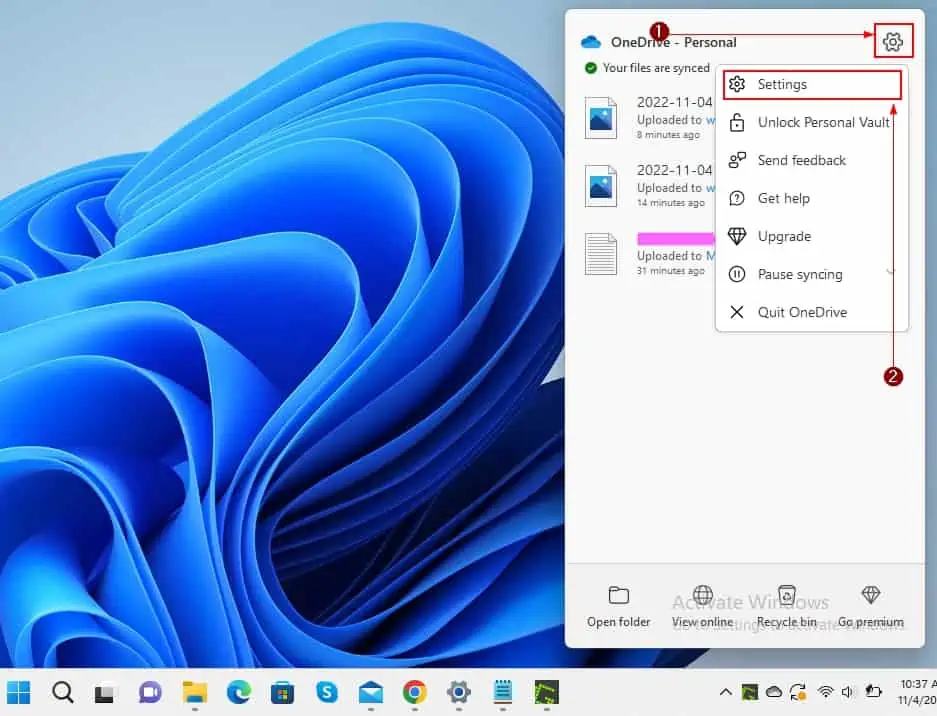
- On the window that pops up, click the Help & Settings icon and click Settings from the options that appear.
- After that, click the Settings tab on the Microsoft OneDrive window that appears. Next, uncheck Start OneDrive automatically when I sign in to Windows, then click the OK button.

- Finally, restart your Windows 11 PC to effect the changes you’ve made to disable OneDrive.
Option 2: Disable OneDrive by Unlinking your OneDrive Account
Another way to disable OneDrive on your Windows 11 PC is by unlinking your OneDrive account from the computer. To achieve that, follow the steps below carefully.
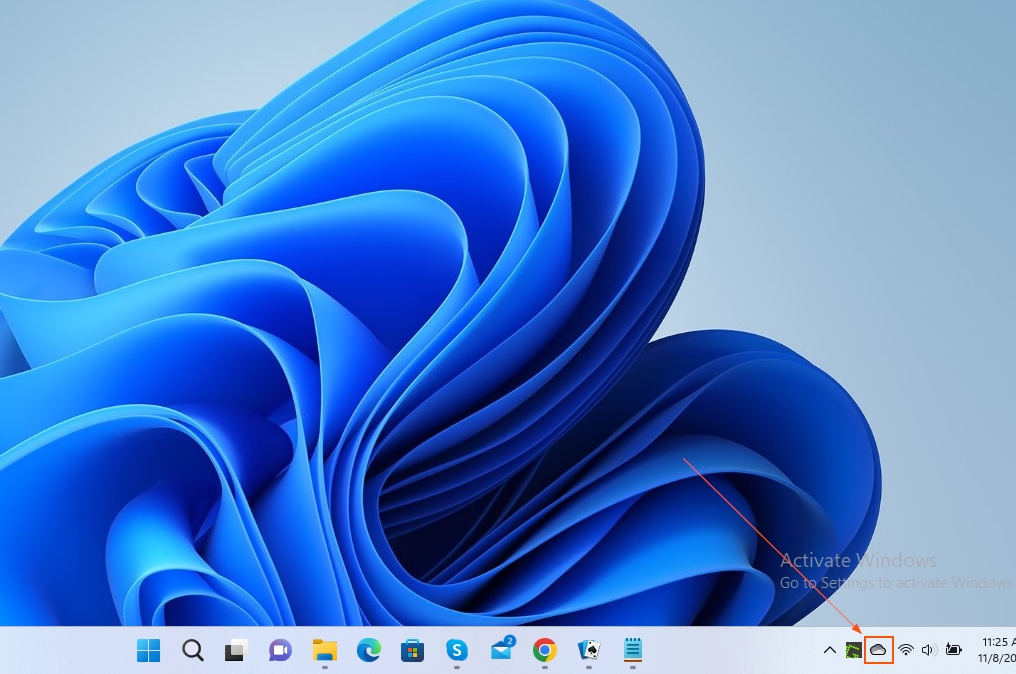
- Firstly, right-click the OneDrive icon on the right part of the Windows 11 taskbar.
- After that, click the Help & Settings icon at the top of the window that pops up, then select Settings from the displayed options.
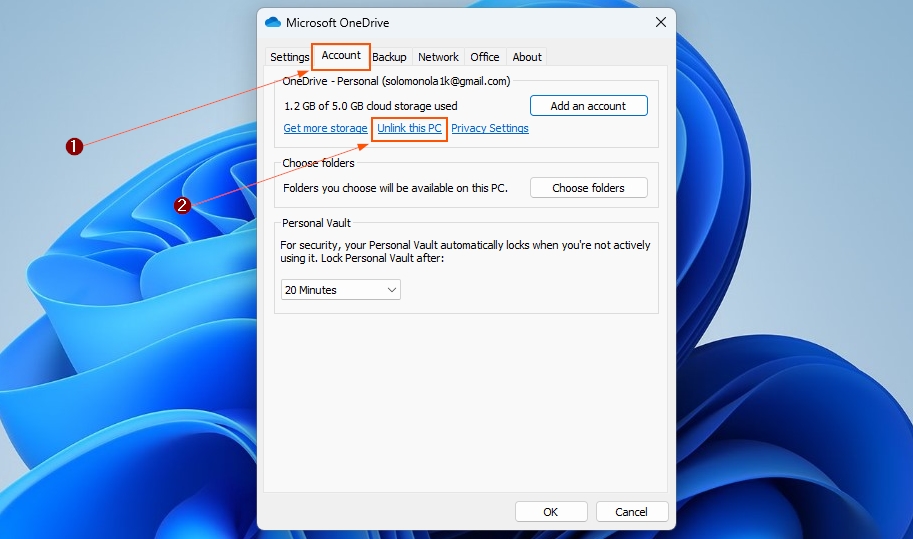
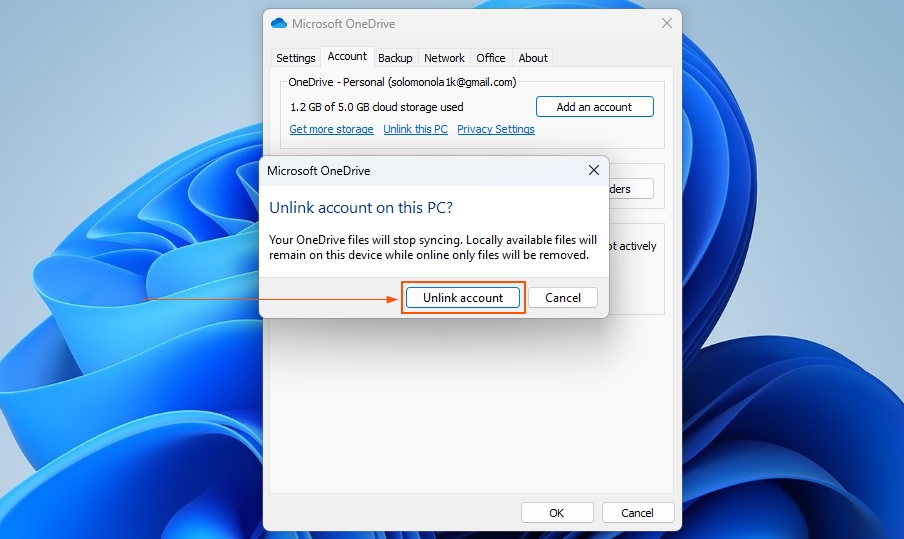
- Following that, click the Account tab on the window that appears, then select Unlink this PC.
- On the small Microsoft OneDrive prompt box that appears, click the Unlink account button.
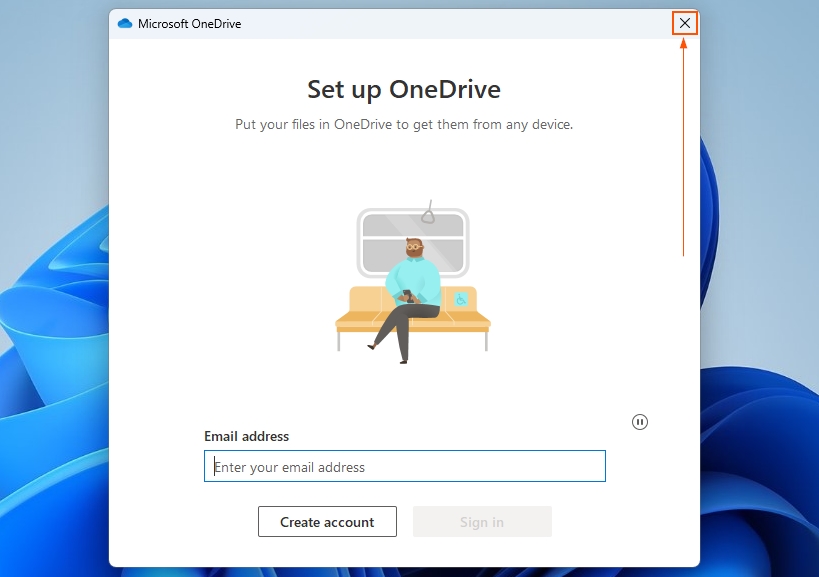
- Finally, close the Microsoft OneDrive window that appears by left-clicking the X button at the top right corner.
Option 3: Disable OneDrive Through the Group Policy Editor
The third way to disable OneDrive on your Windows 11 PC is through the Group Policy Editor. The steps below will guide you to accomplish that.
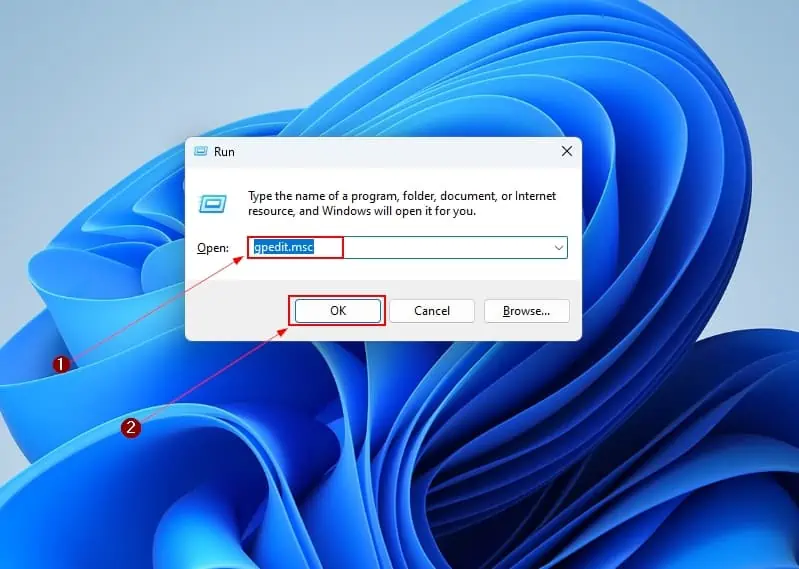
- Press the Windows key + R to open the Run command. Then, type “gpedit.msc” (without the quote) in the Run input box and click the OK button.
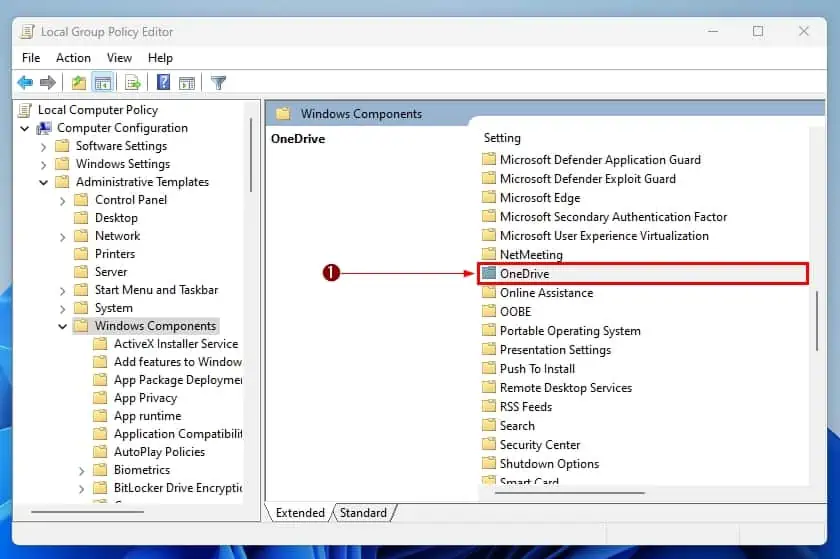
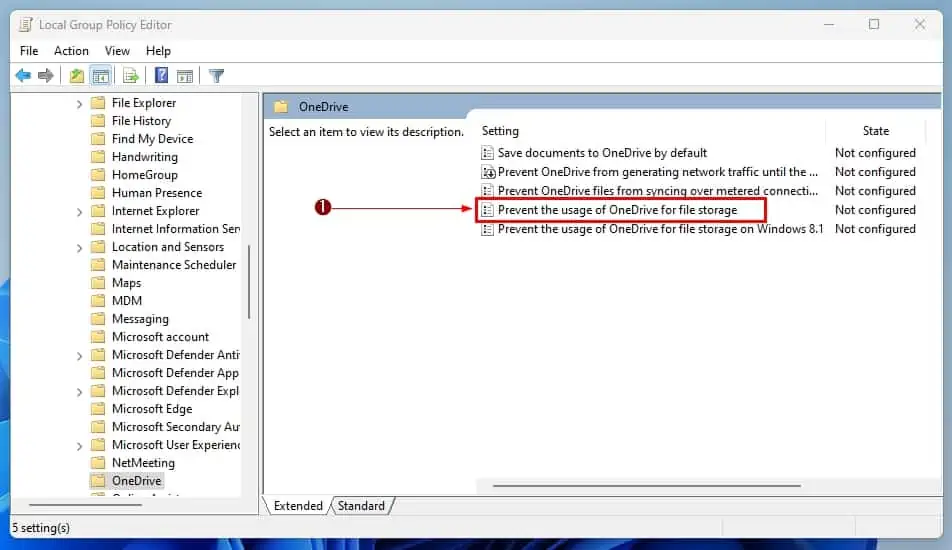
- When the Local Group Policy Editor window opens, navigate to the location below using the folders on the left pane. Then, double-click the OneDrive folder on the right pane of the window.
Computer Configuration ➜ Administrative Templates ➜ Windows Components
- After doing that, double-click Prevent the usage of OneDrive for file storage on the window’s right pane.
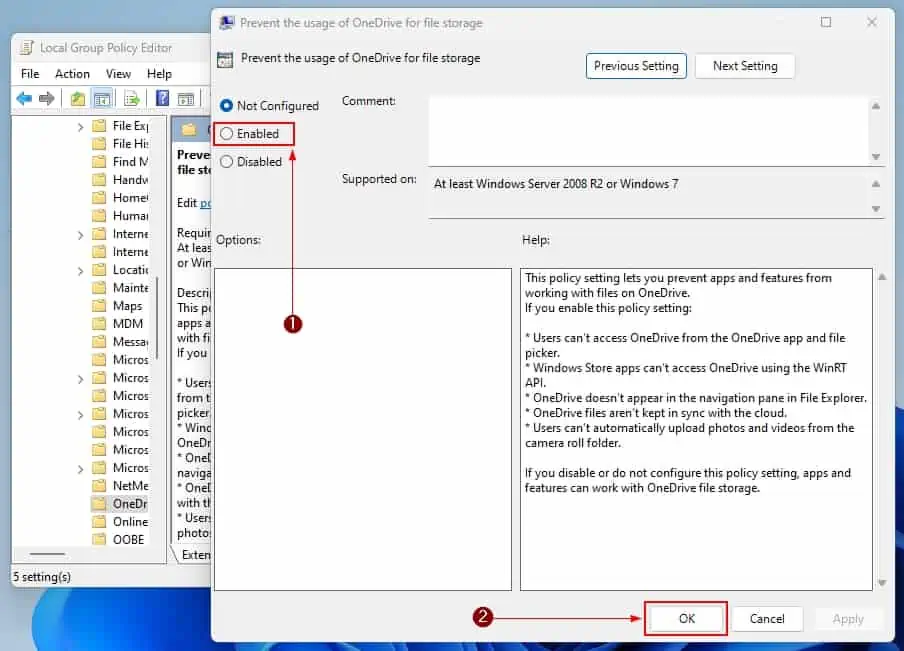
- On the window that appears, click the Enable radio button. Then, click the OK button at the bottom of the window to save the change.
Frequently Asked Questions
Formerly called SkyDrive, OneDrive is a Microsoft-owned cloud storage application. It is designed to allow Windows users to sync their computer files and access them anywhere from other devices.
OneDrive is owned by Microsoft.
Yes, you can download and install OneDrive On your Mac Computer. However, you’ll need the Apple Rossetta 2 emulator app in order to install and use OneDrive On your Mac PC.
Yes, OneDrive comes with the Windows 11 operating system.
Absolutely, you can save PDFs in your OneDrive account.
Conclusion
OneDrive is a great application that comes with Windows 11 OS, which allows users to save their files on the internet. However, some users have found themselves struggling to keep the application running and active due to various reasons.
Hence, the need to disable OneDrive arises. Gladly, I have successfully shown you three methods to disable OneDrive on your Windows 11 PC in this guide.
The first method involved disabling the application by preventing it from starting up. However, the second method is to unlink the OneDrive from the Windows 11 computer.
Meanwhile, the third and last method entailed using the Group Policy Editor to disable OneDrive.
I believe this guide was detailed enough and helpful to you. If you find the guide insightful, click on “Yes” beside the “Was this page helpful” question below.
You may also express your thoughts and opinions by using the “Leave a Comment” form at the bottom of this page.
Lastly, for more on Windows 11 how-to guides, visit our Windows 11 How-To page.


