Do you want to block or exclude internal traffic in Google Analytics 4 (GA4)? This is a smart move, and this guide will teach you how to do that.
Step 1: Get your Public IP Address
The first step to excluding internal traffic in Google Analytics 4 is to determine your public IP address. Follow the steps below to find your IP address.
- Click this link to open a Google search that displays your IP address – what is my ip – Google Search
- Then, note your public IP address. Google is likely to display your IPv4 address. However, you may also have a public IPv6 address.

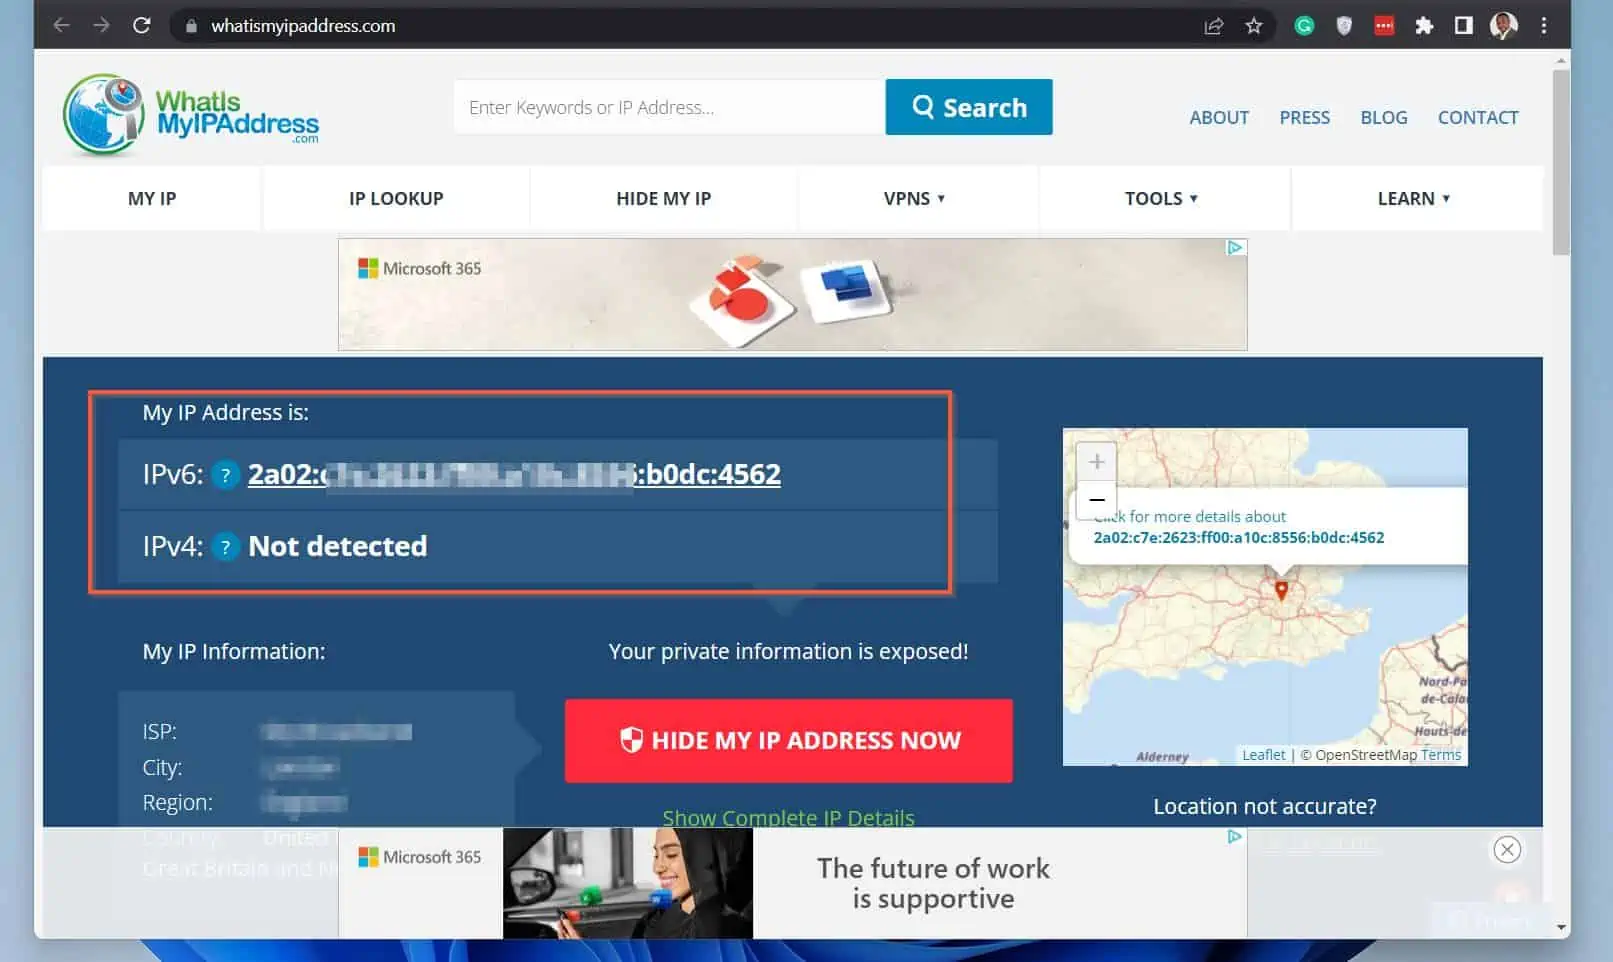
- Finally, to get both your IPv6 and IPv4 address, open What Is My IP Address – See Your Public Address – IPv4 & IPv6. The website should display your IPv4 and IPv6.
As you can see from the screenshot below, the site displays my IPv6 address but could not detect my IPv4 address. Fortunatly, I already have my IPv4 from the Google search result.
Copy both IP addresses as you would need them in the next section.
Step 2: Define your Internal IP Address in Google Analytics 4 (GA4) Data Stream Setting
After you determine your public IP address, the next step to excluding internal traffic in Google Analytics 4 is to define internal traffic in the GA4 Data stream settings.
Follow the steps below to complete this step…
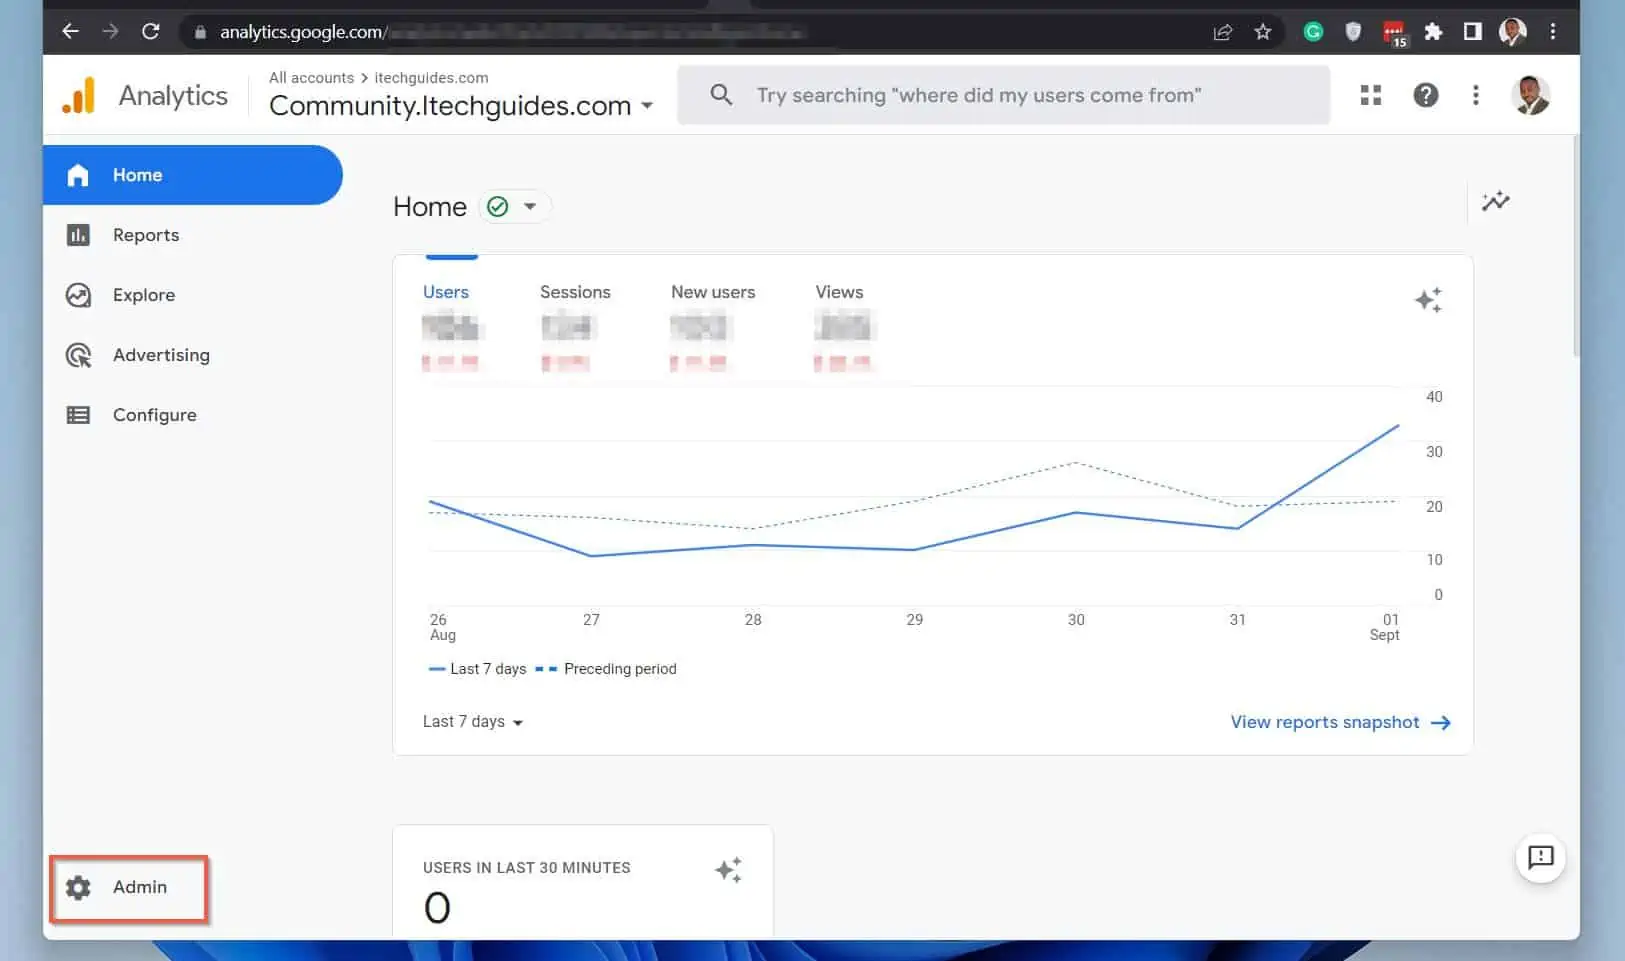
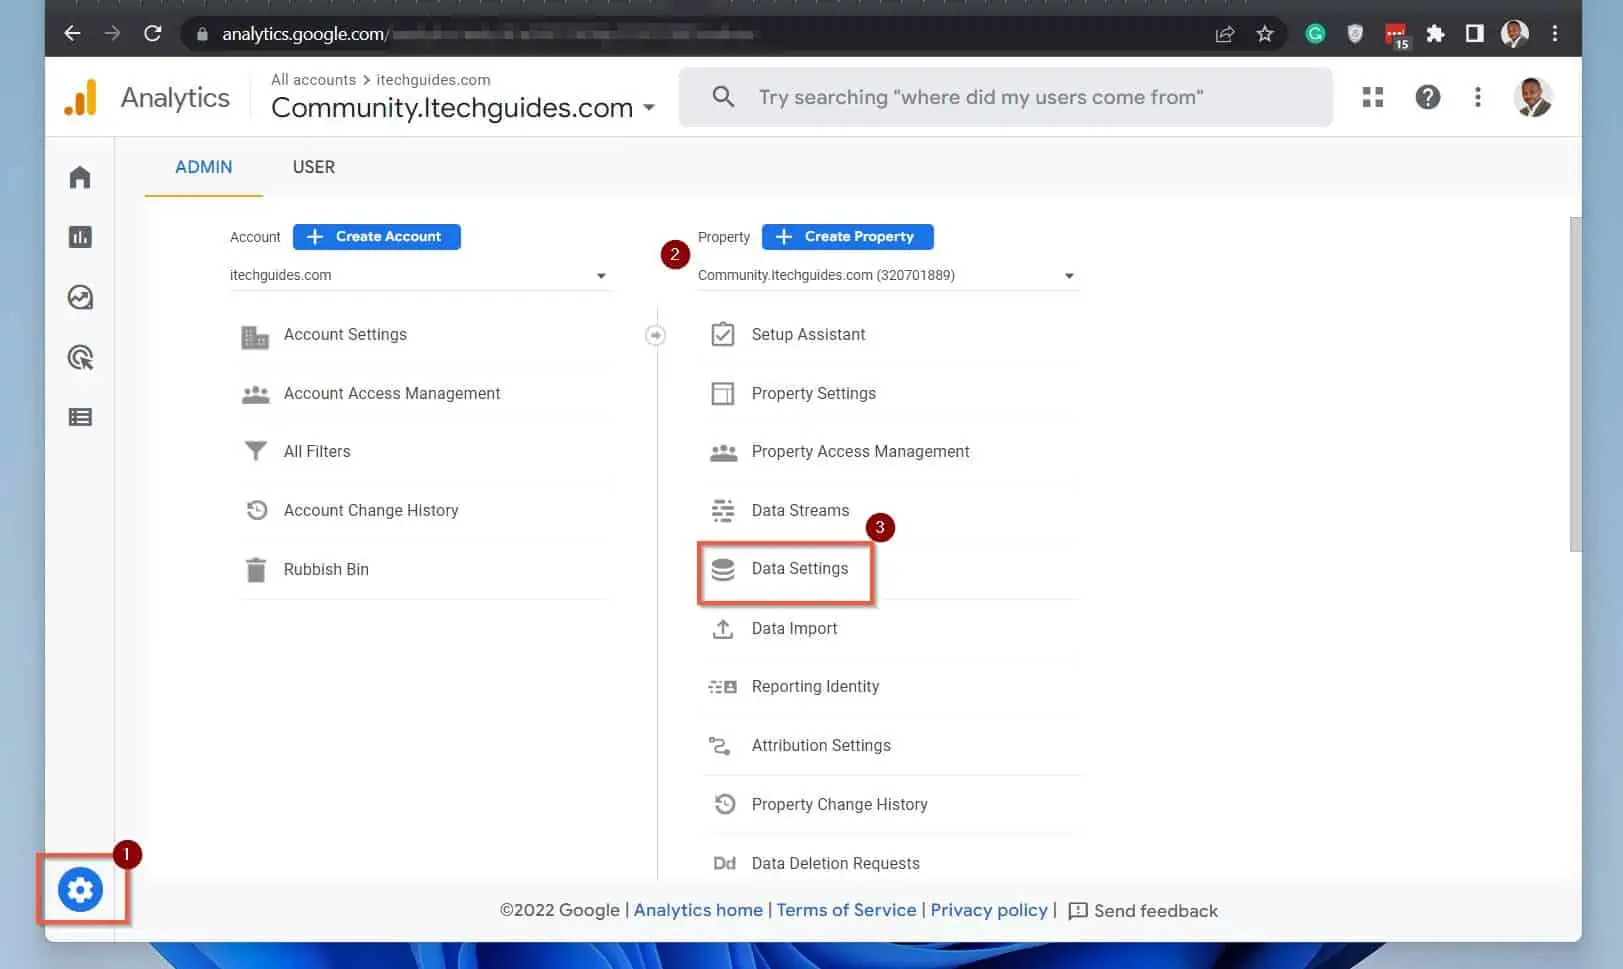
- Sign in to your Google Analytics. Then, on the bottom left of Analytics, click Admin.
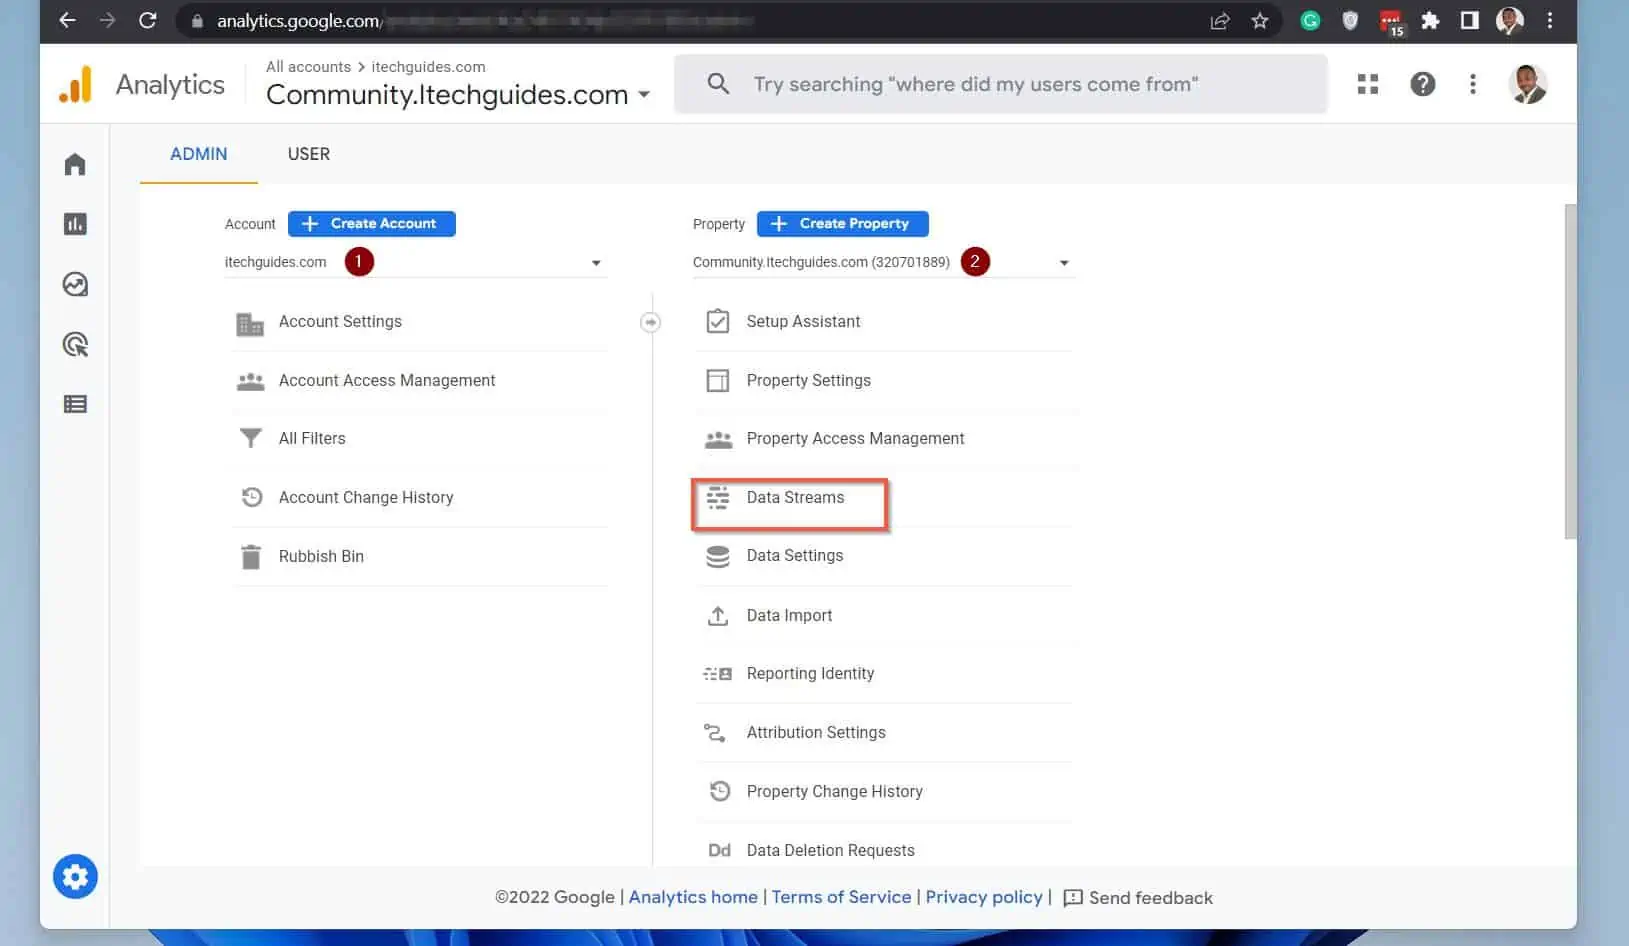
- When your Google Analytics Admin settings open, select the account that contains this GA4 property in the Account drop-down (1).
- Then, in the Property drop-down, select the GA4 property (2). Finally, on Google Analytics 4, click Data Streams.
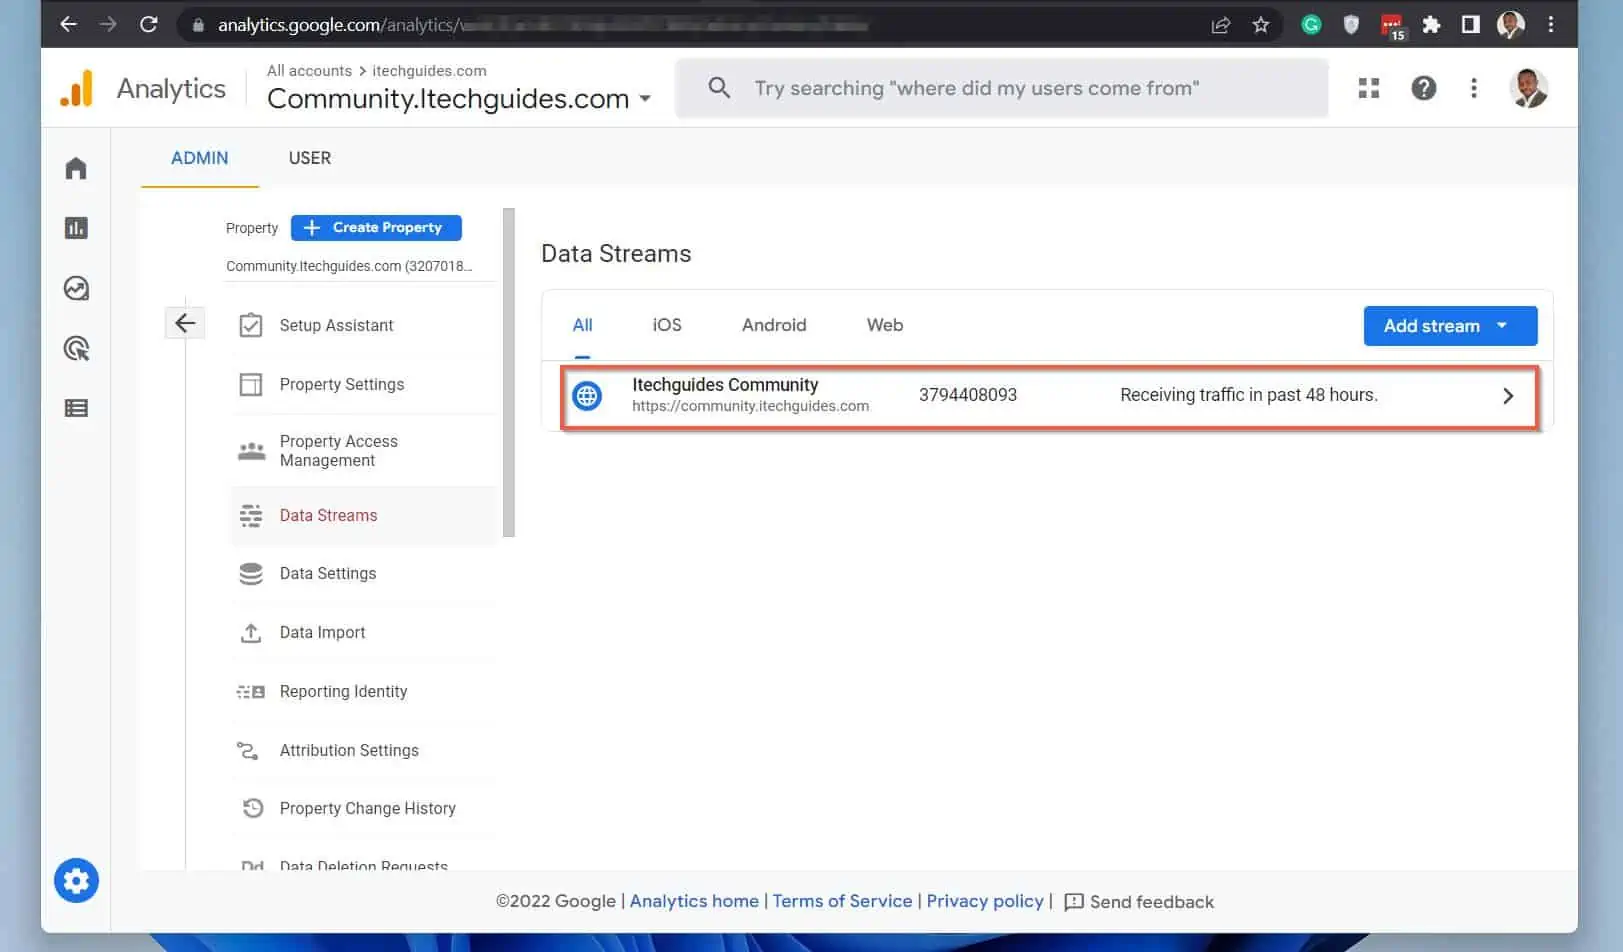
- On the Data Streams page, click on the data stream for the GA4 property you want to edit.
- Then, scroll down to the Google tag section and click “Configure tag settings”.
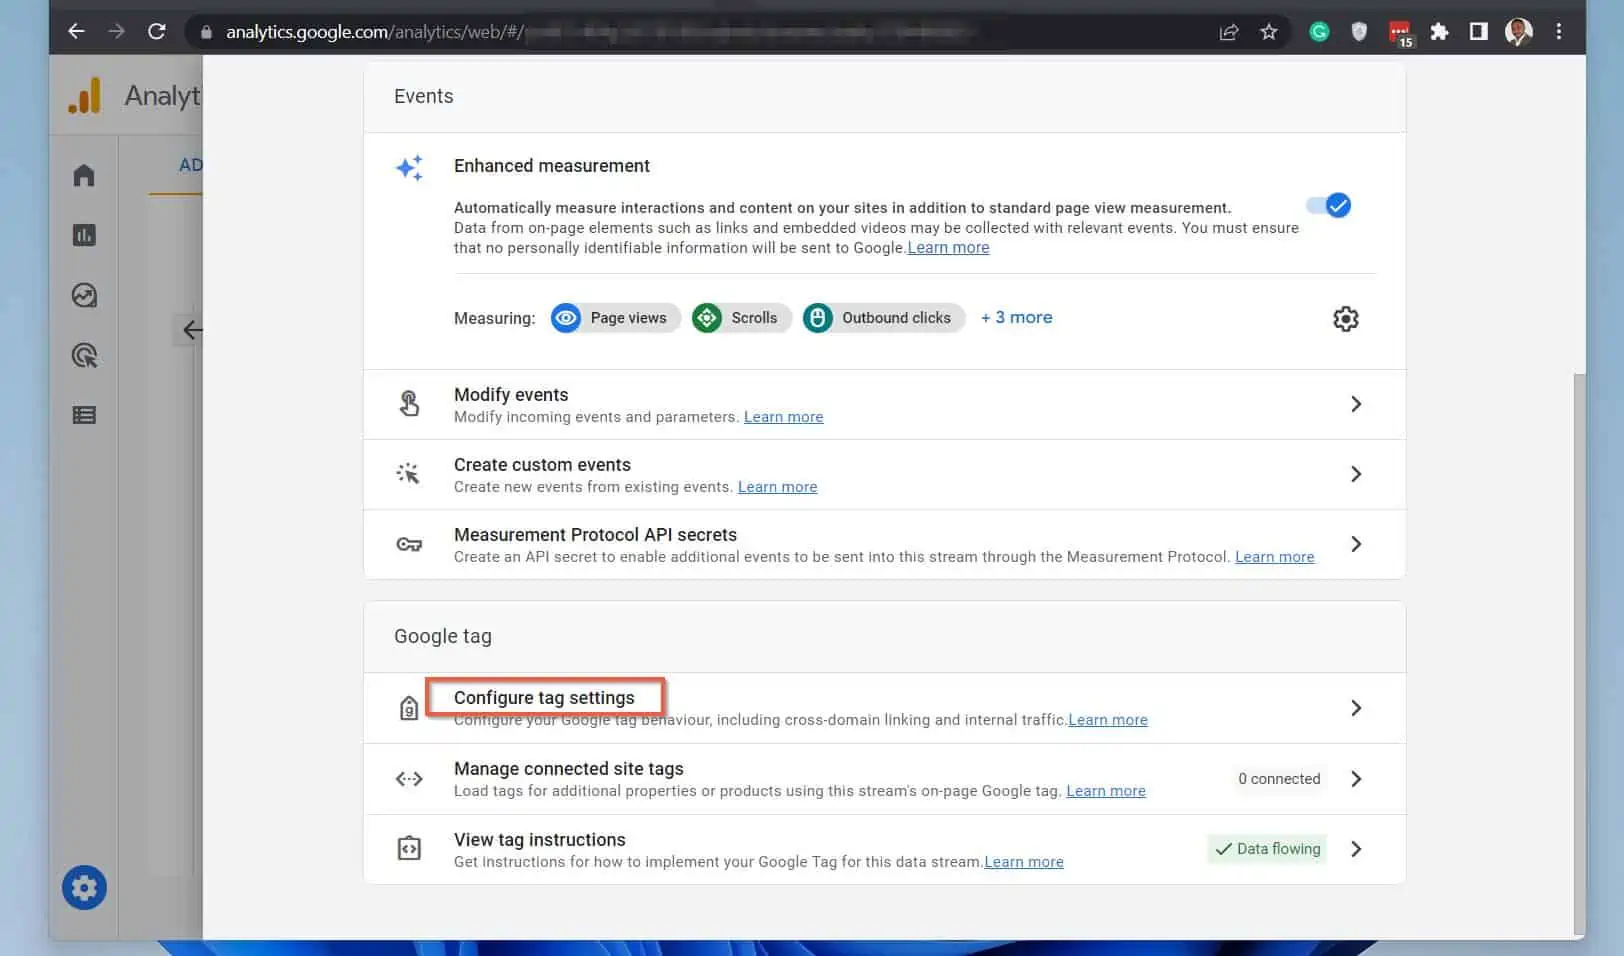
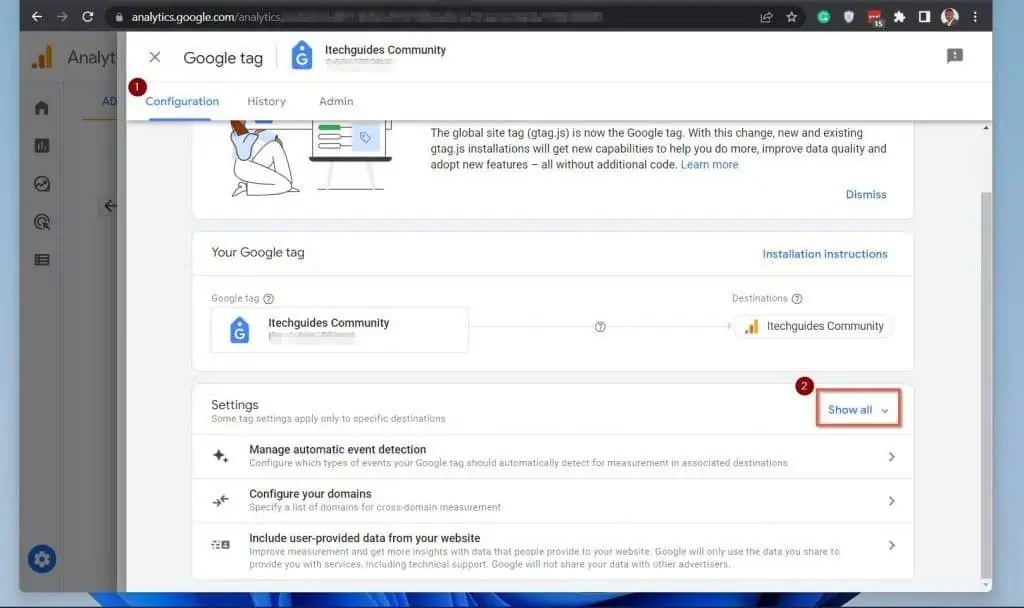
- By default, the Configure tag settings page will open on the “Configuration” (1) tab. Scroll down and on the Settings section, click “Show all”.
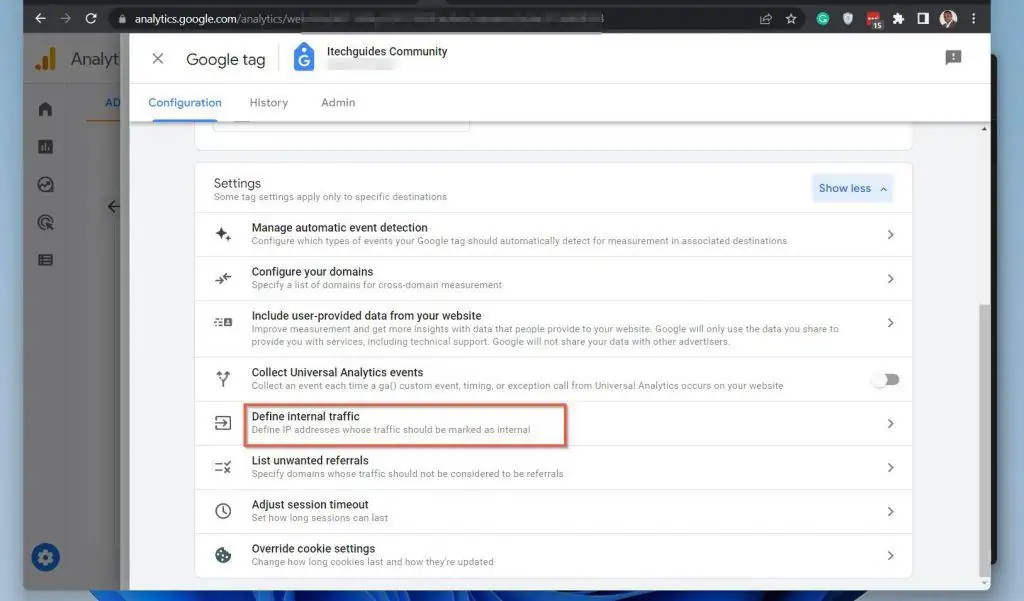
- Then, scroll down and click Define internal traffic. When the “Internal traffic rules” page opens, click the Create button – see the second screenshot below.

- On the Create internal traffic rule page, give the rule a recognizable “Rule name” (1). Then, on the “traffic_type value” rule, enter a name and note it; you’ll require it for the filter you will create in the next section to work.
- Proceed to the IP addresses section. Then, on the “Match type” drop-down, select IP address equals (3) – then, enter your public IPv4 in the Value (5) field.
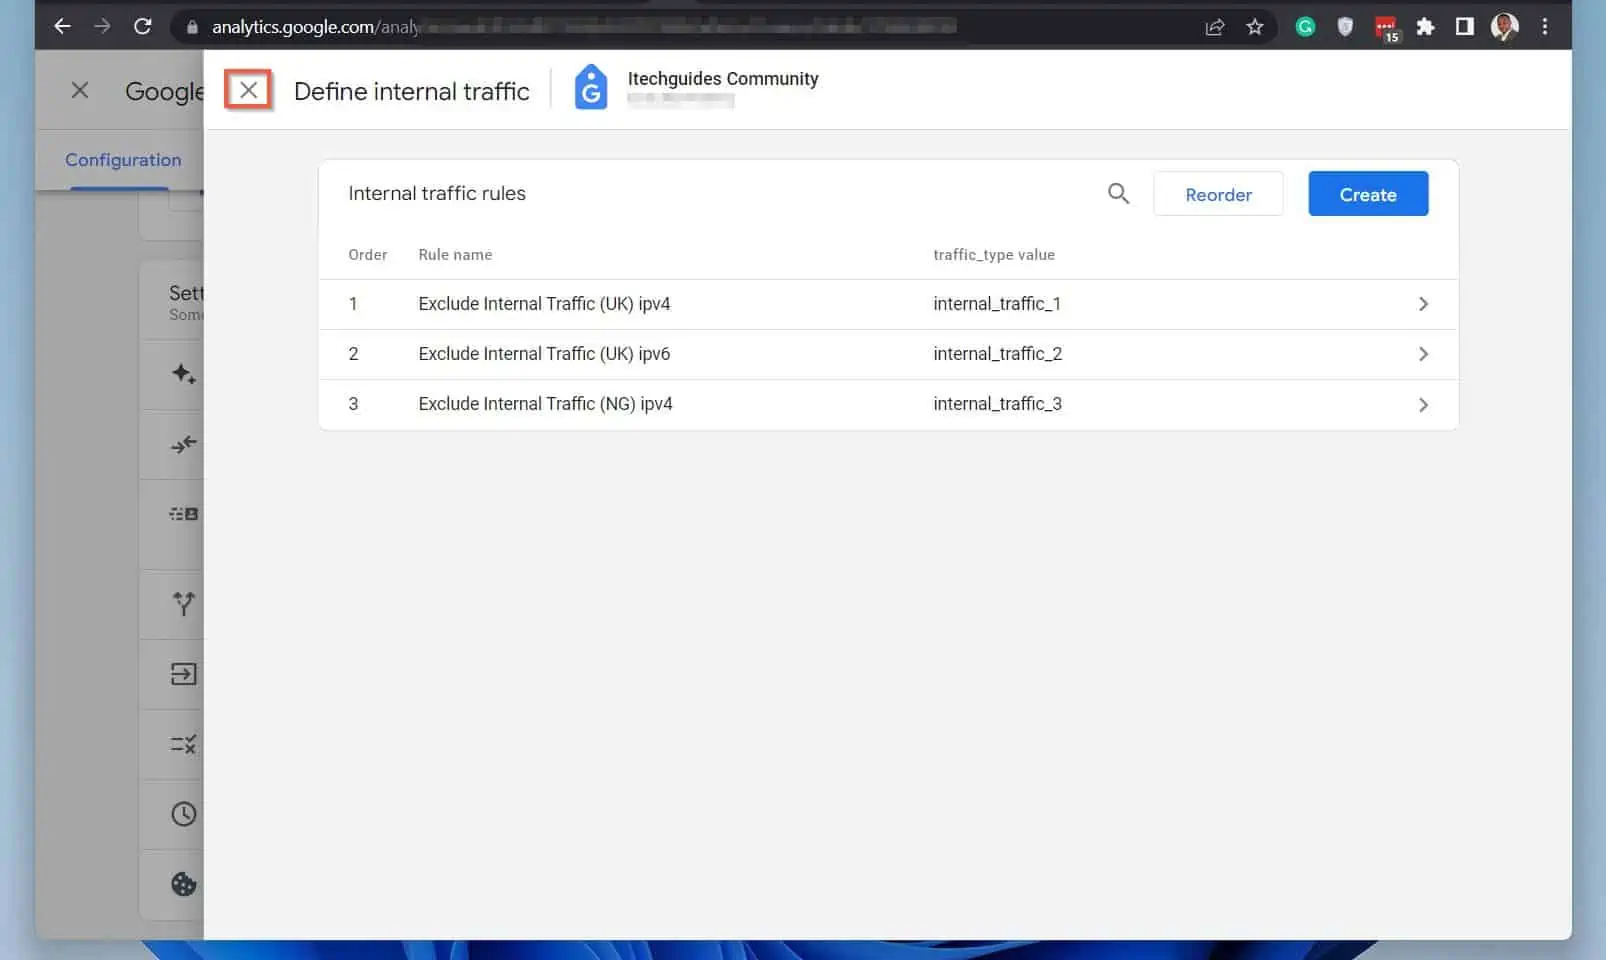
- When you finish, to create the rule that defines your internal IP address in Google Analytics 4, click Create (6). Google Analytics will return to the Define internal traffic page.

- Finally, click the close button on the top left of the Define internal traffic page.
Step 3: Create Filters to Exclude Internal Traffic in Google Analytics 4 (GA4) with the Internal IP Rule
Now that you have identified your internal traffic by creating an internal traffic rule in GA4, it is time to exclude the internal traffic in Google Analytics 4.
To complete this step, you need to create a filter in your GA4 Data Settings. Follow the steps below to complete this task.
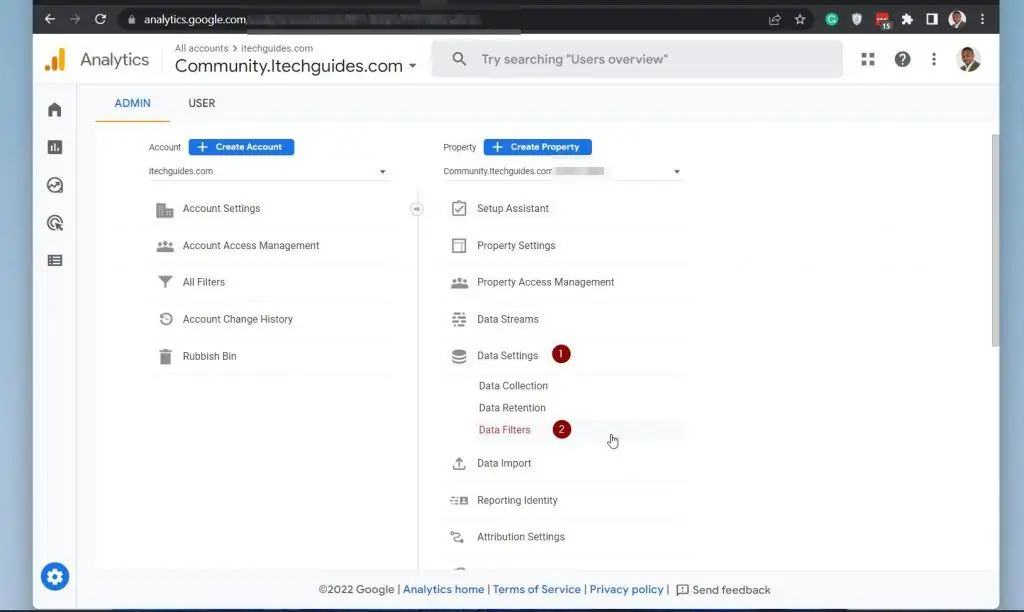
- While still signed in to your Google Analytics, click Admin on the bottom left (1). Then, ensure that you have selected the right Property (2).
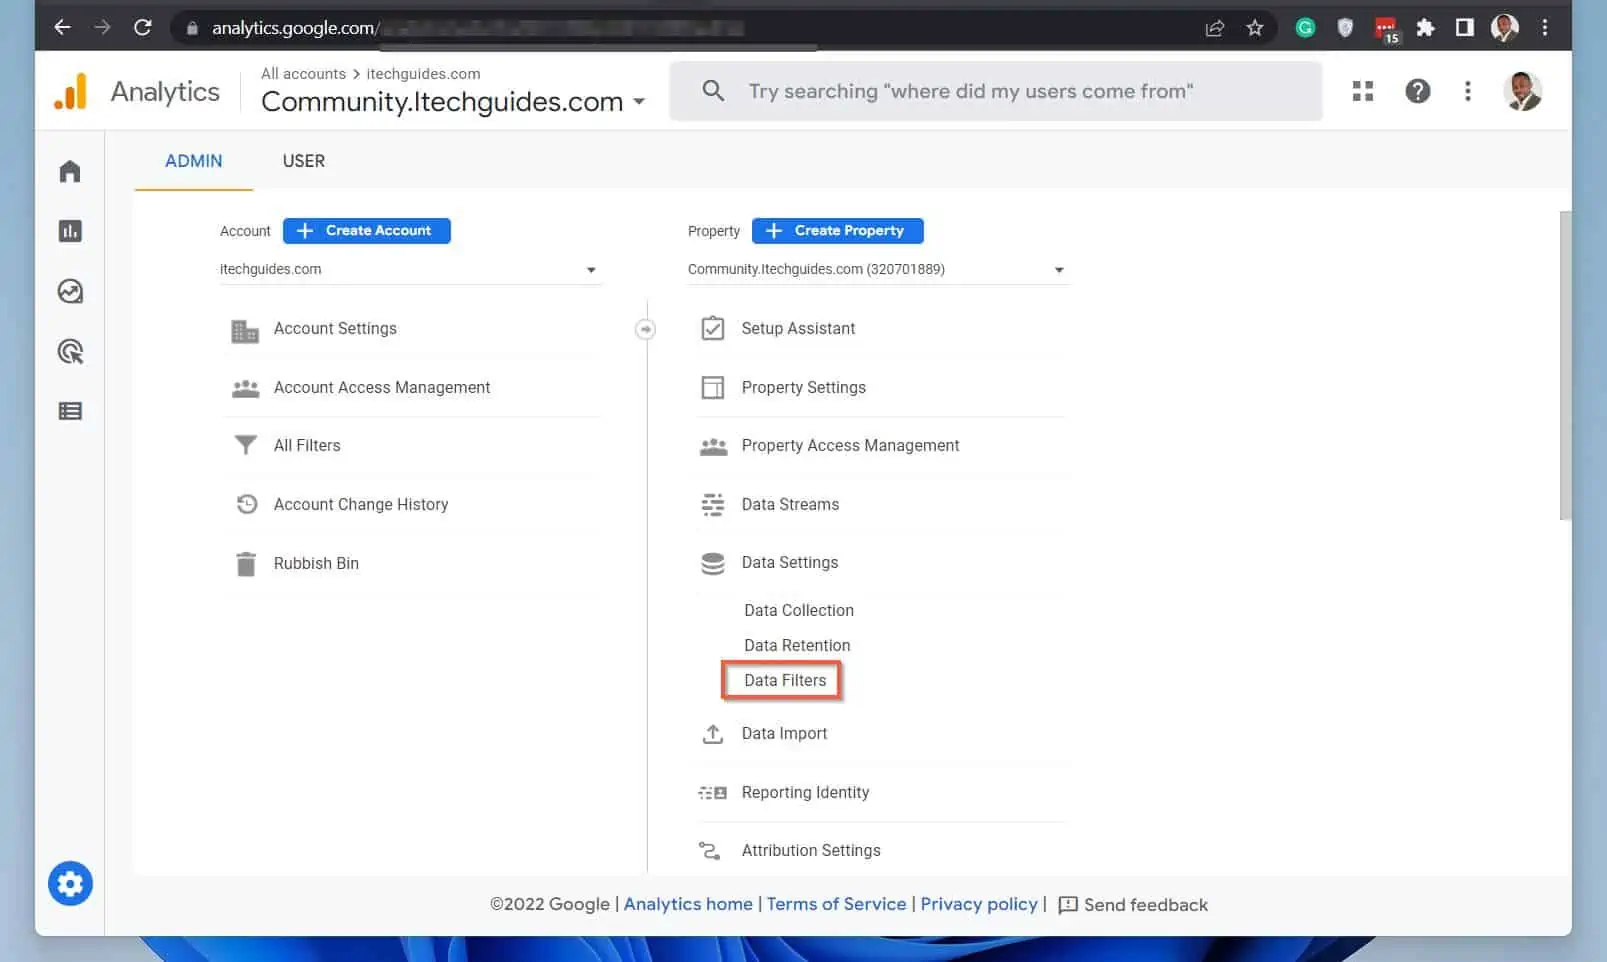
- On the property setting, click Data Settings (3). When you click Data Settings, Google Analytics will display three more options beneath Data Settings.
- Then, beneath Data Settings, click Data Filters.
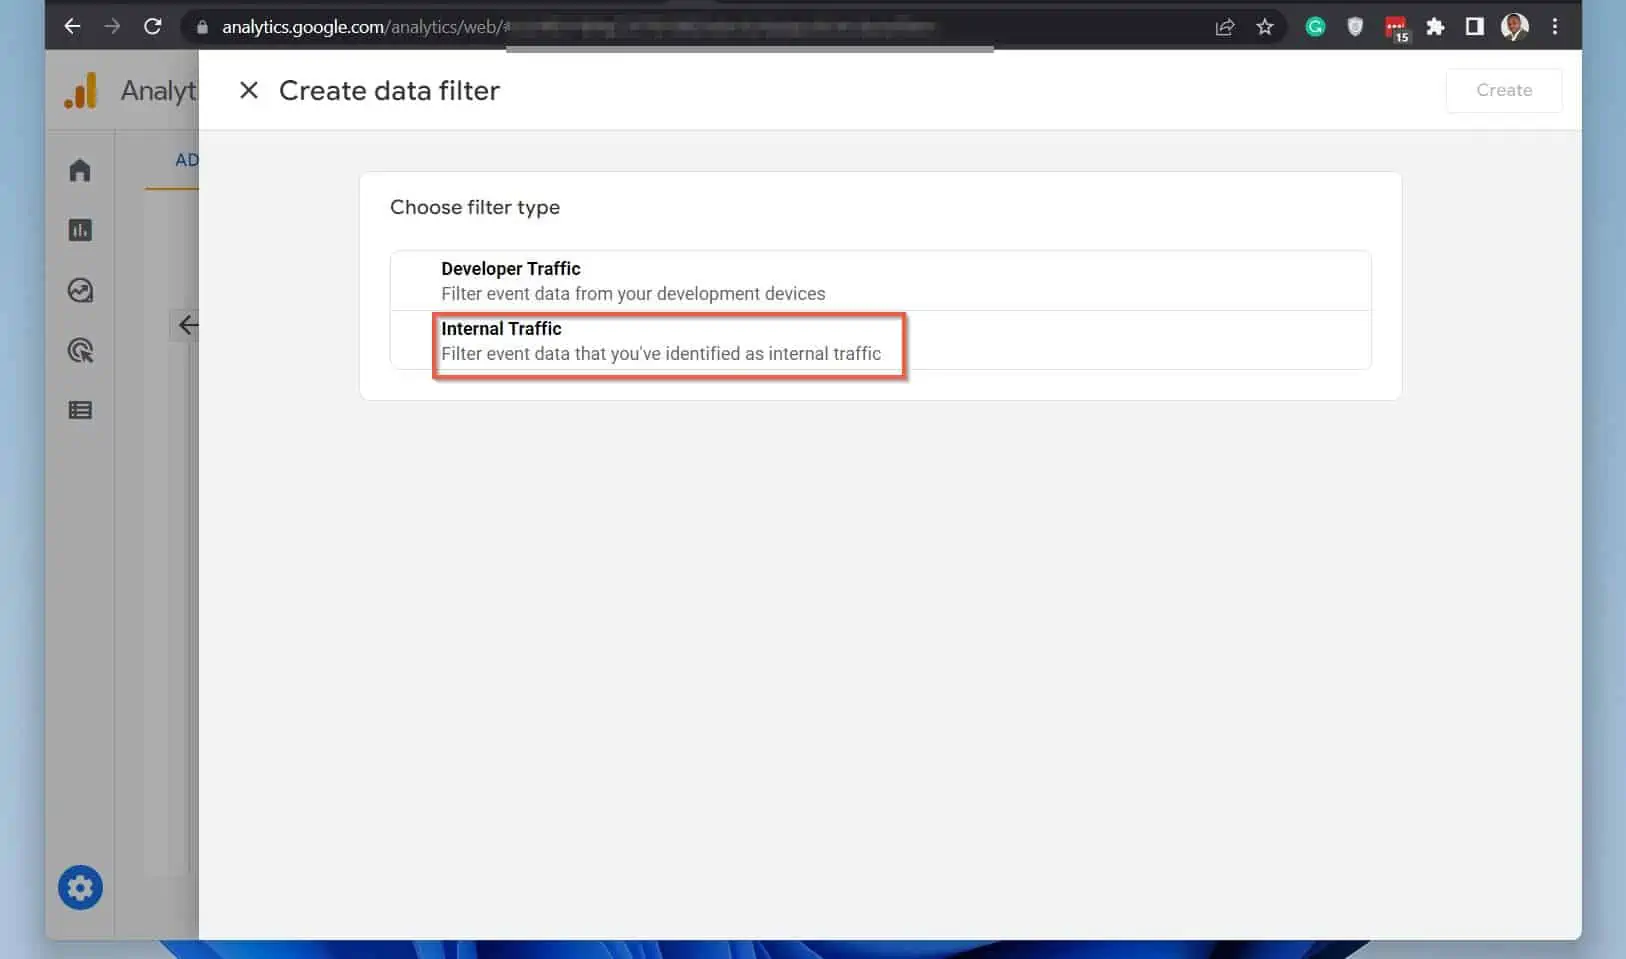
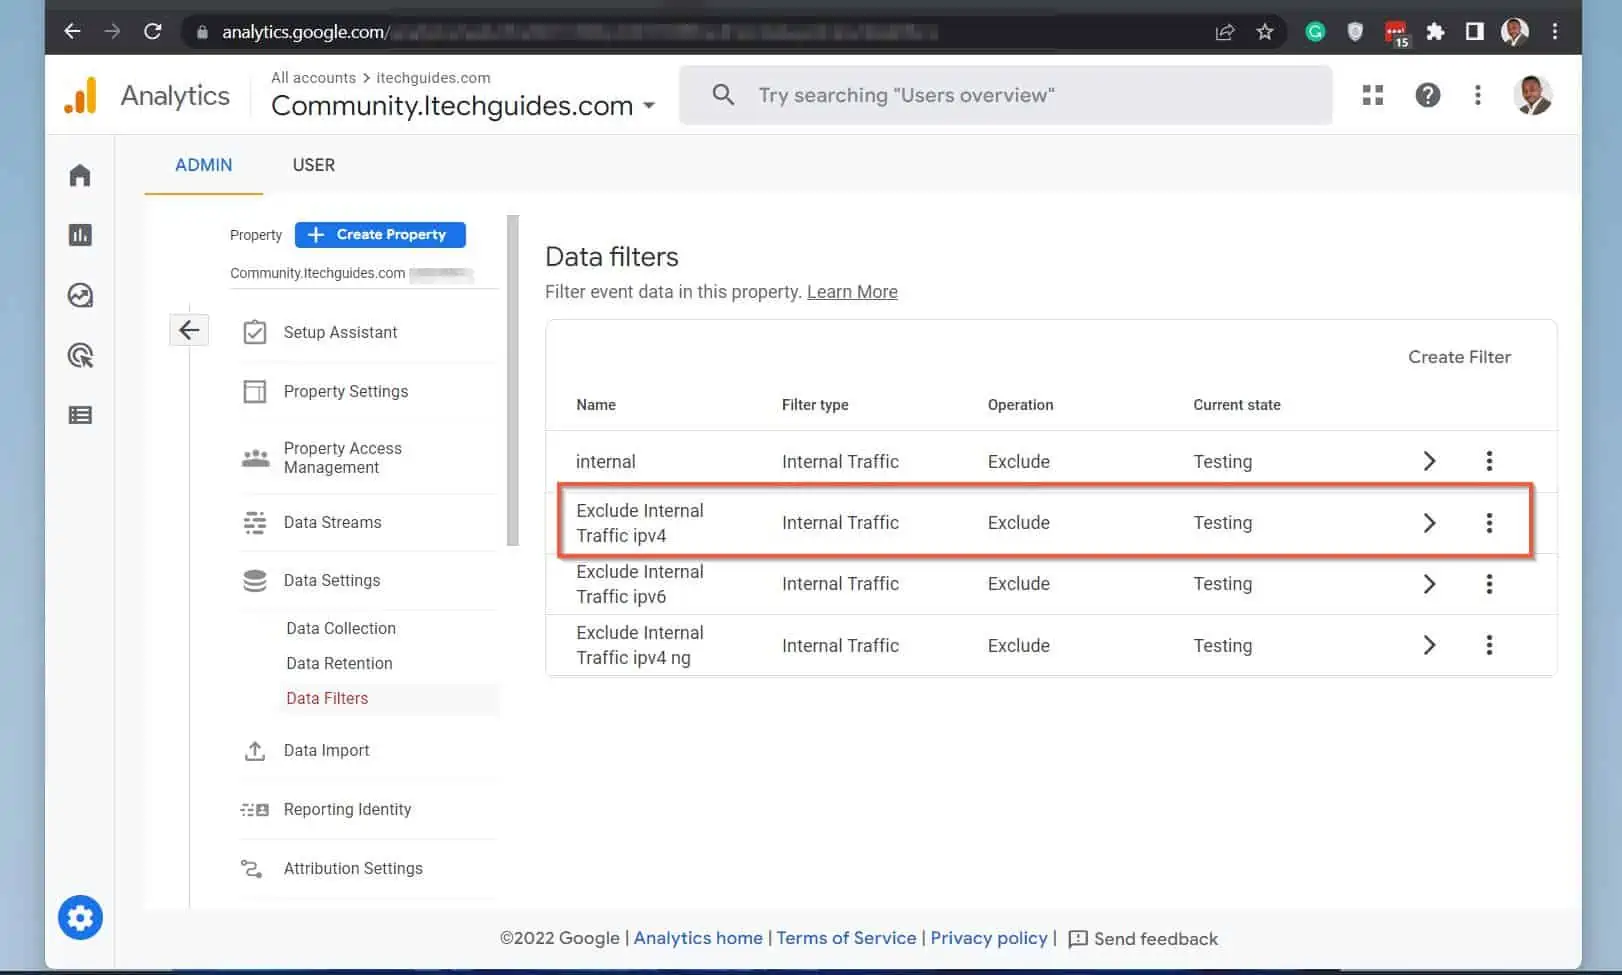
- When the Data filters page opens, click “Create Filter.” Then, click Internal traffic – see the second screenshot below.

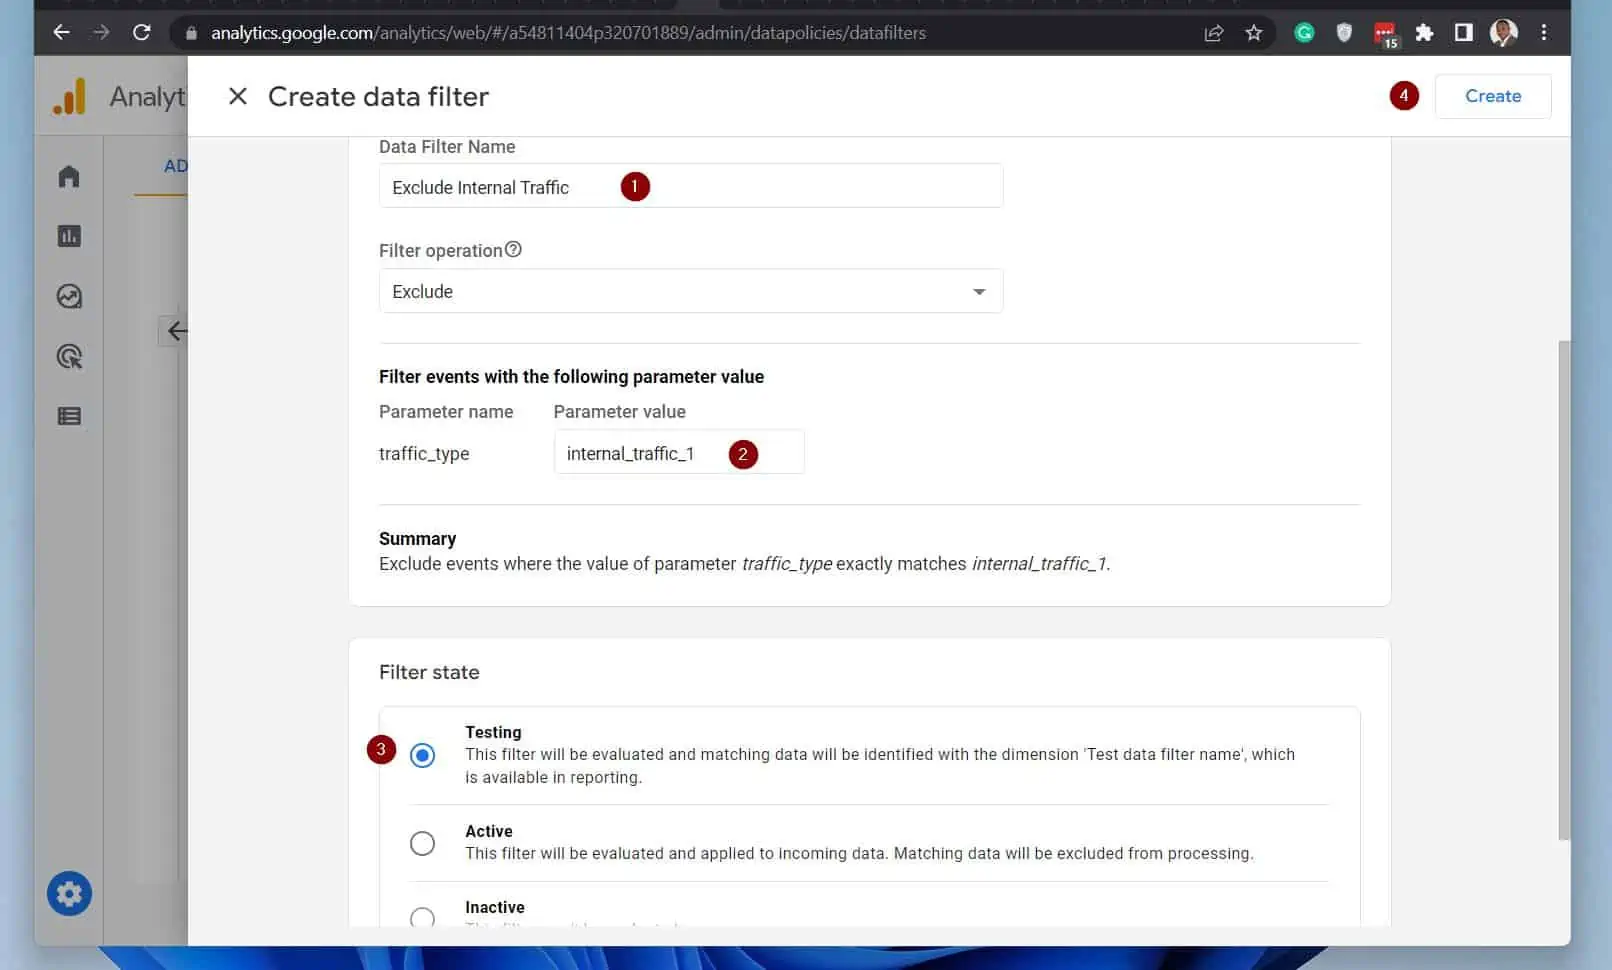
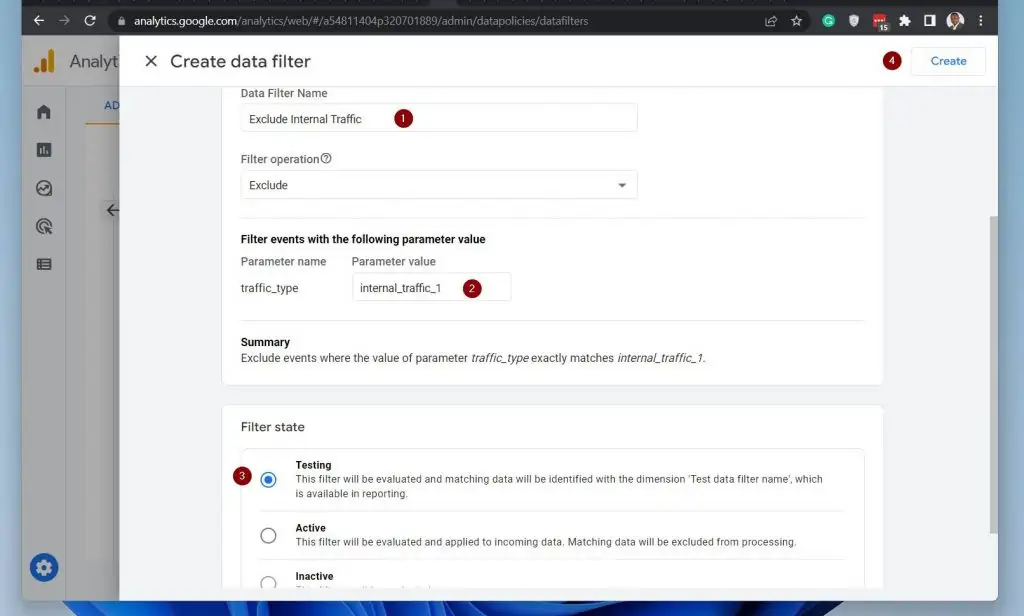
- Finally, complete the Create data filter page as shown below to create a GA4 filter that excludes your internal traffic.
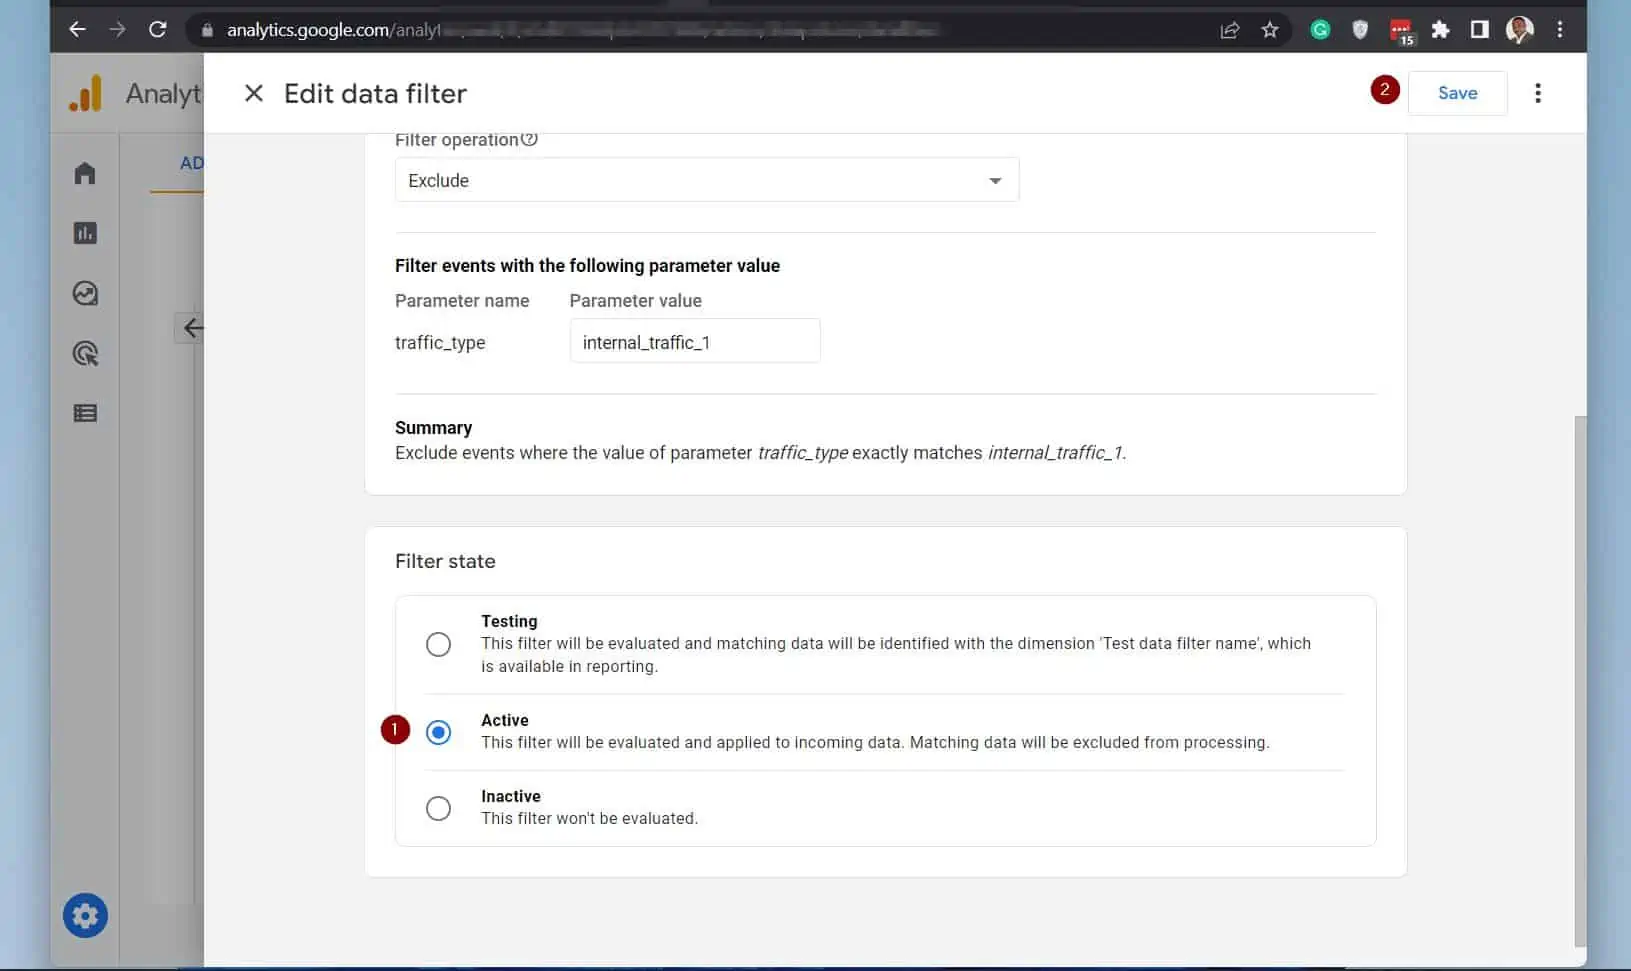
The only setting you can change is the Data Filter Name. You MUST also make sure that you set the traffic_type to the same value you set traffic_type to in the last section.
In this example, my traffic_type is internal_traffic_1.
When you finish, click Create on the top right of the page.
Google warns that filtering is a destructive operation. So, Google strongly recommends that you test your filters before activating them.
Make sure you select Testing in the Filter state section below. Then, proceed to the next section to learn how to test that your filter is working before activating it.
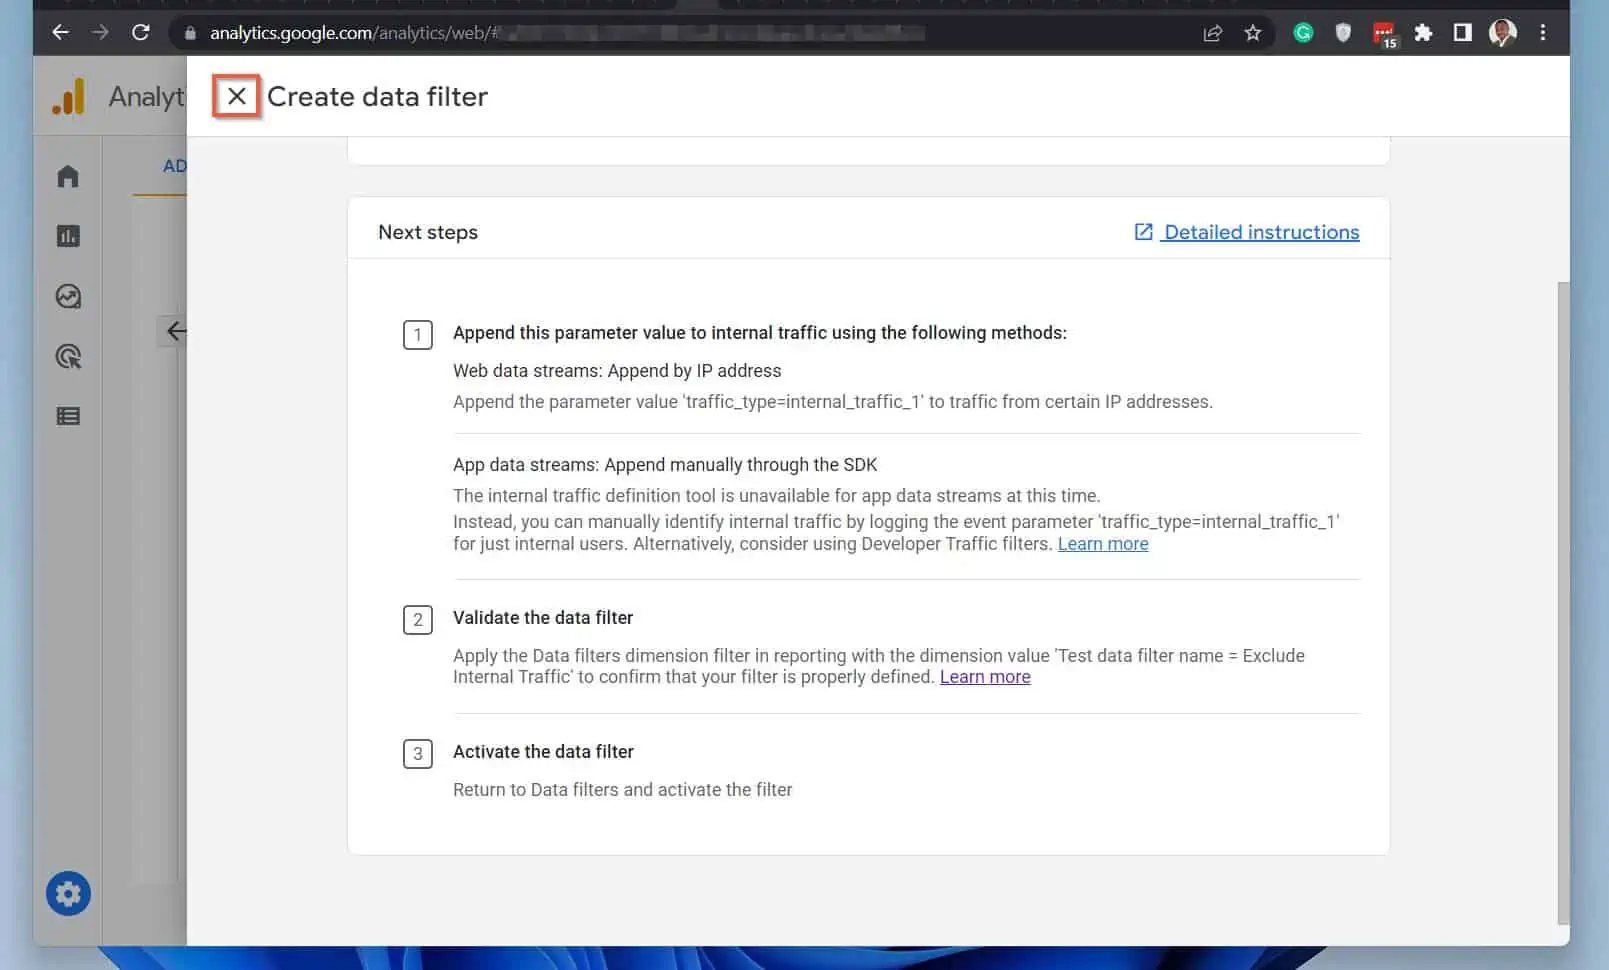
Google Analytics will create the data filter and display additional steps. In the last section, you selected “Testing” in the Filter state section of the configuration.
Google recommends that you test before you activate the filter. You test first before activating it to be sure that your filter works before you activate it.
In the final section of this guide, you will find the steps to test your rule and then activate it.
Step 4: Test and Activate your Internal Traffic GA4 Filter Rule
The last step to exclude internal traffic uin Google Analytics 4 (GA4) is to test that the traffic rule(s) are working as expected. Then, if you’re happy that the rules are working, you activate each data filter rule you created in the last section.
To test the internal traffic rules, follow the steps below:
- Visit your website with the device that has the public IP you want to exclude in GA4.
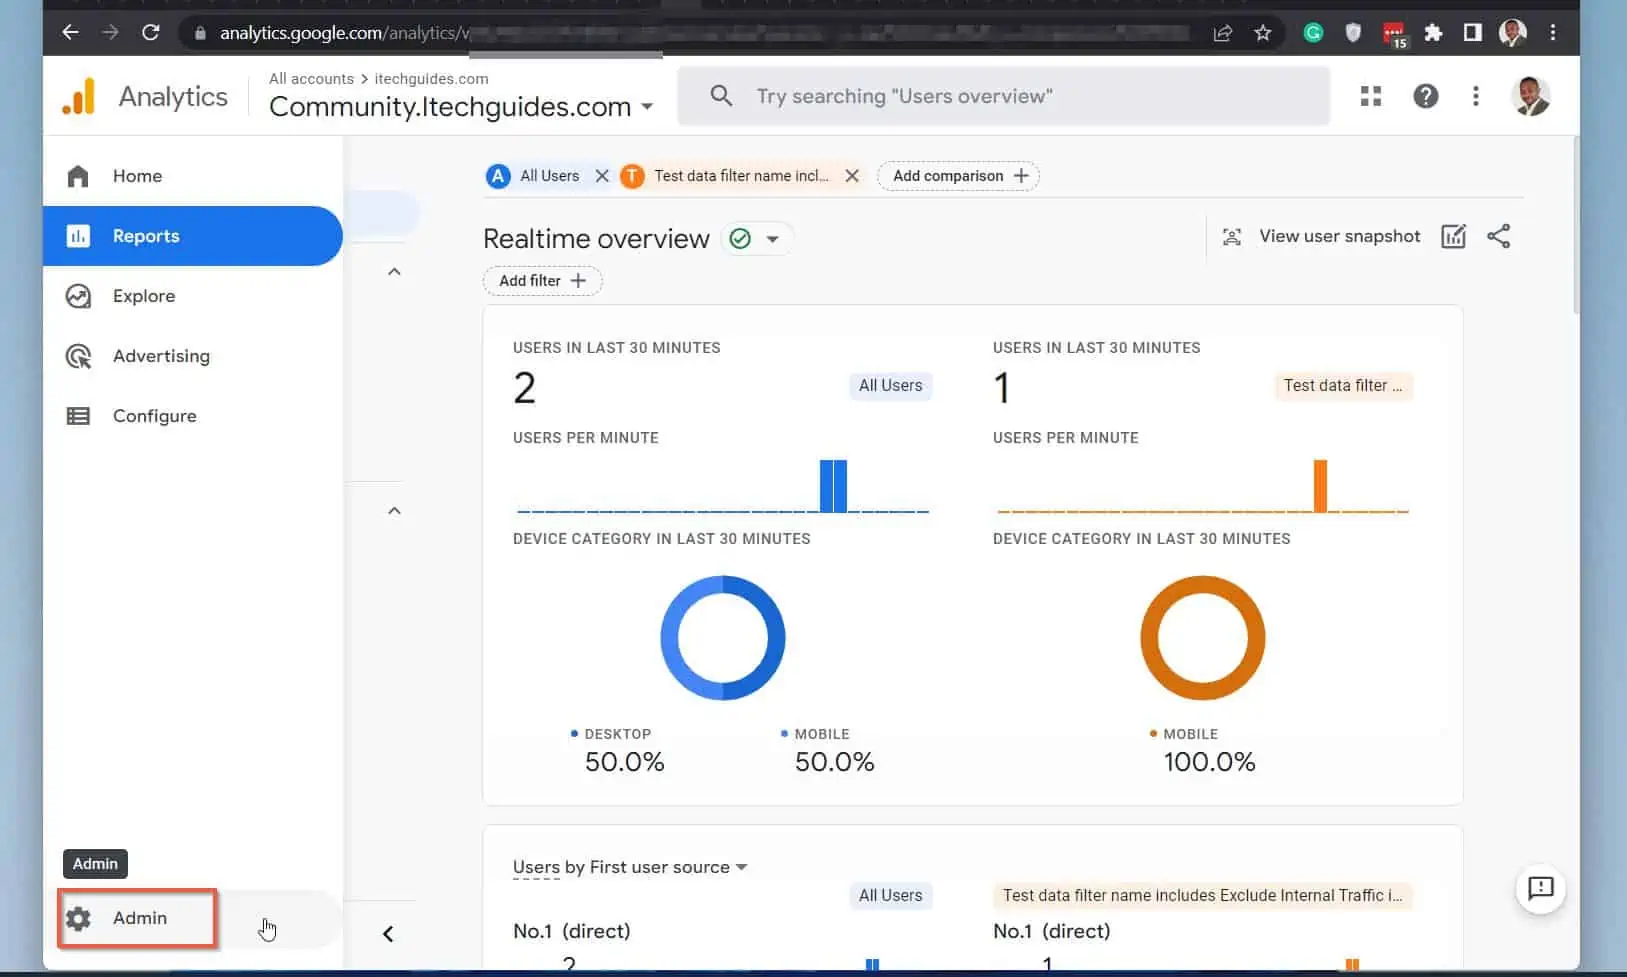
- Then, return to Google Analytics. On the left pane, click Reports.
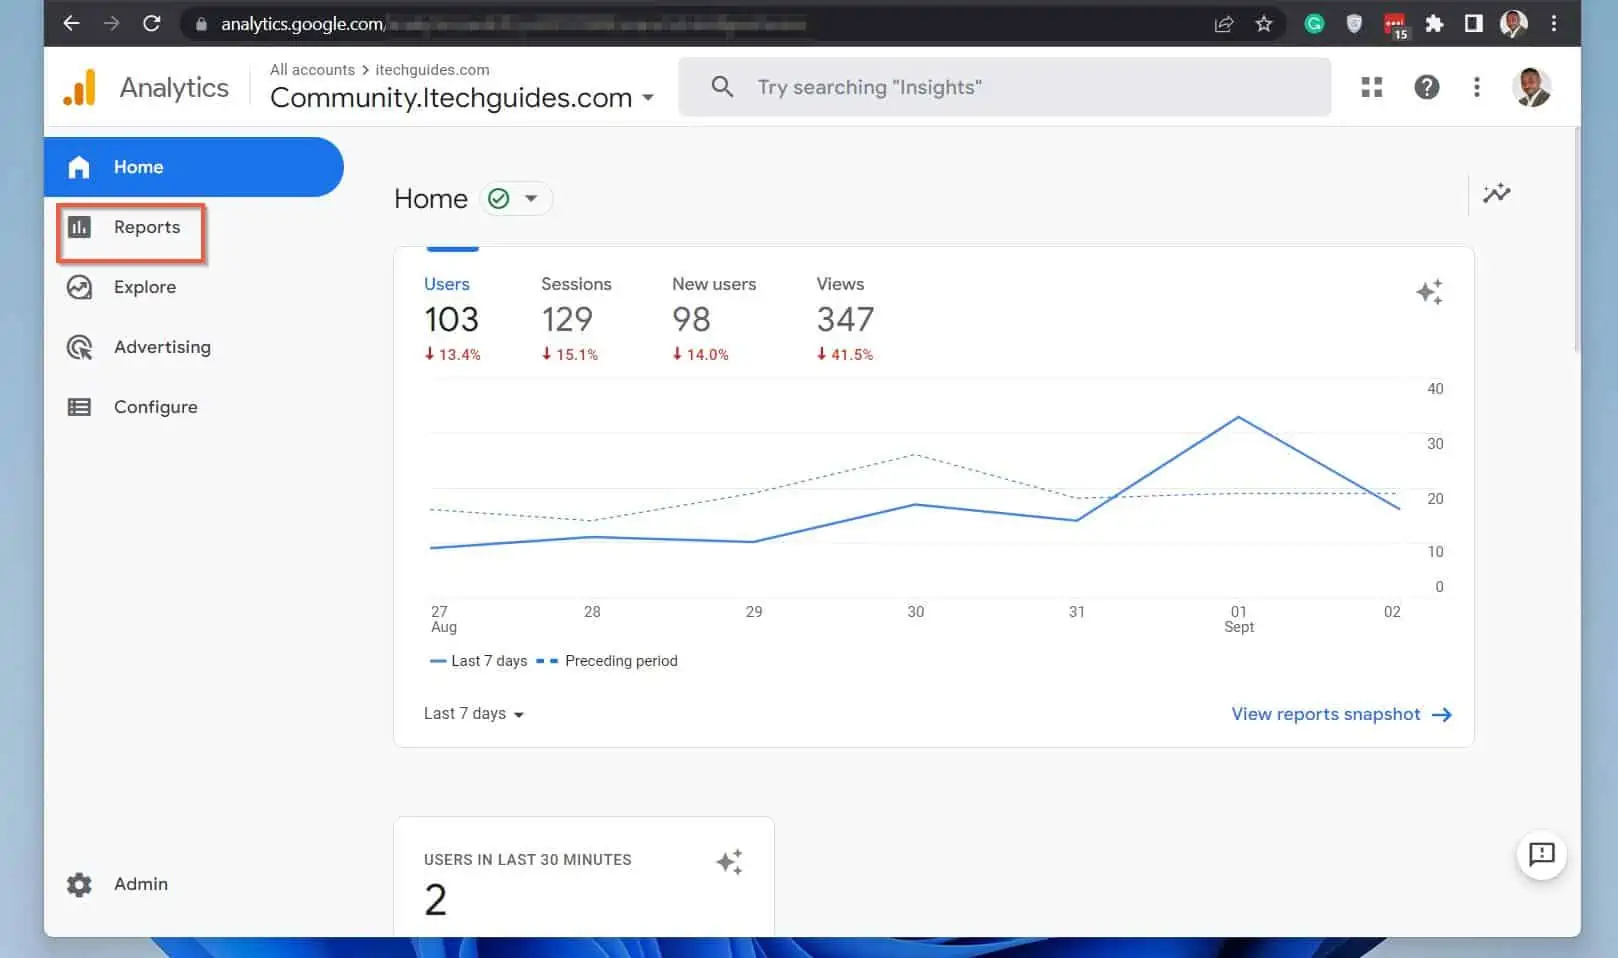
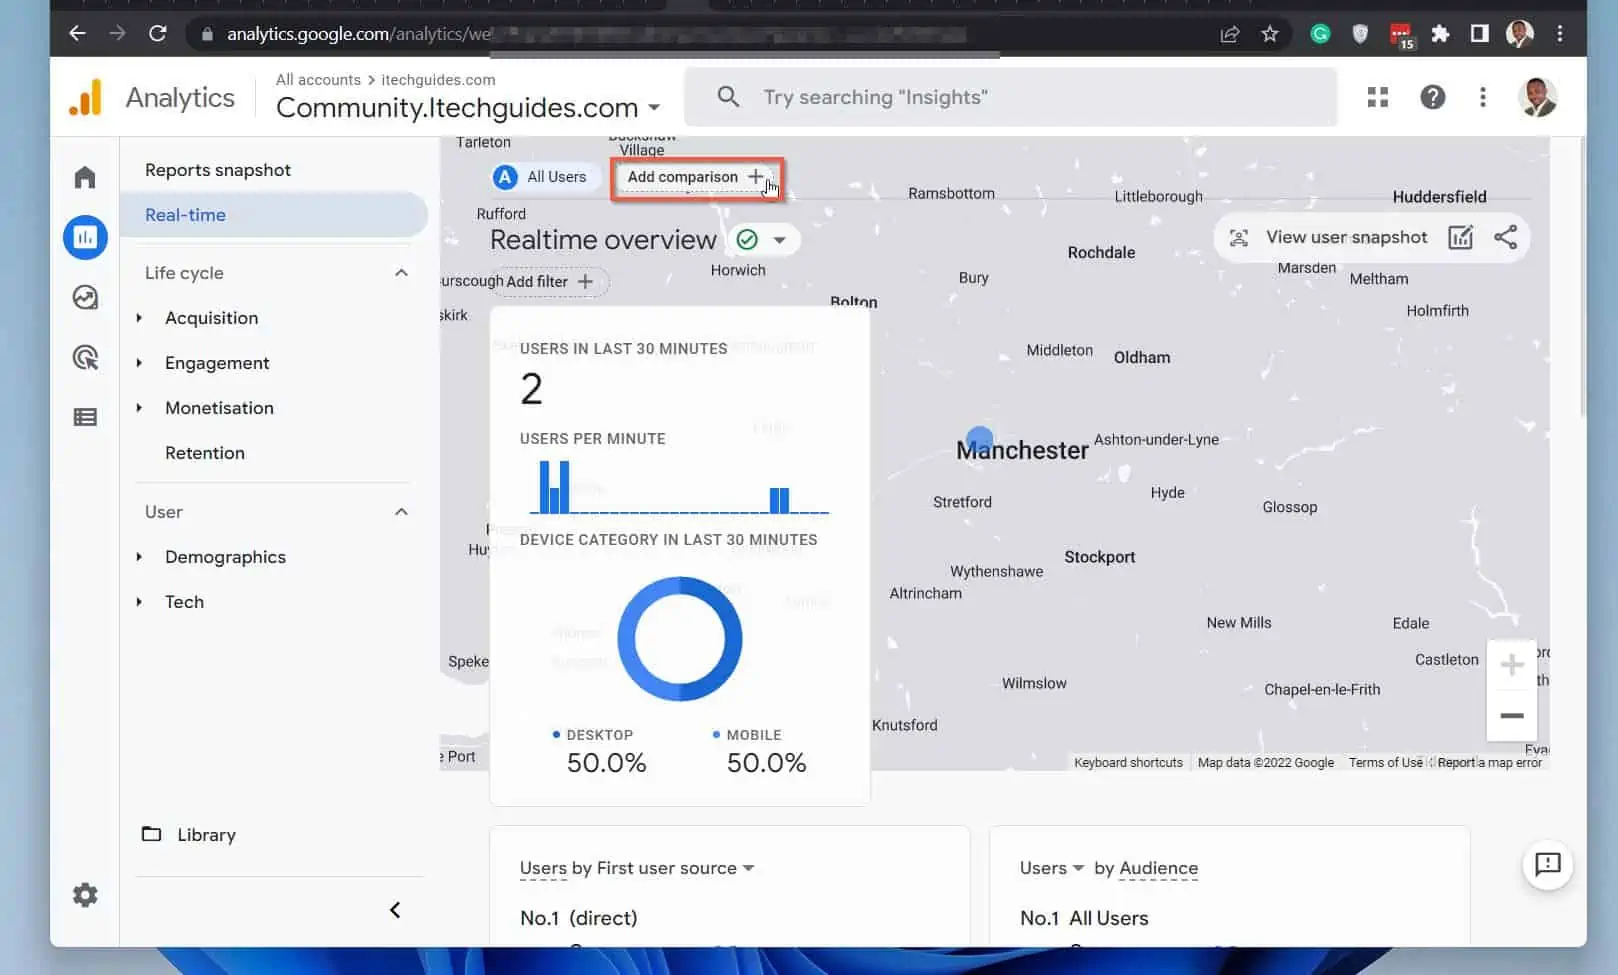
- When the Reports dashboard page opens, click Real-time. Then, click Add comparison – see the second screenshot below.
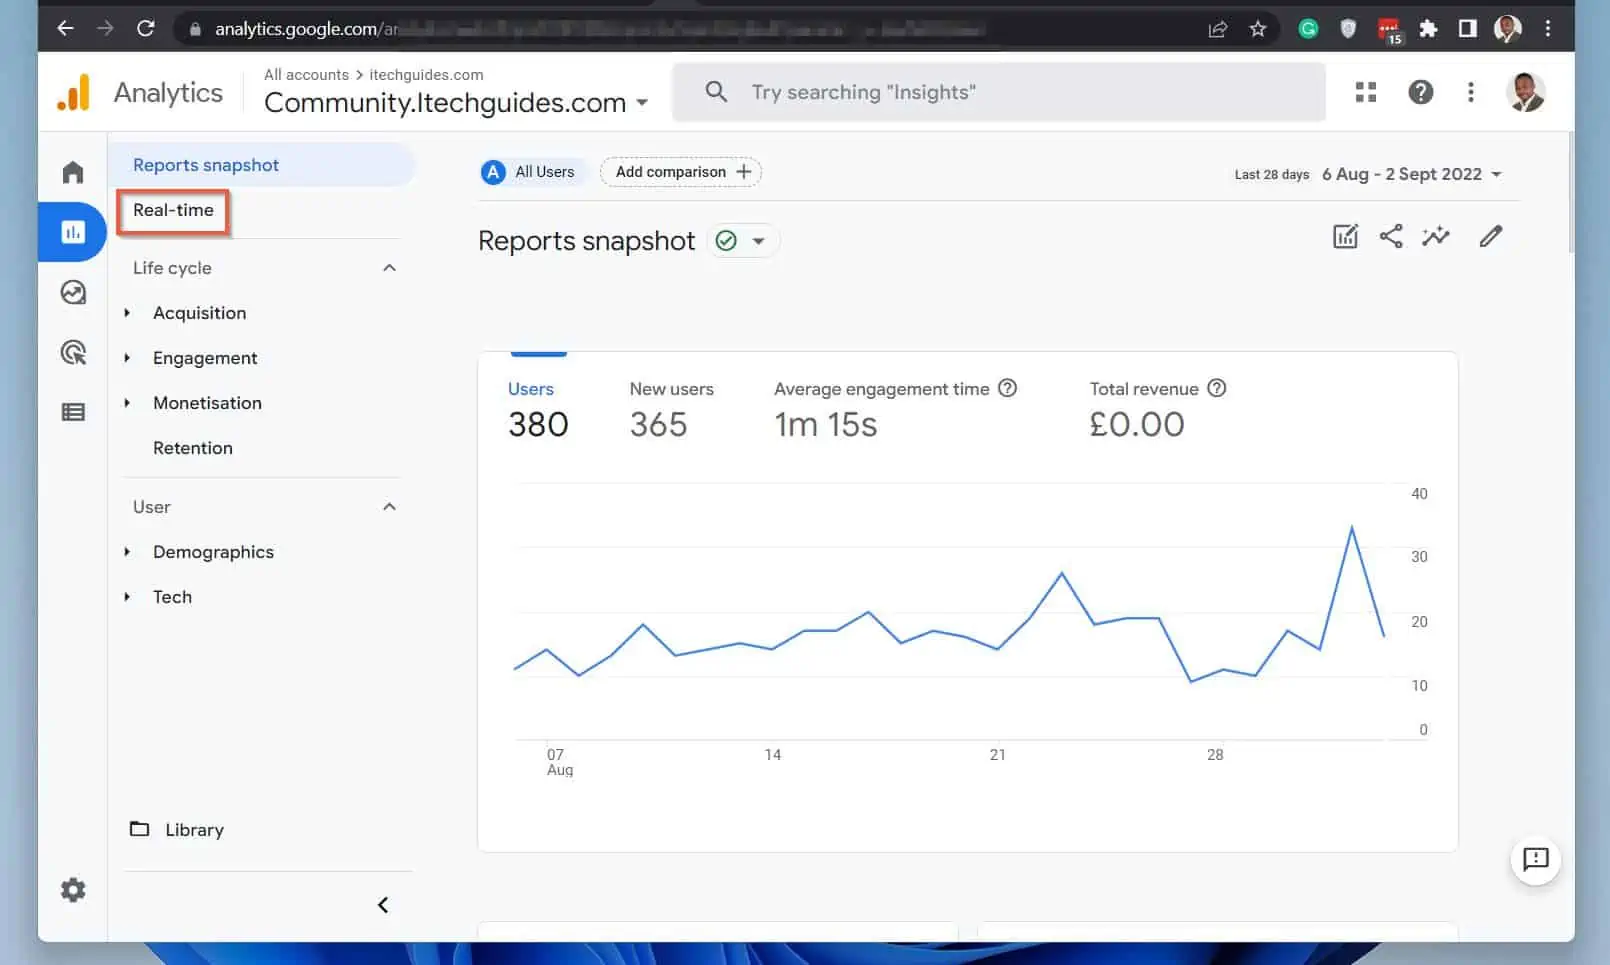
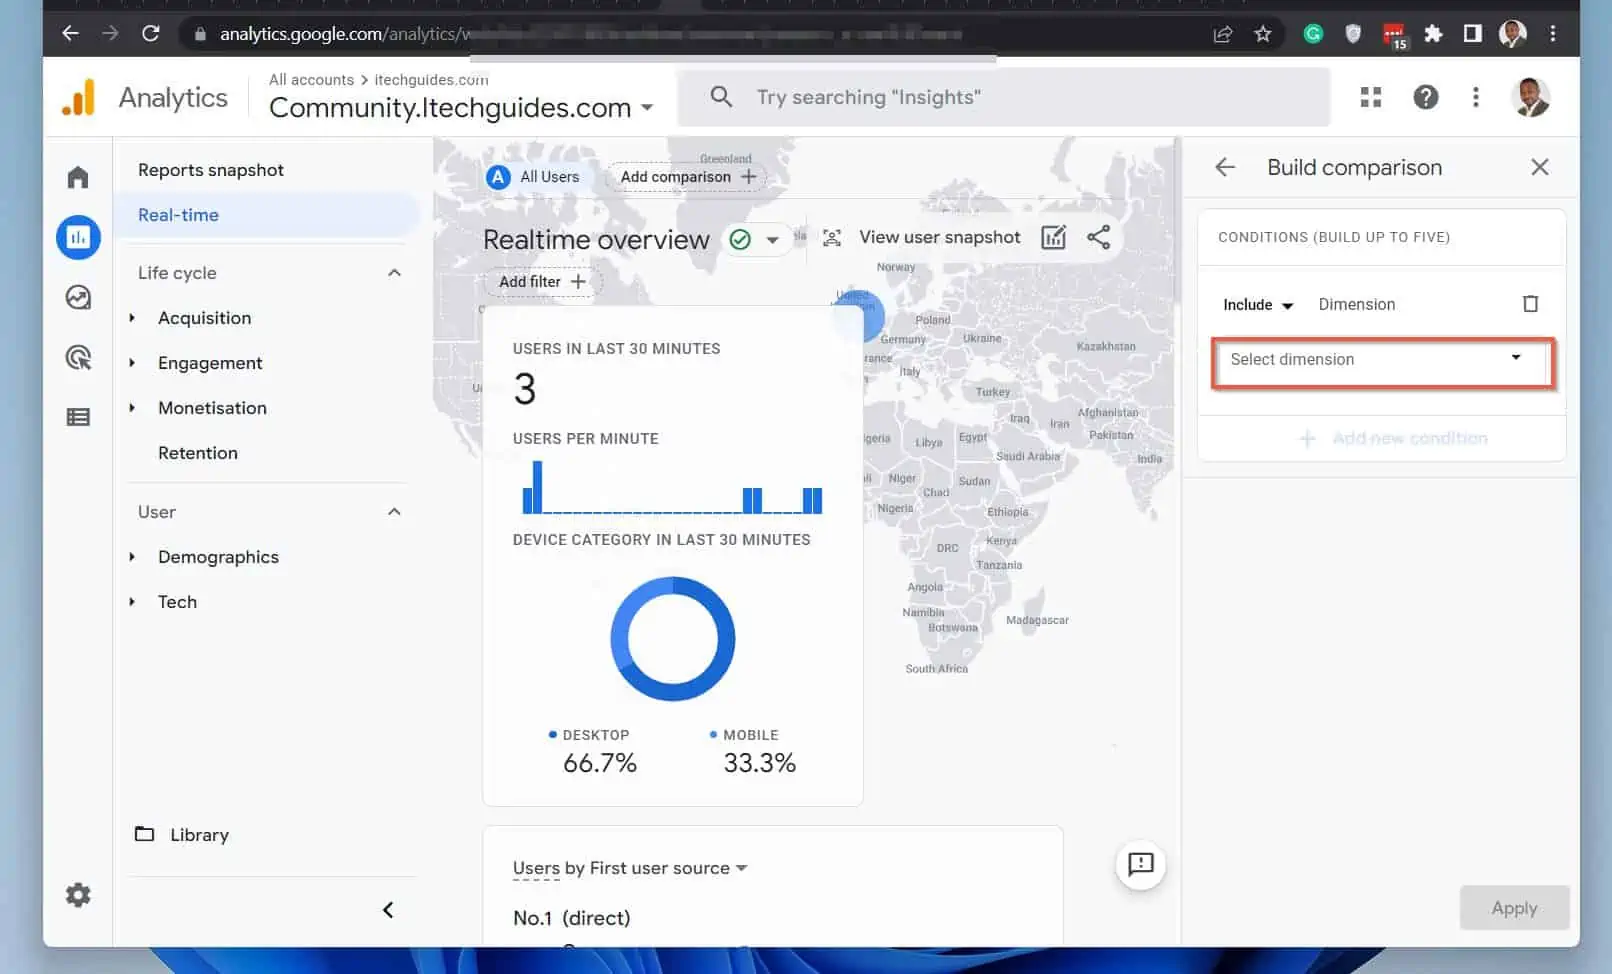
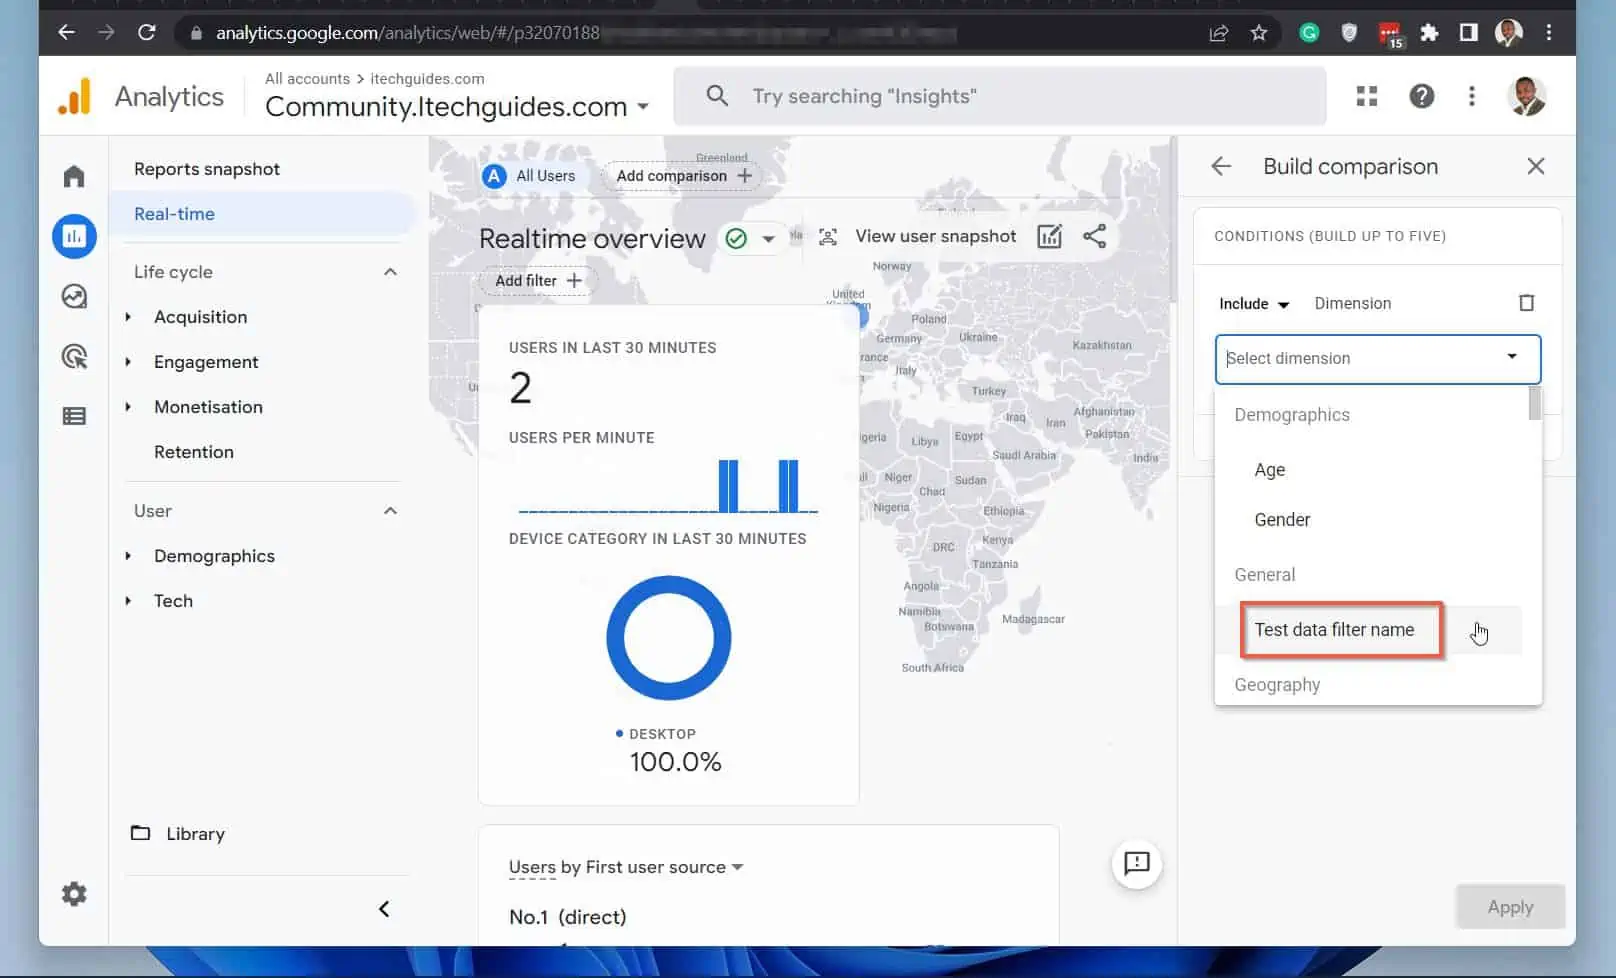
- Next, on the far right, click the Select dimension drop-down. Then, scroll down to the General section and click Test data filter name – see the second screenshot below.
- Finally, click the Select dimension values drop-down, then, click the name of the data filter rule you created in the last section. Finally, click OK and click Apply.
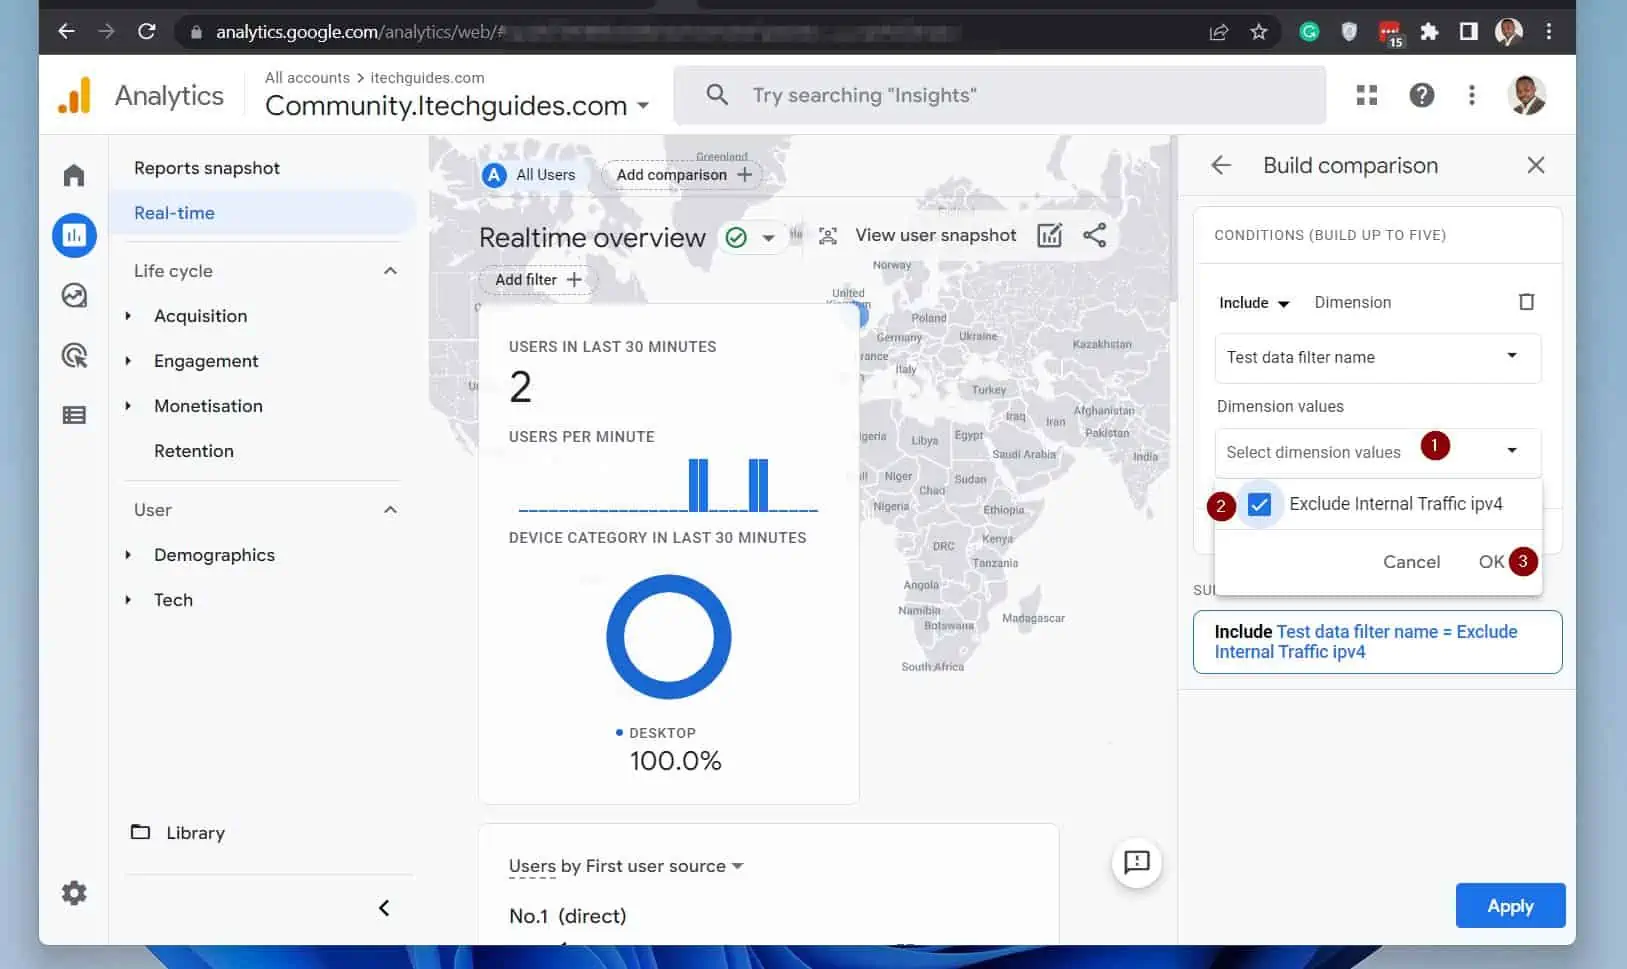
Once you create the comparison filter, Google Analytics will display the test data filter (usually in orange). Then, Google Analytics will display the traffic from your device in that orange section.
After confirming that your Google Analytics 4 (GA4) internal traffic exclusion works, proceed to step 6 to activate the filtering rule.

- On the bottom left of Google Analytics, click the Admin settings icon.
- Then, in the Property column, click Data Settings. Next, from the options Analytics displays, click Data Filters.
- Next, click on the Data filter you want to activate.
- When the Data filter opens, select Active and click Save (top right). Finally, on the confirmation pop-up window, click Activate filter.

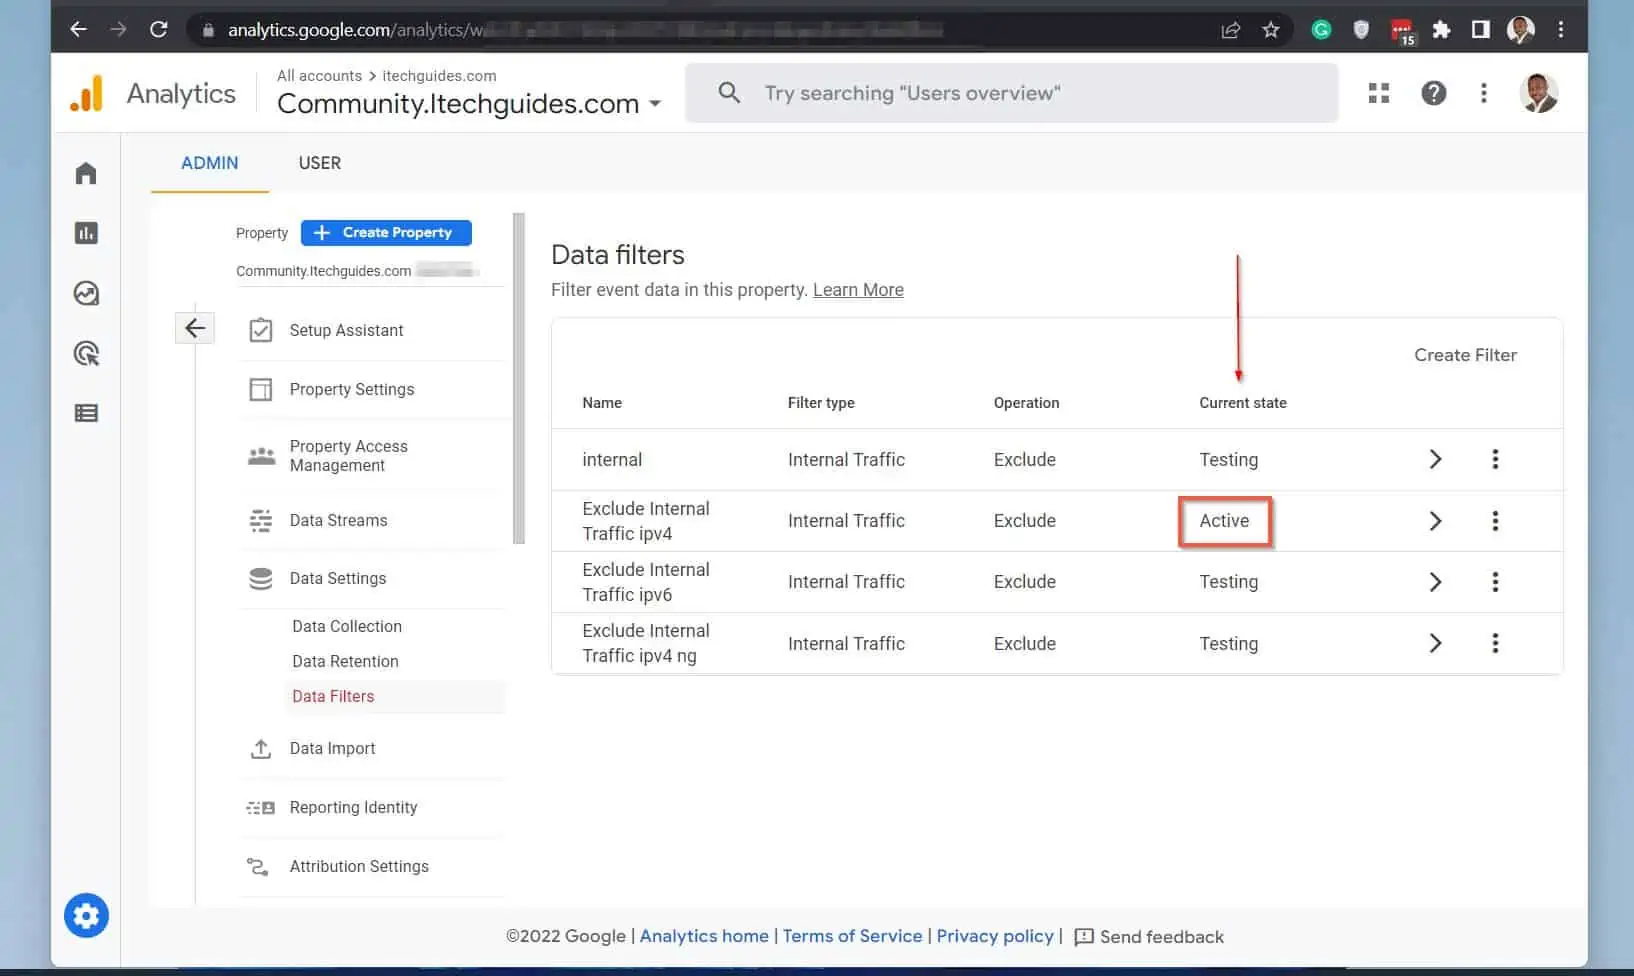
Google Analytics will return to the list of Data filters. The current state of the data filter you just activated will display “Active.”
Repeat steps 8 and 9 for all data filters you want to activate. From now on, Google Analytics 4 (GA4) will exclude any internal traffic that meets your defined criteria.
Frequently Asked Questions
Google Analytics 4 (GA4) is Google’s latest Analytics version with enhanced features. Here are some of the differences between GA4 and the current Universal Analytics:
i) GA4 uses events instead of session-based data
ii) The new GA4 includes privacy controls such as cookieless measurement and behavioral and conversion modeling
iii) GA4 supports predictive capabilities and offer guidance without complex models
Follow the steps below to block an IP address on Google Analytics 4
i) Define the IP as an Internal IP address
ii) Create a data filter that excludes the IP
iii) Test the IP traffic filter
iv) If it works, activate the data filter
If you use the older Google Analytics (not Ga4), follow the steps below to exclude an internal IP address.
i) On the view column of the Google Analytics property, click Filters
ii) When the Filters page opens, click the ADD FILTER button
iii) Give the filter a name, then select Predefined. Then, on the “Select filter type” drop-down, select Exclude.
On the “Select source or destination” drop-list, select traffic from IP address. Finally, on the “Select expression” drop-down, select that are equal to – then, on the IP address field, enter the IP address you want to exclude and click Save.
If Google Analytics excludes an IP address, it is likely that you defined a filter that excludes that IP address from Google Analytics.
The simple answer is Yes, you should use Google Analytics 4 (GA4). However, before you switch to GA4, check that any app or service that requires Google Analytics supports GA4.
In any case, you can (and should) set up both versions of GA side-by-side. Then, switch to GA4 later.
It is important to mention that Google will decommission Universal Analytics from July 2023. To read more about what happens when Google decommissions UA, visit Universal Analytics will be going away – Analytics Help (google.com)
Conclusion
If you run a website and use Google Analytics 4 (GA4) to measure your site performance, it is smart to exclude your internal traffic. This is because internal traffic skews your Analytics data.
Furthermore, it is likely that users within your business will spend more time on your website and visit multiple pages. So, for internal traffic, stats like bounce rate and average session duration will be unreasonably larger than usual.
On the other hand, internal users may spend less time on the website. This will also affect the actual site performance data.
All in all, excluding internal traffic or traffic from logged-in users ensures that your analytics data is accurate and reflects real users’ actual behavior.
I hope you were able to use the steps in this guide to exclude internal traffic in Google Analytics 4 (GA4)! If yes, click on “Yes” beside the “Was this page helpful” question below.
You may also express your thoughts and opinions by using the “Leave a Comment” form at the bottom of this page.
Finally, visit our WordPress & Websites How-To page for more articles about WordPress and websites.
![WordPress Lost Password Redirects to Page Not Found [Fixed]](https://www.itechguides.com/wp-content/uploads/2024/03/WordPress-Lost-Password-Redirects-to-Page-Not-Found-Fixed.webp)