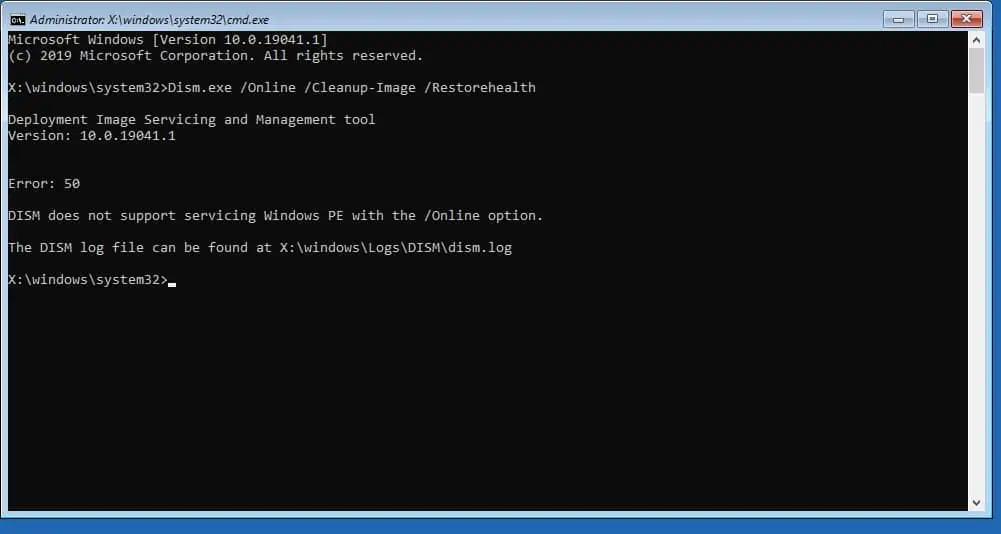
Are you wondering why you received the error message “Error: 50 – DISM Does Not Support Servicing Windows PE With The /Online Option”?
In this guide, I’ll explain why and how you can run DISM in Windows 10 recovery console and avoid this error message.
You receive this error message because you’re trying to run DISM with the /Online option from Windows 10 recovery console. You can only run the DISM command with the /Online option from a running Windows Operating System.
So, when you run the command from the Windows 10 (or any Windows) recovery console, the command fails because the Operating System is not running at the recovery console.
In this guide, I will show you two methods to fix this error message and run DISM successfully. The first method shows you the steps to fix this error message without needing a Windows 10 installation media.
However, in the second method, I’ll show you the steps to fix this problem using Windows 10 installation media.
If, after following the steps in method 1, the problem with your Windows PC is still not fixed, follow the steps in method 2.
I have also included an FAQ section where I answer questions most people ask about this DISM error.
Option 1: Fix DISM Error 50 without a Windows Installation Media
Follow the steps in this section to fix “Error: 50 – DISM Does Not Support Servicing Windows PE With The /Online”. As I mentioned earlier, this method will fix the error message but may not fix the Windows problem.
- Boot Windows 10 to the recovery console. When your PC displays the screen below, proceed to step 2 below.
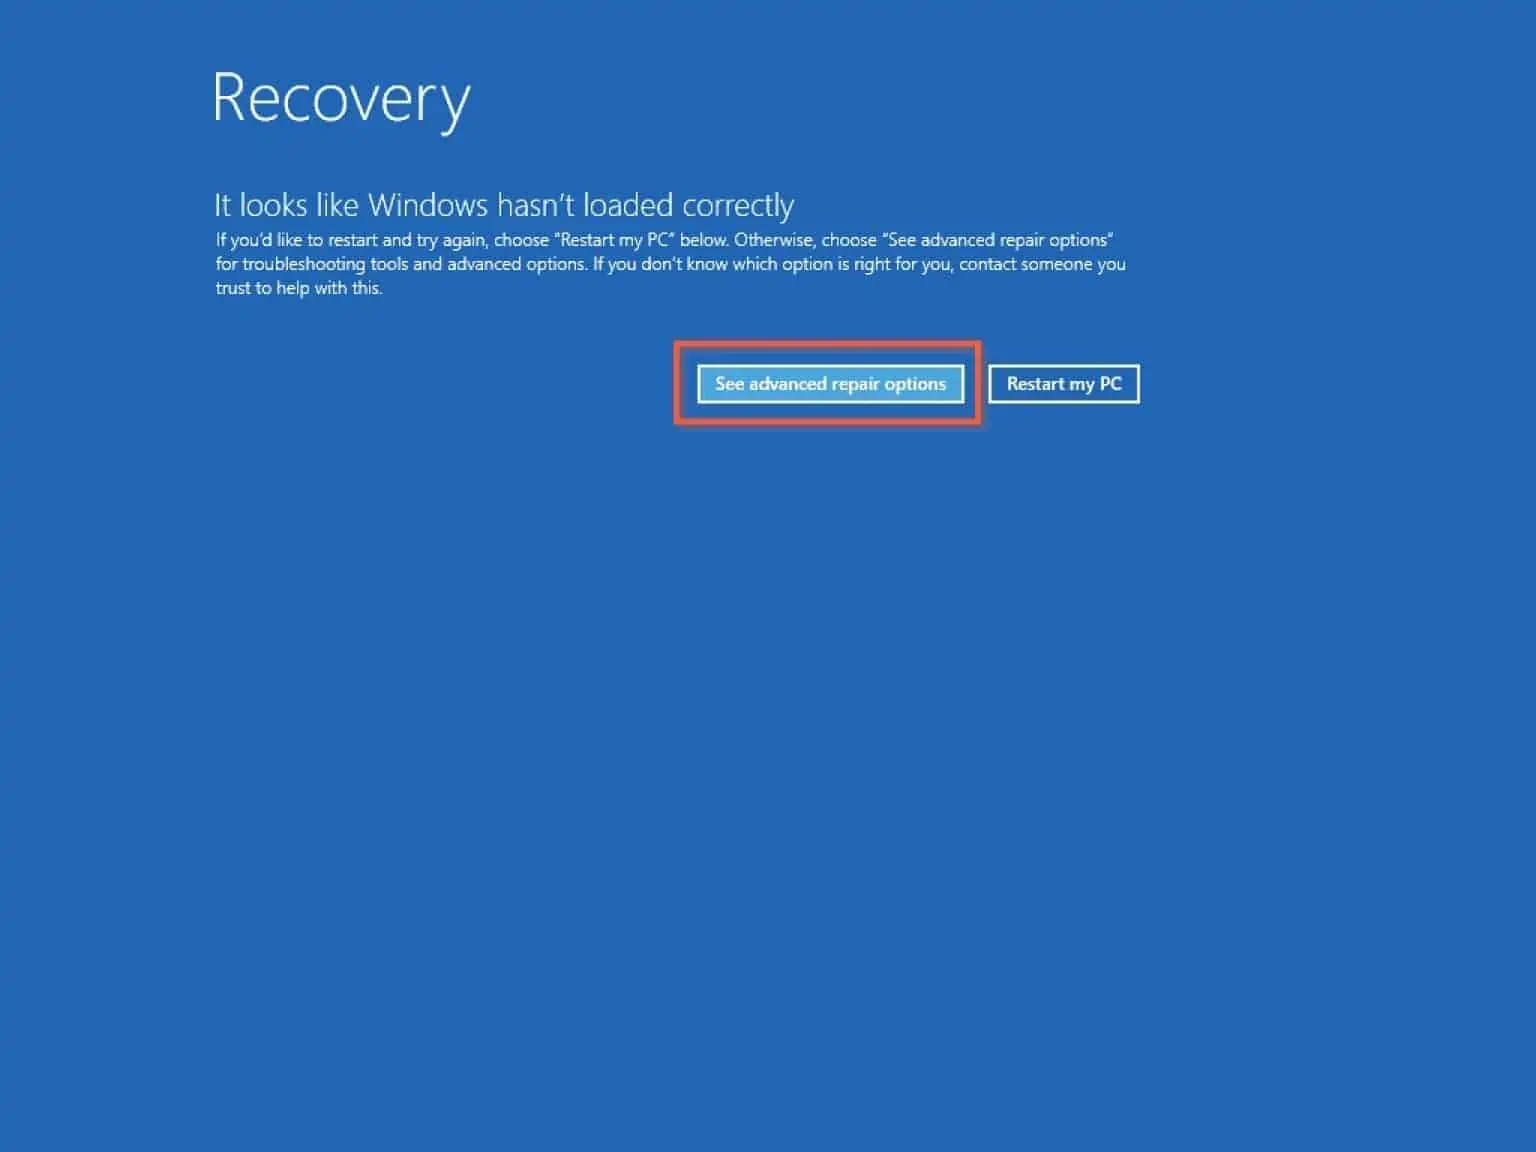
- Click “See advanced options”, then navigate to “Troubleshoot -> Advanced options -> Command Prompt.”
- When Command Prompt opens, type the command below into the CMD console. Then, to run it, press the enter key on your keyboard.
The command creates a folder called “Scratch”. You’ll need the folder in the next step.
mkdir c:\Scratch
- Then, run the DISM command below.
DISM /Image:c:\ /Cleanup-Image /Restorehealth /ScratchDir:c:\Scratch
As you can see from the screenshot below, the command ran successfully without displaying “Error: 50 – DISM Does Not Support Servicing Windows PE With The /Online”.
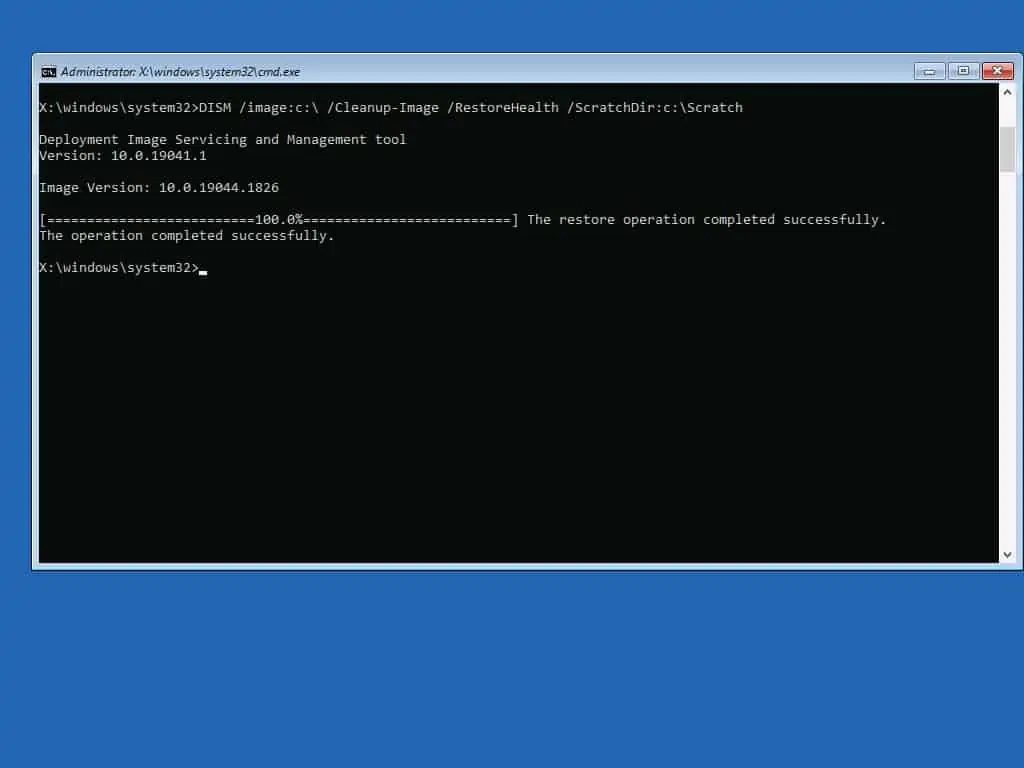
However, this DISM command may not repair your Windows PC.
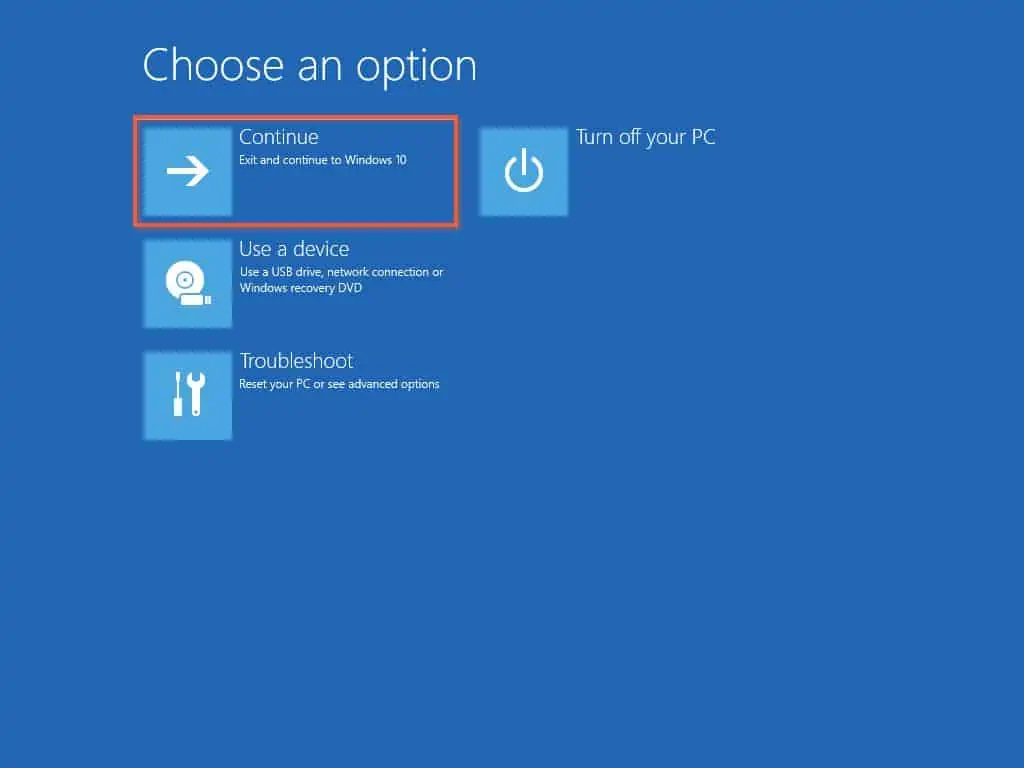
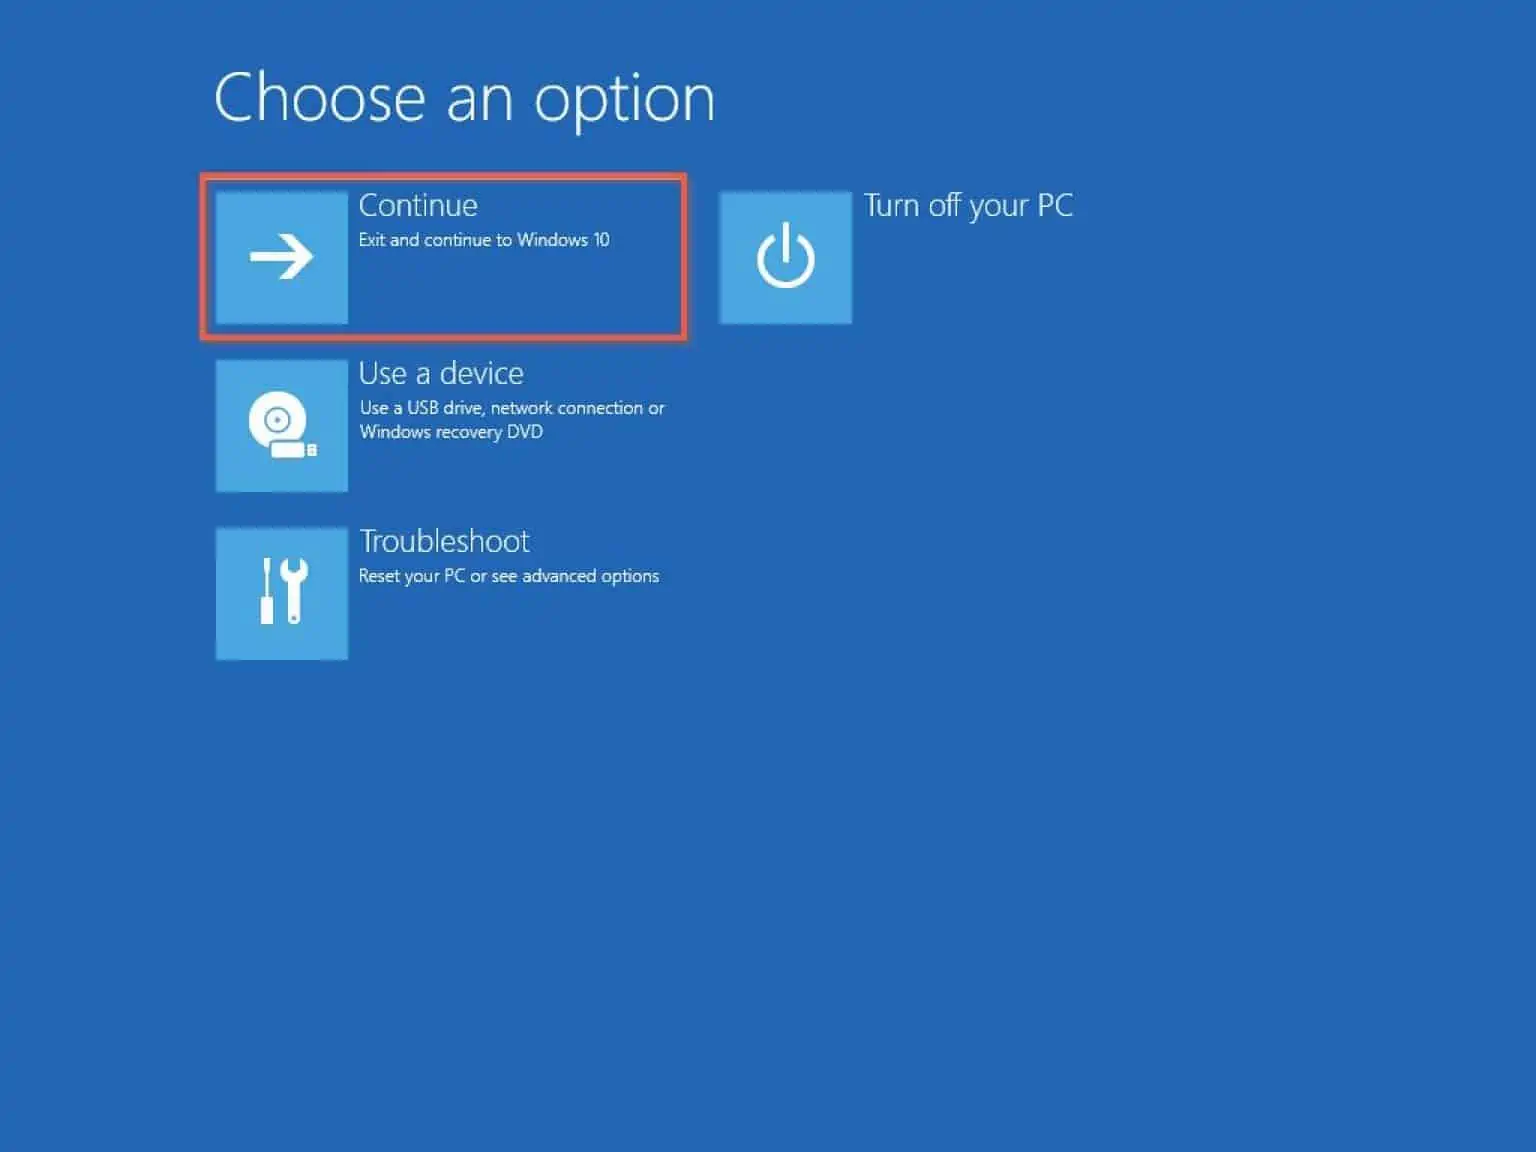
- When the command completes, close Command Prompt, then click “Continue” to start your Windows normally.
After restarting your Windows, if the error is fixed, you do not need to try the second (and longer!) method below. However, if the reason you ran the DISM command is not fixed, try the second method below.
Option 2: Fix DISM Error 50 with a Windows Installation Media
This method is similar to the last method with one difference. In the last method, you did not require a Windows installation media.
However, in this method, you need to insert a Windows USB installation media into your computer.
So, why does DISM need a Windows installation media?
Essentially, the “DISM /Image:c:\ /Cleanup-Image /Restorehealth” command repairs your Windows installation.
If your computer was connected to the internet, DISM downloads the required Windows files to fix your computer.
However, because you’re running DISM from the Windows recovery console, DISM does not have access to the interment and so cannot download any files.
This is why we need to provide the Windows installation media to DISM so it can pick up any files it needs to repair your Windows installation from there.
Follow the steps below to Fix “Error: 50 – DISM Does Not Support Servicing Windows PE With The /Online Option” usingh a Windows installation media.
- Insert a Windows 10 (or the relevant Windows) installation USB into your computer.
- Then, Boot Windows 10 to the recovery console. When your Windows PC displays the screen below, proceed to the second step below.
- Click “See advanced options”, then navigate to “Troubleshoot -> Advanced options -> Command Prompt.”
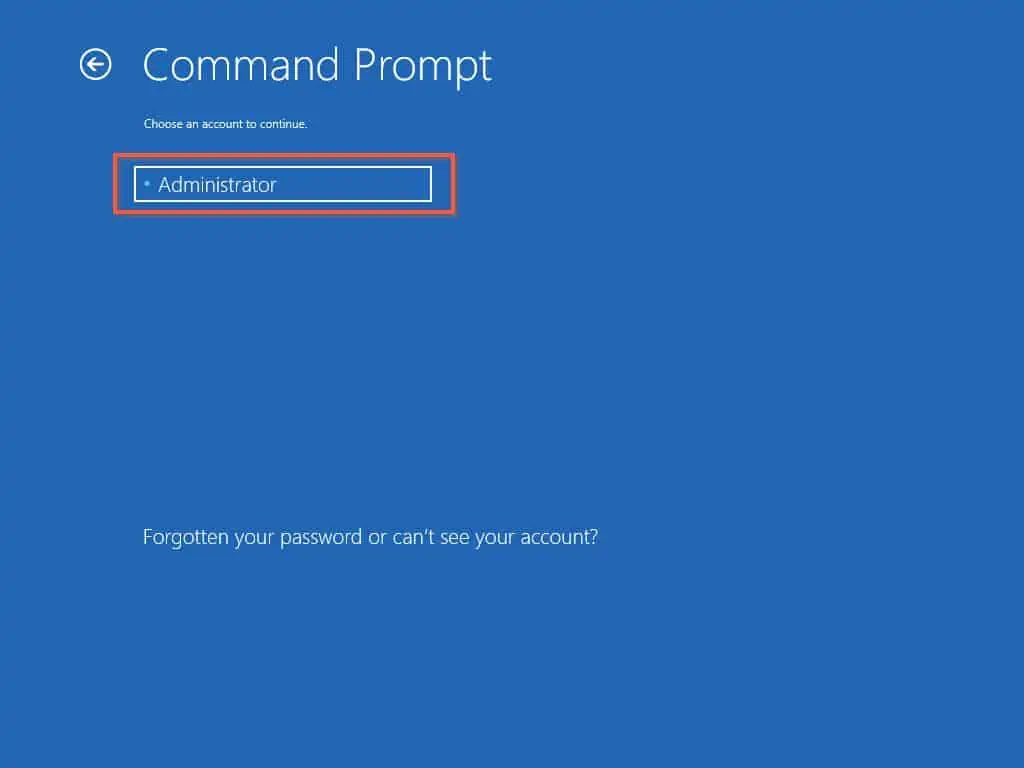
- When you click Command Prompt, Windows recovery console will require you to enter the password for the local “Administrator” account.
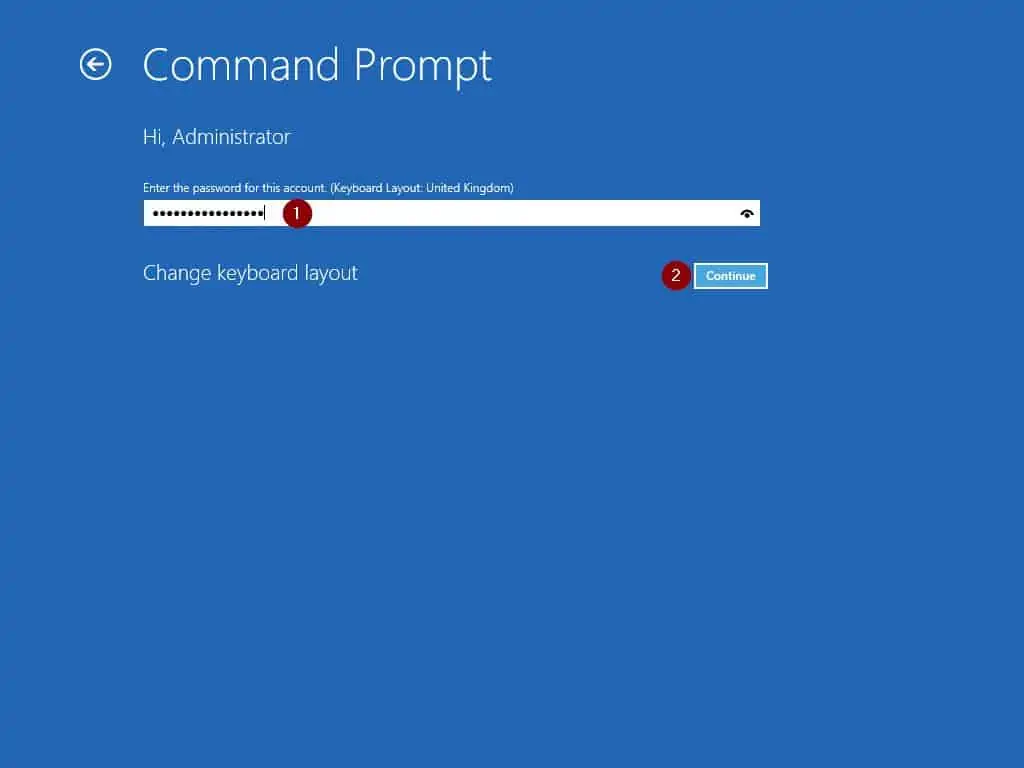
- Click on the name of the local administrator account, then enter the password and click “Continue”.
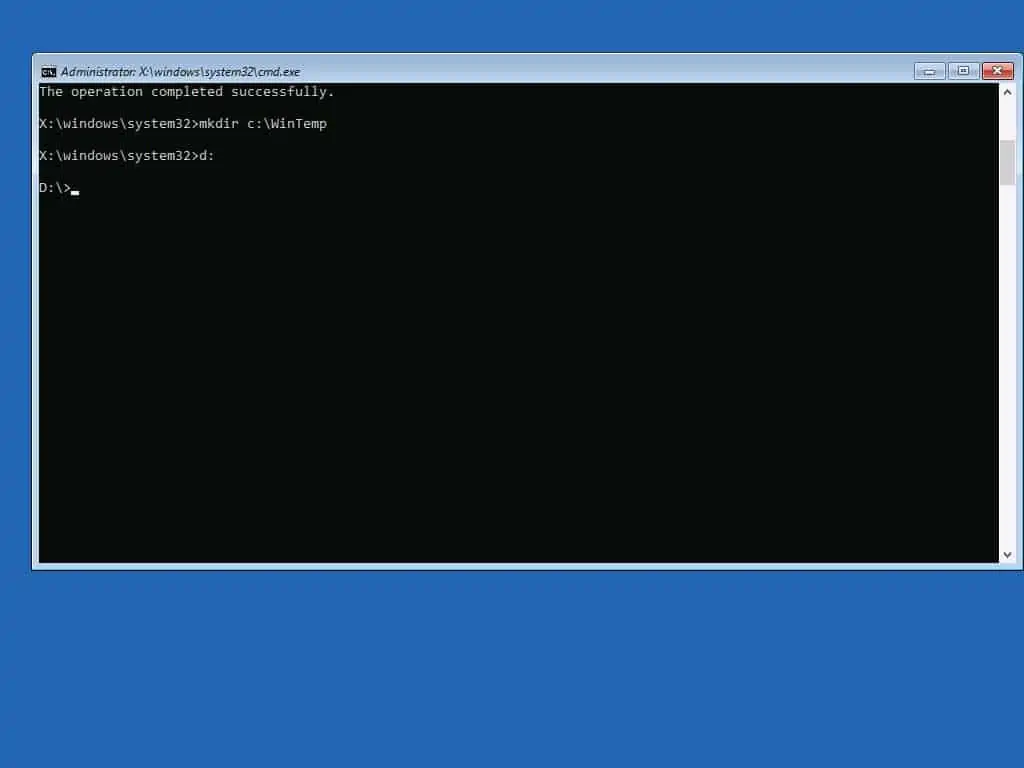
- When command prompt opens, run the commands below to create two folders –
mkdir c:\WinInstall
mkdir c:\Scratch
In step seven below, you’ll determine the drive your Windows installation USB drive is mounted
- Then, to determine whether Windows mounted the installation USB in drive D:, type the command below and press the enter key on your keyboard.
D:
If drive D exists on your computer, the command prompt will change directory to drive D:
- To check if drive D is where your Windows installation media is mounted, enter the command below. Then, to run the command, press the enter key on your keyboard.
DIR
If drive D is where your Windows USB installation media is mounted, the above command will show a folder called “sources”.
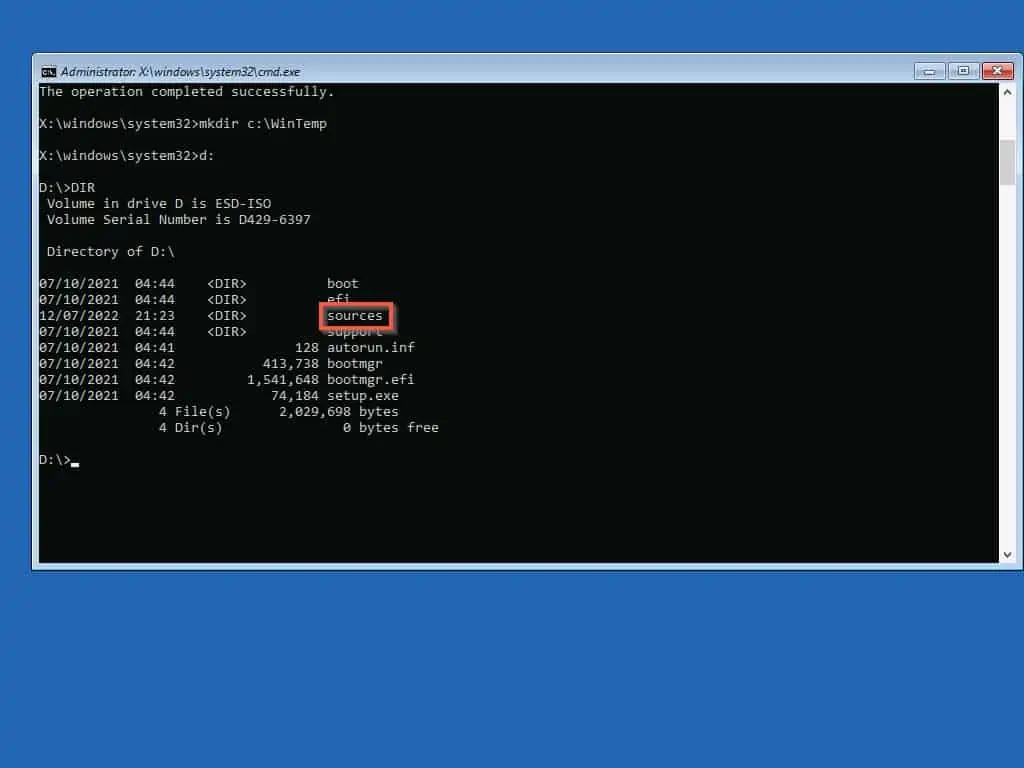
- Next, change directory to the “sources” folder.
CD sources
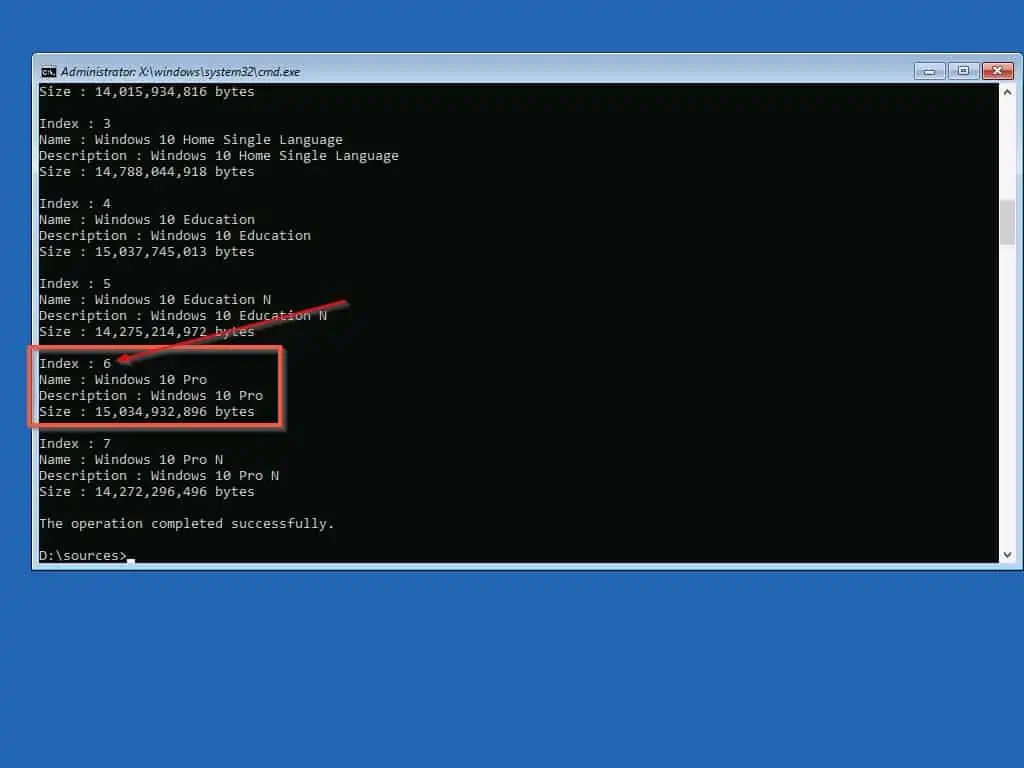
- Finally, run the command below to display all the Operating System versions on the Windows USB installation media.
dism /Get-WimInfo /WimFile:install.esd
- Note the index number of the version of Windows you have on your PC. In this example, my Windows PC is a Pro version.
So, I’ll note the index number, which is 6.
- Next, type the comand below to extract Install.WIM from Install.ESD. To run the command, press the enter key on your keyboard.
Dism /Export-Image /SourceImageFile:install.esd /SourceIndex:6 /DestinationImageFile:c:\WinInstall\install.wim /Compress:max /CheckIntegrity
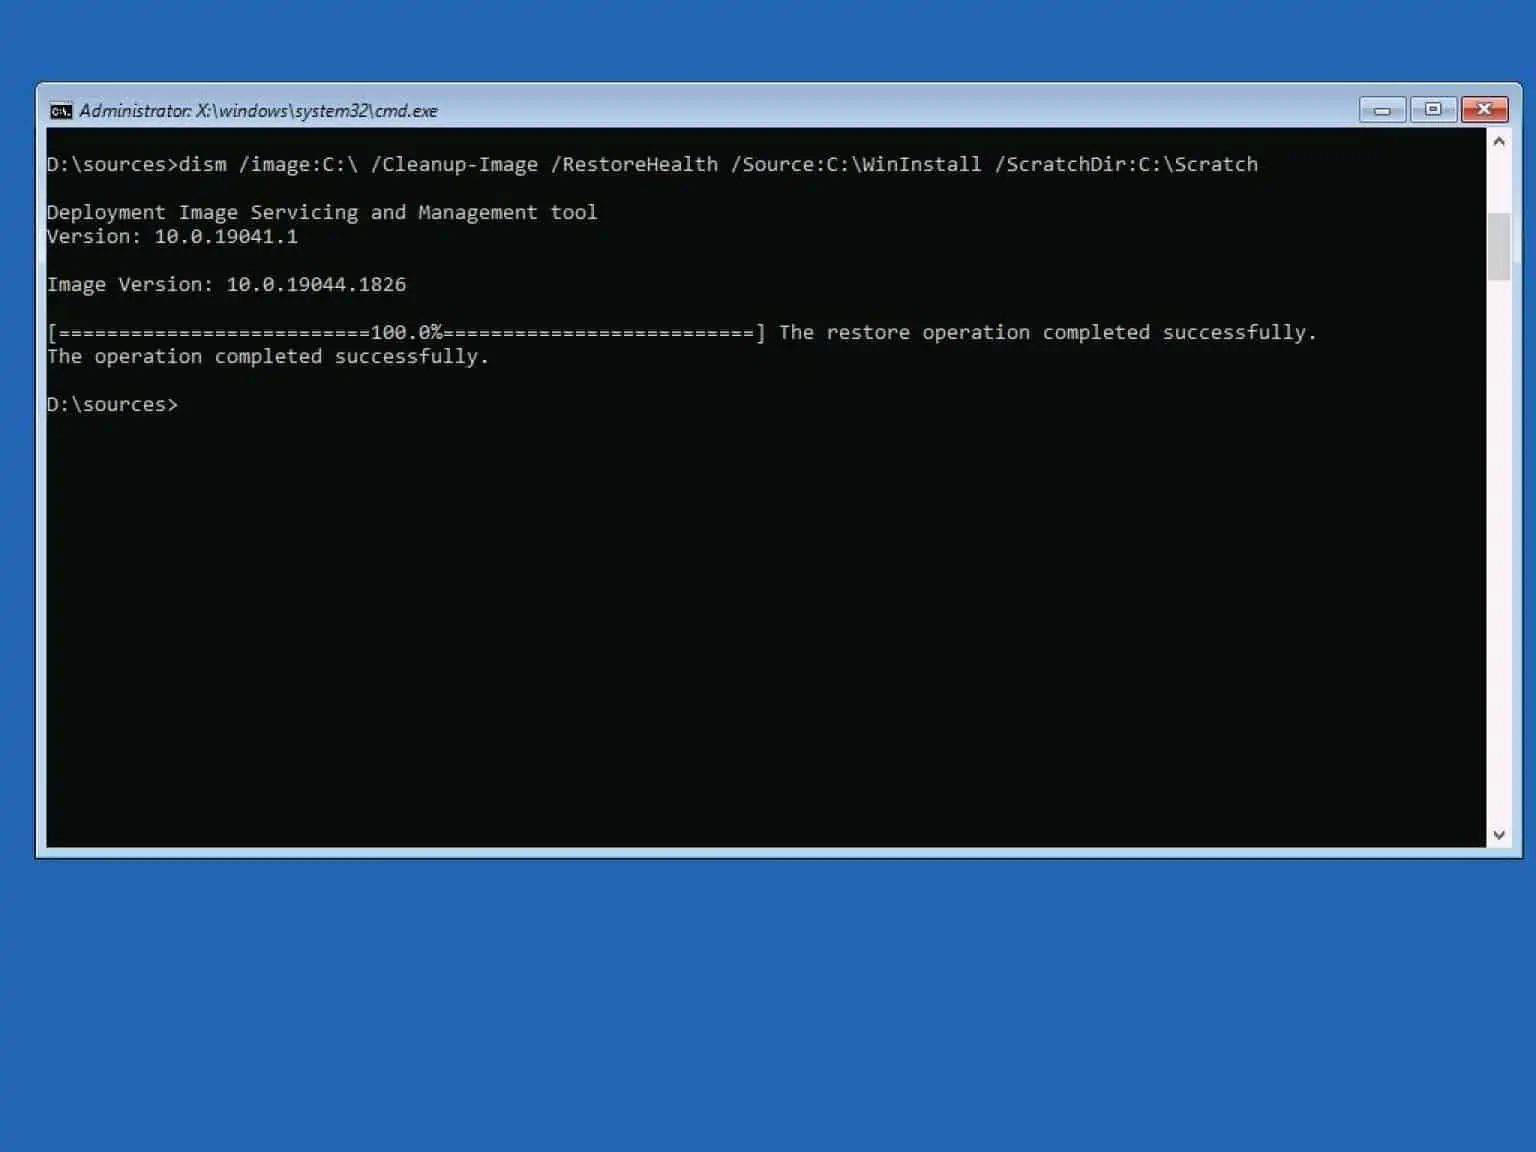
- Finally, to fix “Error: 50 – DISM Does Not Support Servicing Windows PE With The /Online Option” with a windows installation media, type the following command into command prompt. Then, to run the command, press the enter key on your keyboard.
Dism /Image:C:\ /Cleanup-Image /RestoreHealth /Source:C:\WinInstall /ScratchDir:c:\Scratch
- When the command completes successfully, close command prompt. Then, on the Choose an option screen, click “Continue”.
Your computer will start normally and the DISM comand would have fixed the problem.
Frequently Asked Question
To fix DISM error 50, change the /Online option to /Image:c:\.
So, instead of running this command:
DISM.exe /Online /Cleanup-Image /Restorehealth
You should run:
DISM /Image:c:\ /Cleanup-Image /Restorehealth
Yes, you should be able to run most, if not all DISM commands in Windows safe mode.
If you want to use DISM to service an offline Windows image, specify the /Image option. Then, speficy the path to the offline WIM, VHD, or VHDX windows image file.
Here is a sample command:
DISM /Image:c:\WinInstall\install.wim /Cleanup-Image /Restorehealth
I don’t believe the order you run DISM and SFC commands matter. However, most times, I run DISM first.
Then, when the DISM command completes, I will run the SFC /scannow command.
If you run the DISM command with the /Online parameter, DISM services the running operating system you’re running the command.
This is contrary to using the /Image parameter to service an offline Windows WIM, VHD or VHDX image.
Conclusion
The DISM Operating System image servicing offers two command switch options. Specifically, you can either run DISM with the /Online or the /Image switch.
If you want to service the running operating system, use the /Online switch. However, if you want to service an offline Windows image (WIM, VHD or VHDX), use the /Image switch.
Based on this knowledge, when you run the DISM /Online command from Windows recovery console (effectively in a WinPE environment), DISM returns an error.
The error message informs you that you cannot run DISM with the /Online option in a WinPE environment.
This guide showed you two ways you can fix “Error: 50 – DISM Does Not Support Servicing Windows PE With The /Online Option”.
I hope you were able to fix this error and successfully run your DISM command. If you did find the guide helpful, would you mind sparing two minutes to share your experience by responding to the “Was this page helpful?” question below.
Finally, you may also find more of our Windows Command Prompt guides helpful.


If there are corrupted system files on your computer, you may also encounter the Dism error 87 windows 7. Thus, to fix this problem, you need to check and repair the corrupted system files firstly. Hence, the Windows built-in tool System File Checker is a good choice to repair the corrupted system files.