Introduction
Are you having troubles with Windows 10 search? Apparently, it is a fairly common problem with a number of Windows 10 users.
If your Windows 10 search is broken, do not panic! This guide offers 6 methods that have proven to restore Windows 10 search.
Steps to Fix Windows 10 Search Not Working Issue
Here are the 6 steps that are proven to fix broken Windows 10 Search:
Check that Windows Search Service is Started
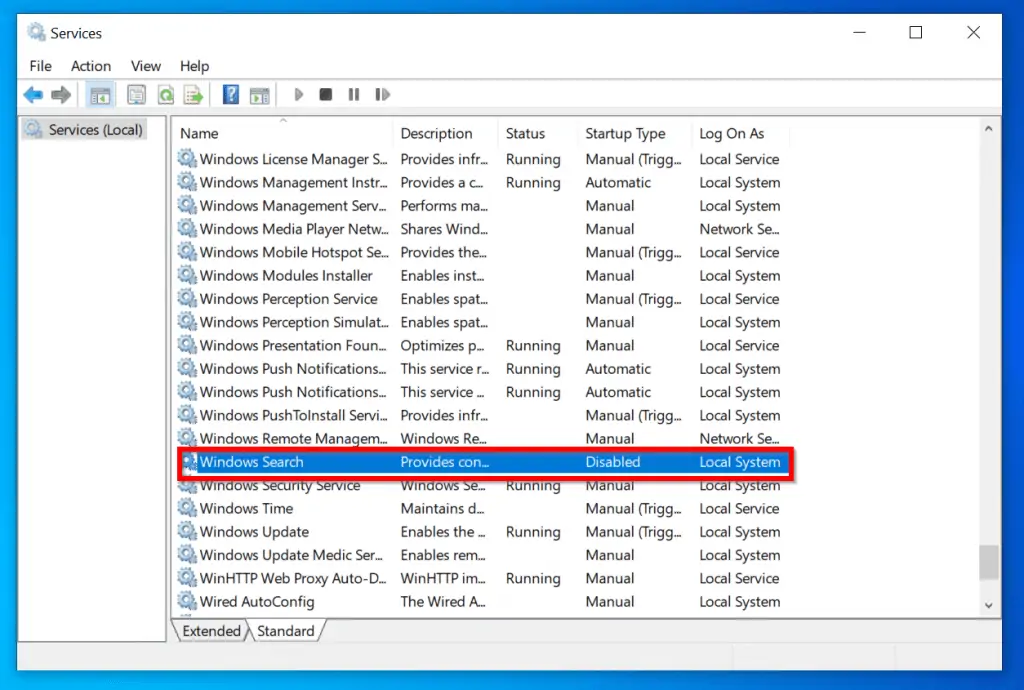
The first logical step to resolve Search problem in Windows 10 is to check that Windows Search service is started and set to Automatic start.
Some users have reported fixing Windows 10 search problem with this simple method.
Here are the steps:
- Press Windows + R (Windows logo on your keyboard pressed simultaneously with the R key). Opens the Run command.
- At the Run command, type services.msc and click OK.

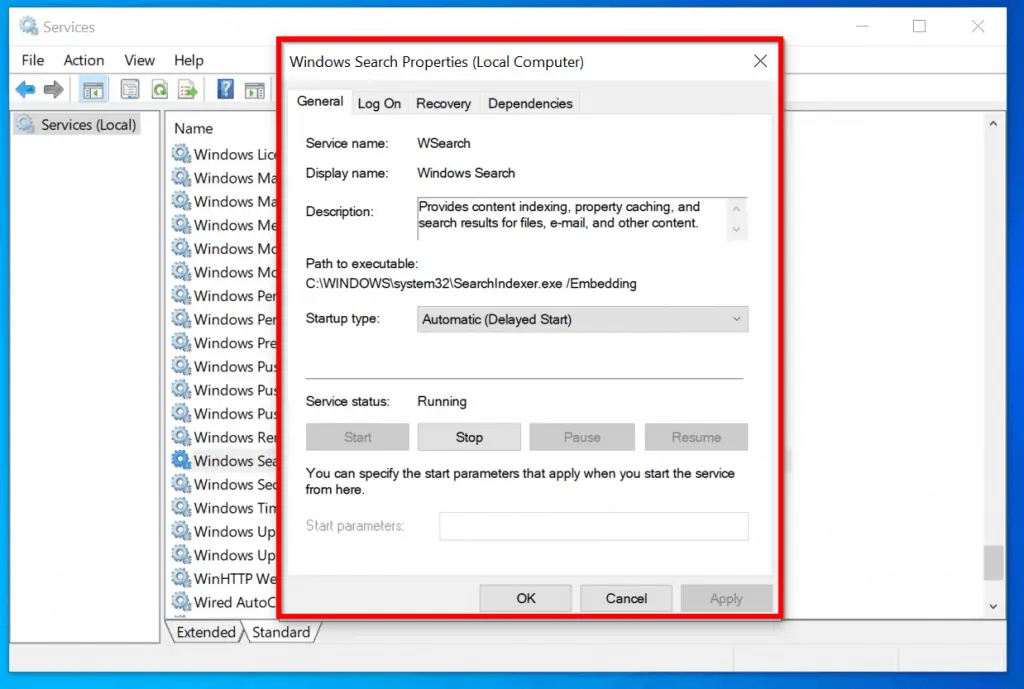
- When Services opens, locate Windows Search Service and double-click it.
- On the Properties of WSearch, confirm that Startup Type is set to Automatic and that its Service status is Running.
Now try searching for something and see whether it works. If it doesn’t work, proceed to the next method.
Create a new Administrator account
If you recently reset your Windows 10 with “keep my files” option, then creating a new local administrator account may fix your Windows 10 Search Not Working issue.
Here are the steps:
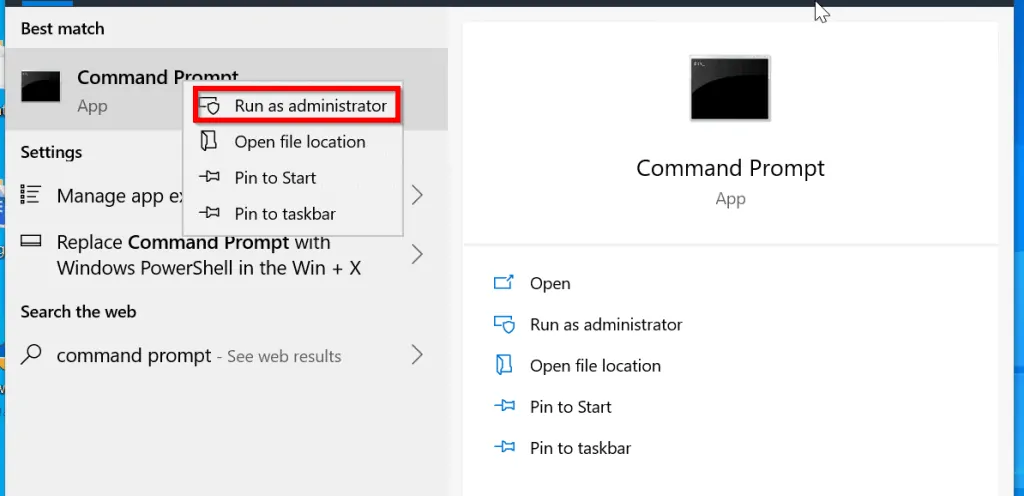
- Search Command Prompt. Then right-click it and click Run as administrator.
- At the command prompt, enter the command below. Then press enter.
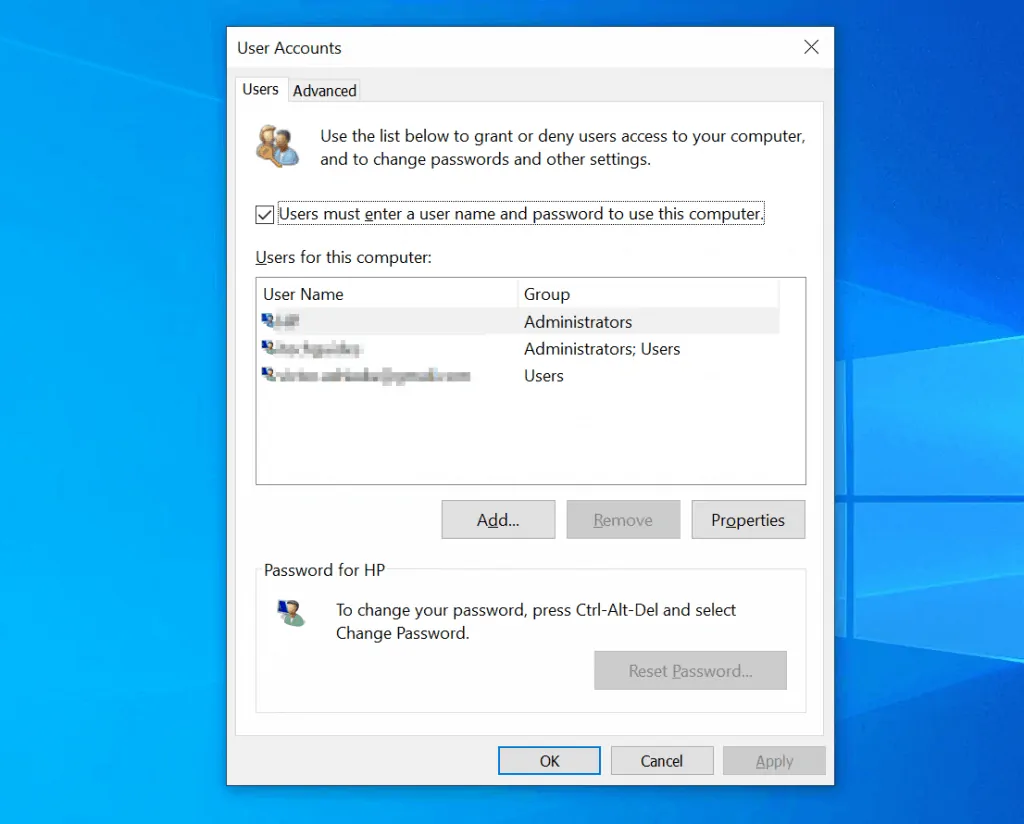
control userpasswords2
The User Accounts tool will open.
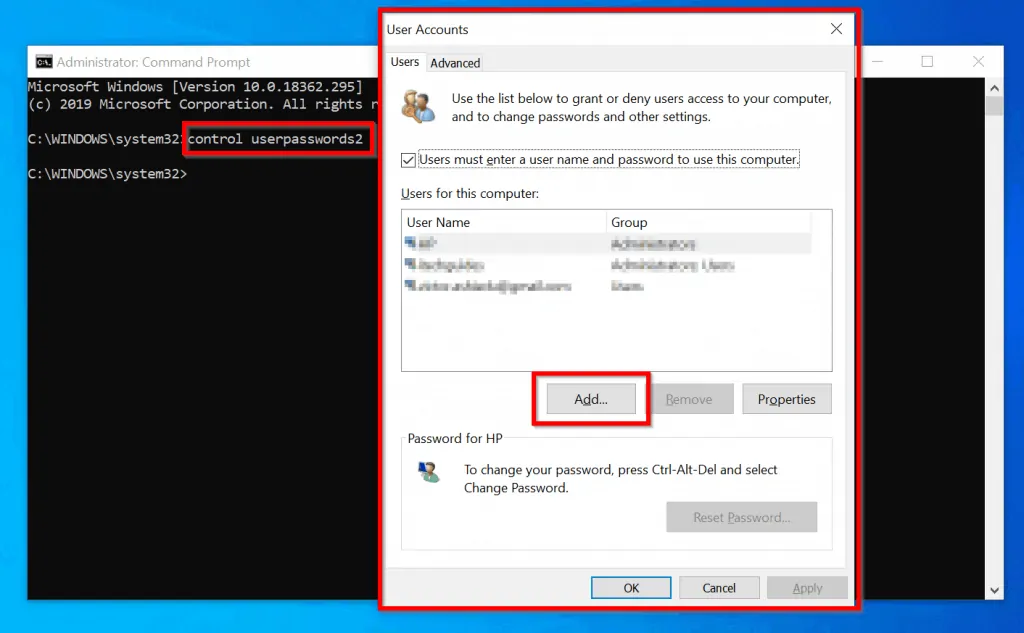
- On the User Accounts tool, click Advanced tab.
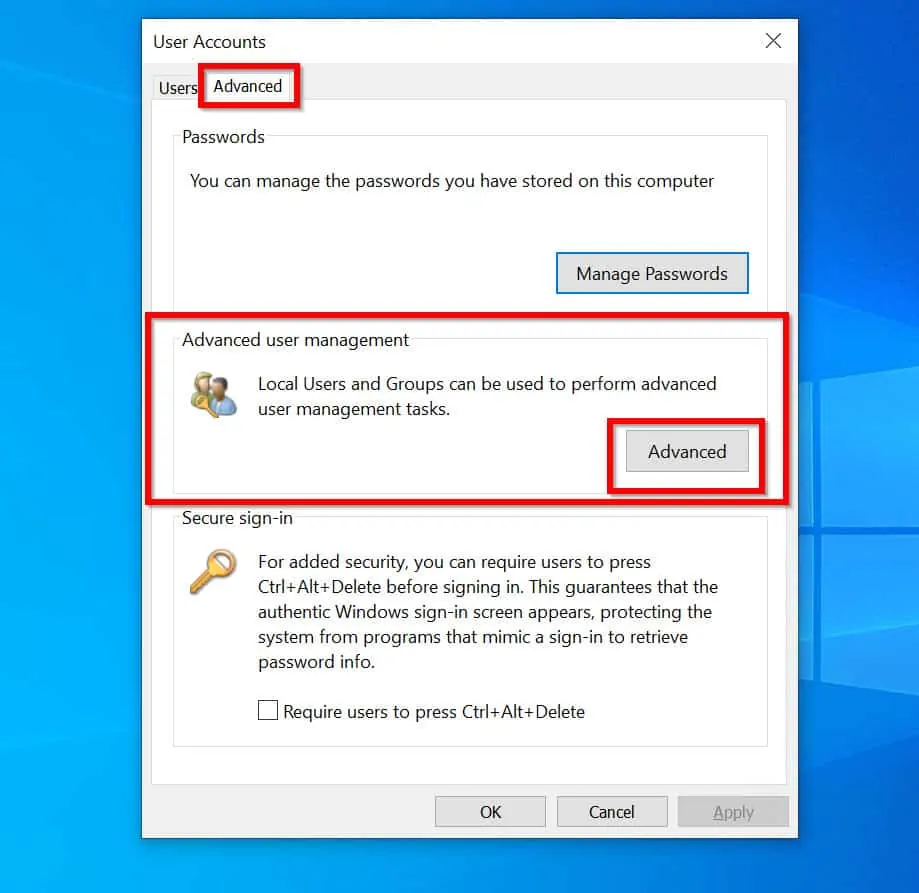
- Then, at the Advanced user management section, click Advanced.
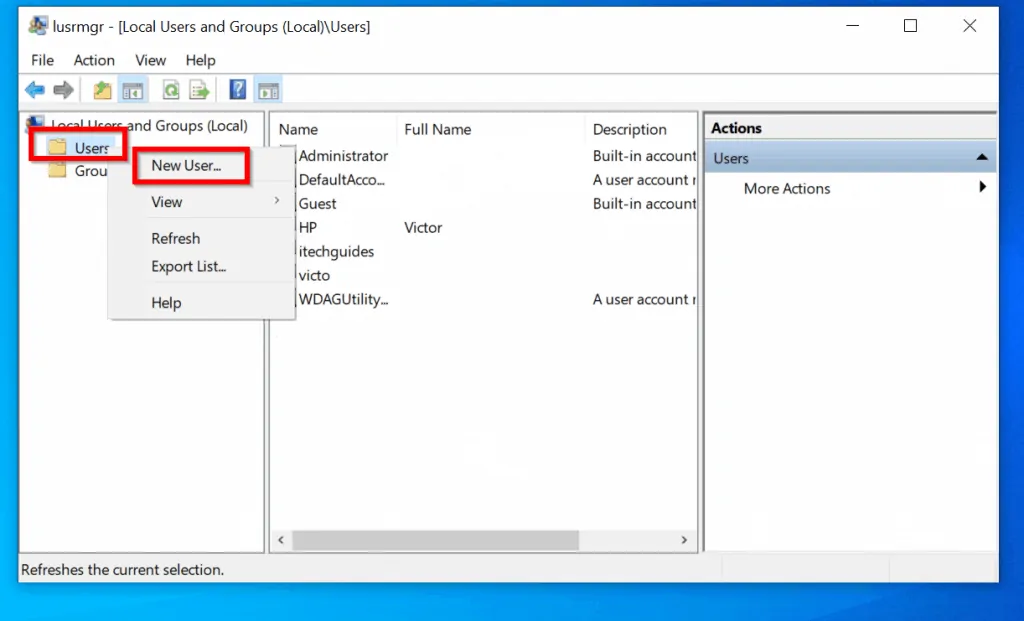
- Right-click Users, then select New User…Enter the user details and click Create.
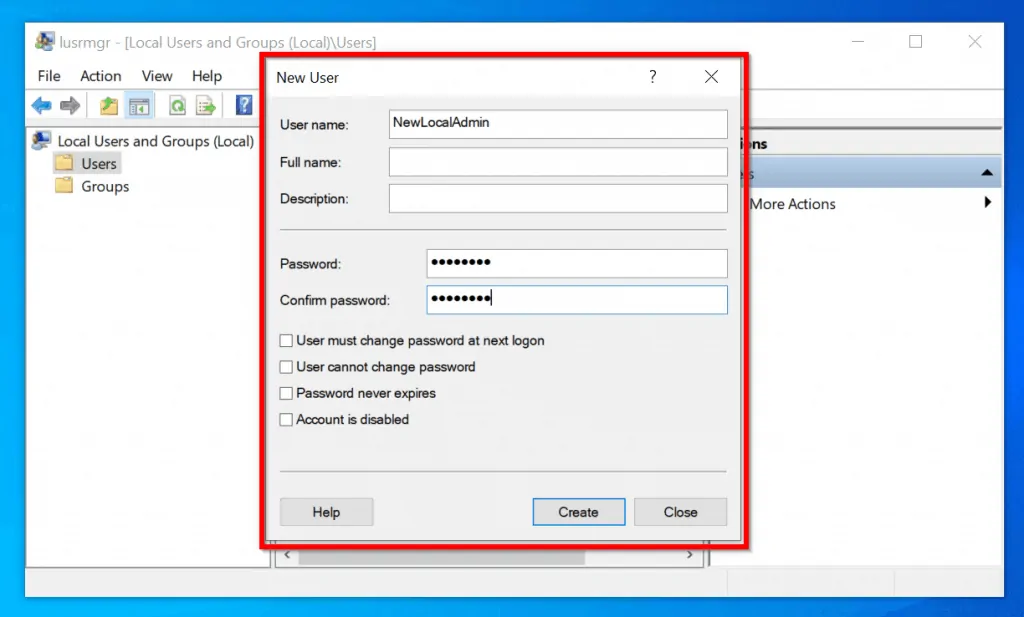
- Finally, assign this new user to the Administrators group. Logon to your computer with the new admin account.
Now try searching for something. If Windows 10 search is still broken, try my next suggested fix.
Use Windows 10 Search and Indexing Troubleshooting Tool
You could use the Search troubleshooting tool to fix this problem as well.
Here are the steps:
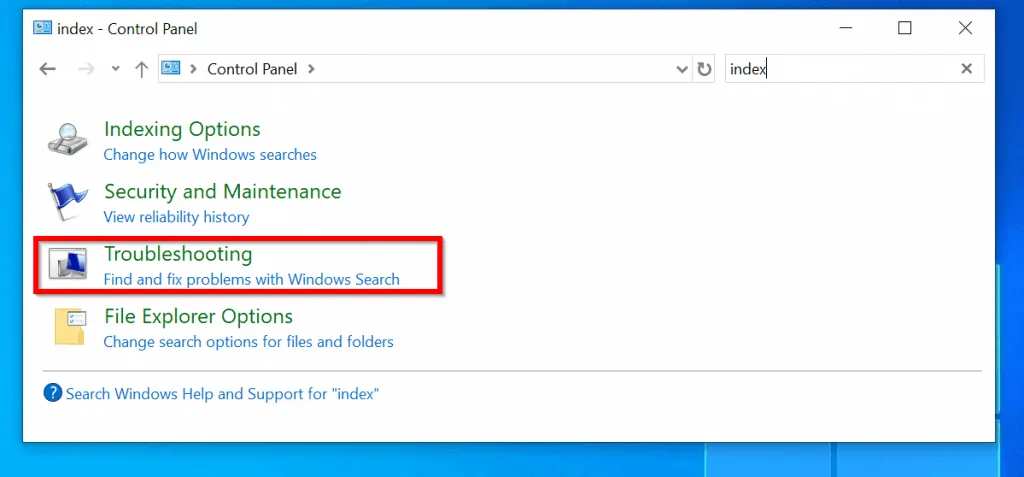
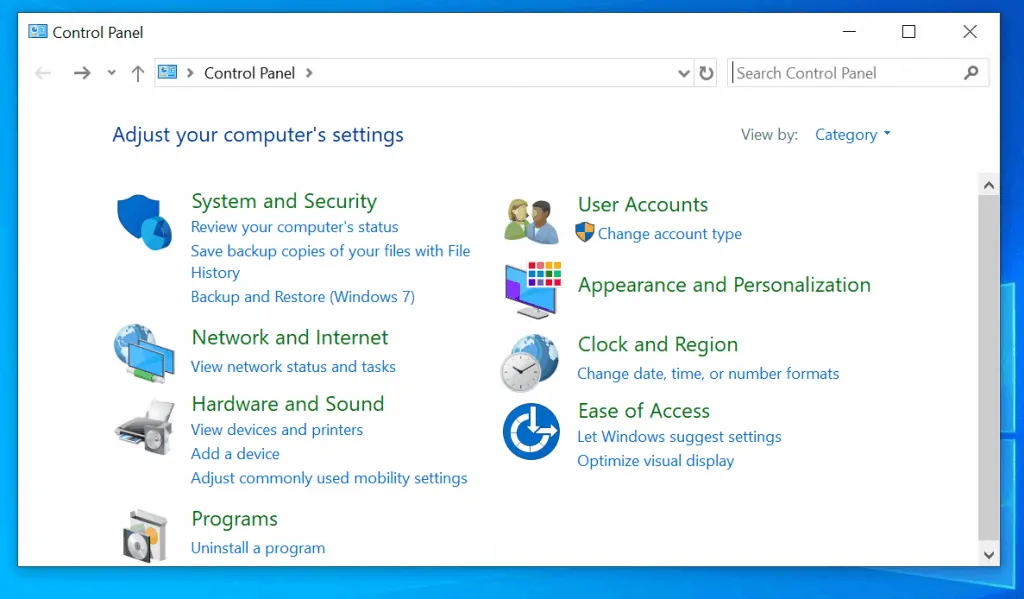
- Open Run command type Control Panel. Then click OK.

- When Control Panel opens, type Index at the search box (top right)
- Then click Find and fix problems with Windows Search. The Search and Indexing tool will open.
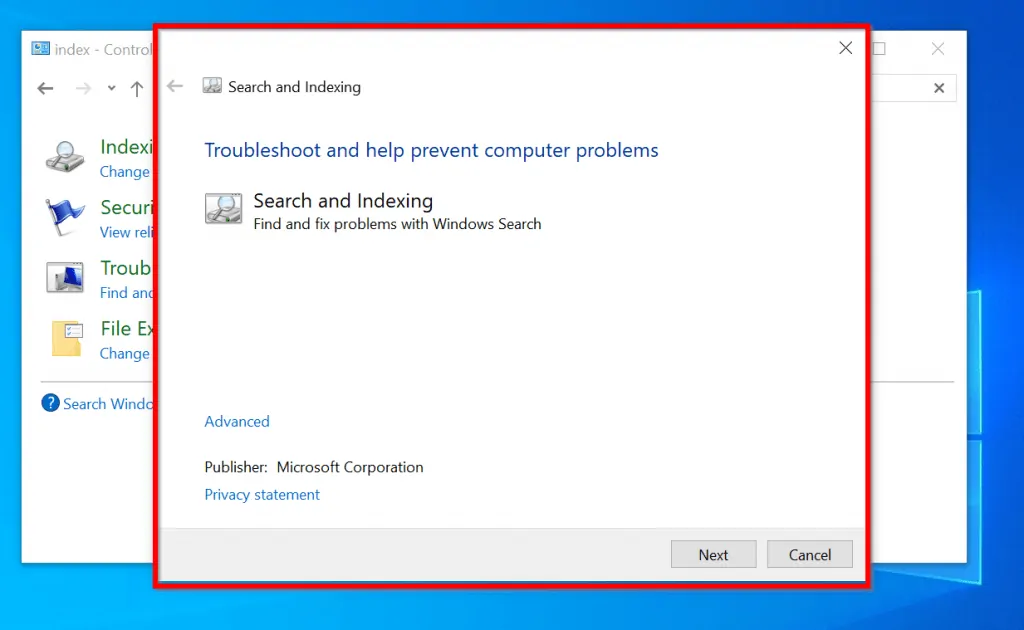
- Click Advanced. Ensure that Apply repairs automatically check box is ticked.
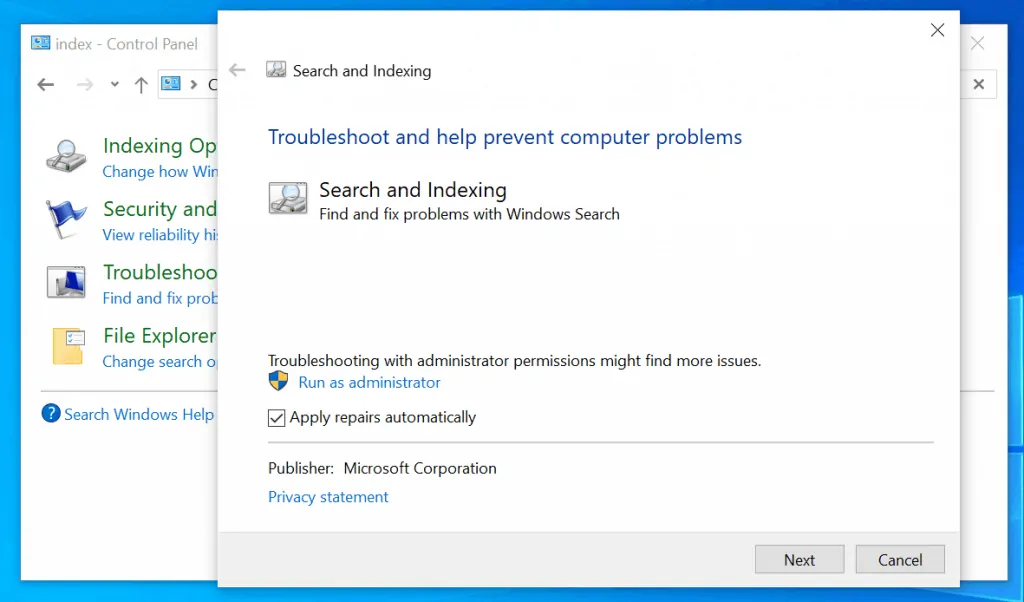
- Then click Run as administrator. To proceed, click Next.
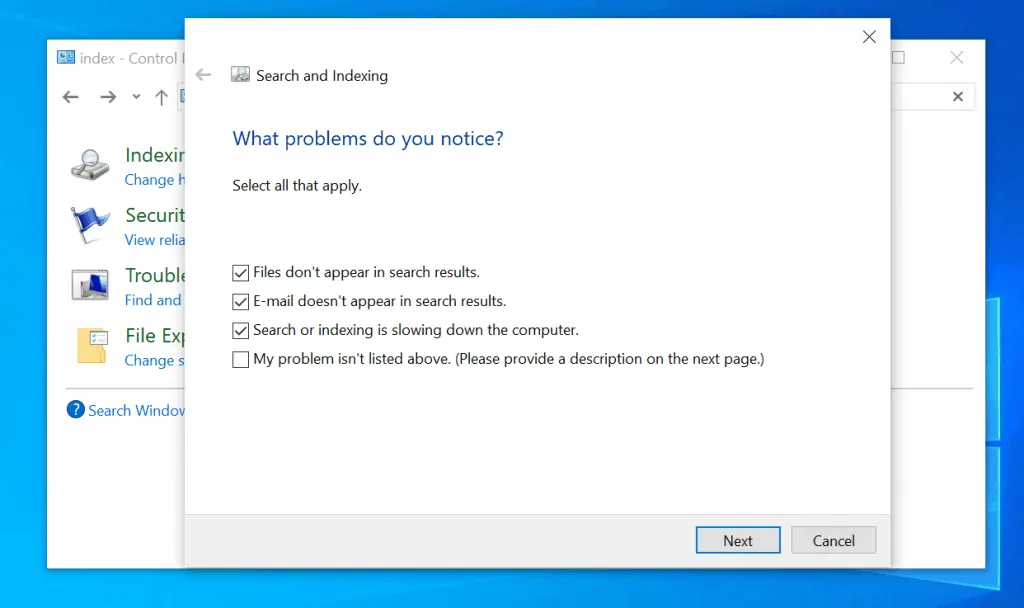
- At the next screen tick all the boxes that apply to your situation.
- Then click Next. The troubleshooter will run and return results.
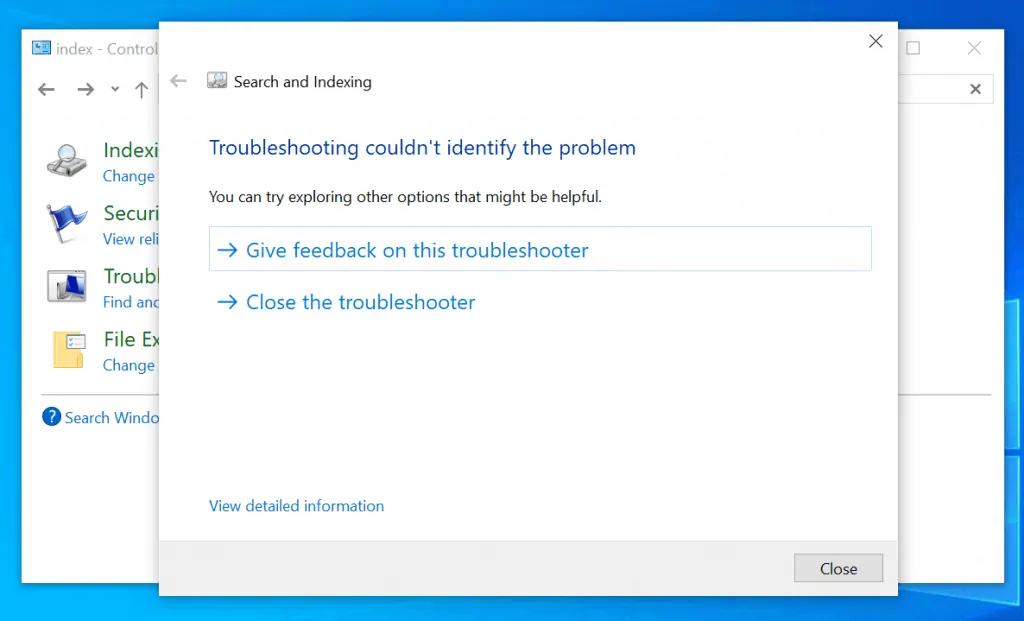
Run a search to see if the problem is resolved. If not fixed, try the next fix below.
Copy Contents of the Old Start Menu to Your New Profile
This method is applicable in upgrade or re-installation situations.
Here are the steps:
- Right-click Windows 10 start menu.
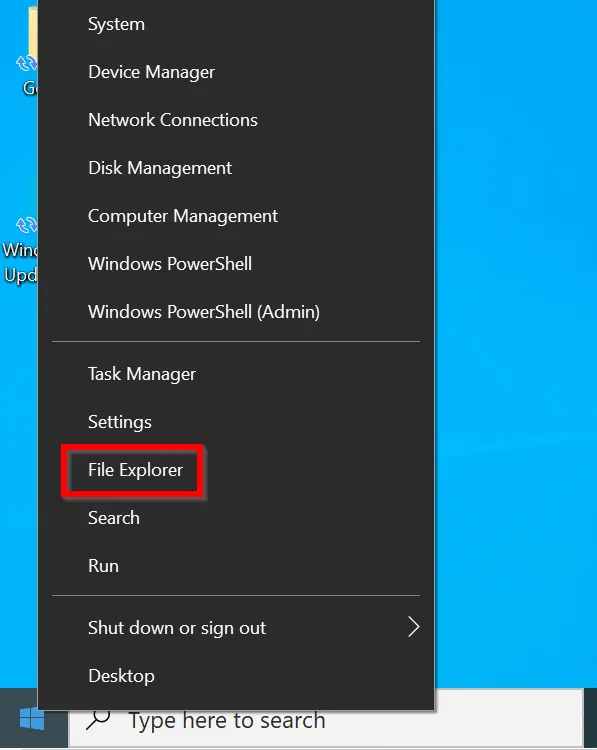
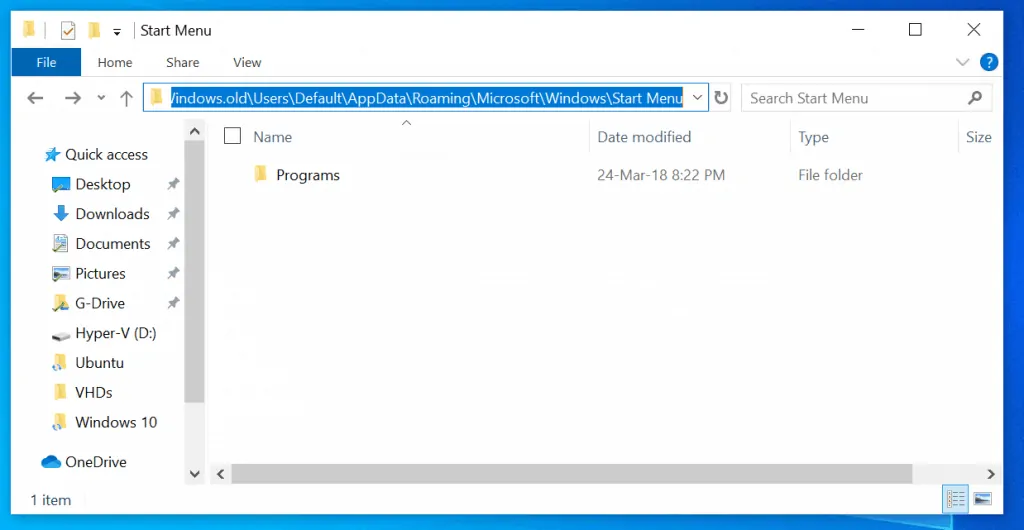
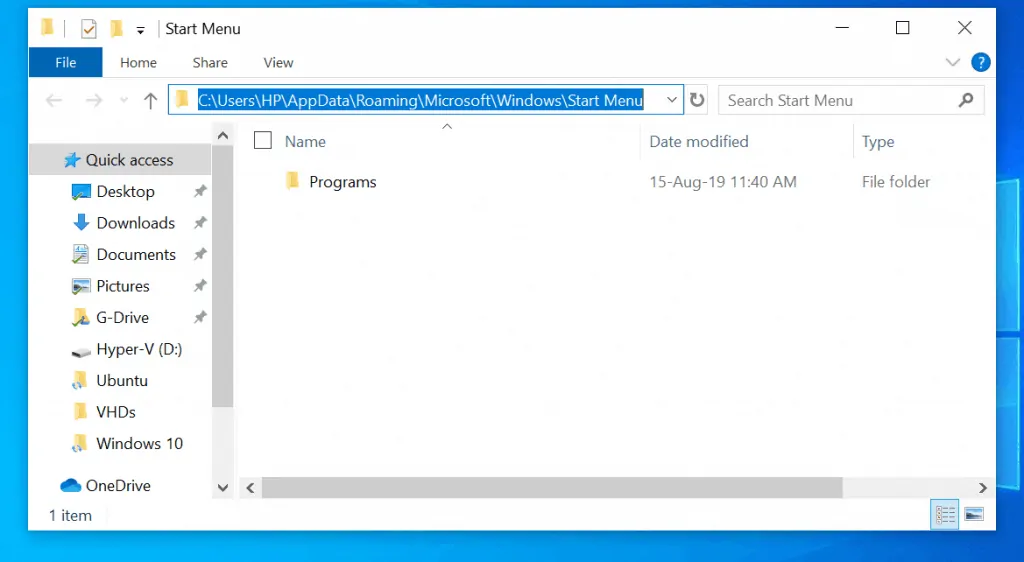
- Then select File Explorer. When it opens, navigate to C:\Windows.old\Users\Default\AppData\Roaming\Microsoft\Windows\Start Menu. Then copy Programs folder.
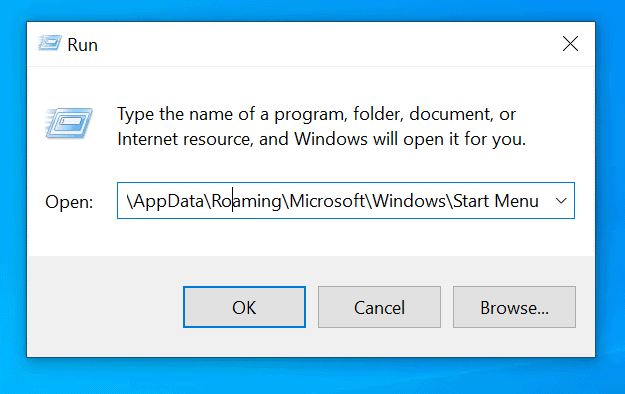
- Now open Run command (Press Windows logo + R on your keyboard), enter %userProfile%\AppData\Roaming\Microsoft\Windows\Start Menu and click OK
- Replace Programs folder in the new Start Menu with the Programs folder from the previous one.
- Then log off, log back in and try searching again.
If Windows 10 search is still not fixed, try the next fix.
Delete Cortana Data from AppData\Pacages Folder
Here are the steps:
- Enable show hidden items (open file Explorer and click View).
- Create a new Administrator account or use an existing one. Then log out of your current account with Search problems.
- Log back to the computer with the new administrator account.
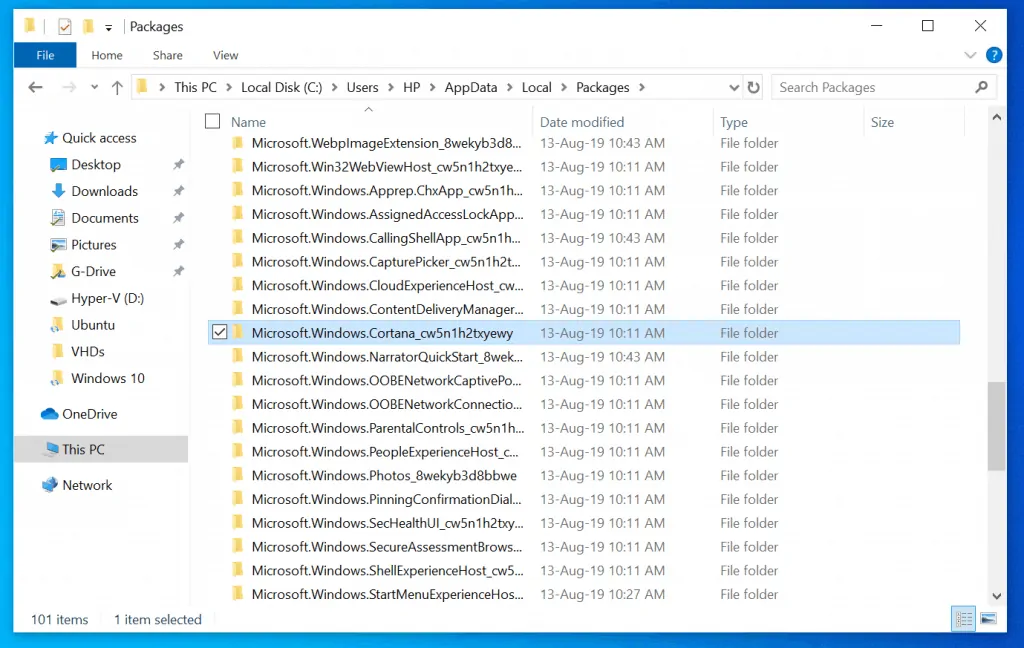
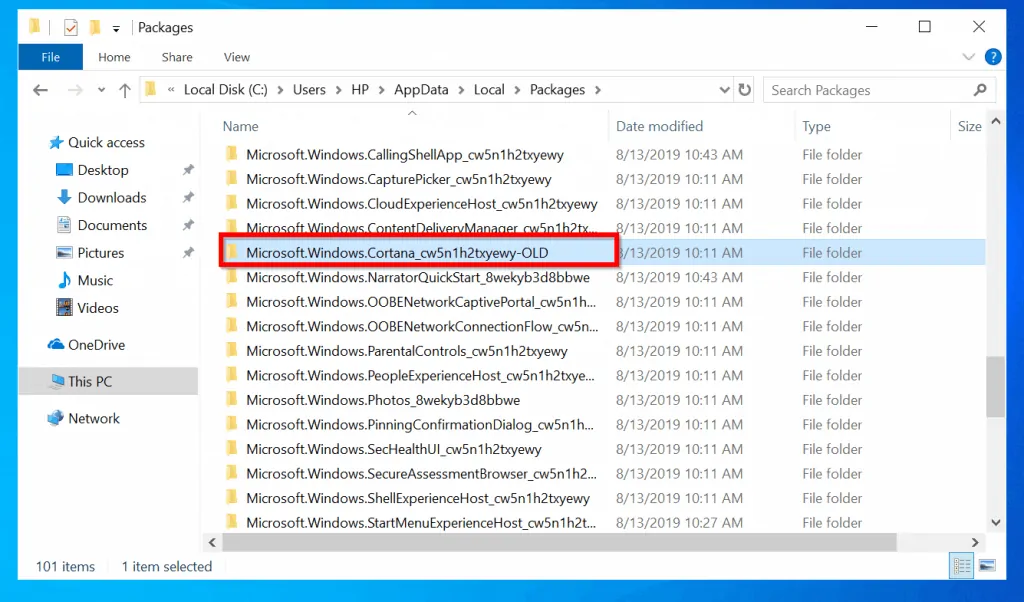
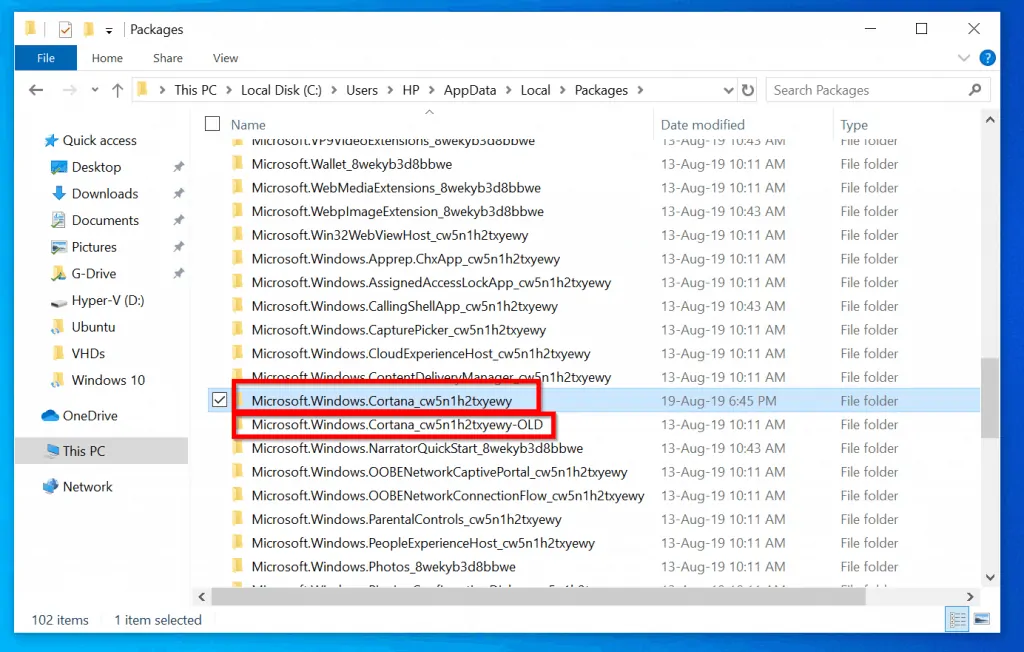
- Then navigate to C:\Users[user-account-with-search-problem]\AppData\Local\Packages. And rename Microsoft.Windows.Cortana_cw5n1h2txyewy folder.
- Log off from the new account. Then log back with your normal account.
Try Windows 10 search to see whether it now works. If Windows 10 search is still not working, try the next fix.
If Everything Else Fails…Reinstall Cortana with PowerShell
My final recommended fix is to reinstall Cortana. Here are the steps:
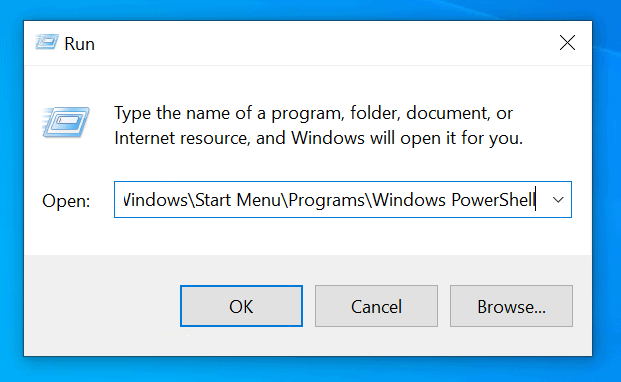
- Search PowerShell. Right-click it and select Run as administrator. Oh! your Windows 10 search is broken! Try this one: Open Run command. Then copy and paste the path below into Run and click OK.
%userprofile%\AppData\Roaming\Microsoft\Windows\Start Menu\Programs\Windows PowerShell
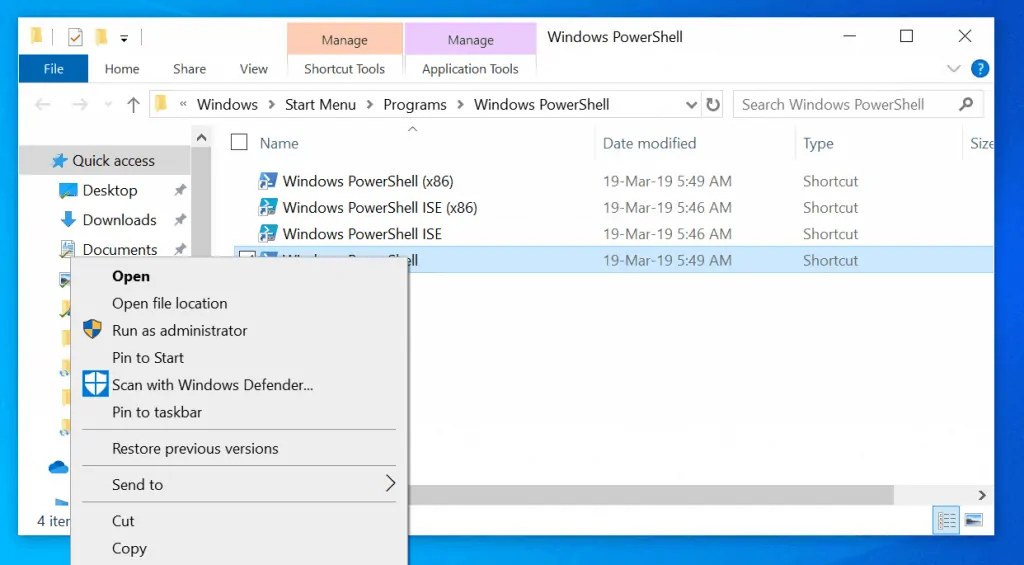
- When the path opens, right-click Windows PowerShell shortcut and select Run as administrator.
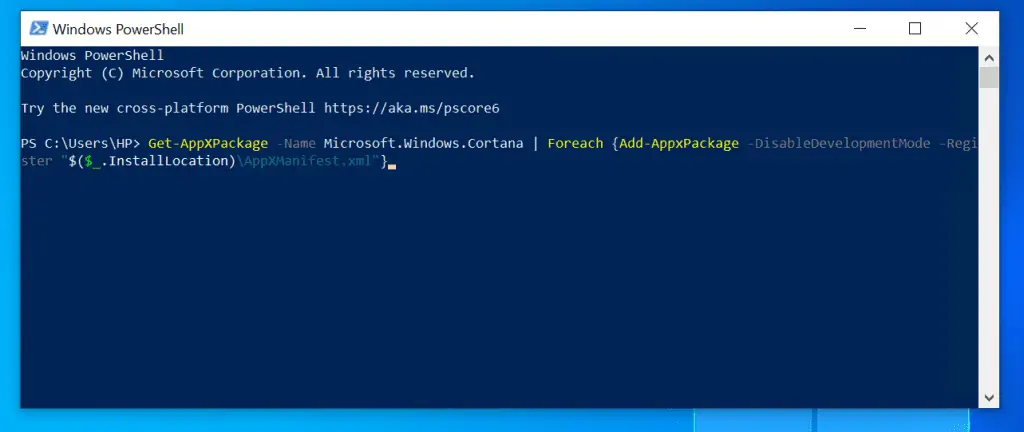
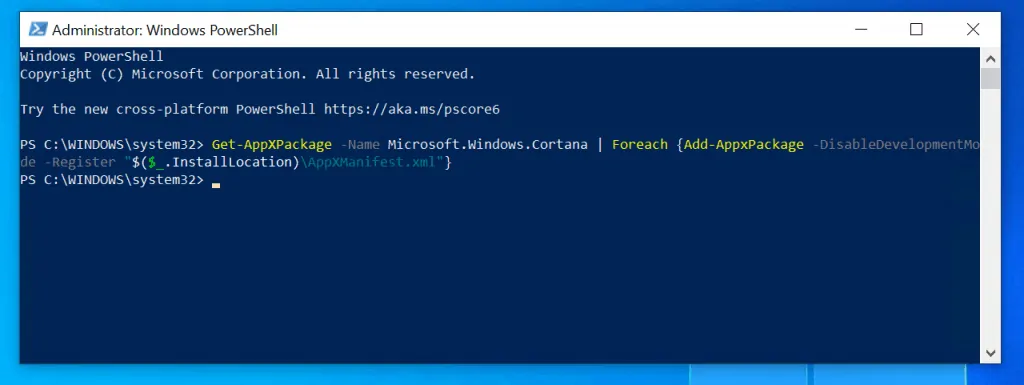
- Then type the command below into the PowerShell prompt and click enter.
Get-AppXPackage -Name Microsoft.Windows.Cortana | Foreach {Add-AppxPackage -DisableDevelopmentMode -Register "$($_.InstallLocation)\AppXManifest.xml"}
Conclusion
There you have them – 6 proven steps that should fix Windows 10 search not working problem.
If you were able to resolve your Windows 10 search problems with this guide, kindly spare 2 minutes to share the method that worked for you at [discourse_topic_url].
Furthermore, if you have questions you may want to ask, you can post them on our community platform at [discourse_topic_url]. Our community team will get back to you with a fix as soon as possible.
Want more Windows 10 guides? Visit our Windows 10 Fixes page. Alternatively, you may want to read more about Cortana known issues.