Google Chrome has become increasingly popular and most users now want it as their default browser. If you’re one of those users, use one of the steps below.
Option 1: Make Chrome Default Browser From Chrome Settings
All browsers, including Chrome have the option to set the browser as your default.
Here are the steps to set Chrome as default browser from Chrome Settings:
- Open Google Chrome and click the 3 dots on the top right of the page. Then click Settings. Then settings page will open in a new tab.

- From Chrome Settings page (left side), click Default browser. Then click Make default.
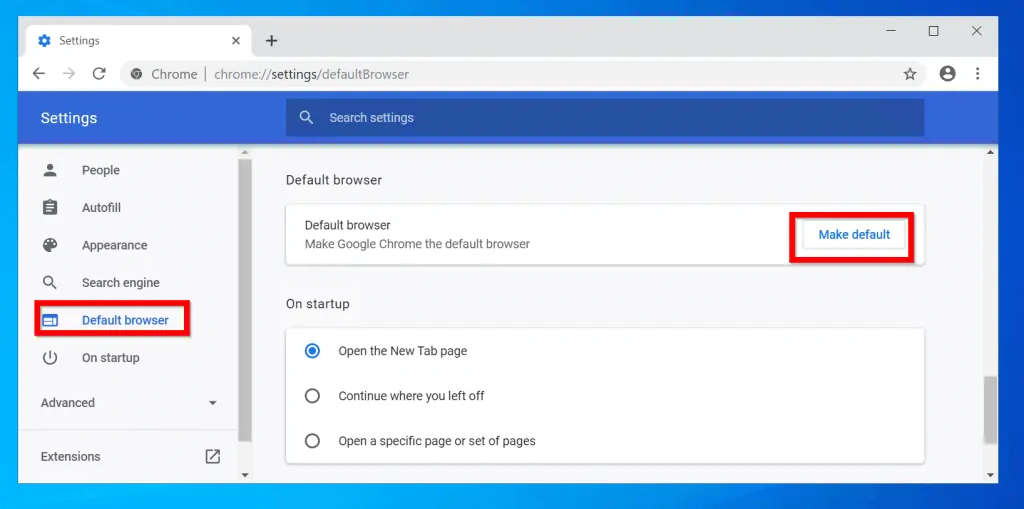
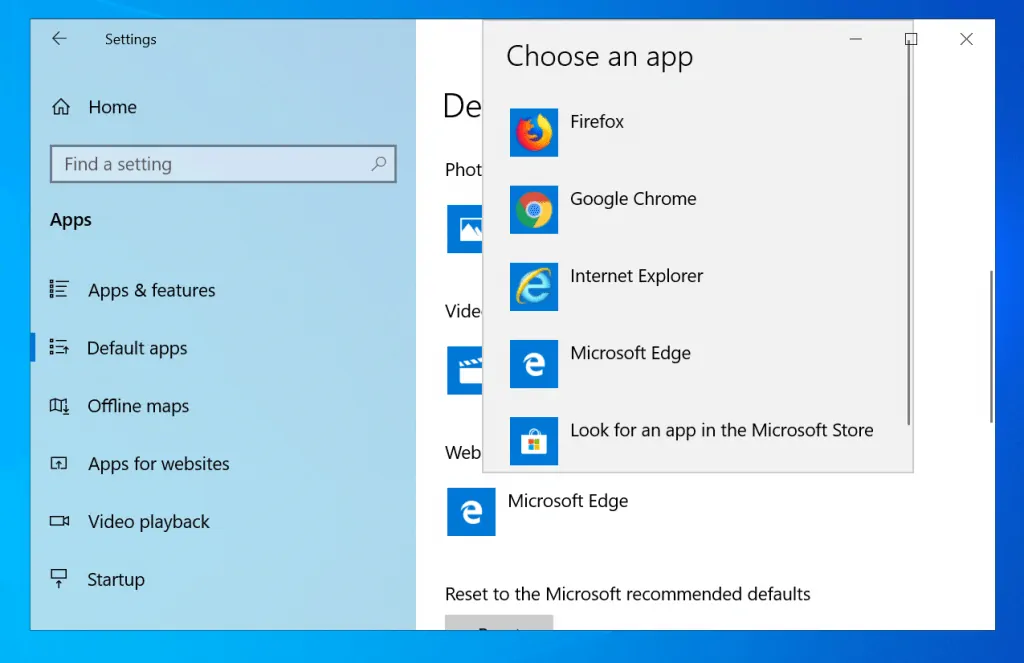
- At the Choose an app page, select Google Chrome.
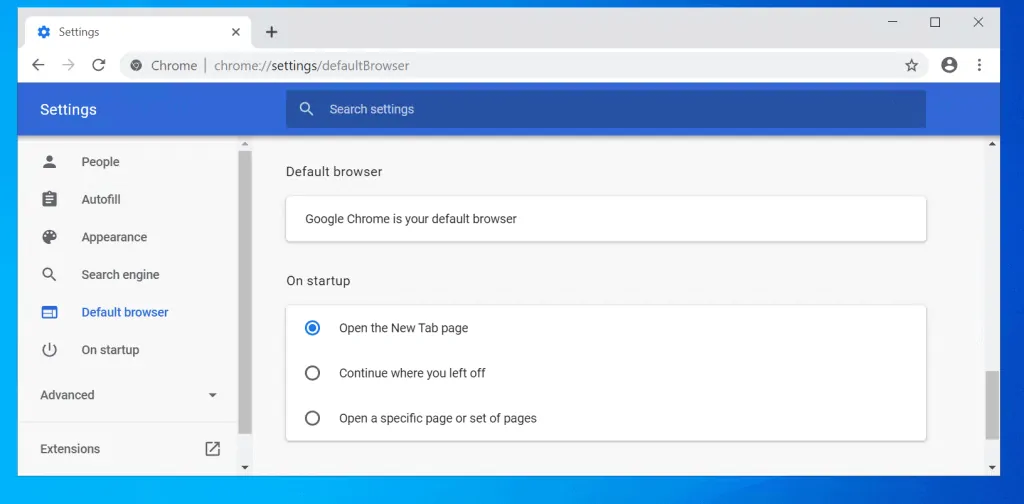
- If you return to Google Chrome settings, it will now show that it is the default browser.
Option 2: Set Chrome as Default From Default Apps Settings
The second method to change Windows 10 default browser is from Settings.
This is similar to the first method but instead of performing the task from Google Chrome settings, you do it from Windows 10 Settings.
Here are the detailed steps:
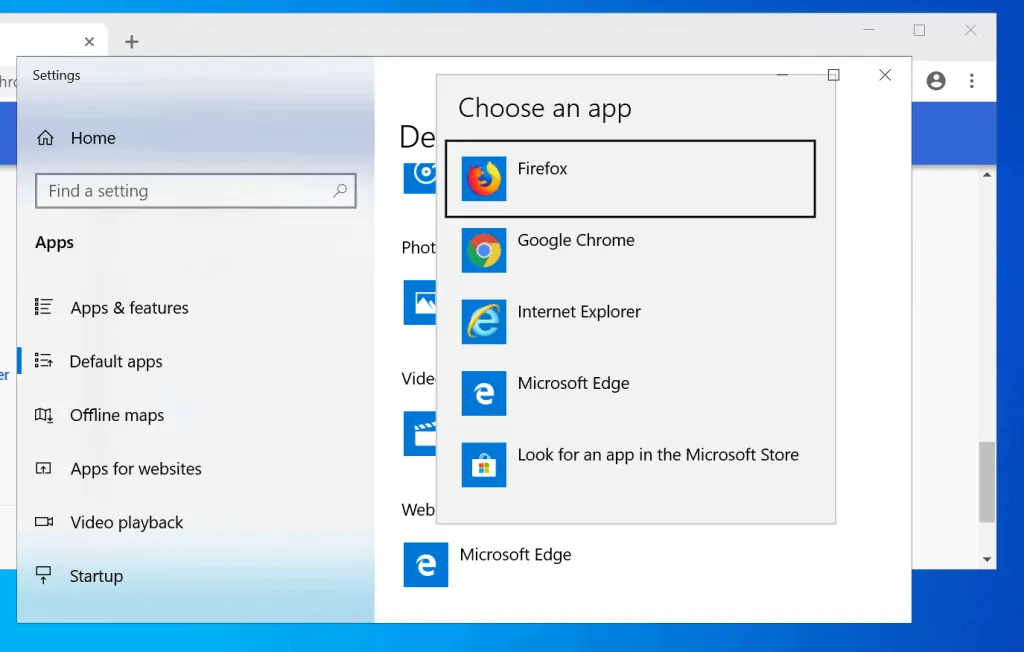
- Right-click Windows 10 start menu. Then click Settings.

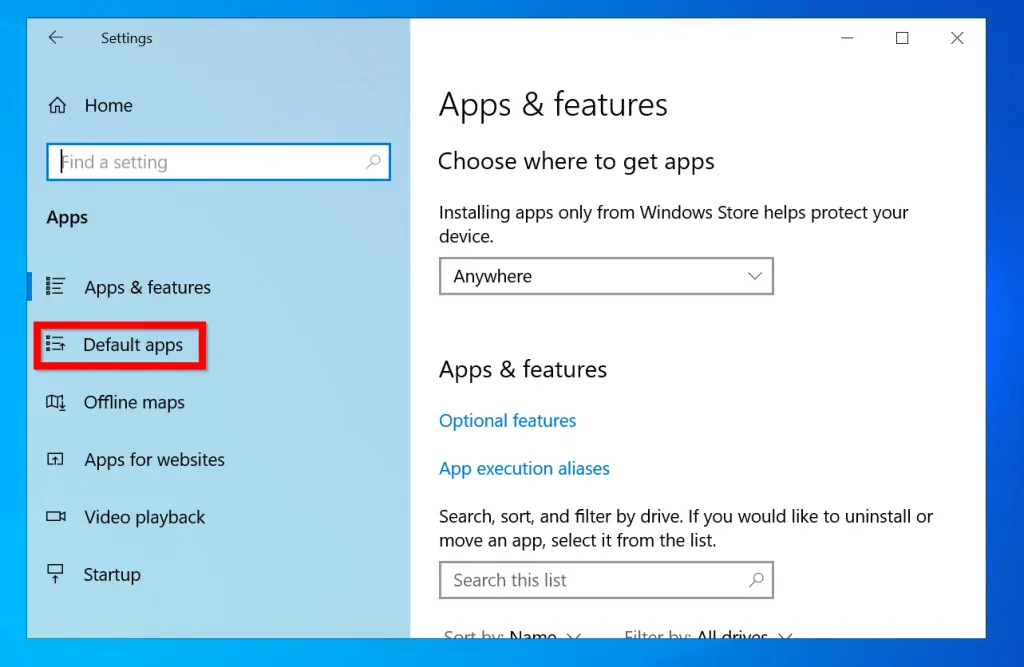
- At Windows Settings, locate and click Apps.

- Then at Apps & features settings, click Default apps.
- When Default apps settings opens, scroll down to Web browser and click Microsoft Edge (the current default browser).
- Then from the list of available browsers, click Google Chrome. Google Chrome is now set as default browser for Windows 10 (see the second image below).
Option 3: Set Chrome as Default Browser with Group Policy
This method is for Windows Administrators that wish to set default browser in domain-joined Windows 10 PCs.
There are 4 tasks required for this method:
- Create a default application association XML file
- Create a new Group Policy Object (GPO)
- Link the GPO to an AD container
- Configure the Group Policy Object
This guide provides detailed steps for tasks 1 and 4. For steps to complete tasks 2 and 3 click the links.
Here are the detailed steps for each task…
Step 1: Create a Default Application Association XML File
- Google has a sample XML file that you can download. Click Download the default application association file to get a copy of the file.
- Then save the file to a location on your computer.
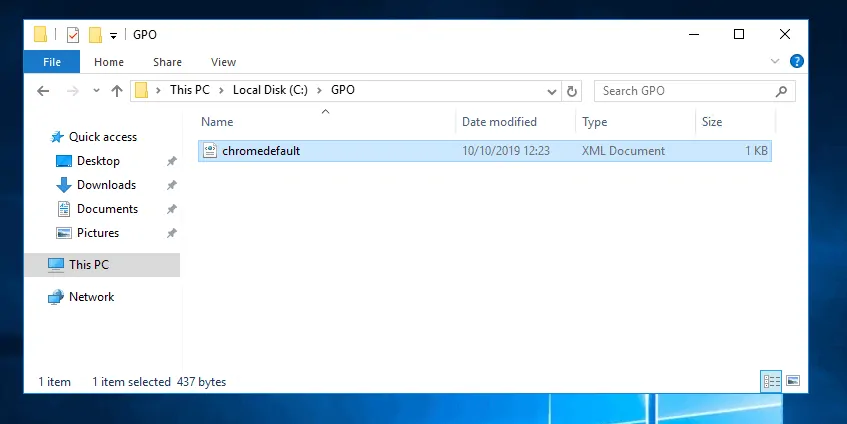
- Finally, copy the file to a location where it will accessible to every computer in the domain. One place is the Scripts folder located in the path \\domain\SYSVOL\domain. Below is the path in my test domain.
\itechguides.local\SYSVOL\iTechGuides.local\scripts
Step 2: Configure the Group Policy Object
The final step is to configure the GPO to set Chrome as default browser.
Here are the steps:
- Login to a Domain Controller and open Server Manager.
- From Server Manager, click Tools. Then select Group Policy Management.
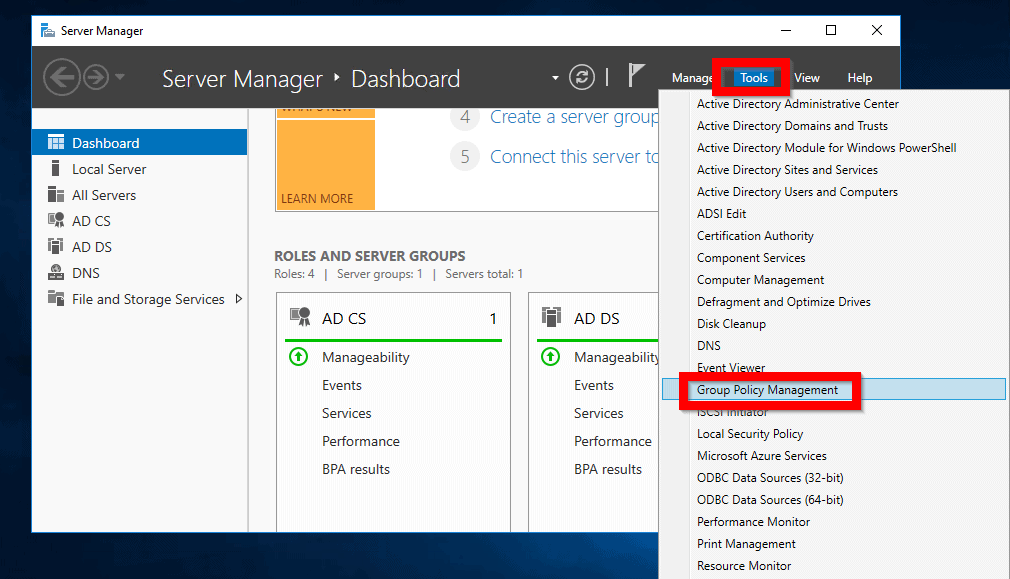
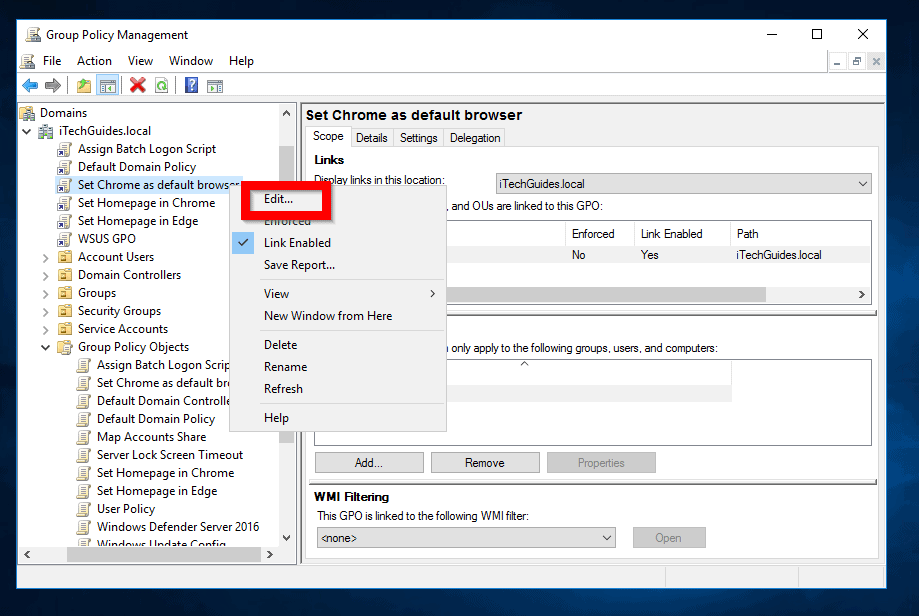
- When Group Policy Management opens, right-click the GPO you created for the purpose. Then select Edit…
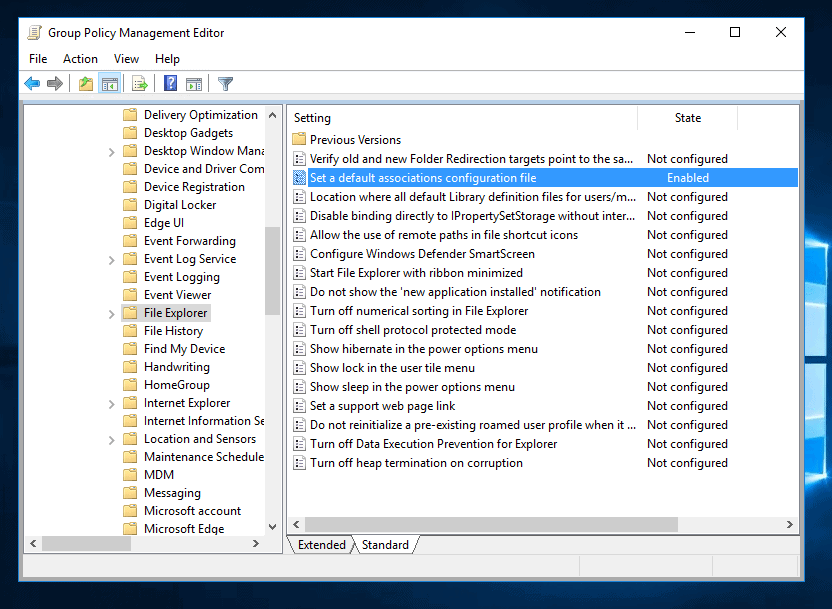
- At the Group Policy Management Editor, navigate to Computer Configuration -> Policies -> Administrative Template -> Windows Components -> File Explorer
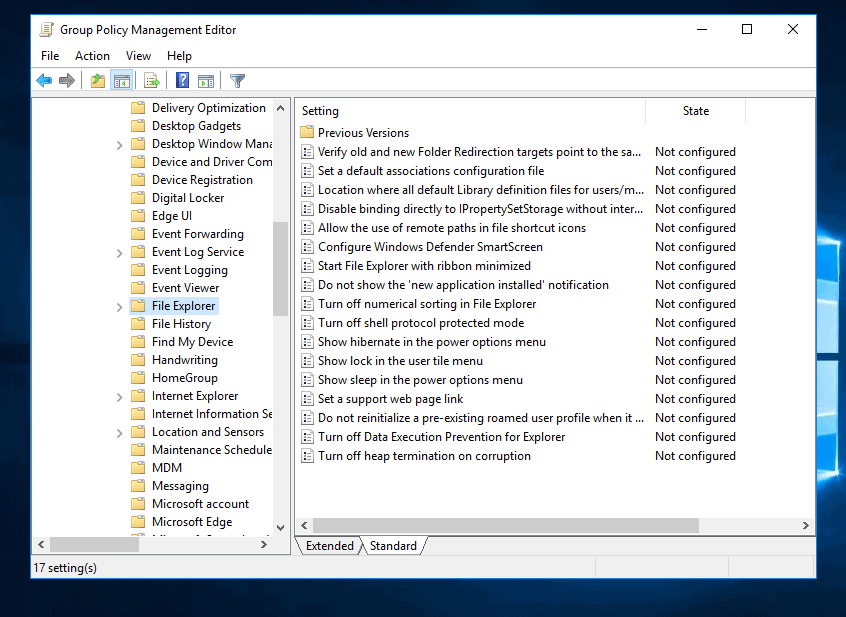
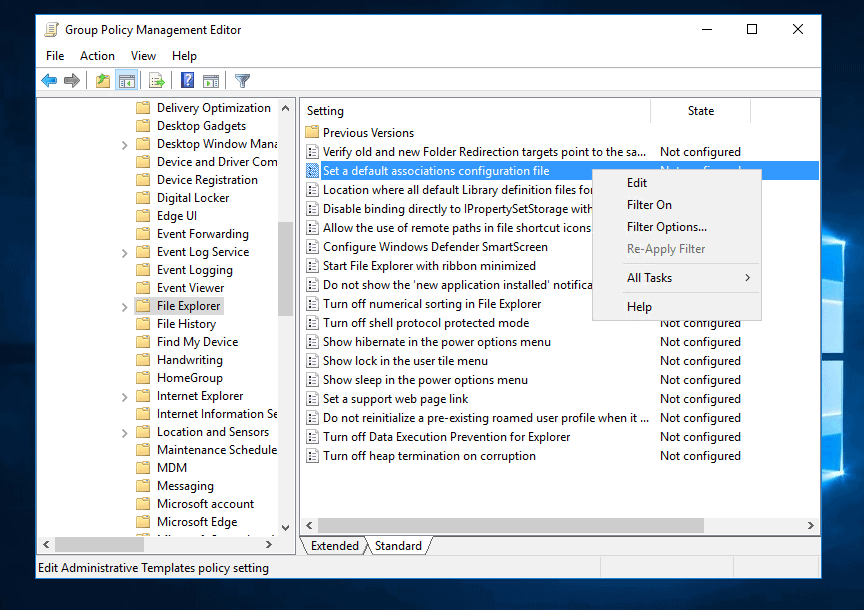
- Click on File Explorer folder. Then on the details pane, right-click Set a default associations configuration file policy and select Edit. You could also double-click the policy to open it for editing.
- When the policy opens for editing, click Enabled. Then, on the Default Association Configuration File field, enter the full path to the XML file you downloaded in step 1 of this section. When you finish configuring the policy, click OK.
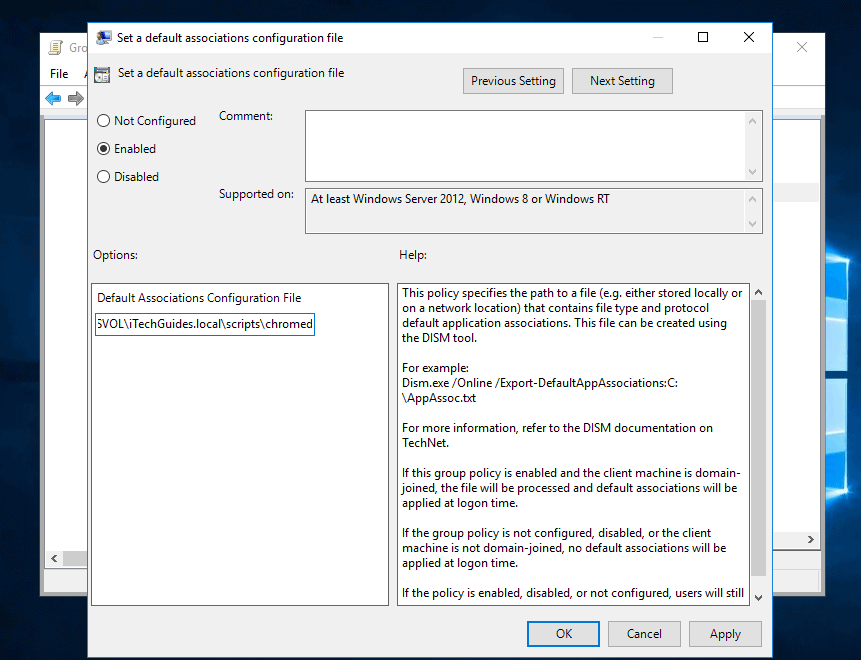
- The policy will now appear as Enabled.
Conclusion
The first two methods discussed in this guide are suitable for configuring individual PCs. meanwhile, for SysAdms setting Chrome as default on multiple PCs, the Group Policy method serves this purpose.
If you found the guide helpful kindly spare 2 minutes to share your feedback by responding to the “Was this page helpful?” question below.
Want more Windows guides? Visit our Windows How To page.


![How To Run Sysprep (Generalize) In Windows 10 [2 Methods]](https://www.itechguides.com/wp-content/uploads/2022/05/8-2.webp)