Do you want to use Hyper-V on your Windows 10 PC? You need to enable virtualization and this guide walks you through the steps.
Overview
To enable Hyper-V, your Windows 10 edition must be Enterprise, Pro, or Education. Windows Home, Mobile, or Mobile Enterprise do not support the Hyper-V feature.
In addition to meeting the above requirement, the PC must also meet the following hardware conditions:
- 64-bit Processor with Second Level Address Translation (SLAT)
- CPU MUST support for VM Monitor Mode Extension (VT-c on Intel CPU’s)
- Minimum of 4 GB memory. It should be higher, depending on the number of Virtual Machines you intend to run concurrently.
Finally, you need to enable Virtualization technology on the computer BIOS.
For a full list of all the requirements visit this link – Windows 10 Hyper-V System Requirements.
Once you’ve confirmed that your Windows 10 PC meets the requirements outlined above, use one of these options to install Hyper-V.
Option 1: Enable Virtualization from Control Panel
To use this method, here are the steps below:
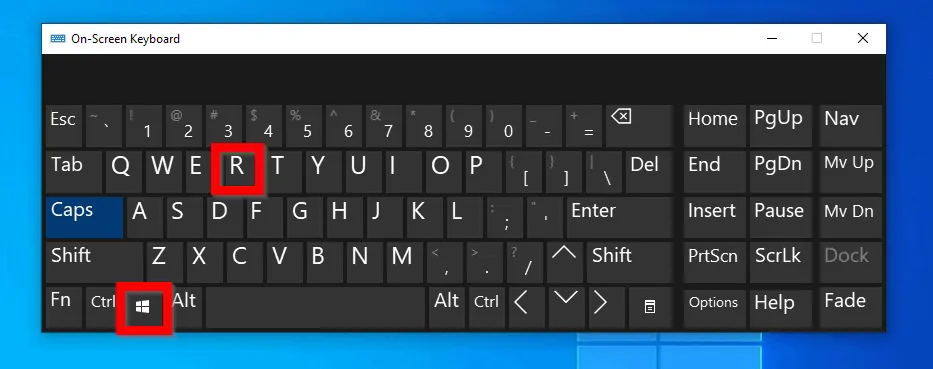
- Press Windows logo + R key to open Run command.
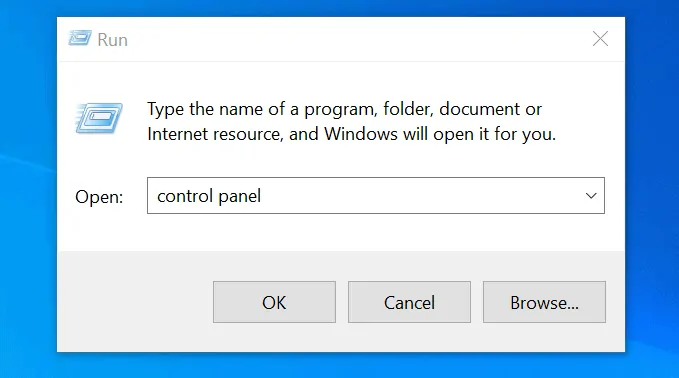
- At Run command, type control panel. Then press OK.
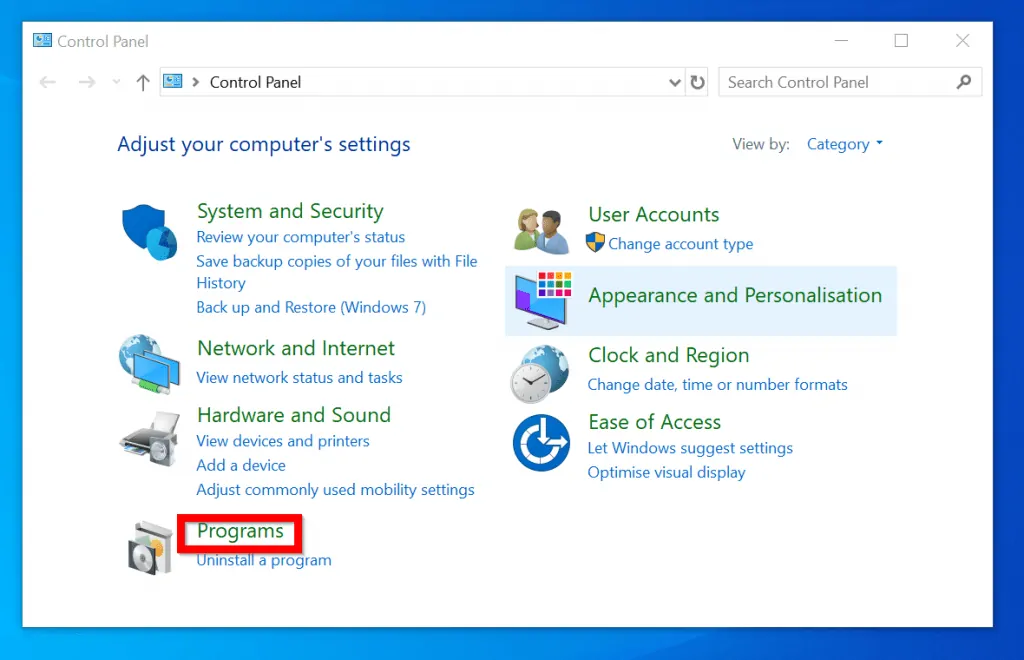
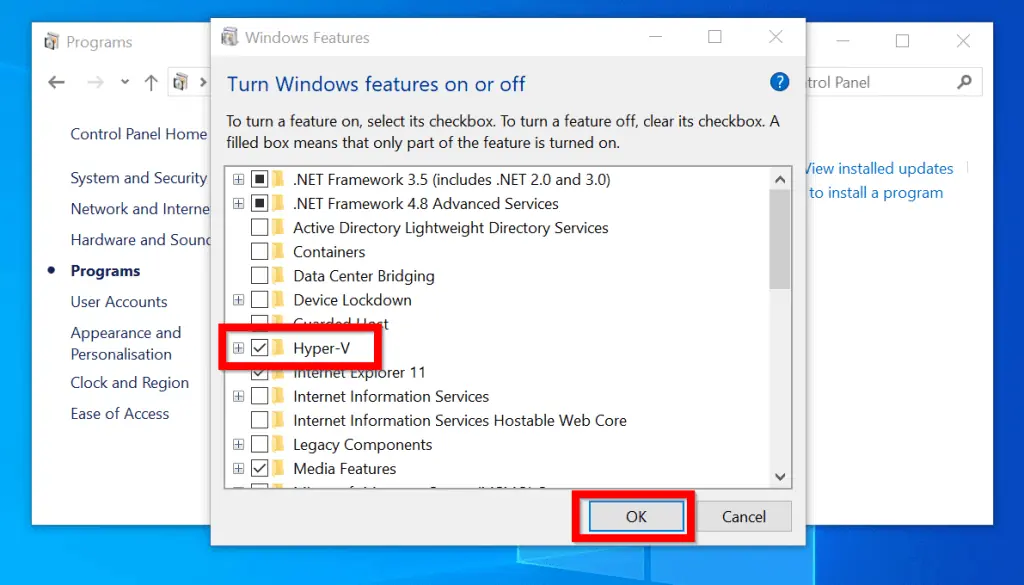
- When Control Panel opens, click Programs.
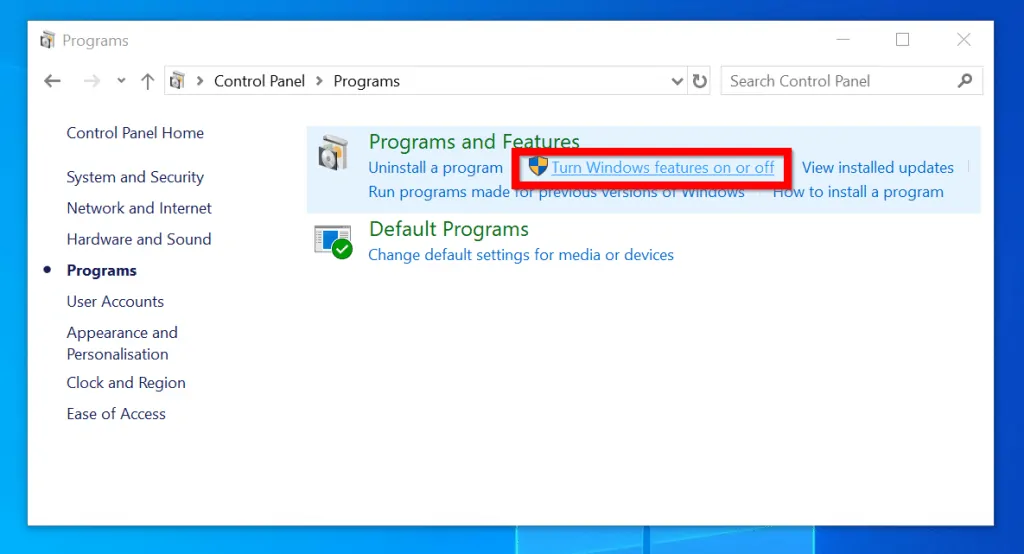
- Then click Turn Windows Feature on or Off.
- Finally, to enable Hyper-V in Turn Windows feature on or off, check the box beside Hyper-V. Then click OK.
- The feature will begin to install…

- Then you will be required to restart your PC to complete the installation. Click Restart now.

Option 2: Enable Virtualization with DISM
You can also enable Hyper-V (virtualization) on Windows 10 with DISM. Here are the detailed steps:
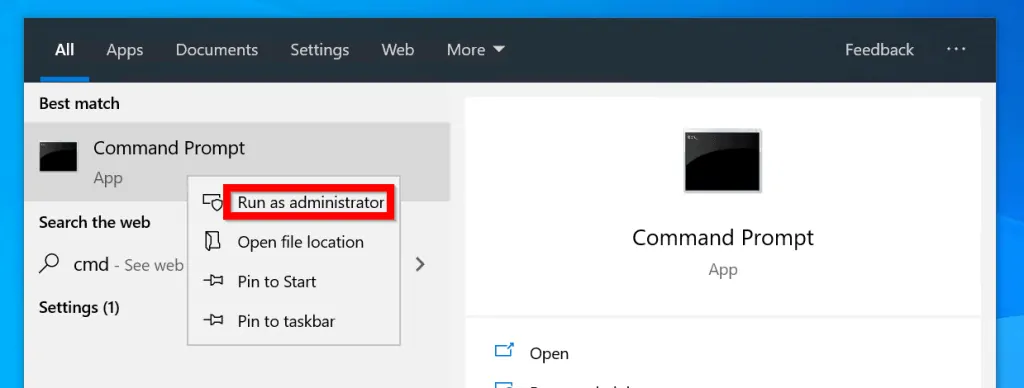
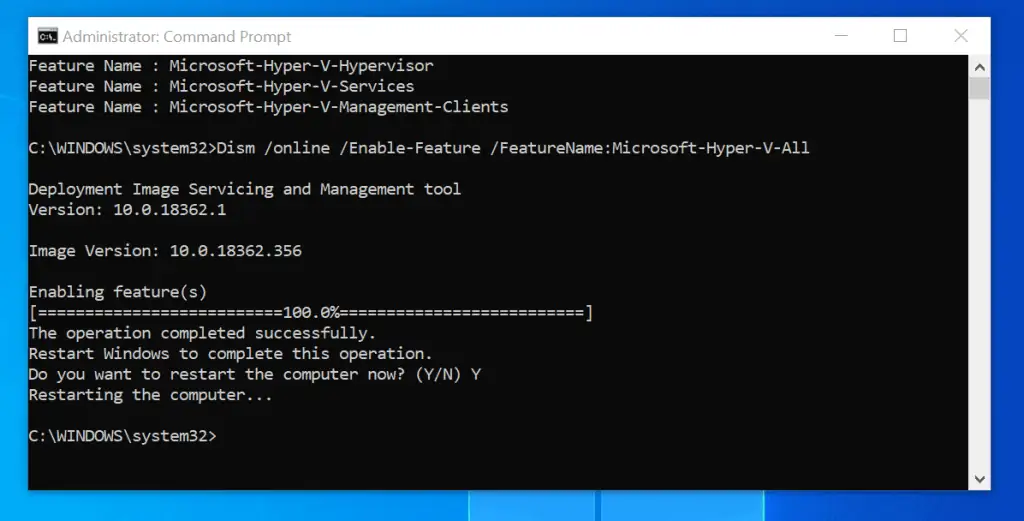
- Type cmd in the search bar. Then right-click Command Prompt and select Run as administrator.
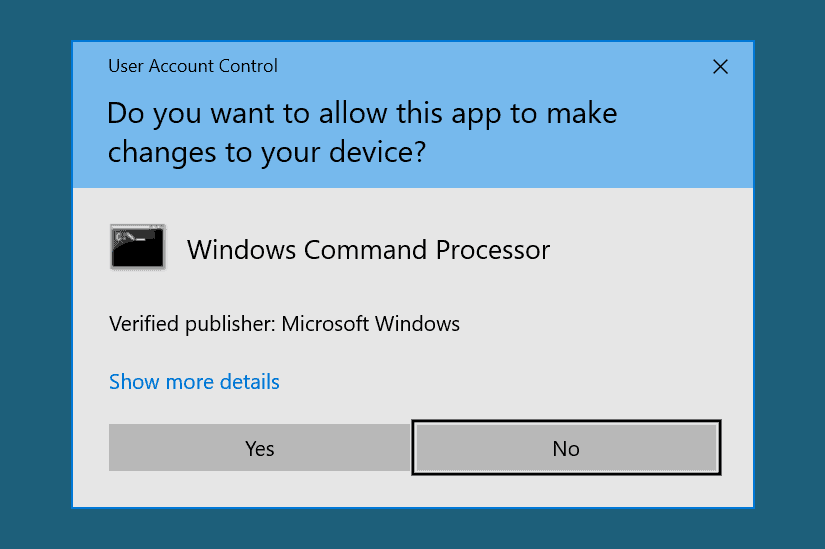
- If you receive User Account Control prompt, click Yes.
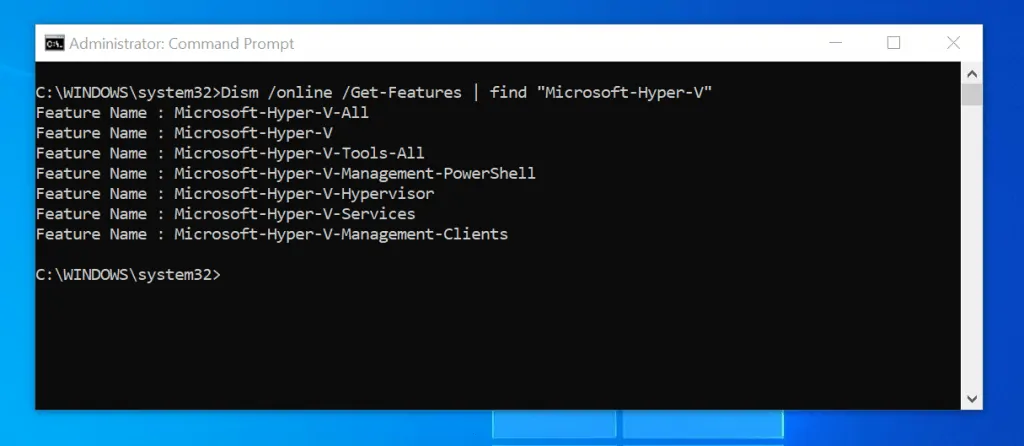
- On the command prompt, type this command. Then press enter.
Dism /online /Get-Features | find "Microsoft-Hyper-V"
The command lists all available Hyper-V features…
- To install all Hyper-V in Windows 10 (all features), type the command below. Then press enter.
Dism /online /Enable-Feature /FeatureName:Microsoft-Hyper-V-All
- The feature will initiate the installation. Then prompt for a restart. Type Y and press enter.
Option 3: Enable Virtualization with PowerShell
Here are the steps for this method:
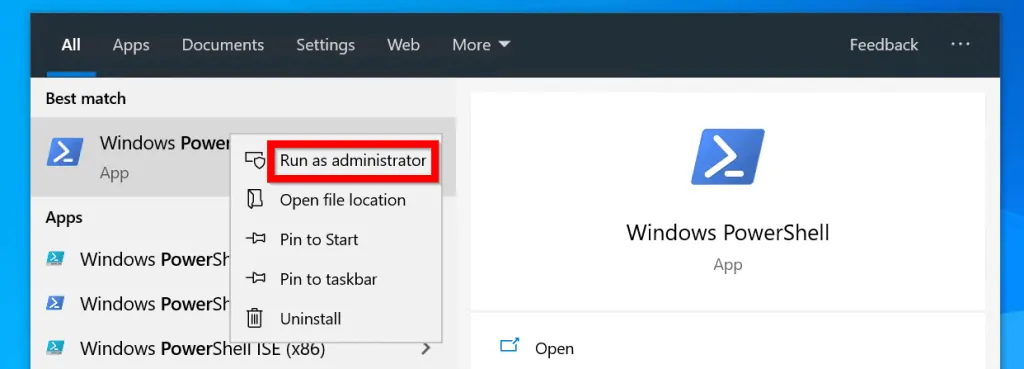
- Search PowerShell. Then right-click Windows PowerShell and select Run as Administrator.
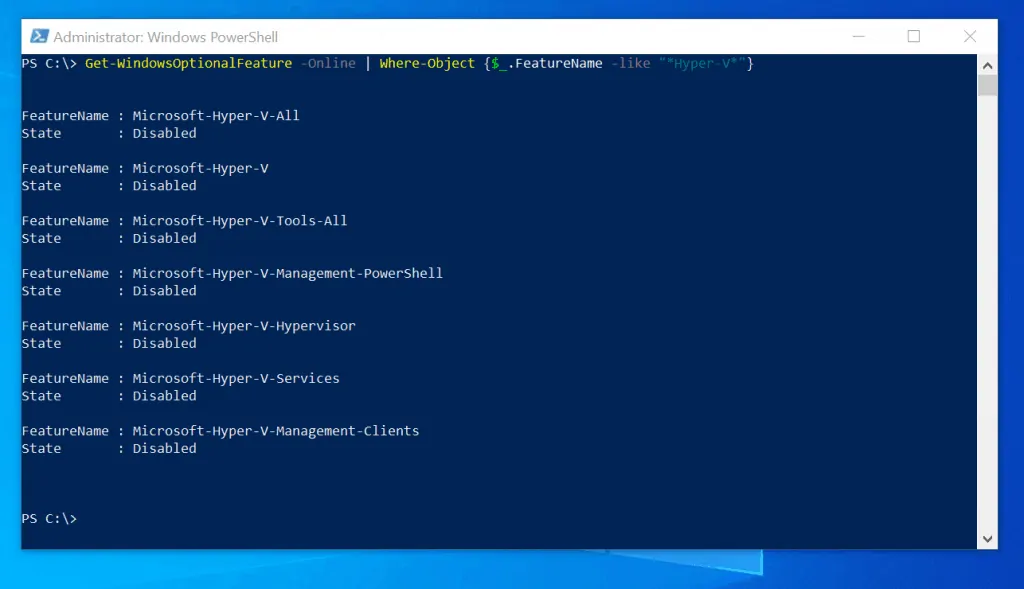
- At the PowerShell command prompt, to list available Hyper-V features, type the command below. Then press enter.
Get-WindowsOptionalFeature -Online | Where-Object {$_.FeatureName -like "Hyper-V"}
The command lists all available Hyper-V features…
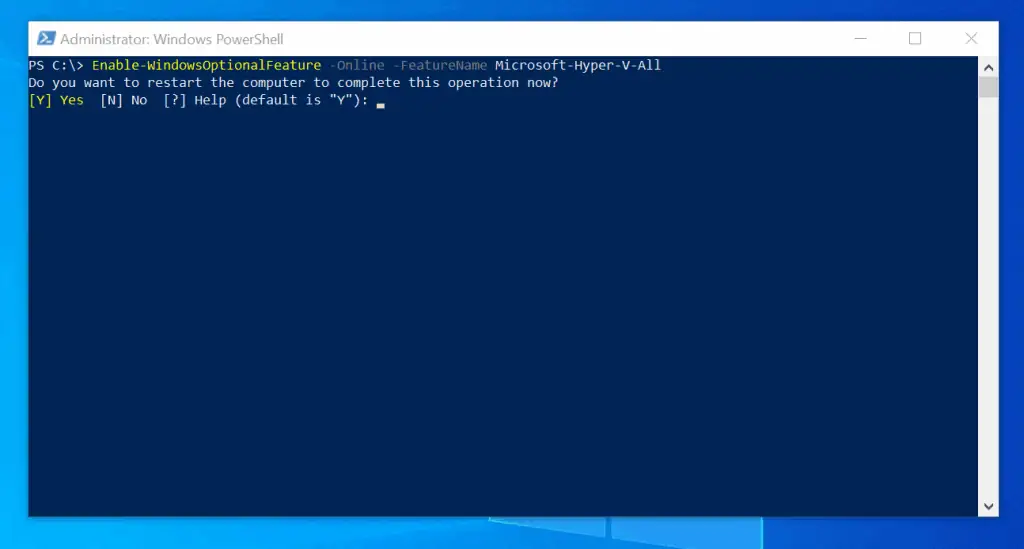
- To enable all Hyper-V features, type this command. Then press enter.
Enable-WindowsOptionalFeature -Online -FeatureName Microsoft-Hyper-V-All
- The command will install the features. Then prompt for a restart. Type Y. Then press enter.
Conclusion
Microsoft made it possible to run virtual machines on Windows 10 PCs that meet the requirements. As I pointed out in this guide, to run VMs on your Windows 10 computer, you must install the Hyper-V Windows optional feature.
In this guide, I shared three methods you can use to accomplish this task – via the GUI tool, DISM command, or Windows PowerShell.
Would you mind telling us the method you used to accomplish this task? To share your thoughts or ask questions, head over to the “Leave a Reply” comments form at the bottom of this page.
Alternatively, you can respond to the “Was this page helpful?” question below.
Finally, for more Windows 10 Itechguides, visit our Windows 10 How-To page.


![How To Run Sysprep (Generalize) In Windows 10 [2 Methods]](https://www.itechguides.com/wp-content/uploads/2022/05/8-2.webp)
Hello sir
Please I want to enable my virtualization tech but they requested for bios password of which I have no idea.
Can you please help me out
Thank you for the guide. I was able to enable hyper V. But I can’t find VT-x in my bios(maybe because is outdated) can you teach me on how to update Phoenix bios utility?
Hi Junior,
Thanks for the comment. Regarding the VT-x in my BIOS, there is a chance that the laptop does not support this feature.
Is the Hyper-V working?
Also, if you send me your laptop model I can check whether it supports VT-x
Thank you for the guide. I was able to enable Hyper V, but is there a way to enable VT-x through the command prompt?
I don’t have the password to my BIO.
Hi Albert,
Unfortunately, the only way to enable VT-x is to boot to the BIOS. There may be a way to remove the BIOS password? Check Google.