This Itechguide teaches you how to change account name on Windows 10. The guide covers steps for 2 methods to change account name on Windows 10.
Option 1: Change Account Name for a Microsoft Account
Use this method to change account name on Windows 10 if you sign in to Windows 10 with a Microsoft account.
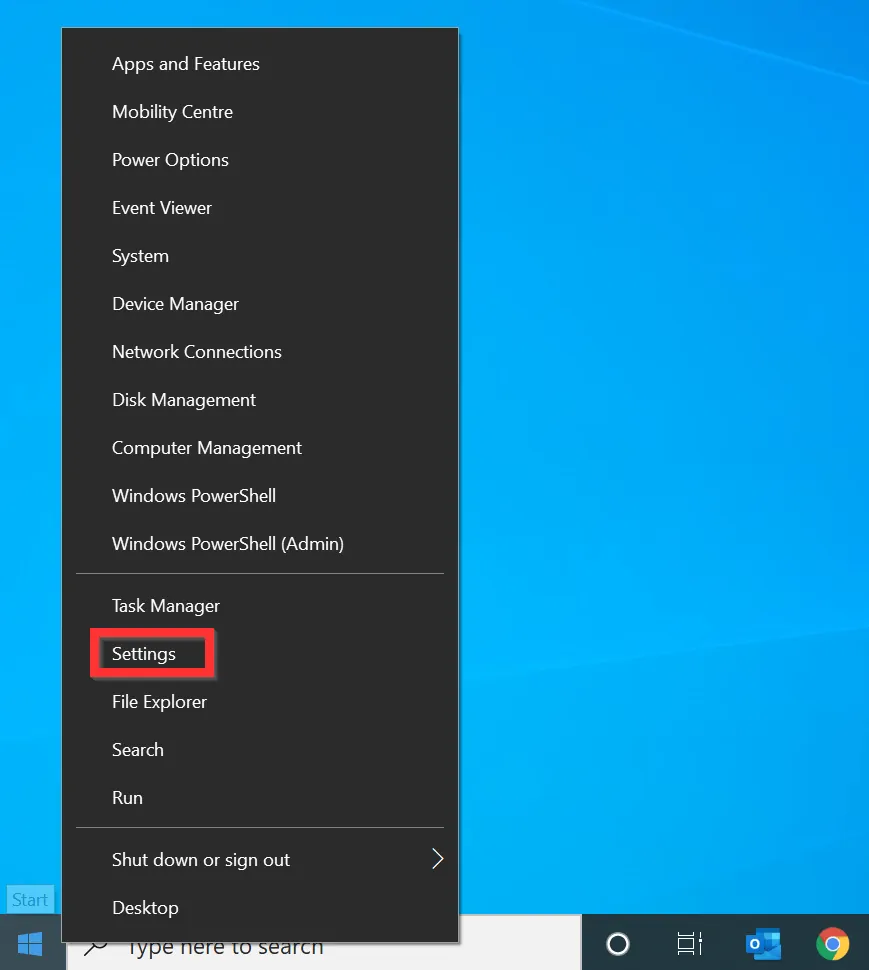
- Right-click Windows 10 Start menu and click Settings.
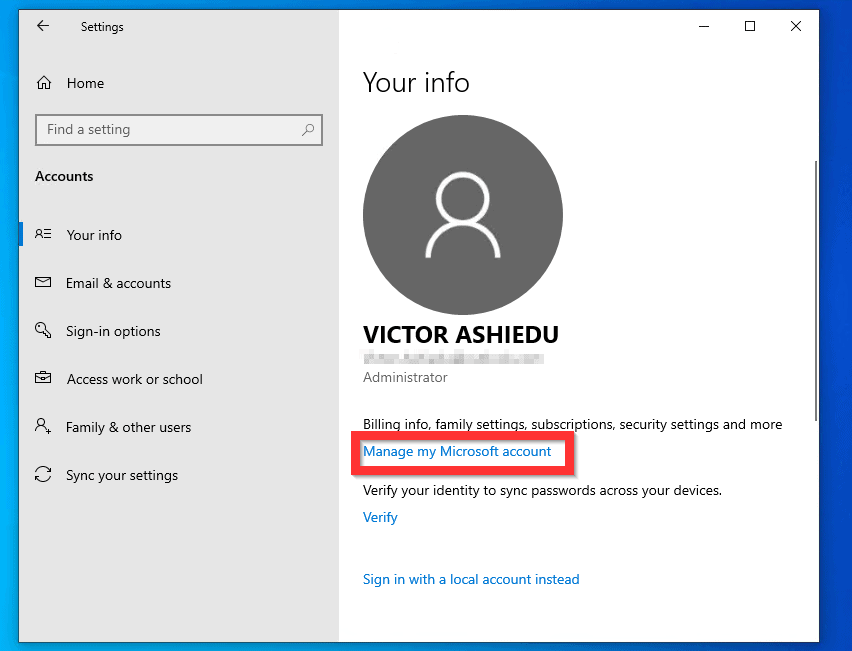
- Then, on the Windows Settings screen, click Account. Your info page will open.

- On the Your info screen, below Billing info, family settings, subscriptions, security settings and more, click Manage my Microsoft account. Your Microsoft account will open on the default browser for your Windows 10 PC.
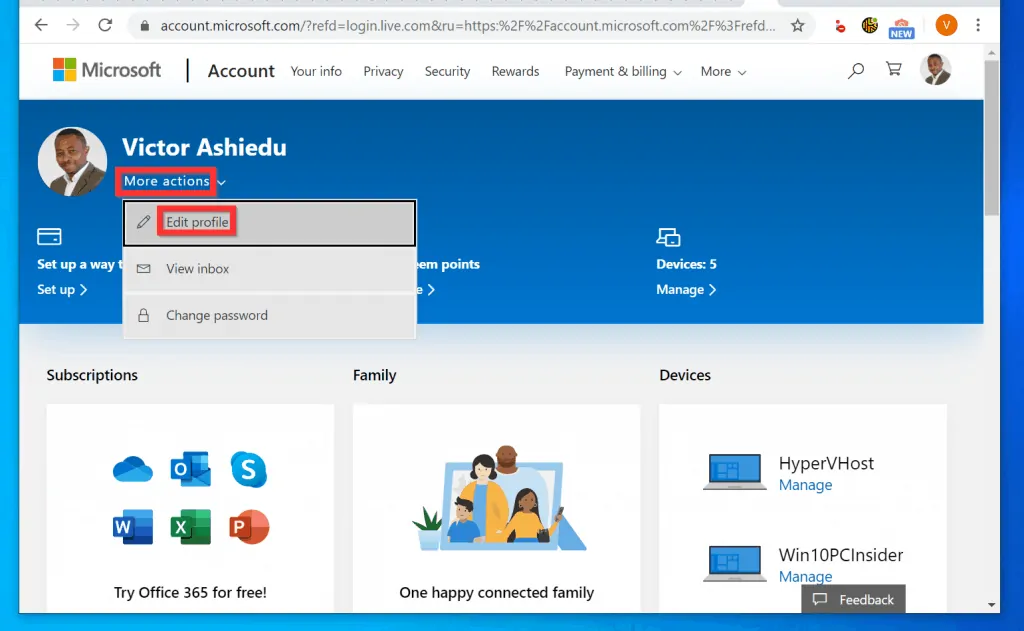
- Beneath your name, click the More actions drop-down and select Edit profile.
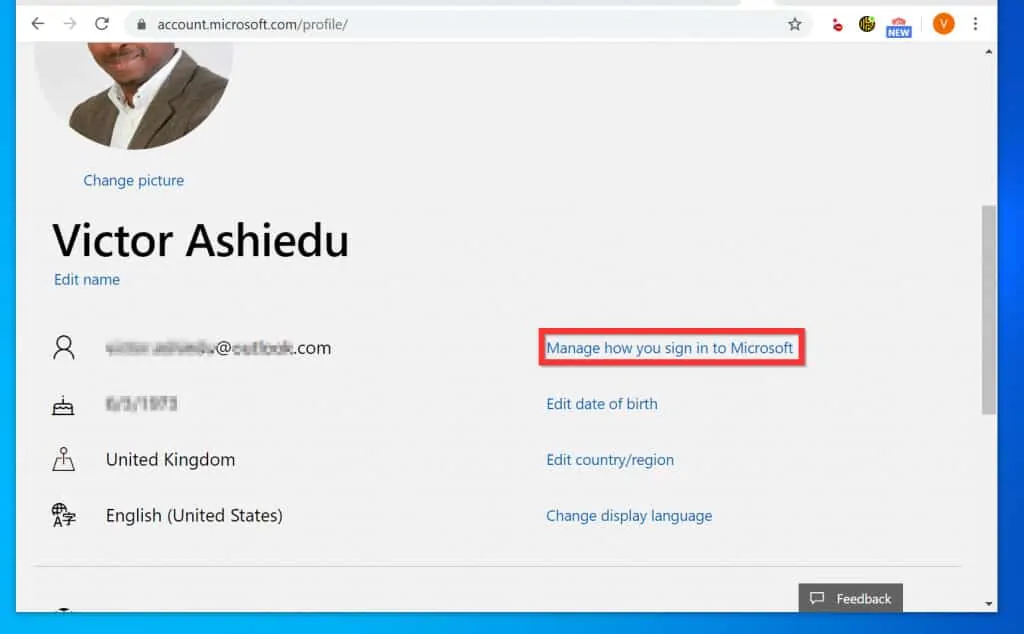
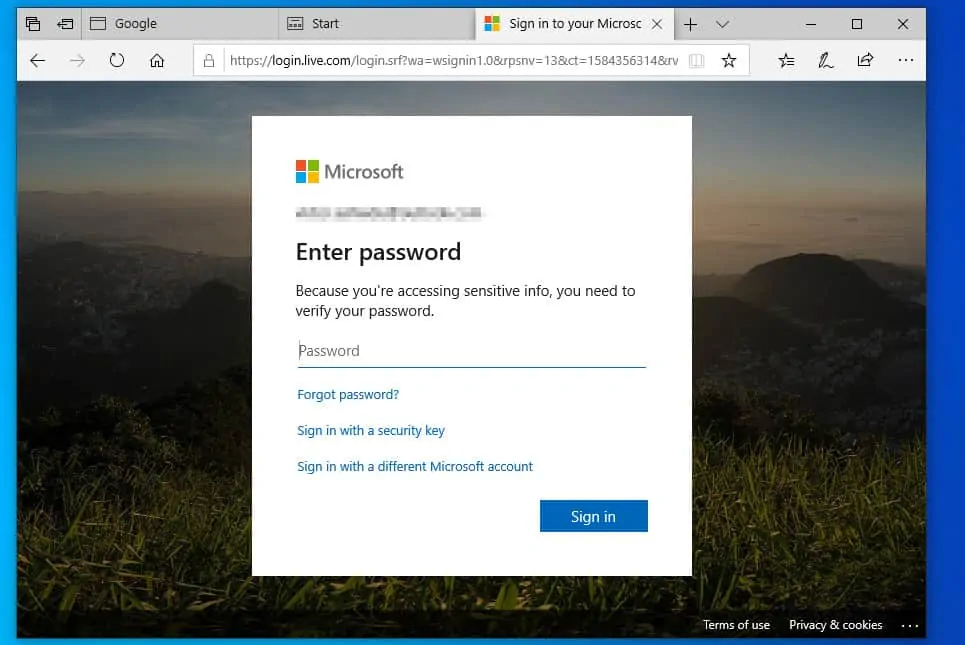
- When your account opens for editing, scroll down. Then, beside your current email address click Manage how you sign in to Microsoft.
- You may be required to verify your account. Complete the verification and proceed to the next step.
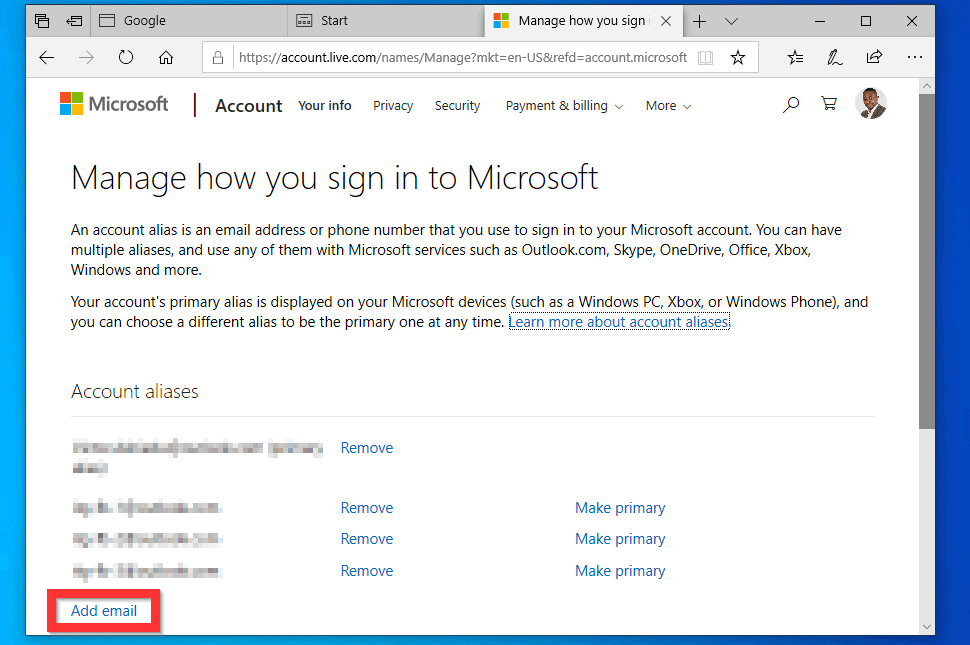
- Finally, to change the login email for your Microsoft account, on the Account aliases section, beneath the current email address, click Add email.
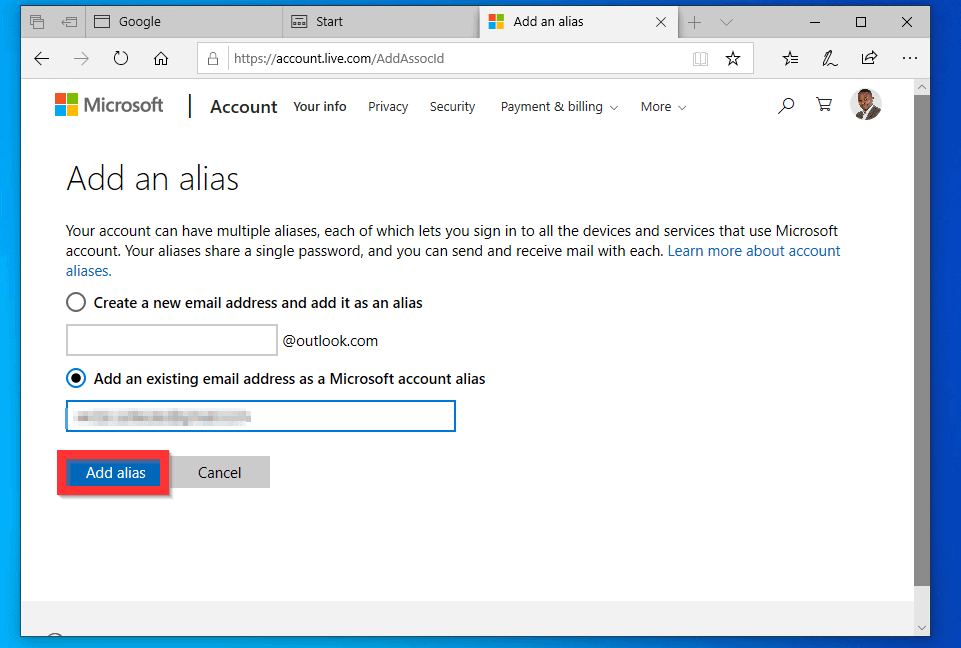
- Then, on the Add an alias page, select Add an existing email address as a Microsoft account alias. Enter the new Microsoft email address you want to use to sign in to Windows 10 and click Add alias.
- You will be returned to the Manage how you sign in to Microsoft page.
- The email address you just added to your account will have “verify” beside it – indicating that you need to verify the email address.
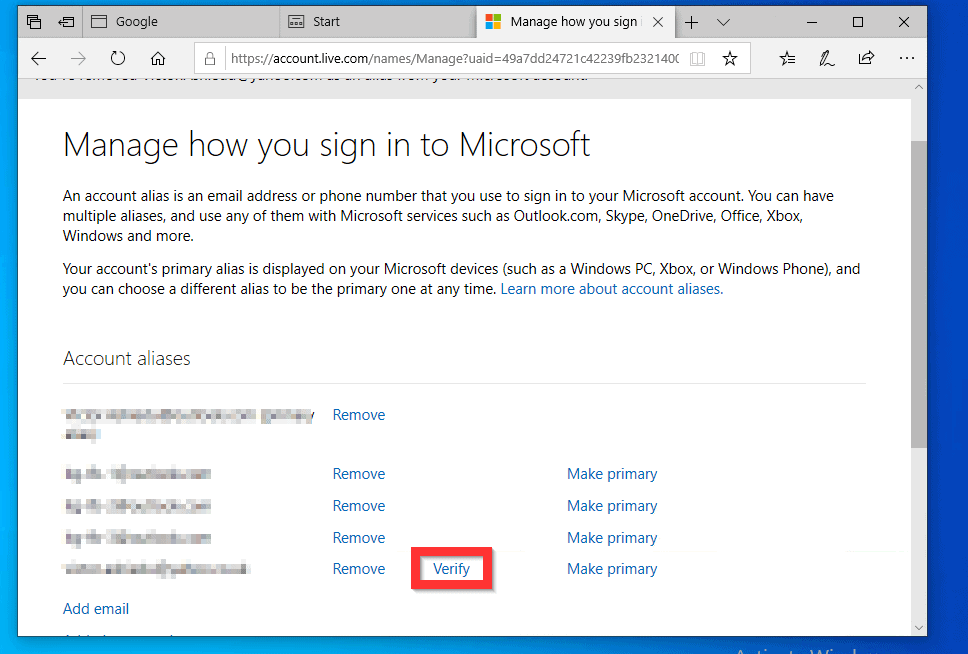
- Open the email and click the verification link Microsoft sent to the email address.
- Once you complete the verification, return to your Microsoft account page and refresh the page (press F5).
- Then, beside the new email address, click Make primary.
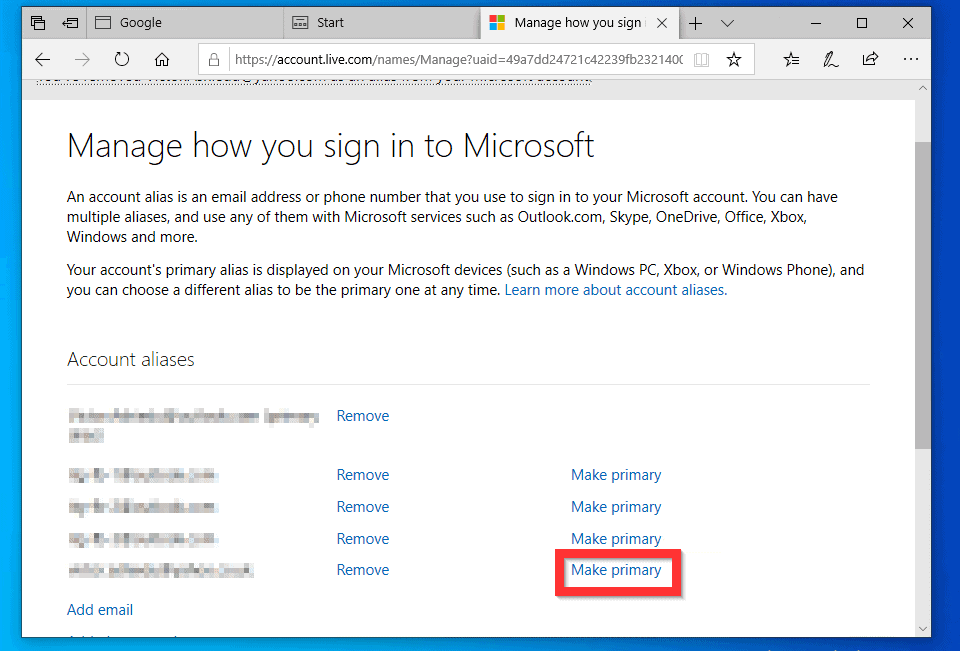
- Finally, to change account name on Windows 10 for a Microsoft account, on the confirmation pop-up window, click Yes.
- Then, wait for the new email to become the primary email address for your Microsoft account.

- You will be automatically signed out of your account. You do not need to sign back in. The login email for the Microsoft account on your Windows 10 PC will automatically update.
- To confirm that your Windows 10 account now uses the new email address, right-click Windows start menu and select Settings. You should be directed to Your Info screen.
- The email address beneath your name will now display the new email address on your Microsoft account. You have successfully changed the login account name for your Microsoft account.
If you want to change the name displayed on your account, open your Microsoft account on a browser and make the change there. The change will reflect on your Windows 10 PC as well.

Option 2: Change Account Name for a Local Account
Use this method to change account name if you sign in to Windows 10 with a local account.
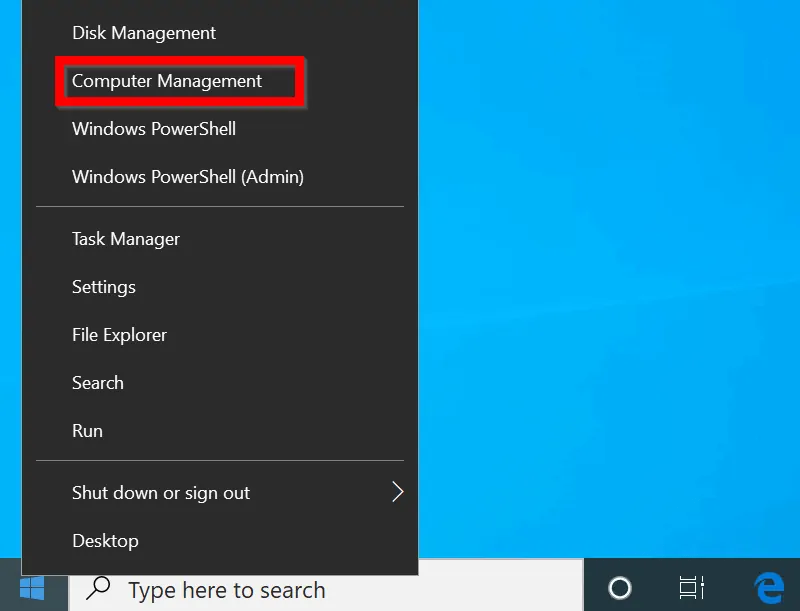
- Right-click the Windows start menu and click Computer Management.
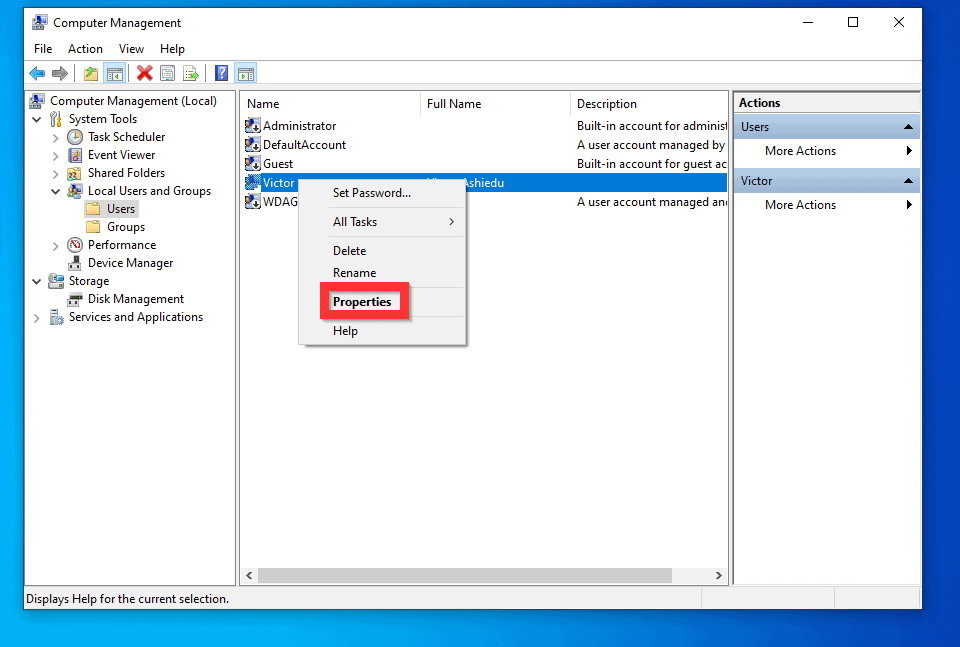
- Then, on Computer Management MMC, expand Local Users and Groups. Then click on the Users node. All the users on the computer will be displayed on the details pane of the Users node.
- Right-click the user you want to change the login name for and select Rename.

- Then, type a new name and press enter. The name will change automatically.
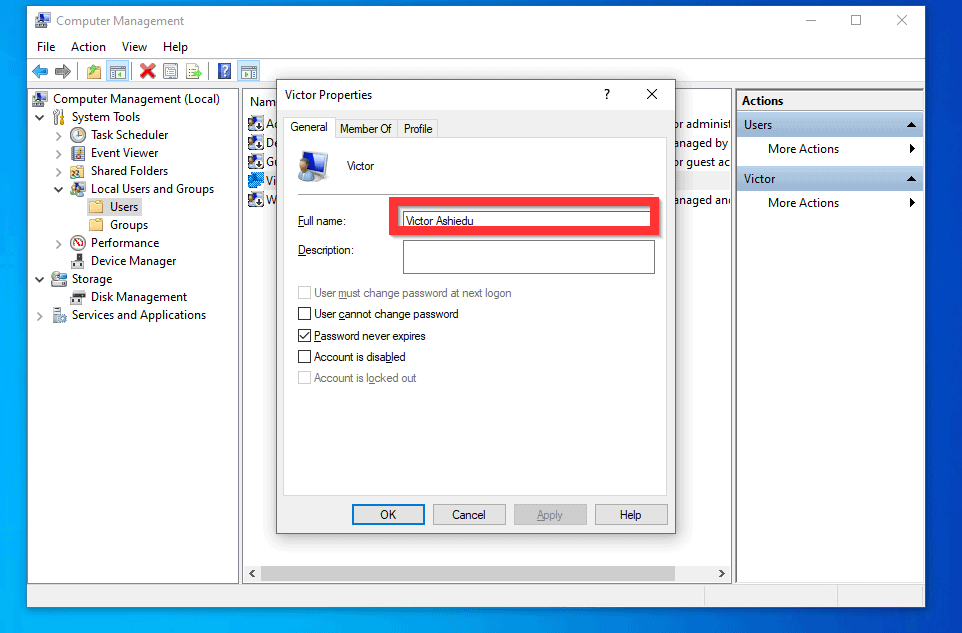
- To change the full name of the user, right-click the name and select Properties.
- When the user’s account Properties open, change the Full name and click OK.
It is very easy to change account name on Windows 10!
I hope you found this Itechguide helpful. If you did, click on “Yes” beside the “Was this page helpful” question below.
You may also express your thoughts and opinions by using the “Leave a Comment” form at the bottom of this page.
Finally, for more Windows 10 Itechguides, visit our Windows How-To page.


![How To Run Sysprep (Generalize) In Windows 10 [2 Methods]](https://www.itechguides.com/wp-content/uploads/2022/05/8-2.webp)