Do you wish to add a WhatsApp button or widget on your WordPress site but don’t know how? You have come to the right place, as this guide teaches how to accomplish that.
Option 1: Integrating WhatsApp Using the “Click To Chat” Plugin
Click To Chat is a free WordPress plugin that allows you to add a WhatsApp button to your WordPress website. Hence, using this plugin, your visitors can contact you on WhatsApp directly from your WordPress website with the click of a button.
Thus, in the first sub-section below, I will provide steps to install this plugin on your WordPress website. However, in the second sub-section, you will learn how to use the plugin to add a WhatsApp button on your site.
Step 1: Install the Click To Chat Plugin
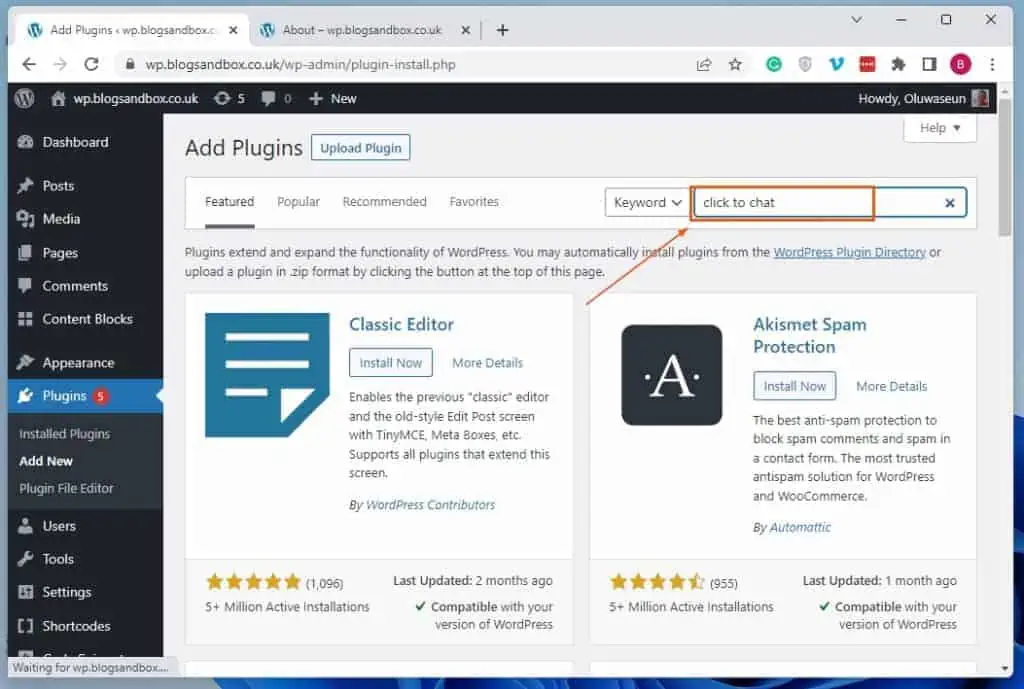
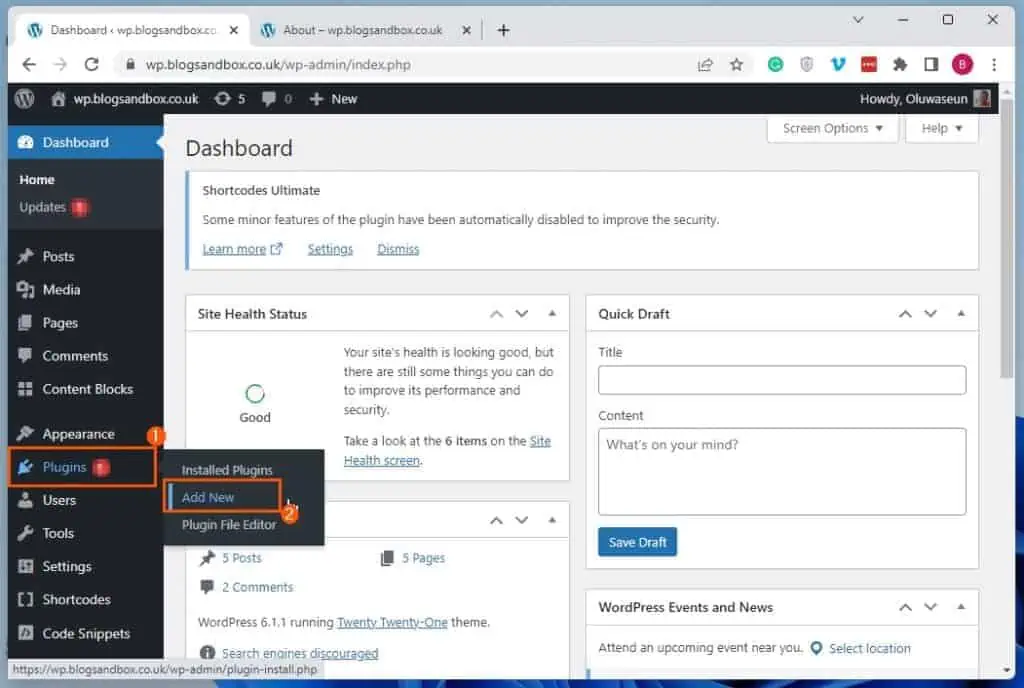
- As an administrator, log in to the backend dashboard of your WordPress site. On the left pane of the dashboard, hover your mouse pointer on Plugins and select Add New.

- Then, input “click to chat” in the search field on the Add Plugins page.
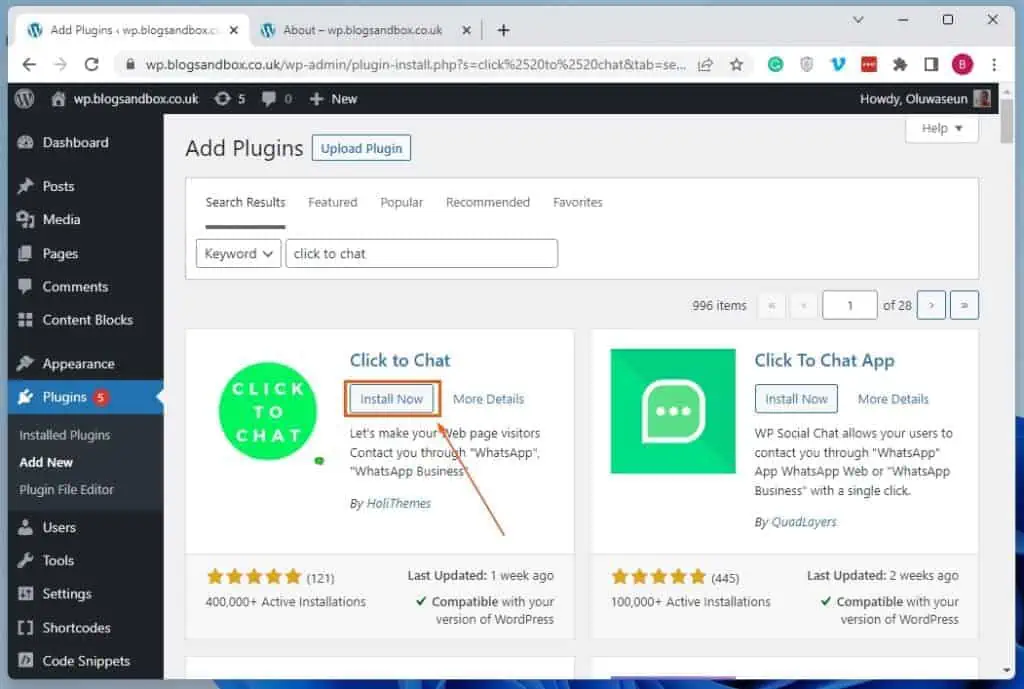
- After doing that, click the Install Now button of the Click to Chat plugin from the search result.
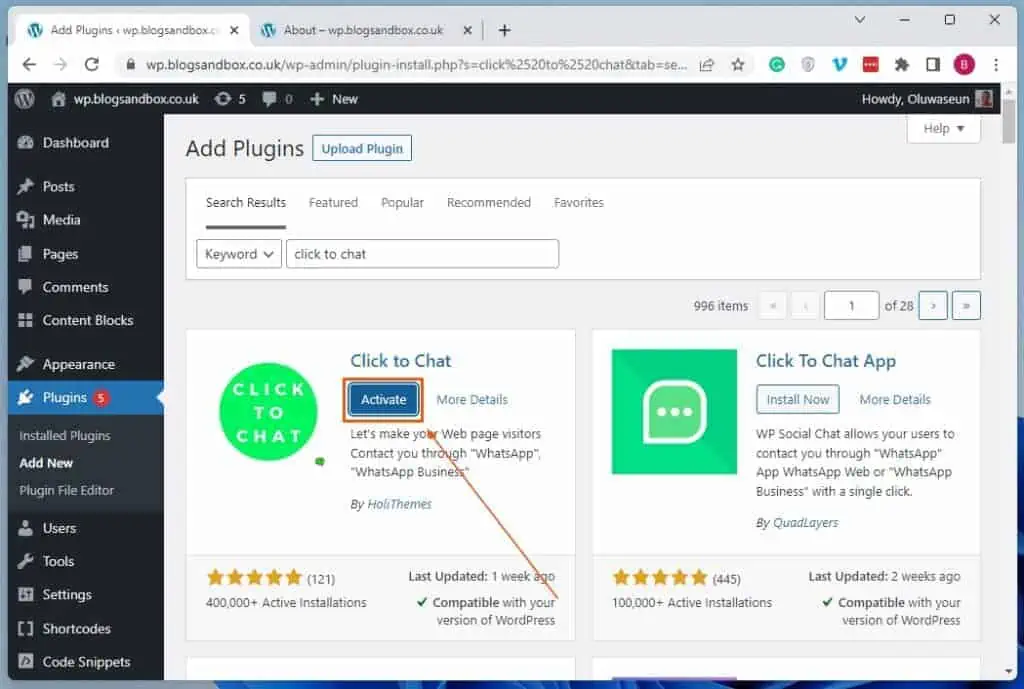
- After successfully installing the Clik to Chat plugin, click the Activate button to enable it on your WordPress site.
Step 2: Integrate WhatsApp Chat Using the Click To Chat Plugin
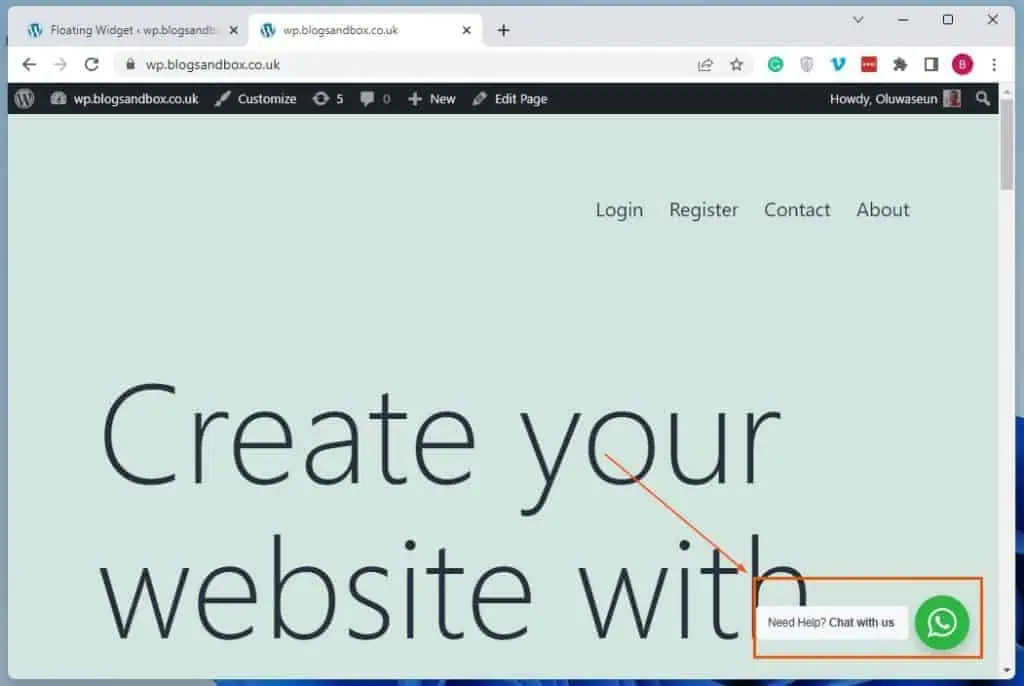
After activating the plugin on your WordPress site, a WhatsApp button should automatically appear on your site’s front end (live website). However, the button won’t be functional as no WhatsApp number is linked to it.
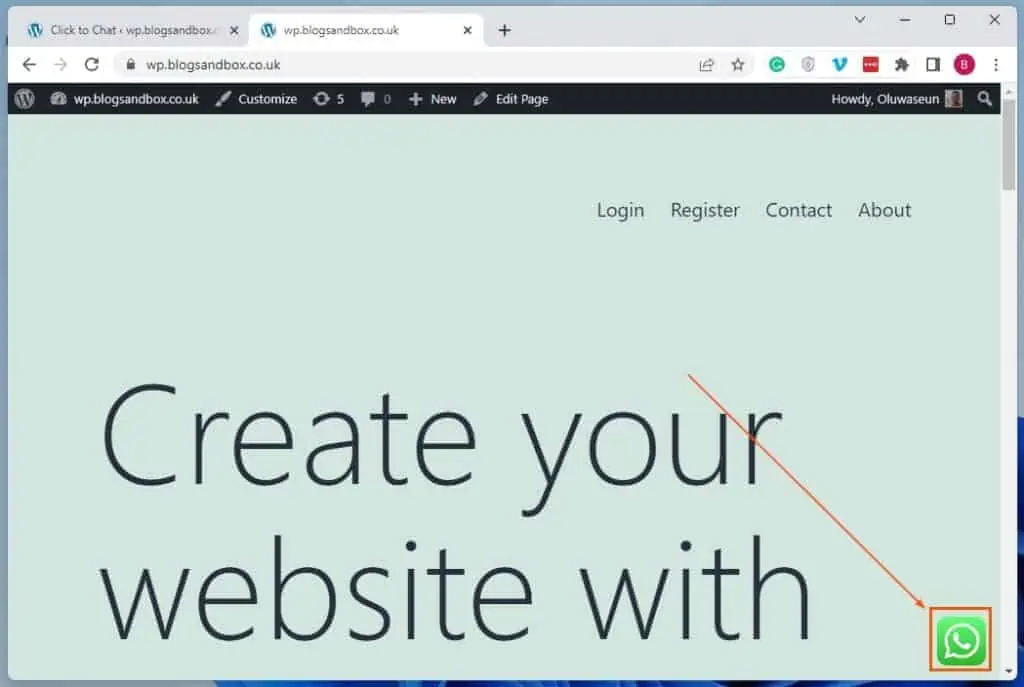
So, to link a WhatsApp number to the WhatsApp button, follow the procedures below.
- Login to your WordPress site’s backend as an administrator. Then, click Click to Chat among the options on the left pane.

- On the Click to Chat – Chat Settings page, input the WhatsApp or WhatsApp business number you want to link to the WhatsApp button in the WhatsApp Number input box.
You can also include a call to action and a pre-filled message for the button.
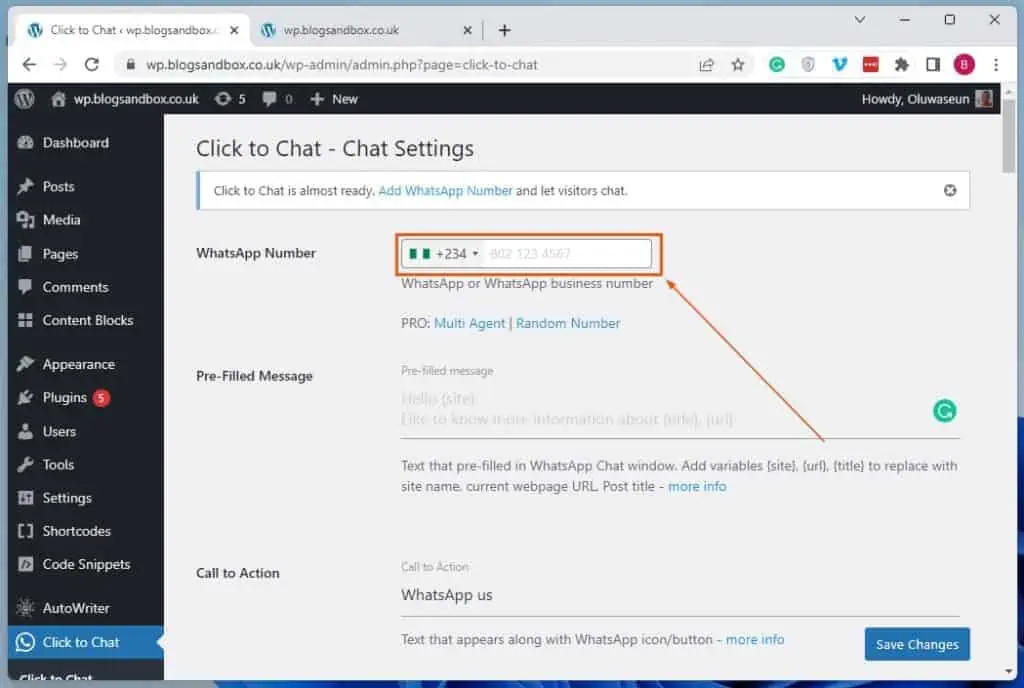
- After doing all that, click the Save Changes button at the bottom right corner of the page.

Option 2: Link WhatsApp Chat Using the WP Chat App Plugin
Another free plugin that allows users to add a WhatsApp button/widget on their WordPress website is the WP Chat App plugin. As a matter of fact, unlike the Click To Chat plugin, this plugin offers more features.
For instance, the plugin allows you to link multiple WhatsApp numbers to a single WhatsApp button. Follow the procedures in the first sub-section below to learn how to install this plugin on your WordPress site.
Meanwhile, the second sub-section will teach you how to use the plugin to add a WhatsApp button on your WordPress site.
Step 1: Install the WP Chat App Plugin
- Using an administrator account, log in to the backend of your WordPress site. Then, hover your mouse cursor on Plugins among the menus on the left pane and select Add New from the displayed options.
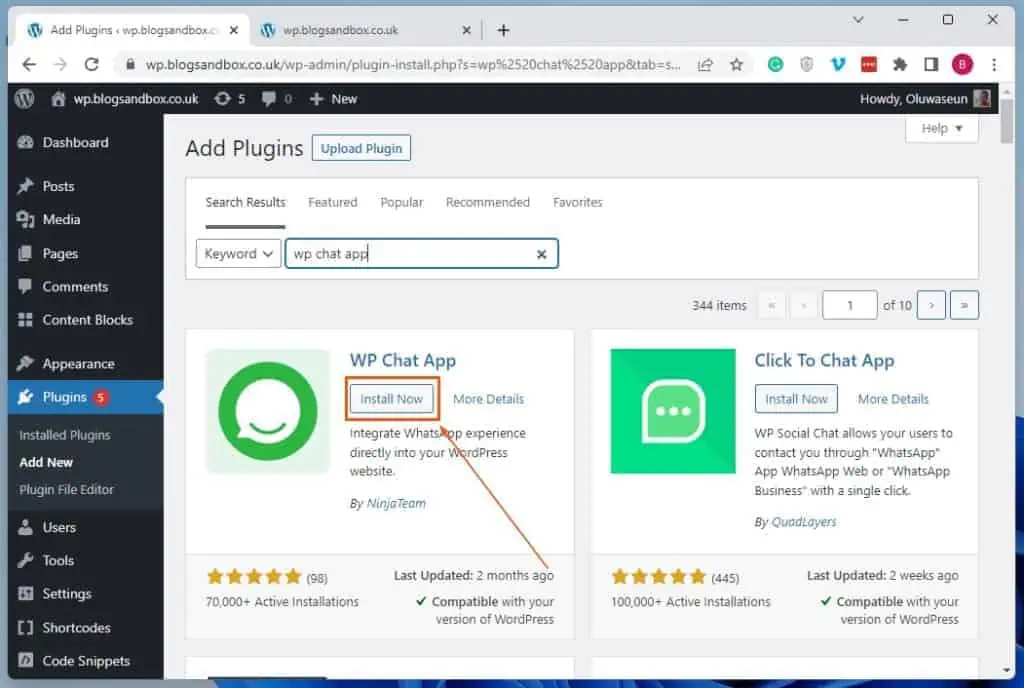
- After doing that, input “wp chat app” in the search box on the Add Plugins page.
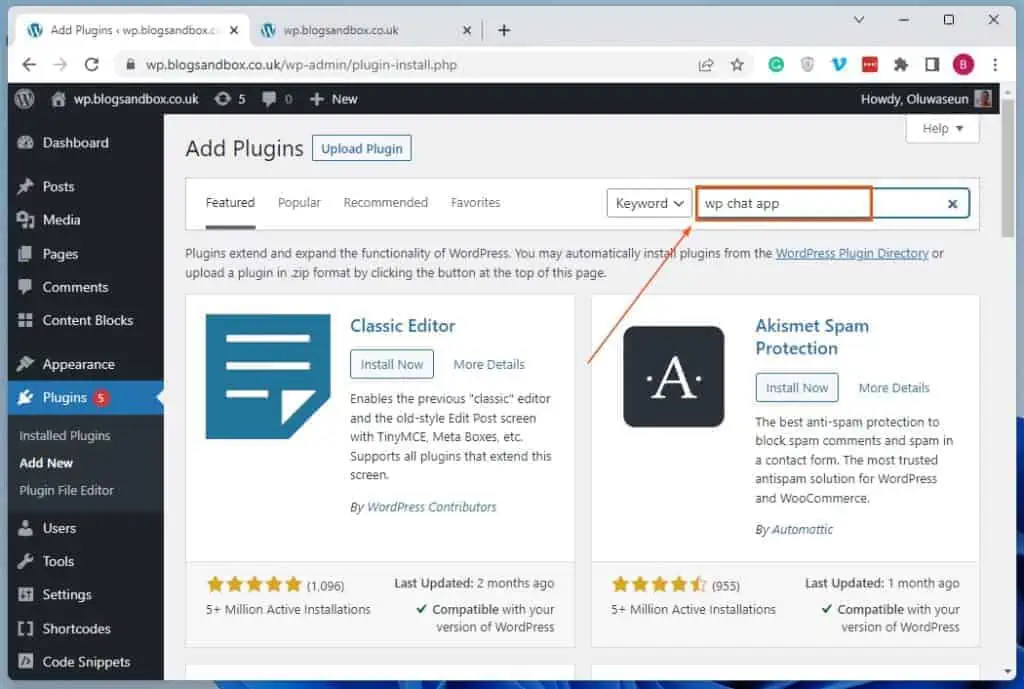
- From the search result, click the Install Now button of the WP Chat App plugin.
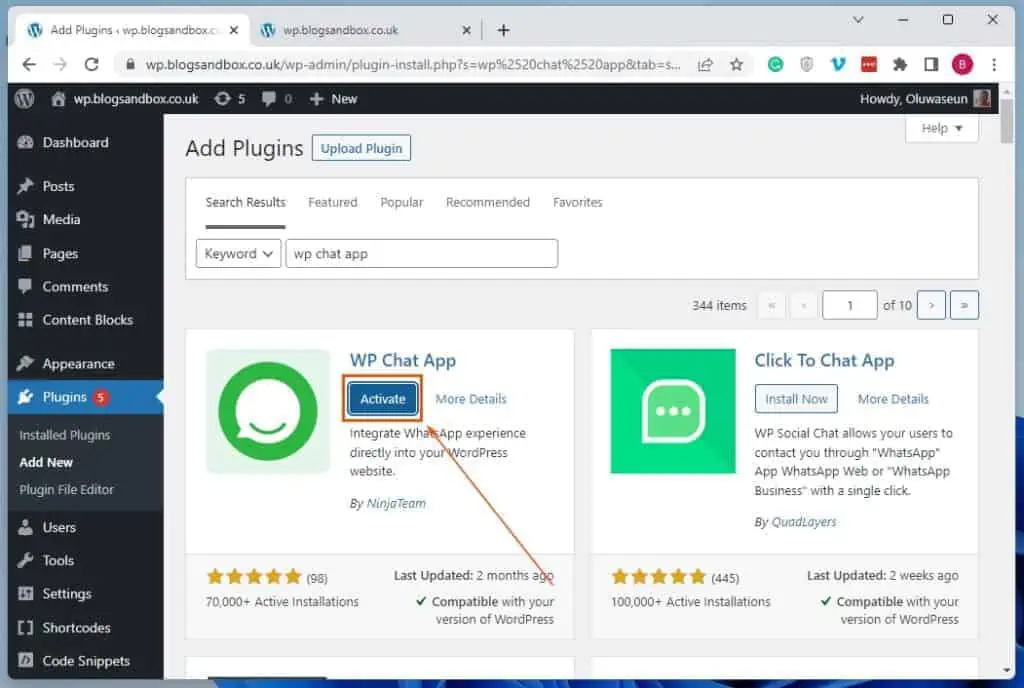
- Following that, click the Activate button to enable the plugin on your site.
Step 2: Integrate WhatsApp With the WP Chat App Plugin
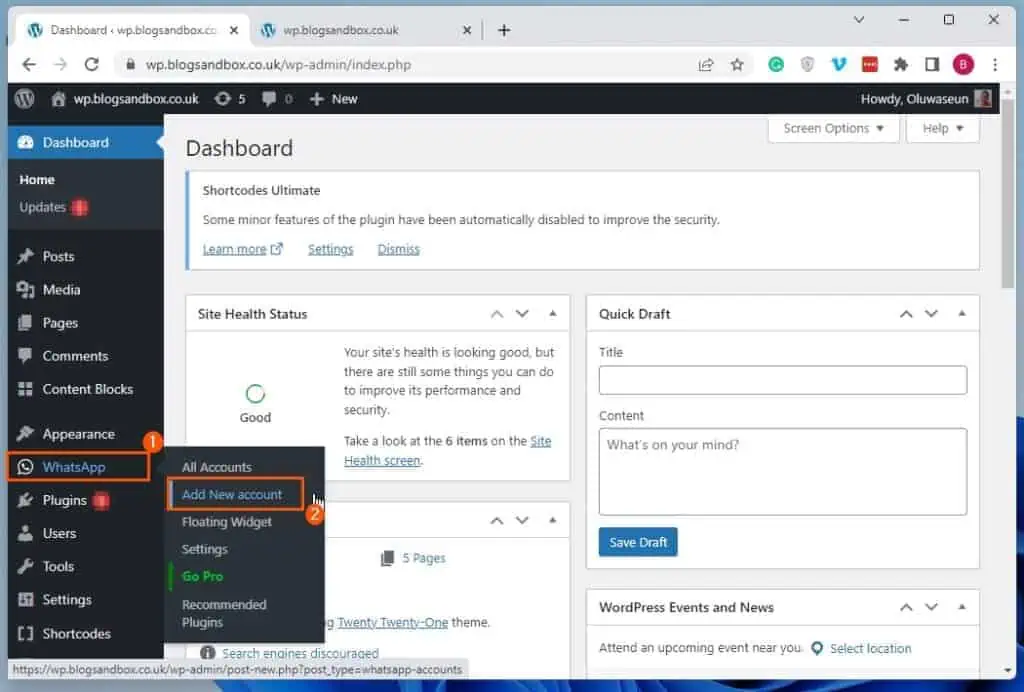
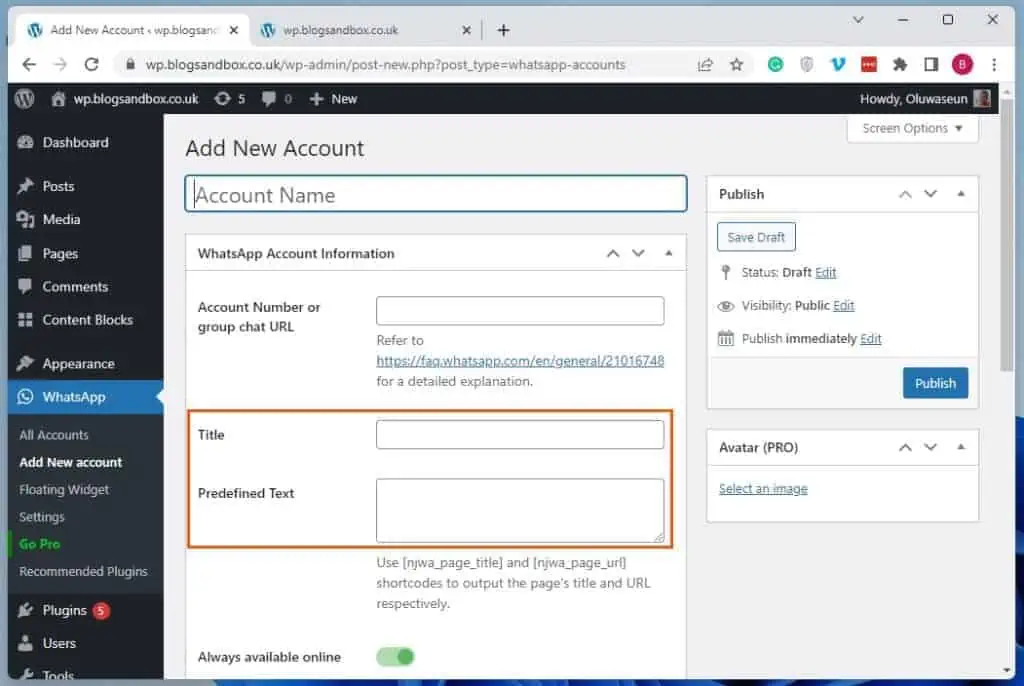
- After activating the WP Chat App plugin, ensure you are logged in to your WordPress site’s backend as an administrator. Then, hover your mouse cursor on WhatsApp on the left pane and select Add New account from the displayed options.
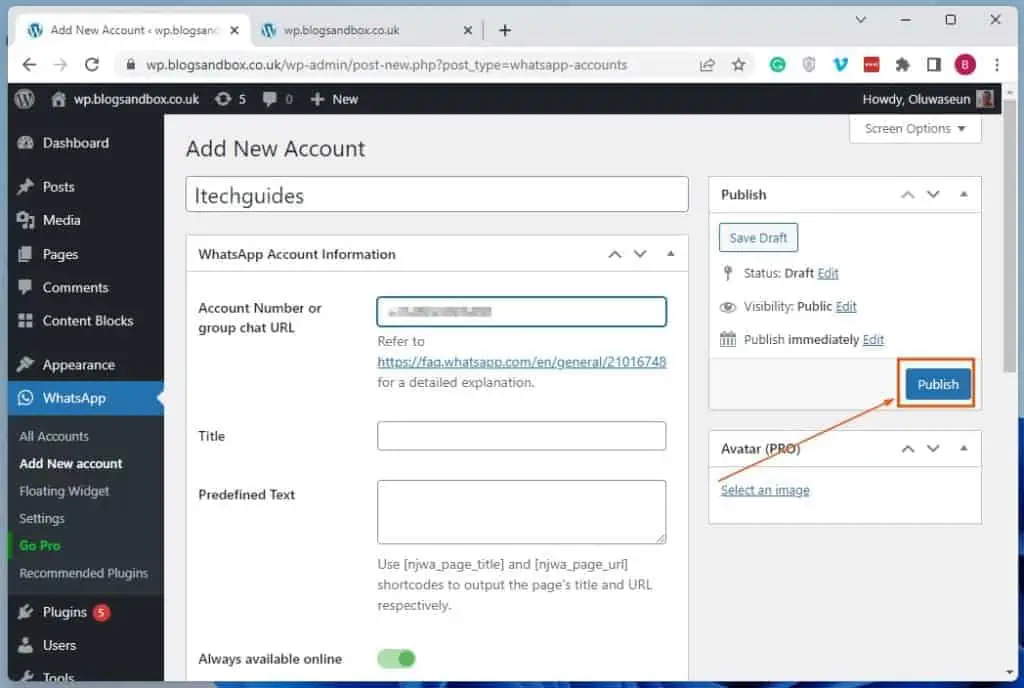
- Next, input a name for a WhatsApp account you want to link to the WhatsApp button in the Account Name input box. After that, input the WhatsApp account number in the Account Number or group chat URL box.
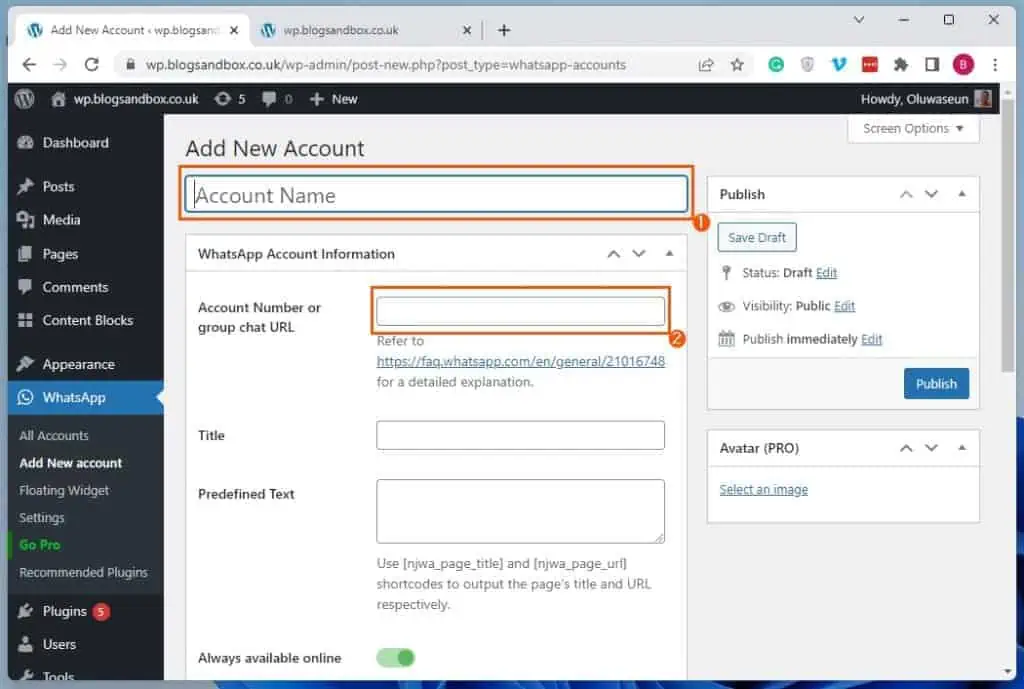
- When you’ve done all that, click the blue Publish on the right side of the page to save the account.
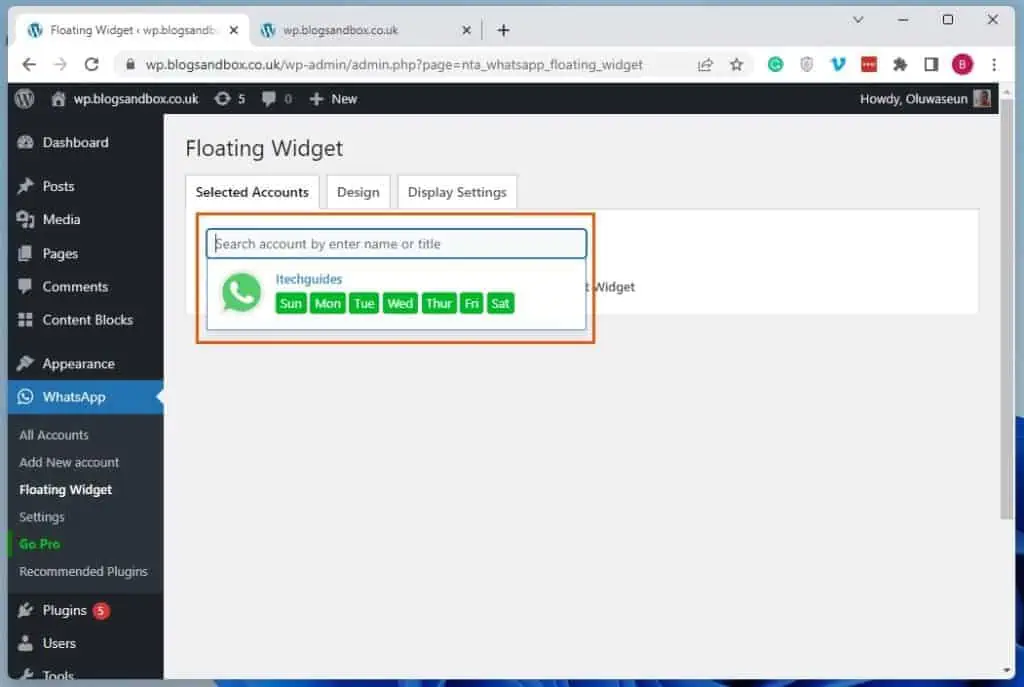
- Now, to link the account you created to the WhatsApp button/widget, click Floating Widgets under WhatsApp on your WordPress backend’s left pane.

- Afterward, click the search box in the Selected Accounts tab on the Floating Widget page. Then, select the WhatsApp account you want to link to the WhatsApp button/widget from the options that appear.
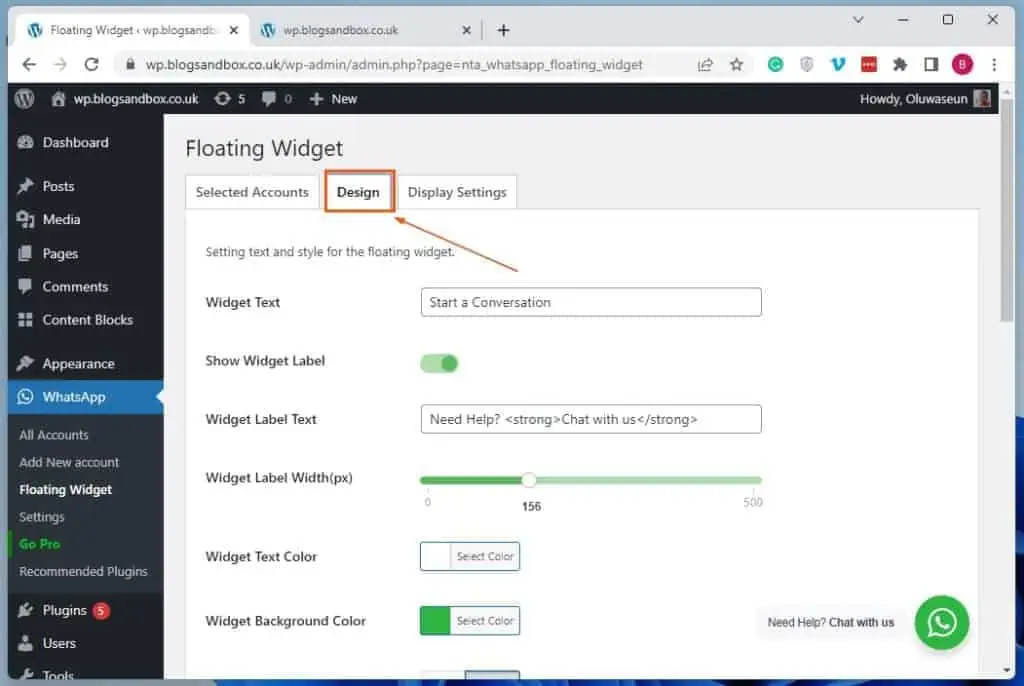
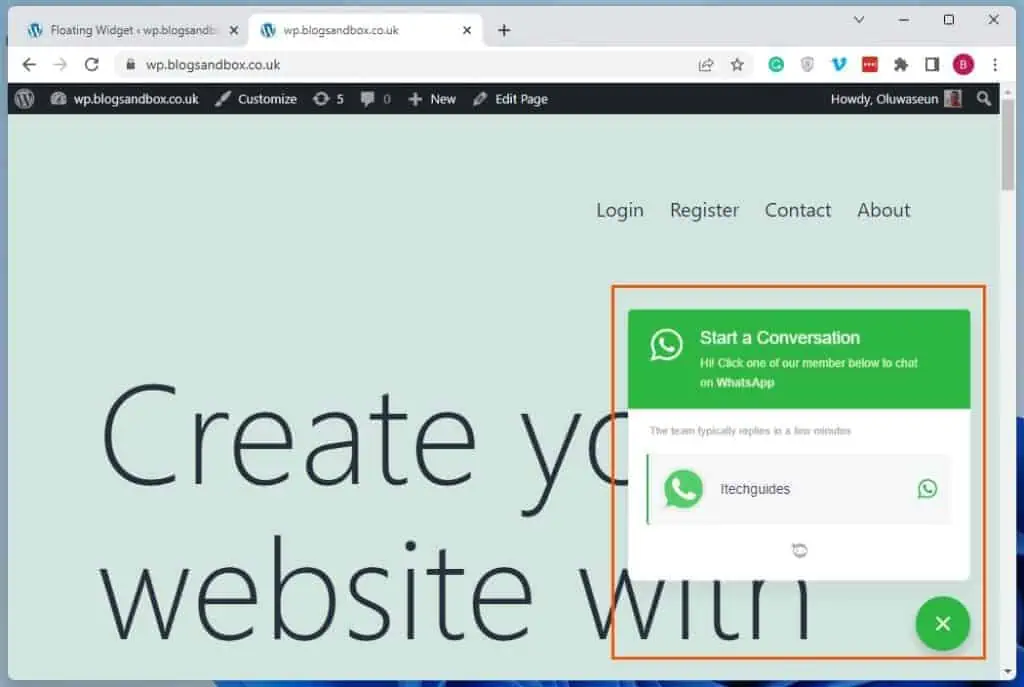
- Finally, the WhatsApp button/widget should appear on your site’s front end (live website). Hence, whenever someone clicks the button, he/she can select the WhatsApp account(s) linked to the button – see the second screenshot.
Frequently Asked Questions
Yes, you can use WhatsApp on your web browser.
Although they are very similar, WhatsApp Web and WhatsApp Desktop are not the same. To be more specific, WhatsApp Web is a browser-based application for WhatsApp.
Meanwhile, WhatsApp Desktop is the official application that you download from a store to use WhatsApp on your computer. Nonetheless, WhatsApp Web and WhatsApp Desktop are computer-based extensions of the WhatsApp account on your smartphone.
You can use several plugins to add a WhatsApp button on your WordPress website. For instance, you can use the WP Chat App plugin or the Click to Chat plugin.
Follow the procedures below to download the WP Chat App plugin on your WordPress site.
a) Using an admin account, log in to the backend dashboard of your WordPress site.
b) Then, hover your mouse cursor on Plugins among the menus on the left pane and select Add New from the displayed options.
c) After doing that, input “wp chat app” in the search box on the Add Plugins page.
d) From the search result, click the Install Now button of the WP Chat App plugin.
e) Following that, click the Activate button to enable the plugin on your site.
Yes, WhatsApp Web is totally free to use.
Conclusion
WhatsApp is a free instant messaging application that is available in most countries. Hence, it is a great means of communication between you and your WordPress website visitors.
However, WordPress doesn’t have a built-in feature that allows users to add a WhatsApp button to their site. Nonetheless, there are several free plugins you can use to accomplish that.
Fortunately, this guide demonstrated how to install and use two of these plugins to add a WhatsApp button/widget to your WordPress site. These plugins are the Click To Chat plugin and WP Chat App Plugin.
I hope you were able to add a WhatsApp button/widget on your WordPress site with the procedures provided in this guide. If you were, click on “Yes” beside the “Was this page helpful” question below.
You may also express your thoughts and opinions by using the “Leave a Reply” form at the bottom of this page.
Finally, visit our WordPress & Websites How-To page to get more helpful WordPress guides.
![WordPress Lost Password Redirects to Page Not Found [Fixed]](https://www.itechguides.com/wp-content/uploads/2024/03/WordPress-Lost-Password-Redirects-to-Page-Not-Found-Fixed.webp)