You can boot Windows Server 2016 to Recovery mode by interrupting the server boot 3 times or via the installation media. Read the details below.
Why Boot to Recovery Mode?
There are so many reasons you may want to boot Windows Server 2016 Recovery Mode:
- Fix Boot errors
- Uninstall problematic Windows updates
- Restore the server to a previous restore point
- Access Safe Mode boot options
Option 1: Boot to Recovery Mode By Interrupting the Boot
If you don’t have access to a Windows Server 2016 installation media (DVD or USB) you can still boot to Recovery Mode.
Here are the steps:
- Press the power button to boot your server. When the white circles start displaying, press the power button to power off the server.

- Power up the server again. Then turn it off when the boot circles show up.
- When you start the server the third time, it will initiate Preparing Automatic Repair. This may take between 2 to 5 minutes (depending on your server). Wait…
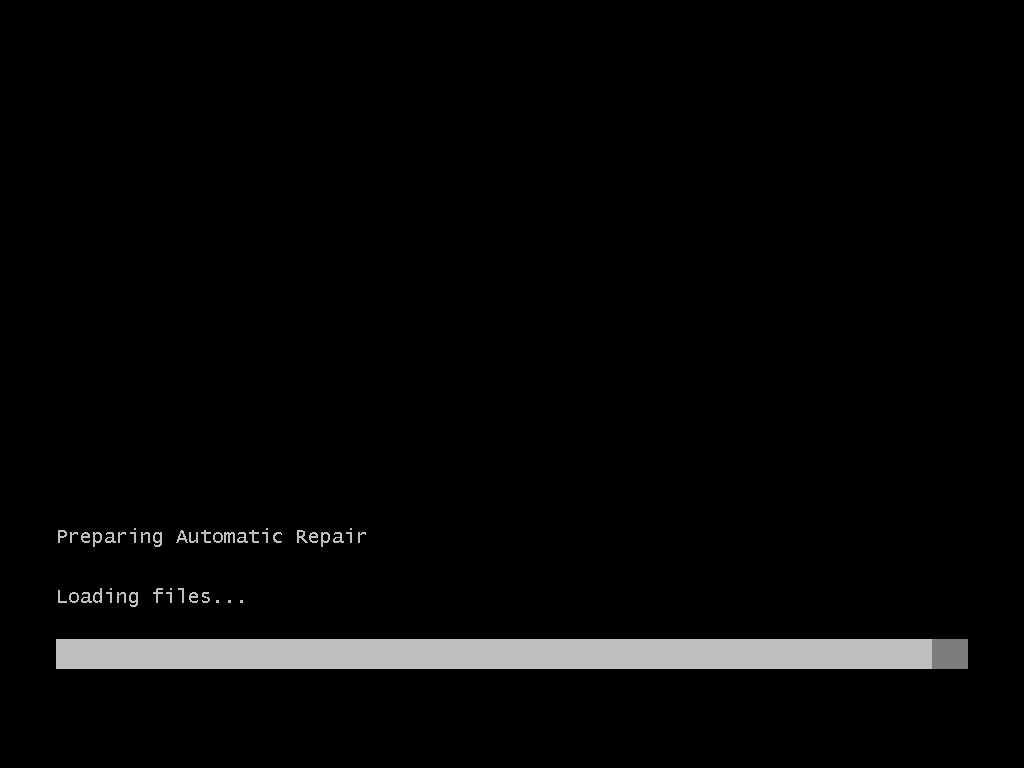
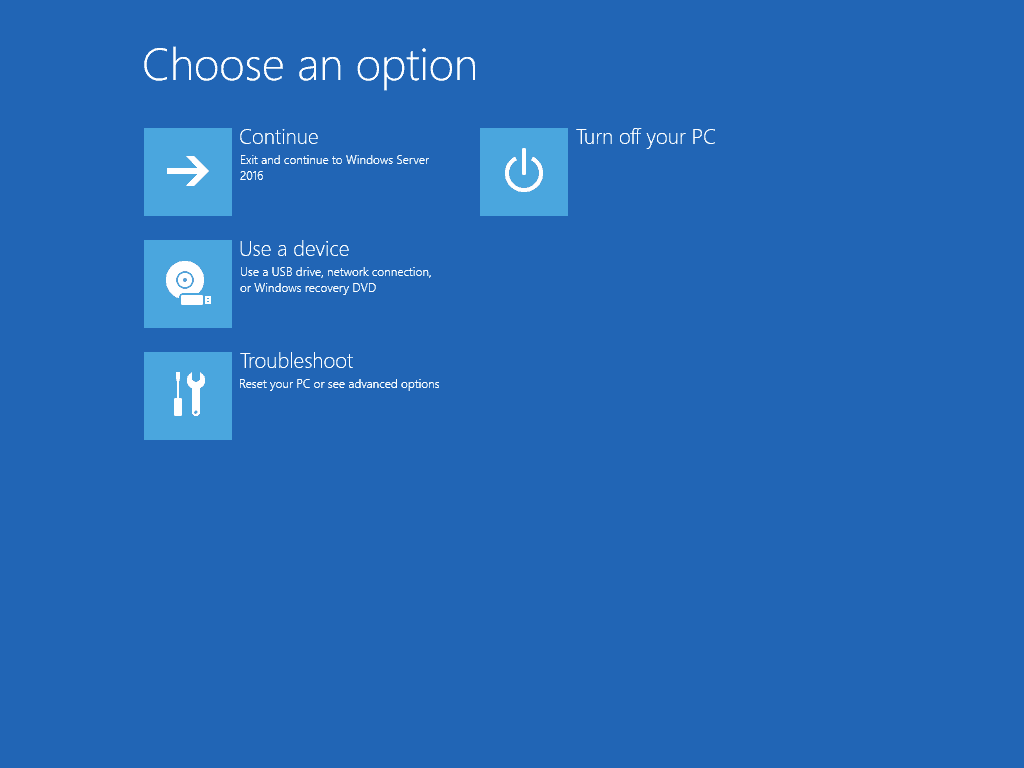
- Then it will boot to Recovery Mode! To display recovery mode options, click Troubleshoot.

- When you click Troubleshoot, Advanced options screen below will display.
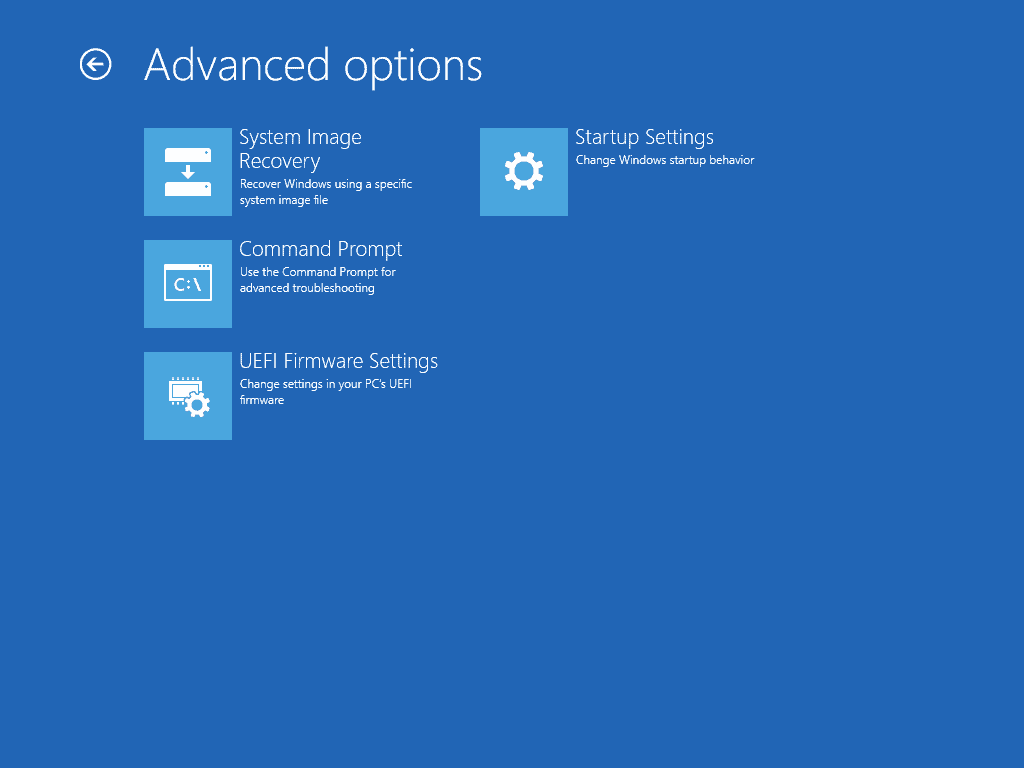
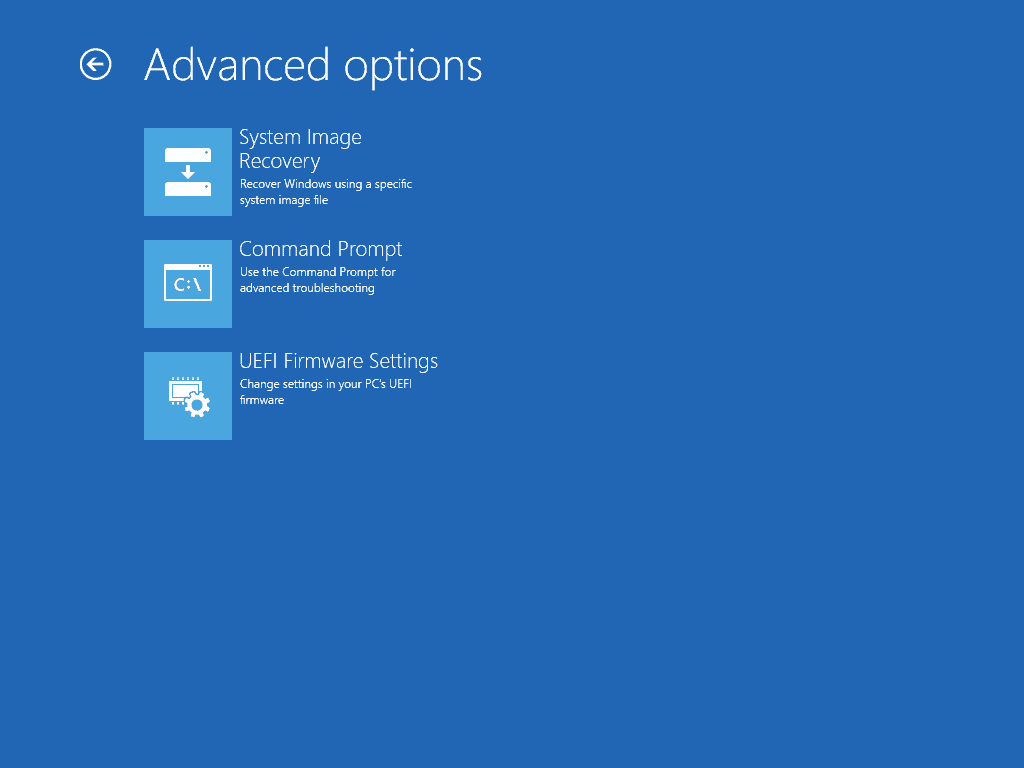
The options are explained below:
- System Image Recovery: Click this option if you previously enabled system restore and have available restore points.
- Command Prompt: This will load a command prompt. You can then run cmd commands. One very useful command to fix most problems is DISM.exe /Online /Cleanup-Image /Restorehealth.
- UEFI Firmware Settings: When you click this option, your server will boot to UEFI BIOS.
- Startup Settings: This is one hidden gem! This gives you options to display Safe mode boot options.
The next section demos how to boot Windows Server 2016 to Recovery mode with a Server 2016 installation media.
Option 2: Boot to Recovery Mode from Installation Media
To boot to Recovery mode using a Server 2016 DVD or USB:
- Insert the media into your server (USB or DVD)
- Then modify your boot sequence to boot from the above media first
- Power up your server. Watch out for this screen to confirm boot from CD or DVD. Then pres any key to continue.

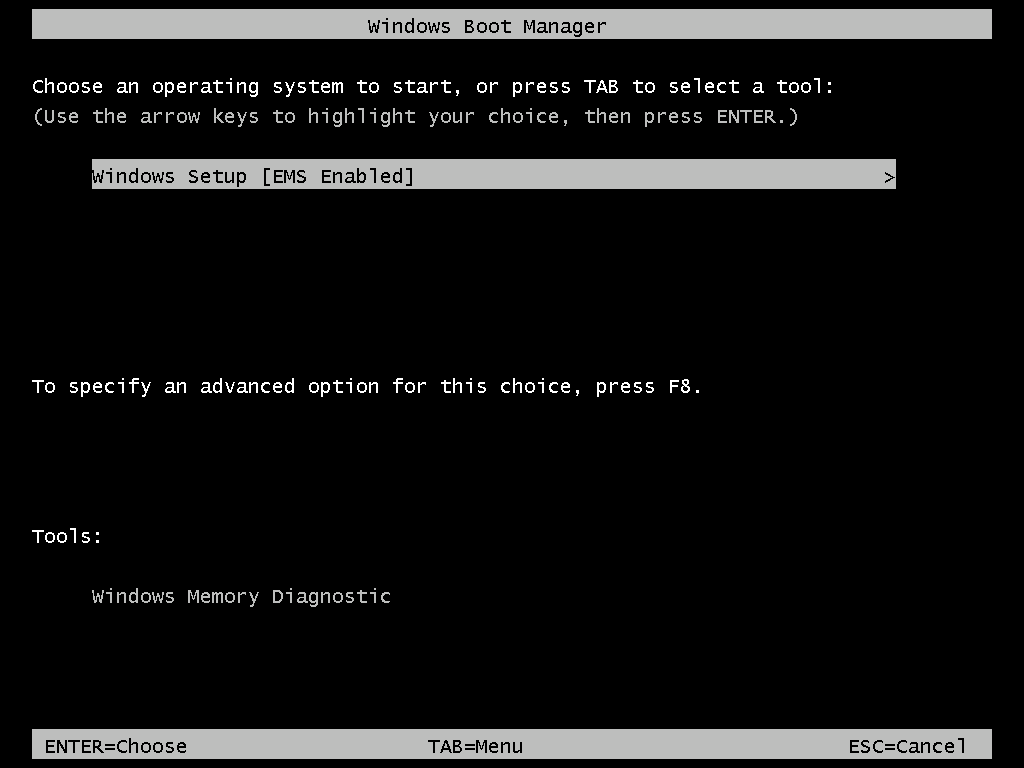
- At Windows Boot Manager, select Windows Setup [EMS Enabled]. Then press Enter on your keyboard.
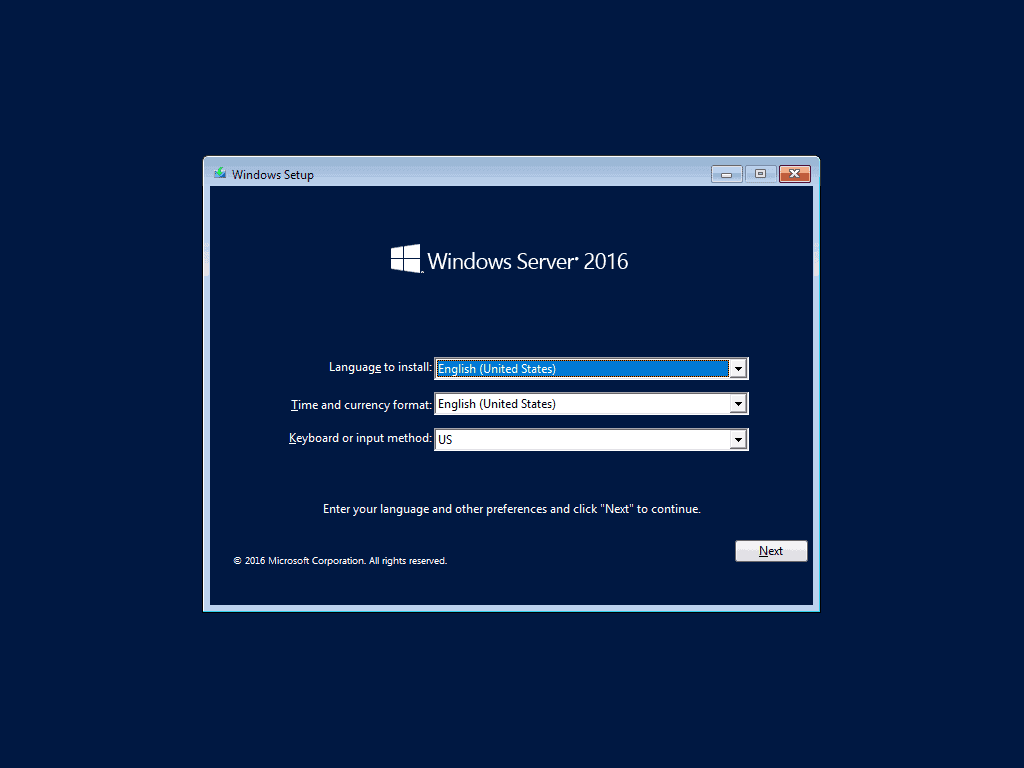
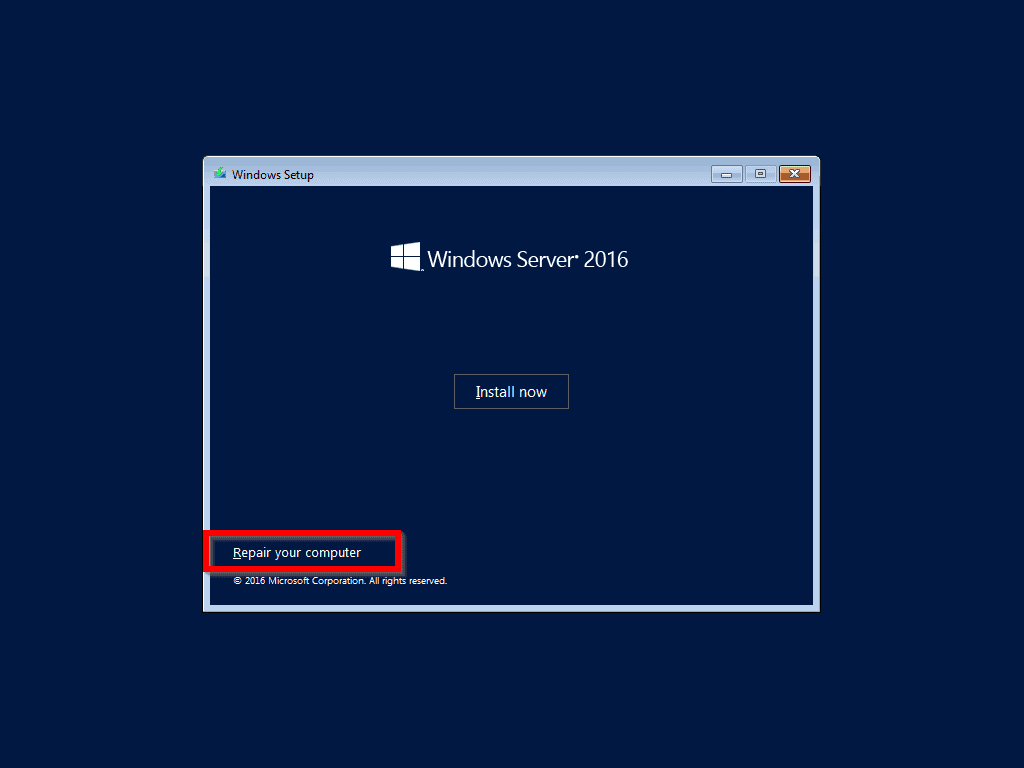
- At Windows Server 2016 installation screen, click Next.
- Then click Repair your computer.
- After a about a minute, Recovery Mode will be displayed. This is the same page from booting to Recovery Mode using the first method.
- Like in the first method, to display more Recovery Mode options, click Troubleshoot. But, as you can see this offers less repair options. It offers the first 3 options but Startup Repair is not included.
Conclusion
As discussed in this guide you can boot Windows Server 2016 to recovery in two ways: 1, by interrupting normal boot twice. 2, Booting from Windows Server 2016 installation media.
Both methods offer you 3 options: System Image Recovery, Command Prompt, and UEFI Firmware Settings.
However, the first method offers one additional option – Startup Repair. This is used to boot Windows Server 2016 to safe mode.
I hope you found this article helpful. If it was helpful, kindly take two minutes to share your experience by responding to the “Was this page helpful?” question below.
Lastly, for more Server 2016 fixes, visit our Windows Server 2016 page.


Similar fix for Windows Server 2016 Corrupted Boot files.
As above but then :
Click on command Prompt.
Type in the following commands and hit enter after each line of command:
Bootrec /fixmbr
Bootrec /fixboot
Bootrec /scanos
Bootrec /rebuildbcd