For obvious security reasons, setting lock screen timeout in Windows Servers is a necessary best practice. Learn the two methods to do this in Windows Server 2016.
Option 1: Set Lock Screen Timeout From Desktop
Use this option if you want to change Windows Server 2016 Lock Screen Timeout for one server.
If you want to make this change for multiple servers joined to a domain, use the second method below.
Here are the steps for this method:
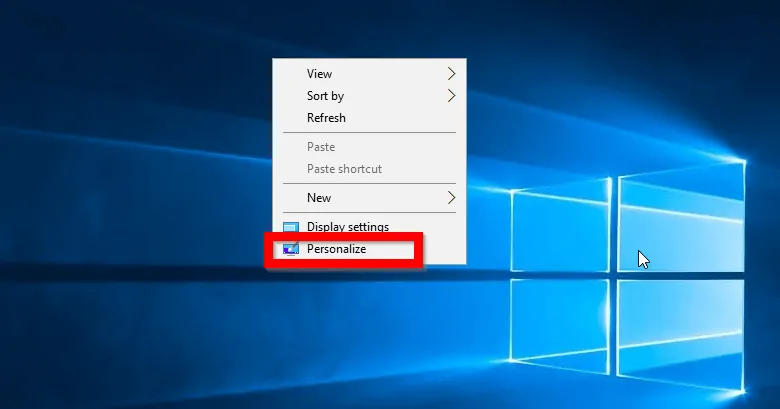
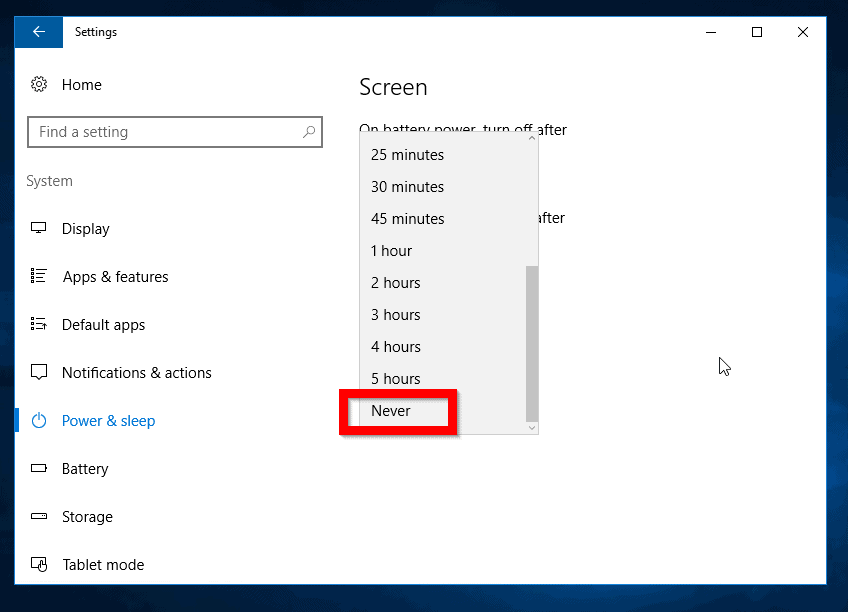
- Login to the server you want to set lock screen time out for. Then right-click anywhere on the desktop and select Personalize.
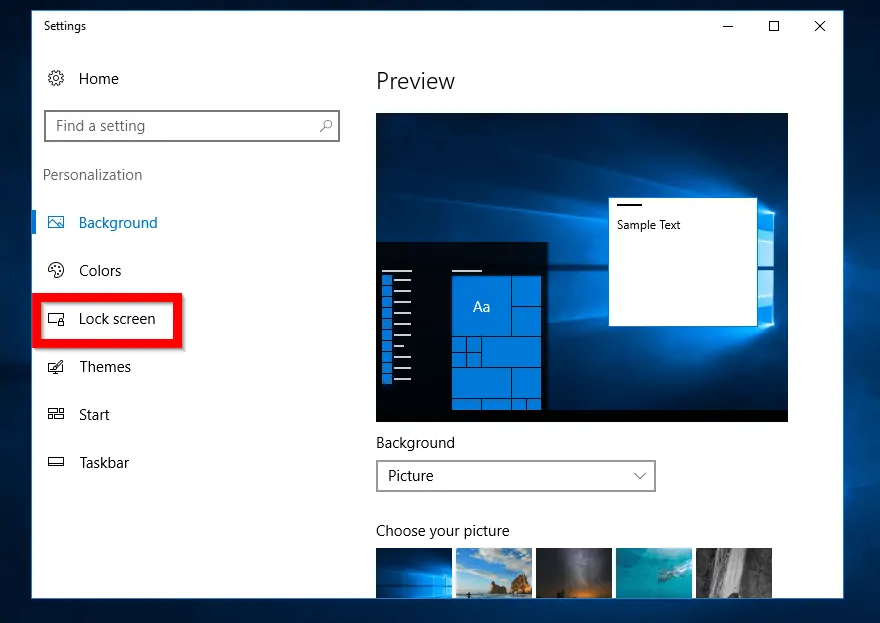
- At the settings screen, click Lock Screen.
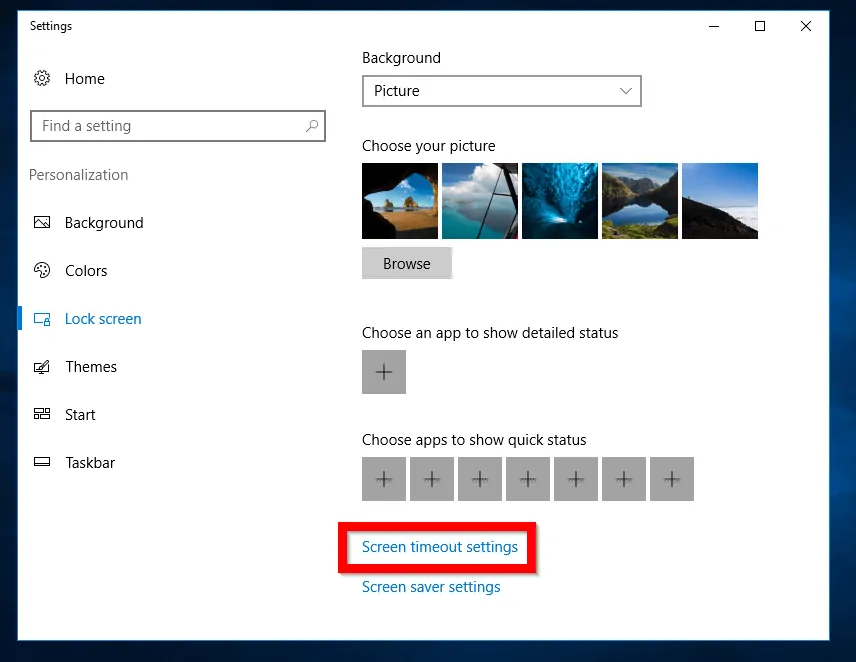
- Then scroll down to Screen timeout settings and click it.
- Finally, set the lock screen timeout behavior. Since most servers are not on battery, the applicable option will be When plugged in, turn off after..
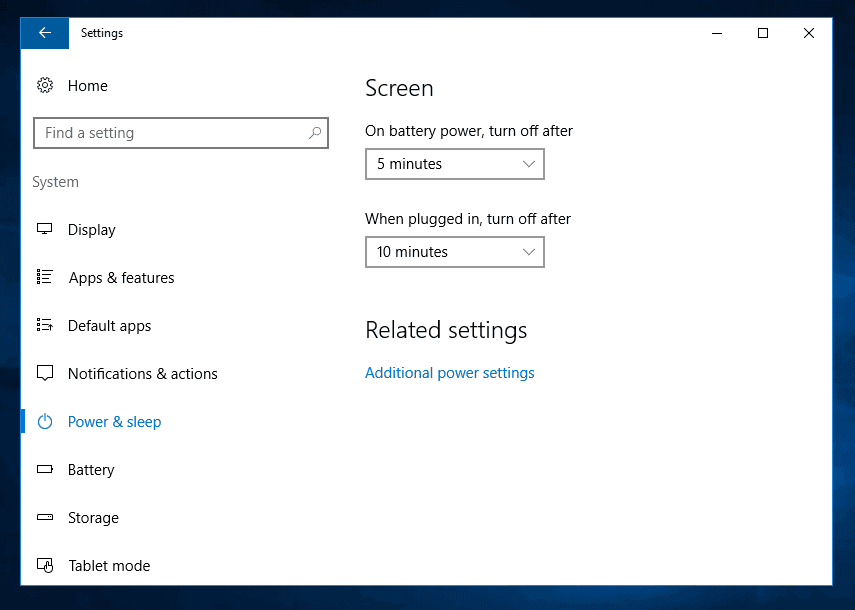
- To disable lock screen timeout completely click the When plugged in, turn off after…drop-down. Then select Never.
Option 2: Set Lock Screen Timeout with Group Policy
As I mentioned in the introduction of this guide, if you need to modify lock screen timeout for multiple servers, this is a better method.
There are 3 parts in this section:
- Create a new GPO
- Edit the GPO
- Link the GPO to an AD Container
Step 1: Create a New GPO
Here are the steps to create a new GPO:
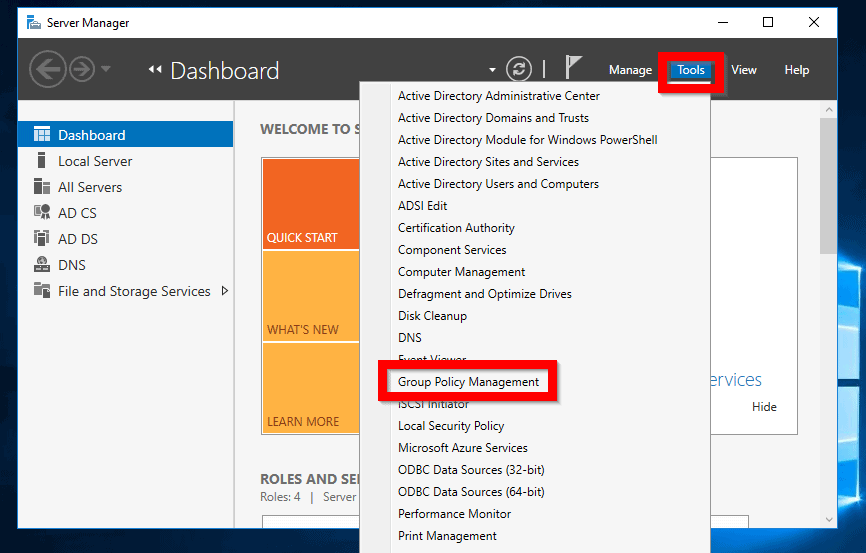
- Login to a Domain Controller and open Server Manager.
- From Server Manager, click Tools. Then Select Group Policy Management.
- When Group Policy Management opens, expand your domain name. Then expand Group Policy Objects container.
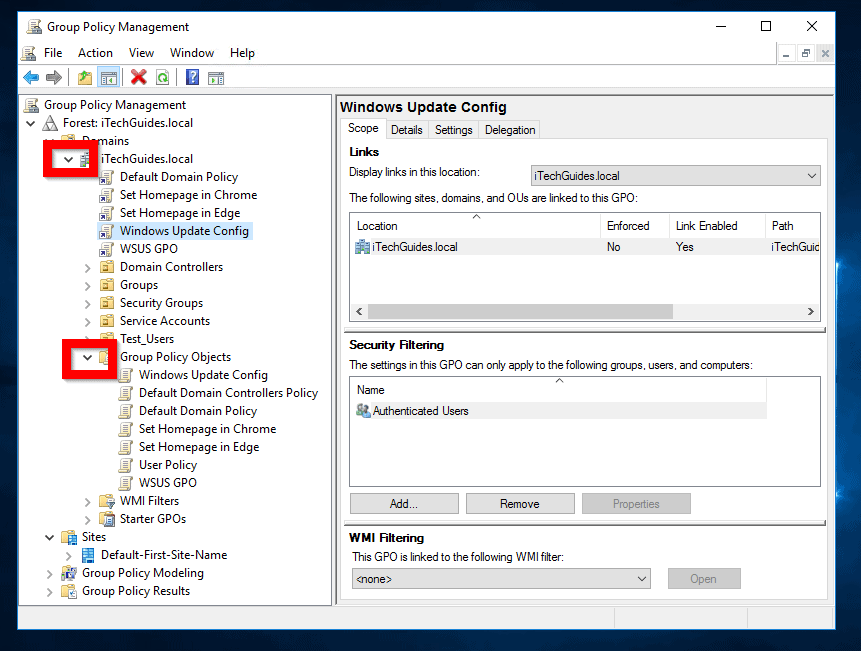
- If you want to use the Default Domain Policy right-click it then select Edit. Alternatively, you can create a new GPO to use to set screen timeout settings for your Windows Server 2016 servers.
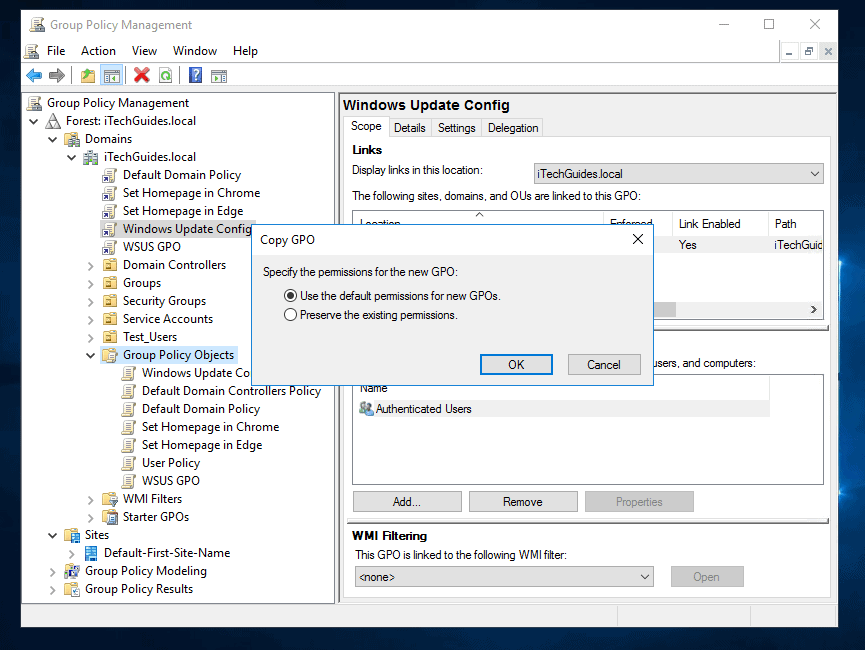
- To create a new GPO on the drag and drop Default Domain Policy to Group Policy Objects container.
- You will receive a Copy GPO prompt. Accept Use the default permissions for new GPOs option. Then click OK. When the copy is complete, click OK (see the second image below).
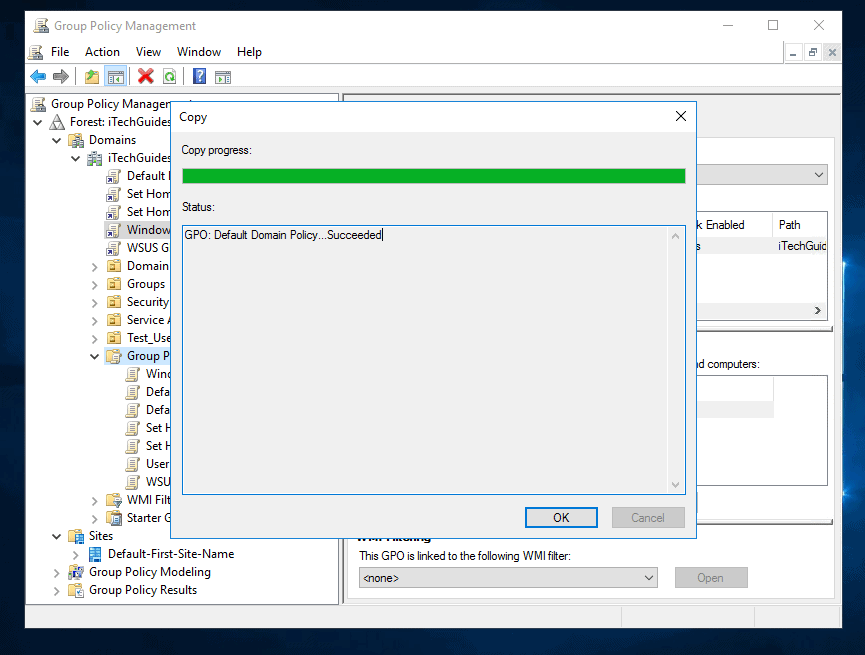
- A new GOP, Copy of Default Domain Policy will be created.
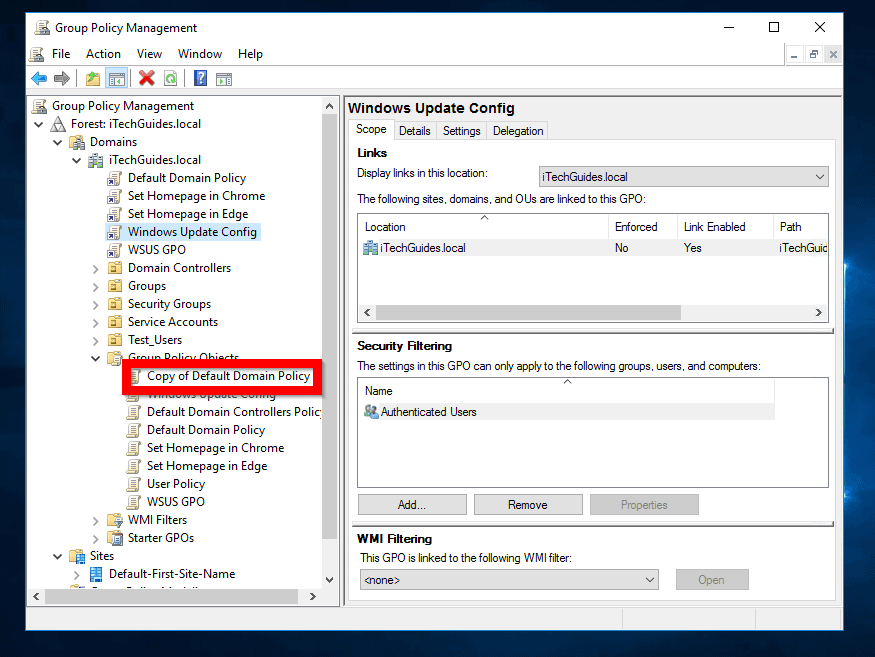
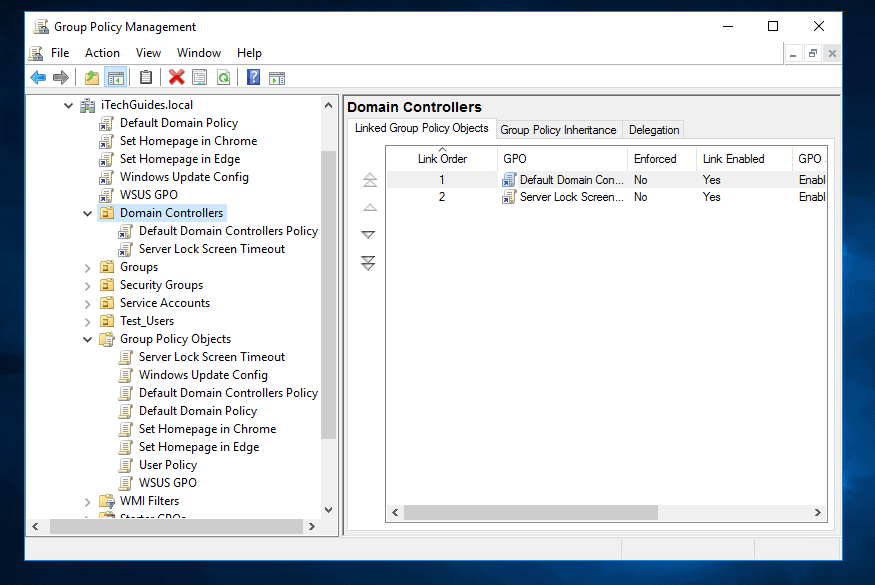
- To rename the new GPO, right-click it. Then select Rename. Then give the GPO a descriptive name (See mine in the second image below).

Step 2: Edit the GPO
After creating a GPO to use for your policy, the next step is to edit the GPO to enable the required policies. Here are the steps:
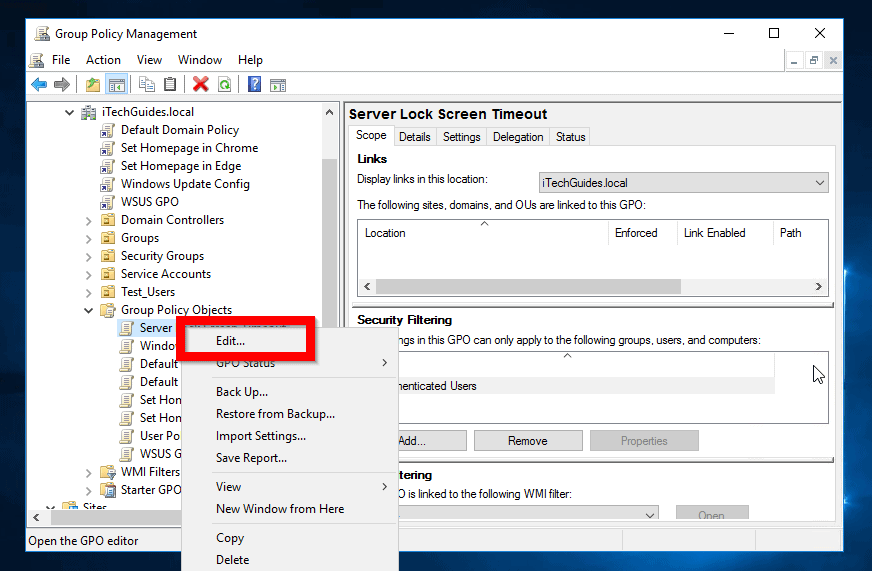
- Right-click the GPO and select Edit.
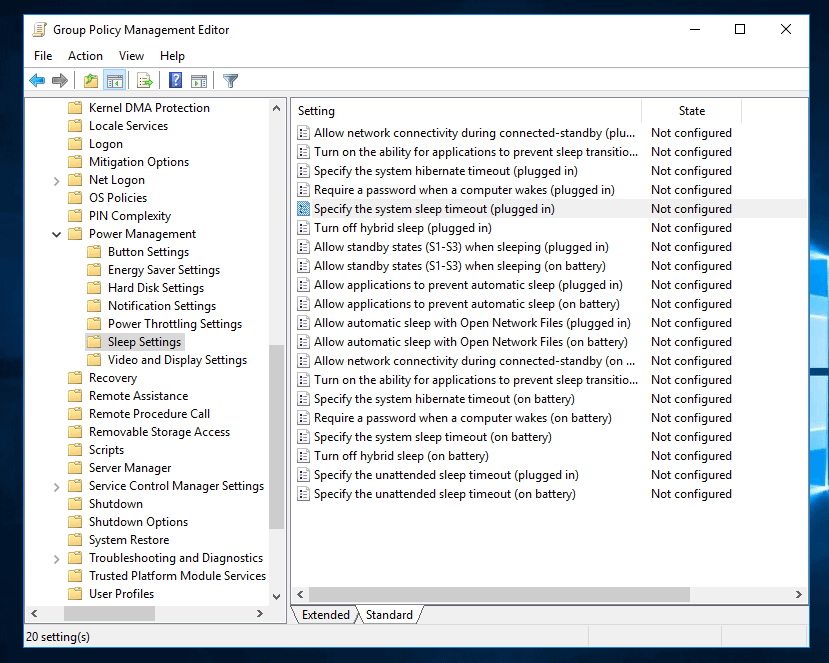
- Then navigate to Computer Configuration -> Policies -> Administrative Templates -> System -> Power Management. Click Sleep Settings. The default view is Extended. To change it, click the Standard tab.
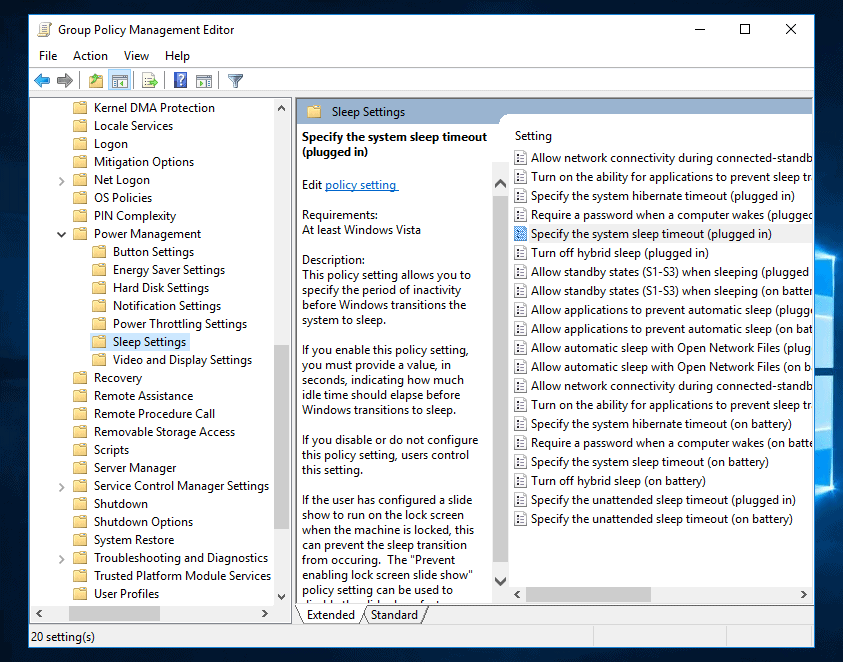
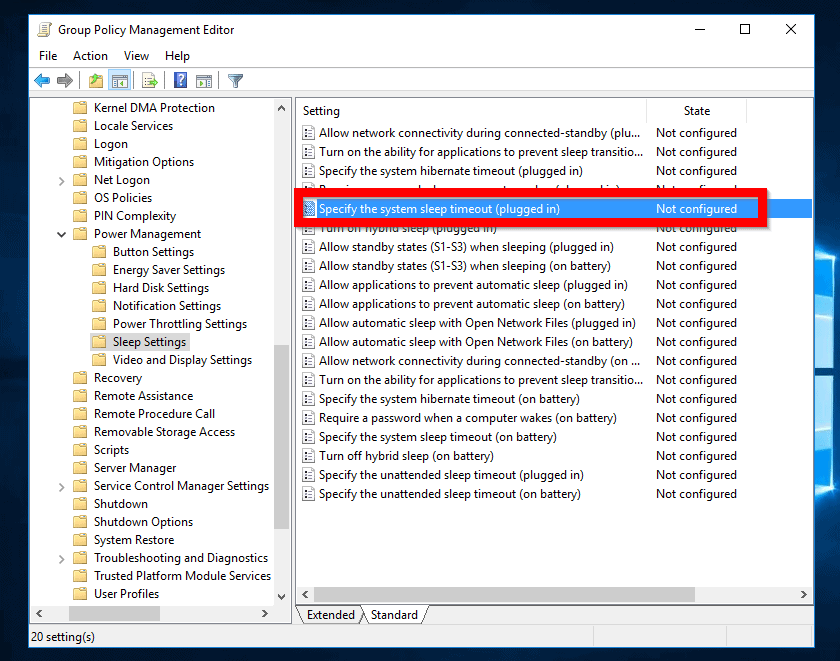
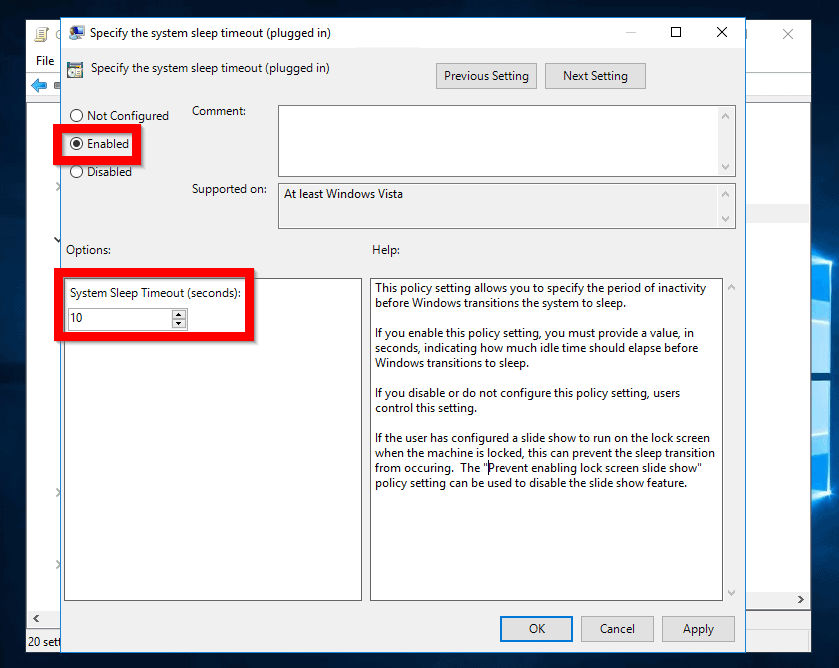
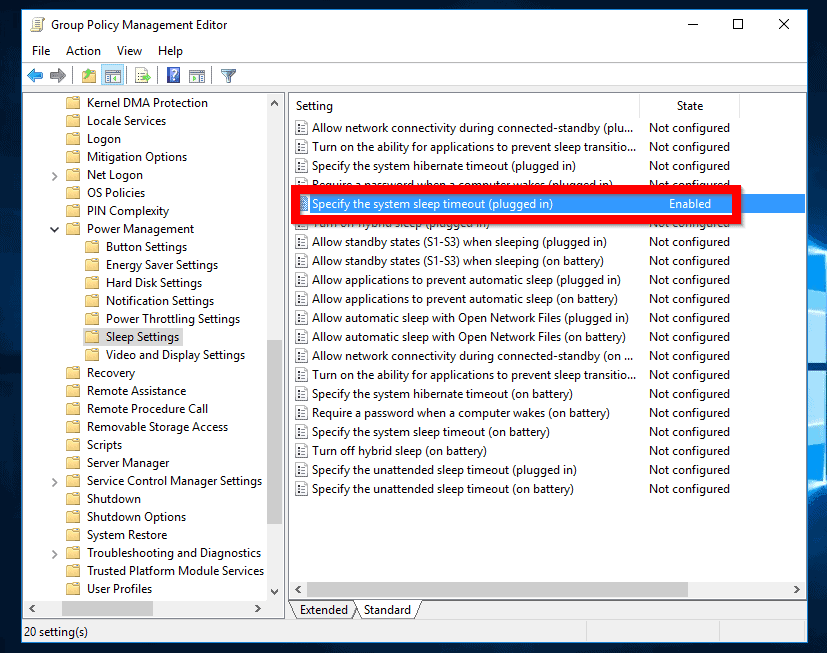
- To configure Windows Server 2016 lock screen timeout, double-click Specify the system sleep timeout (Plugged in) policy.
- When the policy opens, click Enabled. Then on the Options settings, specify the System Sleep Timeout (seconds). When you finish, click Apply, then OK. The policy is now Enabled (See the second image below).
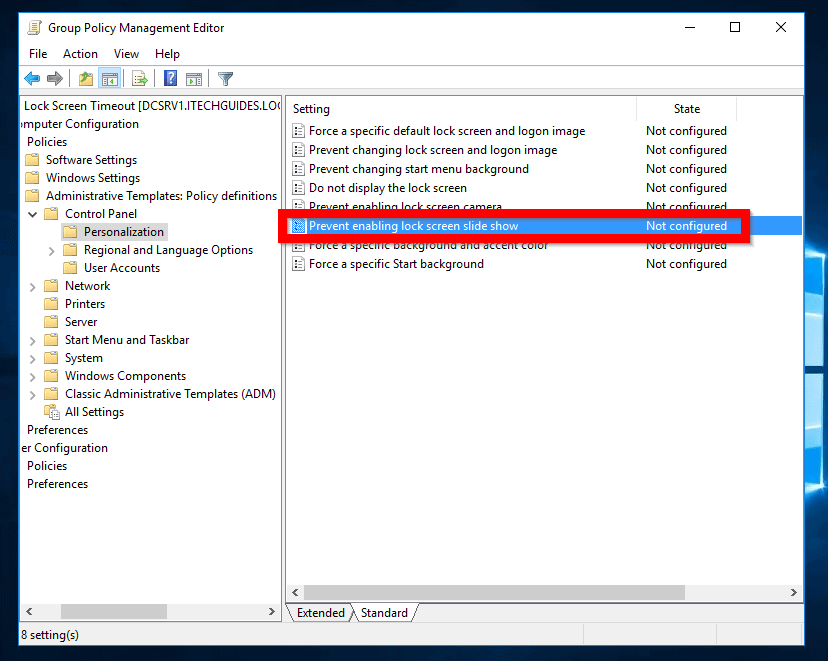
- According to this policy info, to prevent user’s slide show from stopping this policy you need to enable the “Prevent enabling lock screen slide show” policy setting as well.
This policy can be found in the path Computer Configuration -> Administrative Templates -> Control Panel -> Personalization.
Step 3: Link the GPO to an AD Container
Before your GPO can apply to the AD objects (in this example, Windows Server 2016 servers), you need to link the GPO to the Servers container.
Here are the steps:
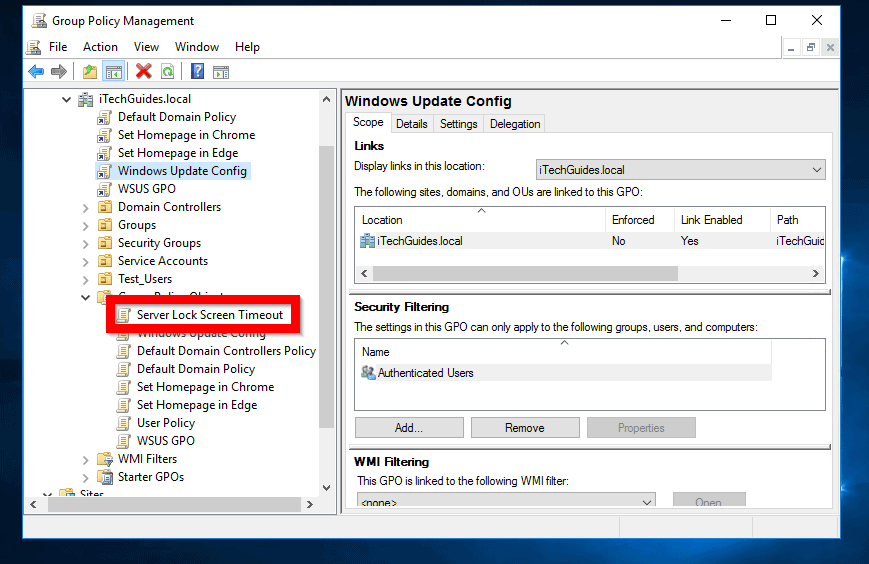
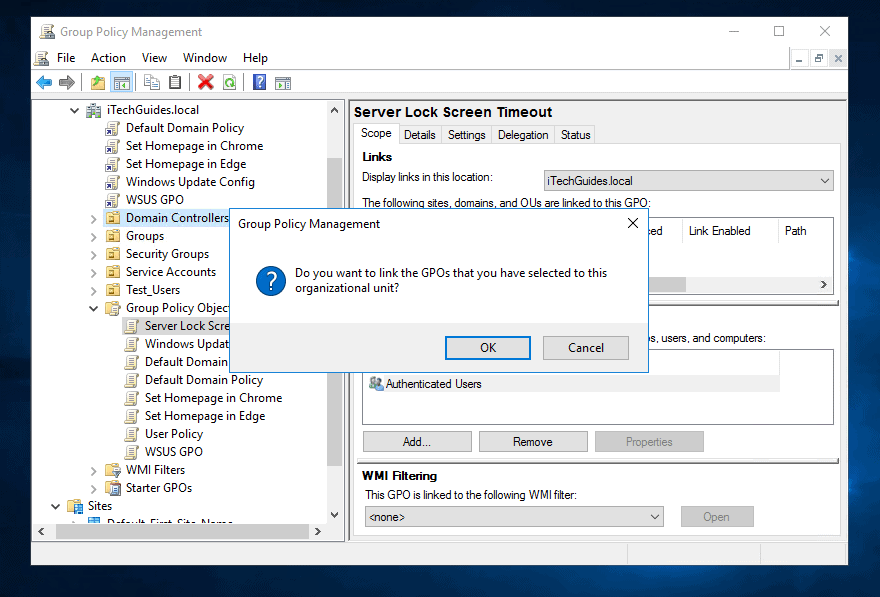
- Drag the GPO from the Group Policy Objects container to the AD container you want to link it to. In this example, I will link my GPO to the Domain Controllers OU.
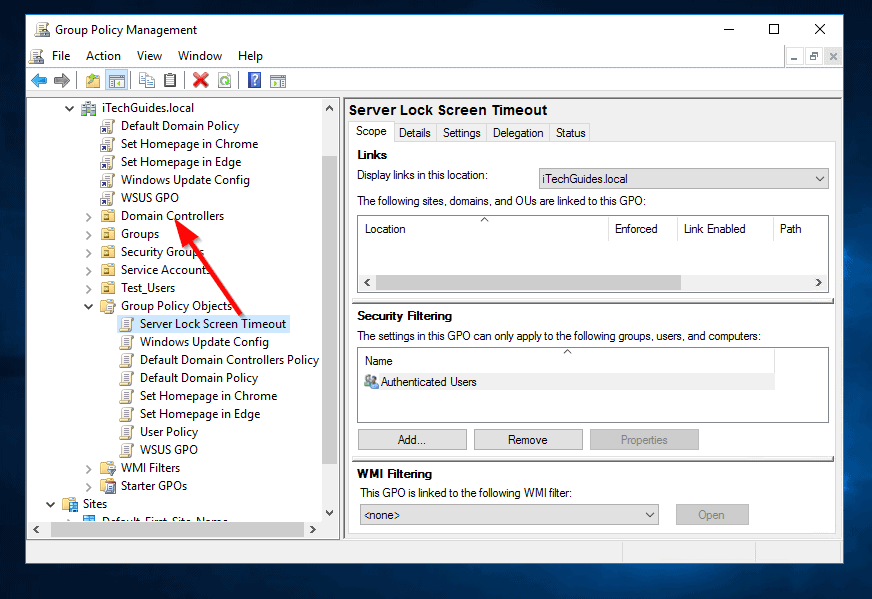
- On the pop up requesting a confirmation, click OK. The new GPO will now appear beneath the container – meaning it is linked to the container (See the second image below).
Conclusion
Those are the two ways you can configure Windows Server 2016 lock screen timeout.
I hope you found this guide helpful? If you found the guide helpful, kindly share the part of the guide you found most helpful.
Share your experience by responding to the “Was this page helpful?” question below.
More Windows Server 2016 guides? Visit our Windows Server How Tos page.