In this guide, I explain three methods to modify the Power settings on a Windows 10 PC.
Option 1: Change Power Settings with Windows Settings
To change Windows 10 power settings from Power & sleep settings:
- Right-click start menu. Then click System.
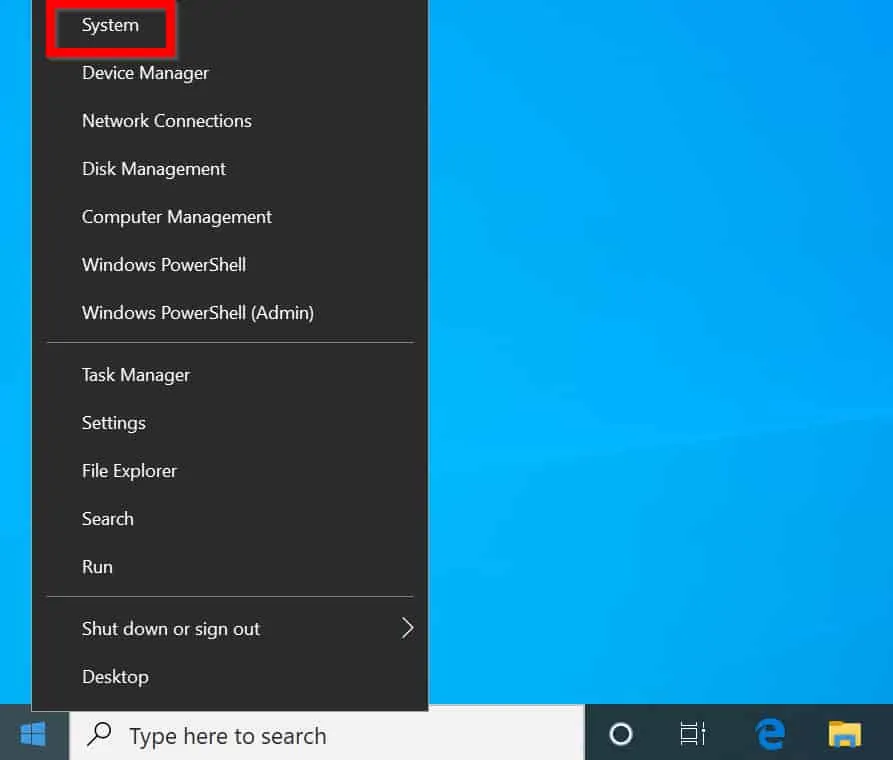
- When System Settings opens, click Power & sleep.
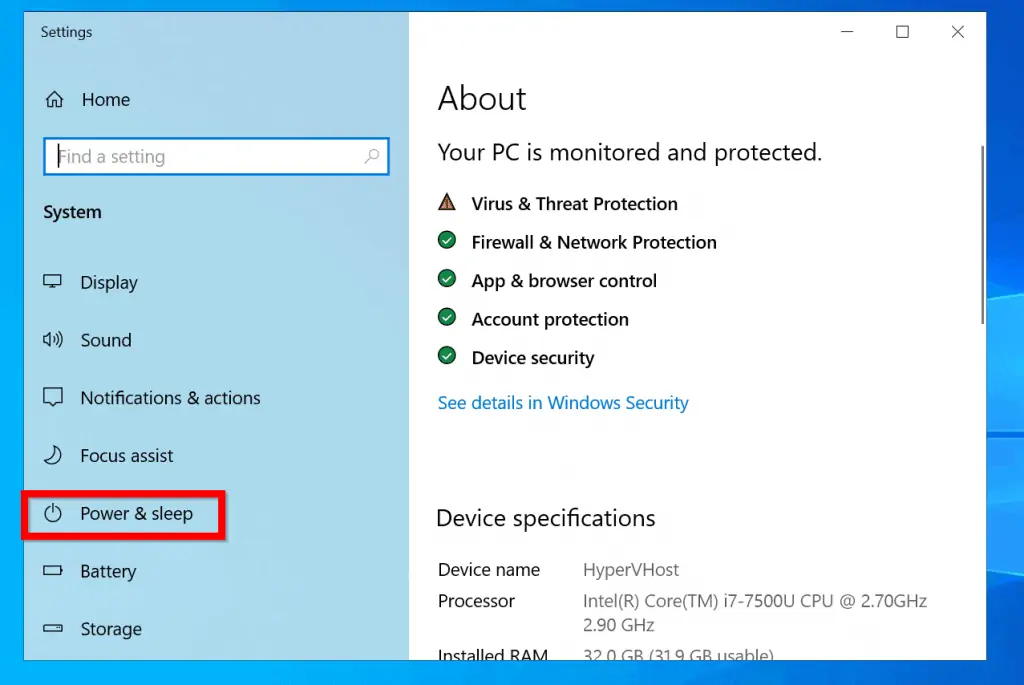
- You can configure power settings here: The Screen section determines when the screen (display) is turned off while Sleep determines when the laptop is “put to sleep” (hard disk is turned off).

Option 2: Modify Power Settings From Control Panel
You can also modify Power Settings in Windows 10 from Control Panel.
Here are the steps:
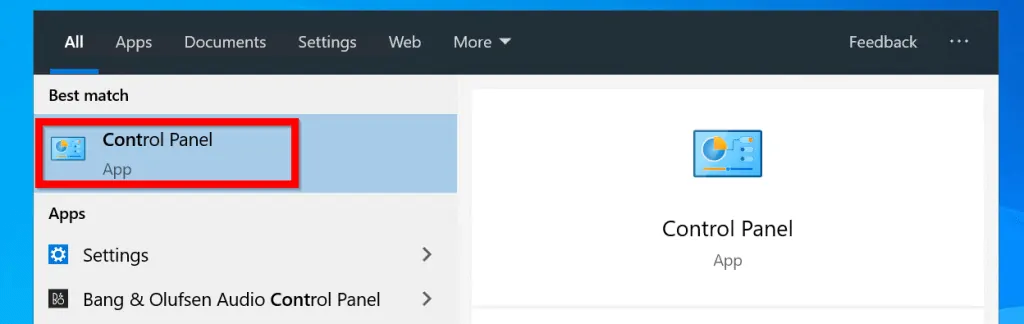
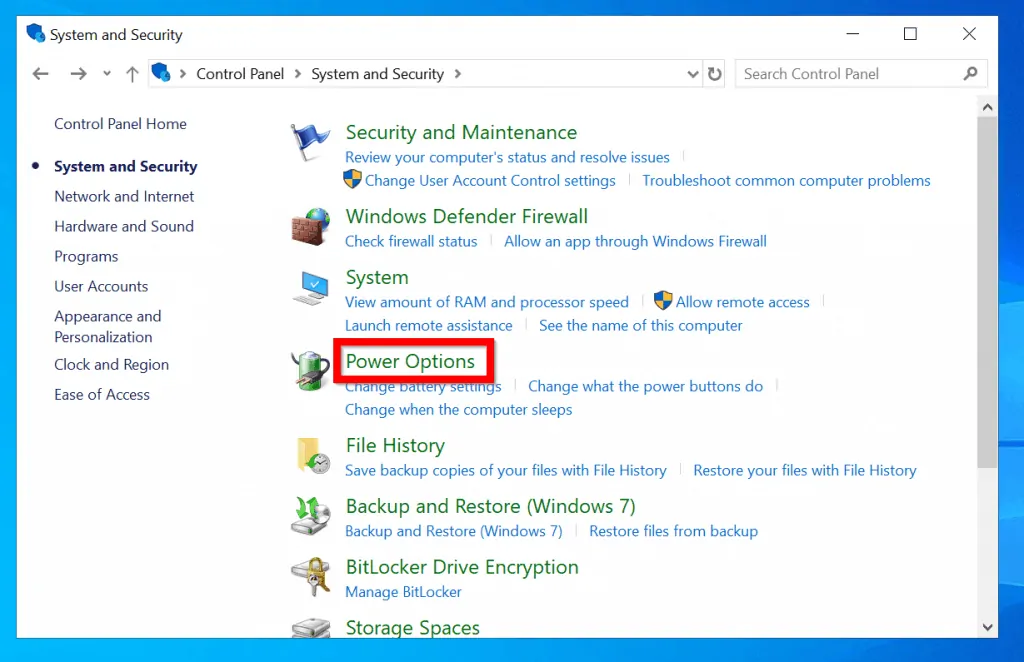
- Type Control Panel in the search bar. Then click it from the search results.
- At Control Panel, click System and Security.
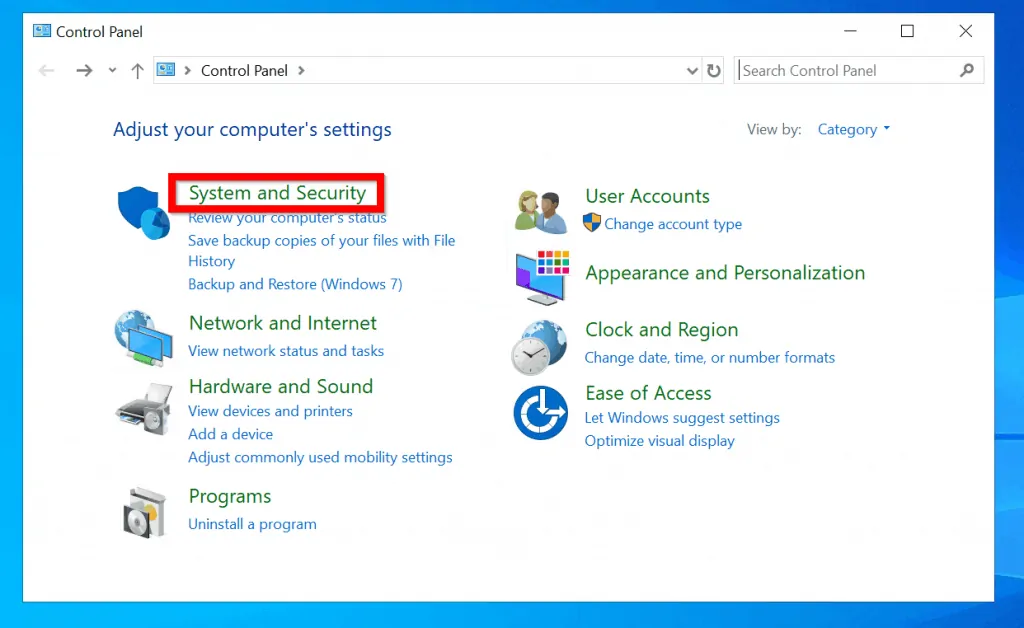
- When System and Security opens, click Power Options.
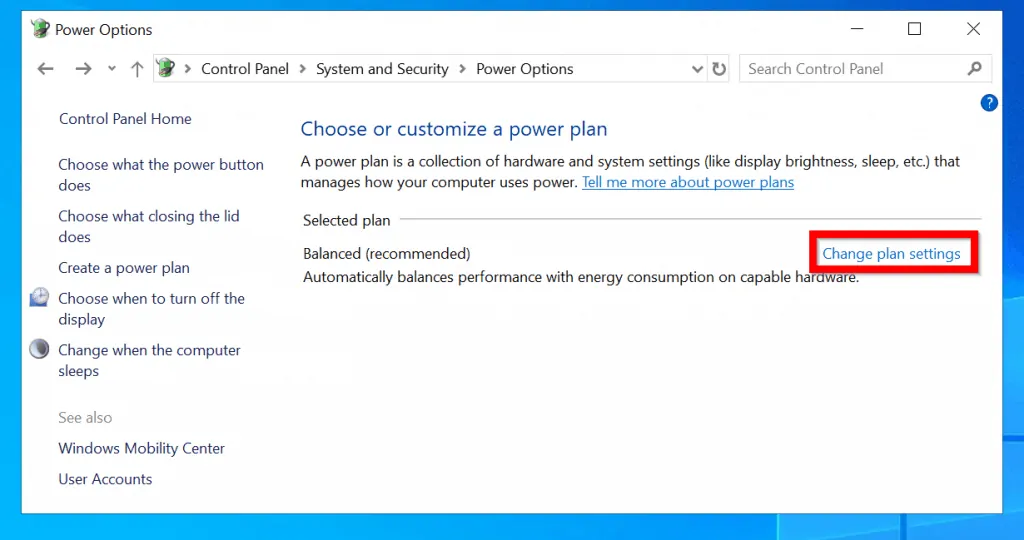
- Then beside the active power plan, click Change plan settings.
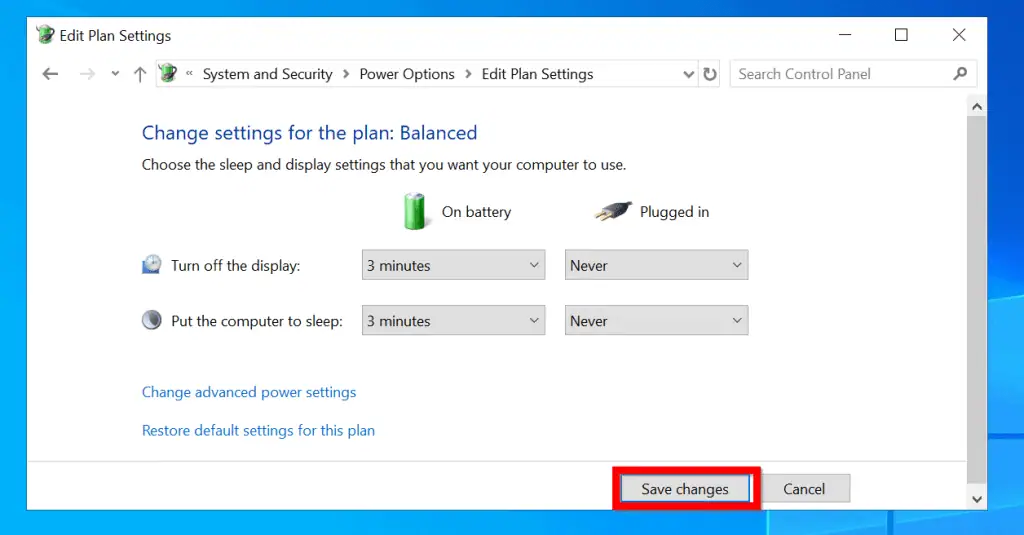
- Finally, modify how your laptop turns off display and put your laptop to sleep when on battery or plugged in to power. When you finish, click Save changes.
Option 3: Change Power Settings with Command Prompt
You can also modify the power settings for a laptop with Powercfg command.
Here are the steps:
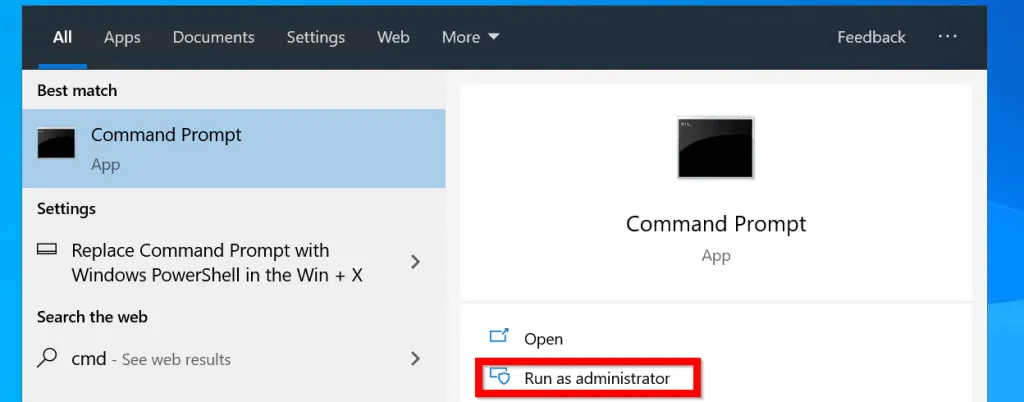
- Type cmd in search bar. Then click Run as administrator.
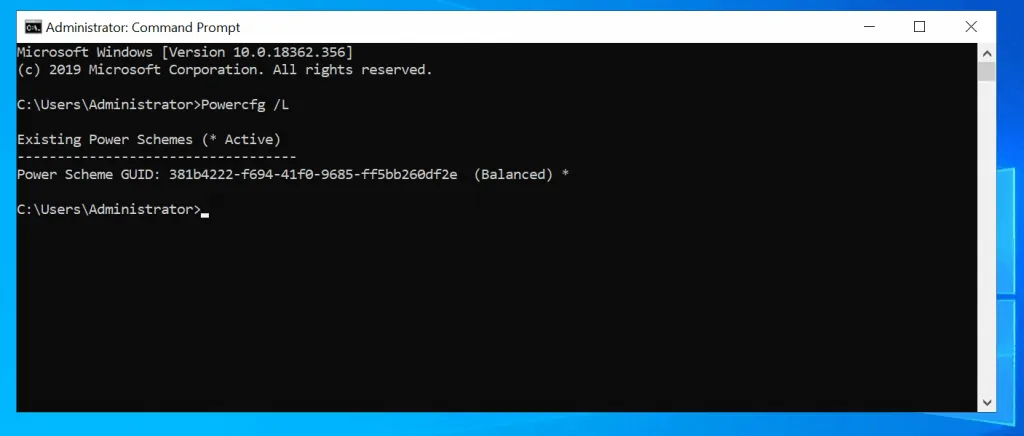
- To list all available power schemes in the PC, type the command below. Then click enter.
Powercfg /L
The Power scheme marked with asterisks (*) is the active power scheme.
- To modify the behavior of the Power scheme on battery and when plugged in, use the /change switch as shown below…
POWERCFG /CHANGE <SETTING> <VALUE>
<SETTING> specifies the power scheme setting you want to change
<VALUE> is the time out value in minutes.
The table below specifies valid values of <SETTING> and the settings each modifies.
| S/N | Power Sheme Setting | Description |
| 1 | monitor-timeout-ac | Configures monitor timeout value for when the laptop is plugged to power. |
| 2 | monitor-timeout-dc | The time set by this will determine length of inactivity to turn monitor off if laptop is on battery. |
| 3 | disk-timeout-ac | This setting determine inactivity timeout settings for hard disk to be turned off if the laptop is connected to power |
| 4 | disk-timeout-dc | This applies to disk timeout as well but this determines timeout settings for when the laptop is on battery. |
| 5 | standby-timeout-ac | To set timeout settings to put the laptop to standby while plugged to power, use this setting |
| 6 | disk-timeout-dc | Sets laptop standby timeout for when the laptop is on battery. |
| 7 | hibernate-timeout-ac | This determines hibernate timeout while plugged to power |
| 8 | hibernate-timeout-dc | Sets hibernate timeout for when the laptop is on battery |
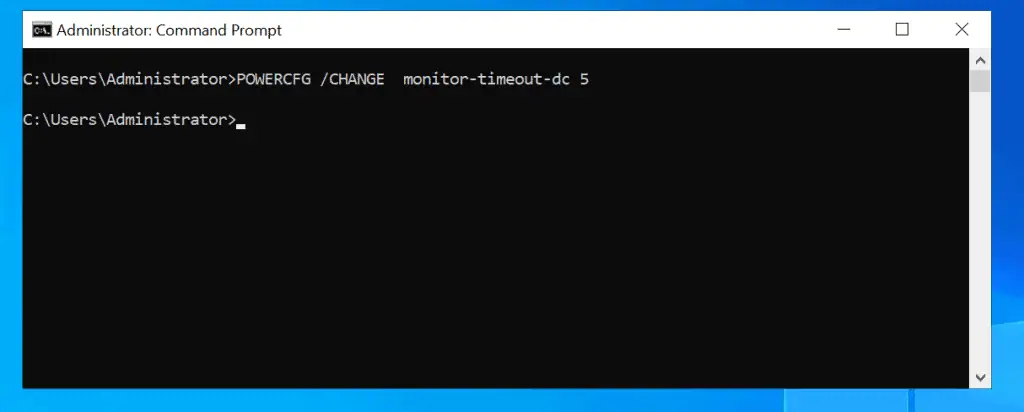
- To change display timeout for my laptop to 5 minutes while on battery, type this command. Then press enter.
POWERCFG /CHANGE monitor-timeout-dc 5
Here is the command in cmd.
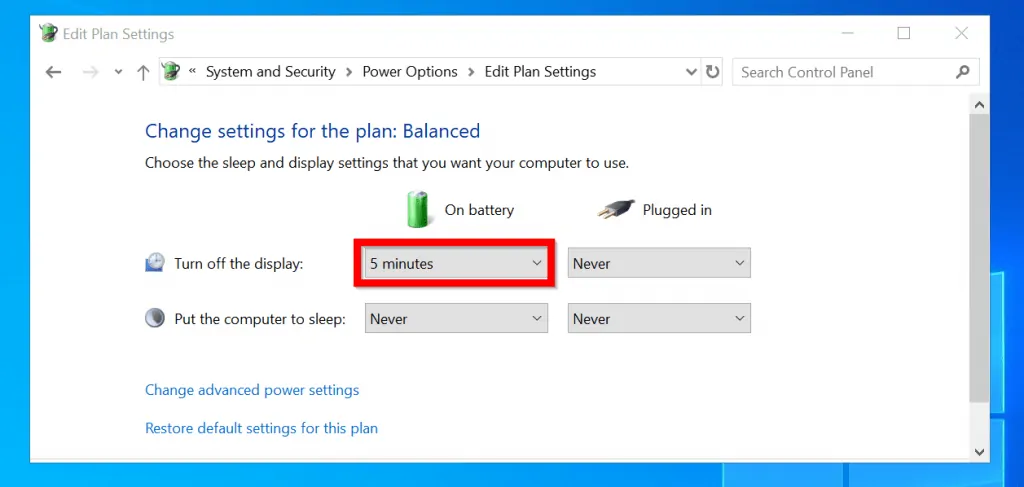
…and the result of the command…Turn off the display has now been set to 5 minutes timeout.
Conclusion
You can modify the power settings of a Windows 10 laptop using one of the methods in this guide. I hope you found this guide helpful.
Kindly let me know the method you used and why you prefer it. To give us feedback, respond to the “Was this page helpful?” question below.
For more Windows guides visit our Windows How-To page.


![How To Run Sysprep (Generalize) In Windows 10 [2 Methods]](https://www.itechguides.com/wp-content/uploads/2022/05/8-2.webp)
All this doesn’t address a simple thing:
HOW DO YOU CHANGE FROM BALANCED PLAN TO PERFORMANCE PLAN?
All you guys showed here is how to edit the Balanced Plan.
This post is about editing a specific power setting and not about how to change the power plan on Windows 10.
However, if you wish to change power plan proceed as follows:
Open Control panel and ensure that the View by is set to category, then click Hardware and Sound. Next, click Power Options.
Finally, when Power Options settings open, select Balanced