If you use WhatsApp for business, setting up an automatic message gives you a professional look. This guide explains the steps.
Step 1: Install the AutoResponder for WA – Auto Reply Bot App
Use the steps below to install “AutoResponder for WA – Auto Reply Bot” App (from your PC browser):
- Login to the same Google account on your Android phone and on your PC
- Then open AutoResponder for WA on Play Store. Then click Install.

- If you are logged in to more than one Android phone with the same email address, they will be listed for selection. To select a device to install the app, click the Choose a device drop-down.
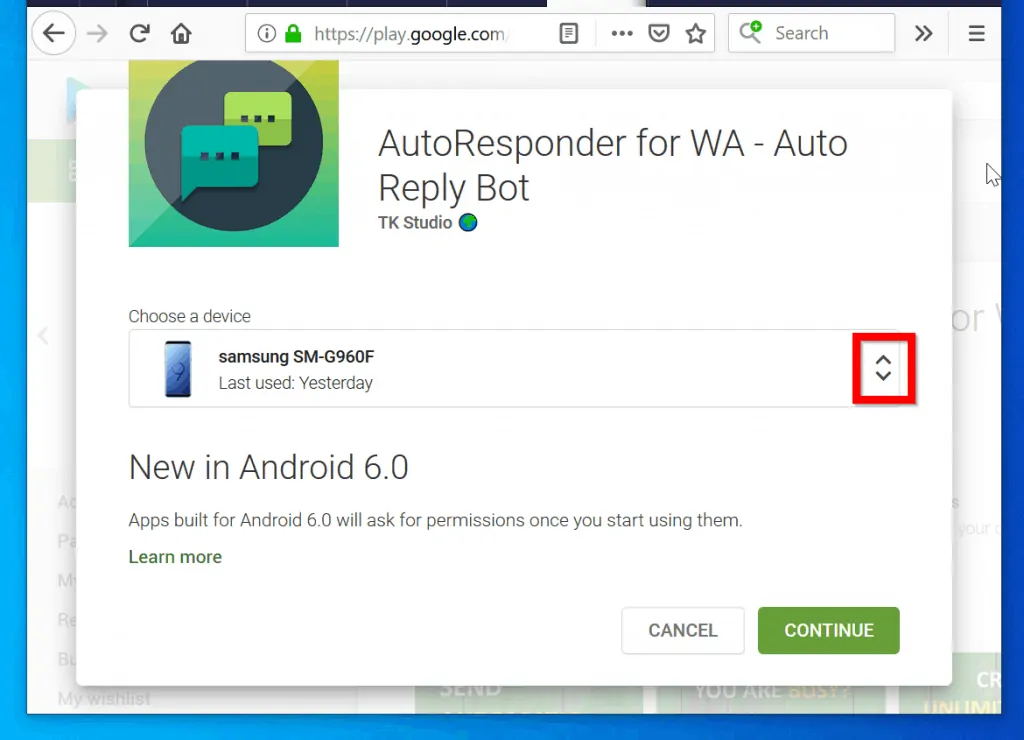
- Then click Continue.
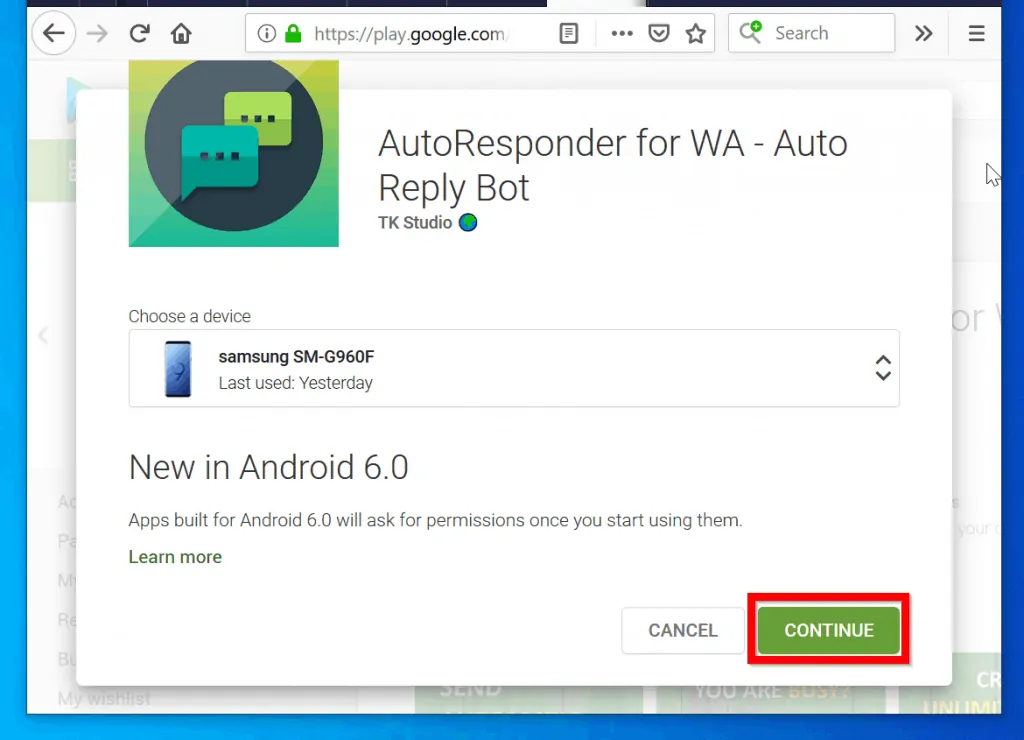
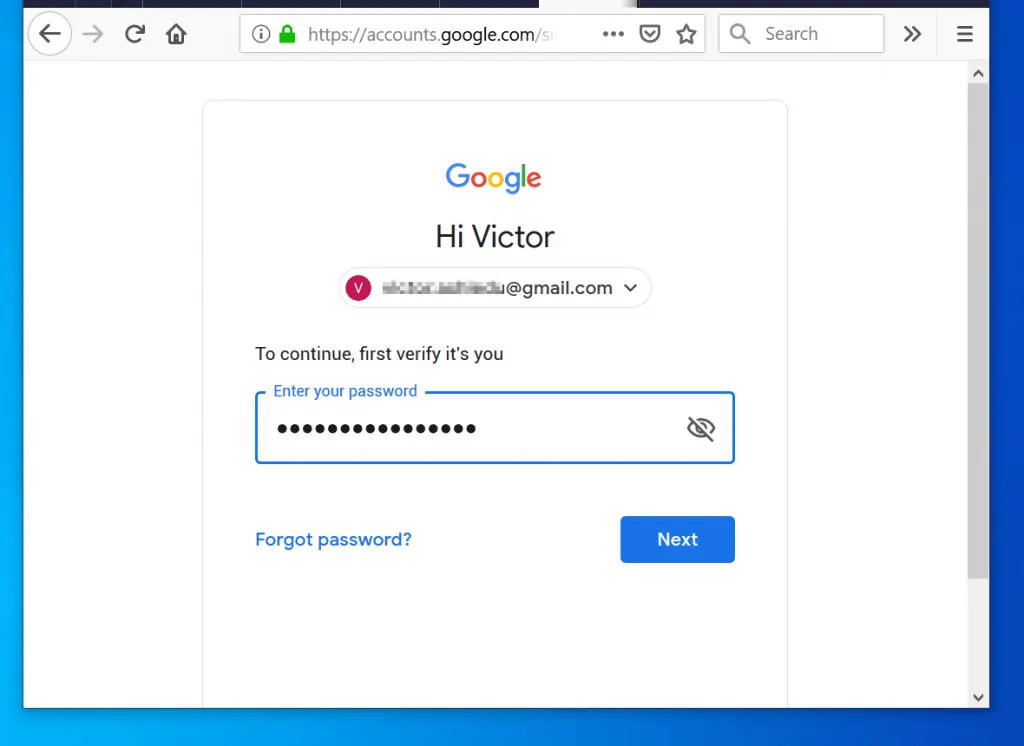
- If you are on Android 6.0 you may be required confirm. At the sign in prompt, enter (or select) the same Google email address you used to sign in to your Android device and click Next. Then type the password for the Google account and click Next.
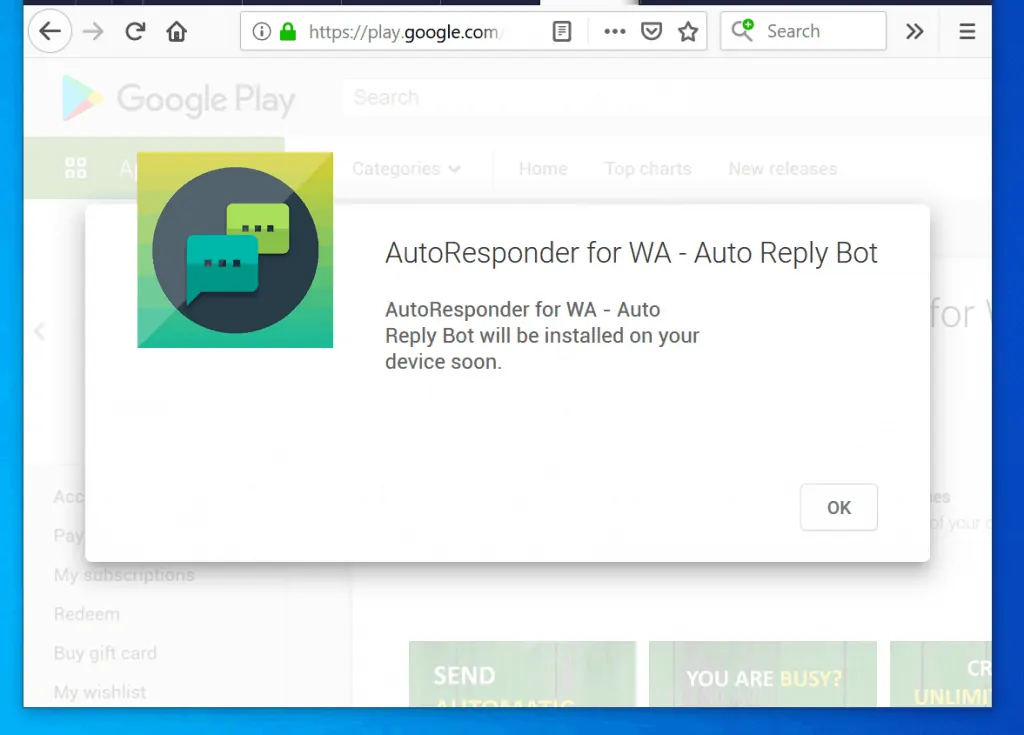
- At the confirmation page, click OK.
The next steps in this guide will be performed from your phone.
Step 2: Create a WhatsApp Auto Reply Rule with the Autoresponder App
Setting up auto reply simply means creating a rule in the App.
Here are the steps:
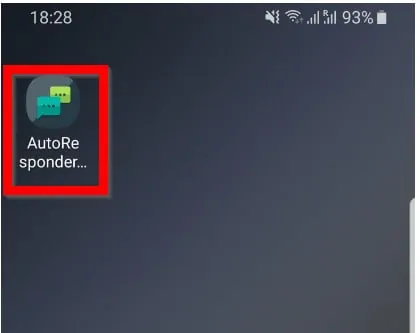
- Open AutoResponder App on your Android phone..
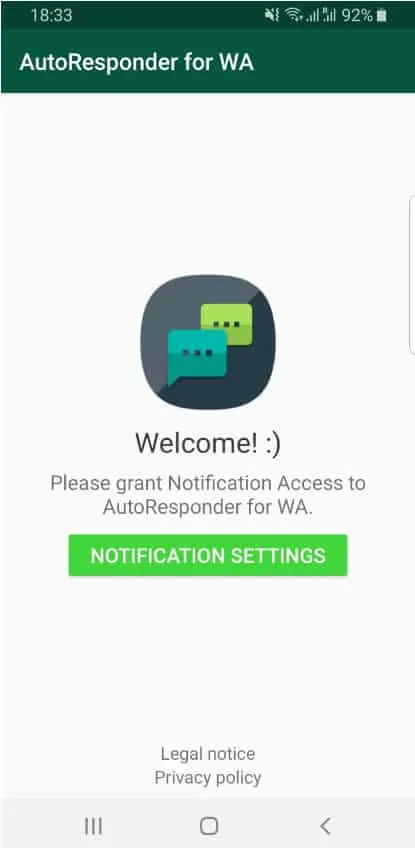
- If you receive a notification to grant the app Notification access, click NOTIFICATION SETTINGS.
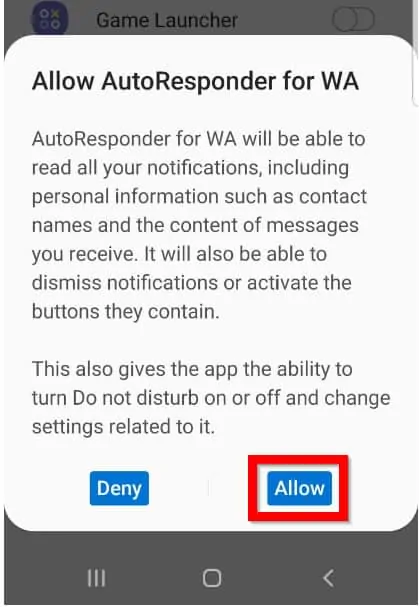
- Then flip the switch beside the app on. It will turn blue.

- Finally, click Allow.
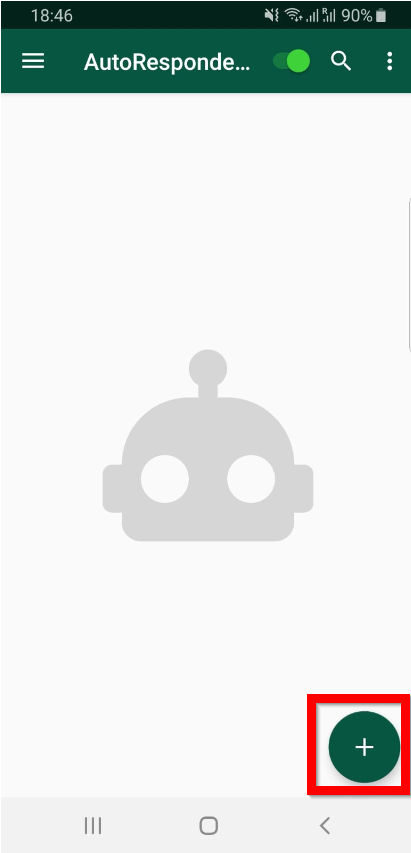
- To create a new rule, click the blinking + sign.
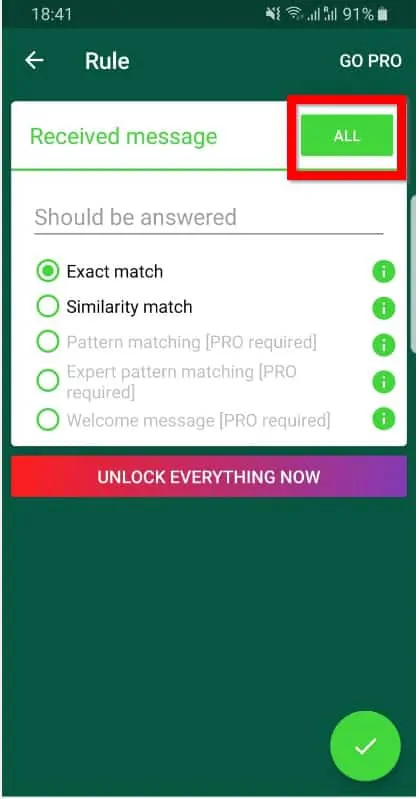
- Then on the Rule screen, if you want to reply to all messages, click ALL.
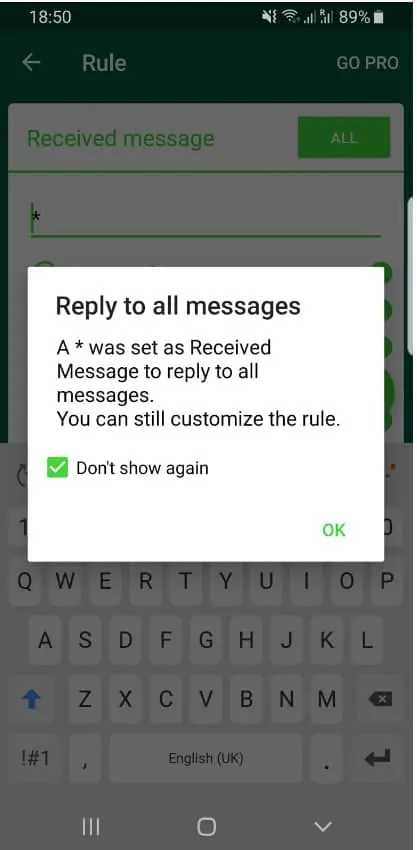
- You will receive a notification that A asterisk (*) was set as Received Messages to reply to all messages. If you do not want to see this message each time you click ALL, check the box Don’t show again. Then click OK. A asterisk (*) will now appear beneath Received message.
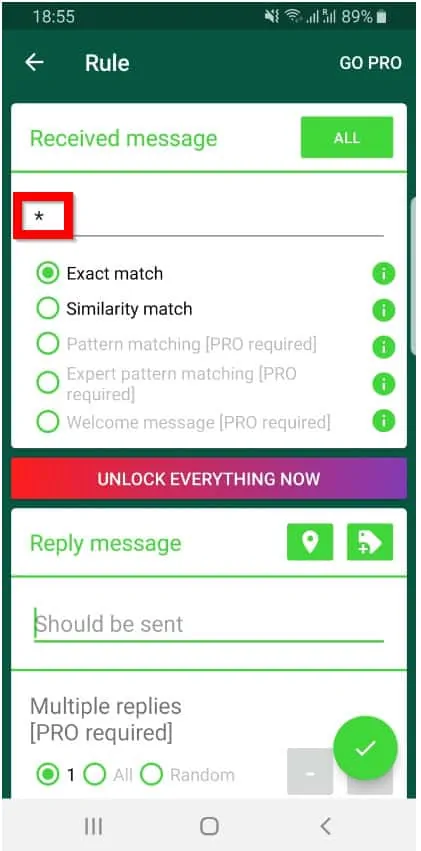
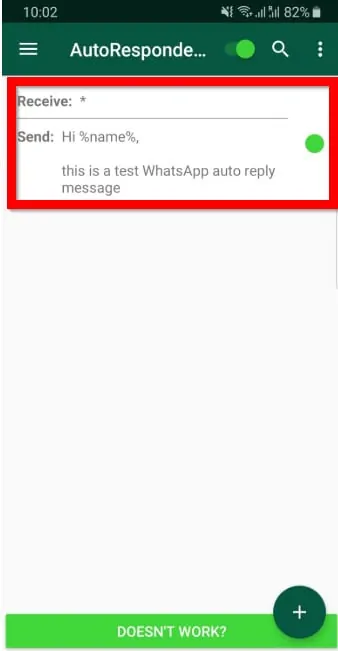
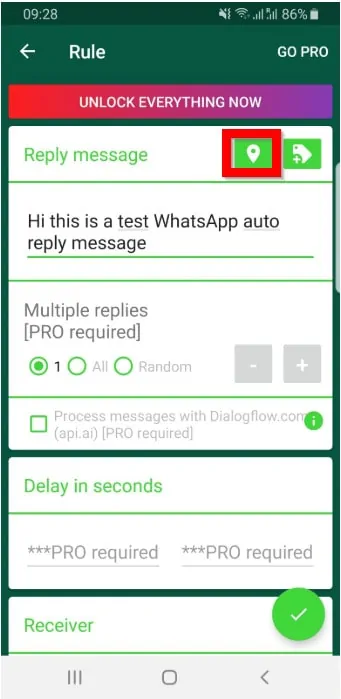
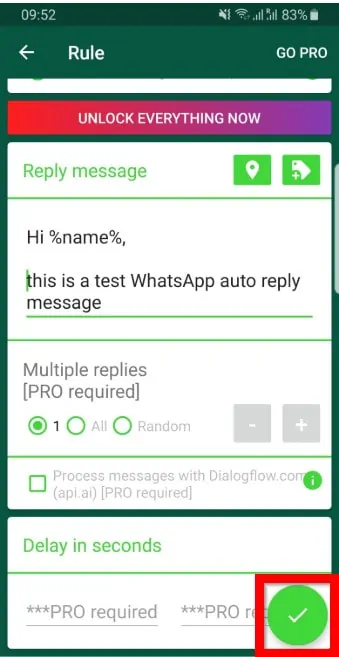
- Beneath Reply message, type the message you want to auto reply. If you wish to include your location, click the location button (highlighted in the image below).
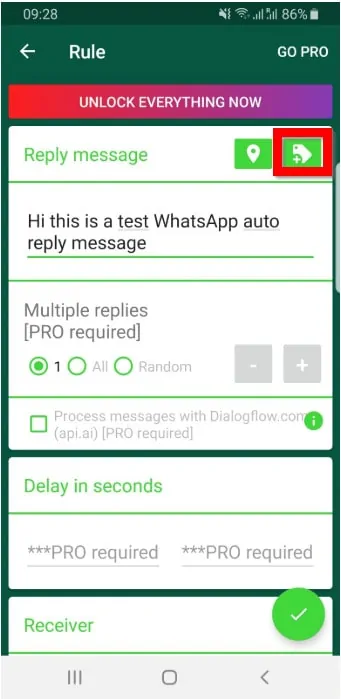
The App has another feature that allows you to insert variables. For instance you can auto insert the date, the recipient’s WhatsApp name and more…
- To insert a variable, click the icon (highlighted below).
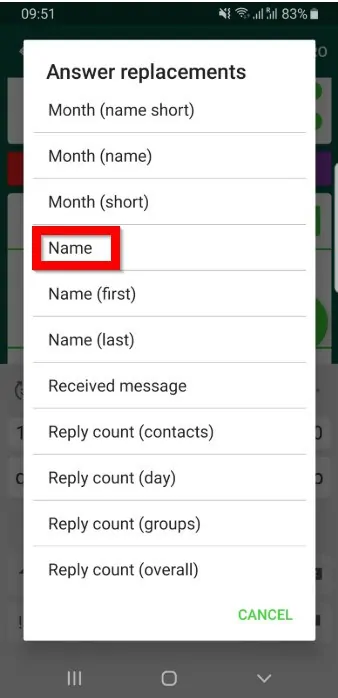
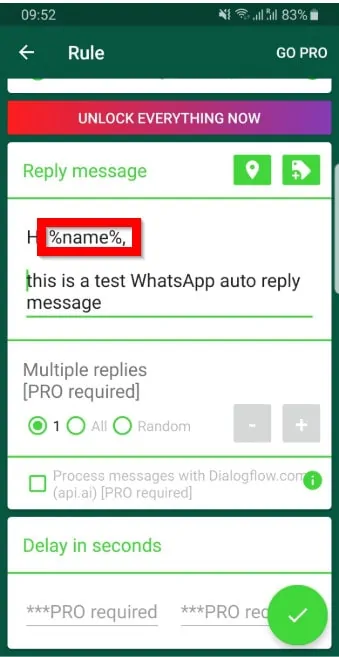
- Then select the variable to insert. For instance to insert the recipient’s WhatsApp name, click Name. The variable will be inserted as shown in the second image below, %name%. When the App auto replies to a message, it will replace %name% with the recipient’s WhatsApp name.
For additional features, you need to pay for the Pro version of the App.
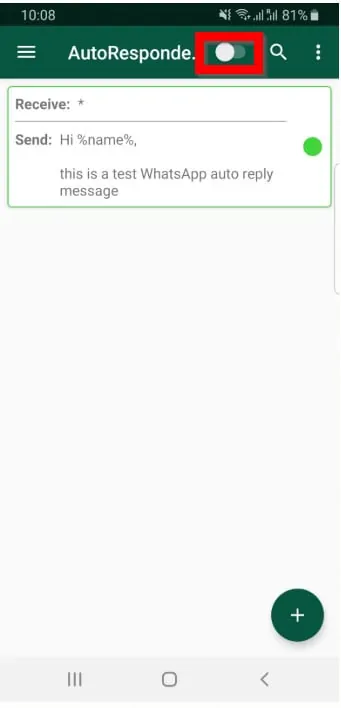
- When you finish, to save the rule click the ✓ highlighted in the image below. The new rule will now be displayed in the App – see the second image below.
Now when somebody sends you a WhatsApp message they will receive your WhatsApp auto reply message. I tested mine and it worked. See the message I received based on the rule I configured in this demo. Notice that it replaced %name% variable with my name – Victor Ashiedu!

If you want to stop WhatsApp auto reply messages, flip the button on top to off position.
Conclusion
WhatsApp auto reply can be a very important tool especially if you use WhatsApp as a business tool. I hope you found this guide helpful!
To give us feedback or leave a comment use the “Leave a Comment” form at the end of this page. Alternatively, respond to the “Was this page helpful?” question below.
For more guides visit our How To page.


xPal is a secure End-to-End Encrypted messenger that
doesn’t require any personal information to use.
Hi,
The feature of auto-reply is really fantastic, also the way you explained it is very informative and easy to understand. Keep up the good work.
Thanks.
Fantastic information i never found this type of info on any website keep it up.