System restore in windows 10 is a very important tool that is probably ignored by most users. But using this tool can save you a lot of trouble especially if your computer fails to boot.
How to Enable System Restore
- Search System Restore and click Create a restore point.

- At System Properties, System Protection tab highlight a drive and click Configure.
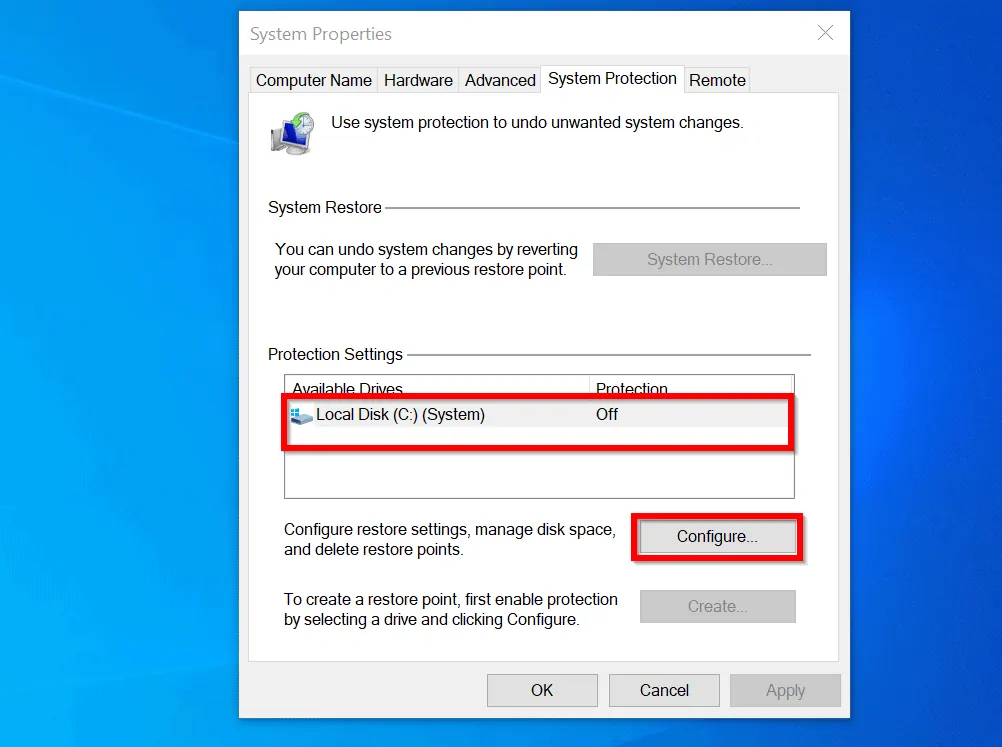
- Then select Turn on system protection and click OK. You can determine the Max disk usage for restore points by moving the slider beside Max Usage.
- To create a Restore point, click Create.
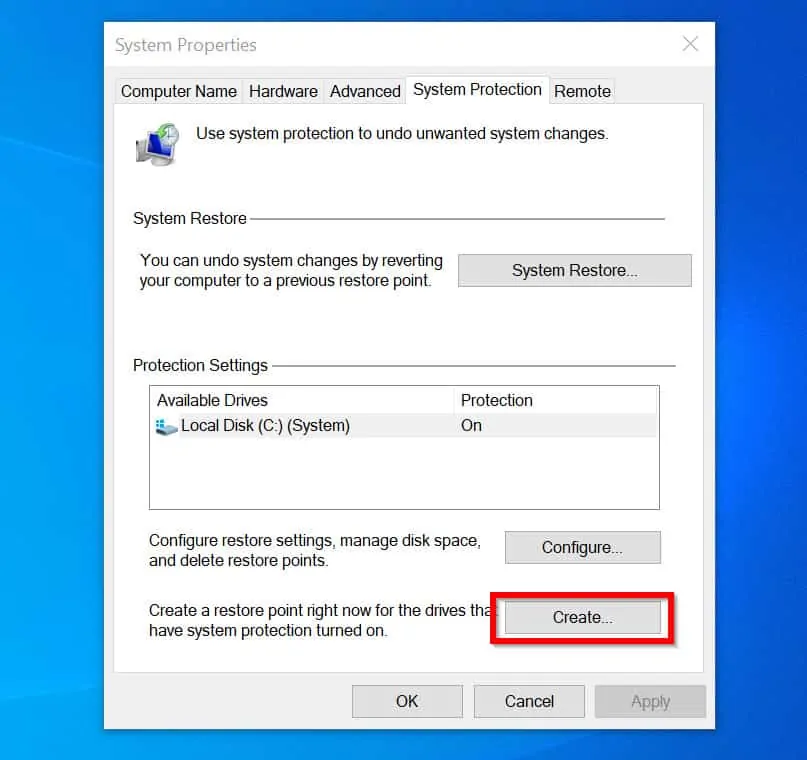
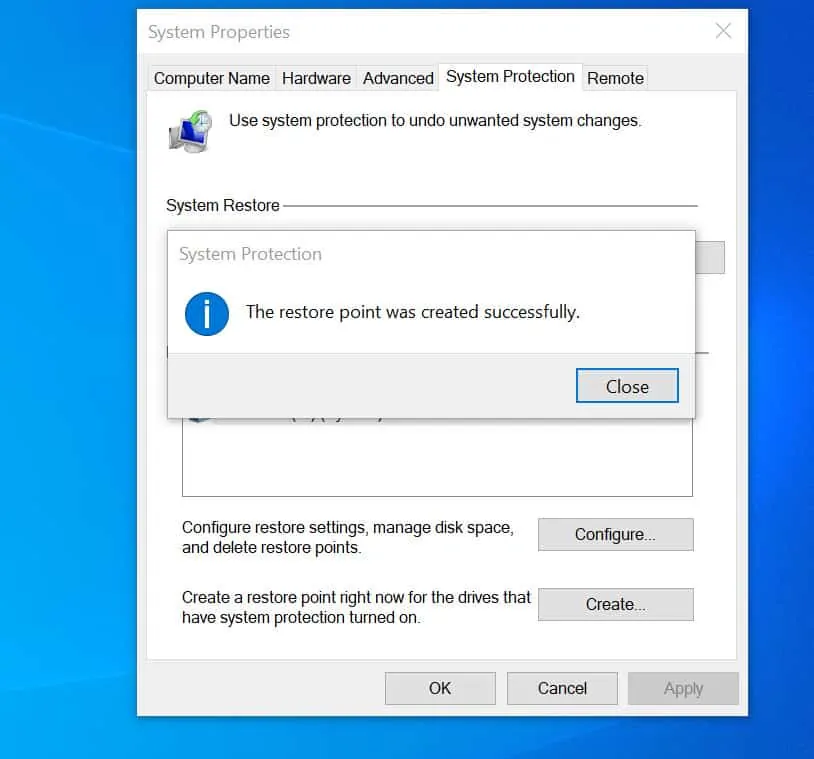
- Then give the restore point a descriptive name and click Create. Wait until you receive the message shown in the second image below.

How to Recover a PC with System Restore
If your computer fails, follow the steps here to revert your computer to a previous restore point. You could also restore your computer even if it hasn’t failed.
In this section I will demonstrate how to:
- Restore your computer from within Windows 10 – use this option if your computer hasn’t failed but you need to revert to where it was before you made a recent change
- Use System restore in Windows 10 to fix your computer when it is not booting.
How to Perform System Restore to Revert to a Previous State
Use the steps in this section to restore your computer to a previous state. This is useful if you recently made a lot of changes but want to roll all the changes back at once.
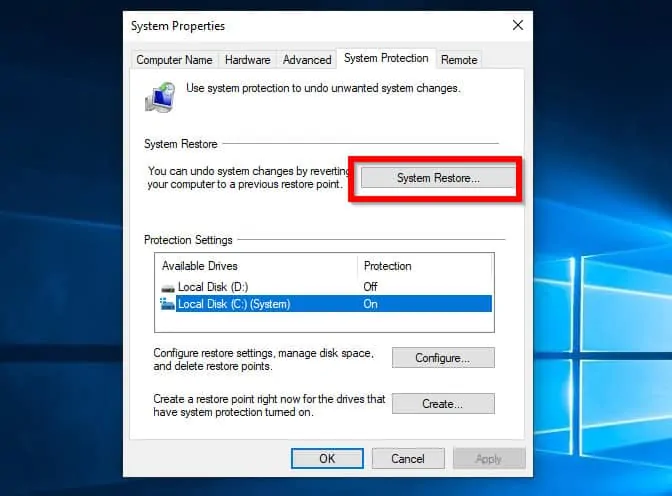
- Search Restore. Then select Create a restore point.
- Then click System Restore.
- When the Restore wizard opens, click Next.
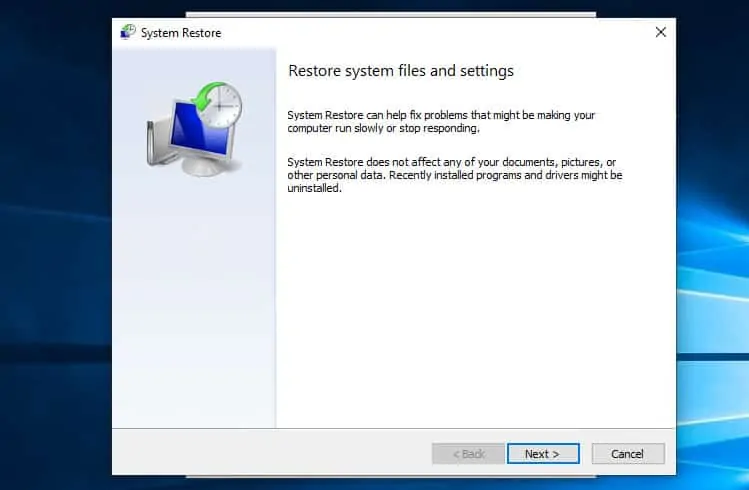
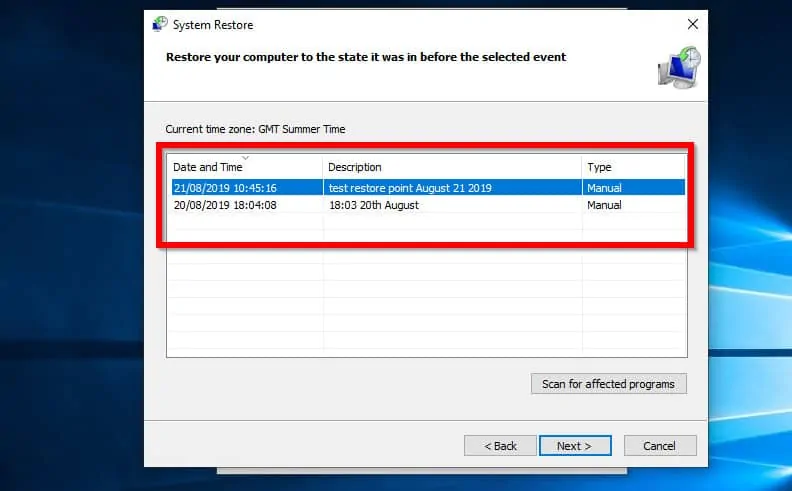
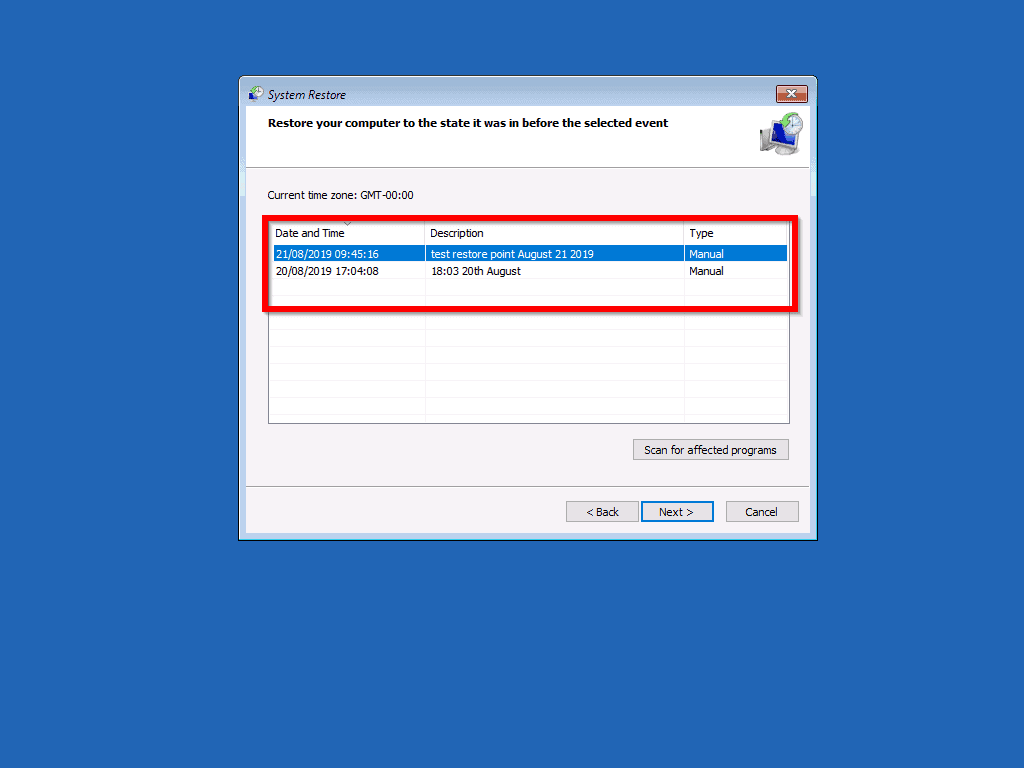
- Then select a restore point and click Next.
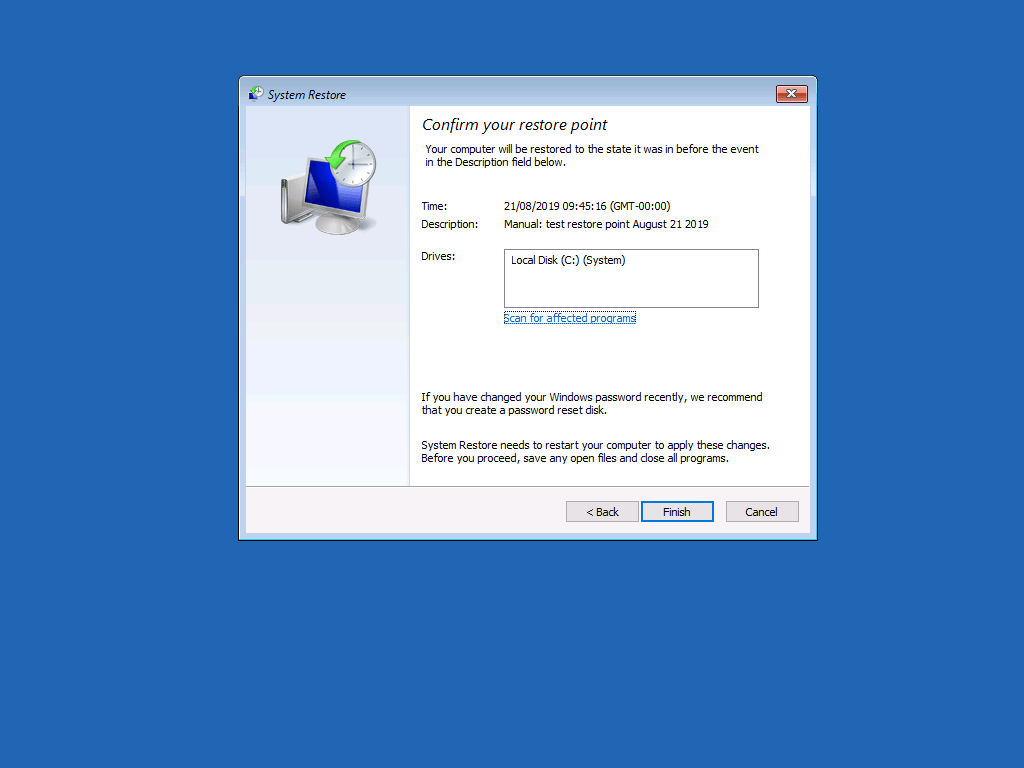
- To commence system restore, click Finish.

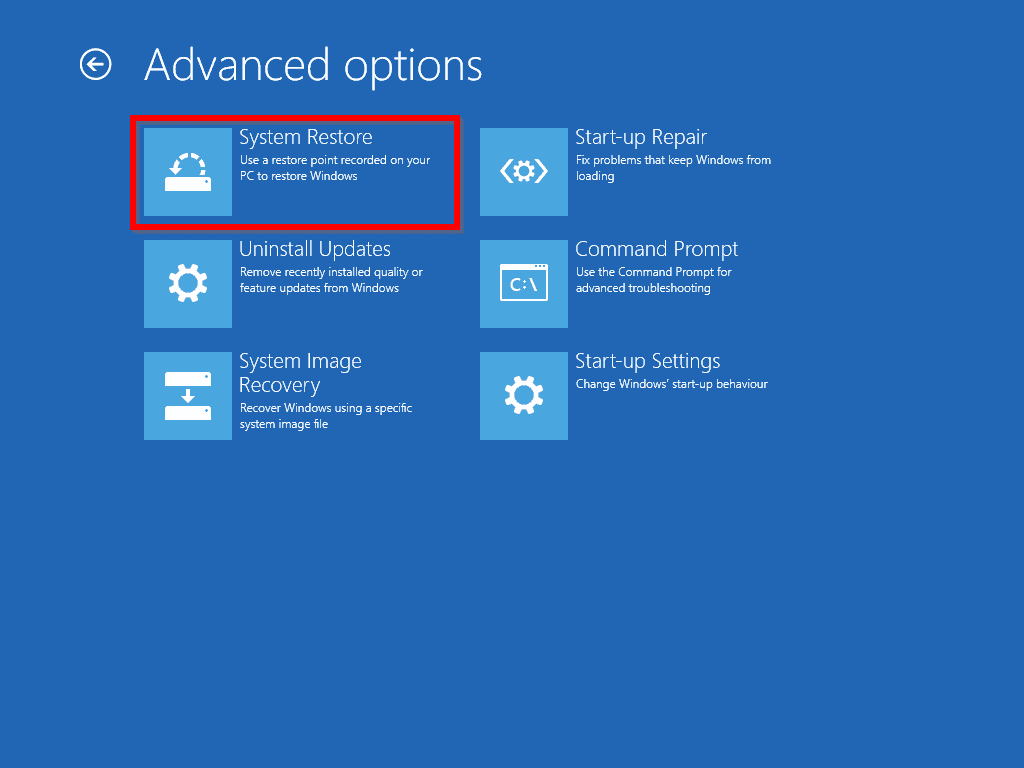
How to Use System Restore in Windows 10 if PC is not Booting
- Use the steps in Start Windows 10 safe Mode by Interrupting Normal Boot to boot your computer to Windows 10 recovery environment.
- When you get to the screen below, click Troubleshoot. Then continue from the next point below.
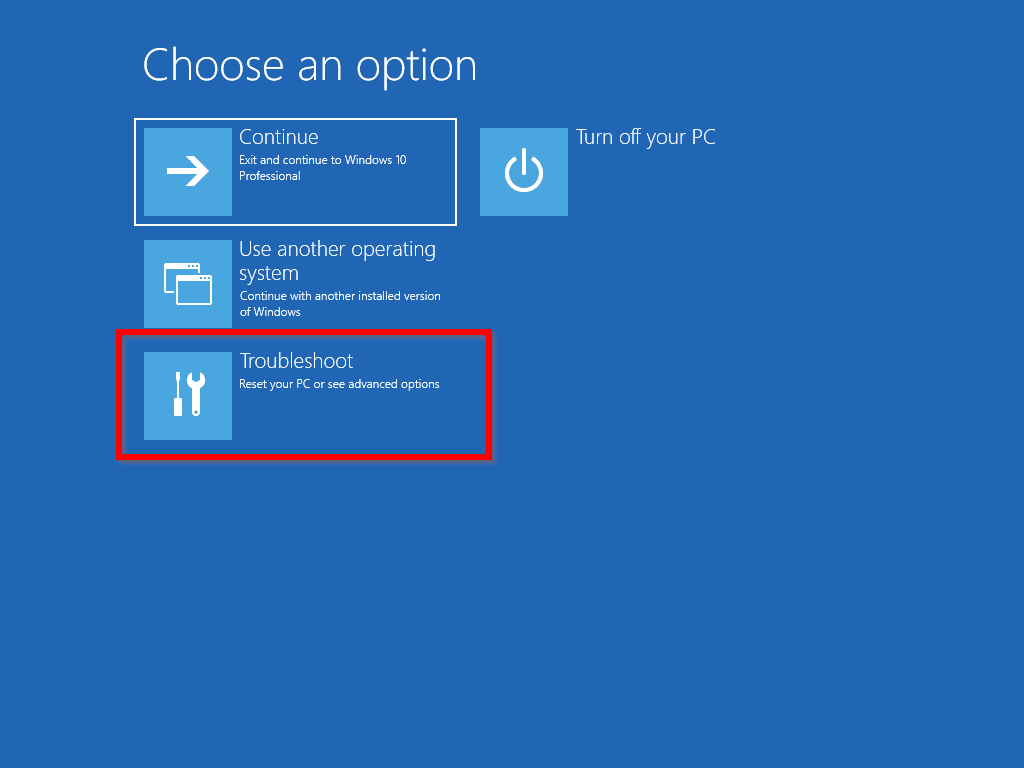
- When Troubleshoot screen opens, click Advanced options.
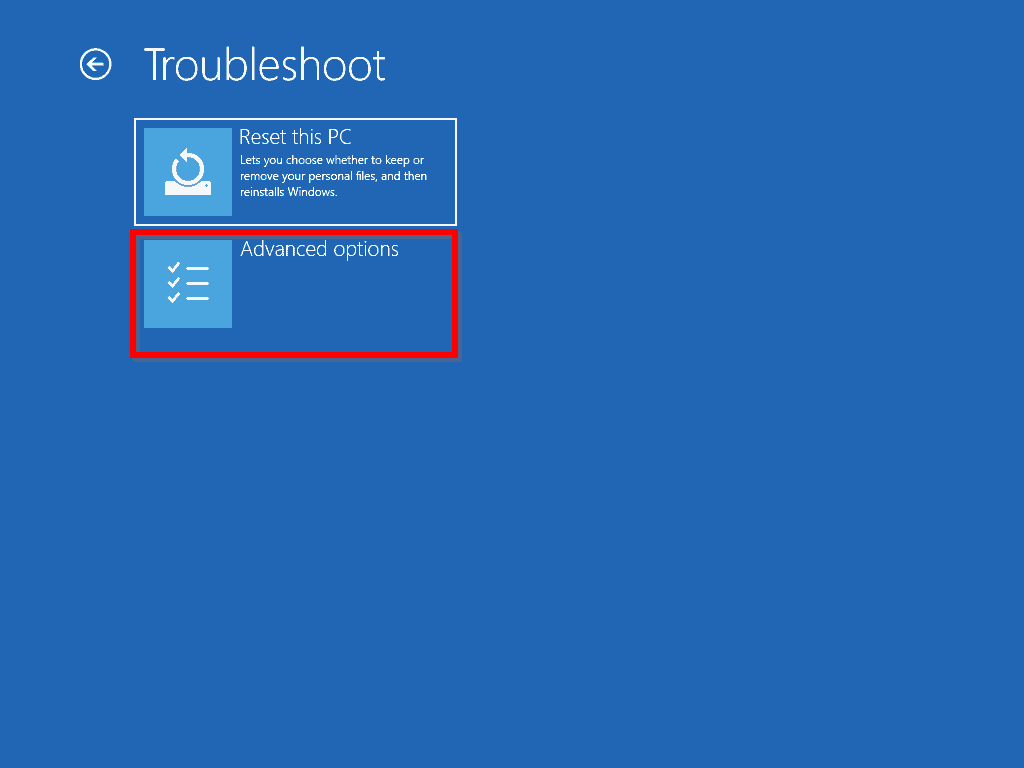
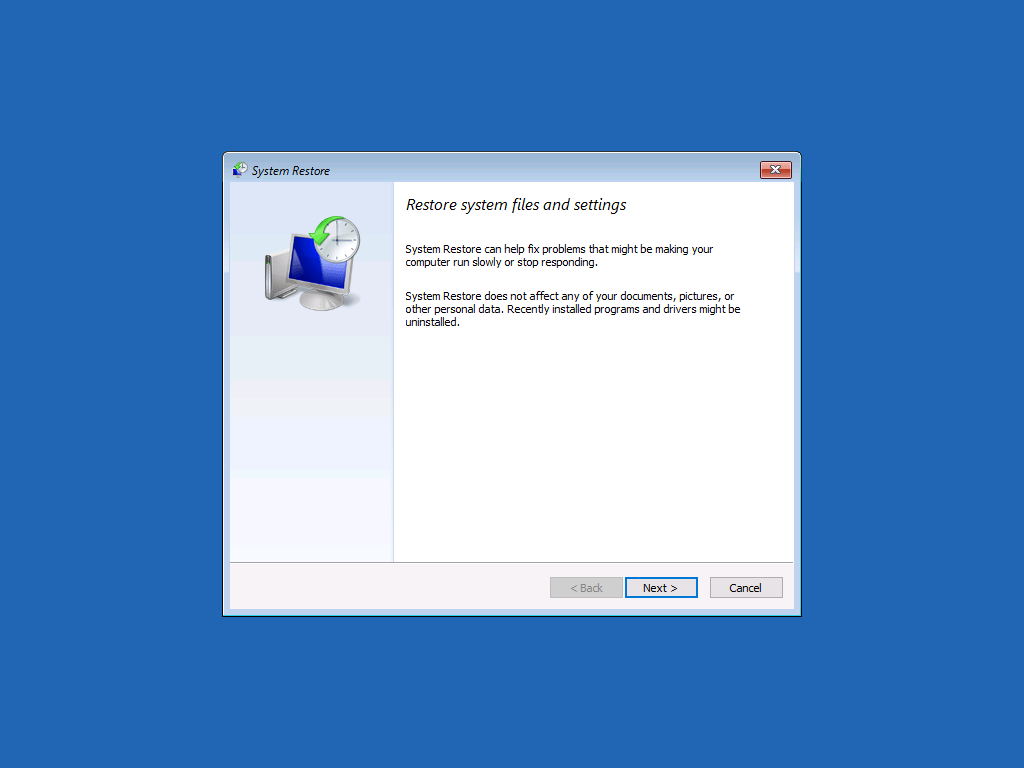
- Then click System Restore.
- When the restore wizard opens, click Next.
- Select a restore point and click Next.
- To initiate the restore, click Finish.
Conclusion
Using the Windows system restore can become a lifesaver when your computer fails to start.
So, if you have just scanned through this guide without enabling and creating a restore point I strongly recommend that you do so now. Next time your computer fails you will be glad you did!
On the other hand, I hope this guide has helped to restore your Windows 10. We love to know your thoughts about this article.
Please let us know if it met your expectations by responding to the “Was this page helpful?” question below.
Want more Windows 10 guides? Visit our Windows 10 How-To page.


![How To Run Sysprep (Generalize) In Windows 10 [2 Methods]](https://www.itechguides.com/wp-content/uploads/2022/05/8-2.webp)
Well, I tried this method after the CHKDSK procedure did not work. But unfortunately there were NO RESTORE points found. (First thing I need to do if I ever get back up and running !)
And trying the REST PC, but the cloud option did not work. Attempting the Local restore. Hope it doesn’t need a disk or something…