In this Itechguide, Victor teaches you how to uninstall Avast on Windows 10. The guide covers steps for 2 methods to uninstall Avast on Windows 10.
Option 1: Uninstall Avast from Apps & features
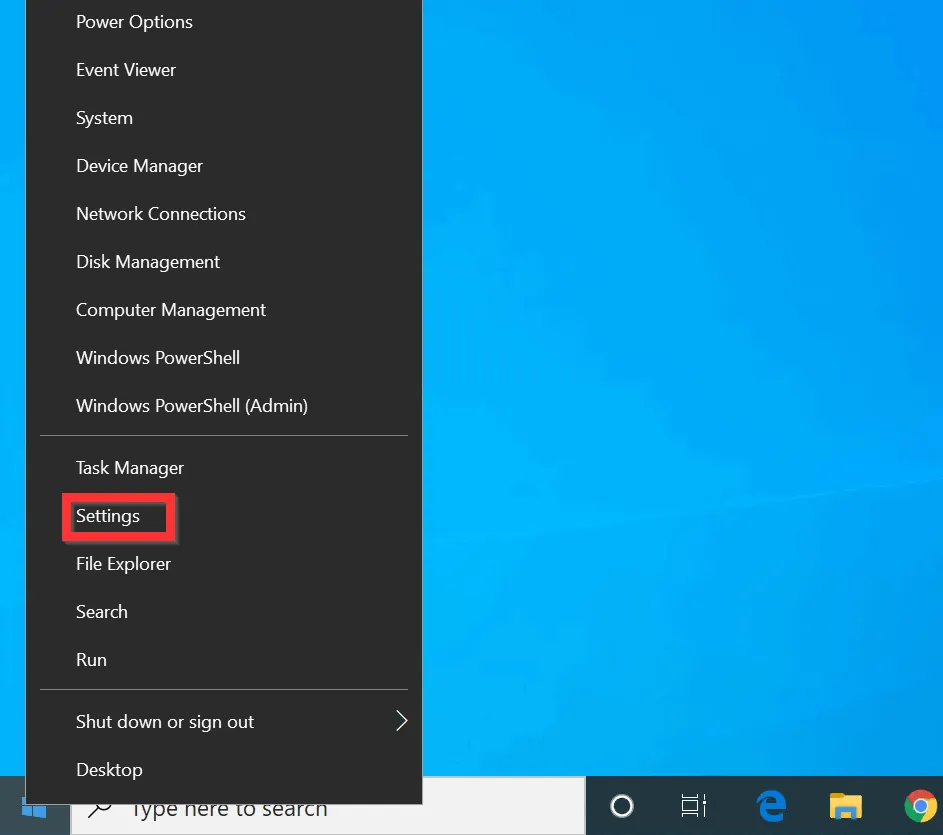
- Right-click the Windows 10 Start menu and click Settings.
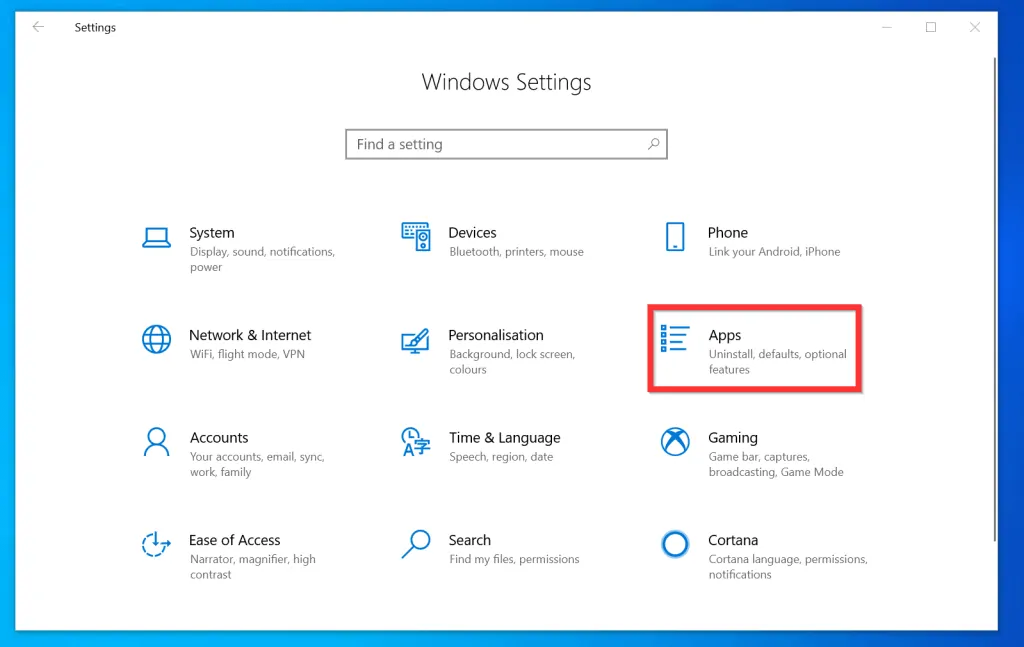
- Then, on Windows Settings, click Apps.
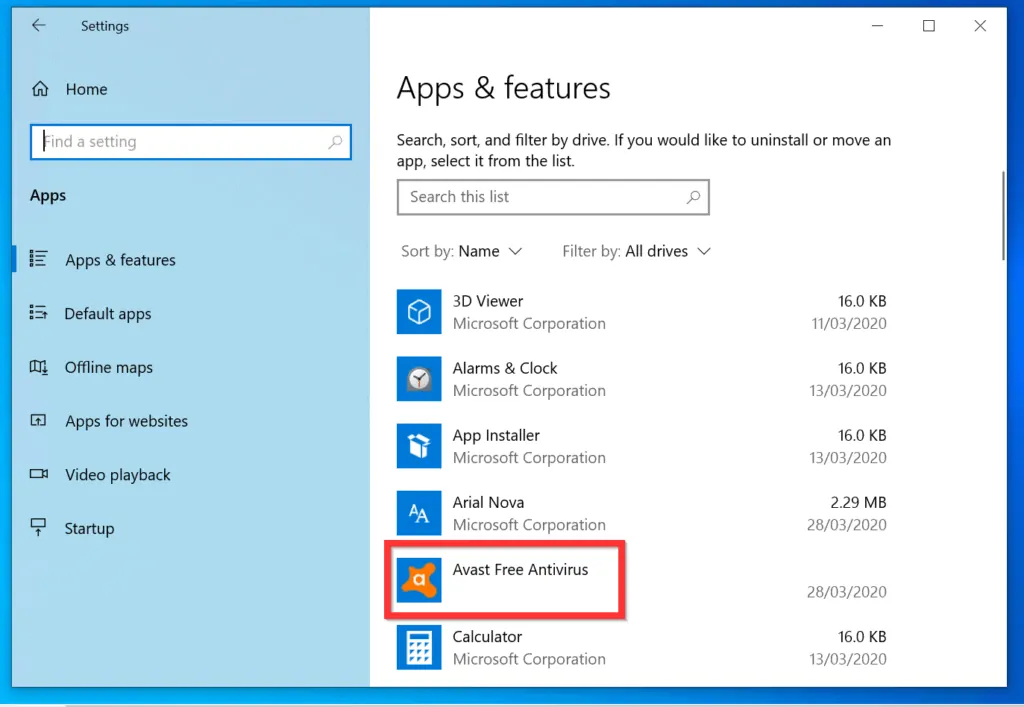
- Scroll down the list of installed apps and click on Avast. The app will display additional options.
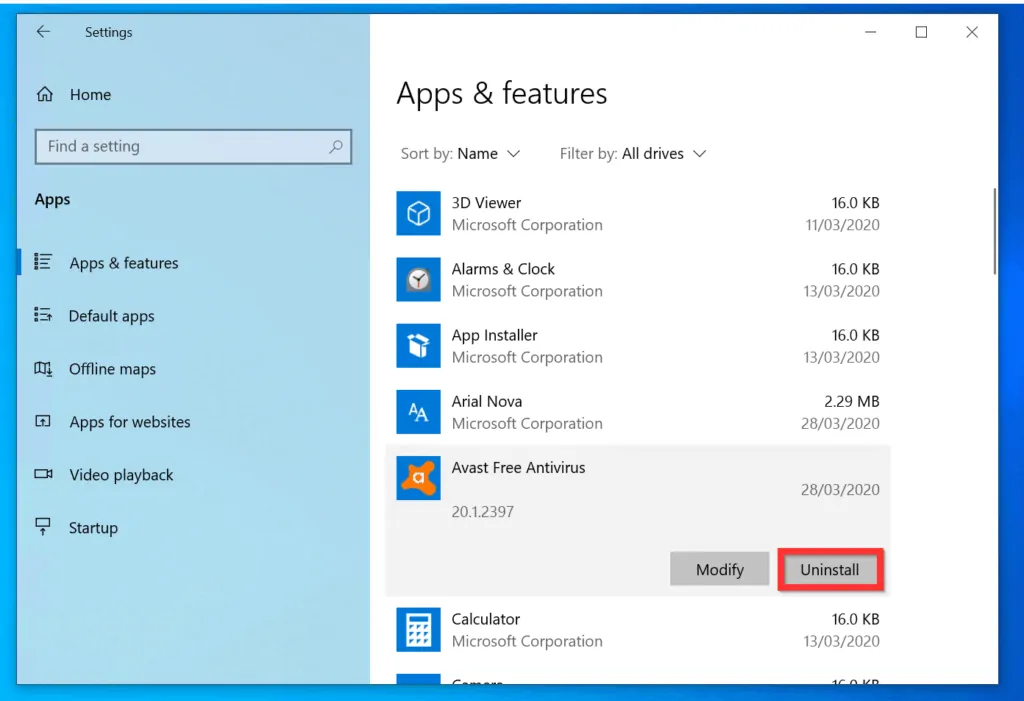
- From the displayed options, click Uninstall. Another Uninstall button will be displayed above the current button.
- To confirm that you want to uninstall the app, click the second Uninstall button. You will receive User Account Control (UAC) confirmation window.

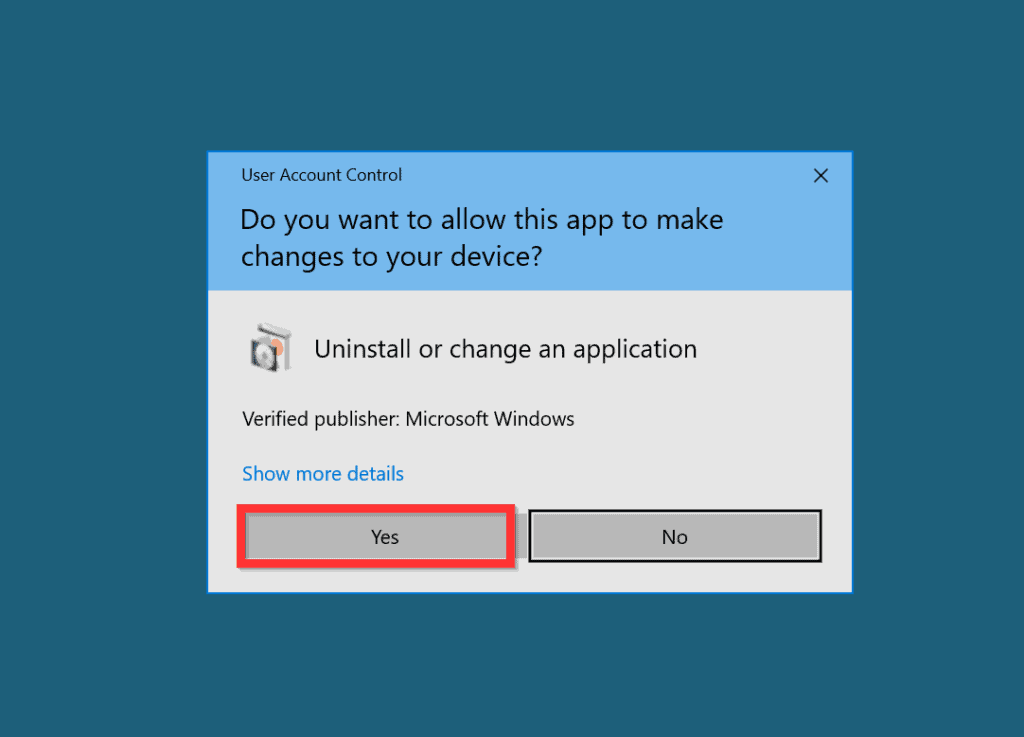
- To authorize the uninstall, on the User Account Control screen, click Yes.
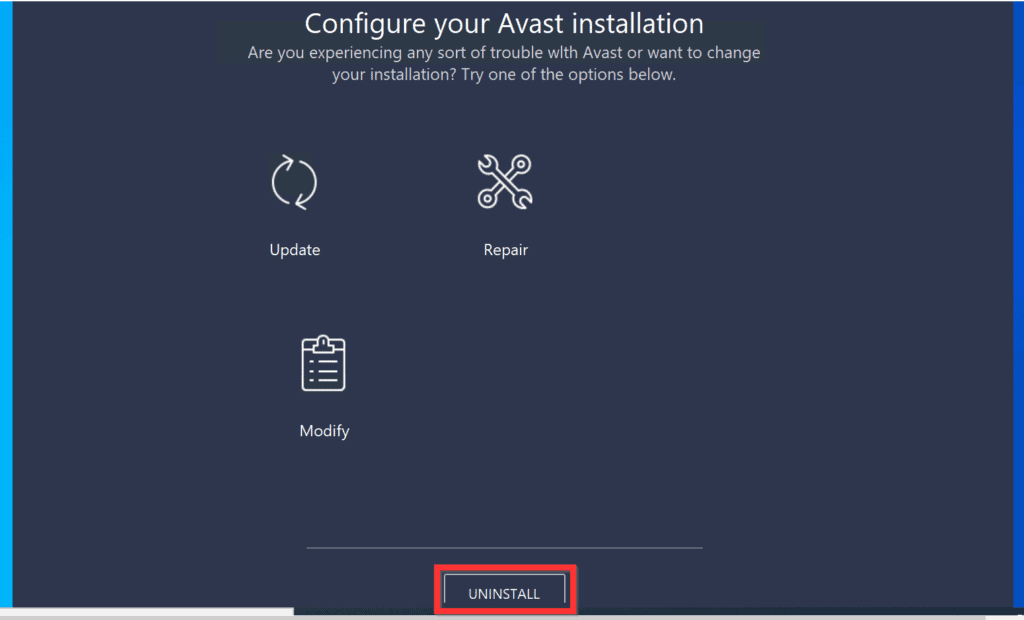
- Avast Setup window will open. To uninstall the app, on the bottom of the window, click UNINSTALL.
Option 2: Uninstall Avast from Control Panel
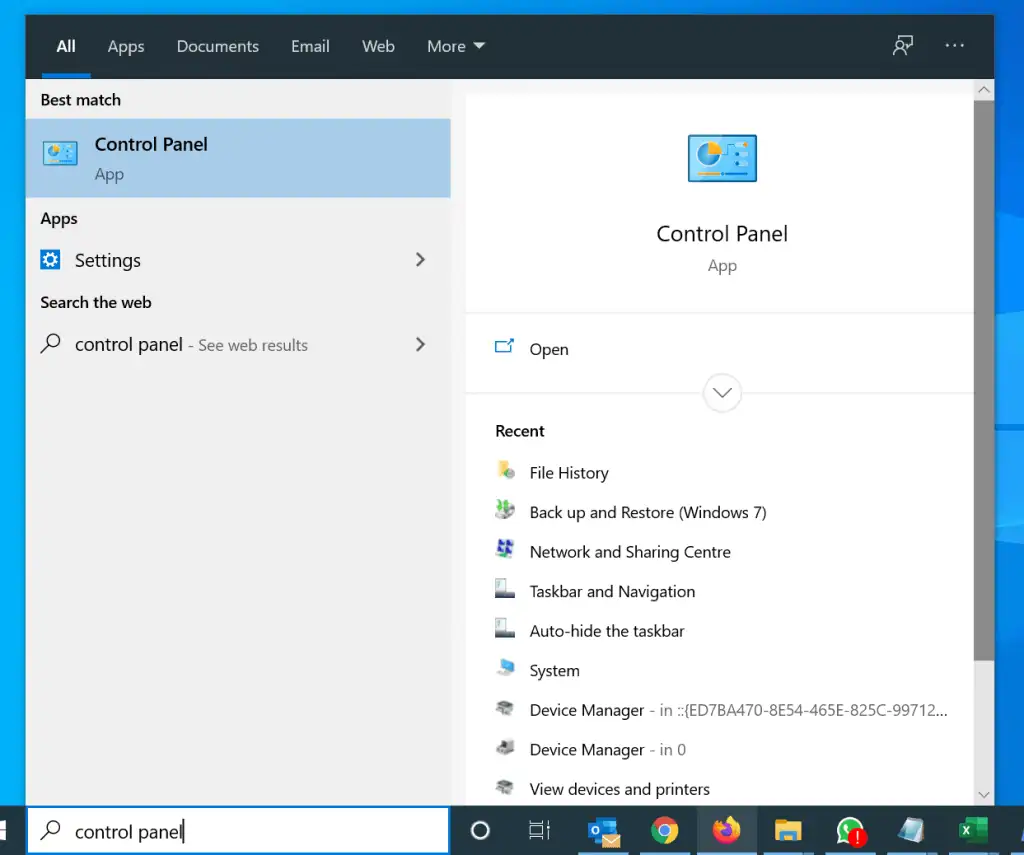
- Type control panel in the search box. Then, from the search results, click Control Panel.
- On Control Panel, if View by is NOT set to Category, click the drop-down and select Category.
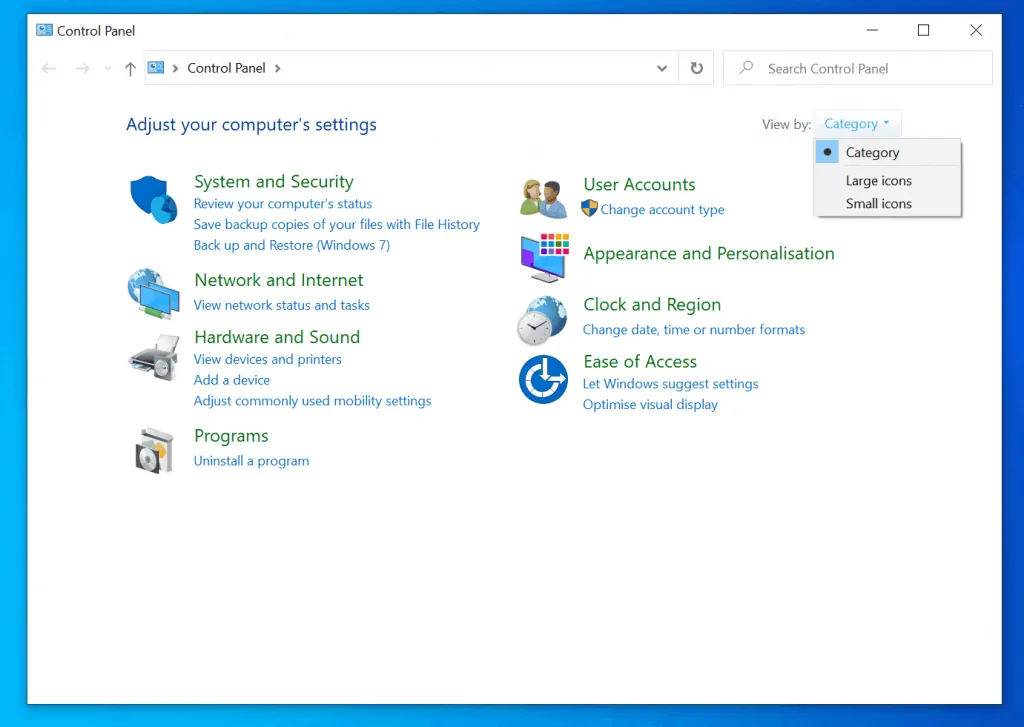
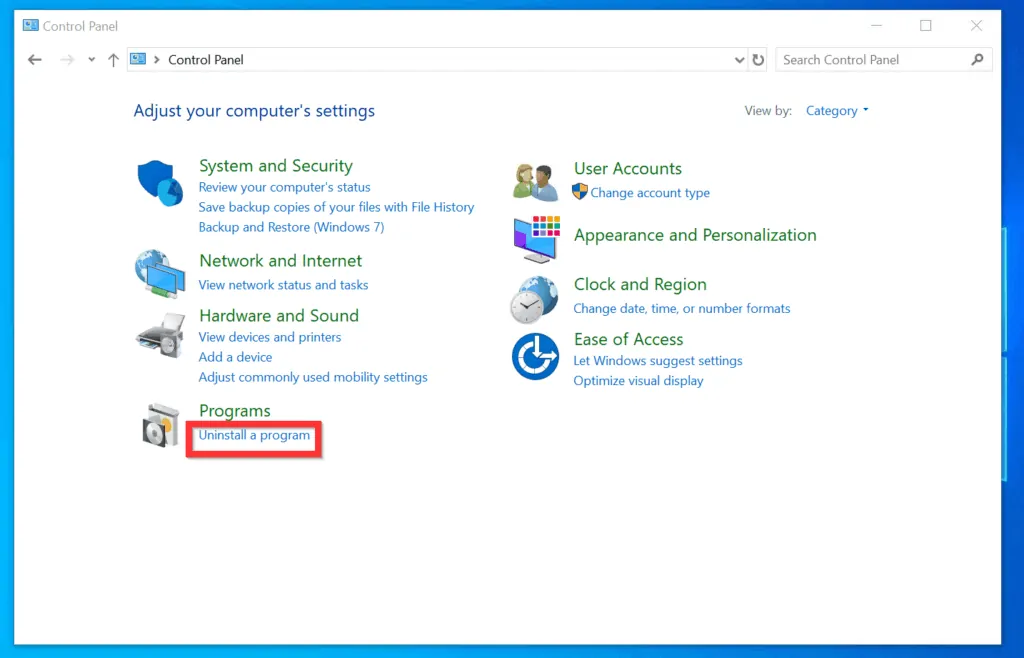
- Then, on the bottom left of Control Panel window, click Uninstall a program.
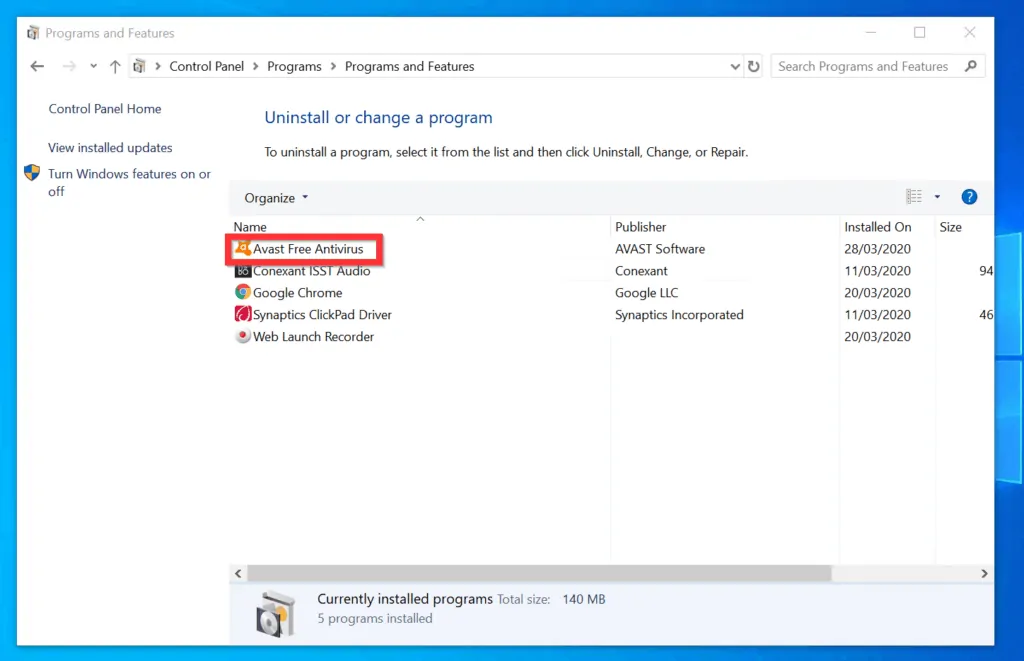
- When the Uninstall or change a program window opens, highlight Avast (click on it once). Once you highlight it, an Uninstall button will be displayed above the Name column.
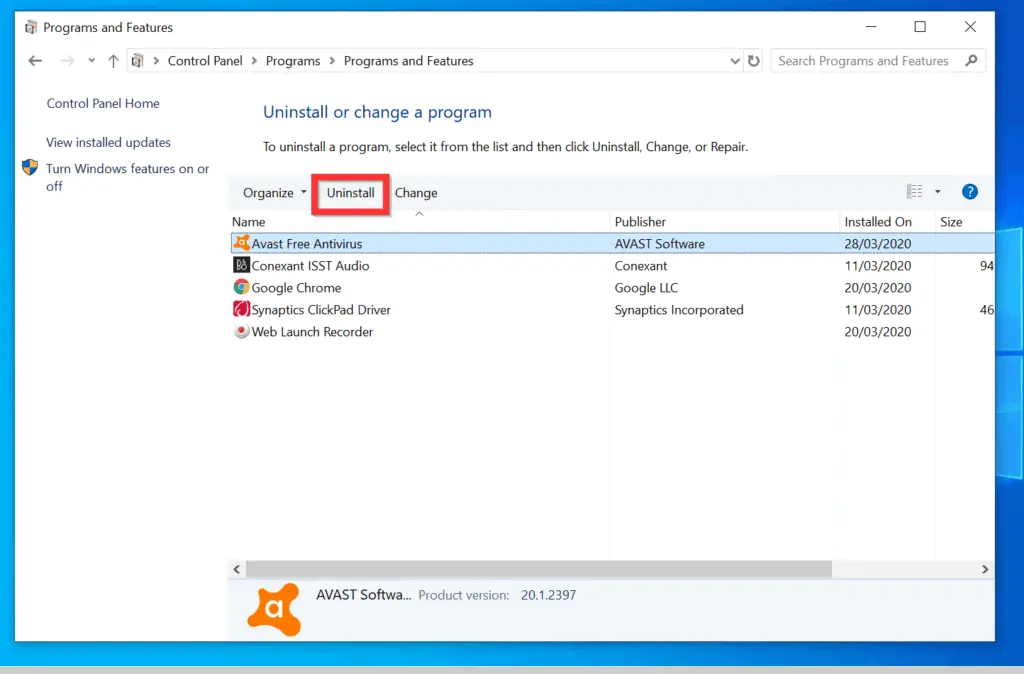
- To uninstall the program, click Uninstall. You will receive User Account Control (UAC) confirmation window.
- On the bottom left of the UAC window, click Yes.
- Avast Setup window will open. To uninstall the program, on the bottom of the window, click UNINSTALL.
I hope you found this Itechguide helpful. If you found it helpful, click on “Yes” beside the “Was this page helpful” question below.
You may also express your thoughts and opinions by using the “Leave a Comment” form at the bottom of this page.
Finally, for more Windows 10 Itechguides, visit our Windows 10 How-To page.


![How To Run Sysprep (Generalize) In Windows 10 [2 Methods]](https://www.itechguides.com/wp-content/uploads/2022/05/8-2.webp)