This Itechguide teaches you how to unhide folders in Windows 10. The guide covers 3 steps to unhide folders in Windows 10.
Step 1: Enable Show Hidden File, Folders, and Drives
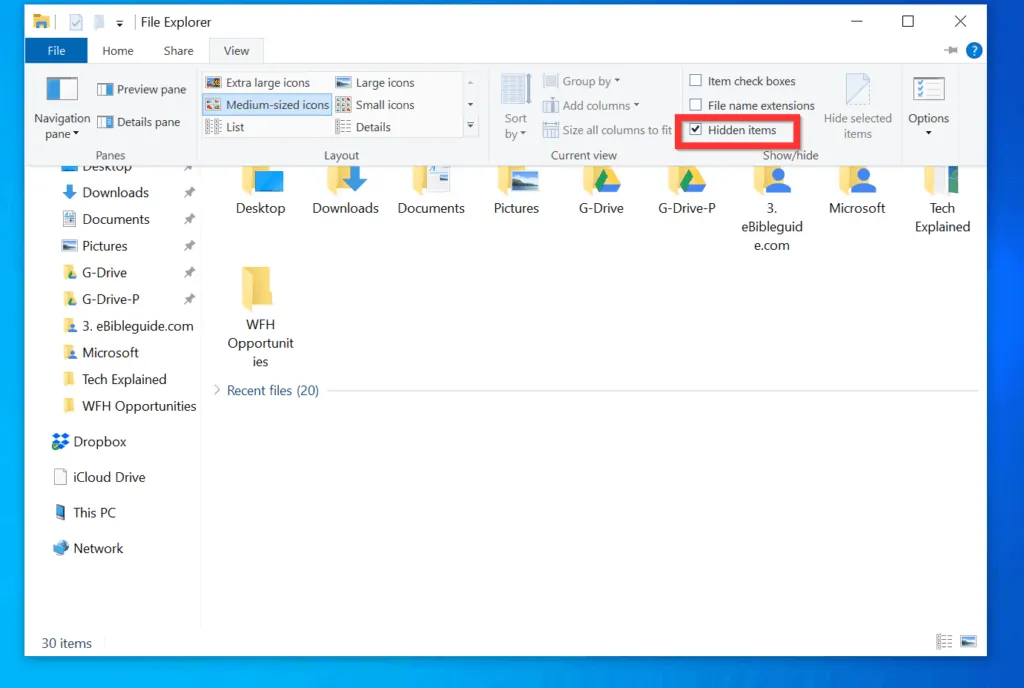
The first step to unhide folders in Windows 10 is to enable the Folder Option to view hidden items.
Here are the steps…
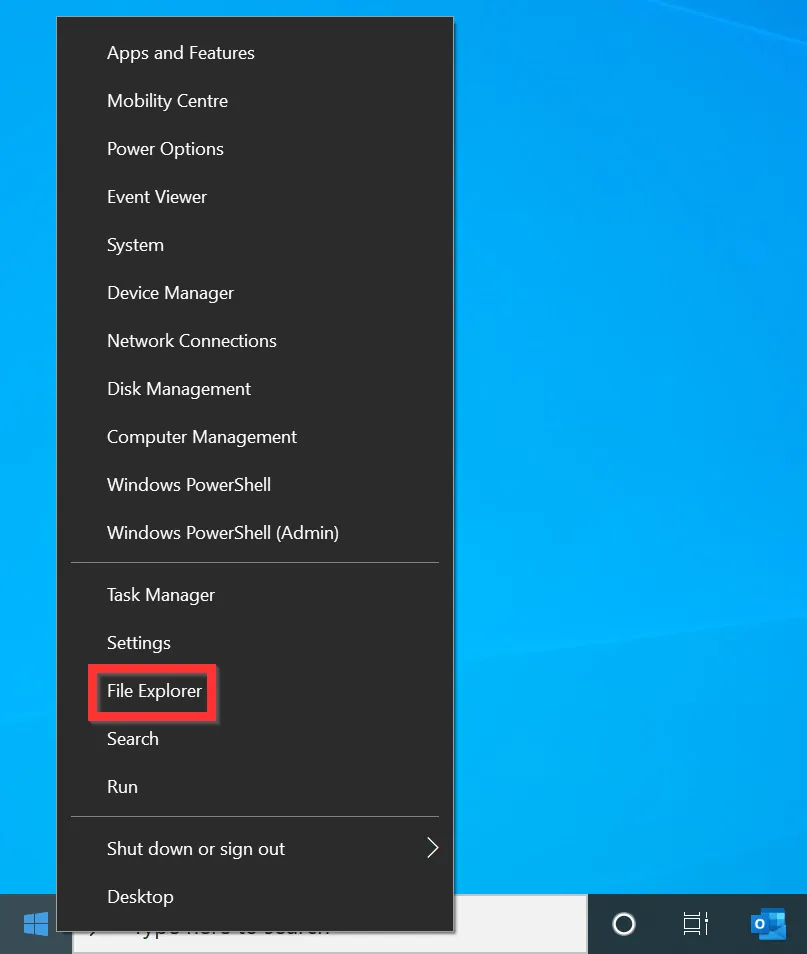
- Right-click the Windows 10 Start menu and click File Explorer.
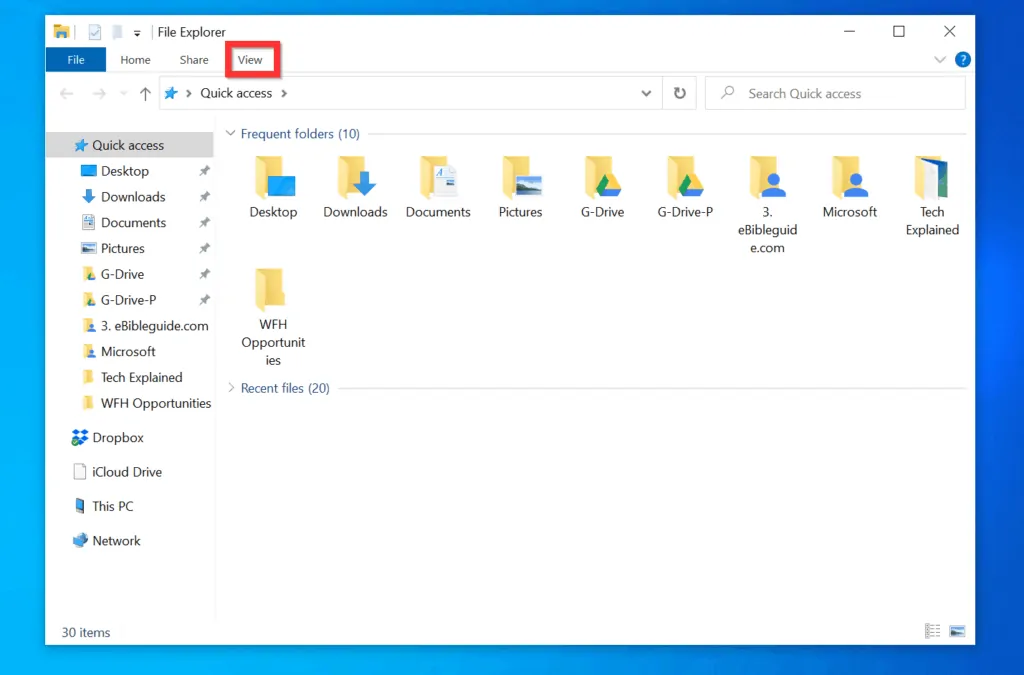
- Then, on the top menu of File Explorer, click the View tab.
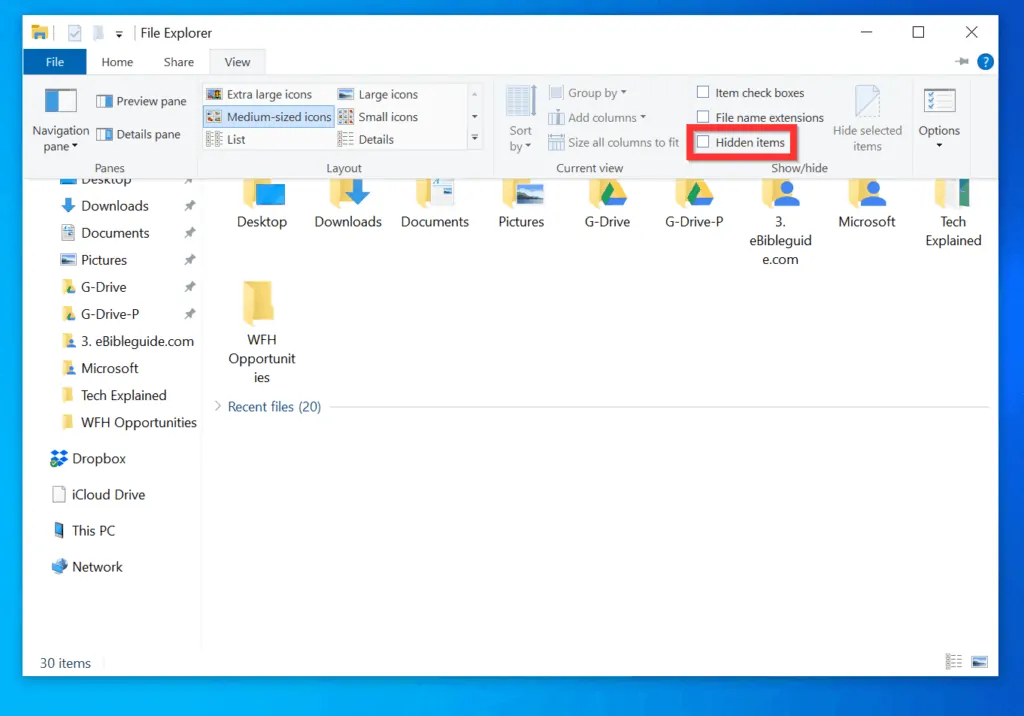
- Finally, to enable show hidden folders, on the Show/Hide category of the View tab, check the Hidden items checkbox.
Step 2: Unhide Folders
Once you have enabled show hidden items, the hidden folder will become visible – use the steps below to remove the Hidden Attribute of the folder.
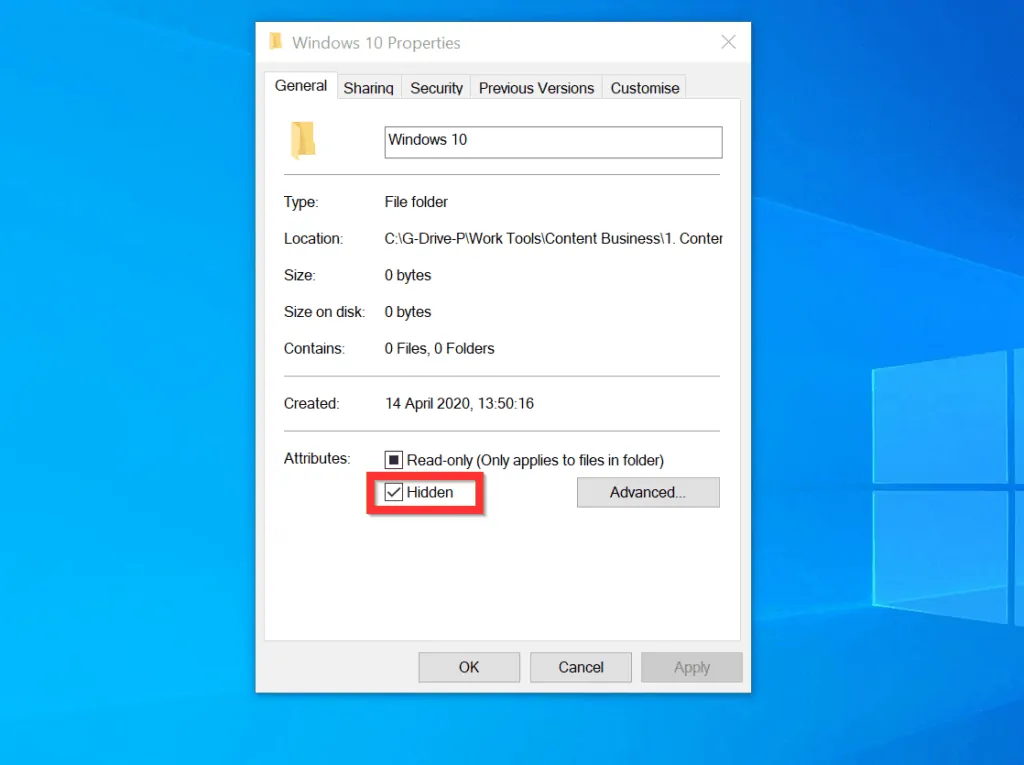
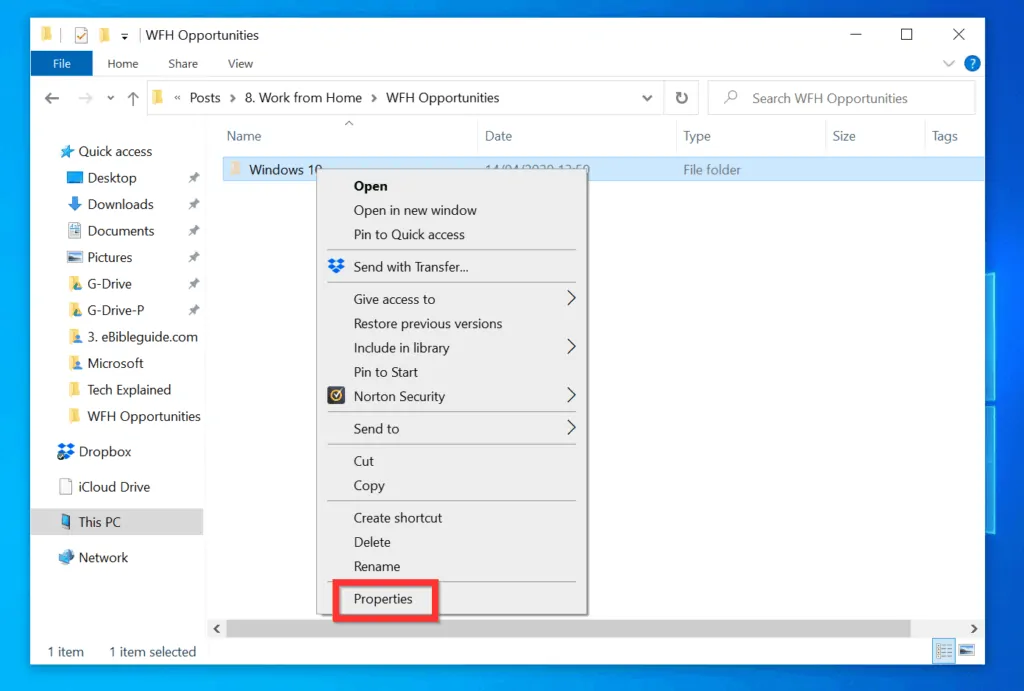
- Right-click the hidden folder you want to unhide and click Properties.
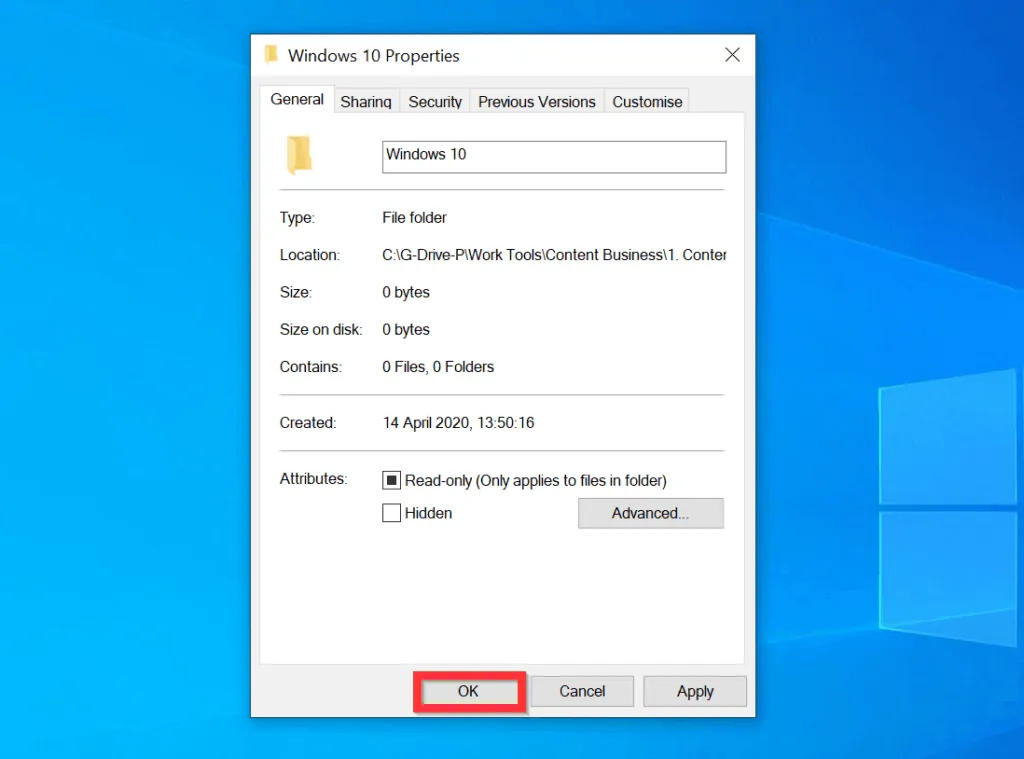
- On the General tab of the folder Properties, uncheck the Hidden checkbox and click OK.
Step 3: Disable Show Hidden Items
This is the last step – at this stage, your hidden folder is already unhidden but you need to reverse the first step. You ca use the method in step 1 to reverse the setting but I want to show you another method to complete the task…
- Right-click the Windows 10 Start menu and click File Explorer.
- Then, on the top menu of File Explorer, click the View tab.
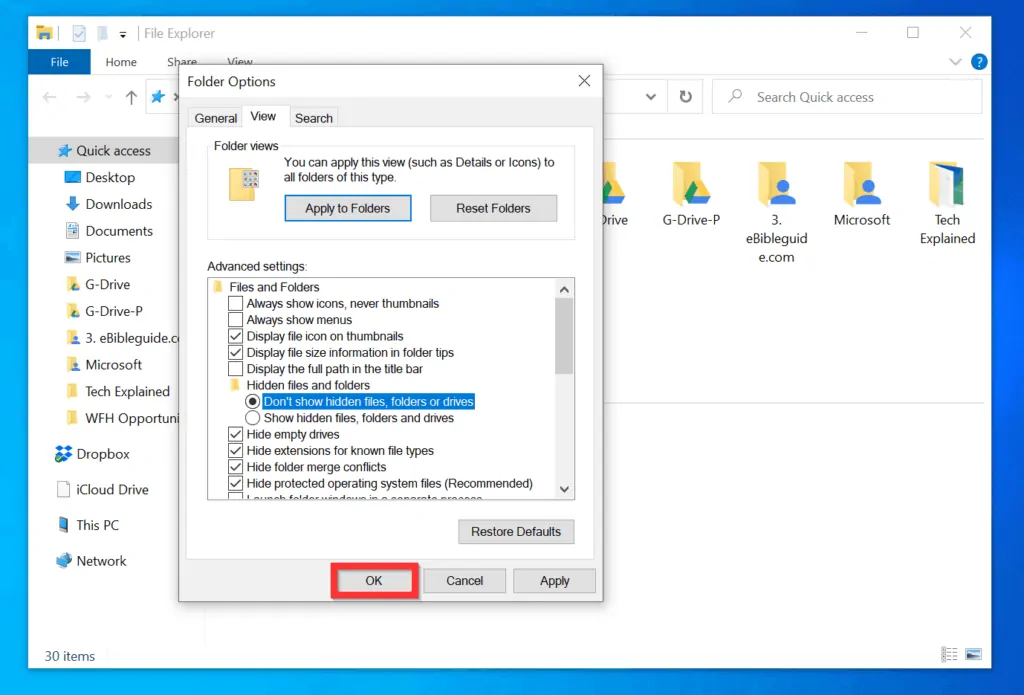
- Then, on the top right of the View tab, click Options. Folder Options will open.
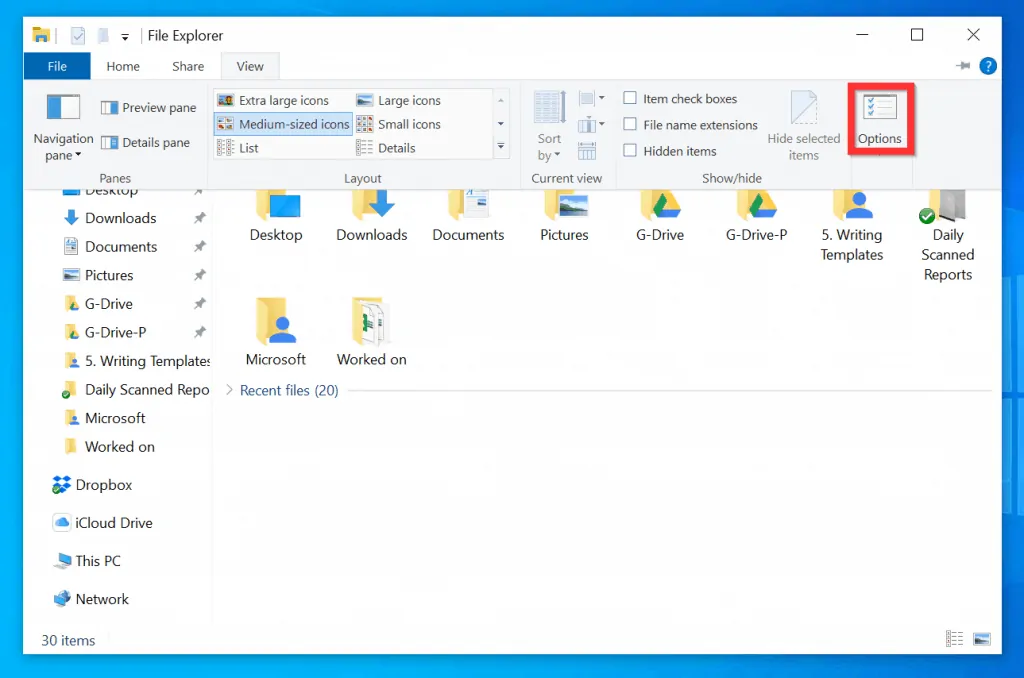
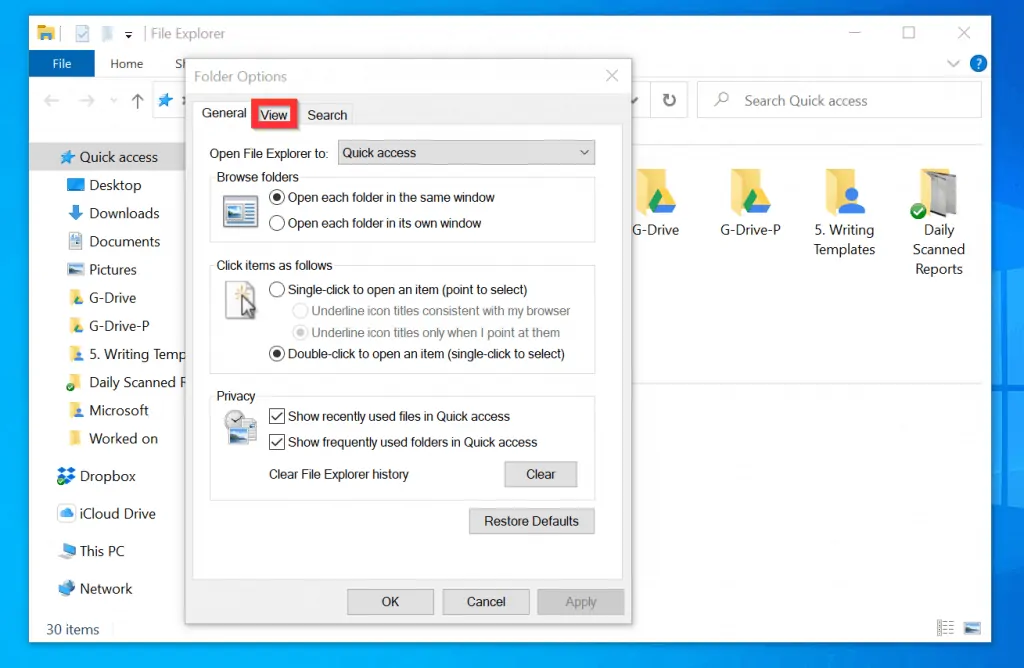
- On the Folder Options window, click the View tab.
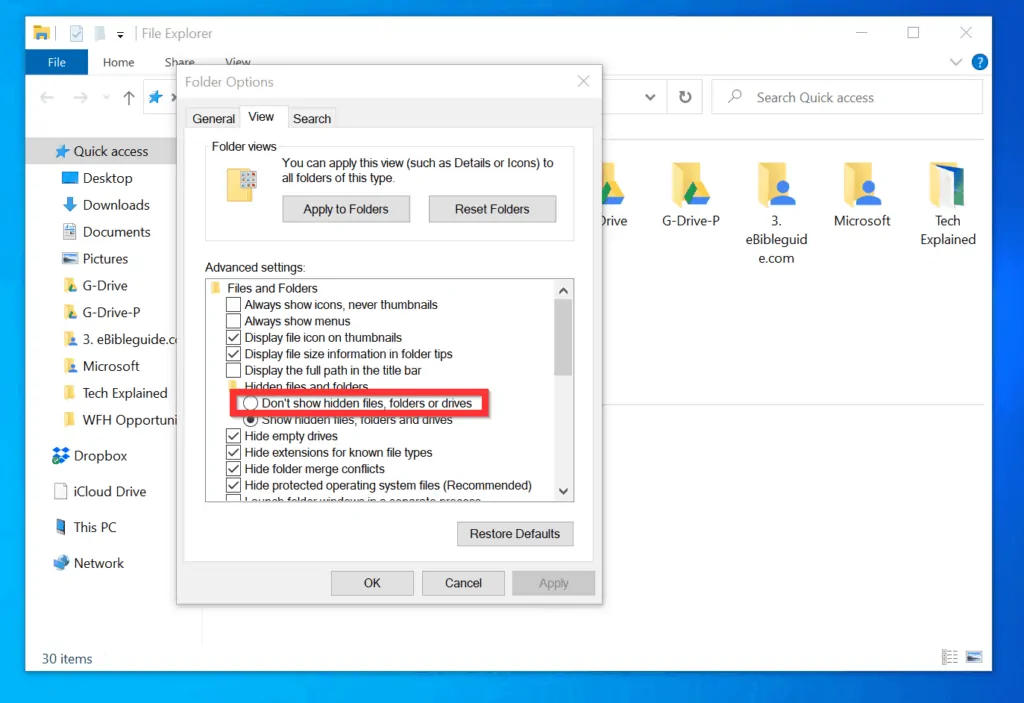
- Finally, below the Advanced settings of Folder Options view tab, locate Hidden files and folders category and select Don’t show hidden files, folders and drives. When you finish, to save your changes, click OK – see the second image below.
I hope you found this Windows 10 Itechguide helpful. If you found this guide helpful, click on “Yes” beside the “Was this page helpful” question below.
You may also express your thoughts and opinions by using the “Leave a Comment” form at the bottom of this page.
Finally, for more Windows 10 Itechguides, visit our Windows 10 How To page


![How To Run Sysprep (Generalize) In Windows 10 [2 Methods]](https://www.itechguides.com/wp-content/uploads/2022/05/8-2.webp)