Do you want to create a video that records your Windows 11 screen? This guide teaches you three methods to screen record on Windows 11.
Option 1: Screen Record with Xbox Game Bar
Windows 10 and Windows 11 have a built-in feature called Xbox Game Bar. Although this is mainly for gamers, non-gamers can use the screen-recording feature of this tool to screen record MP4 videos.
However, this tool has limitations, such as the inability to screen record File Explorer or your Windows desktop. If you want the ability to screen record anything in Windows, see the second section of this guide.
Otherwise, to screen record any other app that works with Xbox Game Bar, follow the steps below:
- Open the app you want to screen record. I want to record my actions in my Chrome browser in this example. So, I’ll open the Chrome browser.
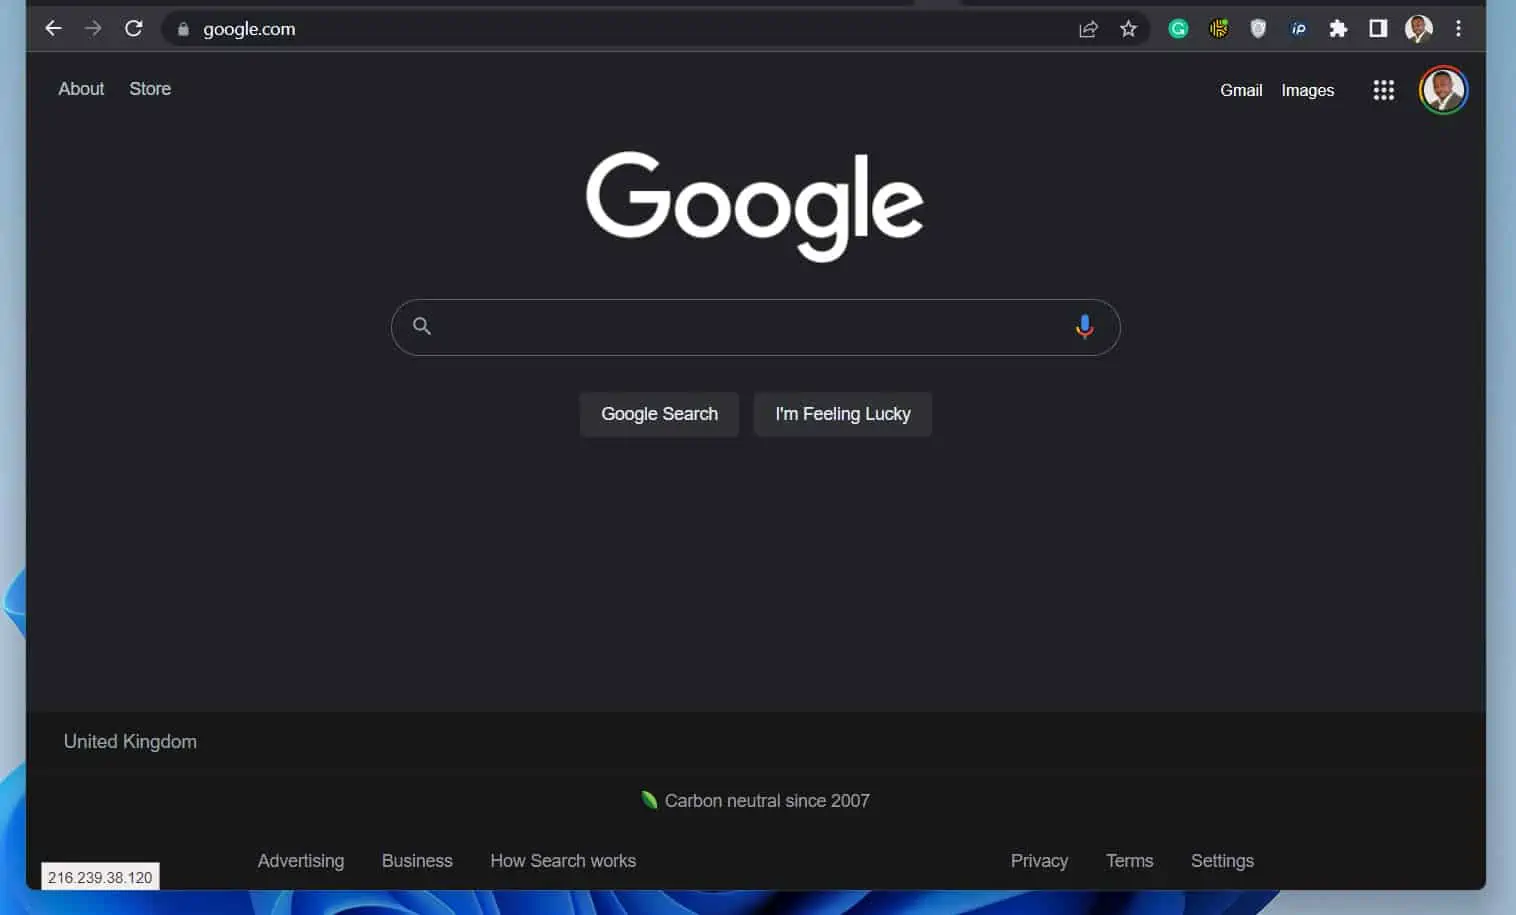
- Once the app you want to screen record is open and is the active window, press the Windows and the G key (Windows + G) simultaneously. This last action will open the Xbox Game Bar app.
To start screen recording, on the top left, click Start recording. You may also use the keyboard shortcut Windows + Alt + R.
Once recording starts, click anywhere outside the Xbox Game Bar to show display the app you’re recording in the active window.
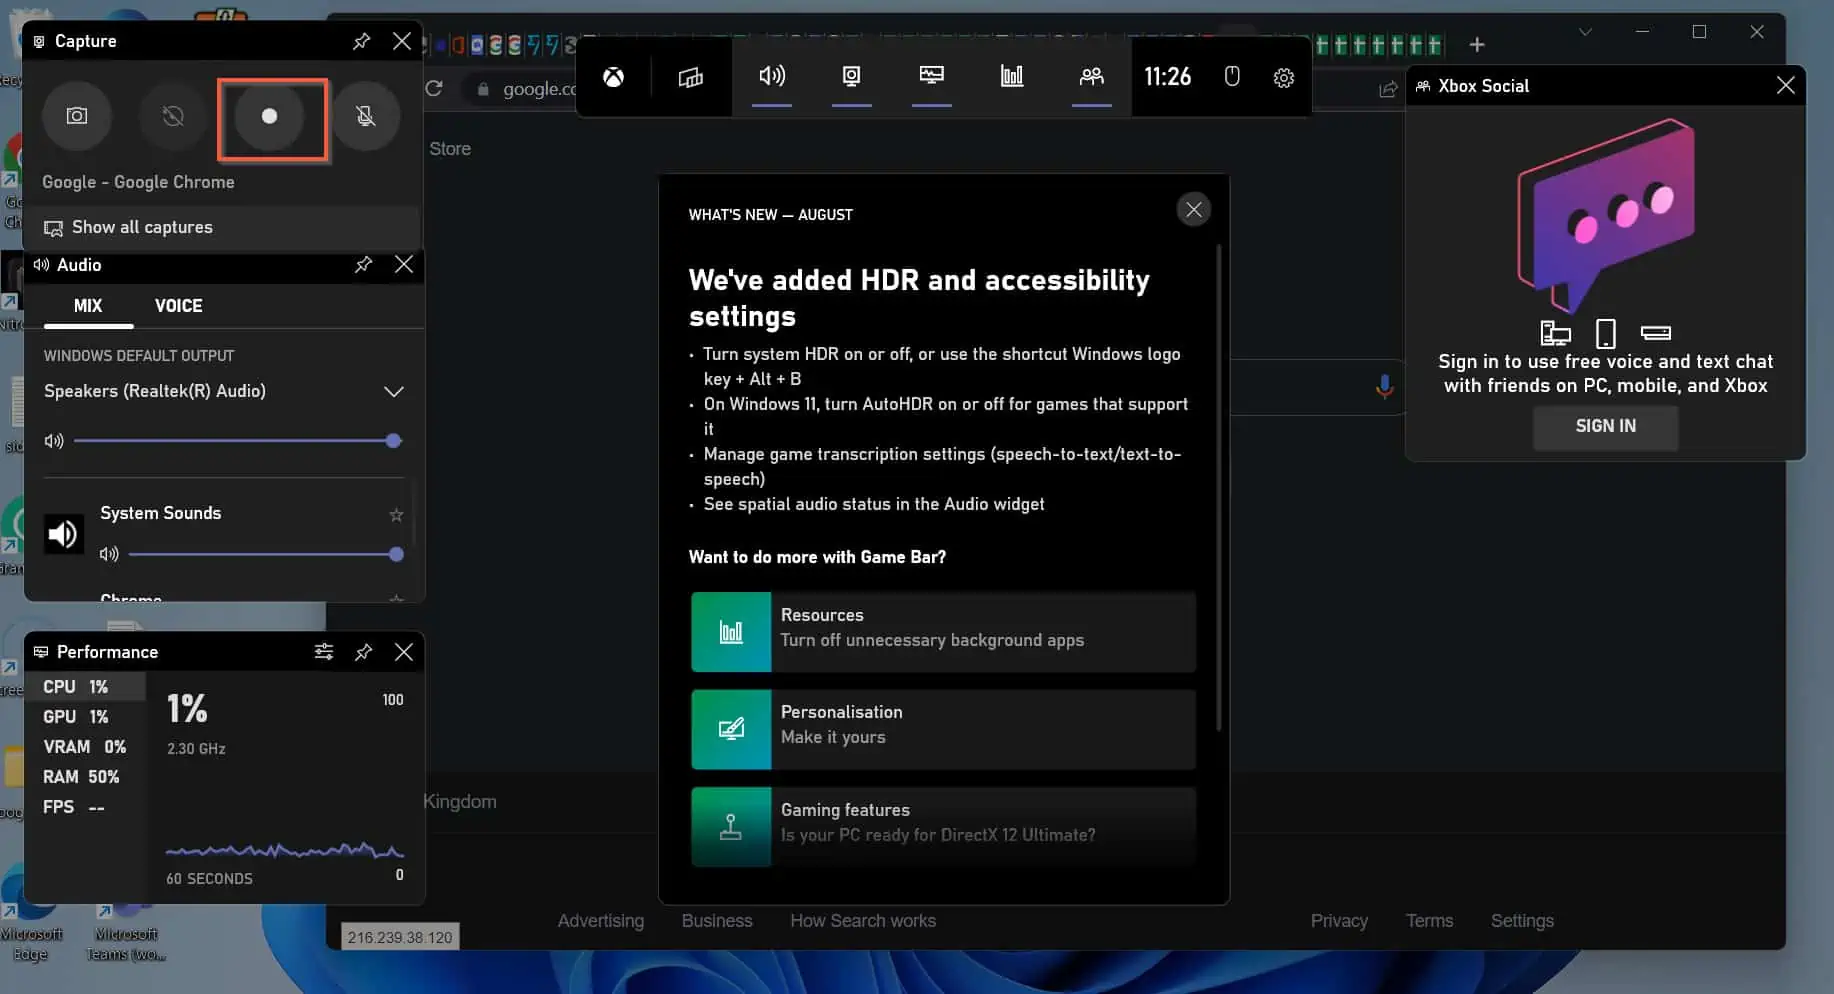
- Then, continue doing whatever action you want to be recorded. You will notice the recoding menu on the top right of the app.
If you look closely at the screenshot below, you’ll also notice that there is a microphone icon. However, the microphone is muted by default.
To record your voice, unmute the microphone. To stop recording, press the circle with the square.
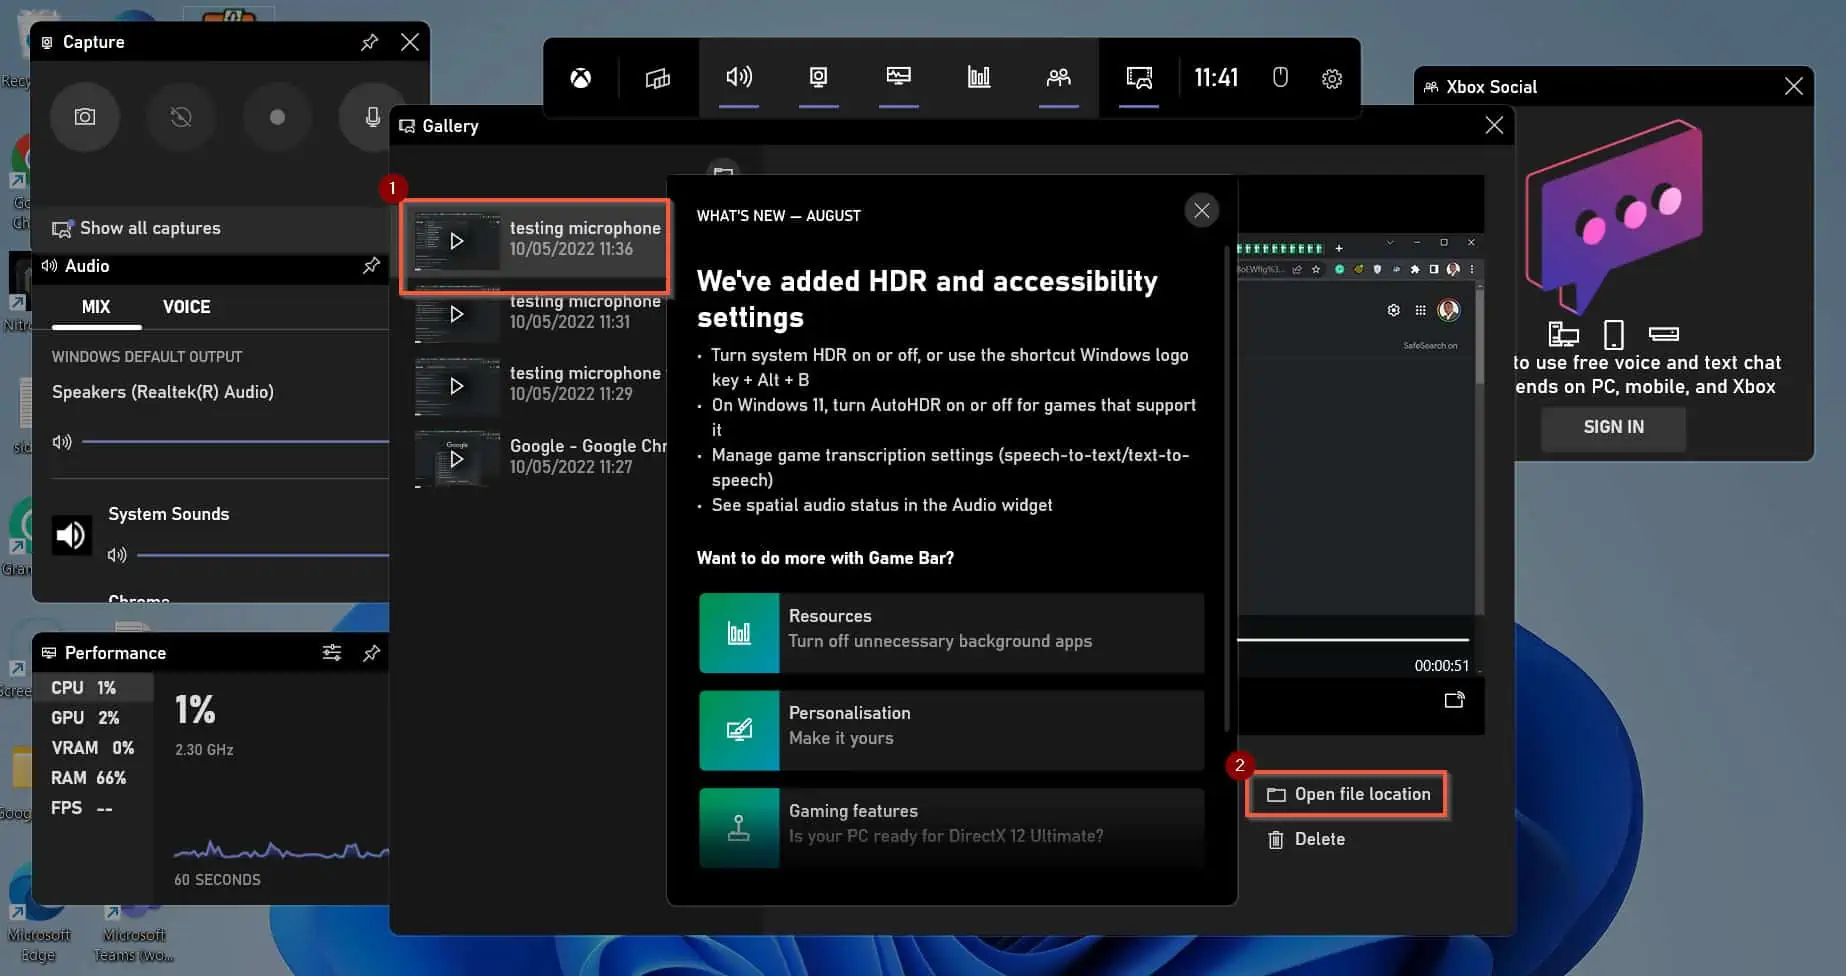
- Then, to open Xbox Game Bar and replay your recording, press the Windows + G keys simultaneously on your keyboard. All your screen recordings will be displayed in the second pane from the left.
To play your screen recording in Windows 11, see step 5 below…
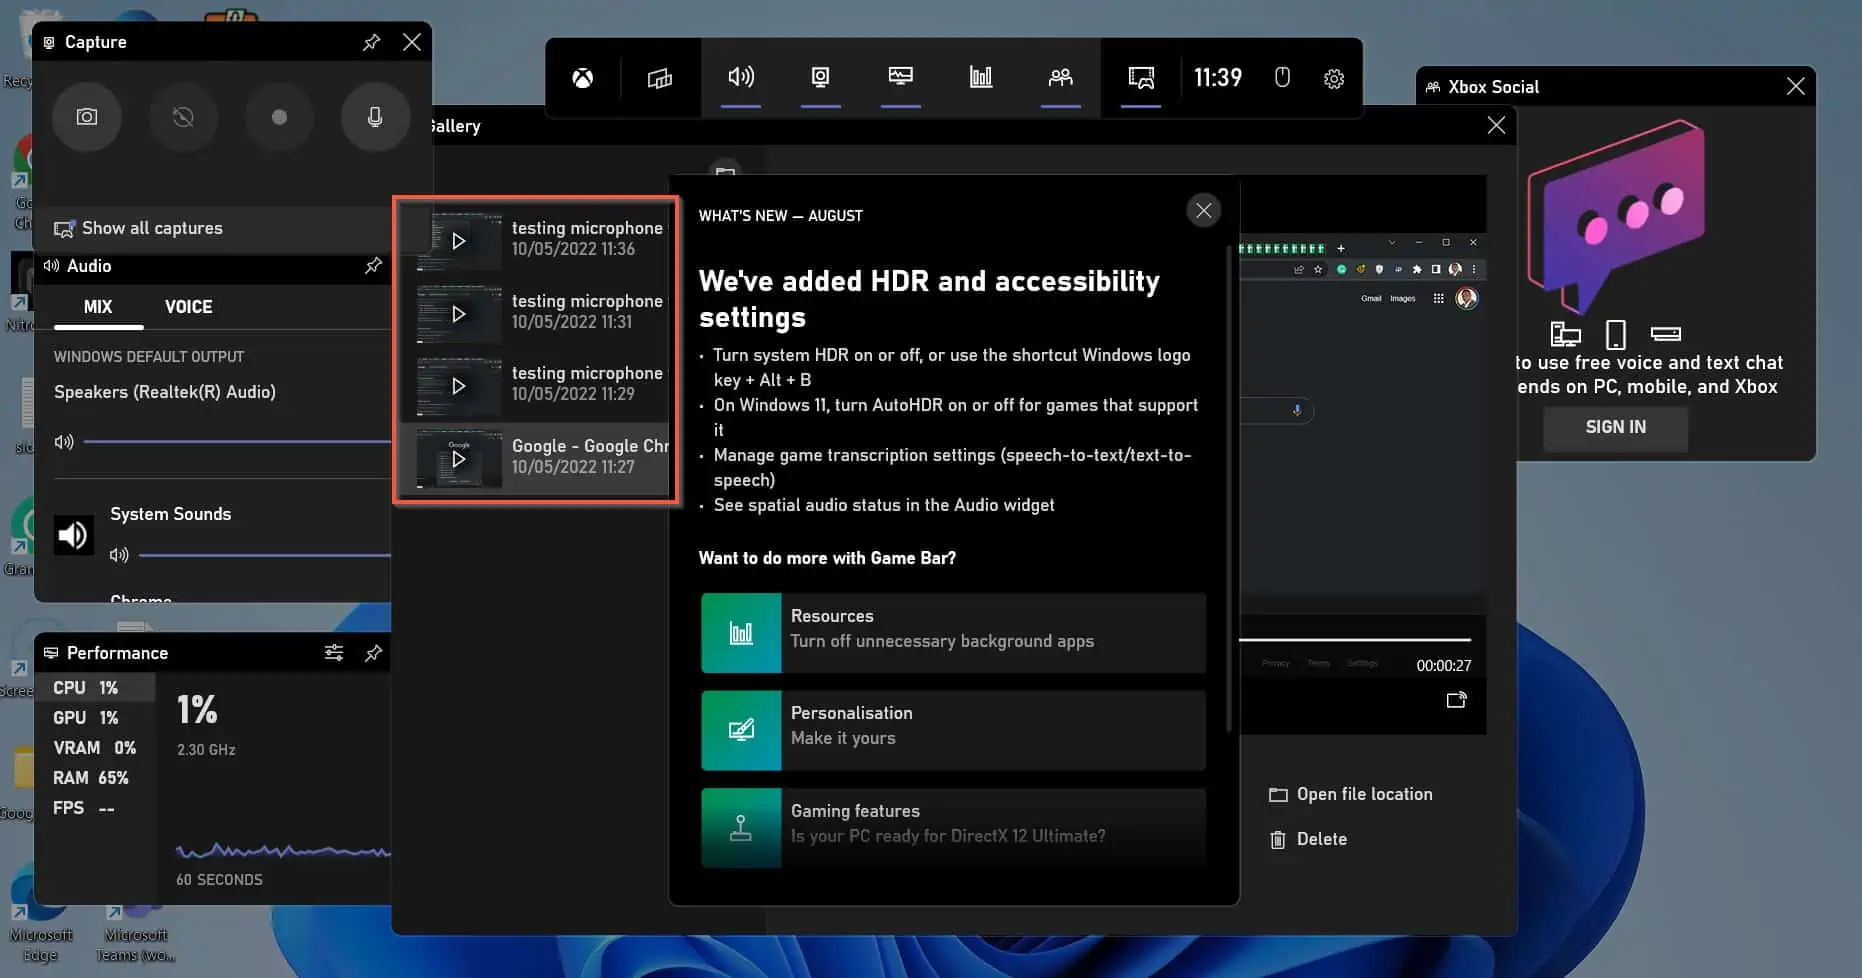
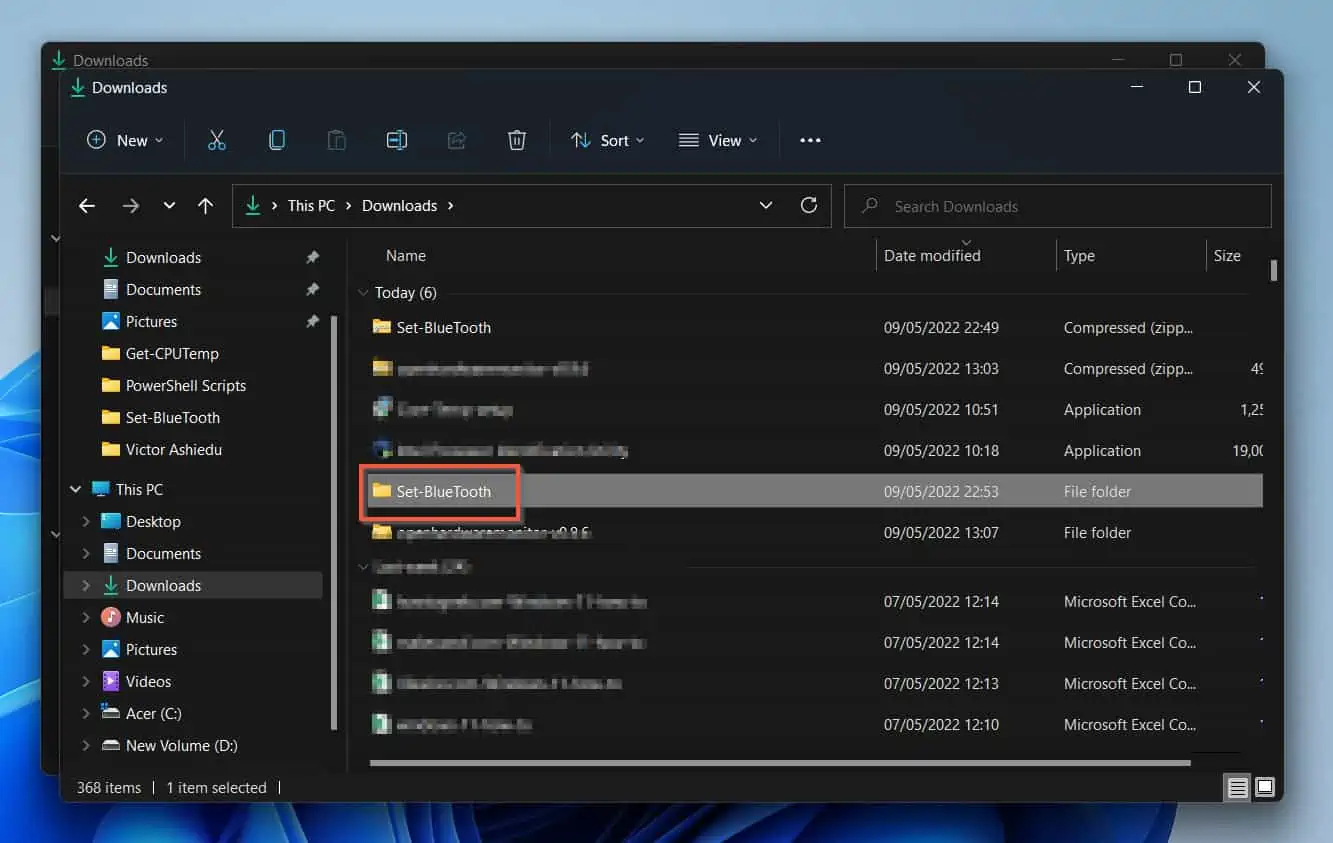
- Click on the screen-recorded video you want to play. Then, click Open file location on the displayed preview (the third pane – counting from left).
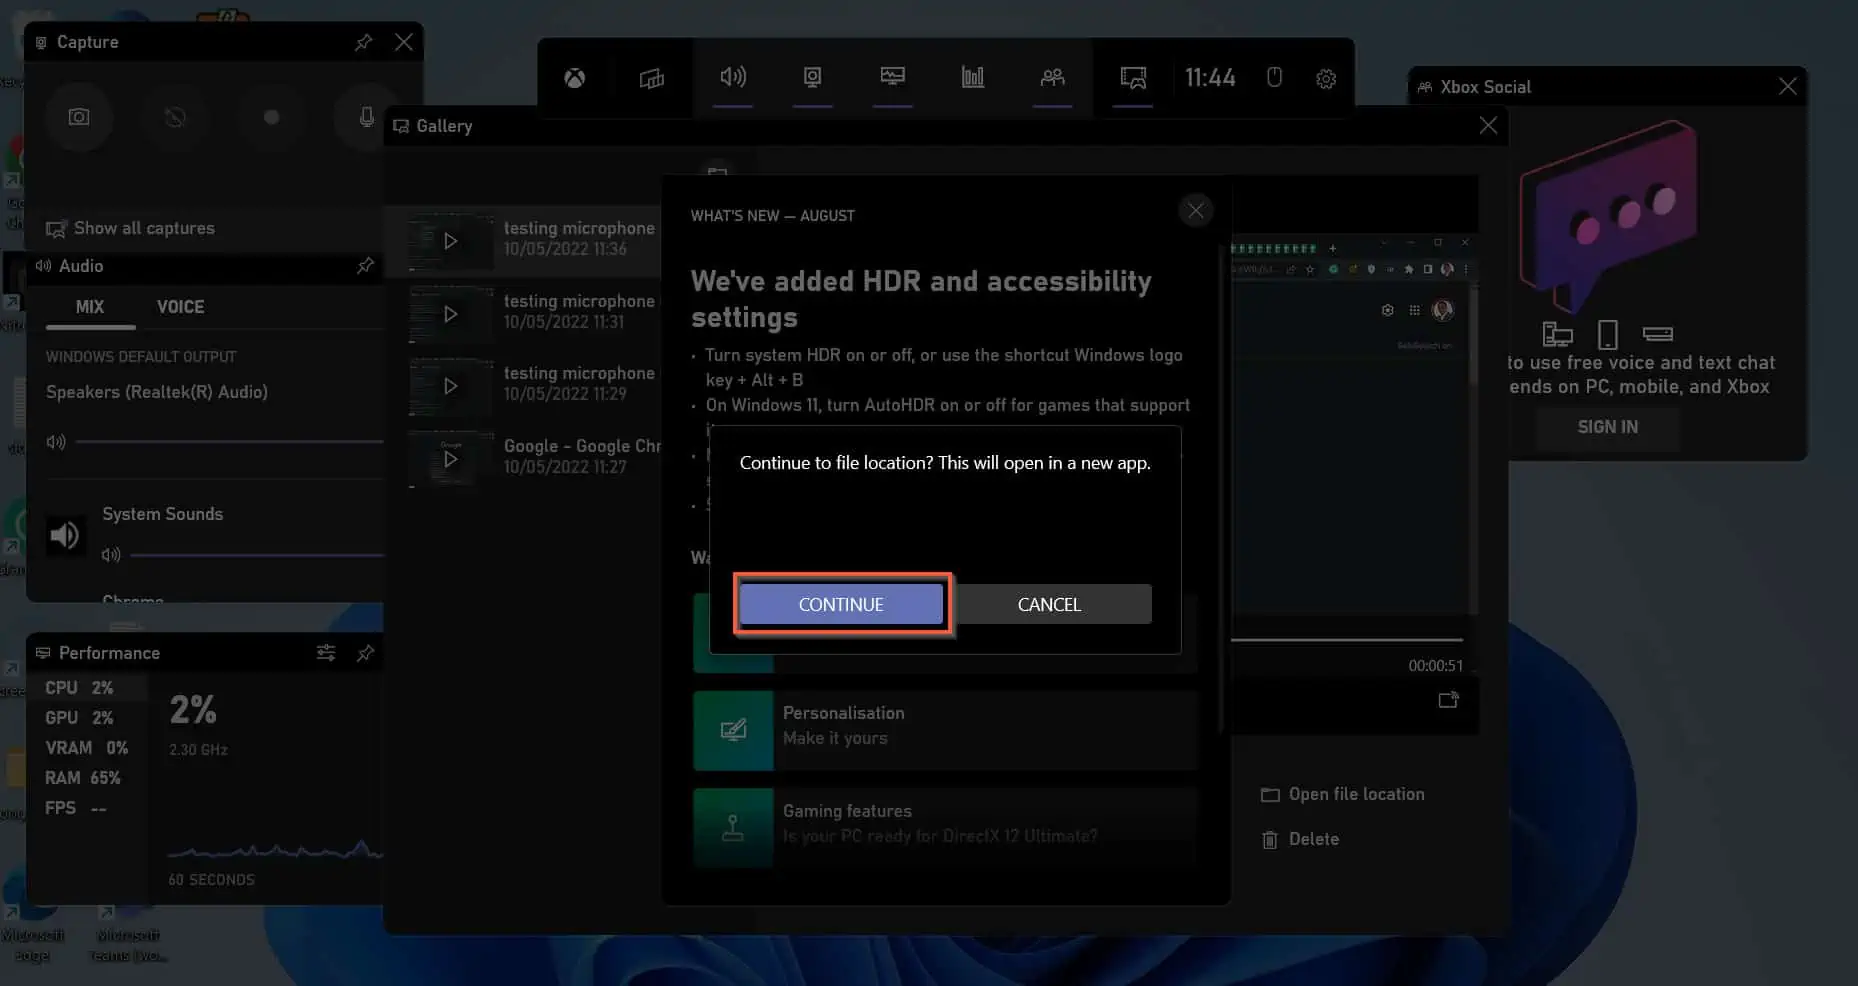
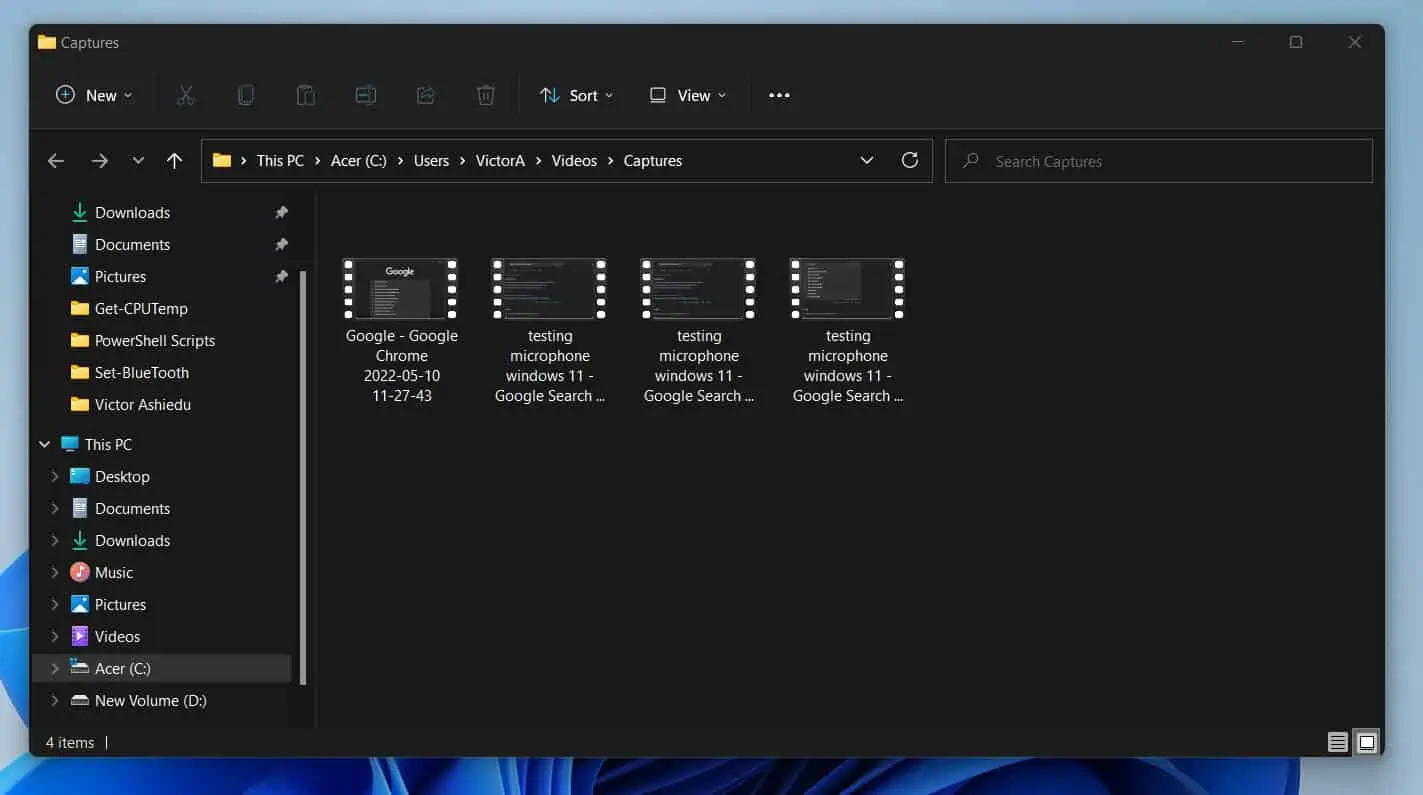
- You’ll receive a warning that you’re about to leave the Xbox Game Bar app. To leave the app, click Continue. This action will open the folder where Windows 11 saved all your screen-recorded videos – see the second screenshot below.
You can play any of the videos as normal.
Option 2: Screen Record with Screencast-O-Matic
Obviously, there are many third-party (non-Microsoft apps) that you can use to screen record in Windows. However, this section will show you how to use Screencast-O-Matic, an app I use.
Screencast-O-Matic is a freemium SaaS tool that has a lot of features. By freemium, I mean that you can start using Screencast-O-Matic for free.
However, you can pay a fee if you want additional features. To screen record in Windows 11 with Screencast-O-Matic, follow the steps below:
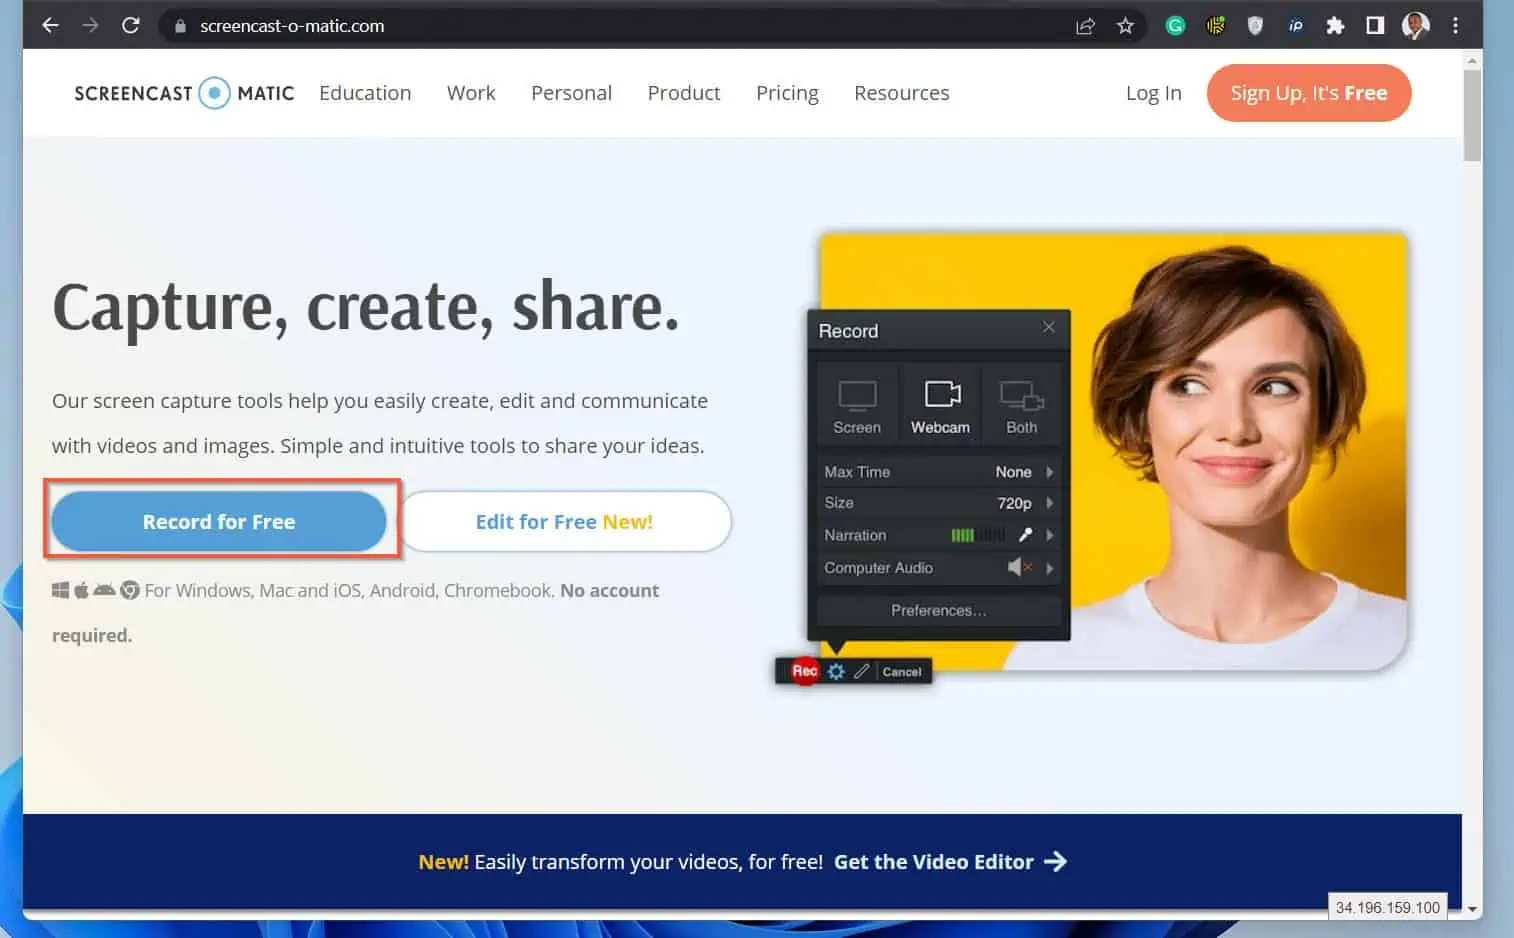
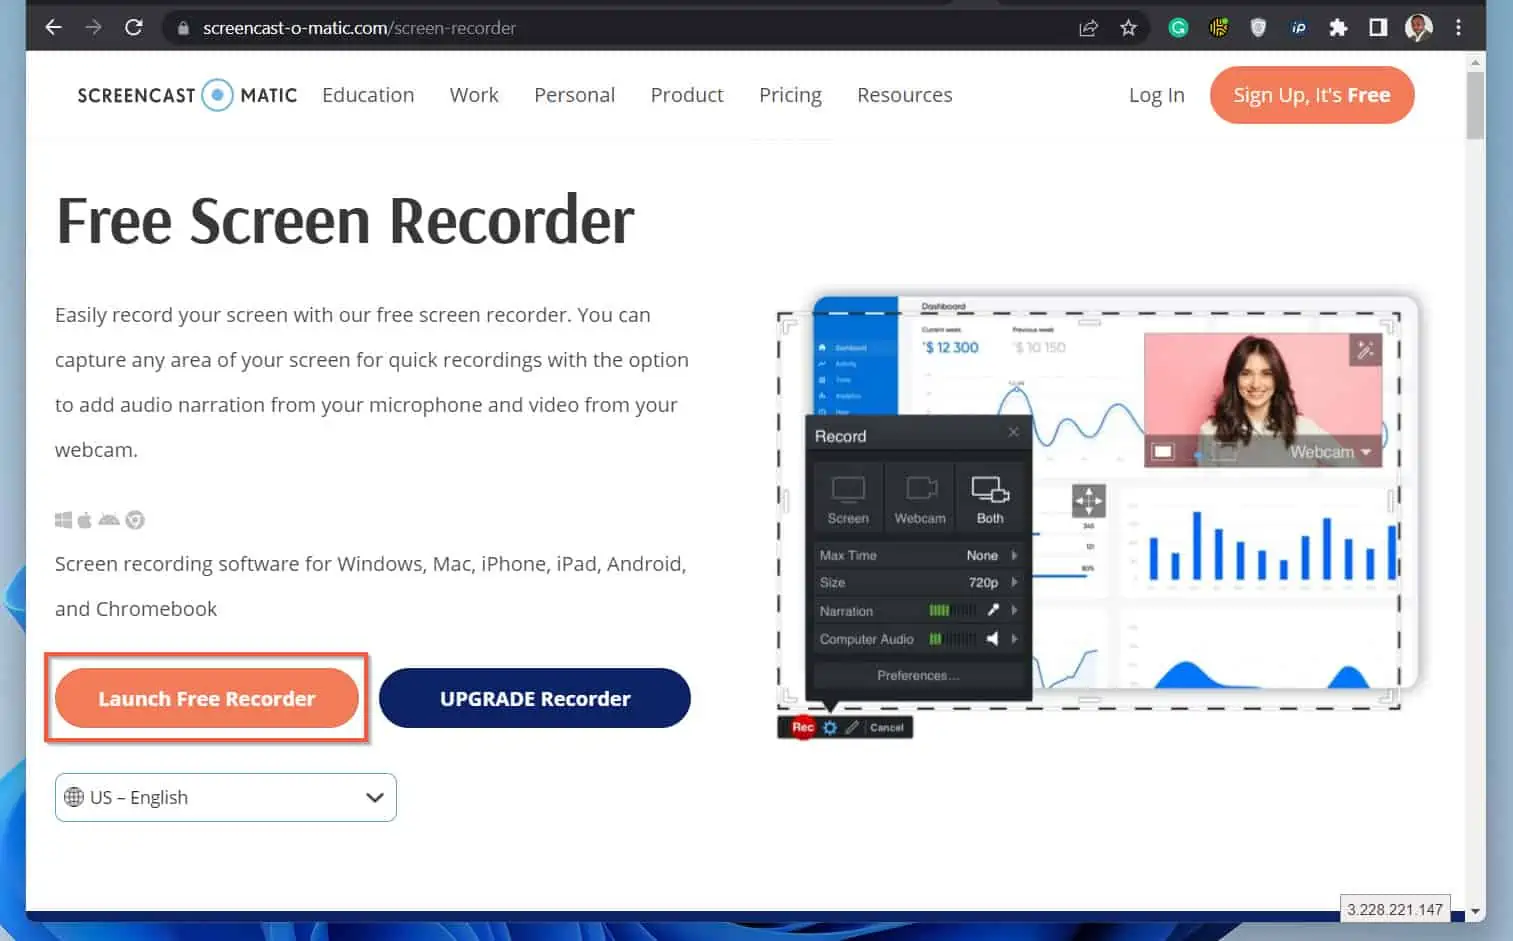
- Open Screencast-O-Matic.com. Then, click Record for Free button.
- Then, click the Launch Free Recorder button on the Free Screen Recorder page. After a while, a file will be downloaded to your computer.
When the file is downloaded, proceed to step 3 below…
- If you use Google Chrome or the new Microsoft Edge, click the file on the bottom left of the browser.

When Screencast-O-Matic opens, it has thick white dotted lines. You will record anything within this line on your Windows 11 PC if you start recording.
- If you wish to increase the space recorded, drag the edges (I have labeled the edges 1 to 4). Once you have decided on the screen to record, you need to learn two more features – see below…
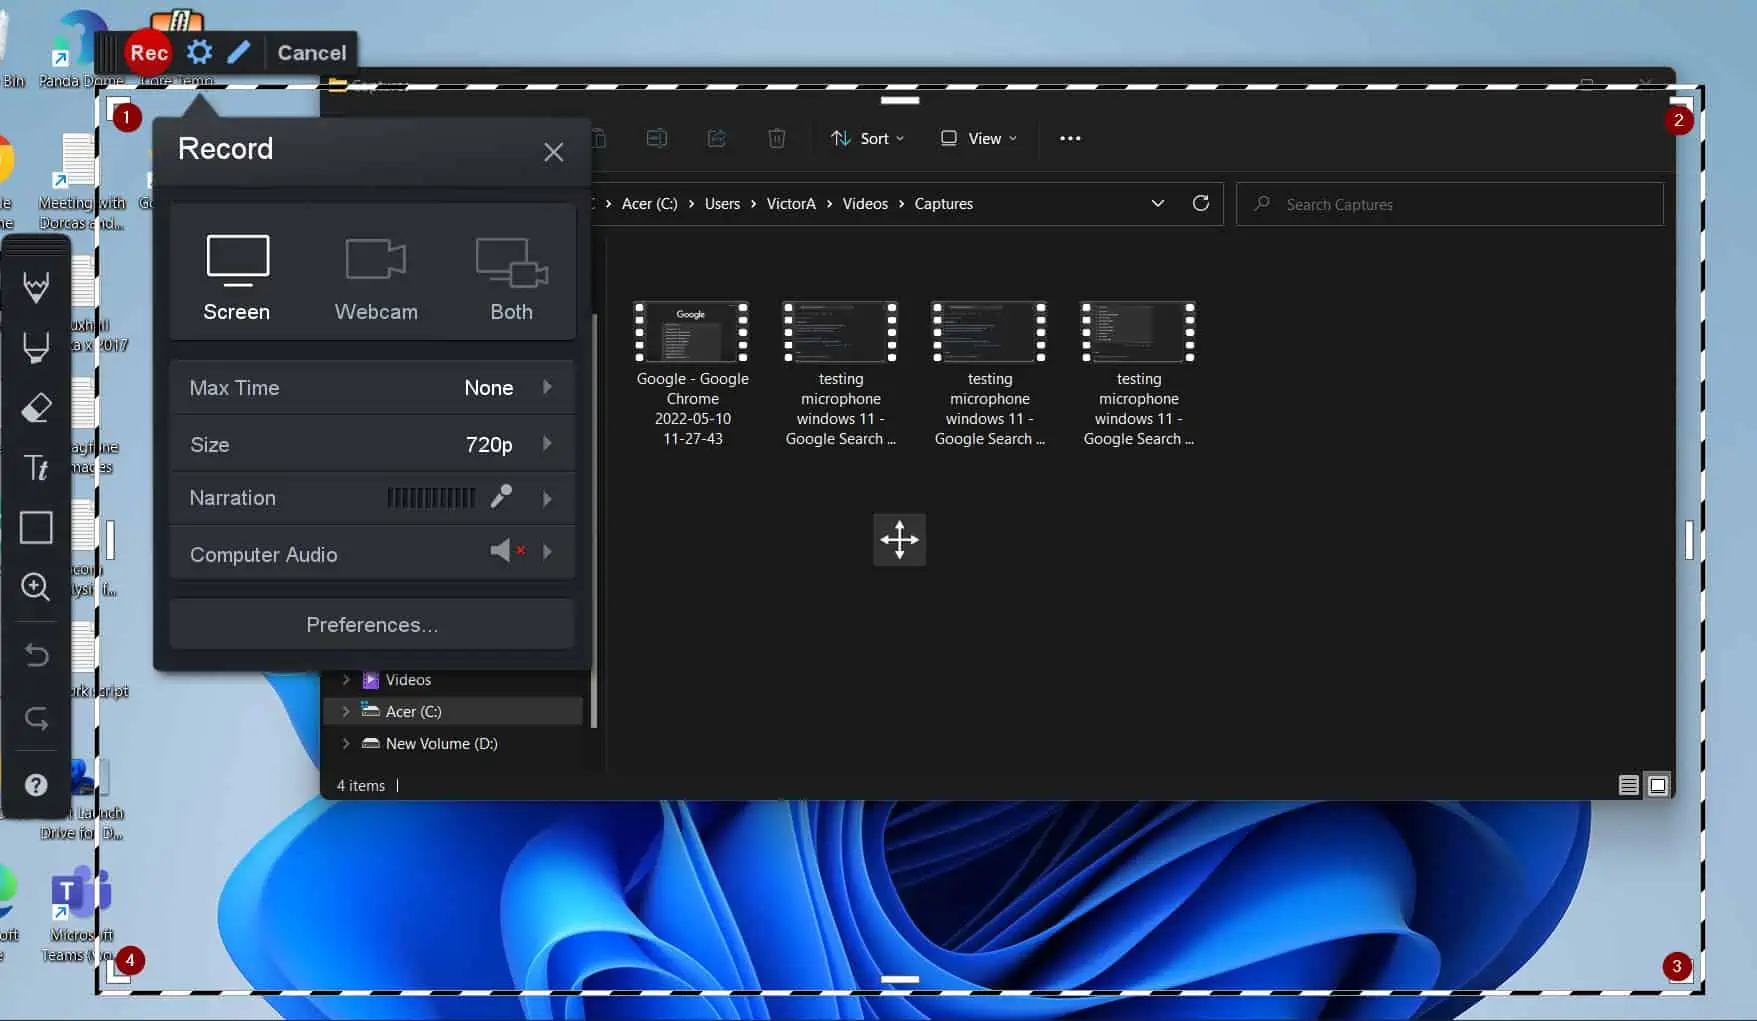
I have labeled these two features 1 and 2 – see the screenshot below.

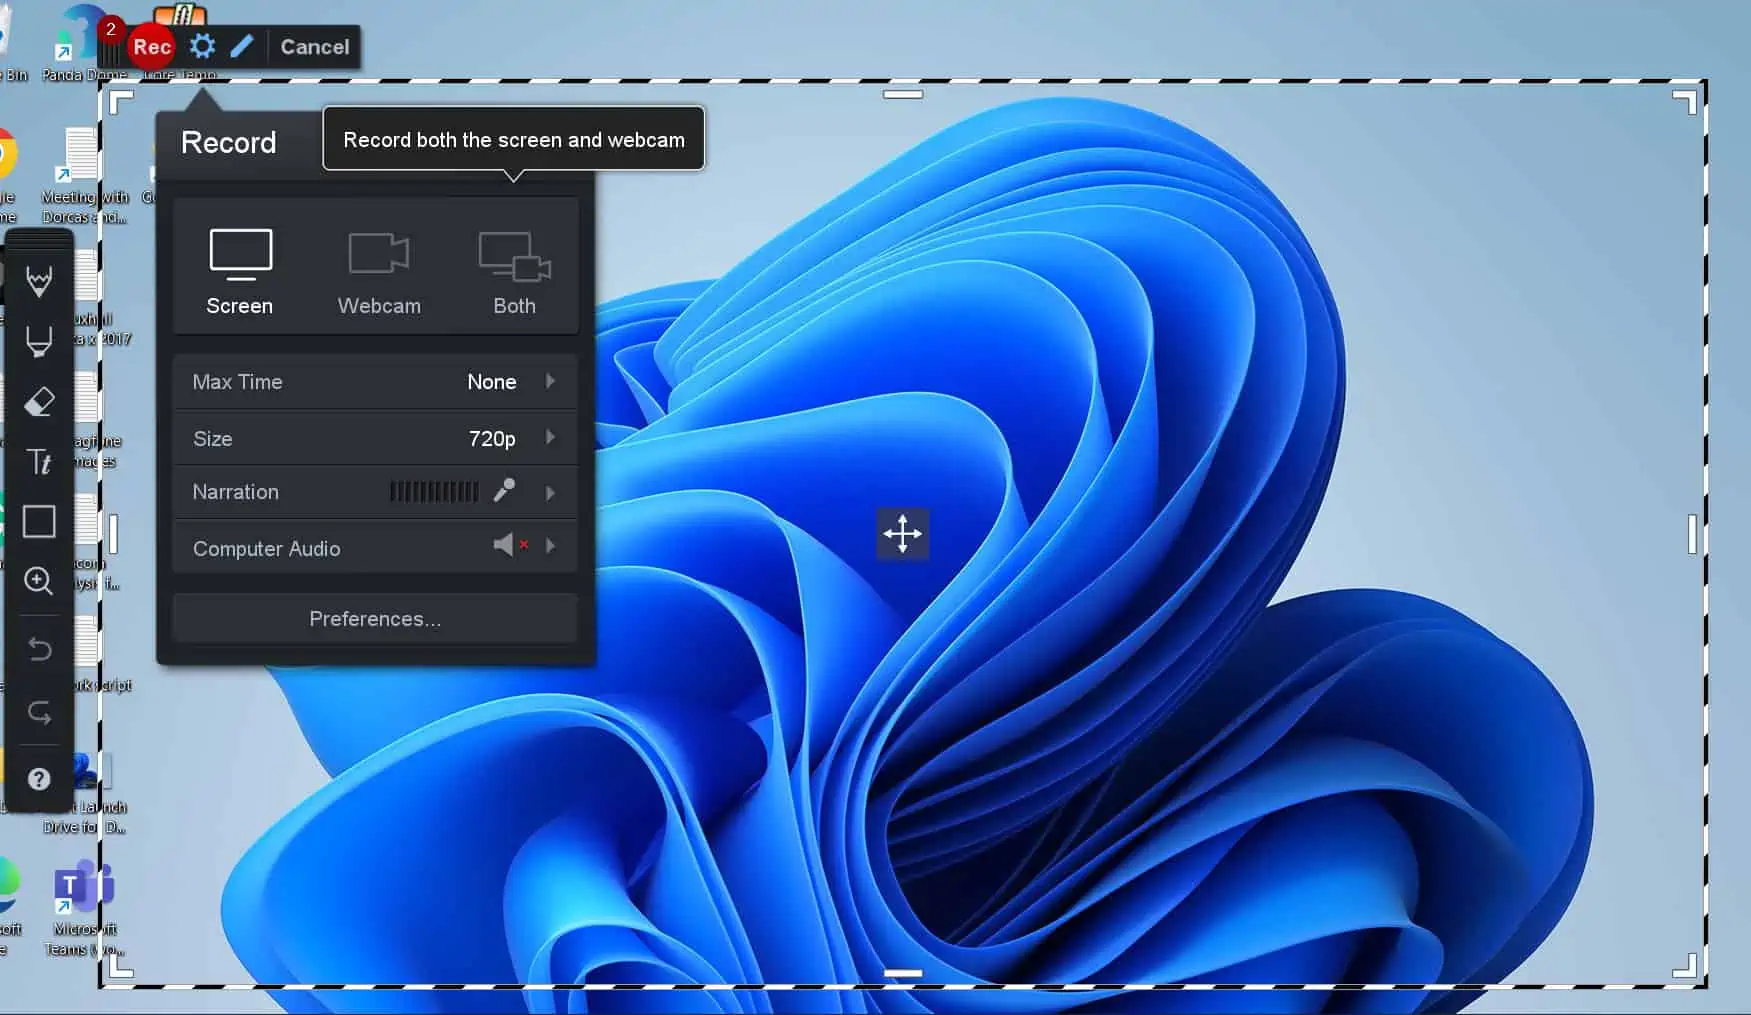
- Starting with the feature I labeled (1), this is where you set your Windows 11 screen recording. As shown in the screenshot below, you can record the screen only.
Alternatively, you can use the webcam to record yourself. Finally, you can record both the screen and using the webcam.

- Moving on to the second feature, this is where you have the Rec (record) button. When you’re ready to start screen recording on Windows 11, press the Rec button.
- When you click on the Rec button, Screencast-O-Matic screen recorder will start counting down from 3. Once it gets to zero, it starts the recording.
All you need to do is to start performing the actions you want to record. In addition to recoding your actions (on the screen), to recorded your voice, you can start speaking.
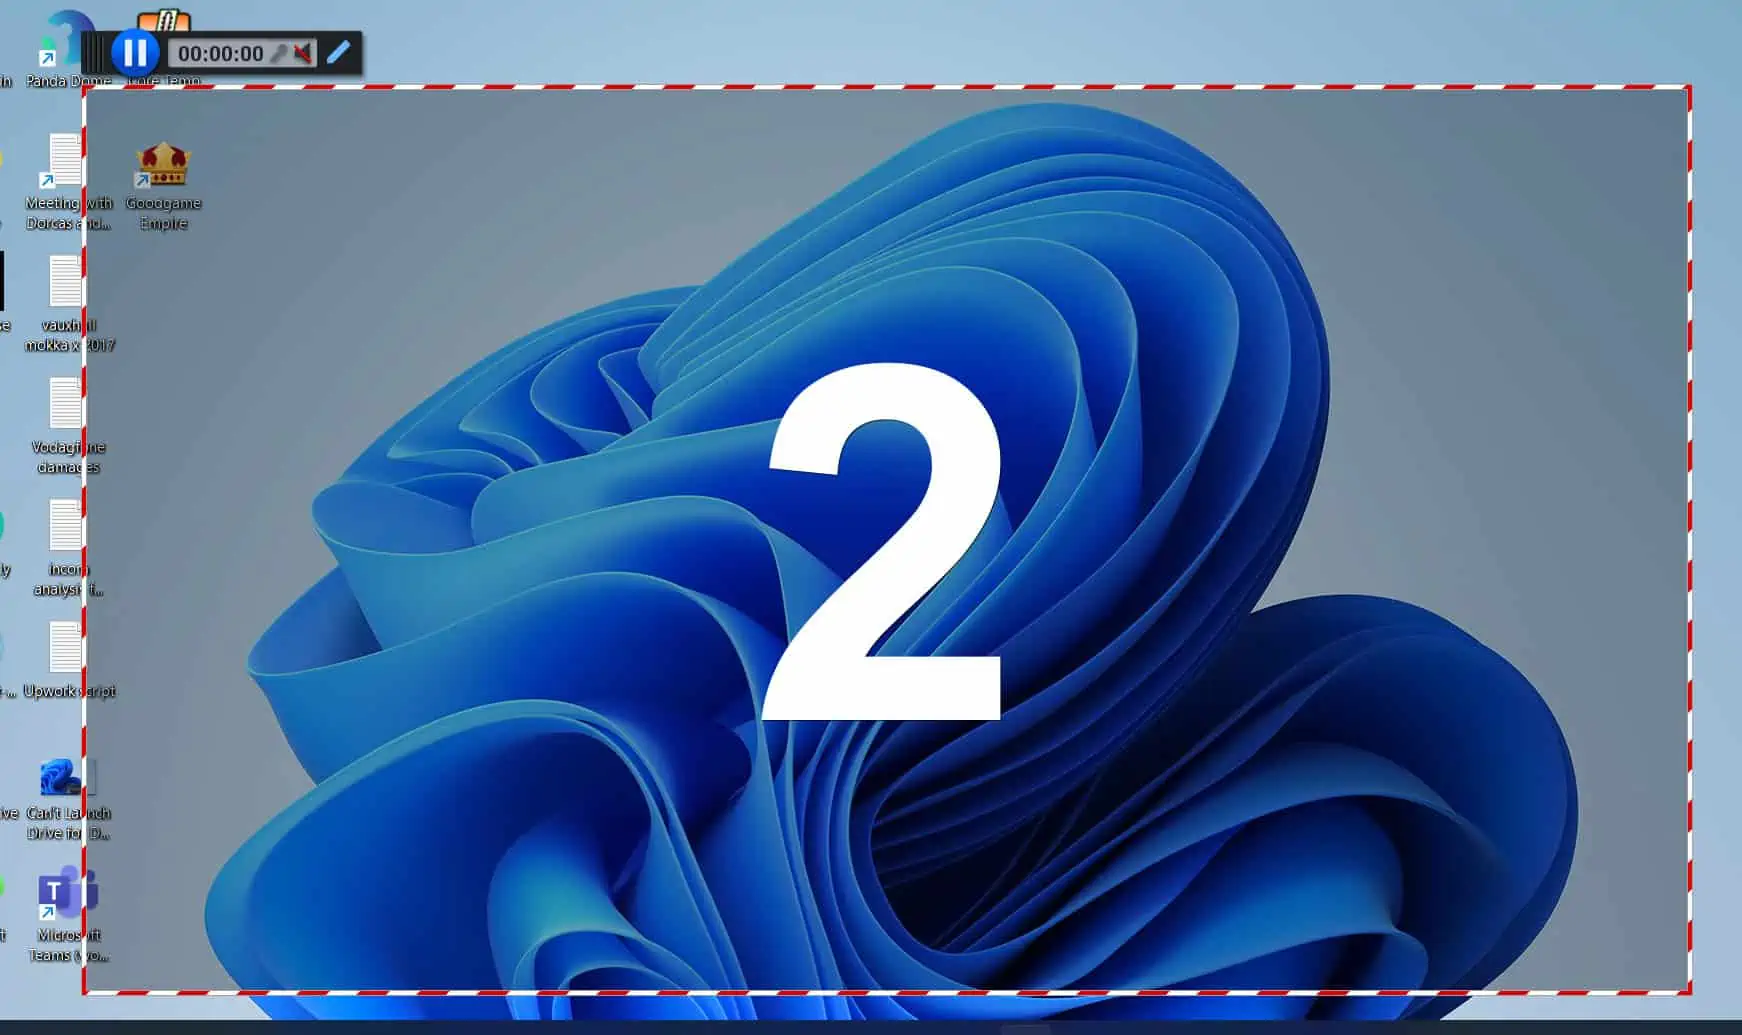
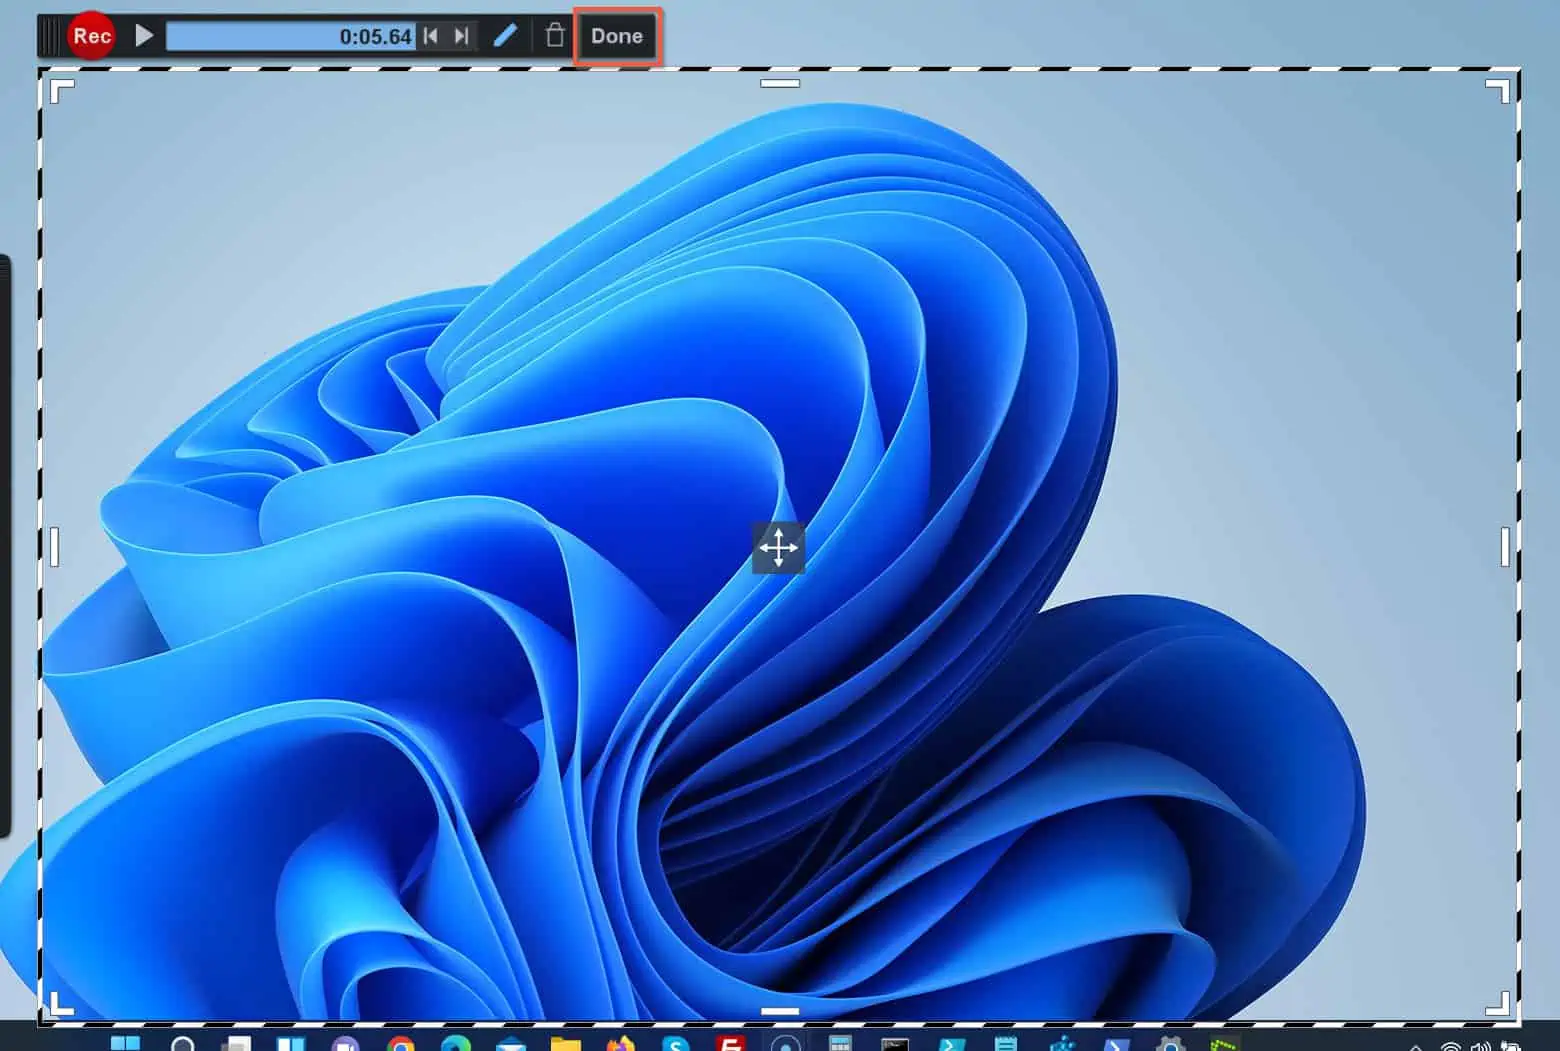
- Then, when you finish screen recording, on the top left, click the pause button – see the screenshot above.
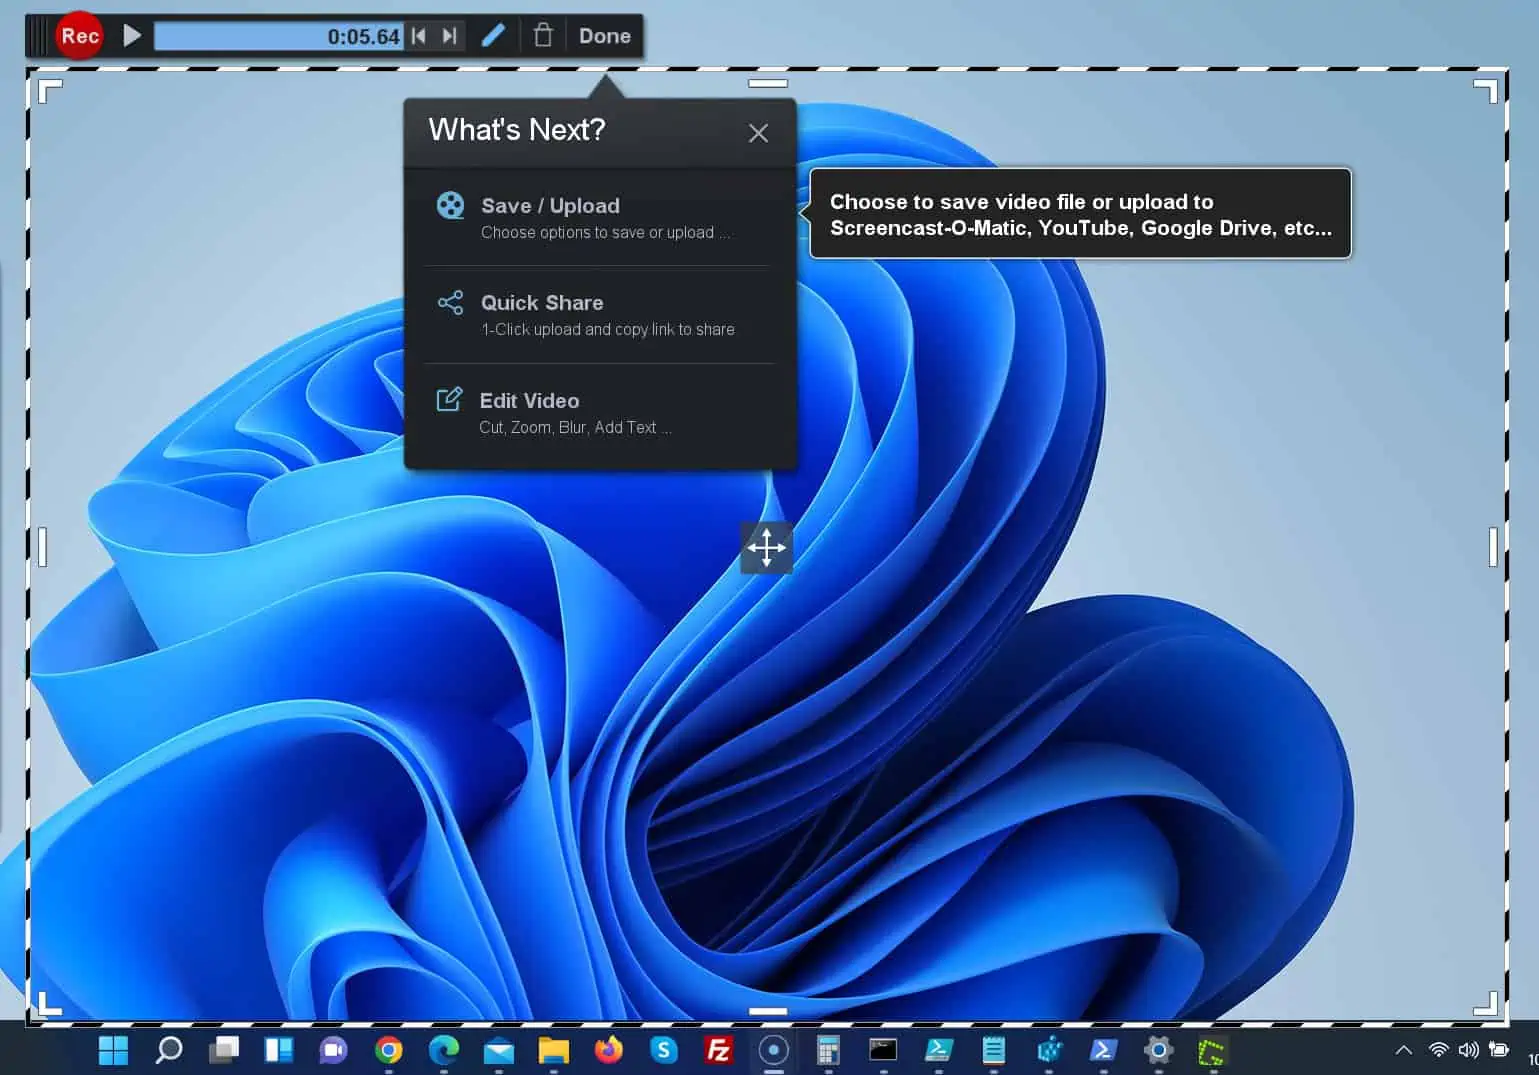
- When you click the pause button, the set of buttons (top left) shown in the screenshot below will be displayed. To finish your recording, click the Done button.
Then, select what you want to do with the video – see the second screenshot below…
Option 3: Screenshot with the Snipping Tool
In the previous 2 sections, I have shown how to screen record in Windows 11 with either the Xbox Game Bar or Screencast-O-Matic.
But, apart from screen recording (video), there are times you want to screenshot (image). In this last section of the guide, I will show you how to take screenshots in Windows 11.
To take a screenshot in Windows 11 using Snipping Tool, follow the steps below:
- To launch the Snipping Tool, press the Windows logo + Shift + S simultaneously on your keyboard. This action will launch the Windows Snipping Tool.

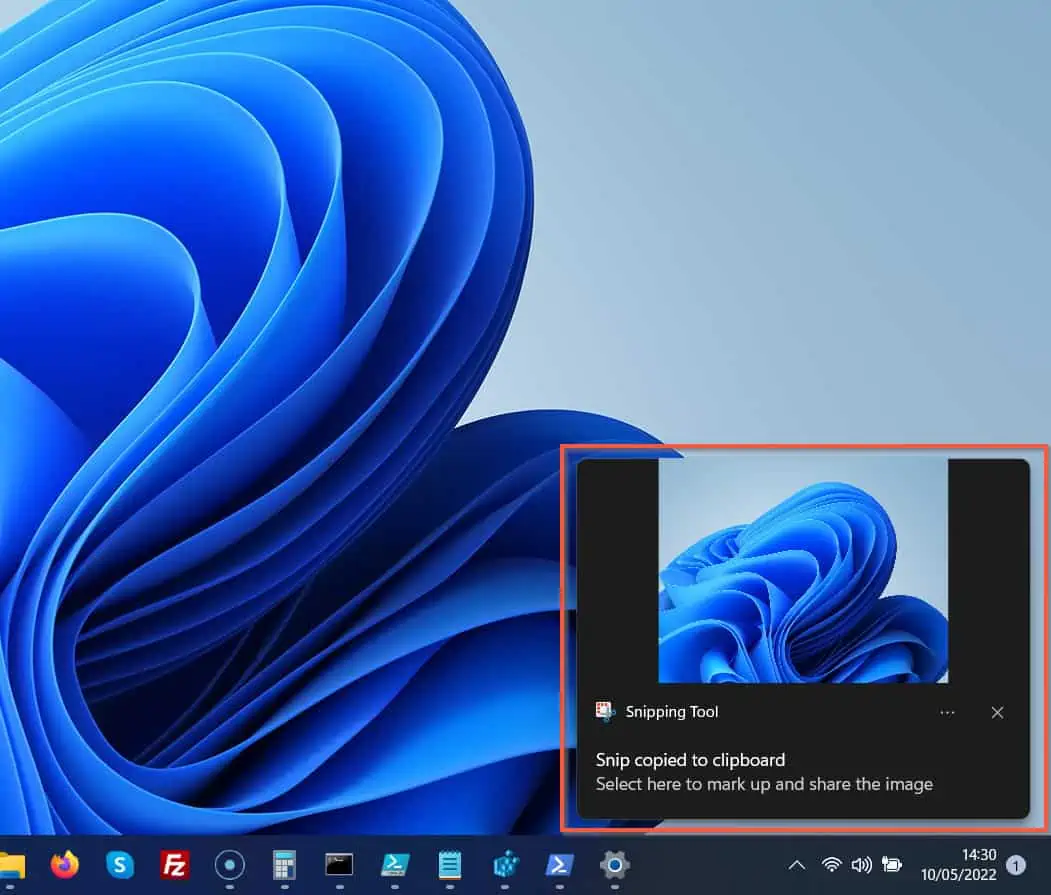
- To take a screenshot of the space, use your mouse to drag. When you stop dragging, the Snipping Tool will display the image at the bottom right of your desktop.
To open the screenshot, click on it.
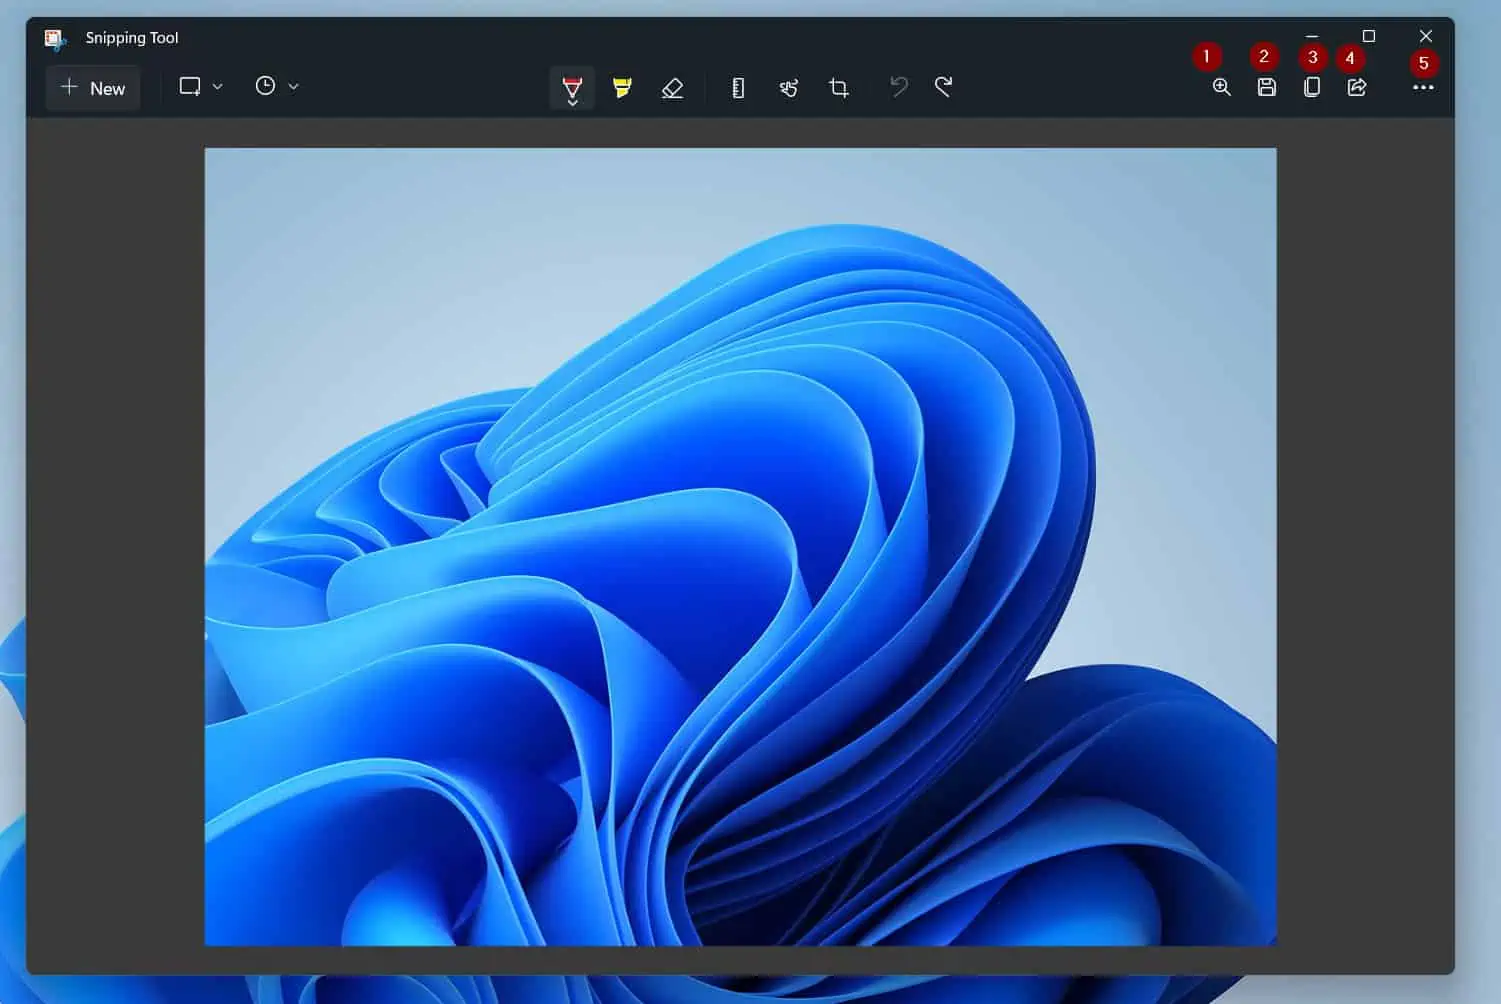
- You can perform many actions on the image. However, I like to highlight the common actions.
On the top right of the image, you can:
zoom the image (1)
save the image (2)
copy the image (3) or
share the image (4)
To see more options, click the menu (5).
Frequently Asked Questions
Yes, Windows 11 has a screen recorder called Xbox Game Bar. Unfortunately, you cannot record your desktop or File Explorer with Xbox Game Bar.
To open Xbox Game Bar, press Windows + Alt + R simultaneously on your keyboard. Then, open the app you want to record.
Finally, on the top left of Xbox Game Bar, click the Record button.
You have multiple options to record your screen on Windows. Firstly, you can use Xbox Game Bar to record your screen on Windows 10 and Windows 11.
Alternatively, you can use one of the other third-party tools like Screencast-O-Matic.com. It is important to note that Screencast-O-Matic.com has more features than Xbox Game Bar.
Windows 10 has a built-in screen recorder called Xbox Game Bar. You can use this app to record screens on Windows 10 except your desktop and File Explorer.
To open Xbox Game Bar, press Windows + Alt + R simultaneously on your keyboard.
The best tool to record part of your screen in Windows 10 or Windows 11 is to use a tool like Screencast-O-Matic.com. This tool allows you to position drag the recoding surface to cover specific parts of your screen.
You can use the built-in Xbox Game Bar to record screen in Windows 10 and Windows 11 for free. To record audio, first, start screen recording on Xbox Game Bar.
Then, click the microphone icon on the top right of the screen recorder. To see the detailed step-by-step guide, click How To Screen Record On Windows 11 With Xbox Game Bar (link opens in the same browser).
Conclusion
Whether you need to record your Windows 11 screen for training or other reasons, you have two main options. You can either use the free, built-in tool, Xbox Game Bar.
Alternatively, you can use one of the many third-party screen-recoding software like Screencast-O-Matic.com. However, it is important to note the limitation of the Xbox Game Bar screen recording.
Specifically, Xbox Game Bar does not support recording your desktop or File Explorer. To screen-record any part of Windows 11, I recommend Screencast-O-Matic.com.
I hope you found this Itechguide helpful. Kindly share your thoughts about it using the comments form at the bottom of this page.
You could also use the “Was this page helpful?” buttons below to give us your feedback.
Finally, for more Windows 11 Itechguides, visit our Windows 11 How-To page. You may also find our Windows 10 How-To guides helpful.


