This Itechguide teaches you how to schedule posts on Instagram. The guide covers 3 steps to schedule posts on Instagram.
Step 1: Create a Free LatelySocial.com Account and Link Your Instagram Account
The first 2 steps to schedule posts on Instagram are – 1, create an account with a tool called LatelySocial.com. 2, connect your Instagram account to the LatelySocial account.
For steps to create a new account with LatelySocial, click How to Create a Free LatelySocial.com Account. Use the steps in How to Connect Instagram Account to LatelySocial.com to complete the second step. Then proceed to the main task in this Itechguide.
Step 2: Schedule Posts with LatelySocial
Once you have completed the first 2 steps above, use the steps in this section to schedule posts. The section is divided into 3 sub-sections.
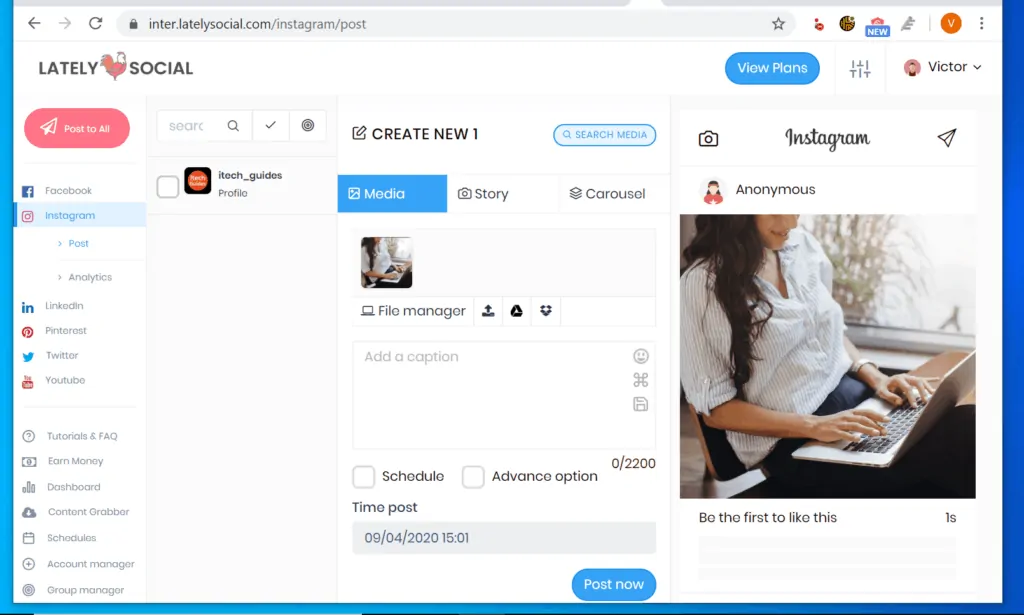
1. Upload the Media (Video or Photo) You Want to Schedule
- Login to your LatelySocial.com account from a PC or Mac.
- Then, on the left pane, click the Instagram link. It will expand and display 2 more options.
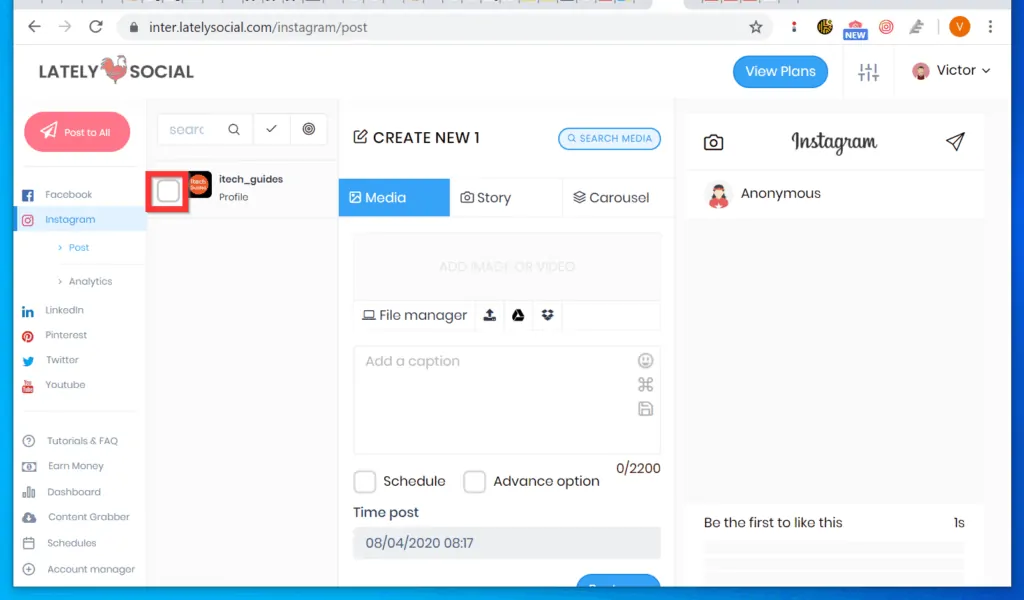
- Below Instagram, click Post. A new post window will open.

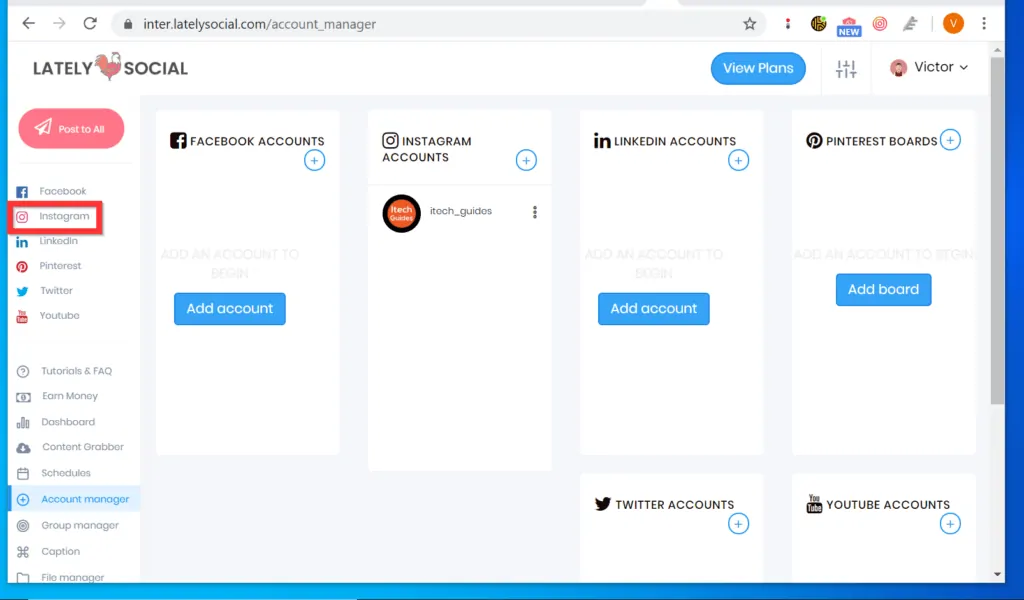
- On the new post window, check the checkbox beside the Instagram account you want to post to. It is necessary to select an account because the tool allows you to connect and post to multiple Social media accounts.
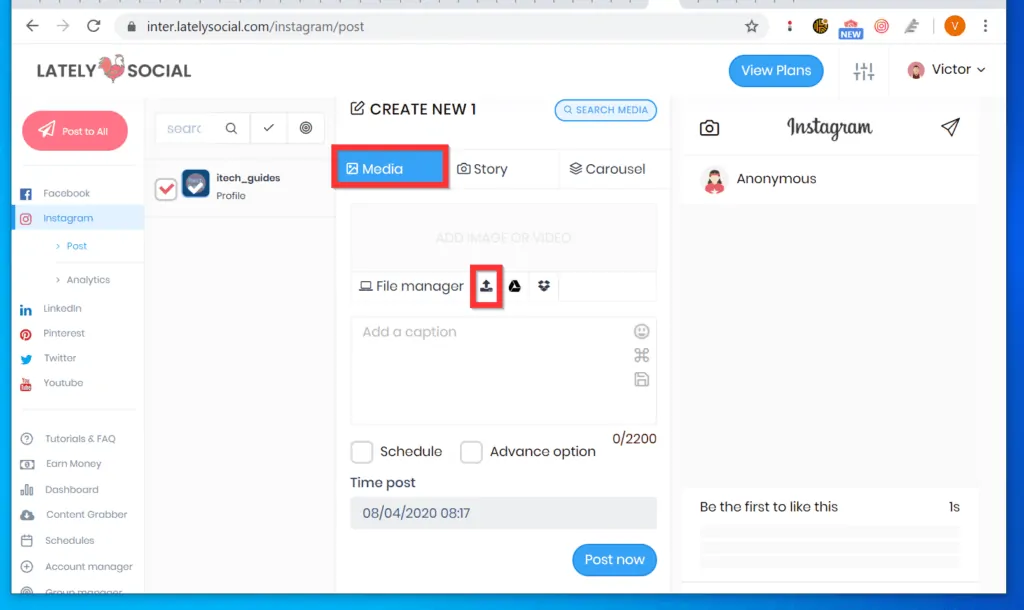
The first icon (counting from left) allows you to upload photos or videos to Instagram (via LatelySocial.com) from your PC. The next 2 icons allow you to upload photos or videos from Google Drive and Dropbox respectively.
- To upload a photo or video from your PC, click the first icon. The tool will open the option to navigate to the folder with the photos or videos you want to schedule to post.
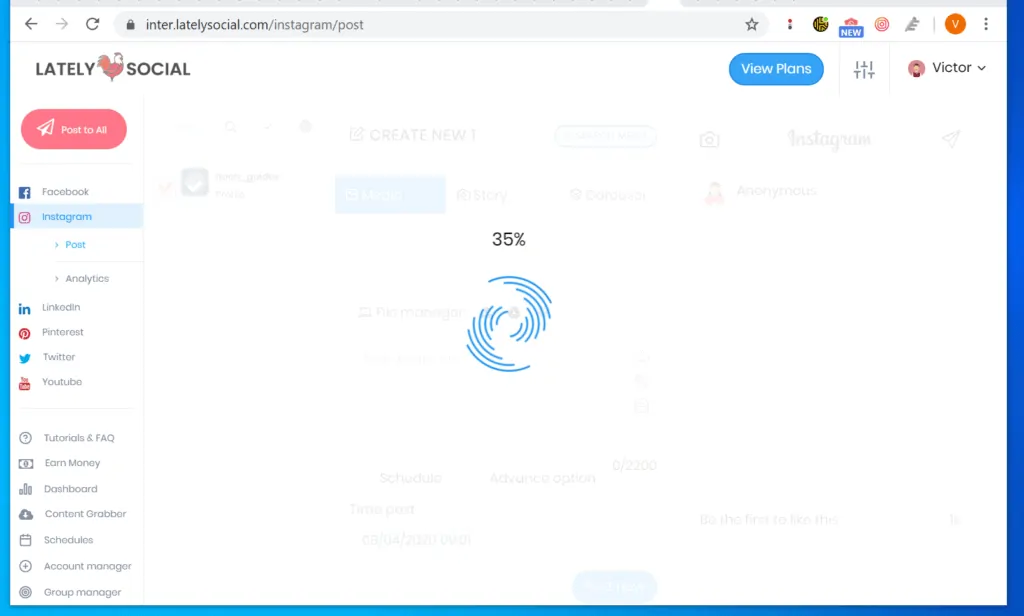
- Browser to the folder containing the videos or photos you want to upload and double-click the video or photo. The item will start uploading to LatelySocial.

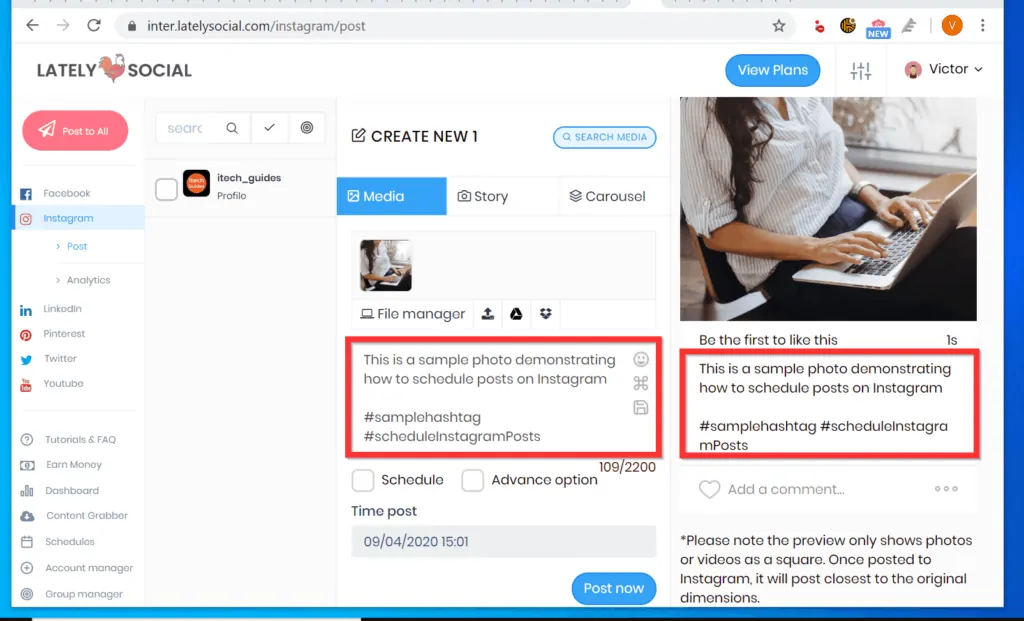
2. Add Post Description, Hashtags, Location and Comments
After uploading the media (videos or photos) you want to schedule to post on Instagram, the next step is to add texts and some other useful information to the post. Here are the steps…
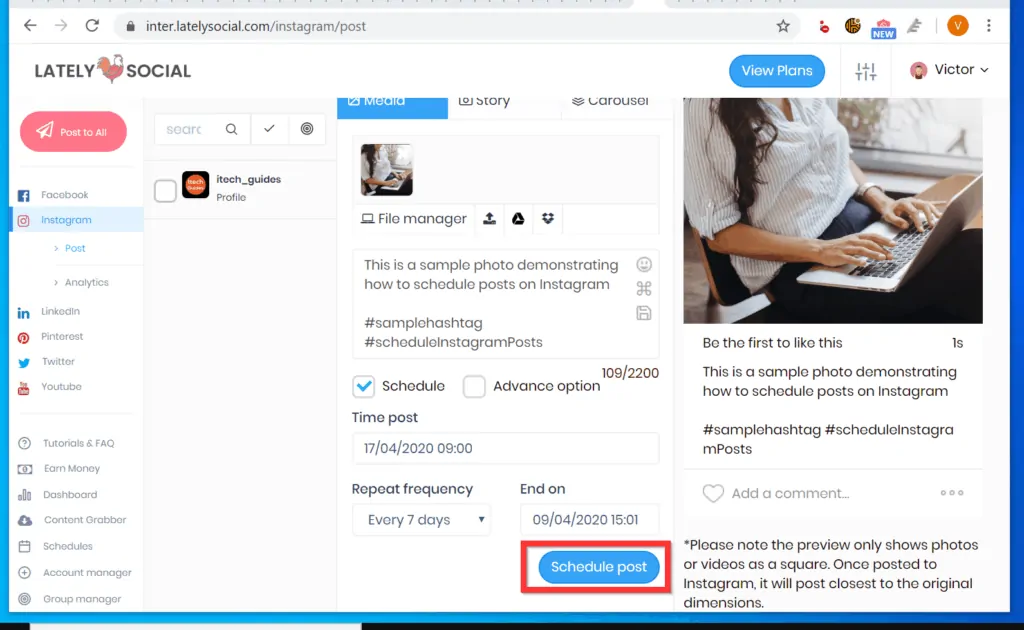
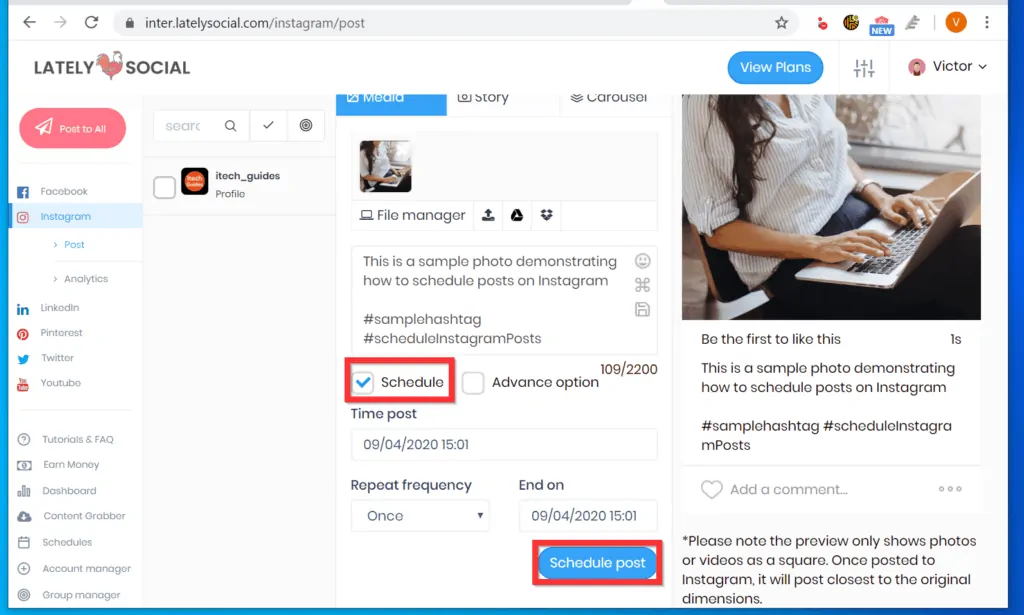
- To add a description or hashtags, enter these details in the Add a caption field (the first highlighted box on the image below – counting left to right).
- As you enter the details, the tool will display a word count and also display the max words allowed – this is displayed on the bottom right of the Add a caption field. In my example, I have entered 109 words of allowed 2200 words.
- Finally, on the right pane (beneath the image of the video/photo preview, a preview of the texts you are entering will be displayed.
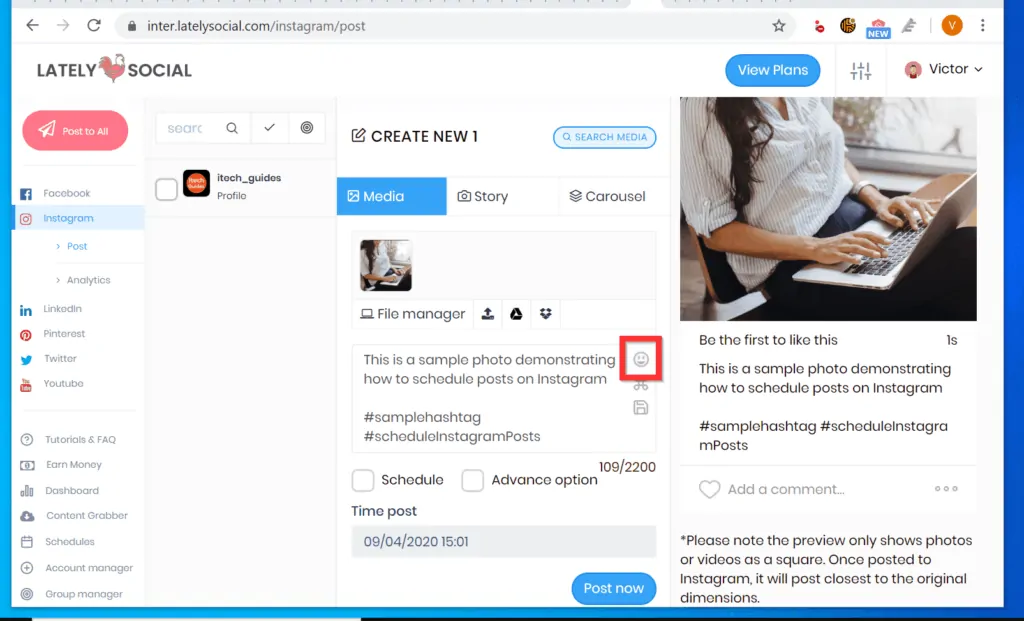
- Still on adding descriptions and hashtags, on the right side of the Add a caption field, you can click the emoji icon and include emojis to the Instagram post you want to schedule.
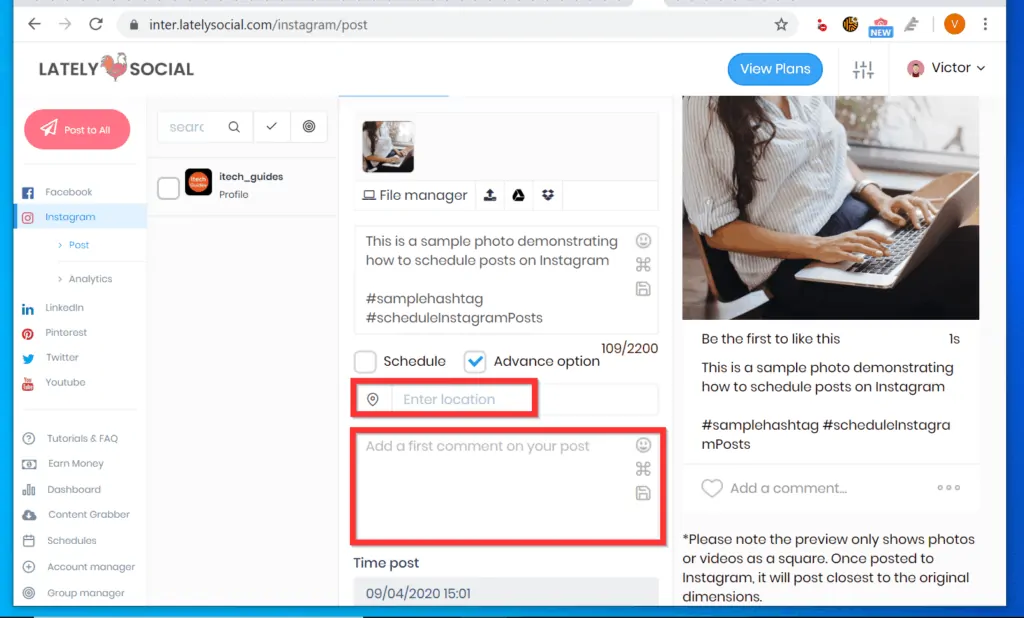
- Finally, before I show you how to actually schedule the post, you can check the Advanced options checkbox to add location and/or add the first comment to the post.
Once you have added some information to your post, proceed to the final step on this Itechguide.
3. Schedule Posts on Instagram
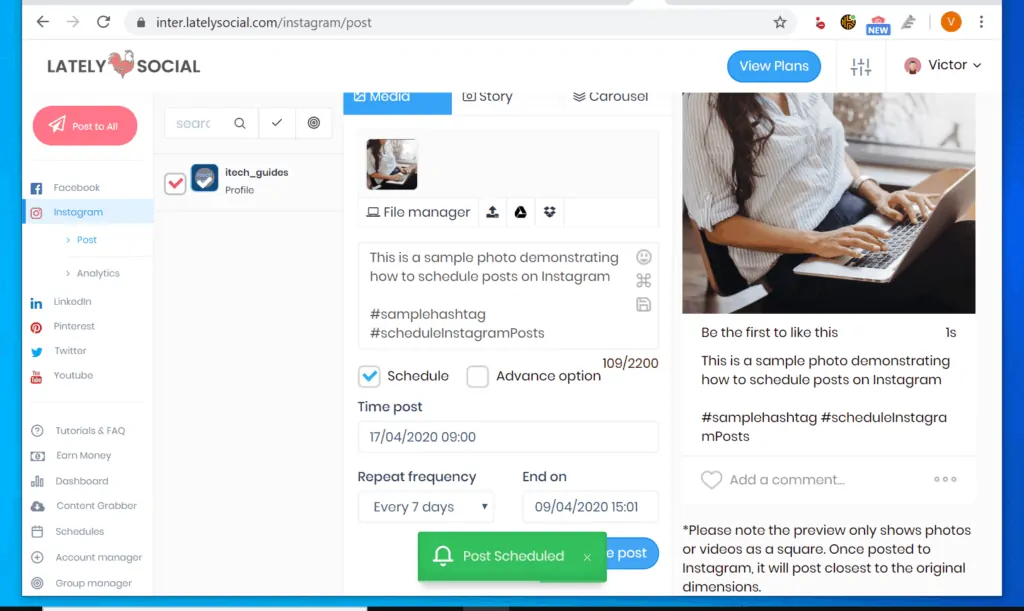
- To begin, check the Schedule checkbox. Once you check this checkbox, the Post now button will change to Schedule post. 3 more options will also be displayed – Time post, Repeat frequency and End on.
- To set the date and time for your post to be published, click the Time post drop-down. The date picker will open.
- Use the arrow on the top right of the date picker to move the date picker by month. The arrow beneath this arrow will move the picker by year – see the second image below.
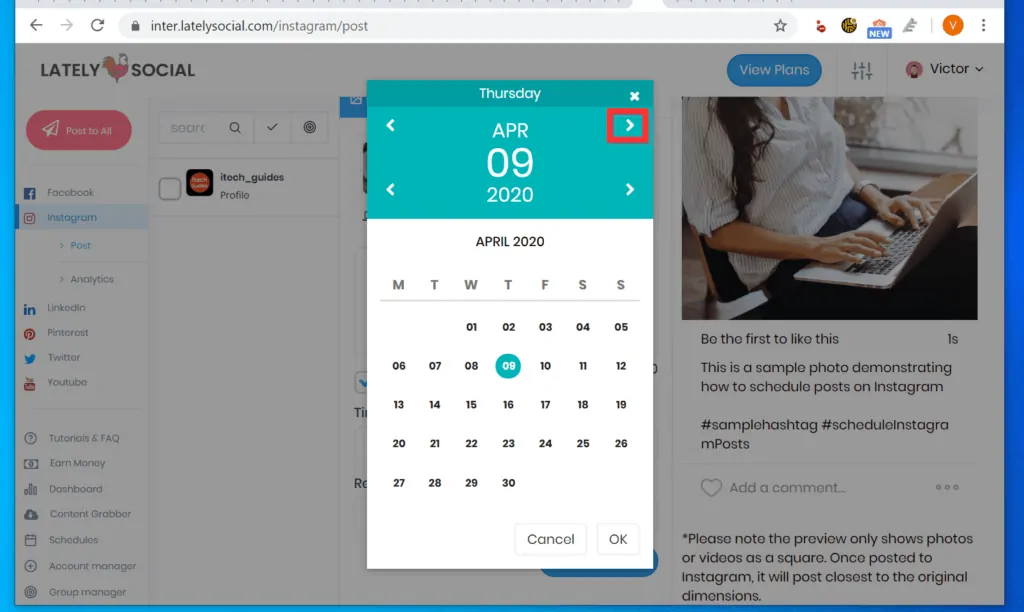
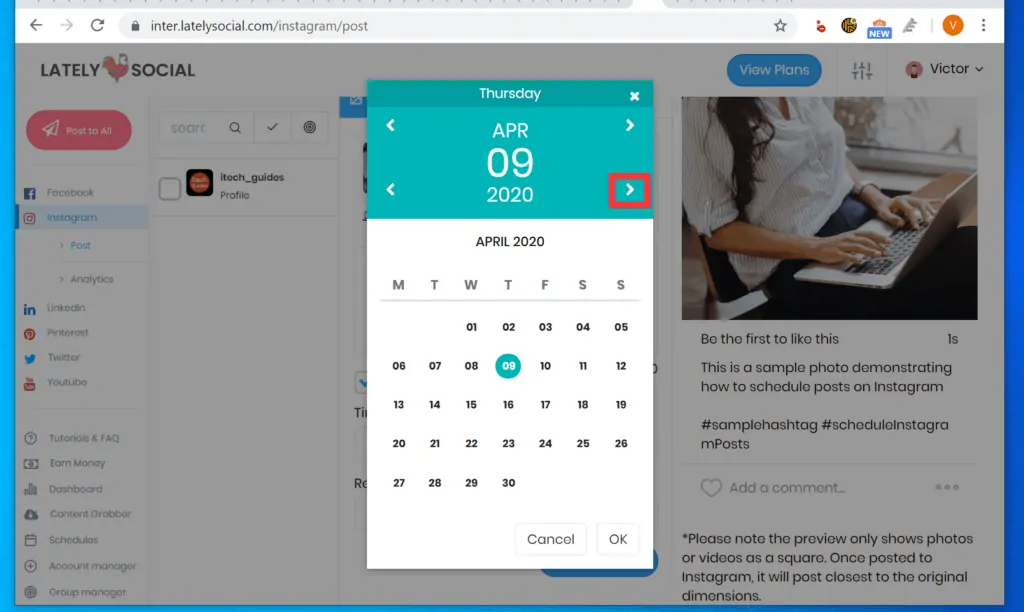
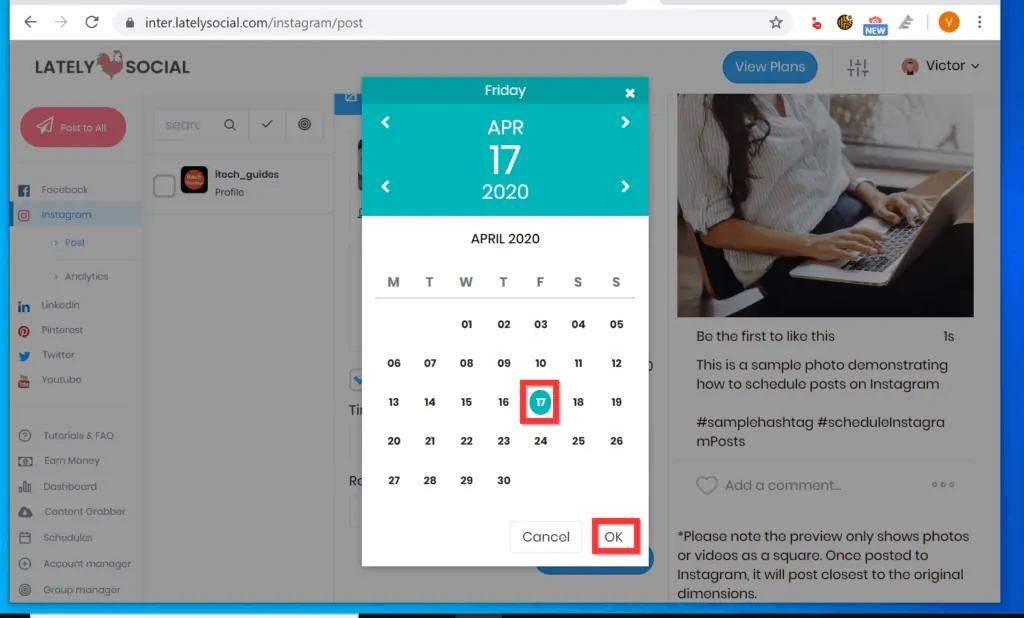
- Once you have selected the year and month you want to schedule your Instagram post, click on a date to select it. Then, on the bottom right of the date picker pop-up, click OK. The time picker will be displayed.
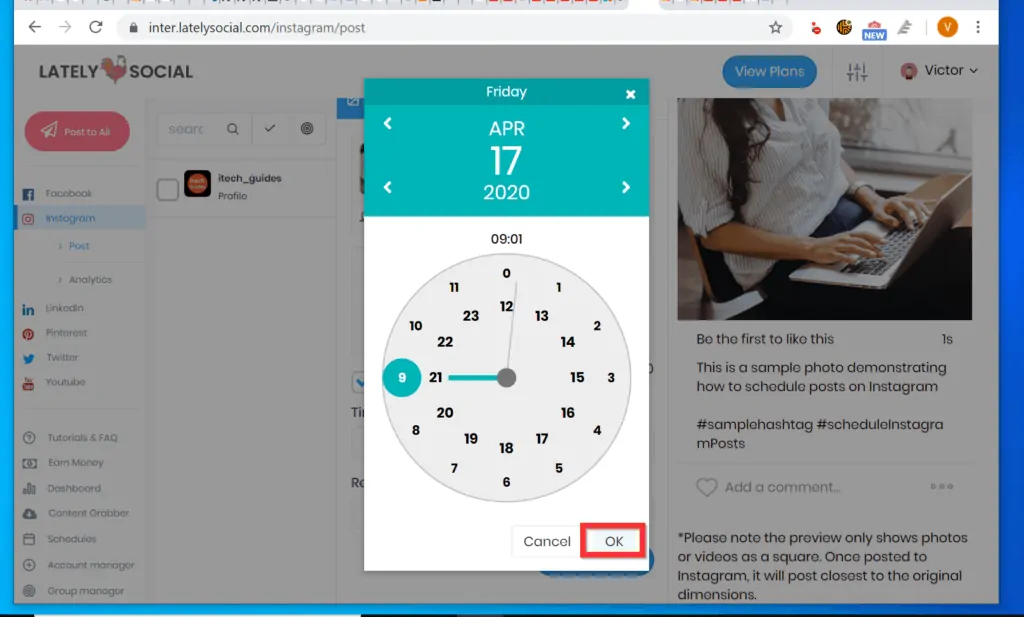
- The time picker has 2 circles – the outer circle is AM, the inner circle is PM. To select a time (hour) to publish your scheduled Instagram post, click a number in one of the circles.
- When you click on a number, the time will be displayed on top of the outer circle – you will have the option to adjust the seconds later.
- When you finish selecting the time, on the bottom right of the time picker, click OK – see the second image below. The option to adjust the seconds will be displayed.

- Move the highlighted circle to adjust the seconds – as you can see below, I have adjusted the time for my post to be schedule to 9:00am April 17 2020.
- After adjusting the seconds, on the bottom right, click OK.
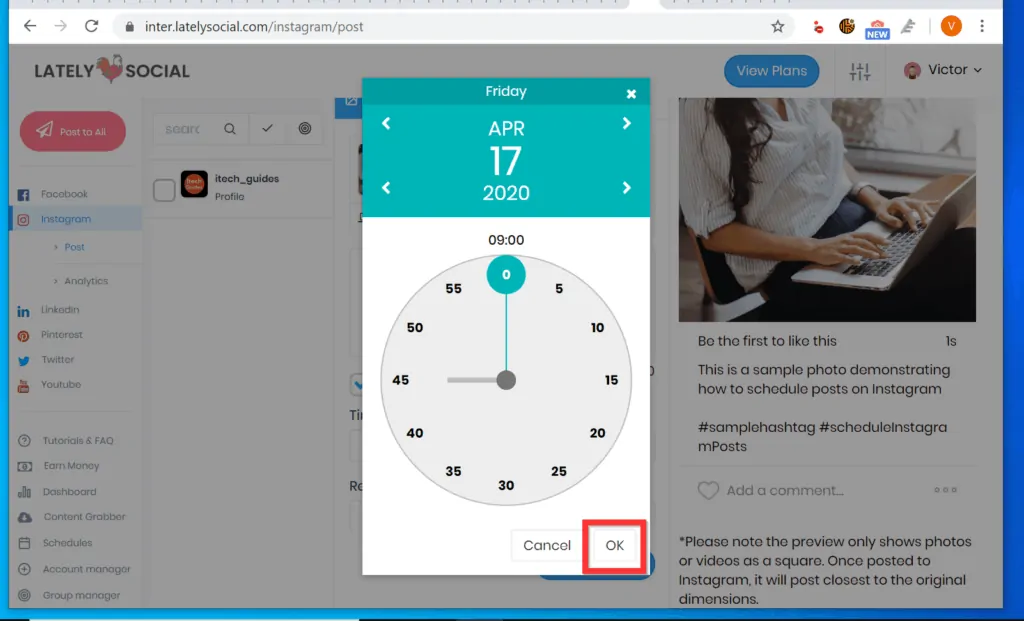

- The time and date you selected will be displayed.
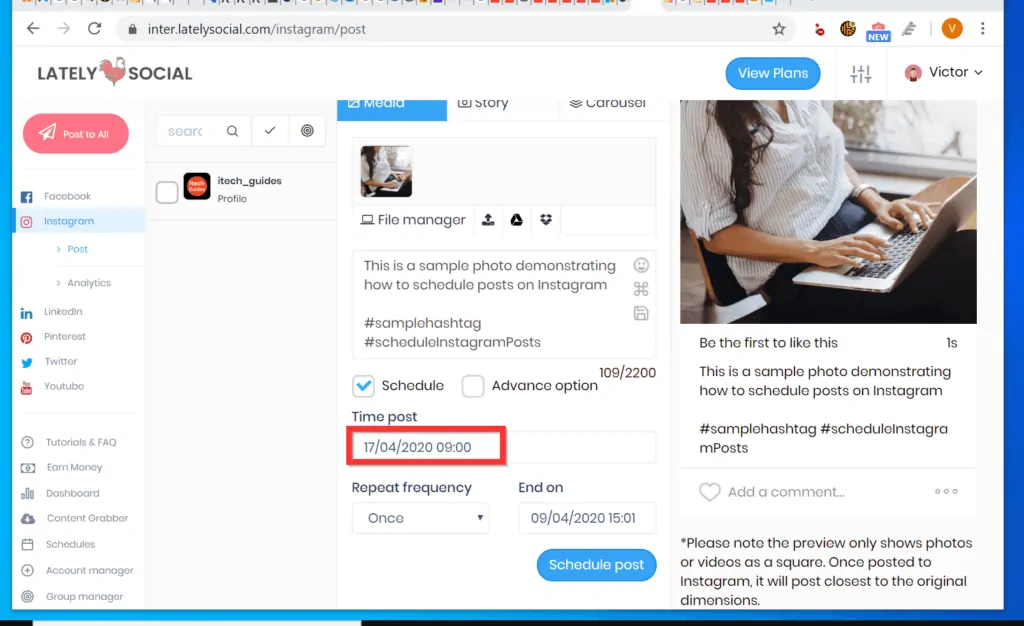
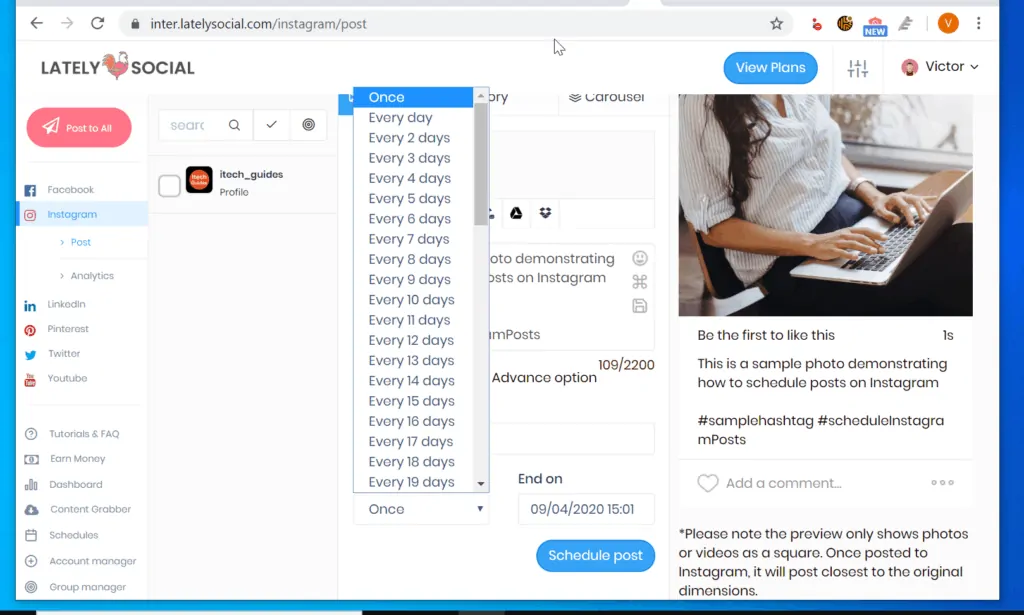
- To select how often your post will re-post, click the Repeat frequency drop-down.
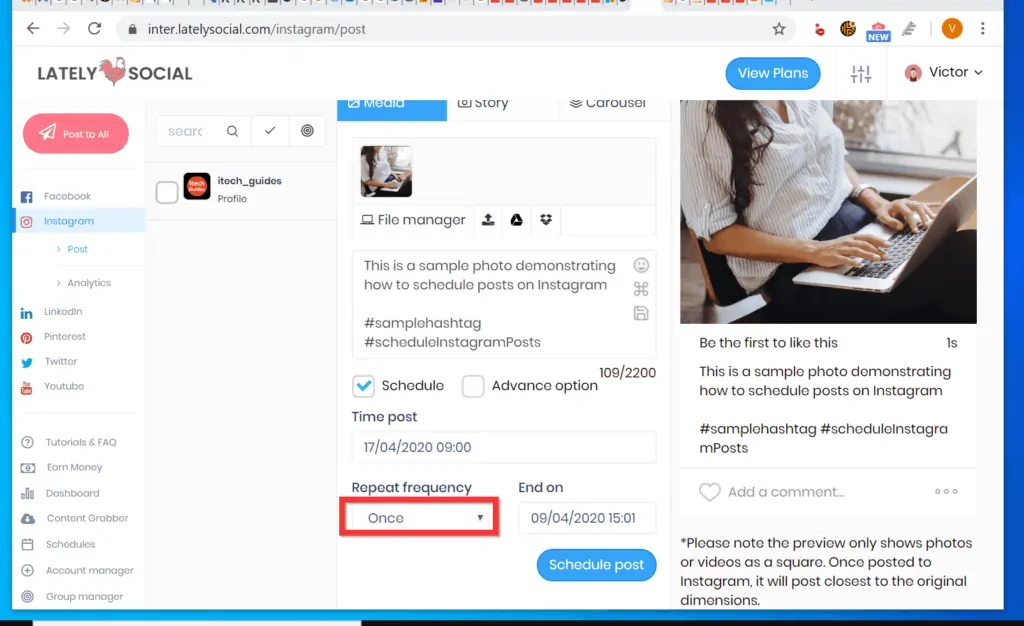
- Then, select a re-post frequency – default is Once but you can also post Every day, Every 2 days, up to Every 60 days.
- Finally, select an End date – then, to schedule posts on Instagram on PC or Mac, on the bottom right of the new post column, click Schedule post.
- If everything went according to plan, on the bottom of the screen the tool will display a Post Scheduled confirmation.
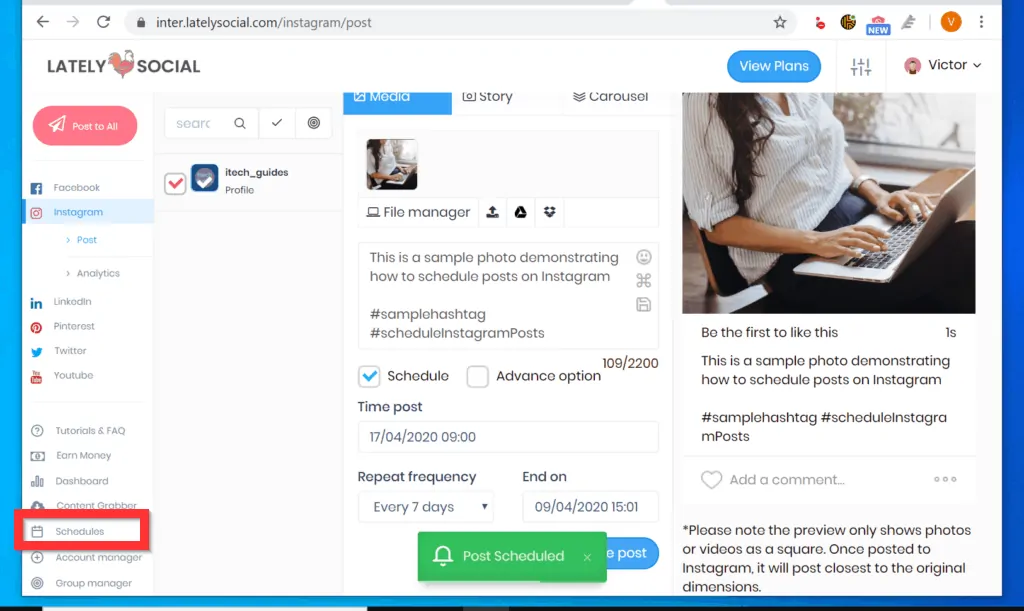
- To view and manage your scheduled posts, on the bottom of the left pane, click the Schedules link.
- All your scheduled posts will be highlighted by date. You can filter by SCHEDULE TYPE and SOCIAL NETWORKS. The date with post schedules will display a preview of the post and the icon of the social media network.
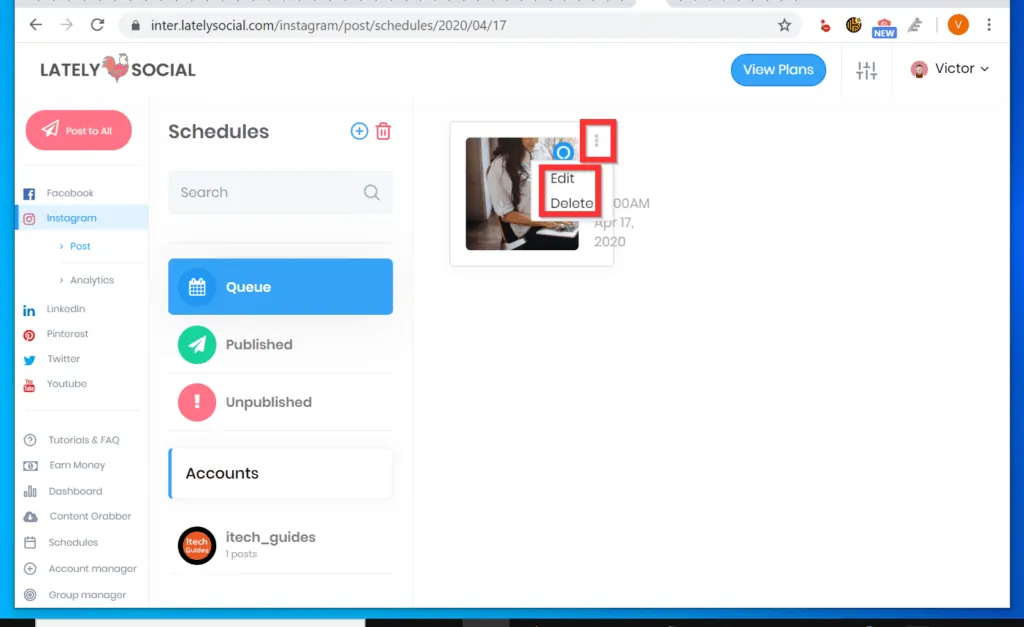
- To edit a scheduled post, click on it. The post will open for editing or deleting.
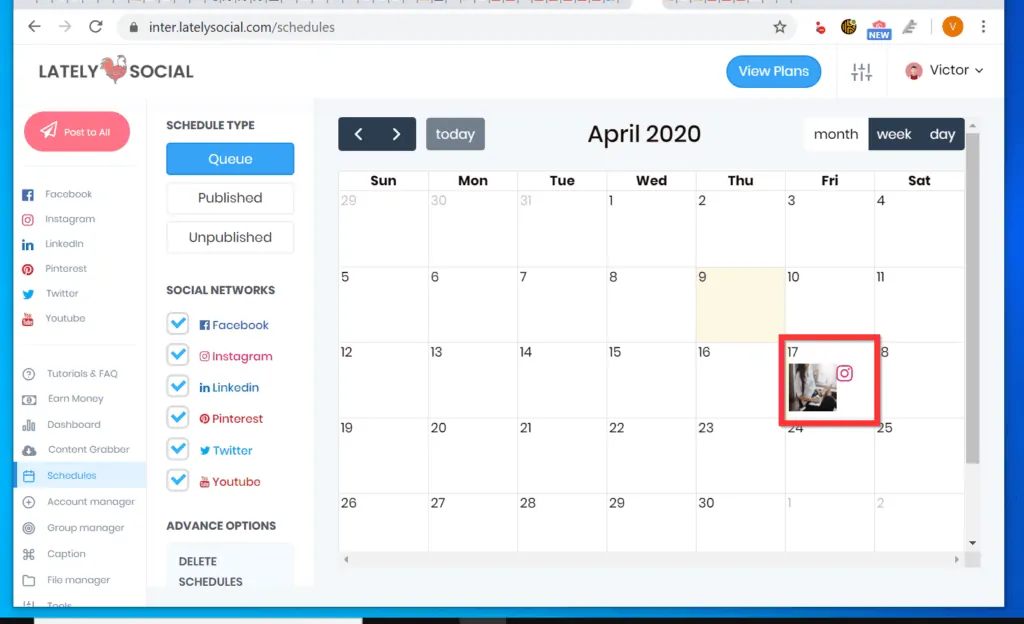
- Then, on the top right of the post, click the post menu (3 dots) and select one of the displayed options.
I hope that you found it helpful. If you did, click on “Yes” beside the “Was this page helpful” question below.
You may also express your thoughts and opinions by using the “Leave a Comment” form at the bottom of this page.
Finally, for more social media Itechguides, visit our Social Media page. You may also be interested in our Work from Home page.