This Itechguide teaches you how to partition a hard drive in Windows 10. The guide covers steps for 2 methods to partition a hard drive in Windows 10.
Option 1: Partition a Hard Drive from Disk Management
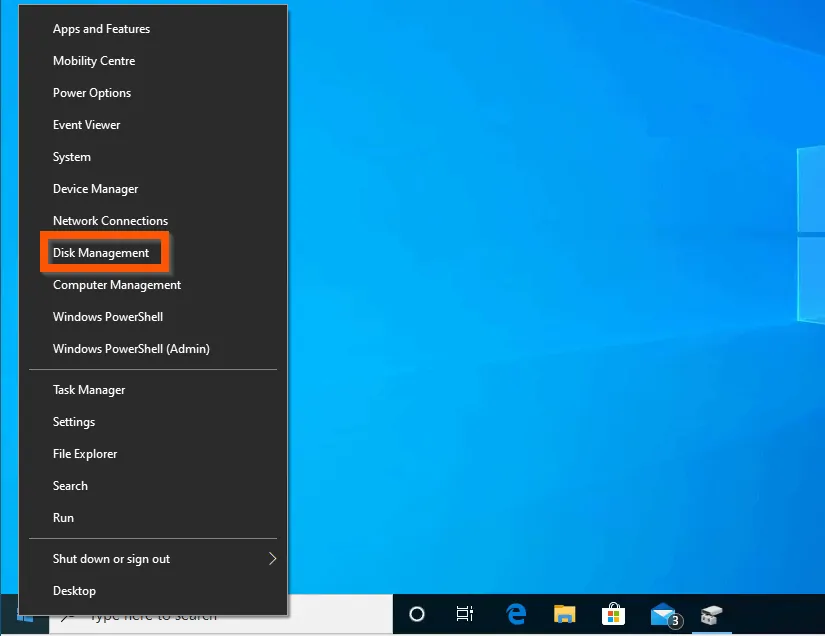
- Right-click Windows 10 Start menu and click Disk Management.
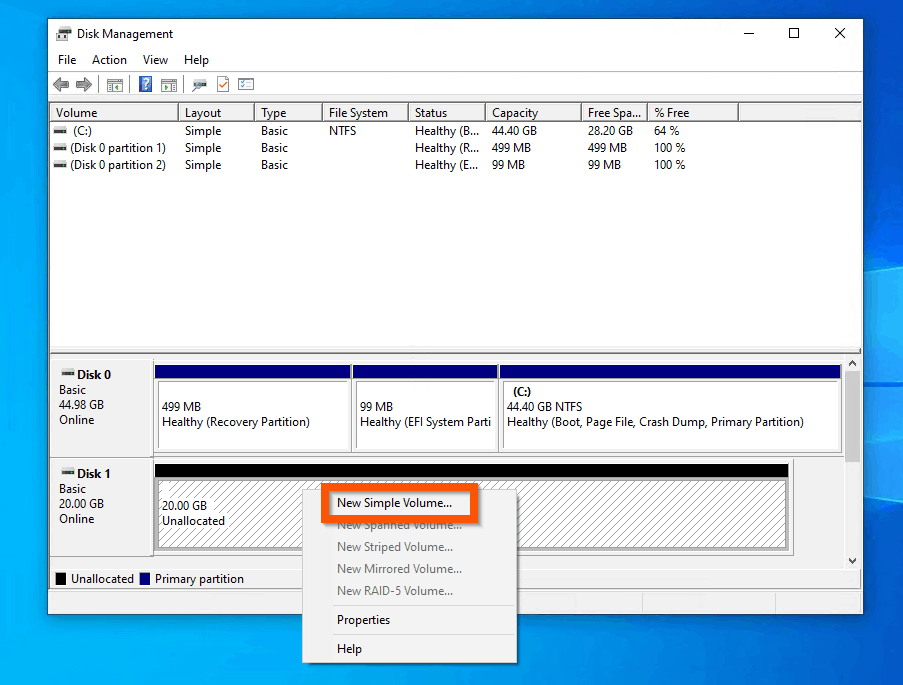
- Then, right-click the unallocated portion of the disk you want to create a partition and select New Simple Volume. The New Simple Volume Wizard will open.
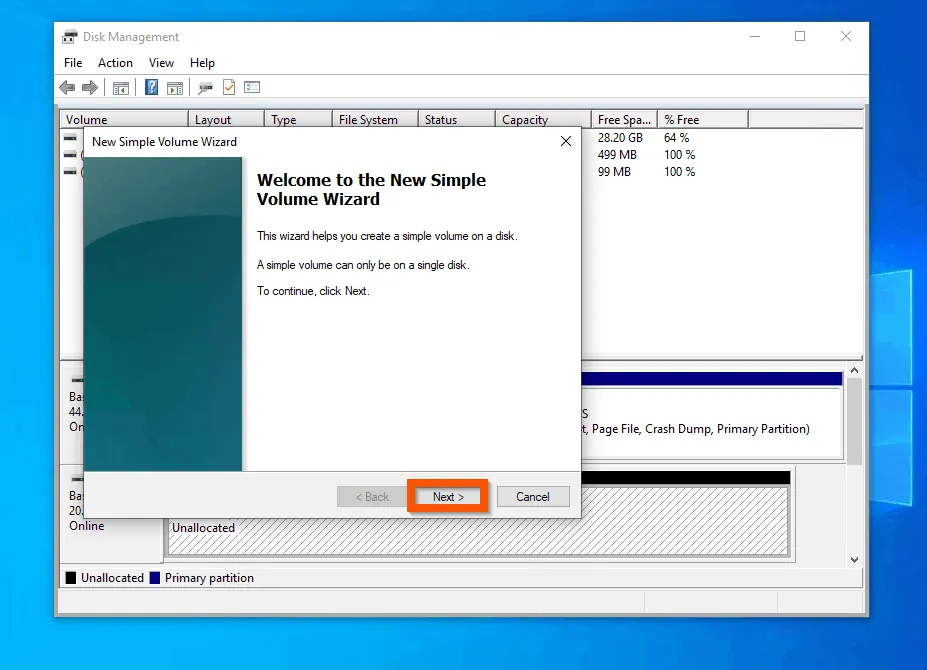
- On the first page of the wizard, click Next.
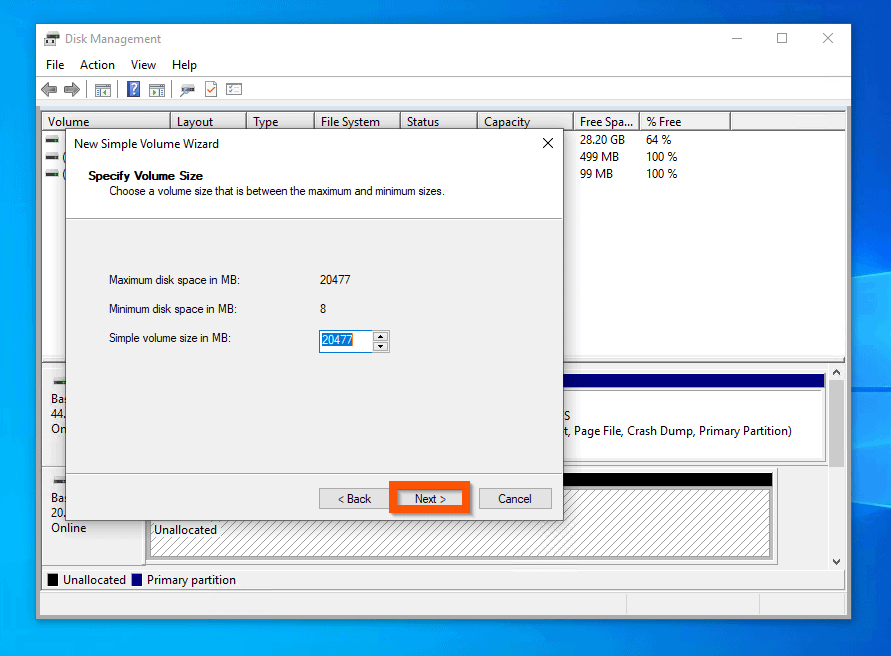
- Then, on the Specify Volume Size screen, enter the size of the partition you want to created and click Next.
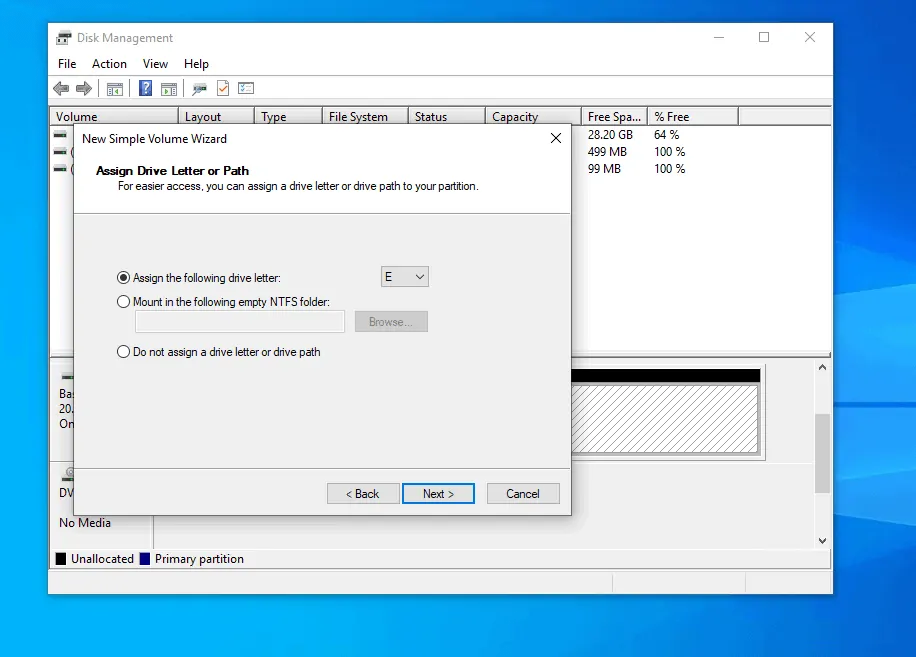
- On the Assign Drive Letter or Path screen, accept the default drive letter assigned by Disk Management and click Next.
- To proceed without assigning the new partition a drive letter, select the Do not assign a driver letter or path option and click Next.
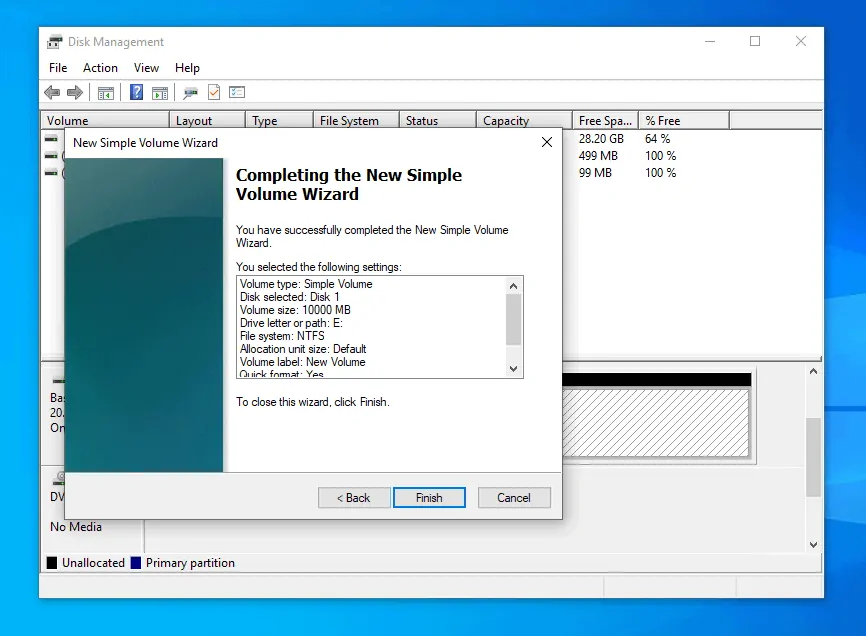
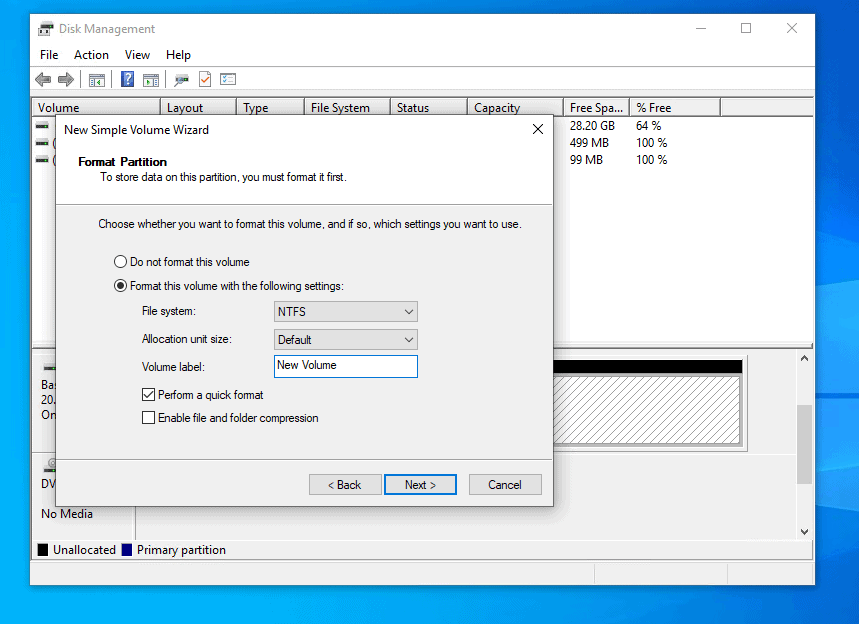
- Finally, to partition a hard drive in Windows 10, on the Format Partition screen, accept the default options and click Next. Then, on the final screen of the wizard, review your selected settings and click Finish.
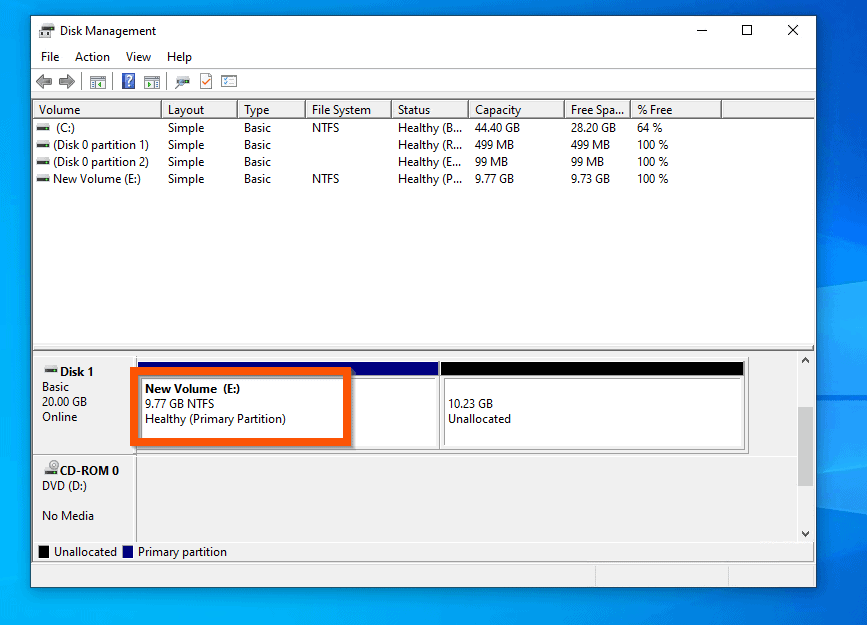
- The new partition will be created and if you selected the option to format it, it will be formatted.
Option 2: Partition a Hard Drive with DISKPART
This section is for advanced users or users that prefer command prompts to GUI tools. To partition a hard drive in Windows 10 with DISKPART, follow the steps below – there are 4 sub-sections:
Step 1: Create a Partition
- Type command prompt in the search box. Then, from the search results, right-click Command Prompt and select Run as Administrator.
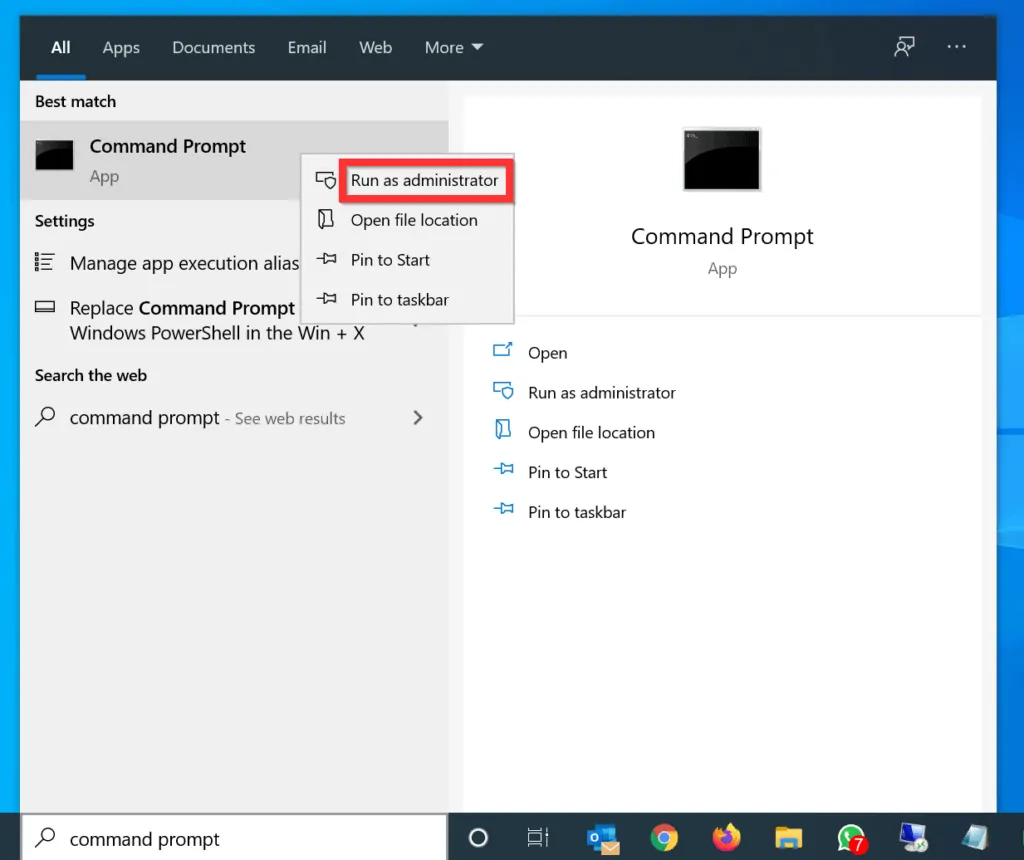
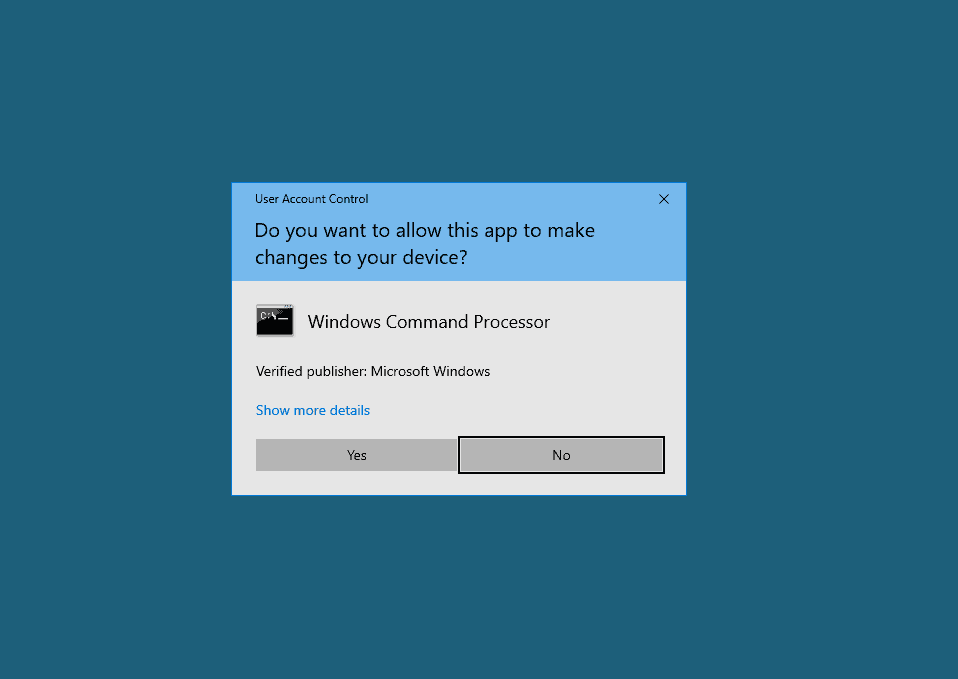
- You will receive a User Access Control (UAC) confirmation, requesting you to allow the “app to make changes to your PC”. On the UAC prompt, click Yes.
- On the Command Prompt, type the command below and press enter.
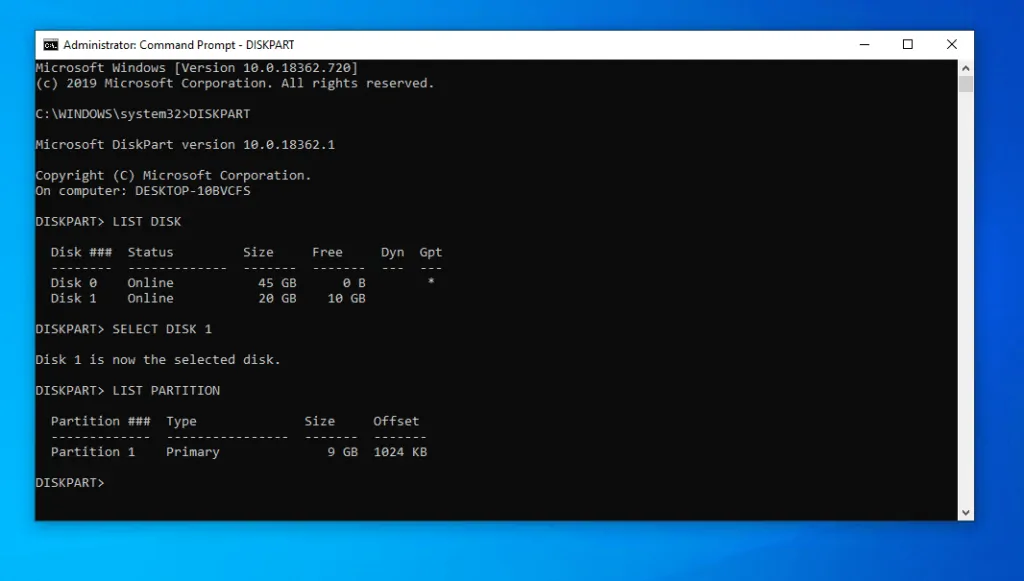
DISKPART
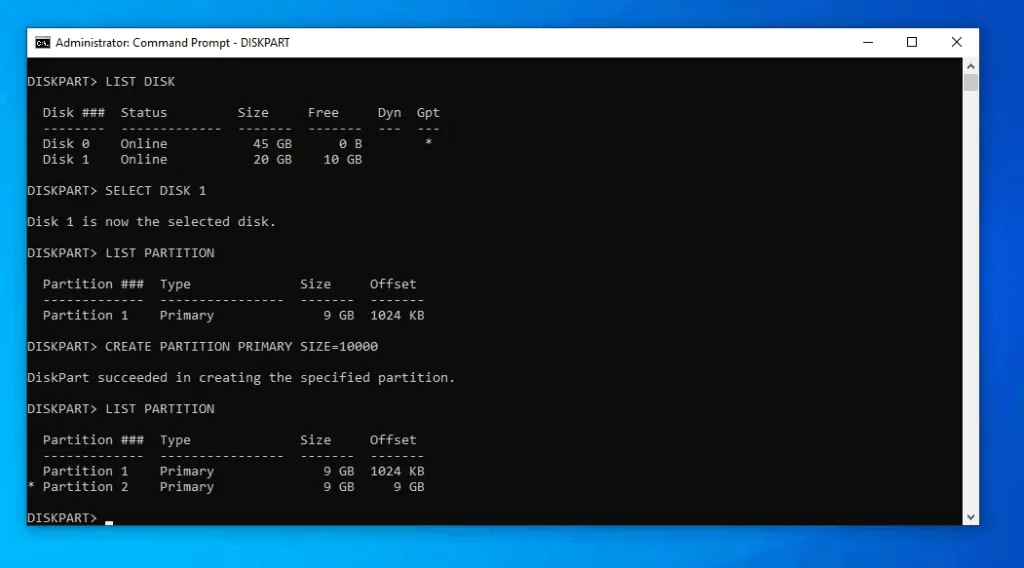
- The DiskPart command prompt will open. To list al all available disks on the PC, type this command and press enter.
LIST DISK
- All disks on the PC will be displayed. Note the disk number with a free space to create a partition. In this example, Disk 1 has a 10GB free space.

- The next step is to select the disk you want to create a partition on. To select the disk, use the command below…
SELECT DISK 1
Replace 1 with your disk #.
- The command will return “Disk # selected successfully”

- Once the disk is selected, the next step is to list available partitions. To display all available partitions, type the LIST PARTITION command and press enter.
LIST PARTITION
- In the first method covered on this Itechguide, I created a 10GB partition with Disk Management. That partition is displayed as 9GB.
- Finally to partition a hard drive in Windows 10 with DISKPART, type the command below. Then, press enter. Before you press enter, read the notes below the command.
CREATE PARTITION PRIMARY SIZE=s
- The command below is an actual command that creates a 10GB partition. However, to create a partition with all available free space, use the second command.
CREATE PARTITION PRIMARY SIZE=10000
CREATE PARTITION PRIMARY
- The partition will be created. To confirm, run the LIST PARTITION command again. In my example, the LIST PARTITION now displays 2 partitions.
Step 2: Assign a Drive Letter to the Partition
When you partition a hard drive in Windows 10, you may want to assign the new partition a drive letter. Follow the steps below.
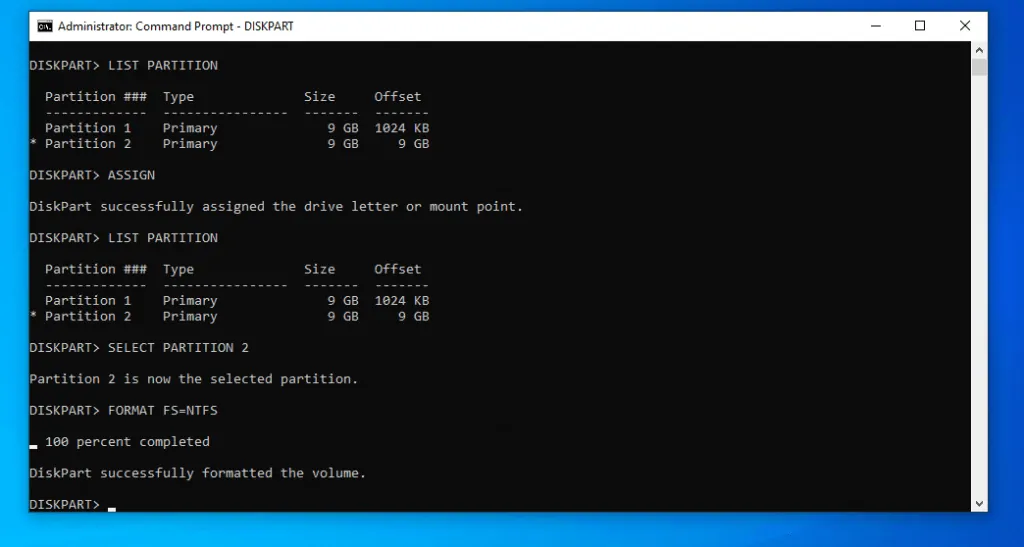
- Still on the DISKPART command prompt, type the ASSIGN LETTER command with the format below.
ASSIGN LETTER=N
- The command below assigns an available drive letter to the partition I created in the last section…
ASSIGN
Step 3: Format the Partition
- The final step is to format the partition. Before you format a partition, you have to select it. To display the partition number, run the LIST PARTITION command.
LIST PARTITION
- Note the partition number of the partition you want to format, then use the SELECT PARTITION command to select the partition.
SELECT PARTITION 2
Replace 2 with your partition #.
- Finally, to format the partition, use the FORMAT command – see a sample command below…
FORMAT FS=NTFS
You can use the 2 methods covered in this Itechguide to partition a hard drive in Windows 10! I hope you found this Itechguide helpful. If you did, click on “Yes” beside the “Was this page helpful” question below.
You may also express your thoughts and opinions by using the “Leave a Comment” form at the bottom of this page.
Finally, for more Windows 10 Itechguides, visit our Windows 10 How-To page. You may also be interested in our Work from Home page.


![How To Run Sysprep (Generalize) In Windows 10 [2 Methods]](https://www.itechguides.com/wp-content/uploads/2022/05/8-2.webp)