This Itechguide teaches you how to lock cells in Google Sheets.
Google Sheets works with permissions. So, locking a cell or cell range means you change the permission in that range such that the content cannot be modified by other people. Or, it can only be modified by the people you specify.
You can Own a spreadsheet or have Edit or View permission. If you own a spreadsheet, you can lock cells in Google Sheets and determine who can change it.
However, if you have Edit permission, you can lock cells and decide who can edit the cells but you CANNOT take ownership of the sheet. Finally, if you have just View permission, you will NOT be able to lock any cell.
Step 1: Open the Google Spreadsheet
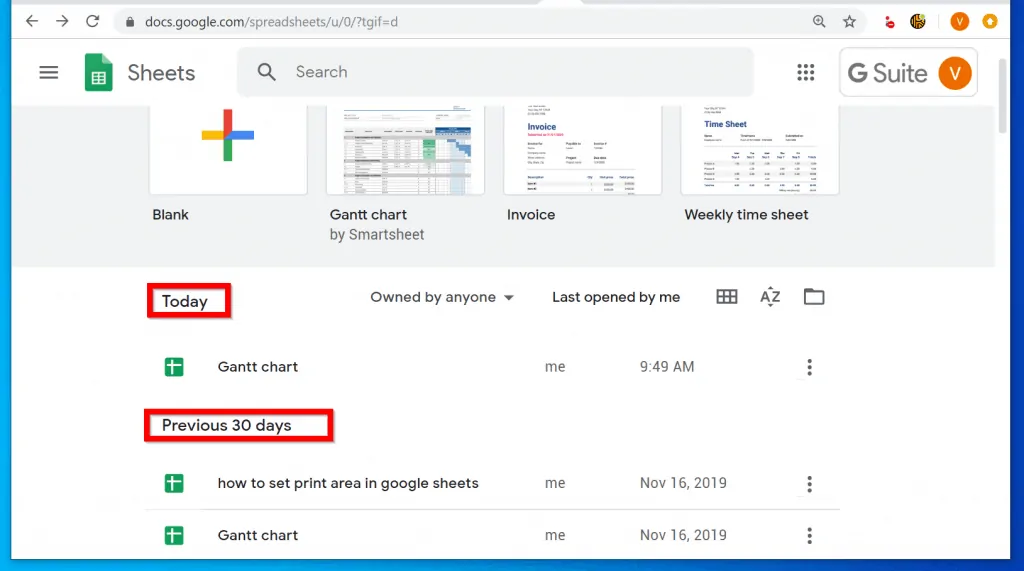
- Open Sheets.Google.com. Then open the spreadsheet from recently opened spreadsheets group – Today or Previous 30 days.
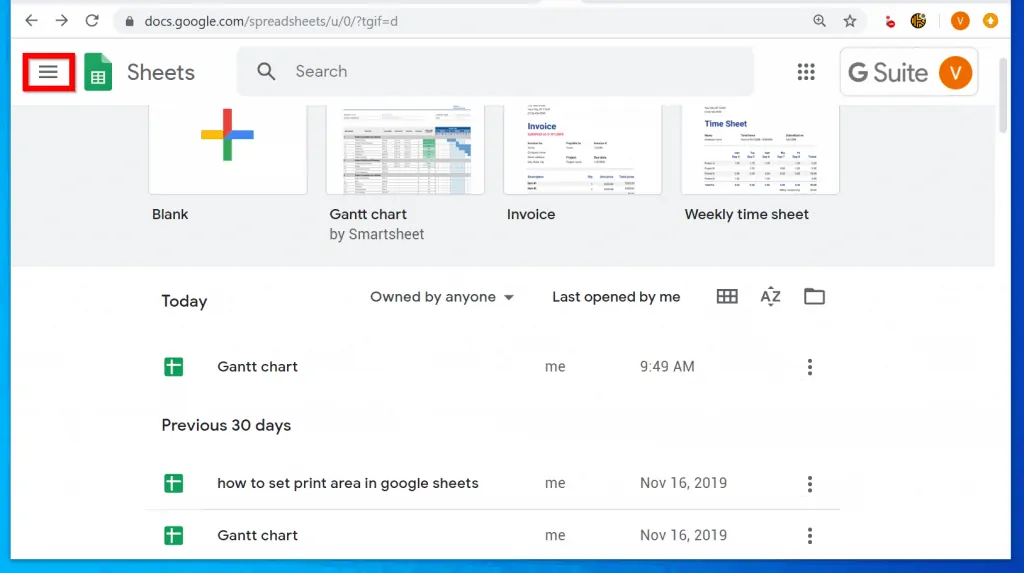
- You could also open a saved spreadsheet from Google Drive. To access Google Drive from Google Sheets home page, click the 3 lines on the top left of the page.
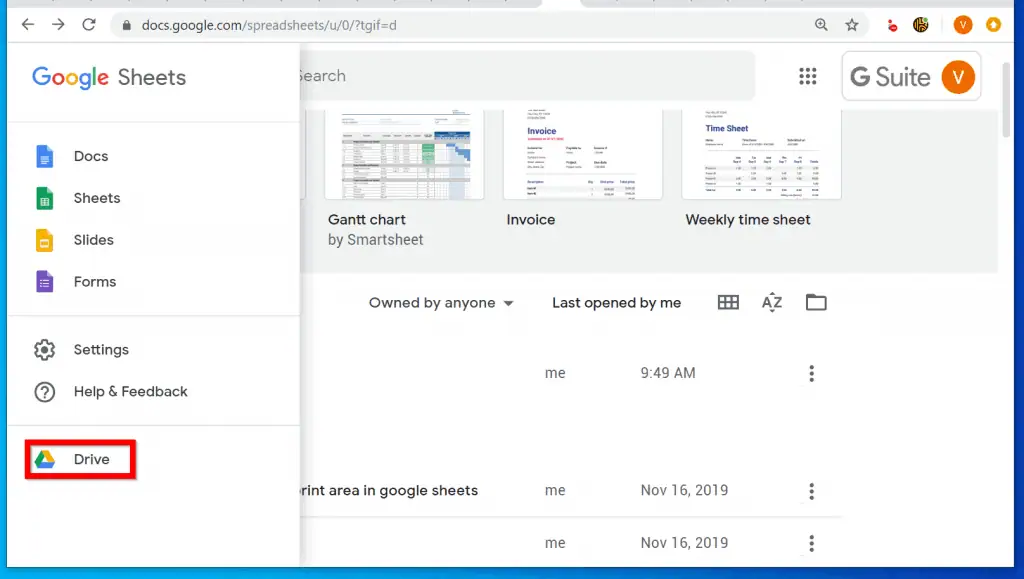
- Then click Drive. Google Drive will open in a new browser tab. Navigate to the folder you saved your spreadsheet and open it.
Step 2: Lock Cells in the Sheet
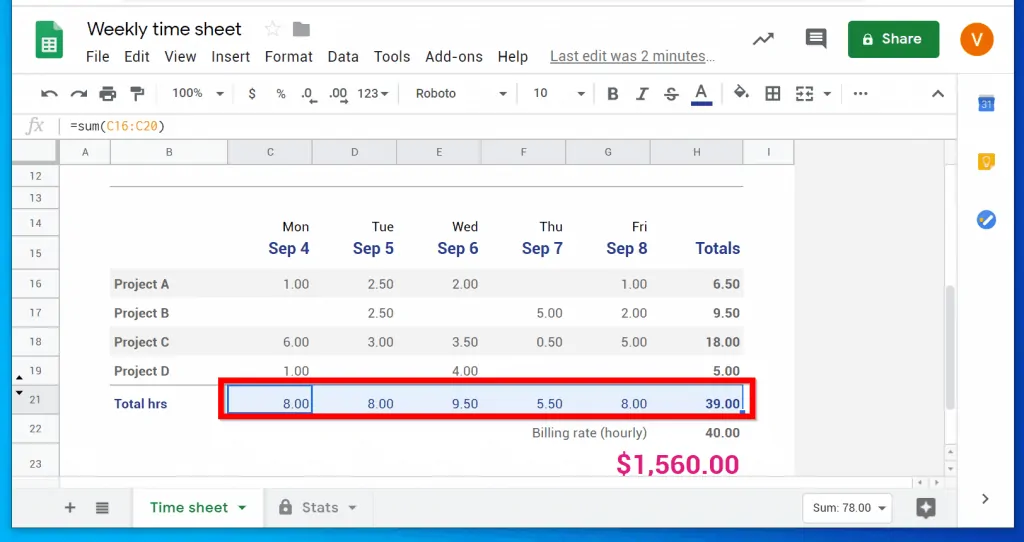
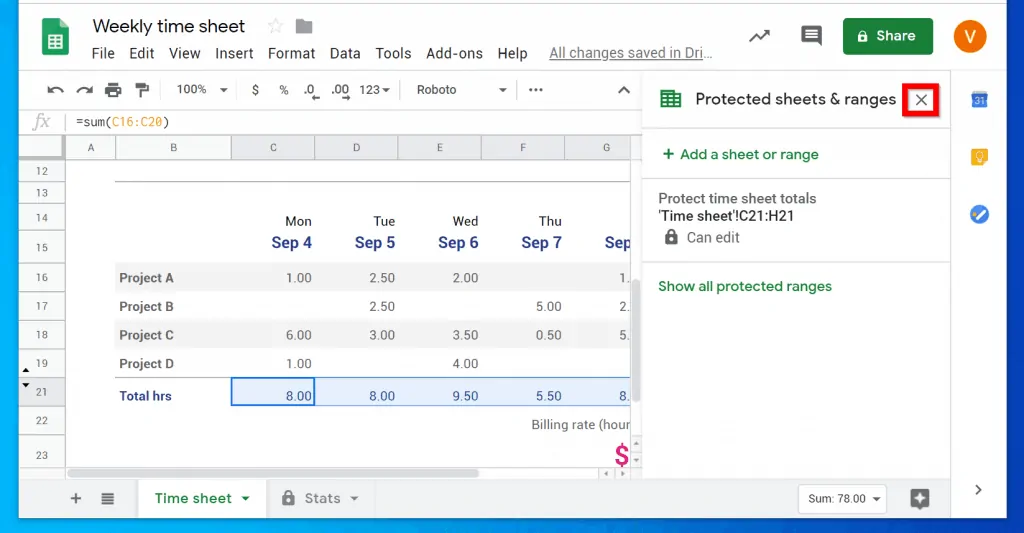
- Select the range of cells you want to lock. In this example, I want to lock cells C21 to H21.
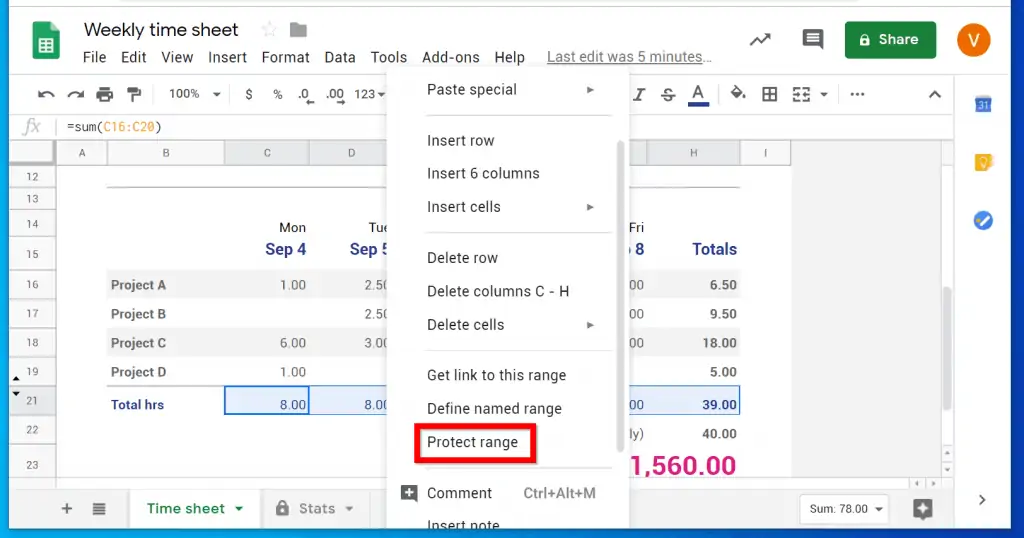
- Once you have selected the cells you want to lock, there are two ways to open the Protected sheets and ranges menu. 1, right-click the selected cells, scroll down the displayed options and click Protect range.
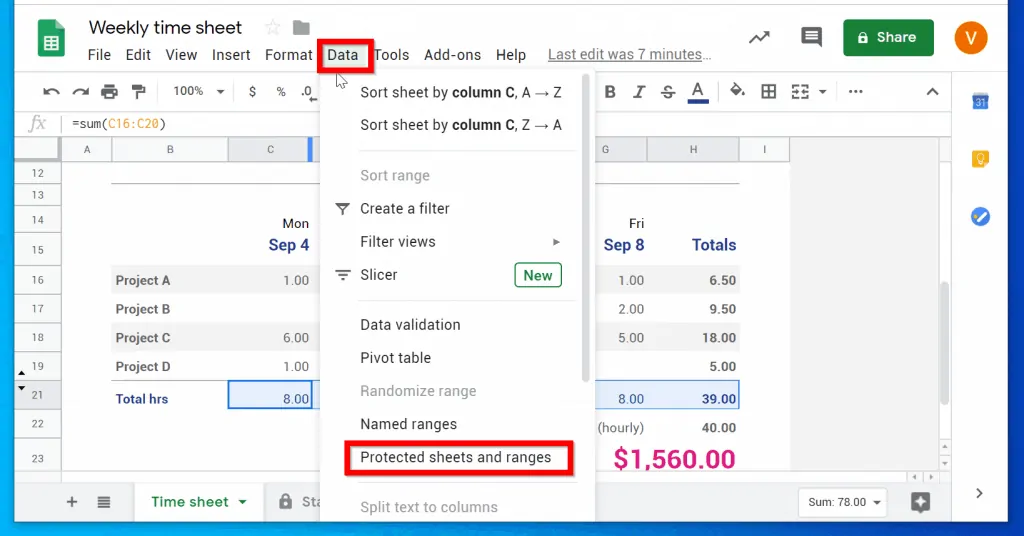
2, Click Data. Then, scroll down the displayed options and select Protected sheets and ranges.
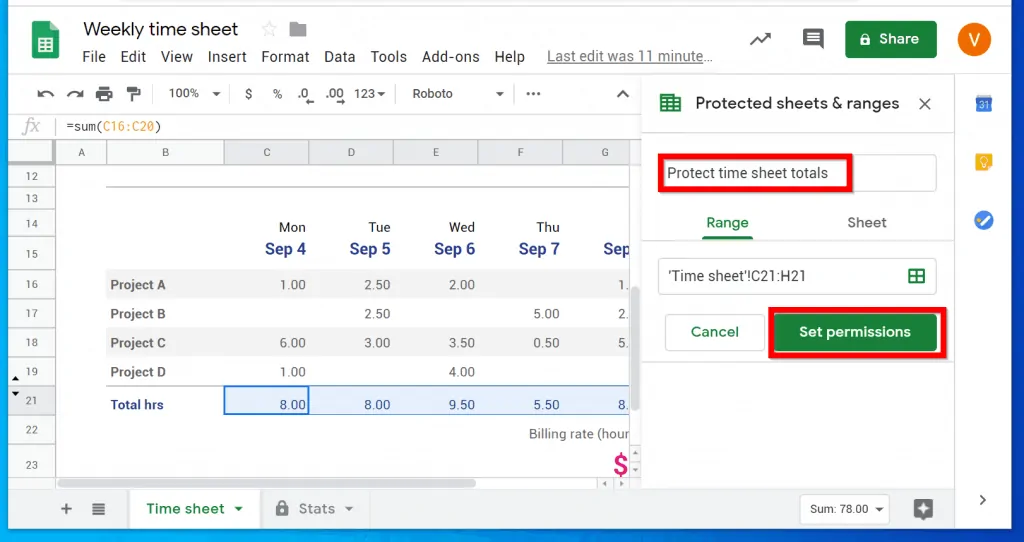
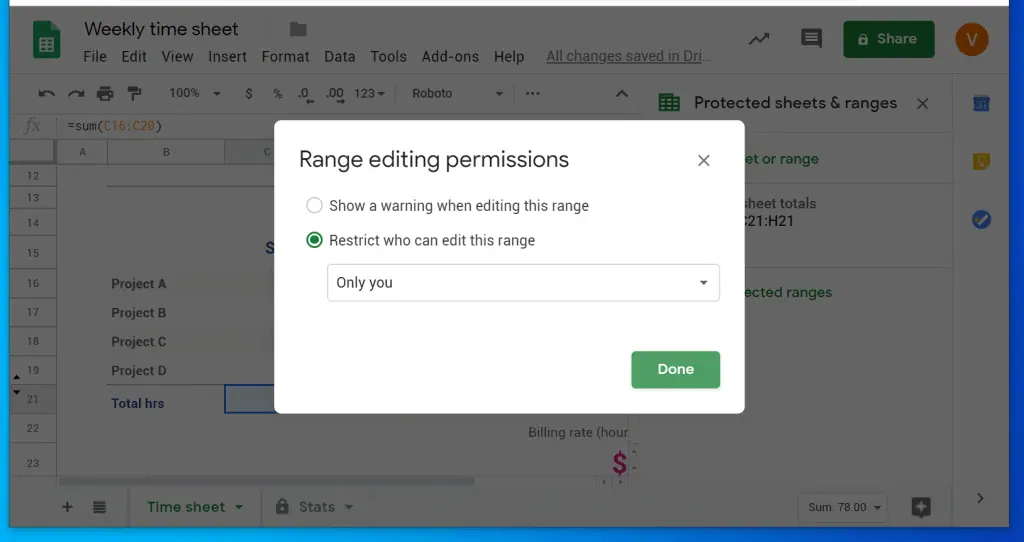
- When the Protected sheets and ranges menu opens (top right of the sheet), give it a name. In this example, I have called my protected range “Protect time sheet totals”. Then click Set permissions.
- By default, the range permission will select Restrict who can edit this range with Only you selected. If you do not want any other person to be able to modify the range, click Done. Alternatively, if you want to allow certain people to change the locked cells, see the steps below.
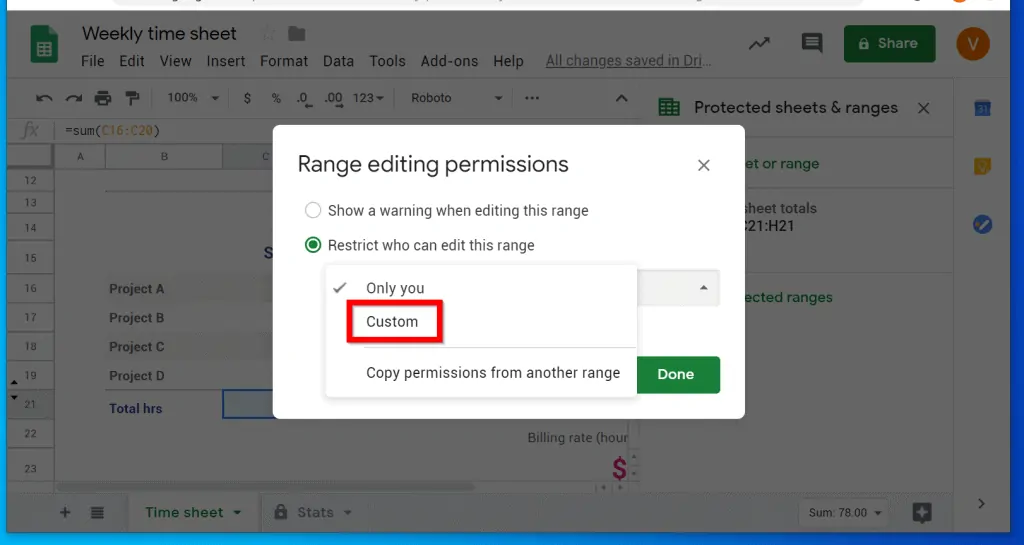
- Click the Only you drop-down and select Custom.
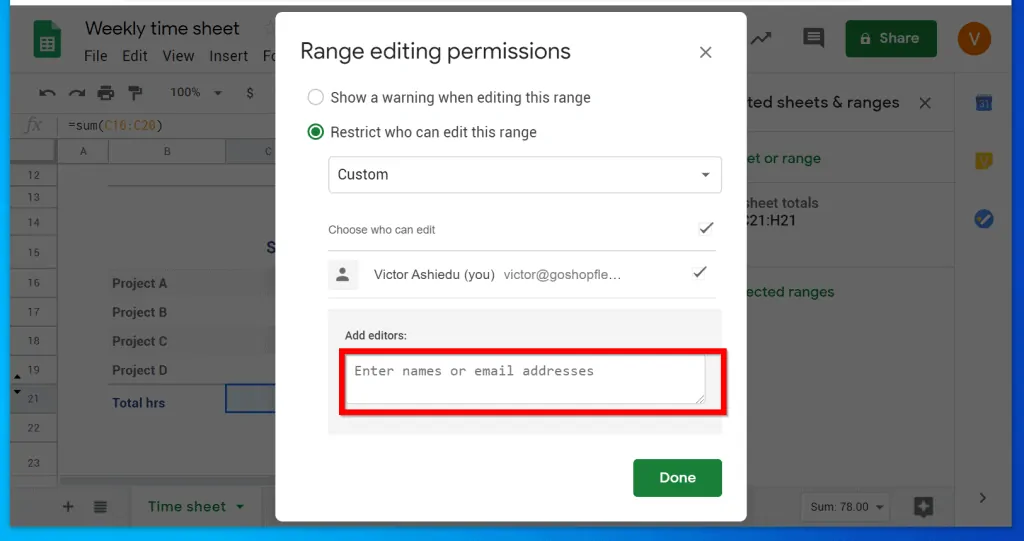
- Finally, on the Add editors box, add the email addresses of the people you want to be able to make changes to the selected range. When you finish, click Done.
- The changes will be saved and the protected cells information will be displayed.
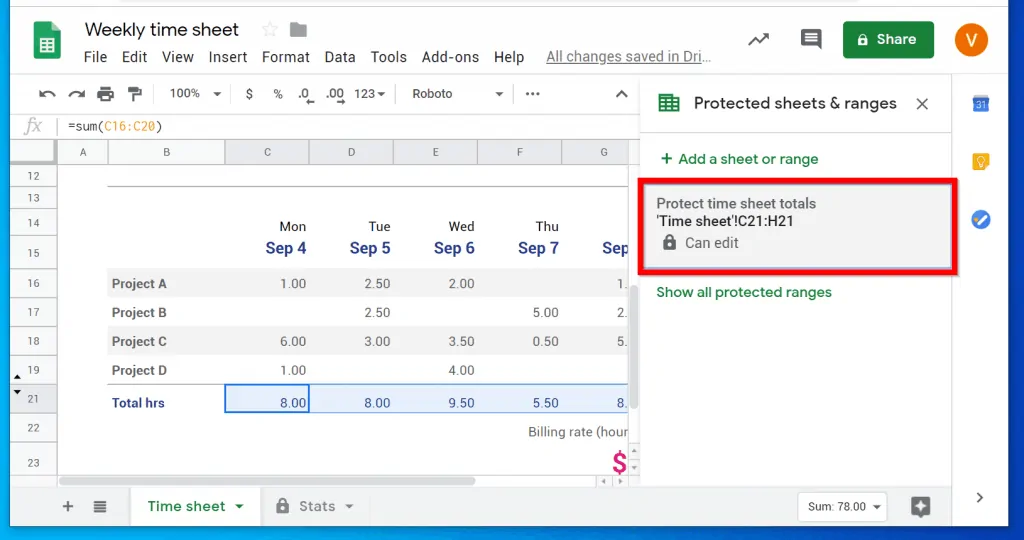
- To close the Protected sheets and ranges menu, click the x beside it
It is this easy to lock cells in Google Sheets! I hope you found this Itechguide helpful. If you found it helpful, click on “Yes” beside the “Was this page helpful” question below.
You may also express your thoughts and opinions by using the “Leave a Comment” form at the bottom of this page.
Finally, to read more Google Itechguides, visit our Google How To page.