Formatting a drive prepares it for installing OS or saving data. Use one of the steps below to format a hard drive in Windows 10.
Option 1: Format a Hard Drive From Disk Management
To format a new hard drive with Disk Management:
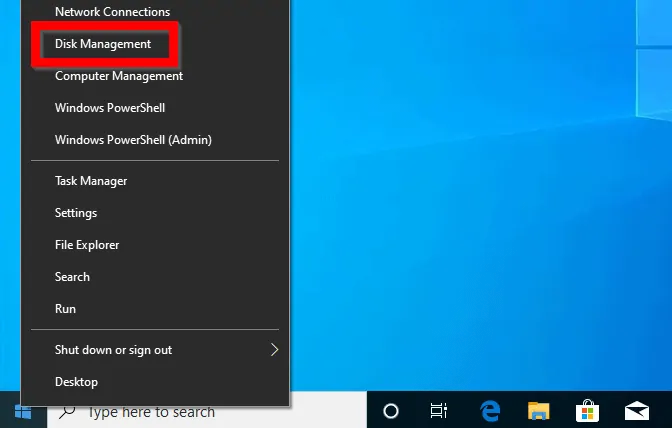
- Right-click Start menu. Then select Disk Management.
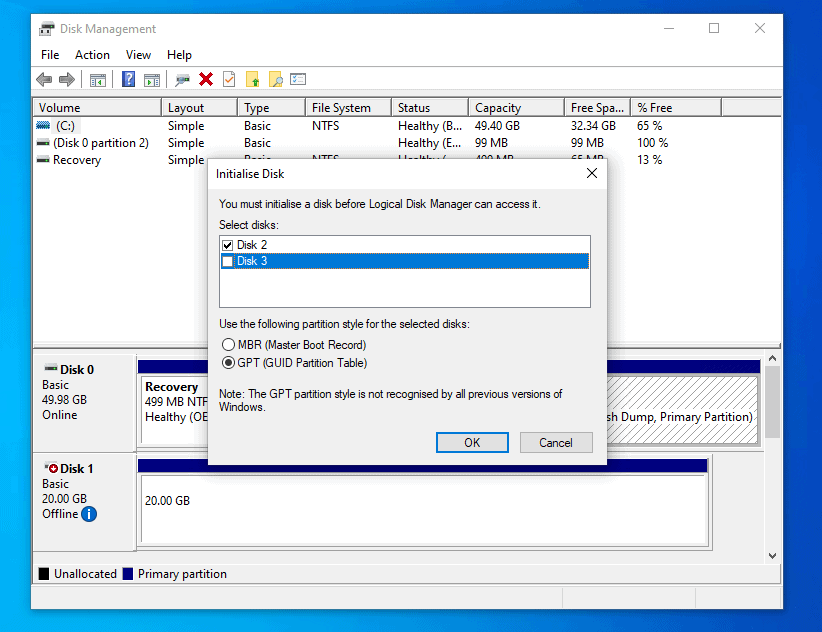
- When Disk Management opens it will load Initialize Disk to initialize the new hard drives. Check the disks you wish to initialize. Then select a partition style and click OK.
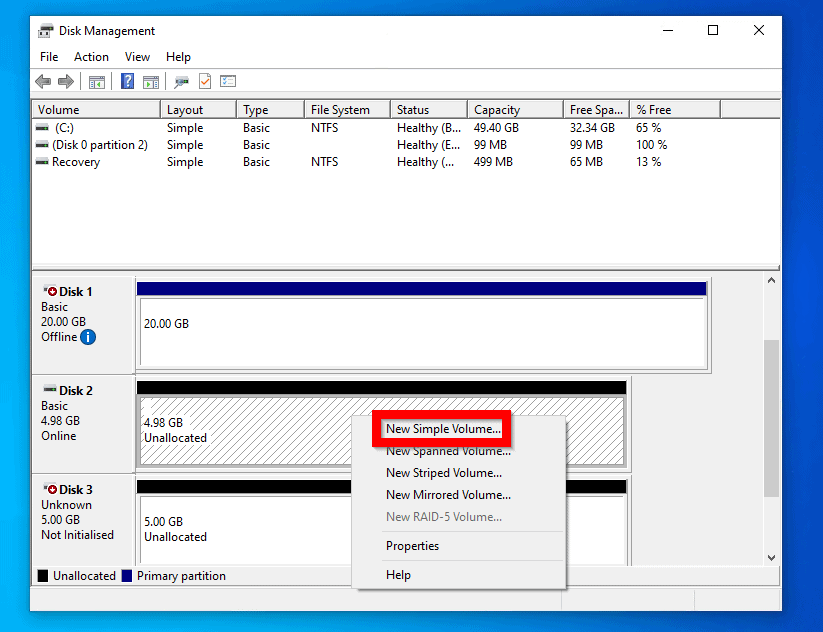
- Before you can format the drive you have to create a volume first. To create a volume right-click the disk. Then select the volume type you wish to create. For this demo I will select New Simple Volume…
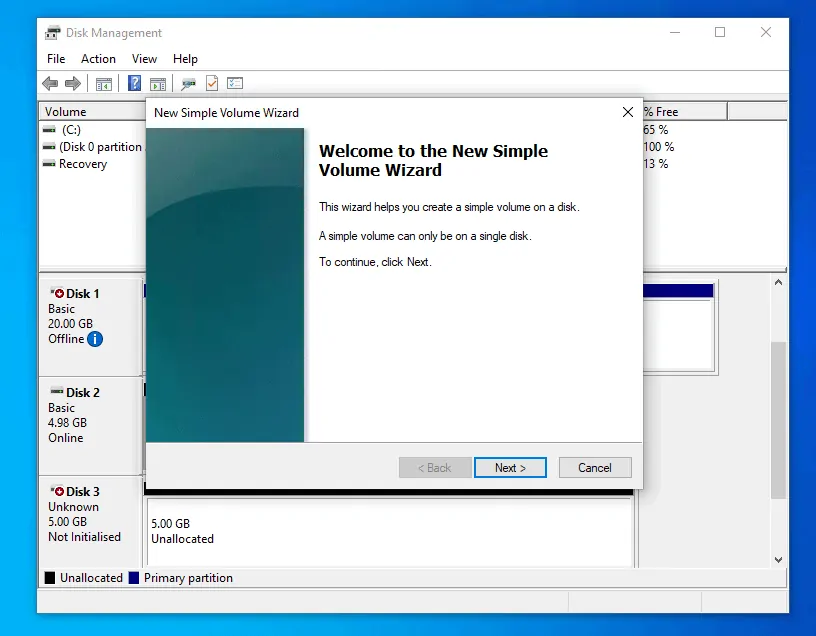
- At the New Simple Volume Wizard, click Next.
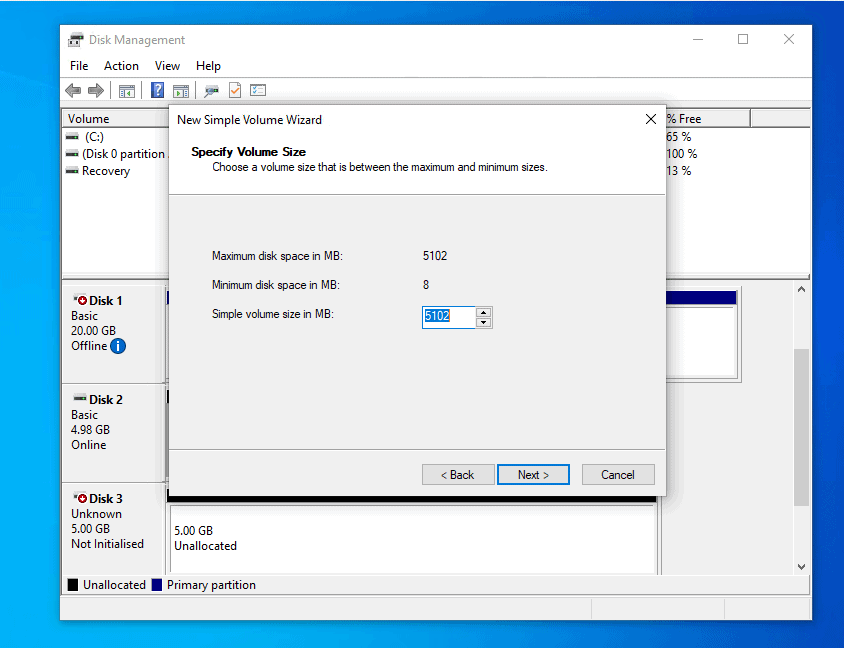
- Then enter the volume size or accept defaults to use all available space in the drive. Then click Next.
- On the Assign Drive Letter or Path screen, select a drive letter to assign the new volume. Then click Next.

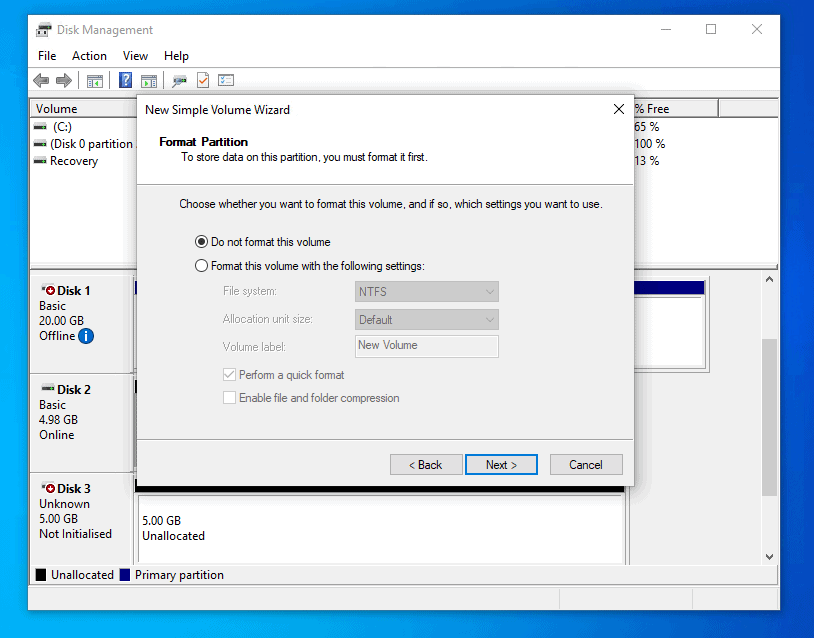
- At the Format Partition screen, you can either select Format this volume with the following settings (Default). Or select Do not format this volume. If you select Format this volume with the following settings the drive will be formatted automatically. For the purpose of this guide I selected Do not format this volume so I can demo another way to format new hard drive in Windows 10. After selecting your option click Next.
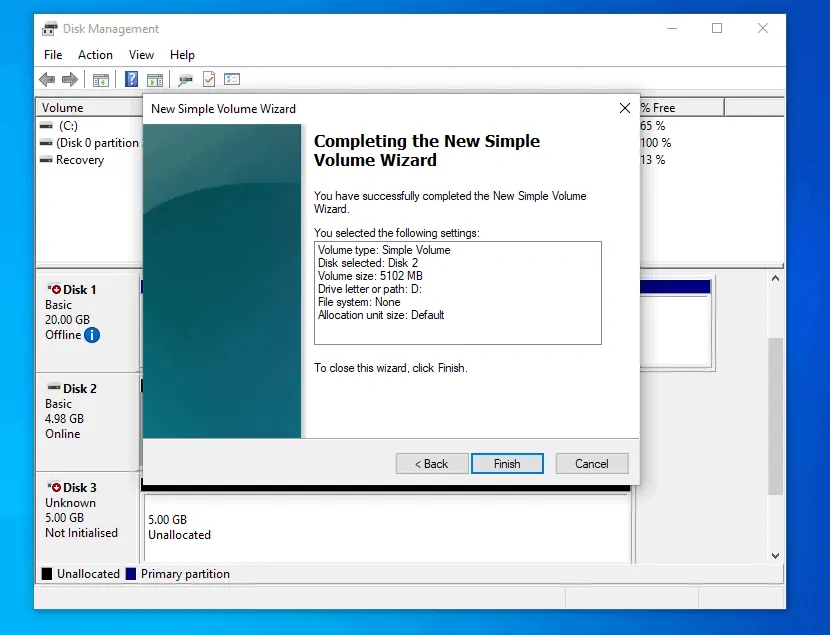
- At the final screen, confirm your selections. Then click Finish.
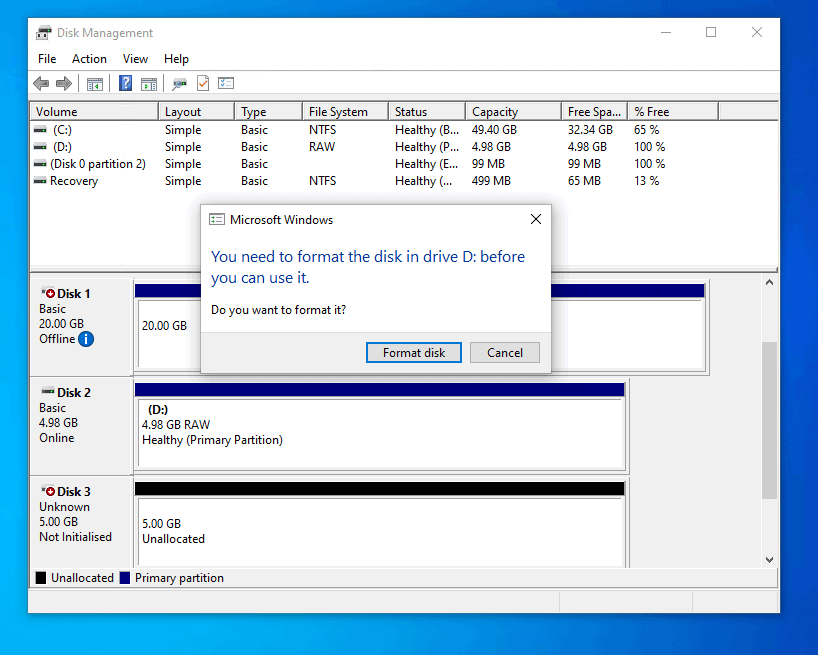
- Once the volume is created Disk Management will prompt you to format the disk. To format the disk click Format. I will click Cancel for now so I can demo another method to format the disk.
- During the volume creation process, you had two ways to format the drive. If you did not format the drive then you can still format it by right-clicking the volume. Then select Format…
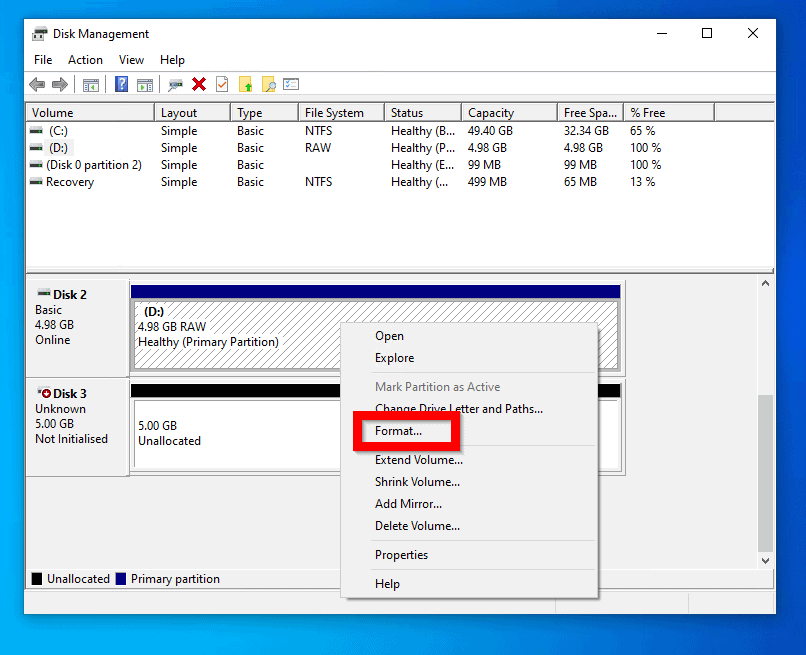
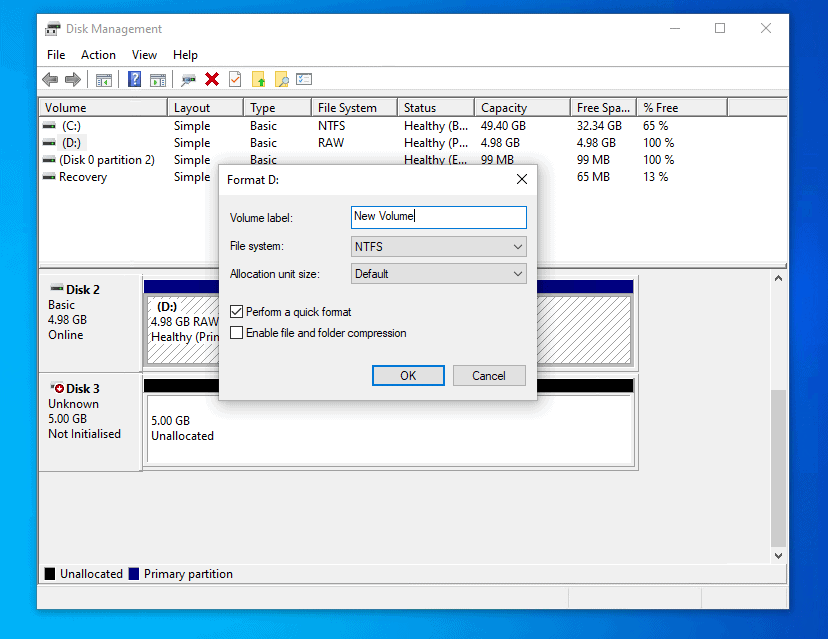
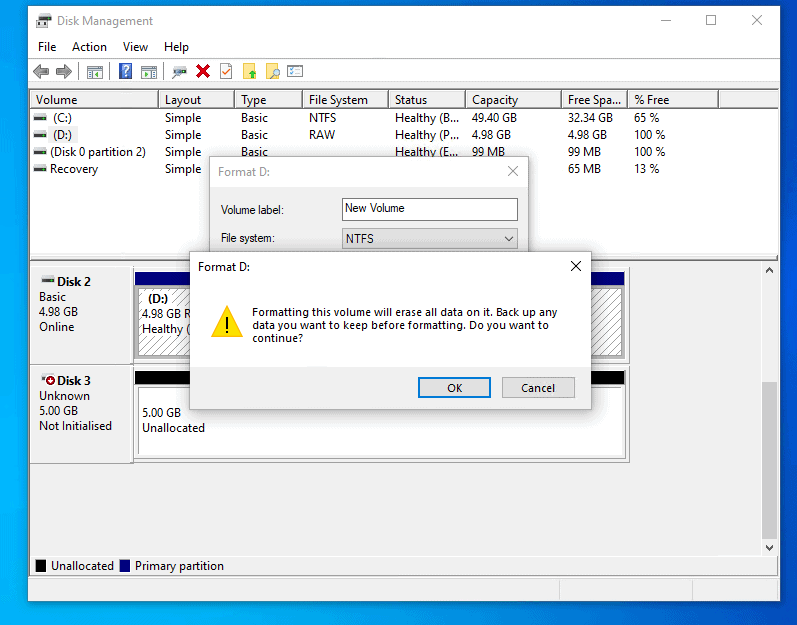
- Then give the volume a Volume Label or accept the default. To format the drive quickly check Perform a quick format. Then click OK. You will receive a data loss warning. Click OK.
Option 2: Format a Hard Drive with the DISKPART Command
DISKPART is a versatile tool in Windows. It can be used to perform a number of tasks including initializing new hard drives, creating volumes and formatting disks.
Steps to format new hard drive in Windows 10 with DISKPART:
- Open Command Prompt as administrator. For steps read this guide Open Command Prompt as Administrator.
- When command prompt opens, type DISKPART and press enter.
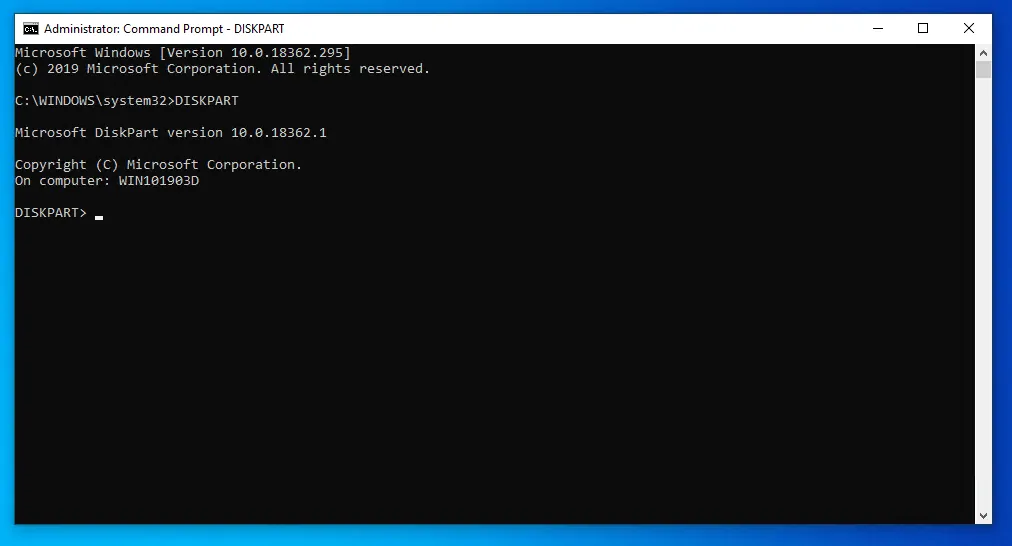
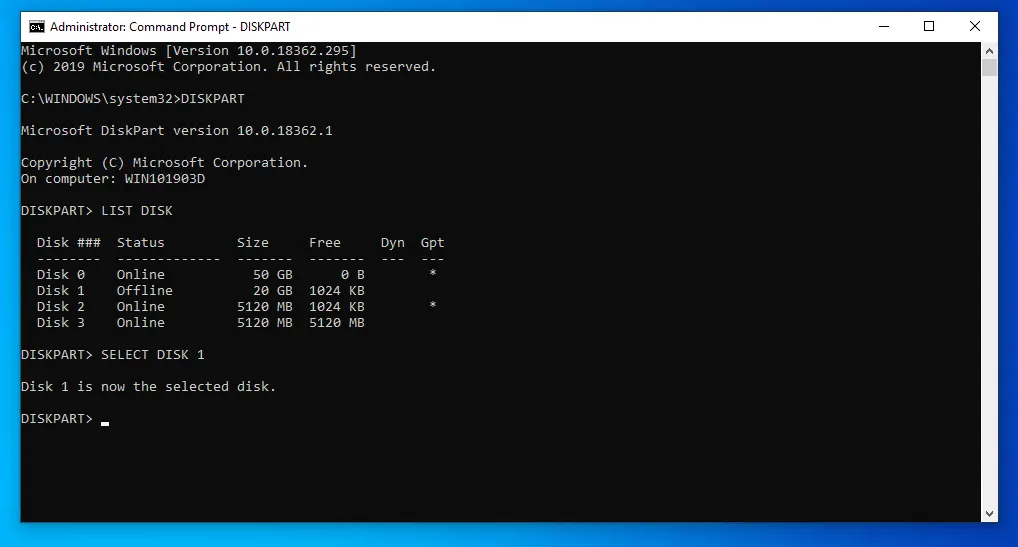
- At the DISKPART prompt type this command. Then press enter.
LIST DISK
The command lists all the disks on your PC. Disk 1 is offline. I will demo with this disk.

- The next step is to select the disk. To do this type the command below. Then click OK.
SELECT DISK 1
Change 1 to the disk number for the disk you wish to work on. The command will return Disk <number> selected.
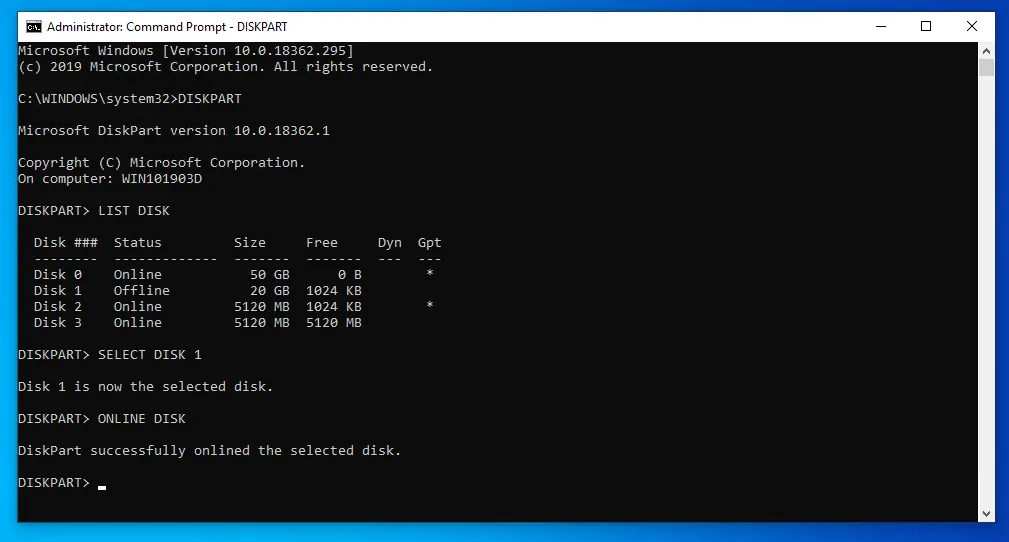
- To bring the disk online, type this command and press enter.
ONLINE DISK
The disk will go online. To confirm, use LIST DISK again. The disk is now online. See the second image below.

- To list available volumes, type the command below. Then press enter.
LIST VOLUME
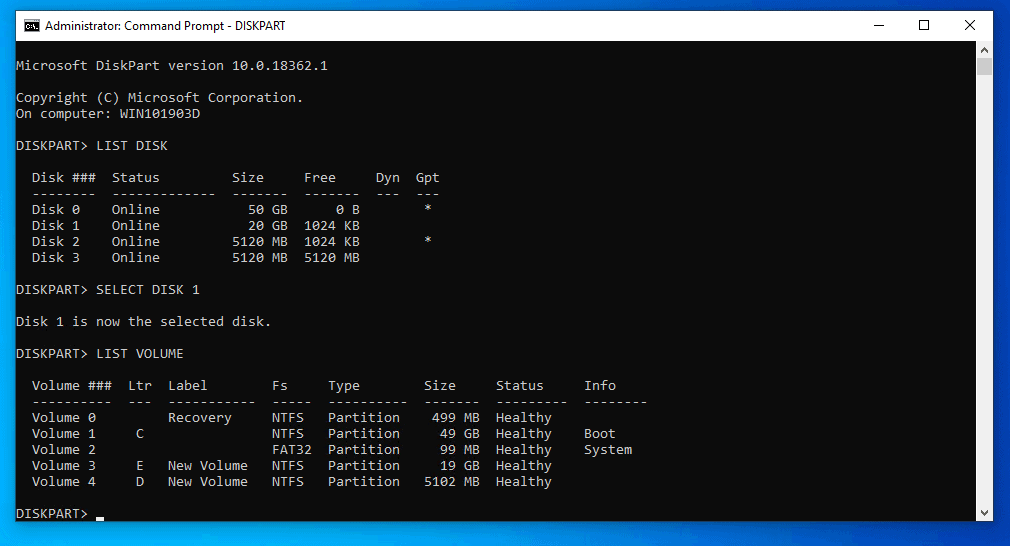
- The next step is to select the volume you want to format. Use the command below.
SELECT VOLUME 3
Change 3 to your volume number…
- To format the drive, type this command and press enter.
FORMAT QUICK FS=NTFS
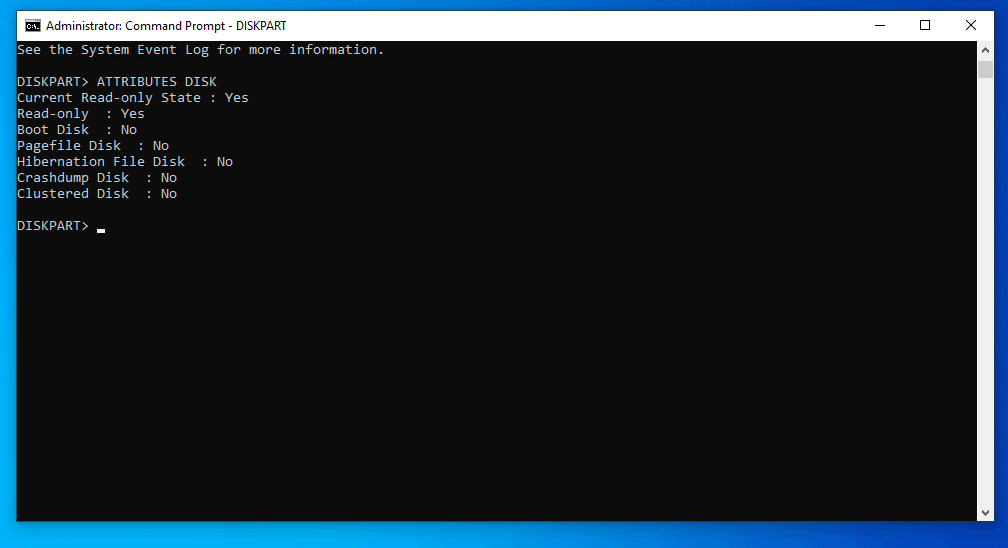
If you receive an error message about the disk being write protected, use the following commands to fix it..
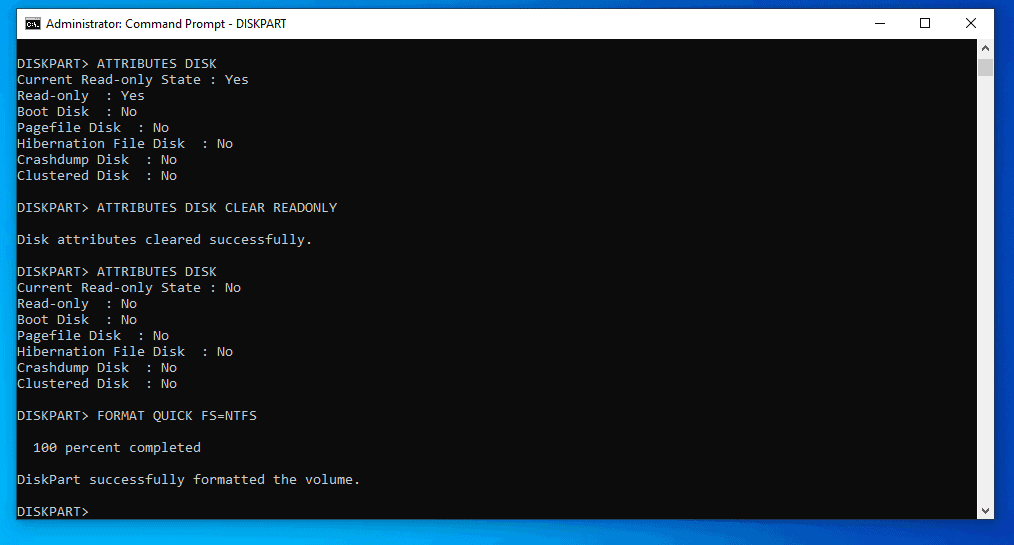
ATTRIBUTES DISK
Notice that the disk is Read-Only.
To remove the read-only attribute use this command..
ATTRIBUTES DISK CLEAR READONLY
To confirm that the read-only attribute have been removed, use this command again..
ATTRIBUTES DISK
If you now format the disk with this command, it should format successfully.
FORMAT QUICK FS=NTFS
Here are the results of all the commands..
Option 3: Format a Hard Drive with Windows PowerShell
You can also format new hard drive in Windows 10 with PowerShell.
Here are the steps:
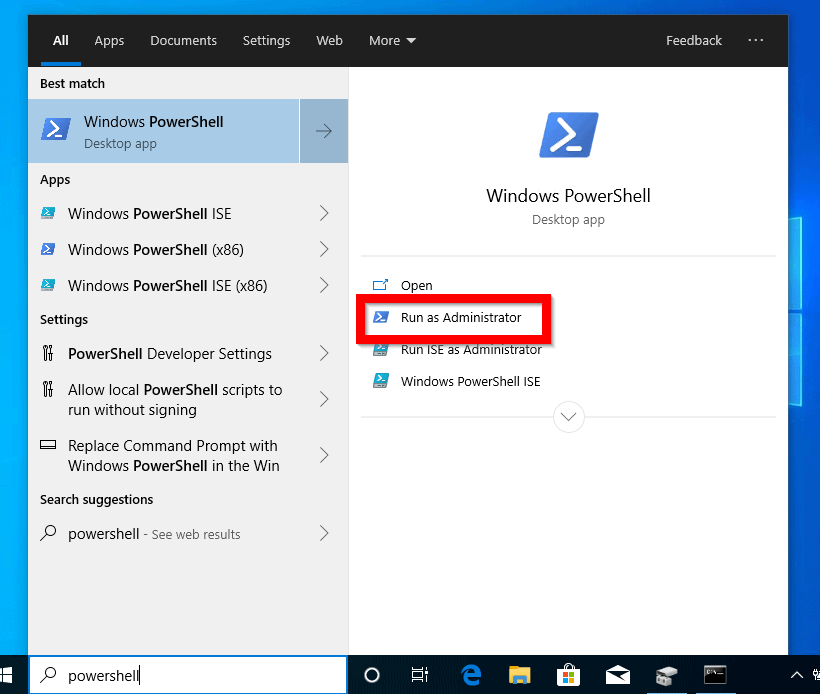
- Type PowerShell in search bar. Then click Run as administrator.
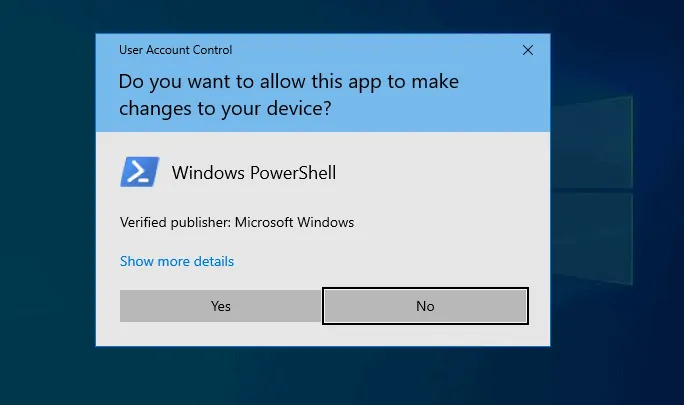
- On the User Account Control confirmation, click Yes.
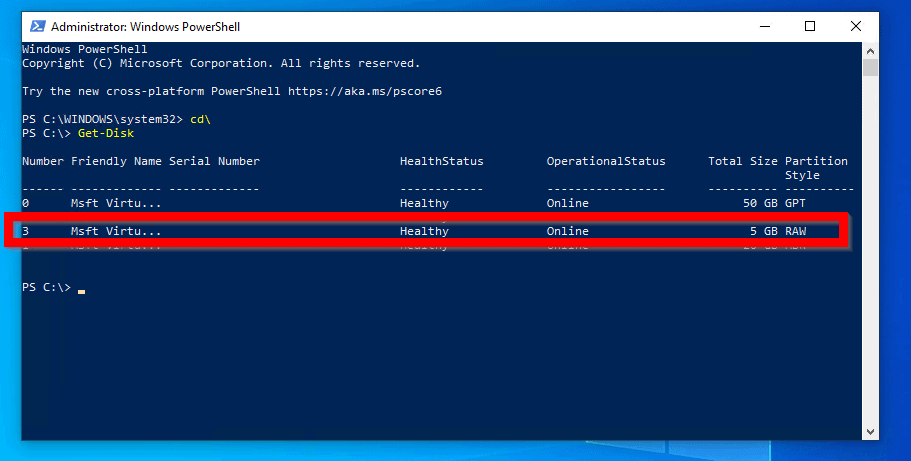
- To list available disks, type this Cmdlet. Then press enter.
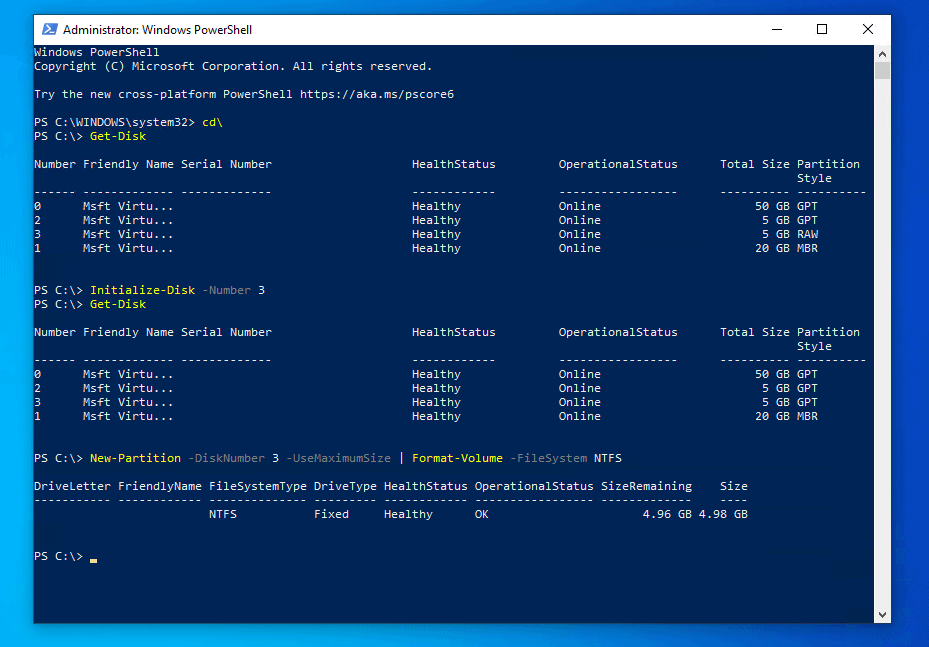
Get-Disk
Here are the disks on my test VM. Take a look at Partition Style column (the last column). Disk 3 has the value, Raw. This means that the disk have not been partitioned.
- Before creating a partition, we need to first initialize the disk with this command
Initialize-Disk -Number 3
Change 3 to the partition number for your disk.
Initialize-Disk -Number 3 -PartitionStyle MBR
- To create a partition in disk 3 and format the partition with NFTS, type this command and press enter.
New-Partition -DiskNumber 3 -UseMaximumSize | Format-Volume -FileSystem NTFS
Here are the commands in PowerShell..In the second Get-Disk Command (after initializing the disk) notice that the Partition Style is GPT. As I said earlier, this is the default partition style. To create an MBR partition, add -PartitionStyle MBR to the Initialize-Disk command.
- Finally, assign the volume a drive letter with this command..
Get-Partition -DiskNumber 3 | Set-Partition -NewDriveLetter F
Conclusion
I am confident that this guide met your expectations but I still want to hear from you. Let me know the method you used to format your drive by responding to the “Was this page helpful?” question below.
Finally, for more Windows 10 Itechguides, visit our Windows How-To page.


![How To Run Sysprep (Generalize) In Windows 10 [2 Methods]](https://www.itechguides.com/wp-content/uploads/2022/05/8-2.webp)
Thank you so much for sharing all this wonderful info about printers!!! It is so appreciated!!! If you are facing any issues on printers, then follow the simple steps given in https://hard-drives.co/download-wd-my-passport-driver-for-windows