The Windows Account Control (UAC) protects your PC from malicious software but may become a pain sometimes. Disable it with one of the options below.
UAC helps prevent potentially malicious or harmful programs from making changes to your computer. It is NOT recommended to turn UAC off unless you have a good reason for doing so..
Option 1: Turn Off UAC From Control Panel
To turn off User Account Control in Windows 10:
- Type UAC in the search bar. Then click Change User Account Control settings.

- At Choose when to be notified about changes to your computer, drag the blue bar down to Never notify. Then click OK.
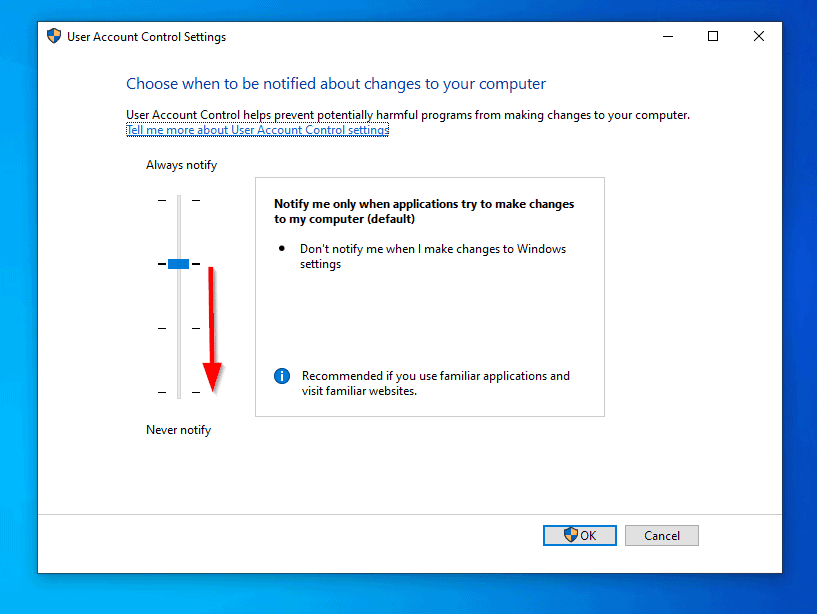
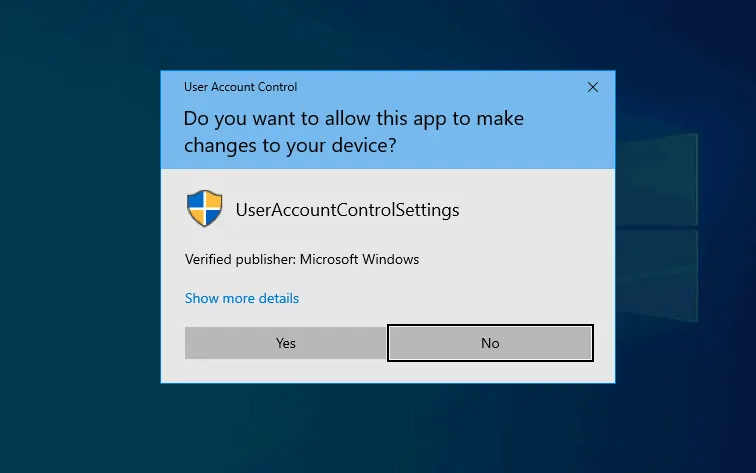
- User Account Control will request your permission. Click Yes.
Option 2: Turn Off UAC in From Windows Registry
Another way to turn off User Account Control in Windows 10 is via registry.
Here are the steps:
- Press Windows logo + R to open Run command.
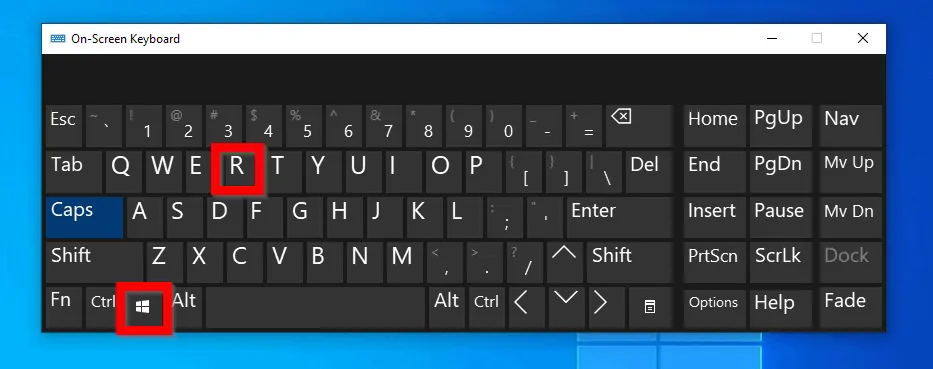
- At Run command, type regedit then press OK.

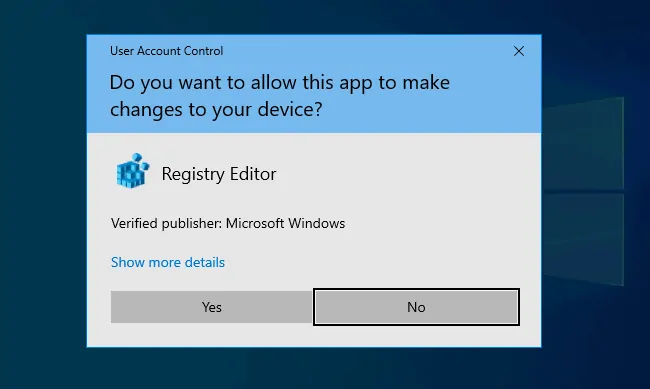
- Then respond Yes to the User Account Control prompt.
- When registry editor opens, navigate to:
HKEY_LOCAL_MACHINE\SOFTWARE\Microsoft\Windows\CurrentVersion\Policies\System - Double-click EnableLUA.
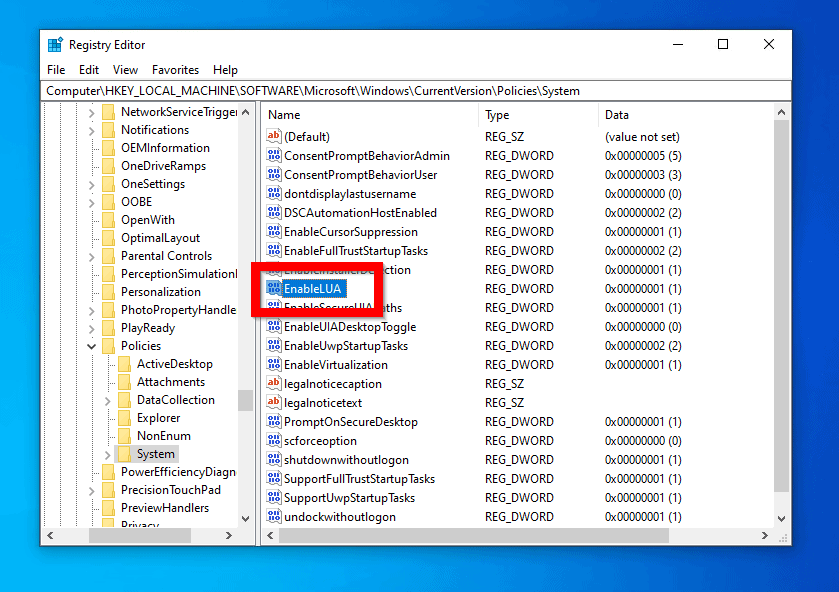
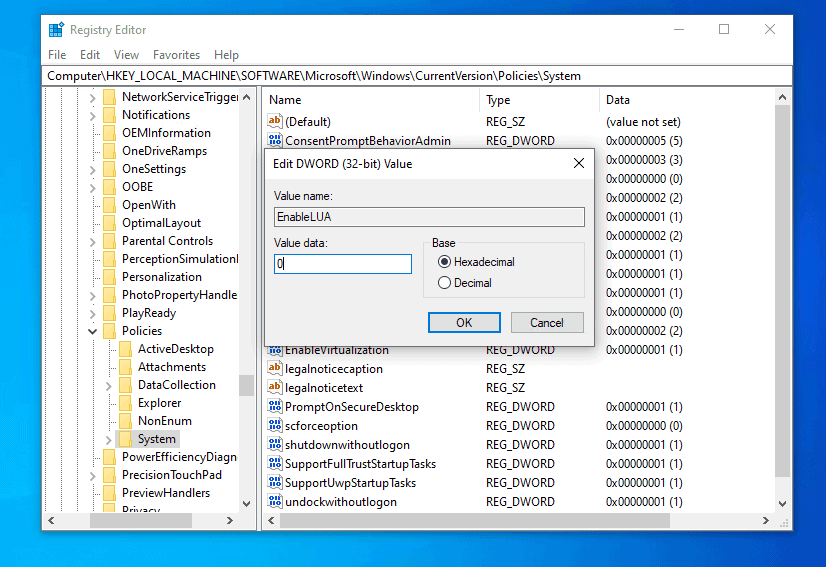
- Finally, change Value data from 1 to 0 and click OK.
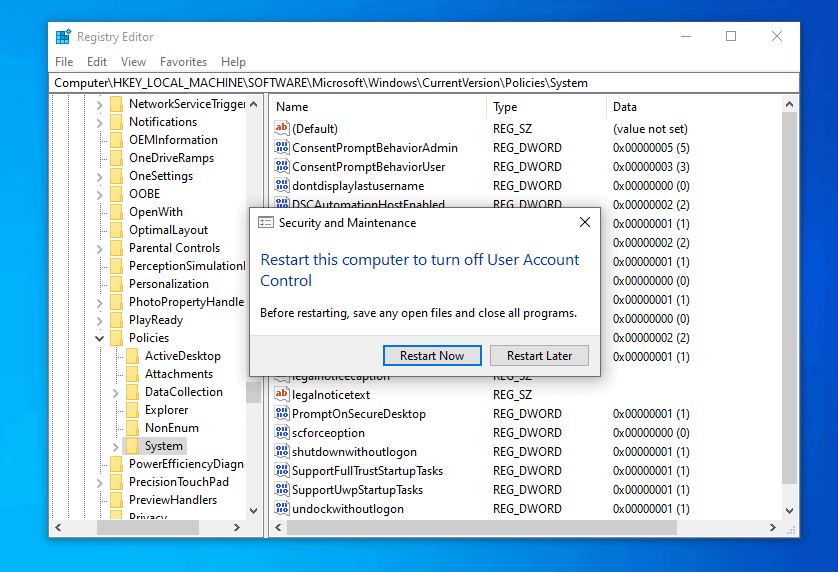
- For the changes to take effect, click Restart Now.
Option 3: Disable UAC with Group Policy
The last method discussed in this guide will demo how to turn off UAC in Windows 10 with Group Policy.
Here are the steps:
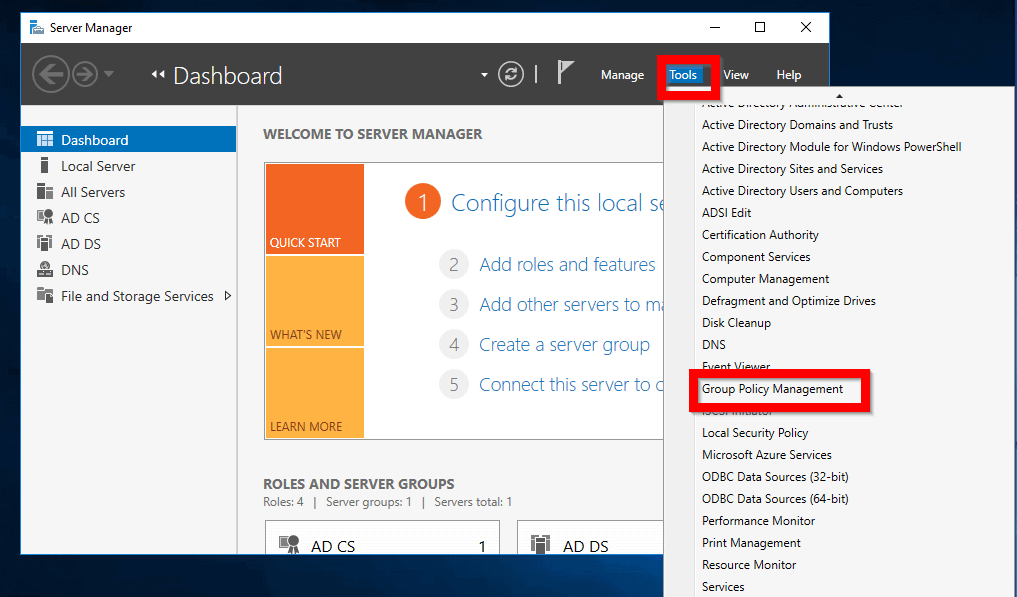
- Login to a Domain Controller and open Server Manager.
- From Server Manager, click Tools. Then select Group Policy Management.
If you have installed RSAT for Active Directory, you can open Group Policy Management from Windows 10.
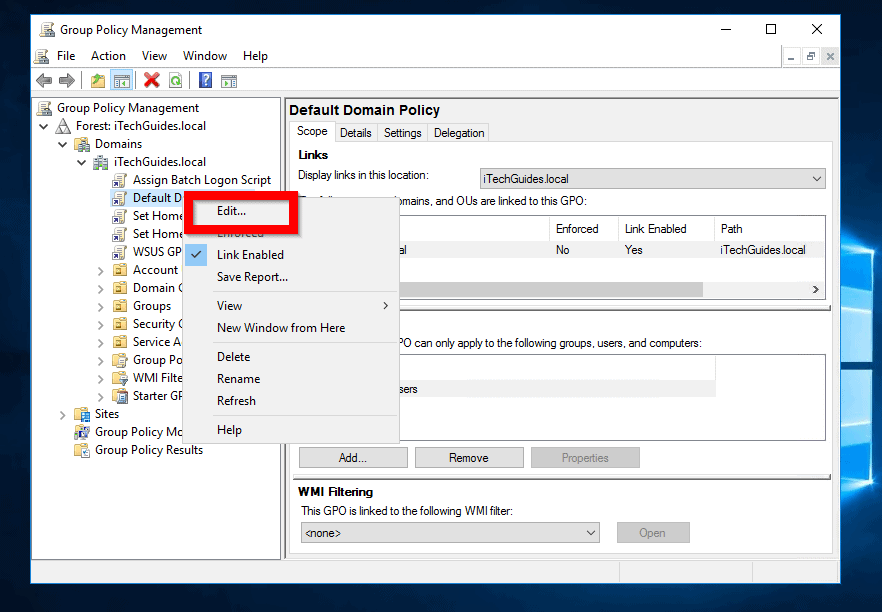
- At Group Policy Management, right-click the GPO you wish to use. Then select Edit…
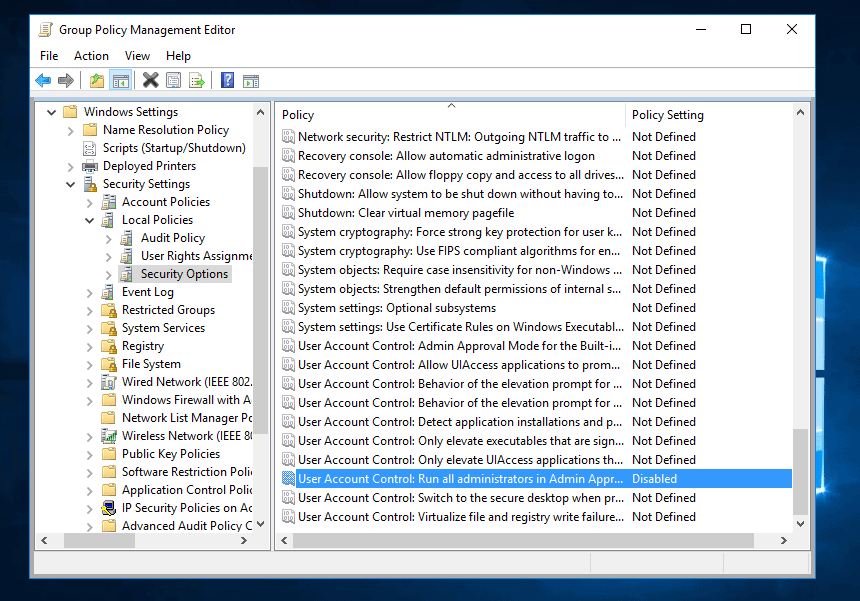
- When Group Policy Management Editor opens, navigate to:
Computer Configuration -> Policies -> Windows Settings -> Security Settings > Local Policies > Security Options
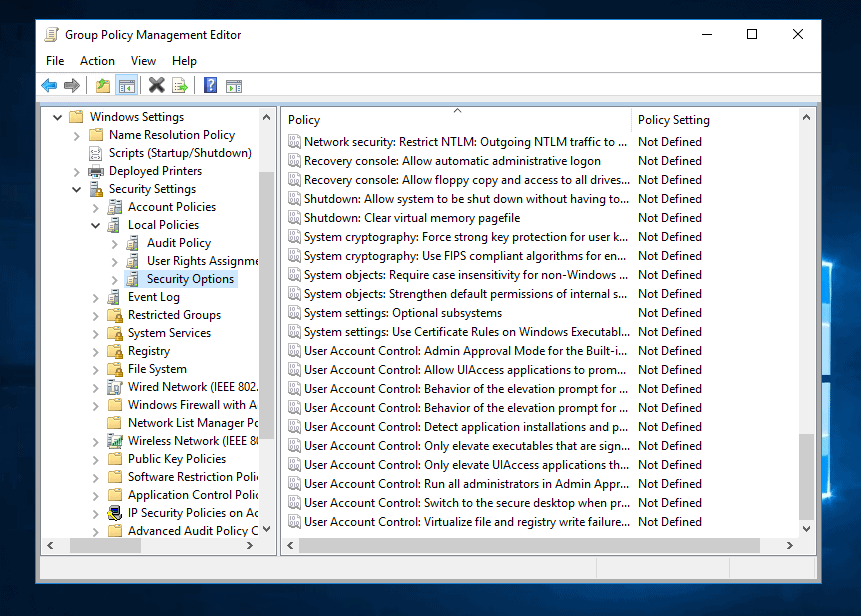
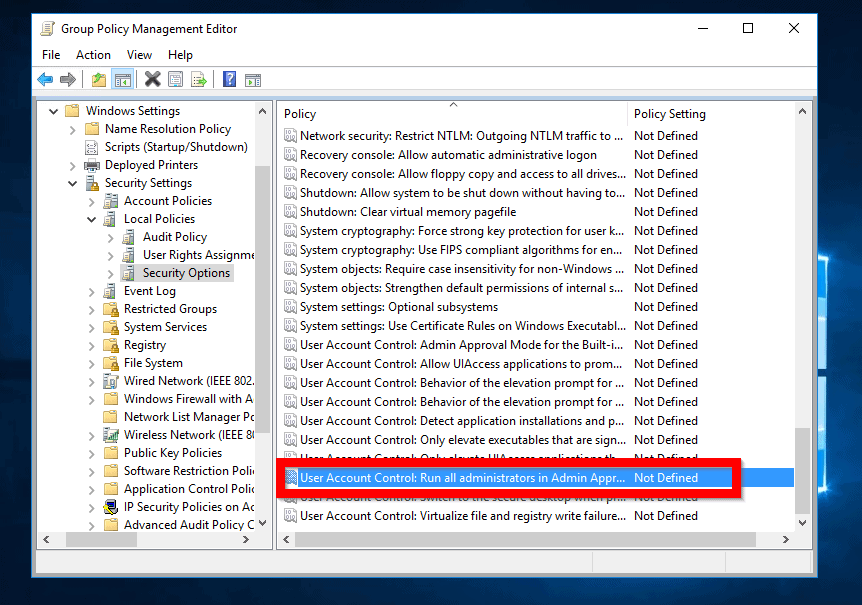
- To turn off UAC in Windows 10 with Group Policy, double-click User Account Control: Run all administrators in admin Approval Mode policy.
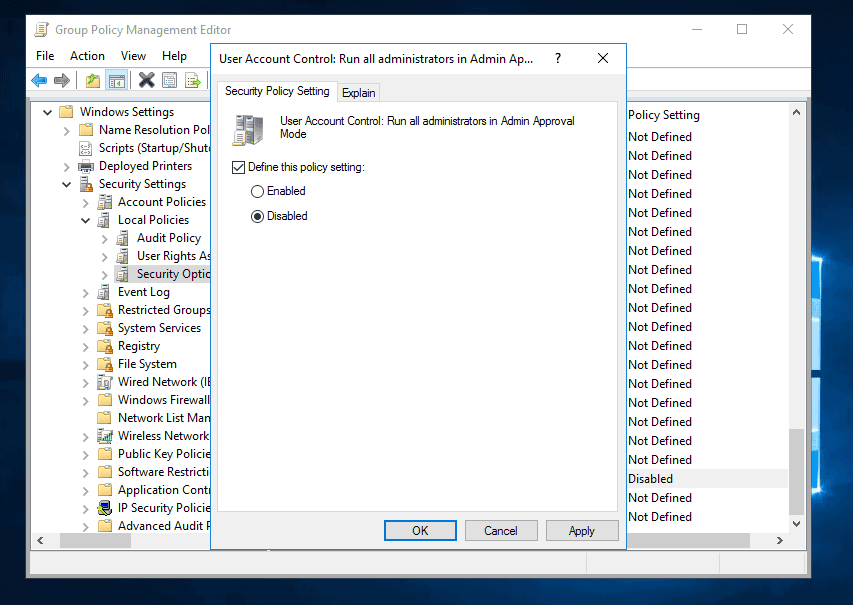
- When the policy opens for editing, check the box beside Define this policy setting. Then click Disabled. Click Apply then click OK. The policy will now shows status as Disabled (See the second image below).
Conclusion
You can use one of the methods discussed in this guide to turn off User Account Control in Windows 10.
Have a question, feedback, or comments? Kindly spare 2 minutes to share your experience by responding to the “Was this page helpful?” question below.
For more Windows guides visit our Windows 10 How-To page.


![How To Run Sysprep (Generalize) In Windows 10 [2 Methods]](https://www.itechguides.com/wp-content/uploads/2022/05/8-2.webp)