This Itechguide teaches you how to change username on Windows 10.
Option 1: Change Username from Computer Management
One of the methods to change username on Windows 10 is to use Local Users and Groups in Computer Management. Here are the detailed steps…
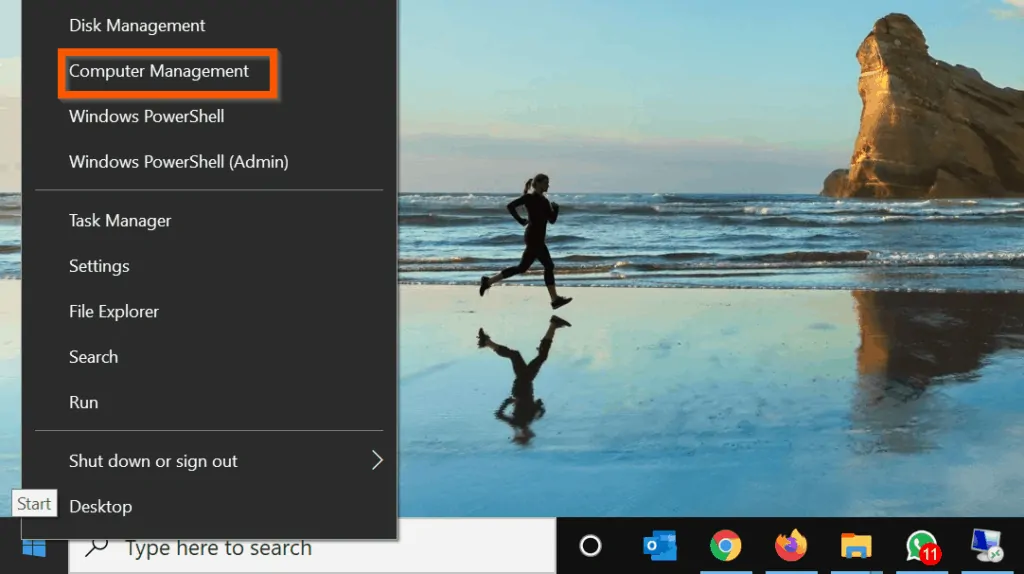
- Right-click Windows 10 Start menu and click Computer Management.
- Then, on the left pane of Computer Management, expand Local Users and Groups. Users and Groups nodes will be available.

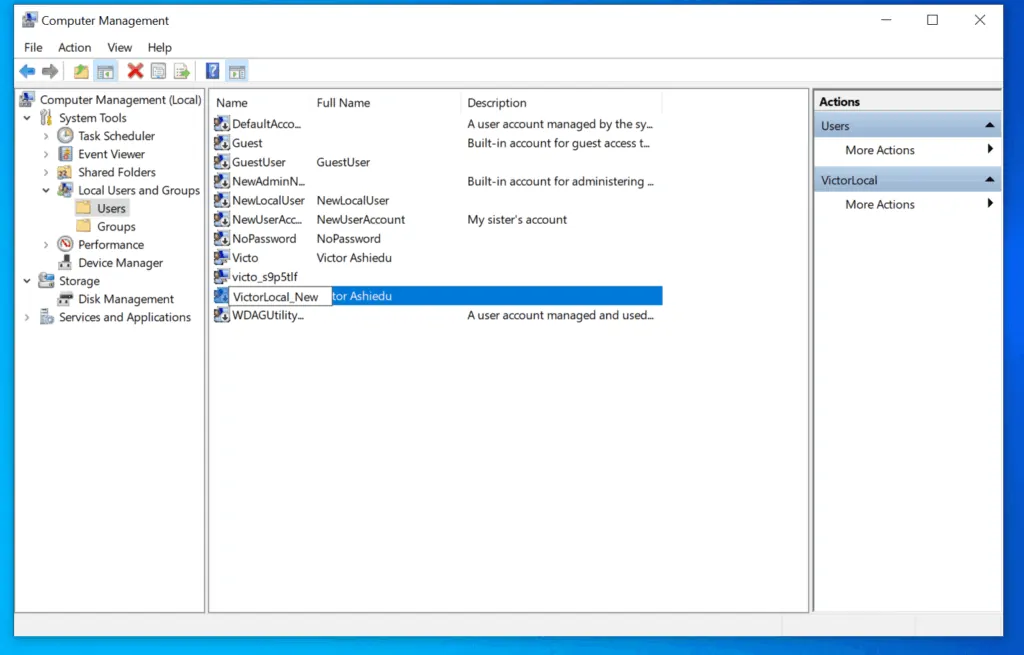
- Click the Users node. Then, on the details pane, right-click the username you want to change and select Rename.
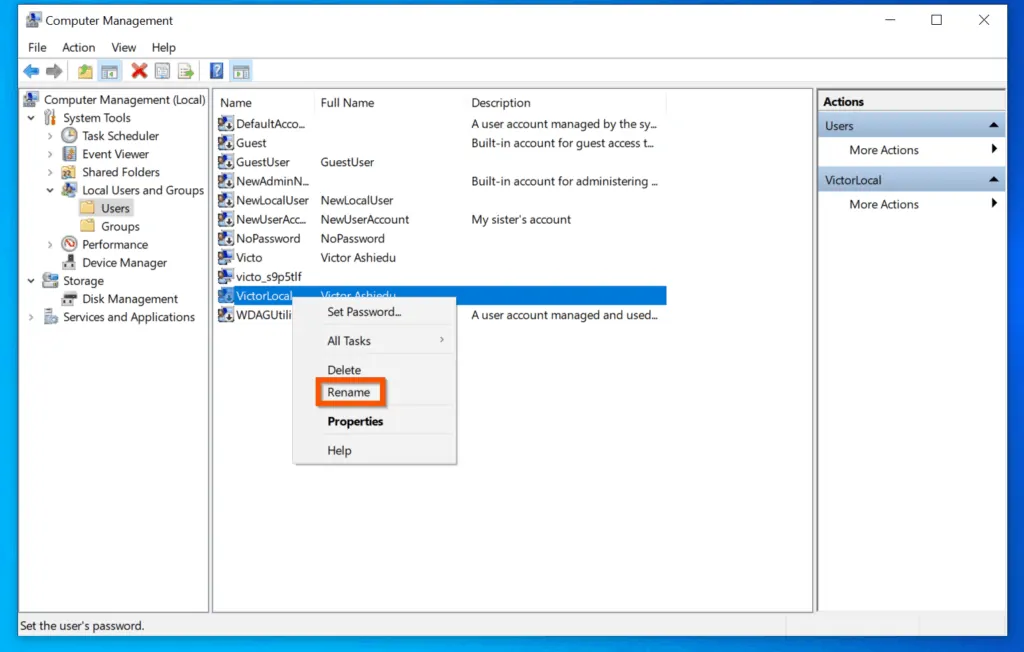
- Finally, enter a new username and press enter. The username for the user will change immediately.
Option 2: Change Username with Command Prompt
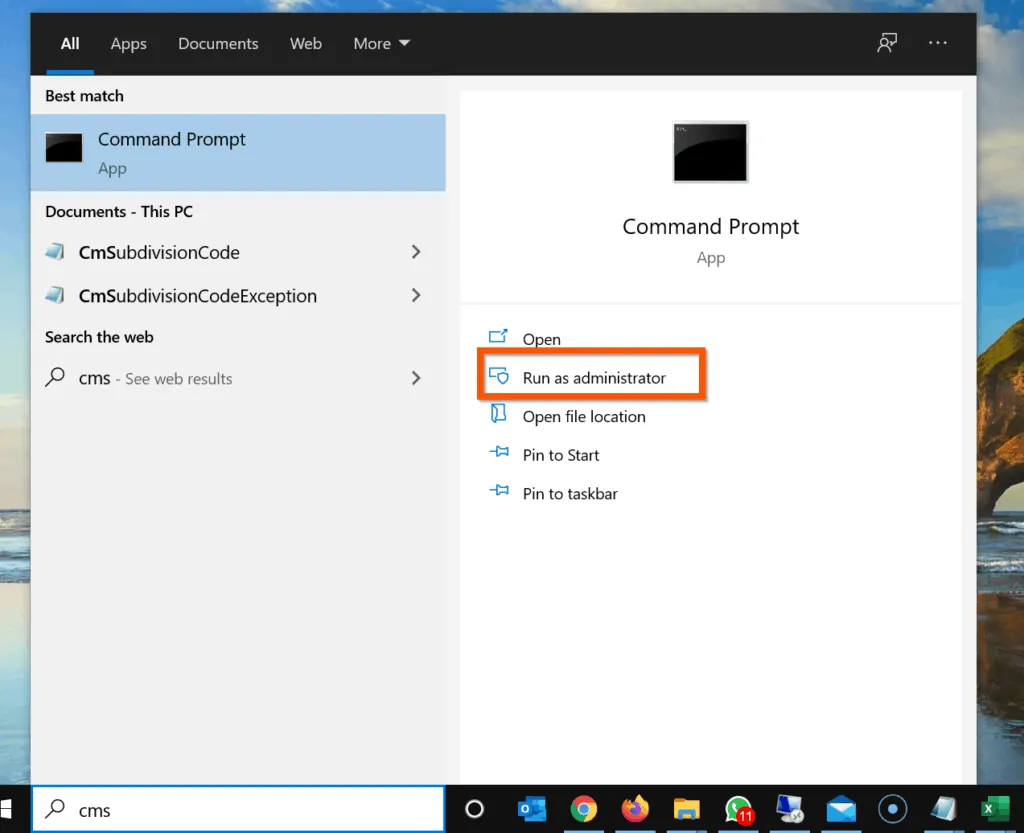
- Type command prompt or cmd in the search box. Then, from the search results, click Run as administrator.
- You will receive a User Account Control confirmation screen requesting you to allow the program to make changes to your computer, click Yes.
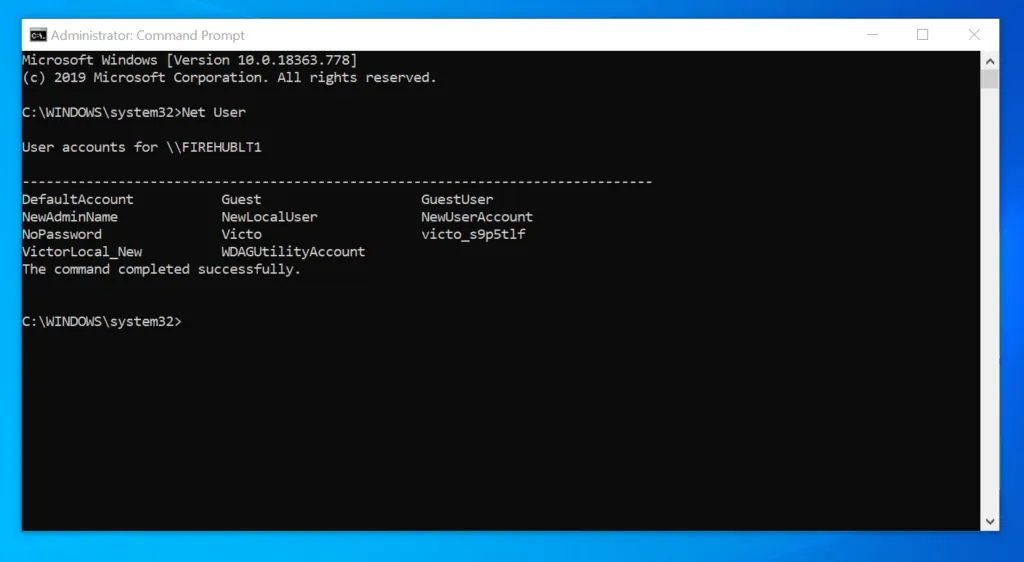
- Then, on the command prompt, to display enabled user accounts on the Windows 10 PC, type Net User and press enter.
Net User
The command will display all the active users on the computer. The command will NOT display disabled users.
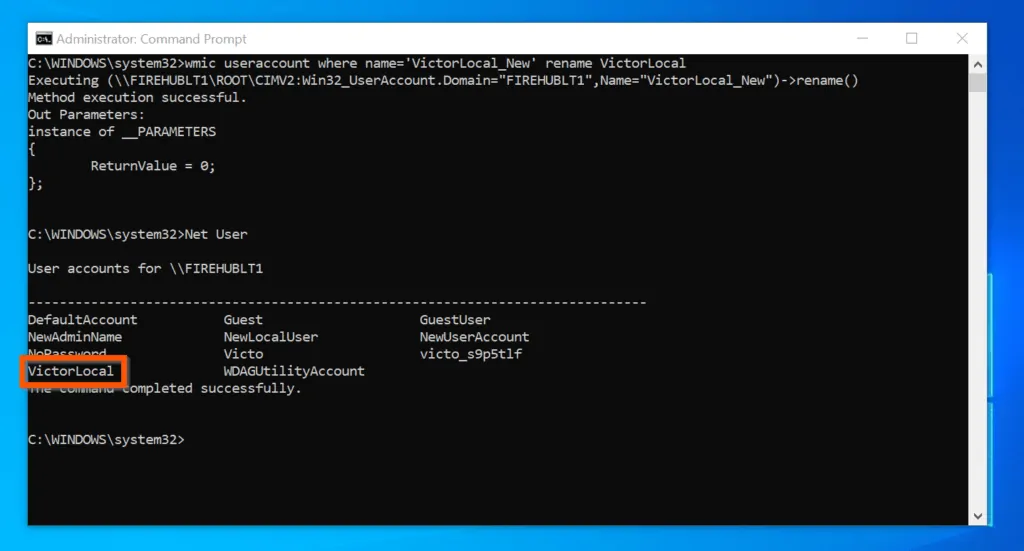
- Finally, to change username on Windows 10 for the user, enter the wmic command like the command shown below and press enter. See the notes beneath the command for parts of the command you need to modify.
wmic useraccount where name='VictorLocal_New' rename VictorLocal
If everything goes well, the command should return “Method execution successful” and the username will change immediately. To confirm that the username changed, run the Net User command again – see the second screenshot below…

Option 3: Change Username with PowerShell
You can also change username on Windows 10 with PowerShell. Here are the steps…
- Type powershell in the search box. Then, right-click Windows PowerShell and click Run as Administrator.
- You will receive a User Account Control requesting permission to allow PowerShell to open, click Yes.

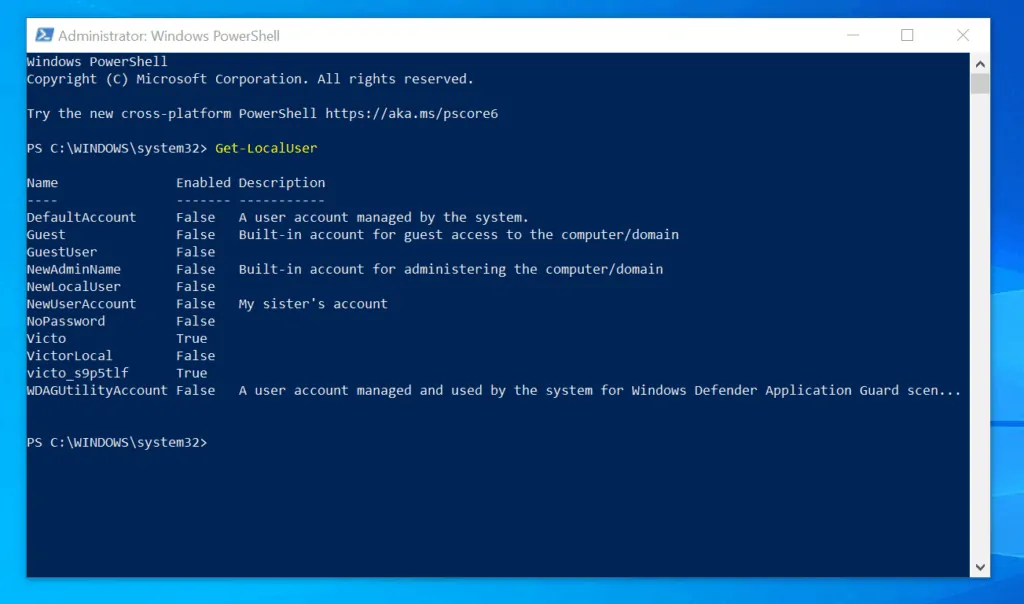
- On the PowerShell prompt, to display all local users, enter the Get-LocalUser Cmdlet and press enter.
Get-LocalUser
Unlike the Command Prompt’s Net Use command, the Get-LocalUser PowerShell Cmdlet displays both enabled and disabled users.
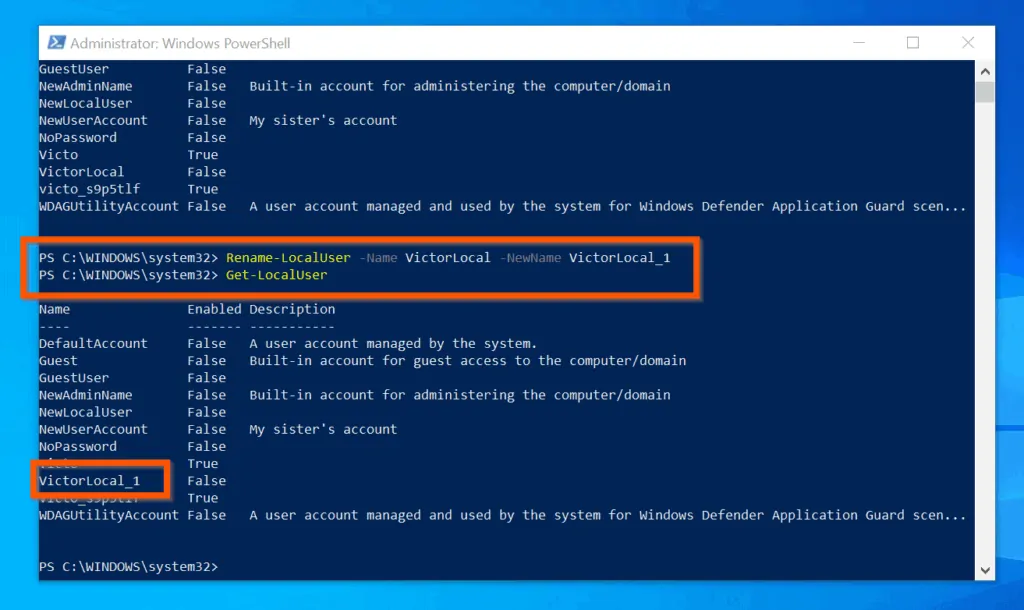
- Finally, to change a user name with PowerShell, enter the Rename-LocalUser Cmdlet as shown below – then, press enter. See the note below the command for parts of the command you need to change.
Rename-LocalUser -Name VictorLocal -NewName VictorLocal_1
When you press enter, PowerShell will return to its prompt. It will look like nothing happened. How, to confirm that the username changed, use the Get-LocalUser Cmdlet.
Conclusion
You can use the methods covered in this Itechguide to change username on Windows 10!
If you were able to change the username of your Windows 10 PC by following the steps in this guide, click on “Yes” beside the “Was this page helpful” question below.
You may also express your thoughts and opinions by using the “Leave a Comment” form at the bottom of this page.
Lastly, for more Windows 10 Itechguides, visit our Windows 10 How-To page. You may also find our Work from Home page very helpful.


![How To Run Sysprep (Generalize) In Windows 10 [2 Methods]](https://www.itechguides.com/wp-content/uploads/2022/05/8-2.webp)