In this Itechguide, Victor teaches you how to change icons on Windows 10. The guide covers steps to change desktop, folder, and file type and shortcut icons.
Option 1: Change Desktop Icons
One method to change icons on Windows 10 is by changing desktop icons like Recycle Bin, This PC, etc. Here are the steps to change desktop icons:
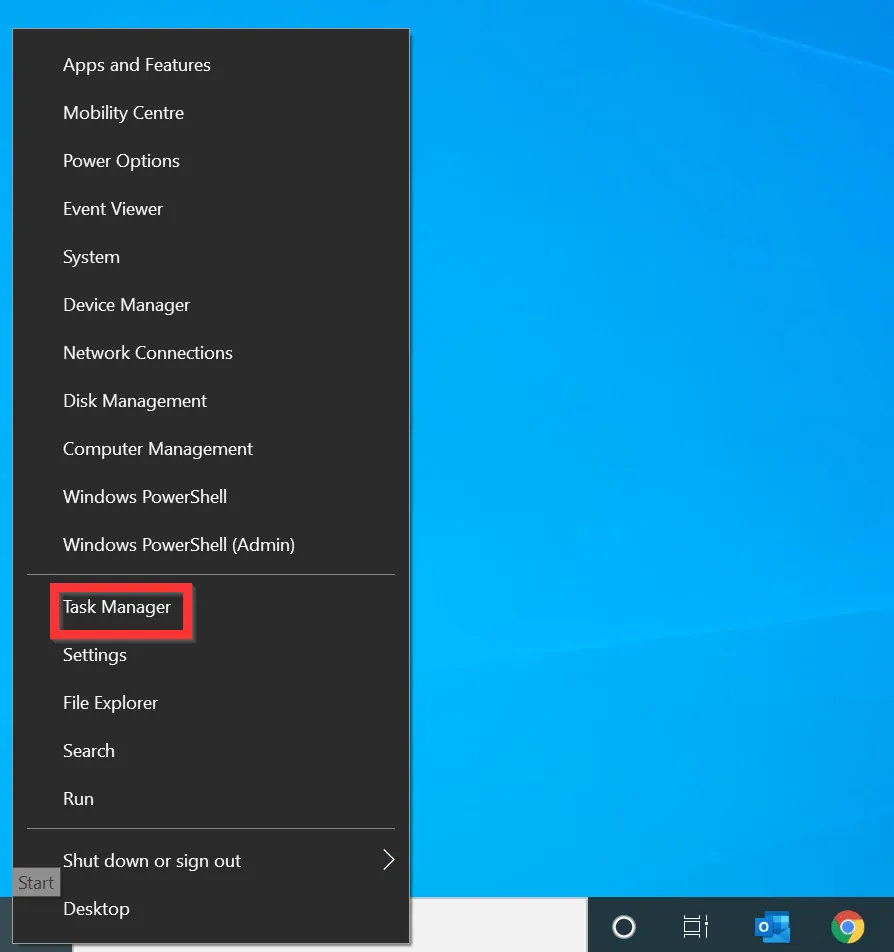
- Right-click the Windows 10 Start menu and click Settings.
- Then, on Windows Settings, click Personalisation.

- On the left pane of the Personalisation settings screen, click Themes.
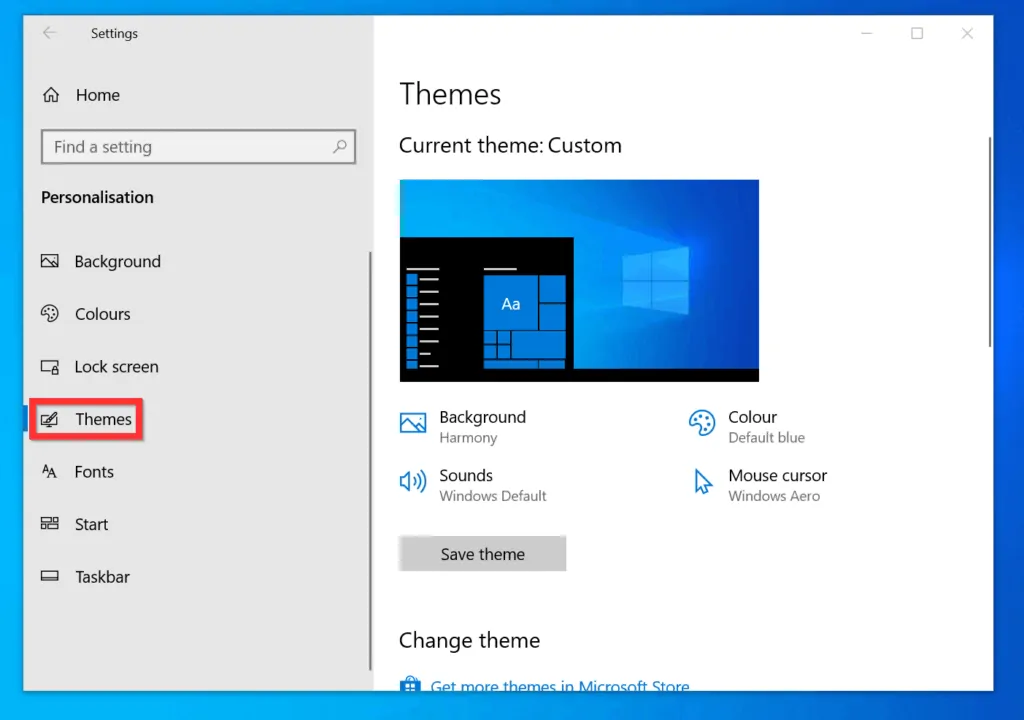
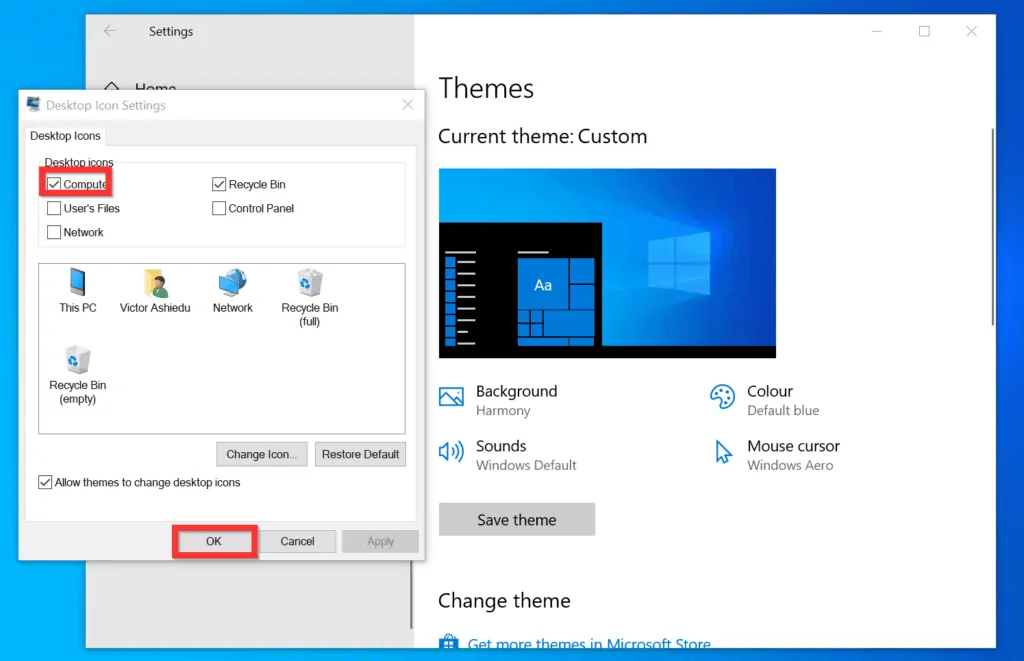
- When the Themes settings screen opens, scroll down to Related Settings and click Desktop icon settings.

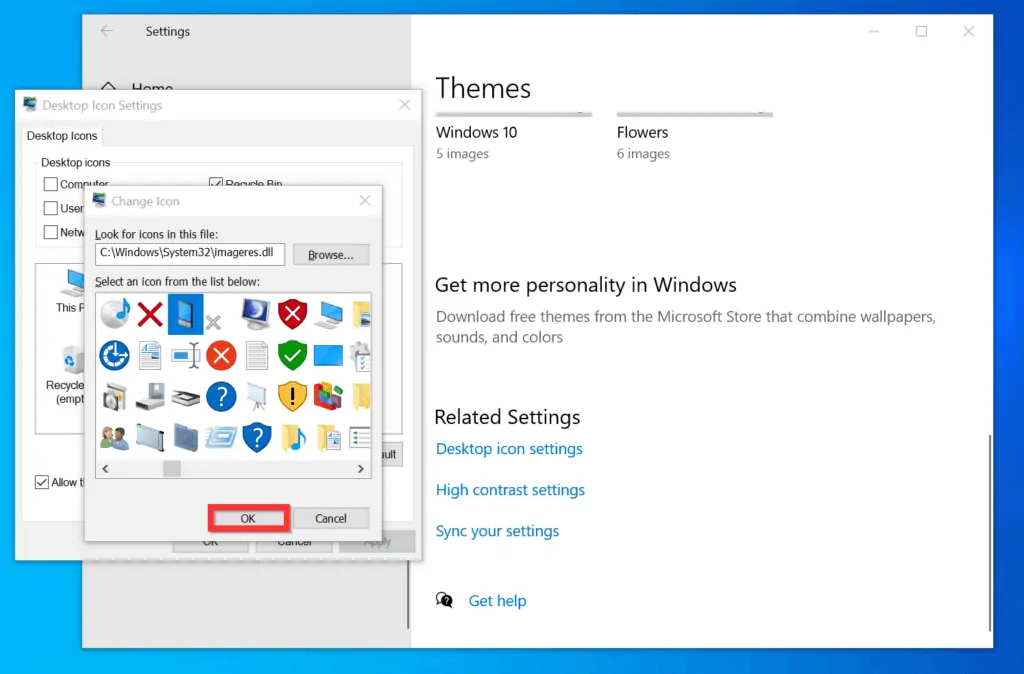
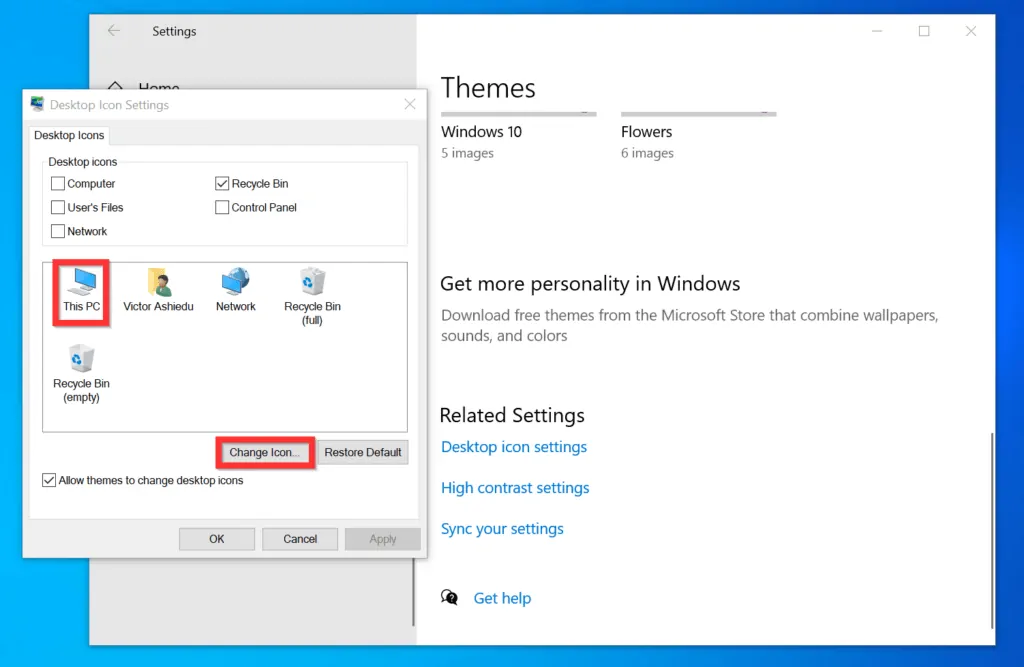
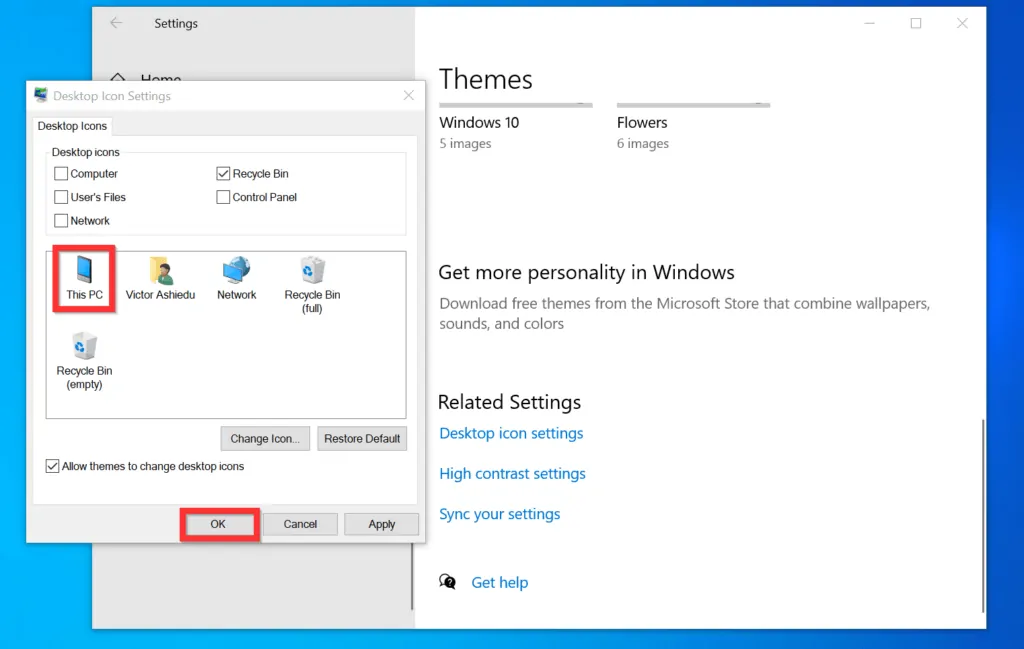
- On Desktop icon settings, select the icon you want to change, then on the bottom right of Desktop Icon Settings, click Change Icon. For example, to change the icon for This PC, select it, then click Change Icon.
- Finally, on the Change Icon settings, select a new icon and click OK.
- The icon for This PC will change to the new selected icon. To save your changes, on the Desktop icon settings screen, click OK.

Option 2: Change Folder Icons
Another method to change icons on Windows 10 is by changing folder icons. Here are the steps to change folder icons…
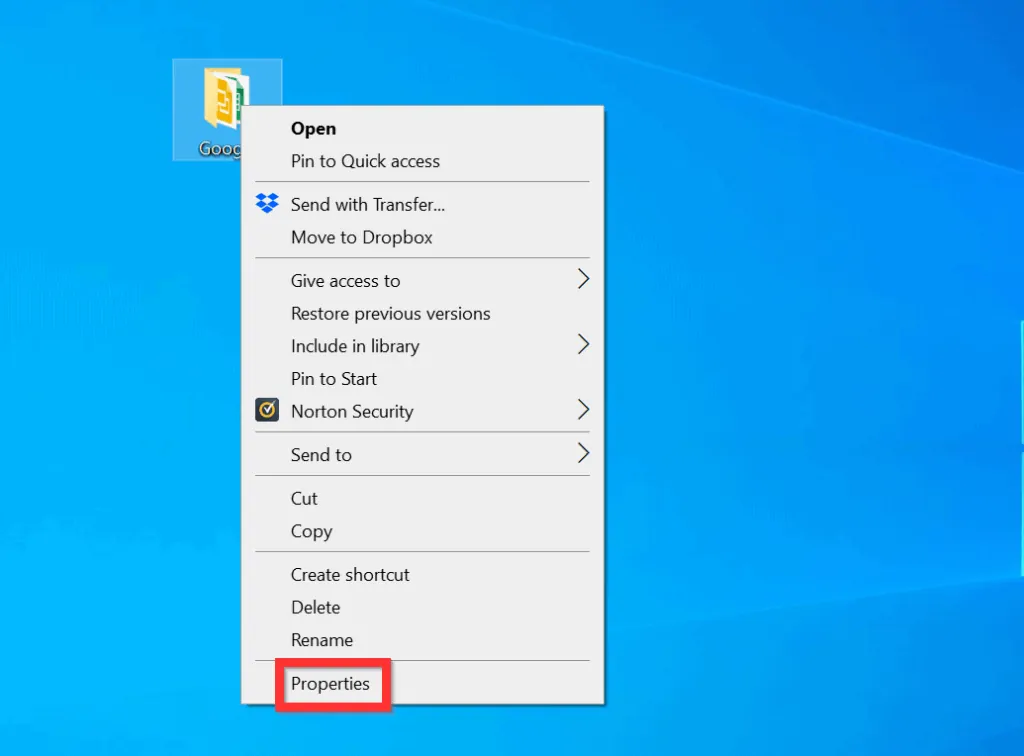
- Right-click any folder on your PC and click Properties.
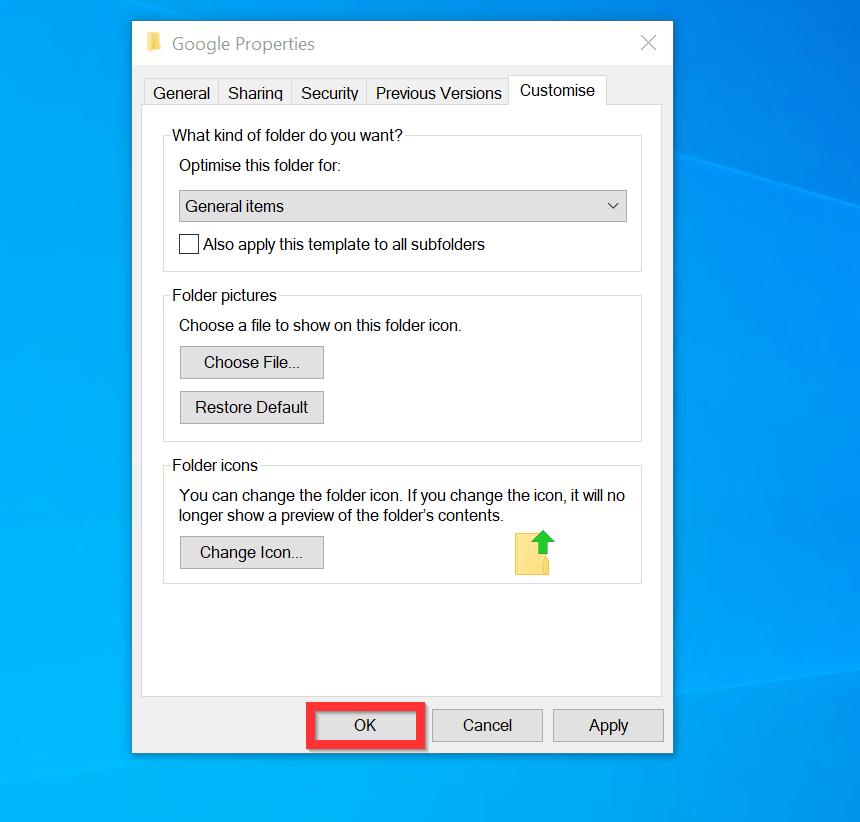
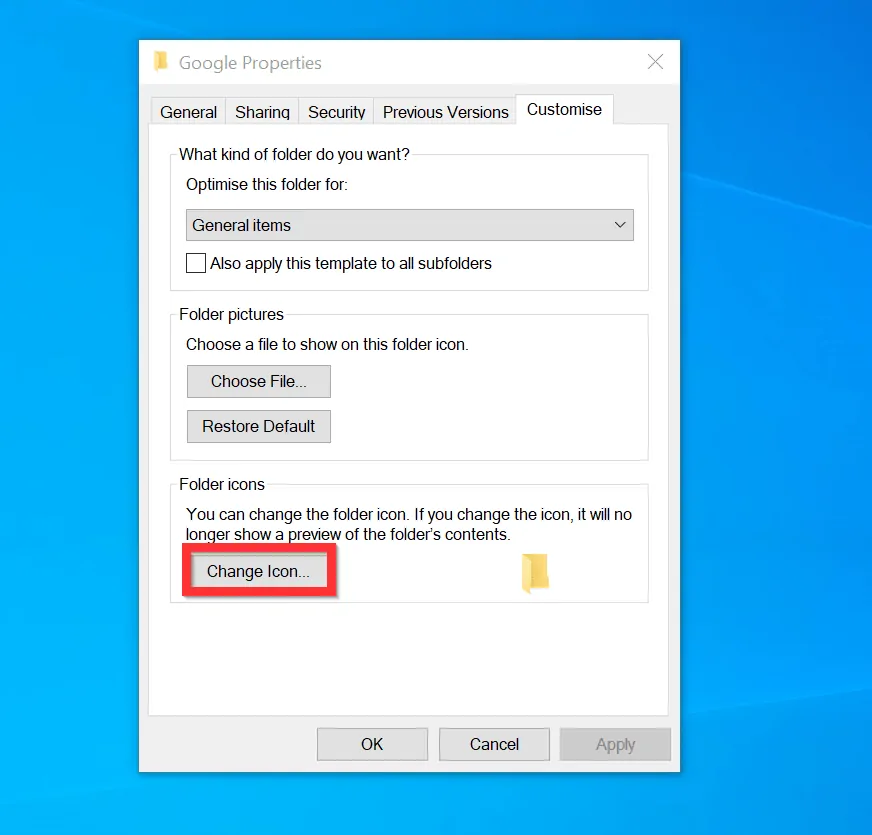
- Then, on the Properties of the folder, click the Custom tab.
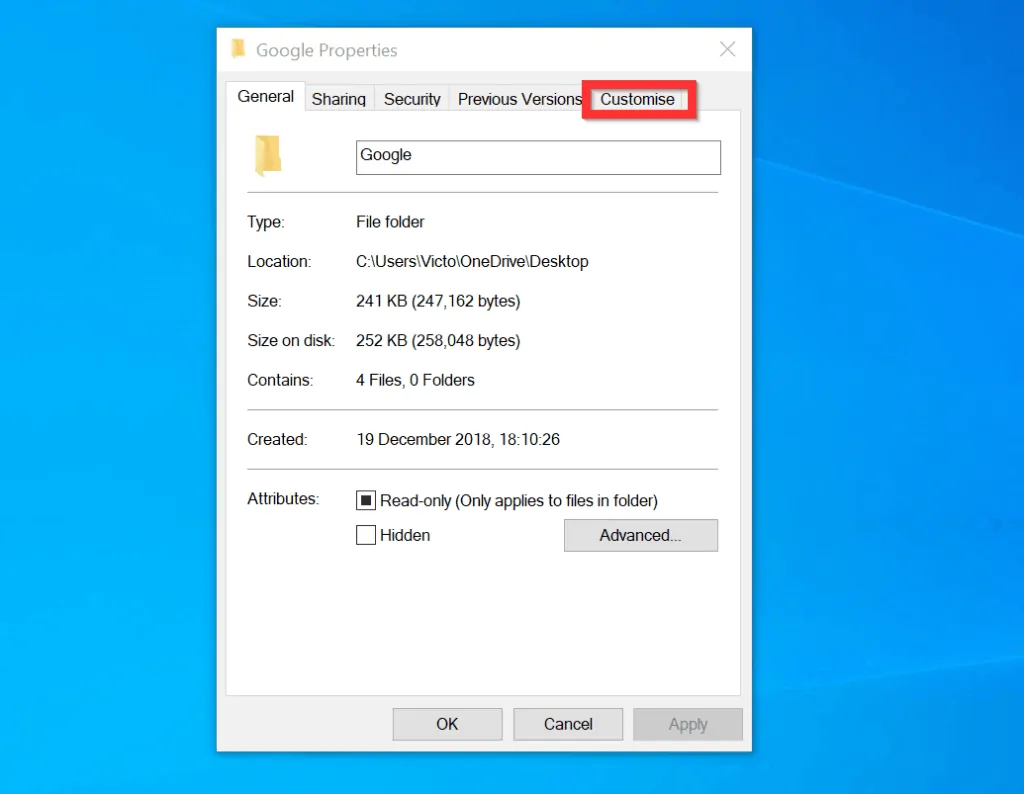
- On the Custom tab, beneath Folder icons, click Change Icon.
- Finally, to change folder icons on Windows 10, on the Change Icon screen, select a new icon and click OK.
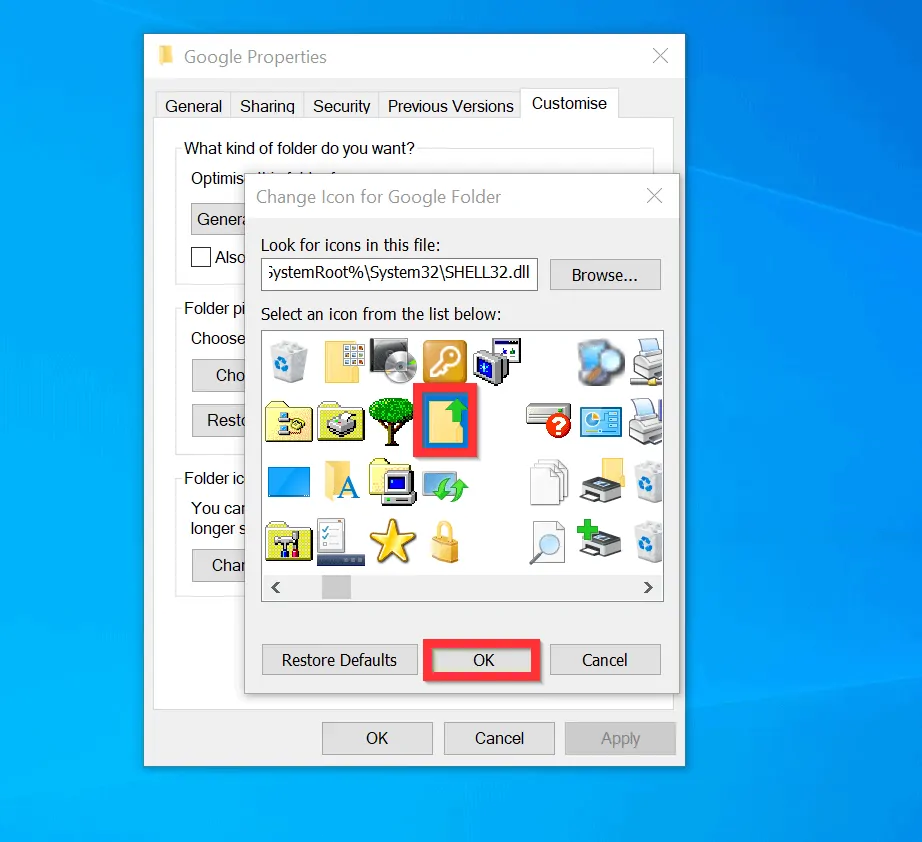
- To apply your changes, on the Properties of the folder, click OK.
Option 3: Change File Type Icons
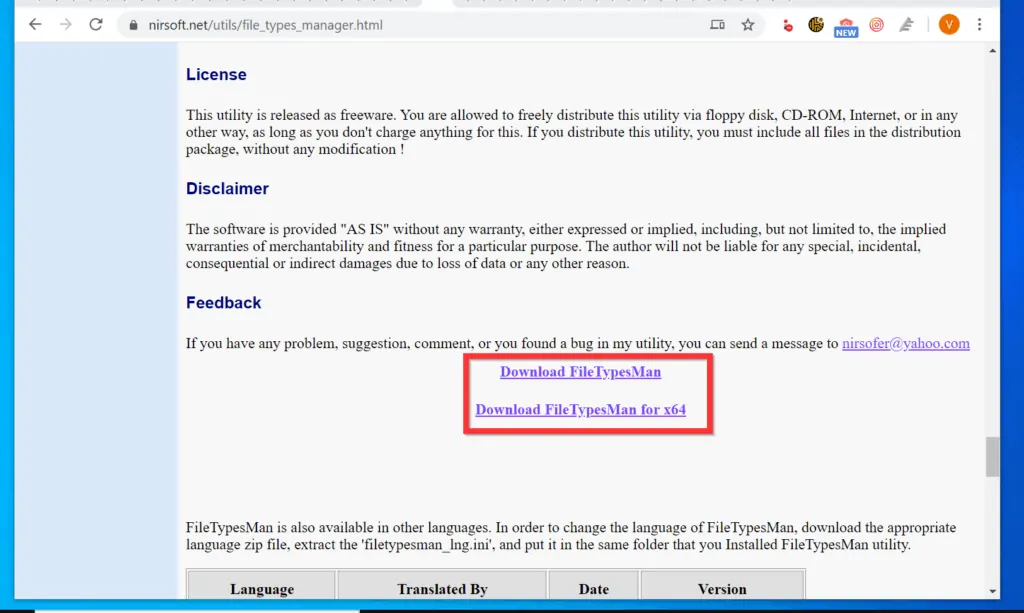
You can also change the icon of a file type. But you need to download and install a 3rd party tool called FileTypesMan. Here are the steps to change file type icons.
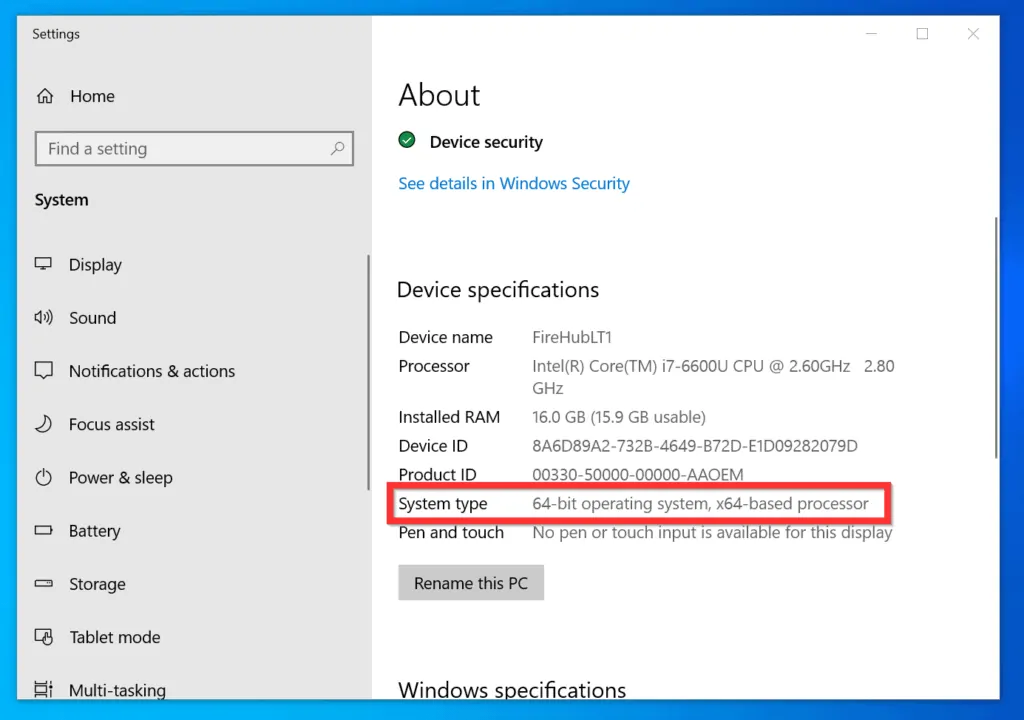
- Click FileTypesMan link. When the page opens, scroll down towards the bottom of the page and click the download link for your Windows 10 System Type.
- If your PC is 64-bits, click the second link below. Otherwise, click the first link.
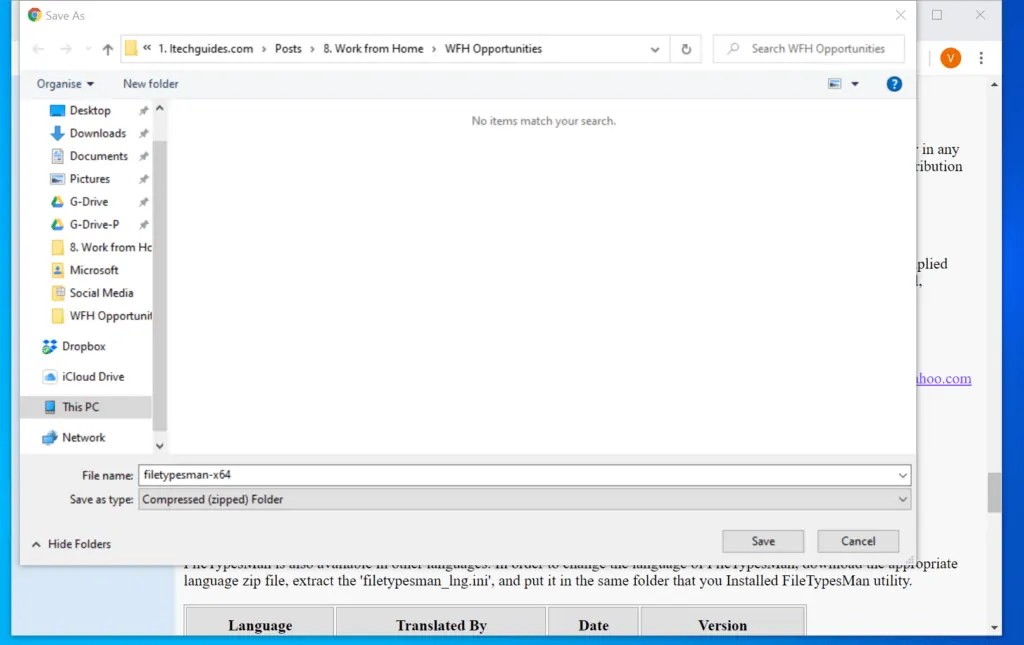
- Then, save the zip file to a folder on your PC.
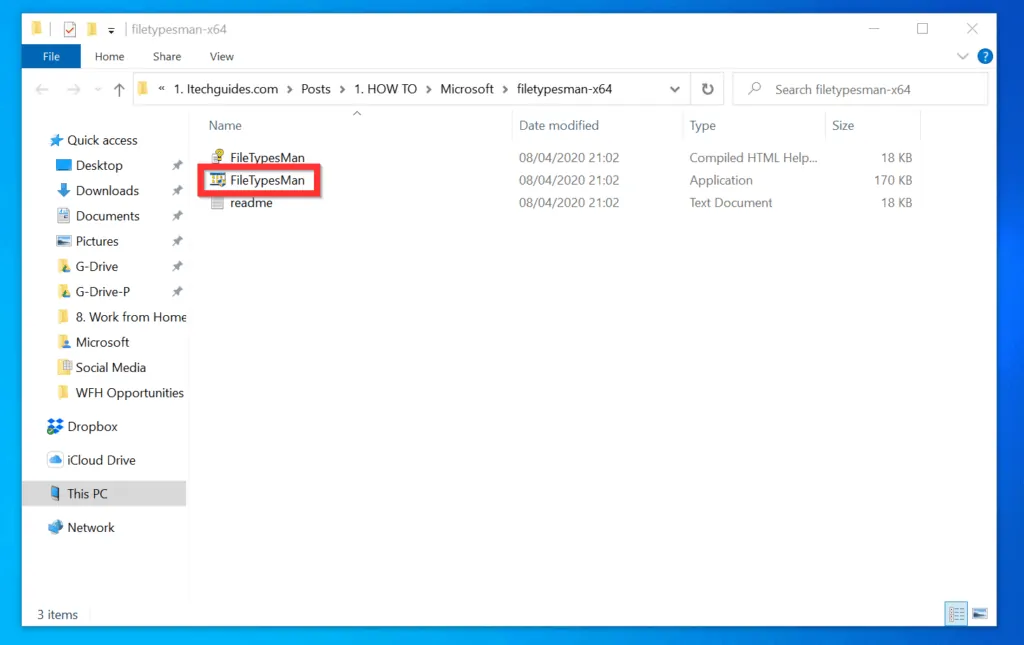
- Finally, unzip the downloaded zip file. Then, open the unzipped folder and double-click FileTypesMan file.
- You will receive a User Access Control screen – click Yes.
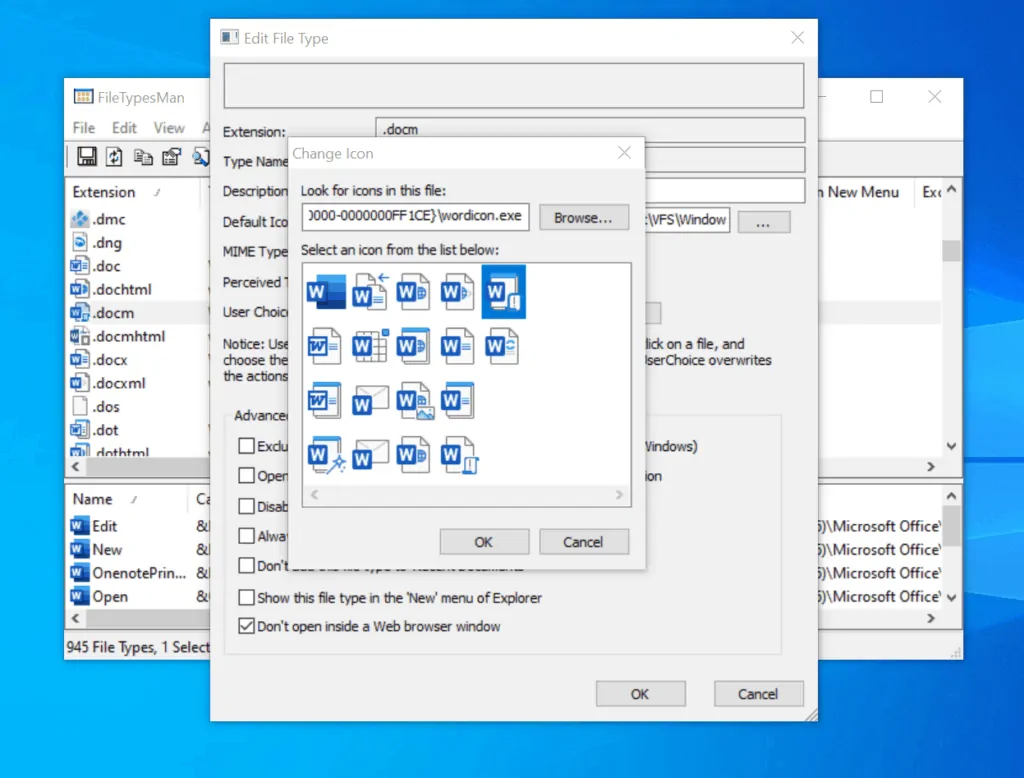
- When the application opens, scroll down to the file extension type you want to change the icon. Then, right-click the file type and click Edit Selected File Type.
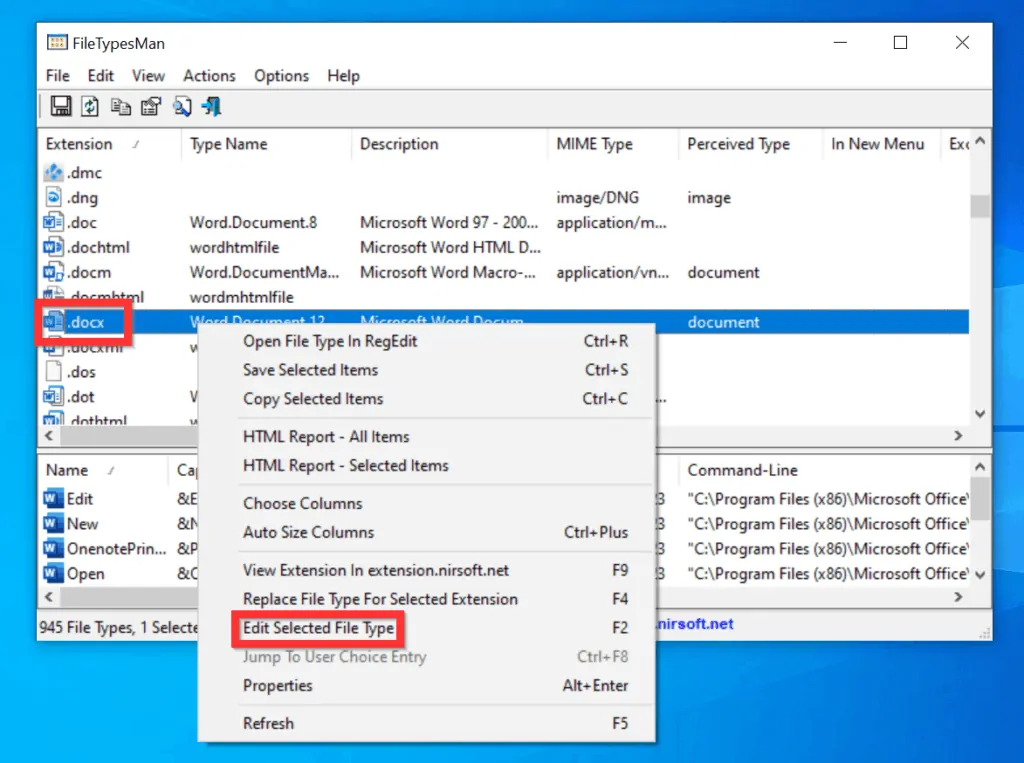

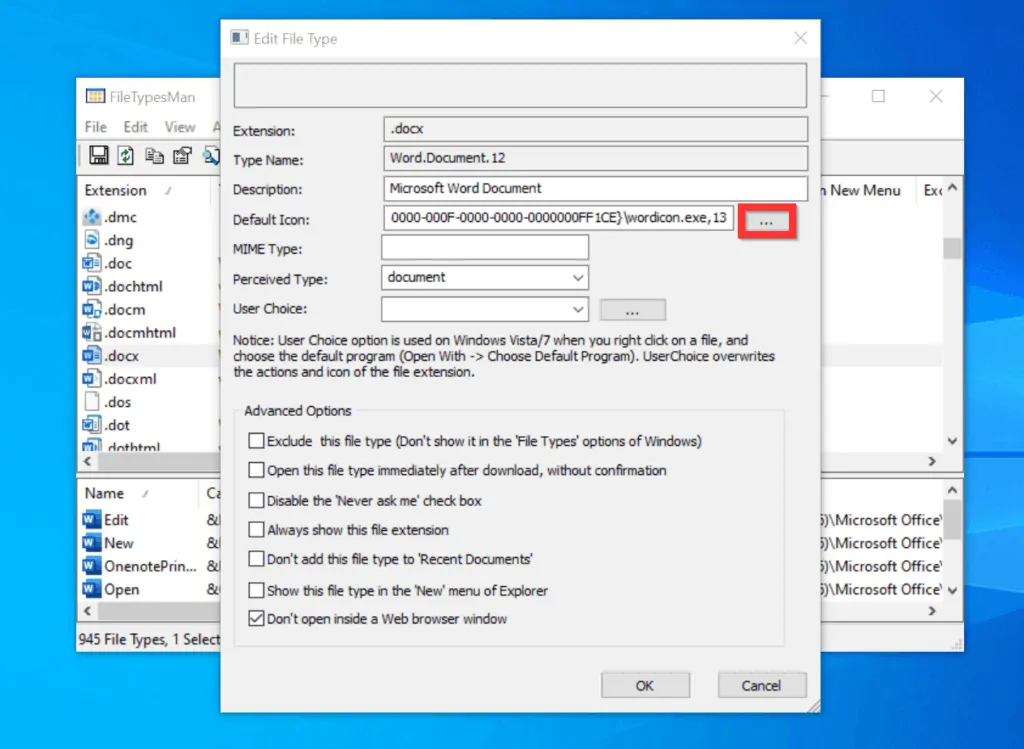
- Finally, on the right side of the Default Icon field, click the 3 dots. Then, select a new icon for the File Type and click OK.
Option 4: Change Shortcut Icons
Another way to change icons on Windows 10 is to change the icon of a specific shortcut. Here are the steps.
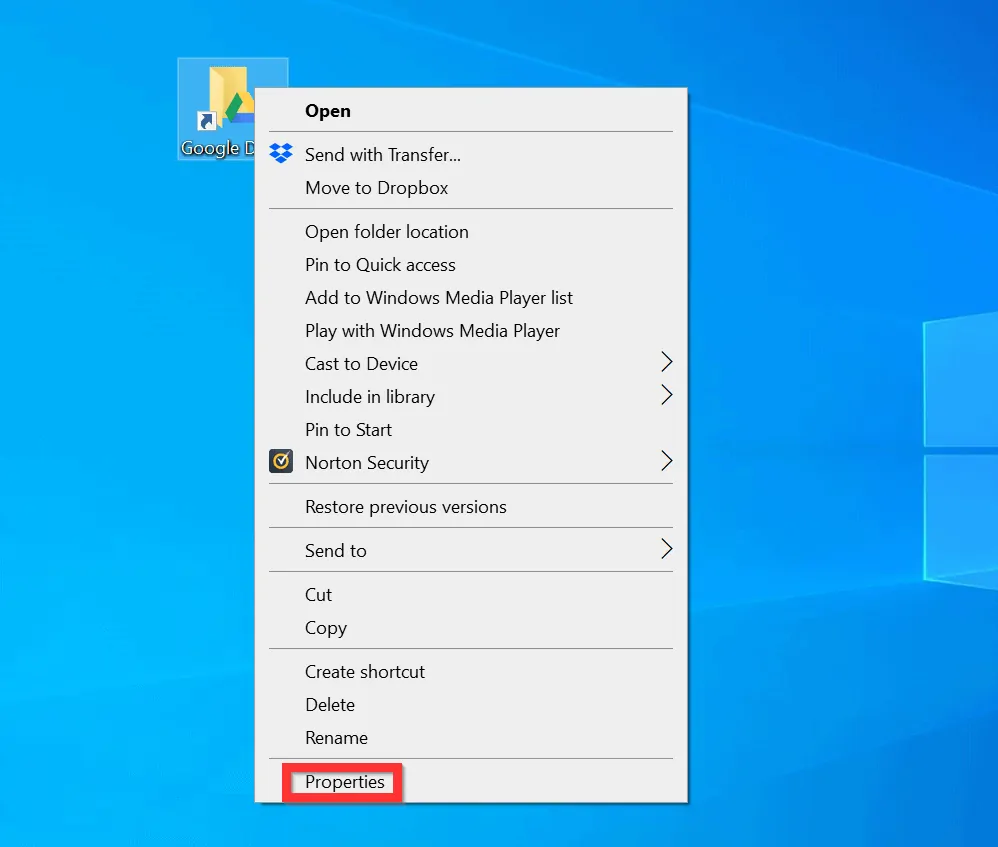
- Right-click the shortcut you want to change its icon and click Properties. The properties of the shortcut will open on the Shortcut tab.
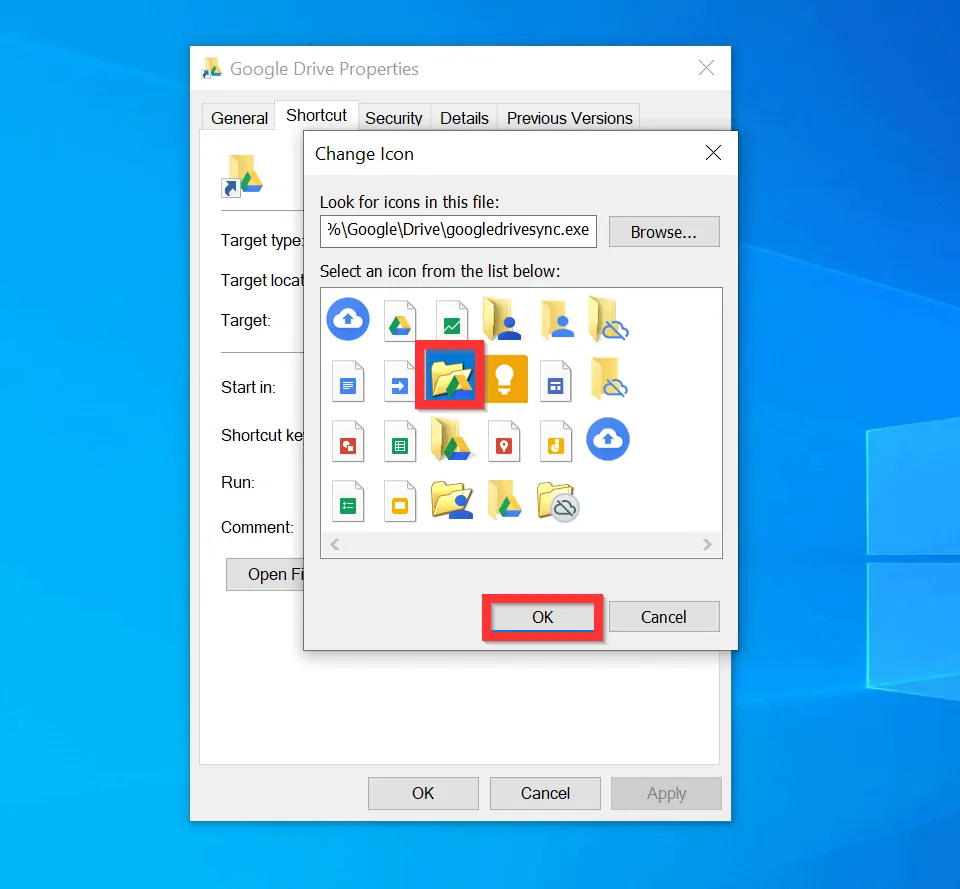
- On the lower part of the Shortcut tab, click Change Icon.
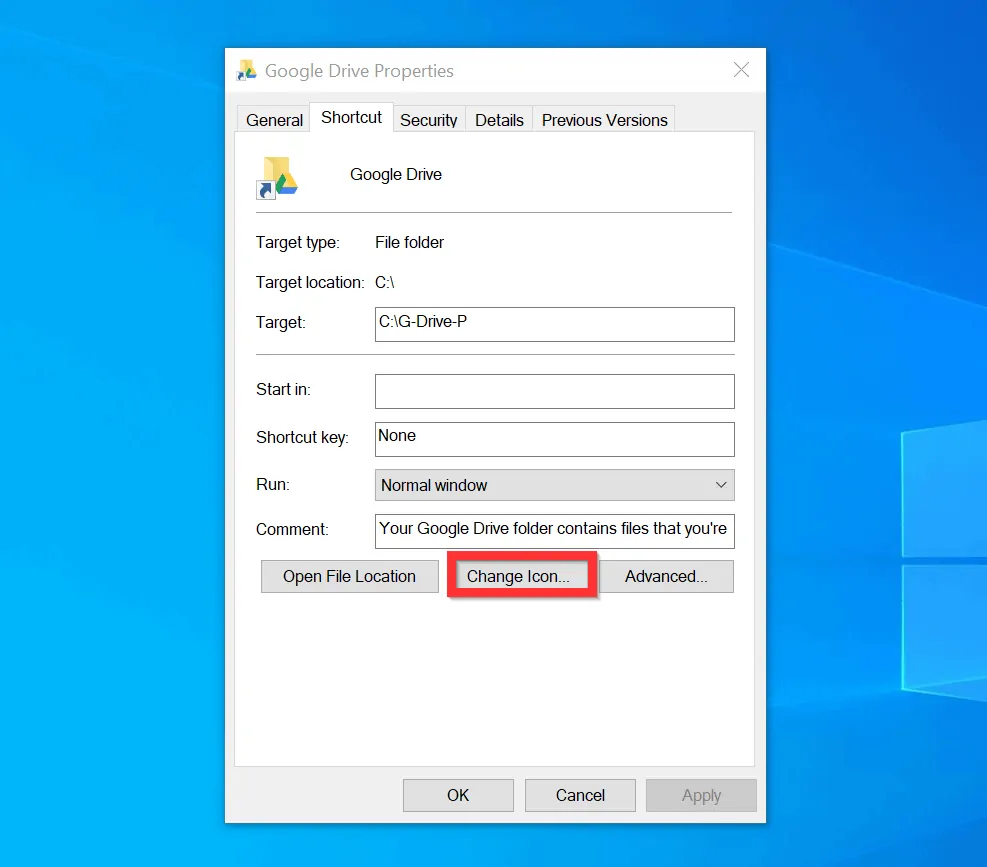
- Finally, on the Change Icon window, select a new icon and click OK. Then, on the Shortcut Properties, click OK.
You can use the 3 methods to change icons on Windows 10! I hope you found this Itechguide helpful. If you found it helpful, click on “Yes” beside the “Was this page helpful” question below.
You may also express your thoughts and opinions by using the “Leave a Comment” form at the bottom of this page.
Finally, for more Windows 10 Itechguides, visit our Windows 10 How-To page. You may also be interested in our Work from Home page.


![How To Run Sysprep (Generalize) In Windows 10 [2 Methods]](https://www.itechguides.com/wp-content/uploads/2022/05/8-2.webp)