This Itechguide teaches you how to unzip files on Windows 10. The guide covers steps for 3 methods to unzip files on Windows 10.
Option 1: Unzip Files from File Explorer
This section covers 2 methods to unzip a file. Here they are…
Method 1: Unzip a File from the Context Menu
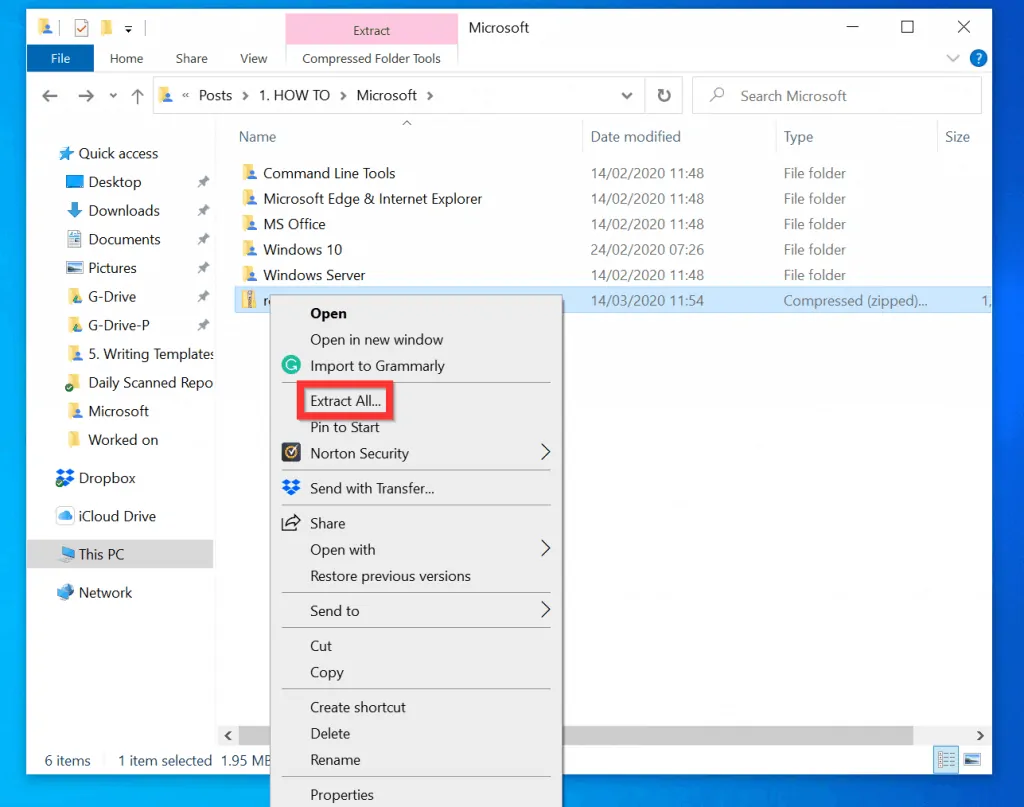
- Open the folder the zip file is saved, right-click it and select Extract All. The Extract Compressed (Zipped) Folders wizard will launch.
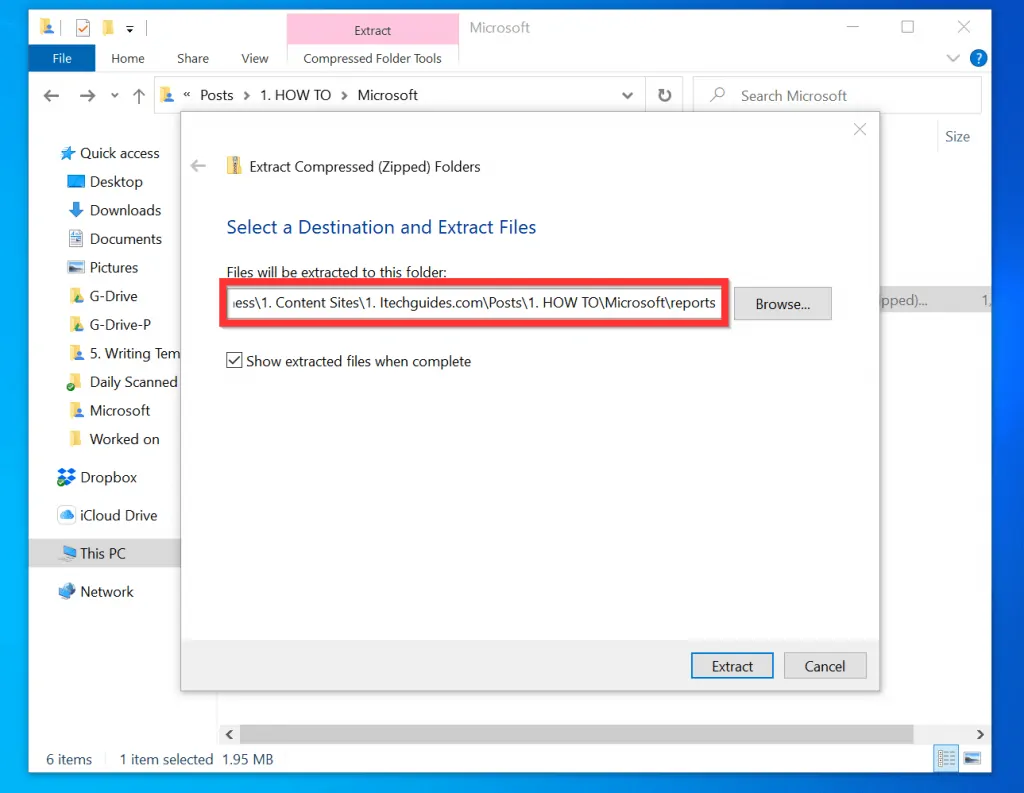
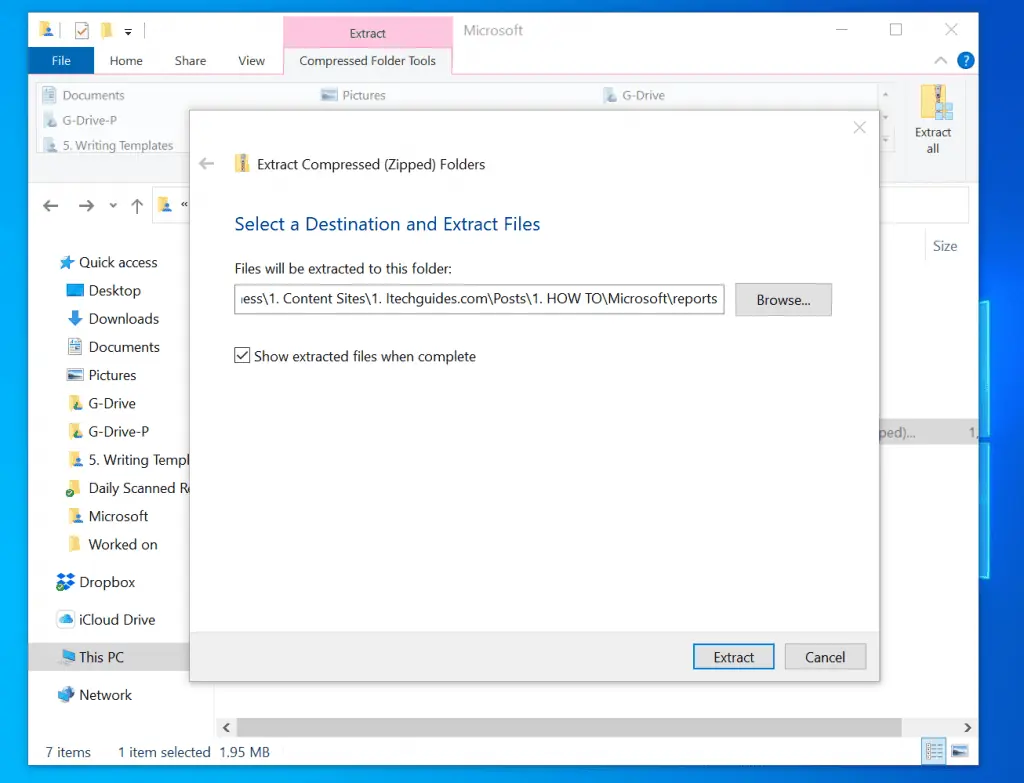
- On the first screen of the wizard, you can change the location to extract the zip file. You can also change the name of the unzipped folder.
- If you want the unzipped folder to open after unzipping, leave the Show extracted files when complete checkbox. Otherwise, uncheck the checkbox.
- To unzip the file, on the bottom right of the wizard, click Extract.
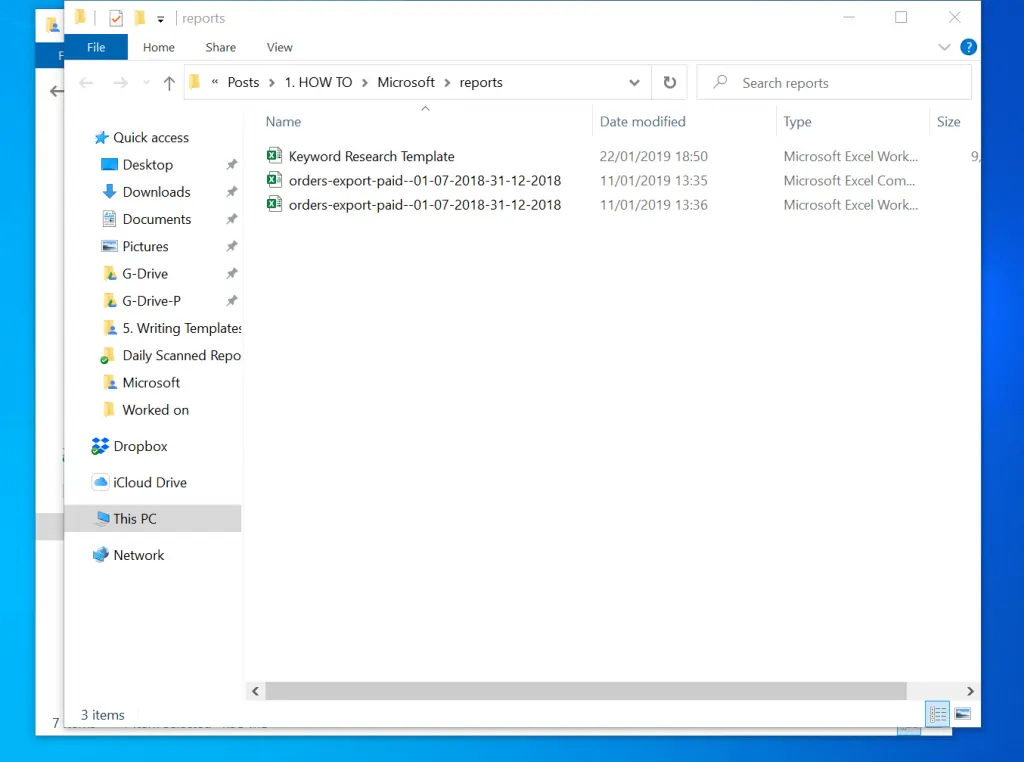
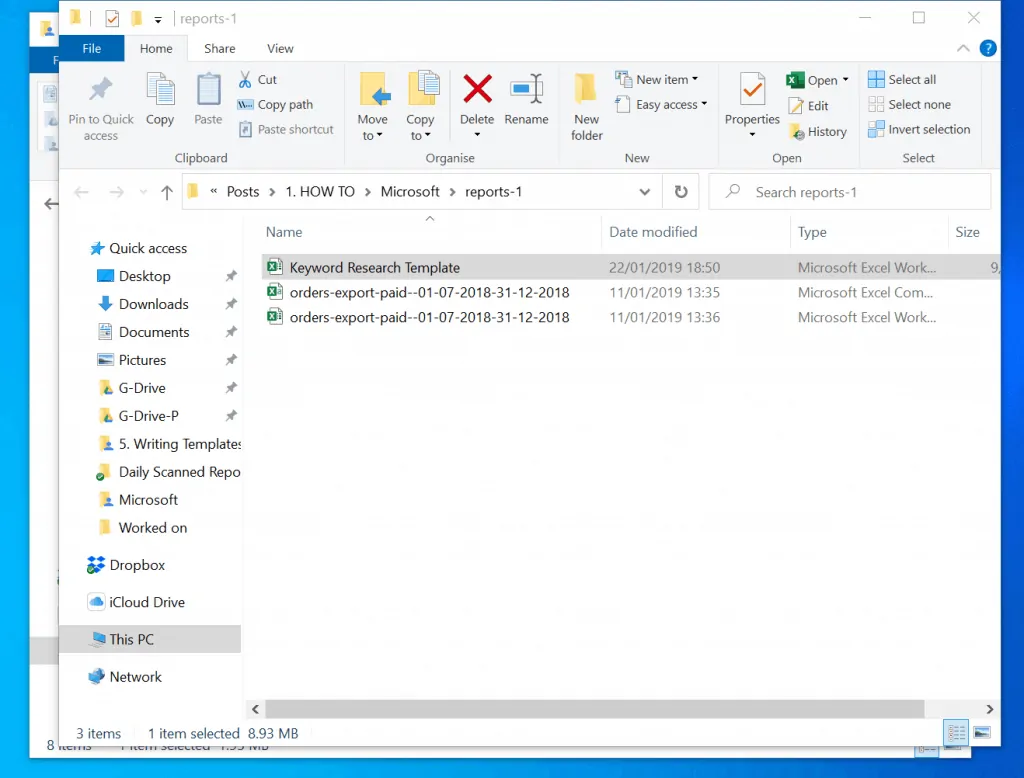
- If you left the Show extracted files when complete checkbox checked, the unzipped folder will open. Otherwise, to open the folder, navigate to where you extracted it to and open it.
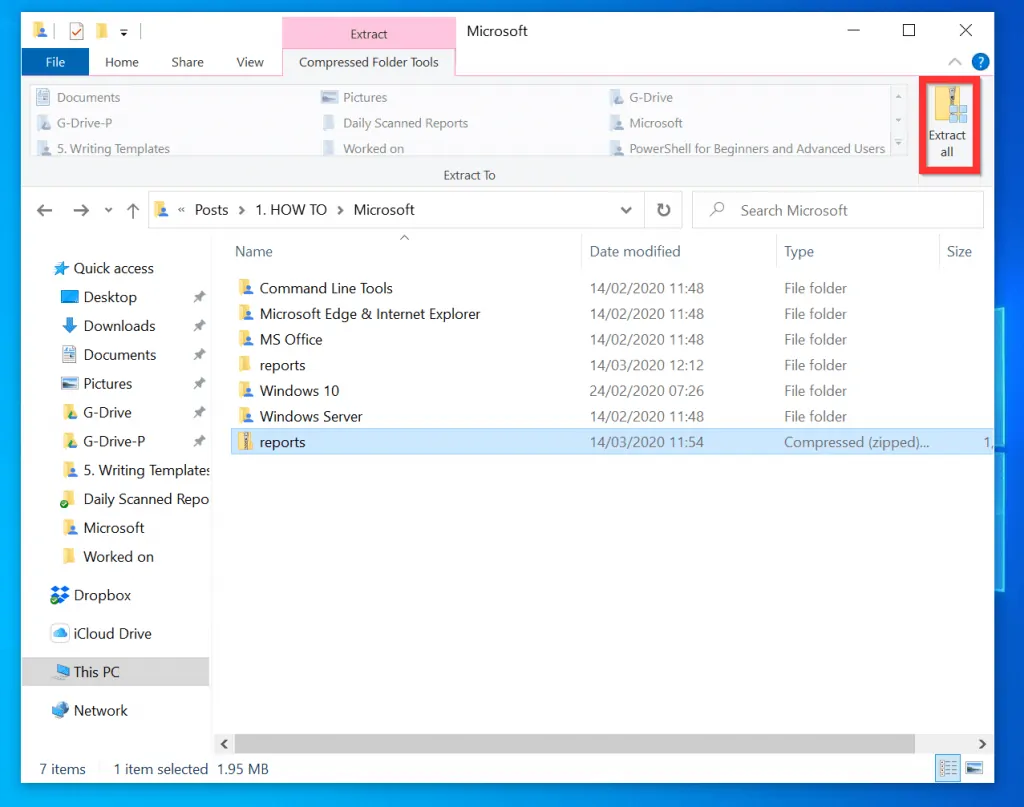
Method 2: Unzip a Zip File from File Explorer Compressed Folder Tools
Here is another method to unzip a file on Windows 10…
- Open the folder the zip file is saved and highlight it (click it once).

- Once you highlight the zip file, a 3rd tab (Compressed Folder Tools) will become available on the File Explorer ribbon. Above the Compressed Folder Tools ribbon, click Extract. The Extract ribbon will expand.
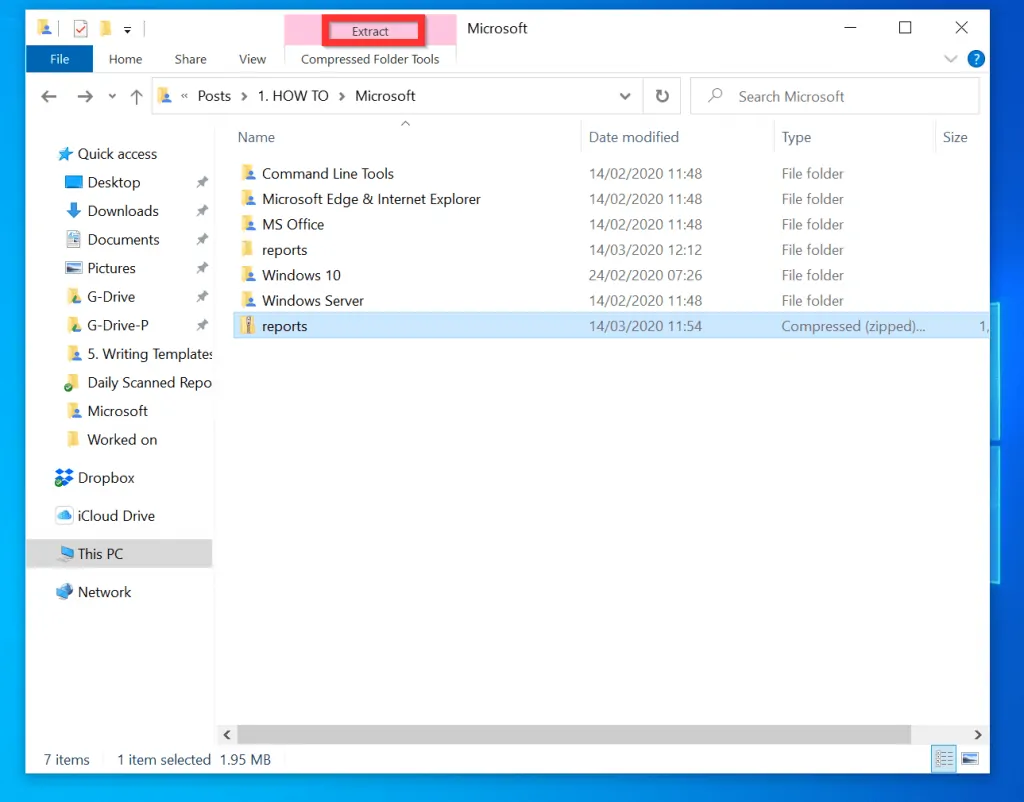
- On the top right of the expanded ribbon, click Extract All.
- When the Extract Compressed (Zipped) Folders wizard launches, on the bottom right, click Extract.
- The file will unzip and the unzipped folder will open automatically.
Option 2: Unzip Files with PowerShell
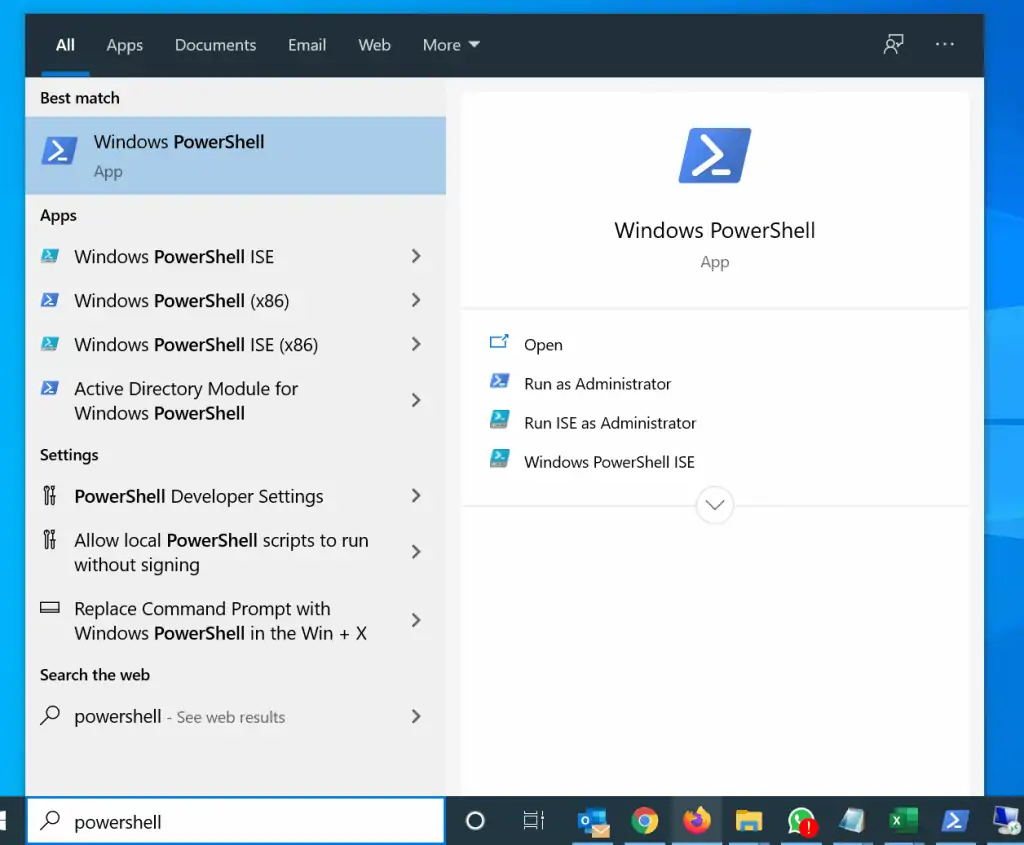
- Type powershell in the Windows 10 search box. Then, from the search results, click Windows PowerShell.
- On the PowerShell prompt, type the Expand-Archive command in the format below and press enter.
Expand-Archive -Path "Full path of the zip file" -DestinationPath "Full path of folder to extract the zip file"
- Here is an example command to unzip a zip file called reports. The file is located in C:\G-Drive-P\. The command will unzip the file to the report-file folder located in C:\G-Drive-P\Reports
Expand-Archive -Path C:\G-Drive-P\reports.zip -DestinationPath C:\G-Drive-P\Reports
- Here is the command in PowerShell. When the command completes the unzipping, the folder in the DestinationPath will open automatically.

It is very easy to unzip files on Windows 10! I hope you found this Itechguide helpful. If you found it helpful, click on “Yes” beside the “Was this page helpful” question below.
You may also express your thoughts and opinions by using the “Leave a Comment” form at the bottom of this page.
Finally, for more Windows 10 Itechguides, visit our Windows How-To page.


![How To Run Sysprep (Generalize) In Windows 10 [2 Methods]](https://www.itechguides.com/wp-content/uploads/2022/05/8-2.webp)