Simple tasks like creating, deleting, or renaming folders or files are everyday tasks. Learn how to perform these tasks on Windows 11 or Windows 10.
Create Files or Folders with File Explorer
To create a file or folder in File Explorer, right-click a space where you want the new item, point to New, and select the item type to create.
To create a folder, select Folder. Alternatively, if you need to create a new text file, select “Text Document.”
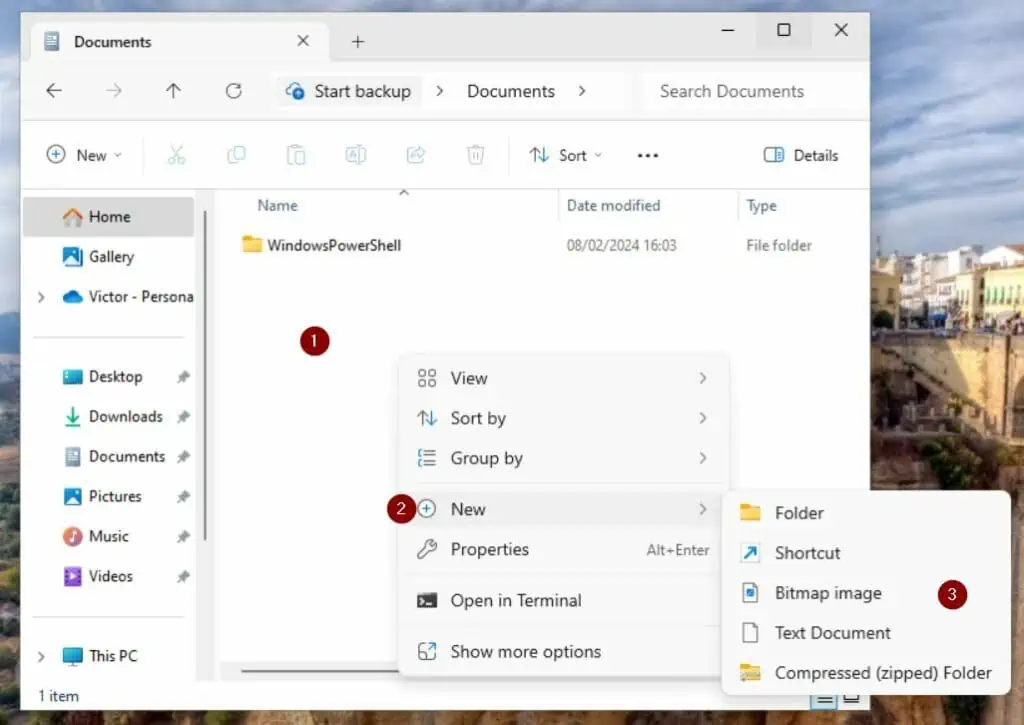
The item created will take the default name. For example, if you create a folder, its name will be “New Folder.”
However, a new text file will have a default name of “New Text Document.”
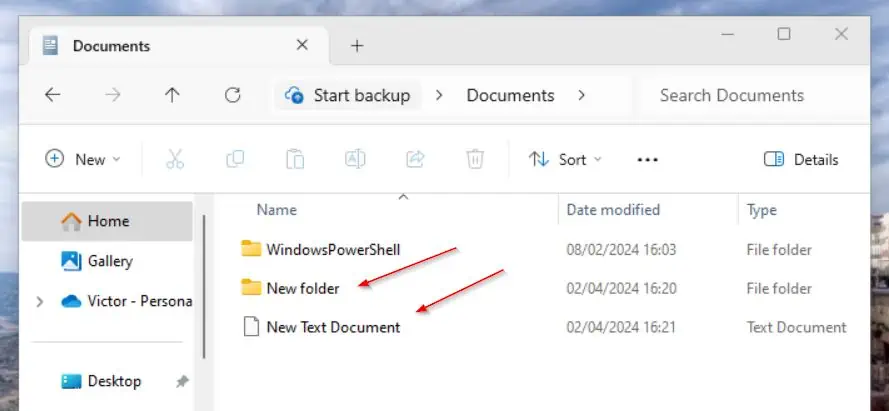
Later, I will show you how to rename the item.
Beyond those two, you also have the option to create Shortcuts, Compressed (zipped) folders, or Bitmap image documents.
Also, depending on the apps installed on your PC, there will be options to create other item types. For example, on my Windows PC, I have Microsoft Office apps and Google Docs apps.
So, I have the option to create new Word, Excel, Google Docs, and Google Sheets documents.
Create Files or Folders with PowerShell
Creating a new item with PowerShell is faster than with File Explorer. The command you need to perform this everyday task is called New-Item.
All you need to create a new folder or file is to specify the path to create the item and the name of the item. In addition to those two, you must also specify the ItemType – File or Directory.
It is important to mention that when you create a file, you must include its extension. Here is a sample command that creates a folder called “papaya” and a text file with the same name on my desktop.
$desktopPath = [environment]::GetFolderPath("desktop")
New-Item -Path $desktopPath -Name papaya -ItemType Directory
New-Item -Path $desktopPath -Name papaya.txt -ItemType File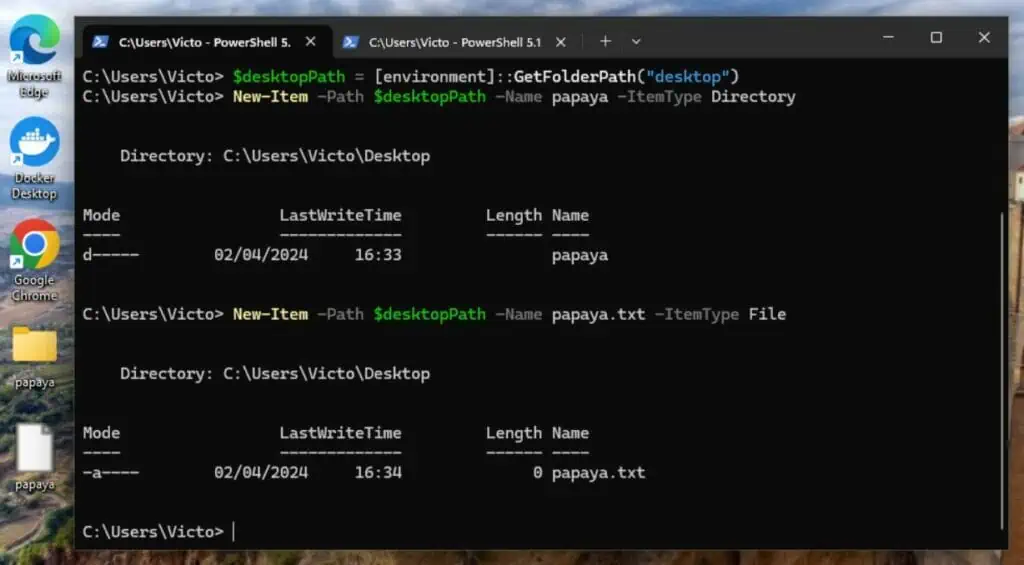
Rename Files or Folders with File Explorer
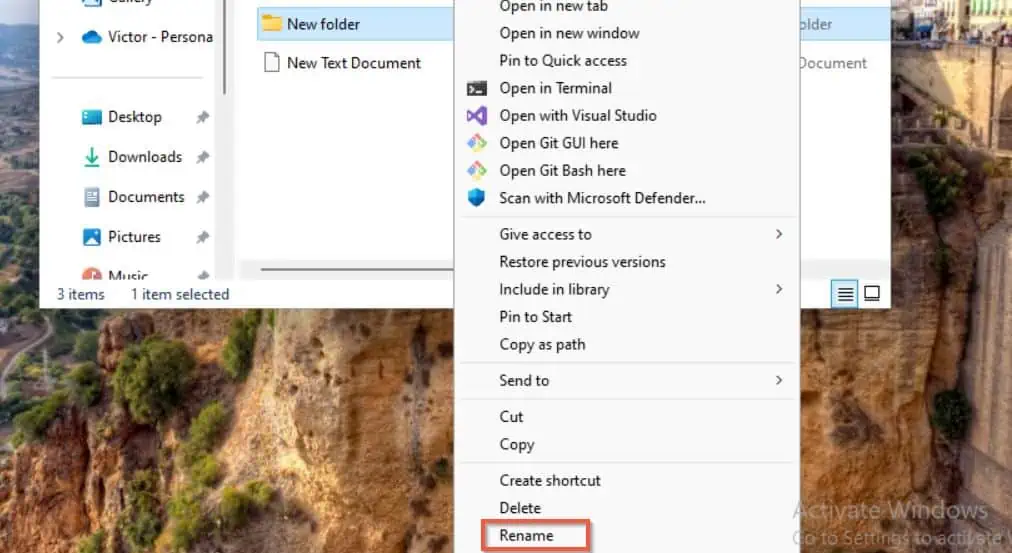
Renaming a file or folder from File Explorer is as easy as right-clicking the item and selecting Rename. In this example, I will rename the “New folder” and “New Text Document” I created in the last section.
On Windows 11, when you right-click an item, it does not show the “Rename” option. Rather, it shows “Show more options”.
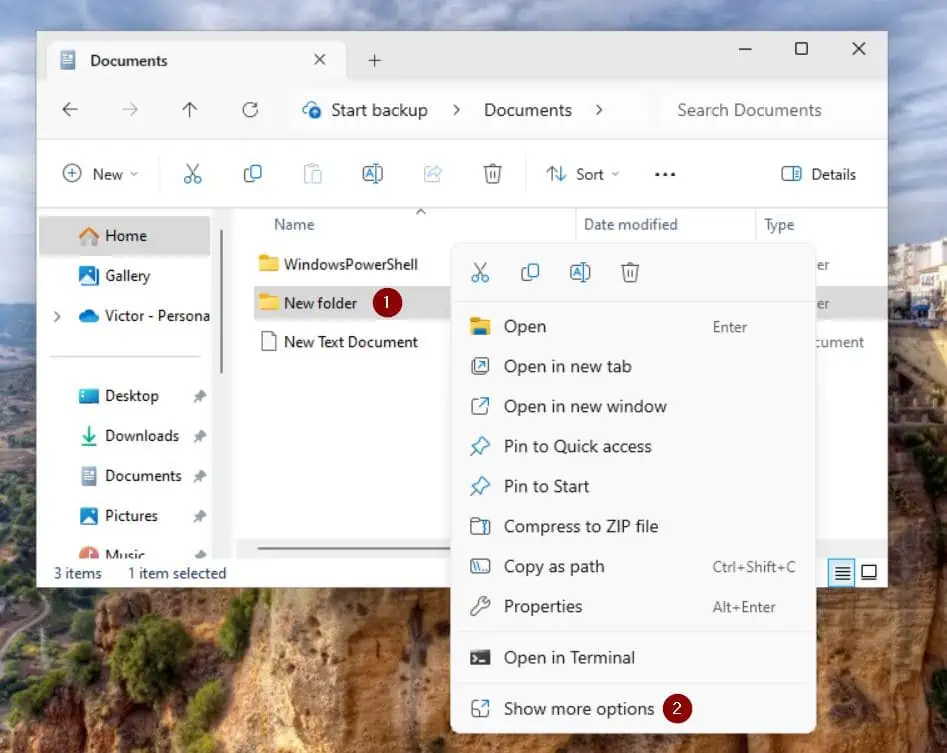
When you click “Show more options” it displays the Rename option.
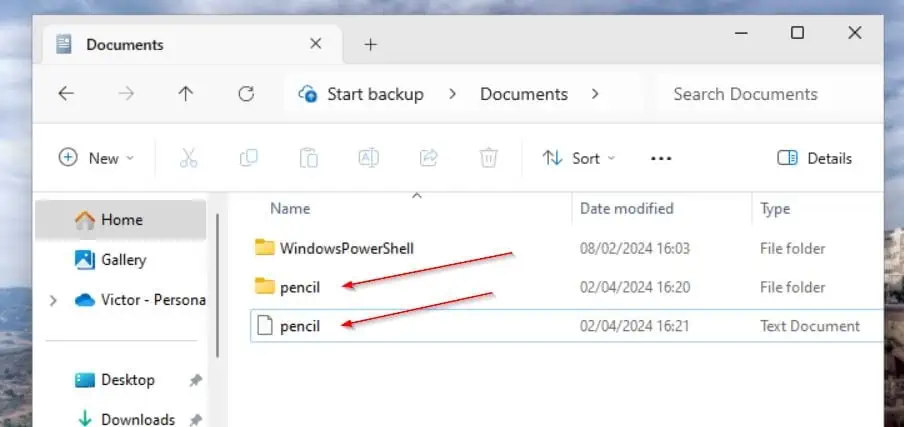
I have renamed the file and folder as “pencil.”
Rename Files or Folders with PowerShell
To rename an item with PowerShell, you require the Rename-Item command. I could show you a single command that renames the file and folder I created earlier.
However, I would rather break it down so it is easy to understand.
Let’s start by returning the two items on my desktop with the Get-ChildItem command.
$desktopPath = [environment]::GetFolderPath("desktop")
Get-ChildItem -Path $desktopPath -Recurse -Include pencil*
The first command saves the path to my desktop to a variable. Meanwhile, the second command returns the two file and folder I created earlier.
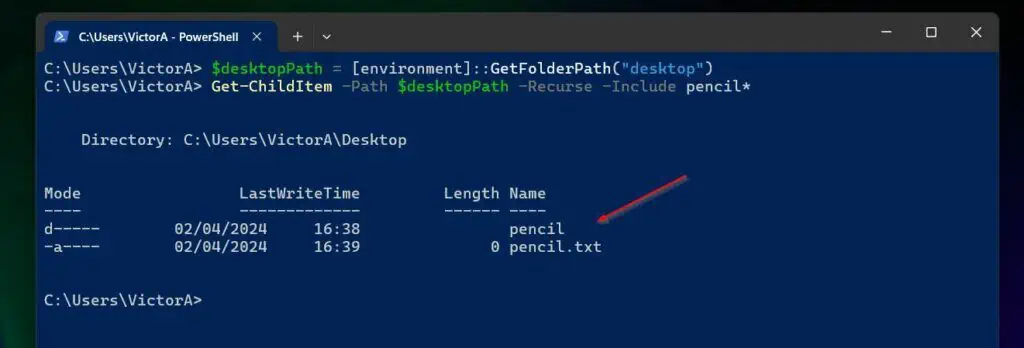
In the next step, I will pipe the last command to the Rename-Item command. The name of this command makes it obvious that it renames items.
However, since the Get-ChildItem command returned two items – a file and a folder – I need a way to return one item at a time so I can rename it.
To do this, I will pipe the Get-ChildItem to Where-Object before pipping it to the Rename-Item. I needed the
The command below renames the folder and file I named “pencil” in the previous section to “panama”.
$desktopPath = [environment]::GetFolderPath("desktop")

(Get-ChildItem -Path $desktopPath -Recurse -Include pencil* | Where-Object {$_.PSIsContainer -eq $false}).FullName | Rename-Item -NewName panama.txt

(Get-ChildItem -Path $desktopPath -Recurse -Include pencil* | Where-Object {$_.PSIsContainer -eq $true}).FullName | Rename-Item -NewName panama
The second command renames the file while the third renames the folder. The trick is to use the $_.PSIsContainer property to return the file or folder.
Additionally, since the Rename-Item command requires the full path to the item, I returned the FullName (the full path) property of the item.
To confirm that the items were renamed, see the result of the Get-ChildItem command in the screenshot below.

Delete Files or Folders with File Explorer
To delete a file or folder from File Explorer, right-click the item and select “Show more options”. After that, the Delete option will be displayed.
Delete Files or Folders with PowerShell
Deleting items with PowerShell is similar to renaming them. In the rename item section, I piped Get-ChildItem to Where-Object and then to Rename-Item.
To delete the item, instead of using Rename-Item, I’ll use Remove-Item.
$desktopPath = [environment]::GetFolderPath("desktop")

(Get-ChildItem -Path $desktopPath -Recurse -Include *panama* | Where-Object {$_.PSIsContainer -eq $false}).FullName | Remove-Item -Force

(Get-ChildItem -Path $desktopPath -Recurse -Include *panama* | Where-Object {$_.PSIsContainer -eq $true}).FullName | Remove-Item -Force
Conclusion
Creating, renaming, and deleting files and folders are common tasks. Whether you prefer performing this task via GUI or PowerShell, I hope you found my guide helpful.
Kindly let me know by responding to the “Was this page helpful?” question below. Before you go, why not check out our other Windows 11 how-to guides?
