This Itechguide teaches you how to change drive letter on Windows 10.
Option 1: Change Drive Letter with Disk Management
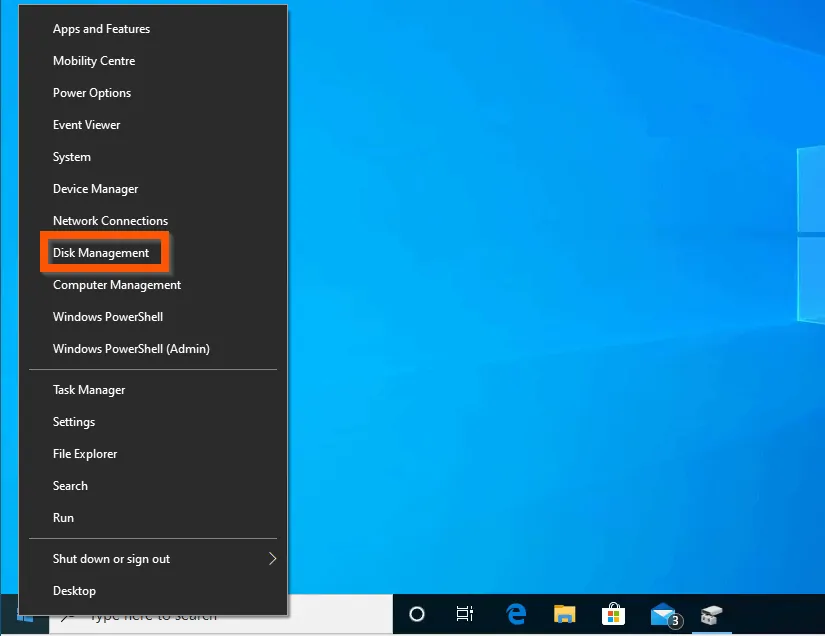
- Right-click Windows 10 Start menu and select Disk Management.
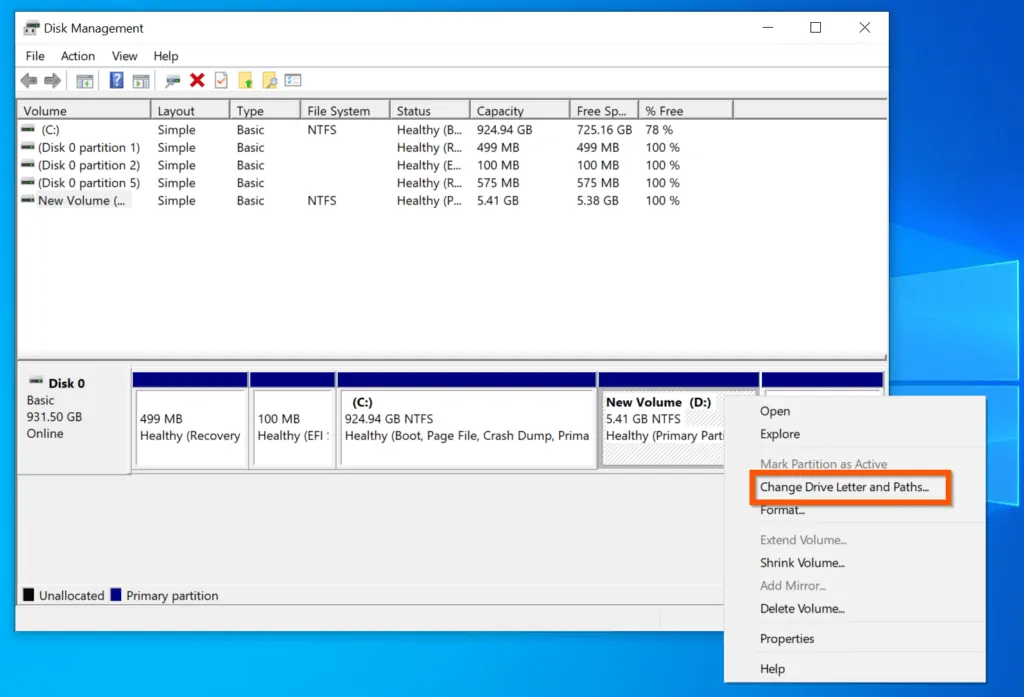
- Then, right-click the partition you want to change drive letter for and select Change Drive Letter and Paths…
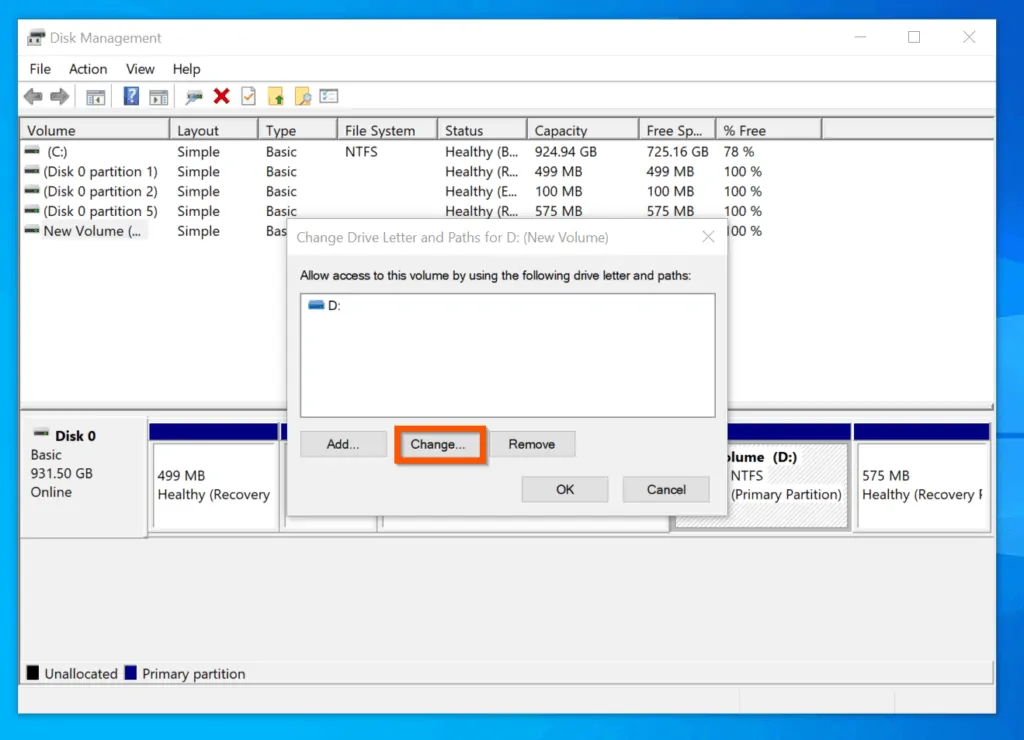
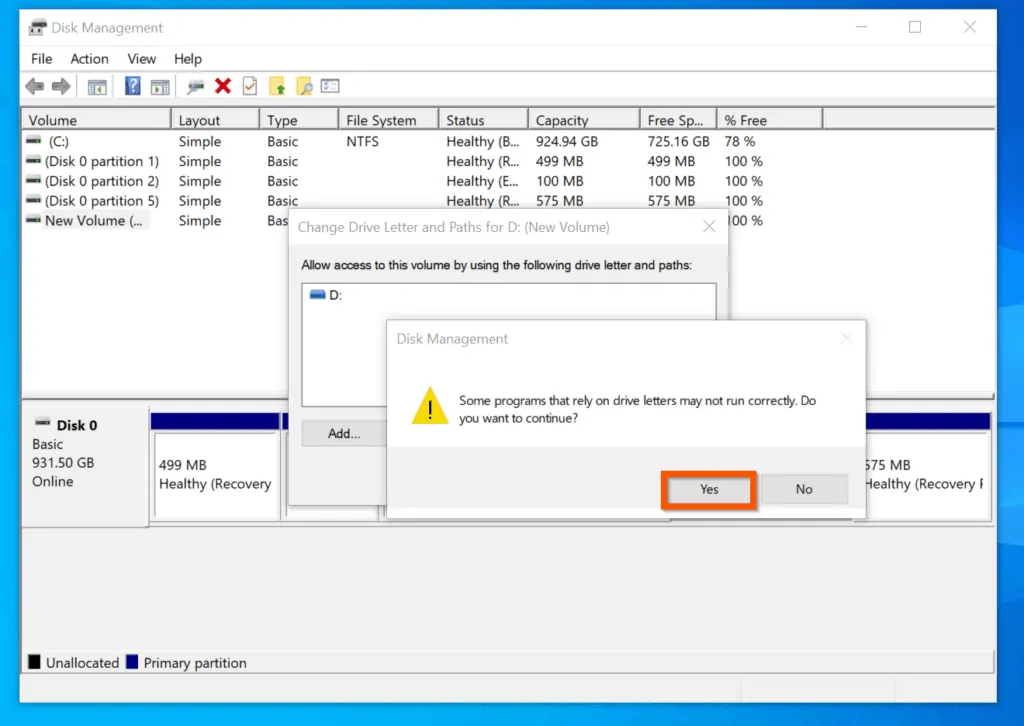
- On the Change Drive Letter and Paths pop-up, click Change.
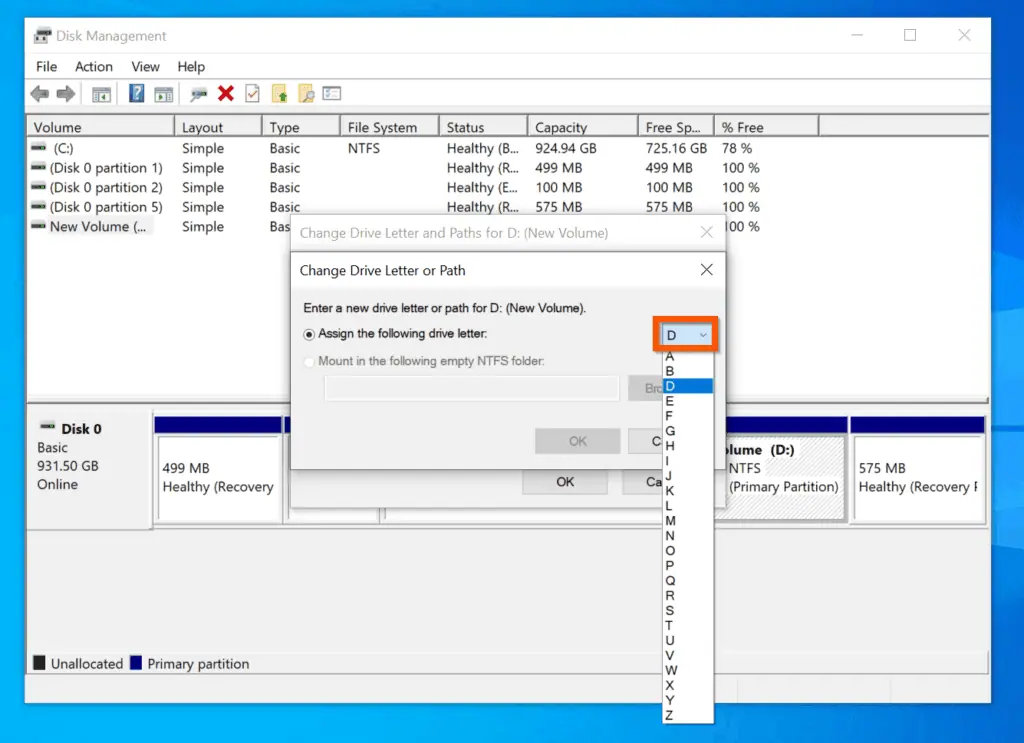
- Then, on the Change Drive Letter or Path pop-up, click the Assign the following drive letter drop-down and select a new drive letter.
- Finally, to change drive letter on Windows 10 with Disk Management, after selecting a new drive letter, click OK.
- Then, on the confirmation pop-up, note the warning and if you want to proceed, click OK.

Option 2: Change Drive Letter with DISKPATH
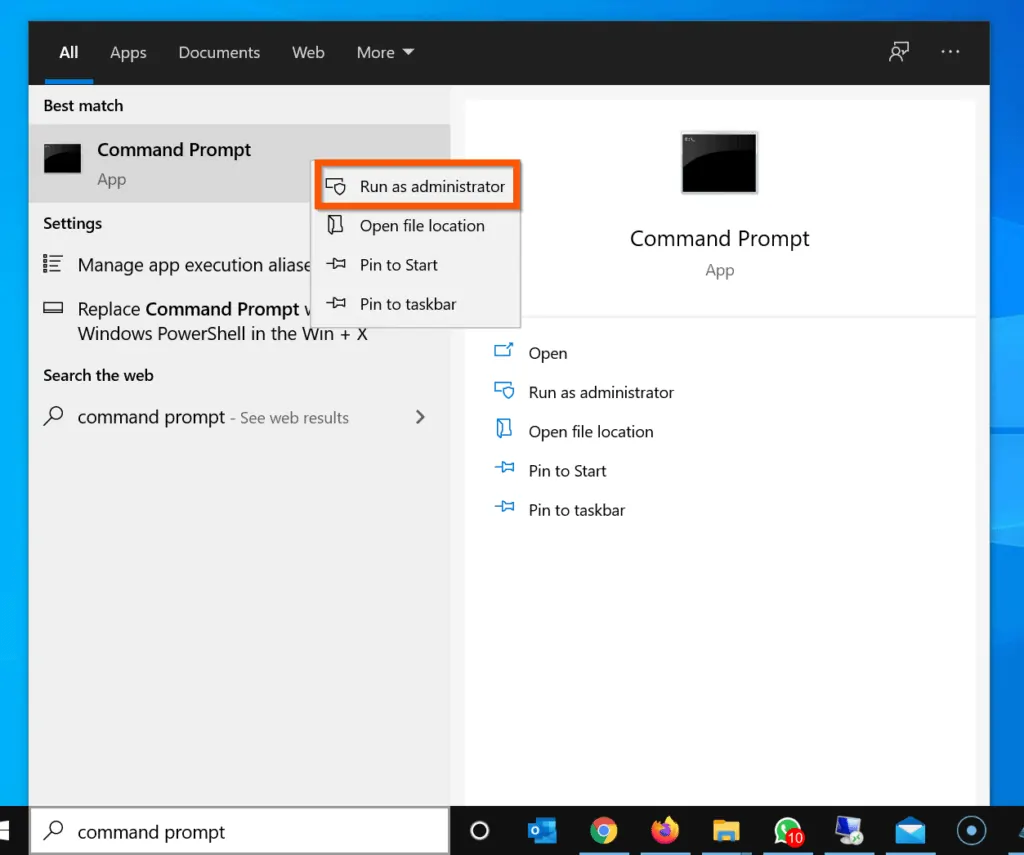
- Type command prompt in the Windows 10 search box. Then, from the search results, right-click Command Prompt and select Run as Administrator.
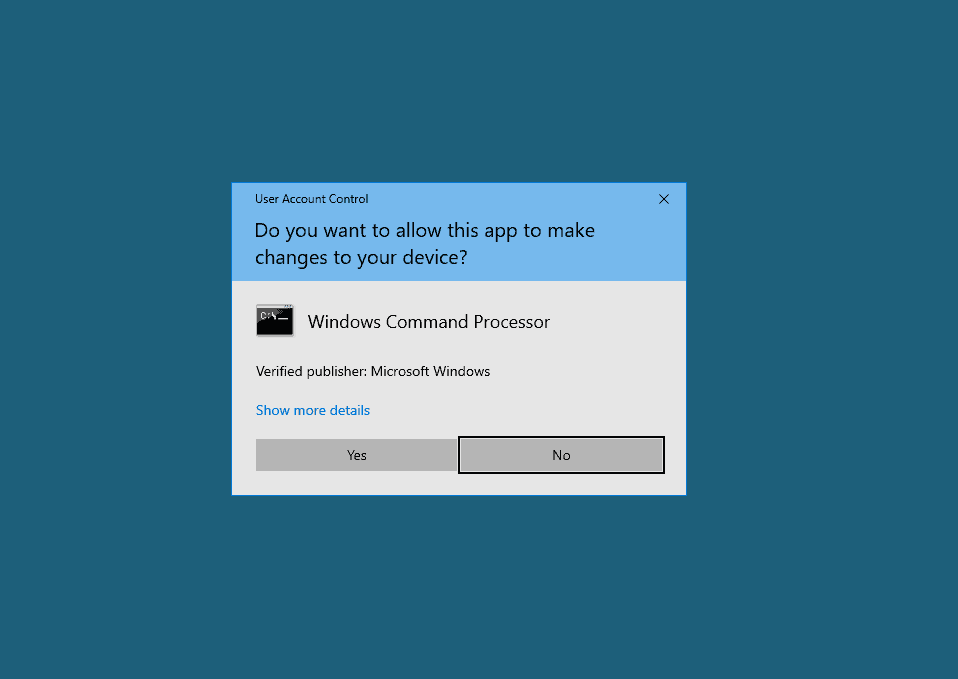
- You will receive a User Access Control (UAC) confirmation, requesting you to allow the “app to make changes to your PC”. On the UAC prompt, click Yes.
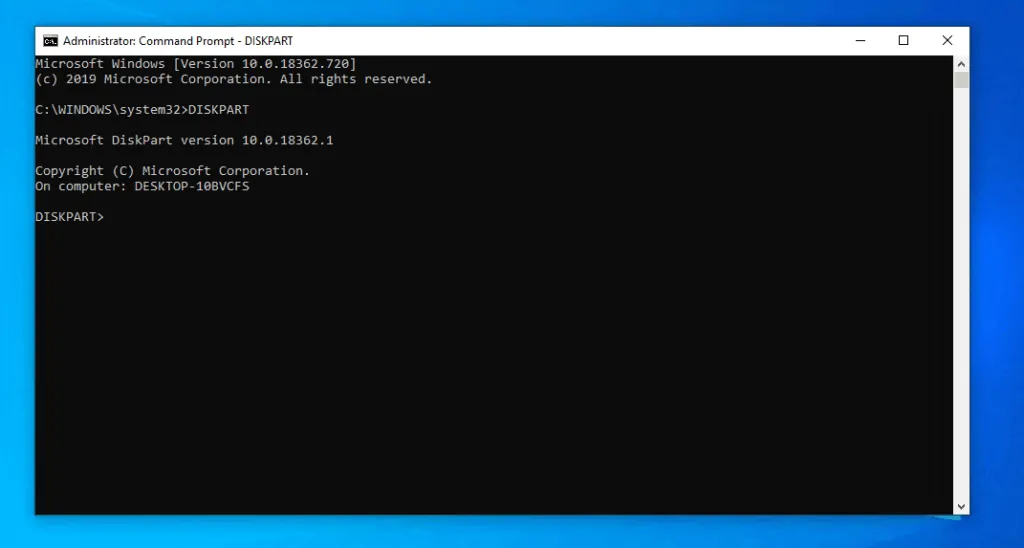
- On the command Prompt, to open the DISKPART, type the command below and press enter.
DISKPART
The DISKPART prompt will open.
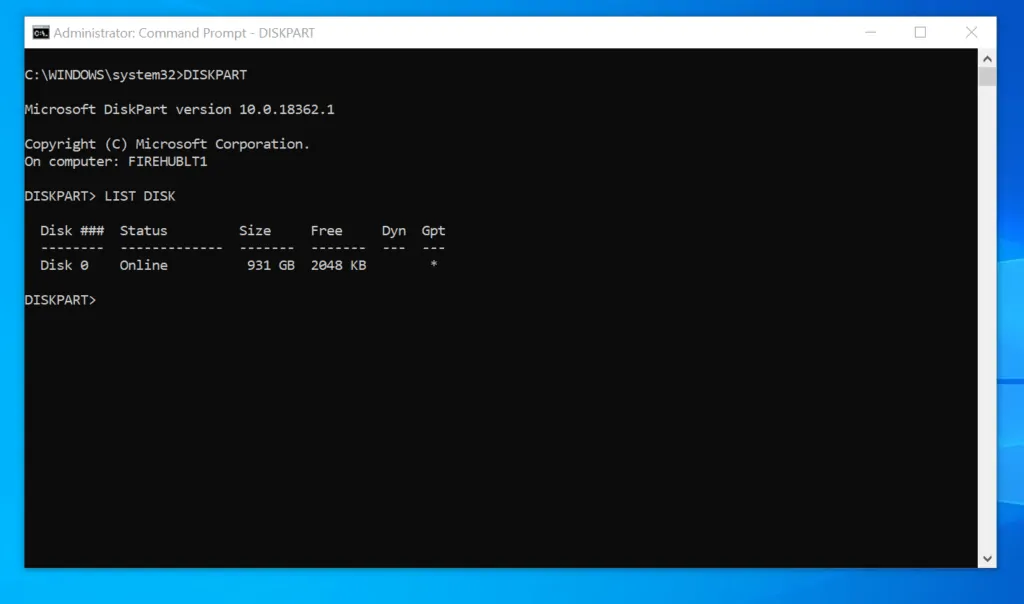
- On the DISKPART prompt, to list all available disks – type this command and press enter.
LISK DISK
The command will list all disks on your computer. The next step is to select a disk.
- To select a disk, enter the command below and press enter.
SELECT DISK 1
The command will return “Disk # is now the selected disk.” The next step is to list all available partitions on the selected disk.

- To list all partitions on the selected disk, enter the LIST PARTITION command and press enter.
LIST PARTITION
Before you proceed to the next step, note the partition # of the partition you want to change drive letter for.
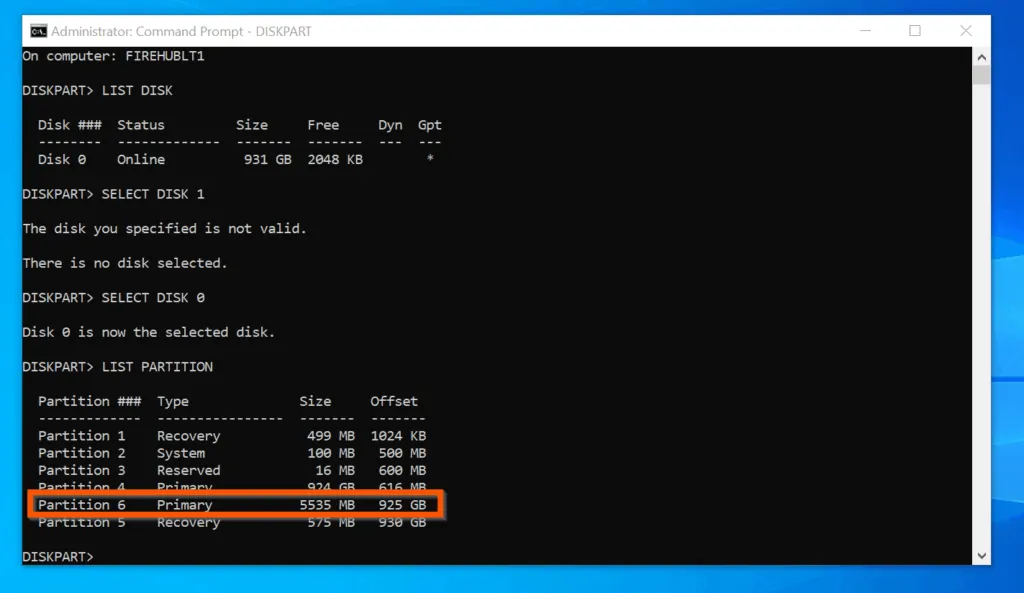
- Then, to select the partition, enter the SELECT PARTITION command followed by the partition # and press enter.
SELECT PARTITION 6
Change 6 to the partition number for the partition you want to change its drive letter.
- Finally, to change drive letter on Windows 10 with DISKPART, use the ASSIGN LETTER command. In this example, I want to assign driver letter D to the partition.
ASSIGN LETTER=D
If the drive letter is available, DISKPPART will assign the drive letter and return a confirmation message.

However, if the drive letter is already assigned to another partition, DISKPPART will return an error message. If you receive an error message, try another drive letter.
Option 3: Change Drive Letter with PowerShell
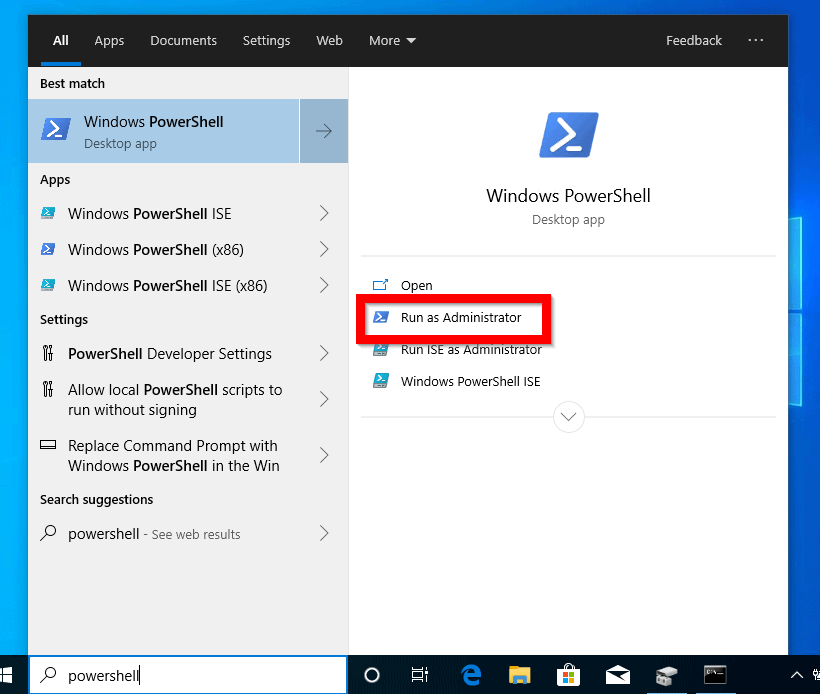
- Type PowerShell in search bar. Then click Run as administrator.
- To identify the disk with the partition you want to assign drive letter, type the Get-Disk cmdlet and press enter.
Get-Disk
The command will display information about all disks on the computer. Note the Disk number (first column) – from the screenshot below, mine is disk number 0. The next step is to get the partitions on the disk.

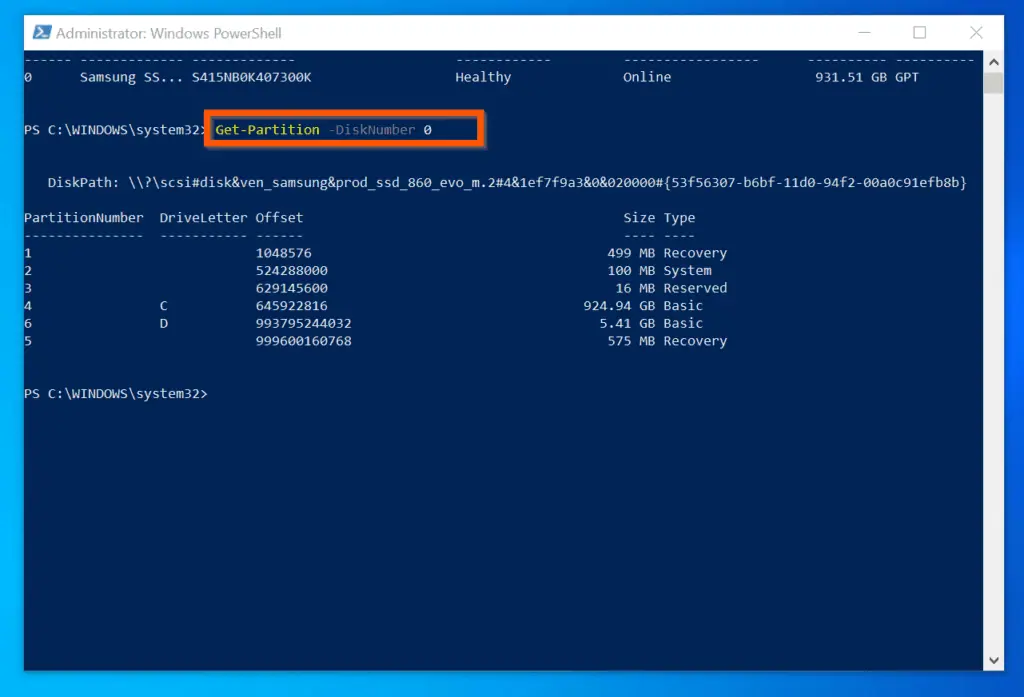
- To list all partitions on a disk, enter the Cmdlet below and press enter
Get-Partition -DiskNumber 0
All partitions on the disk will be displayed. Note the partition number of the partition you want to change its drive letter. From the screenshot below, mine is partition 6.
- Finally, to change drive letter on Windows 10 with PowerShell, enter the Cmdlet below and press enter.
Get-Partition -DiskNumber 0 | Set-Partition -PartitionNumber 6 -NewDriveLetter E
Change 0, 6 and E to your disk number, partition number and drive letters respectively.
Conclusion
You can use the methods covered in this Itechguide to change drive letter Windows 10!
I hope you found this Itechguide helpful. If you did, click on “Yes” beside the “Was this page helpful” question below.
You may also express your thoughts and opinions by using the “Leave a Comment” form at the bottom of this page.
Finally, for more Windows 10 Itechguides, visit our Windows 10 How–To page. You may also find our Work from Home page very helpful.