This Itechguide teaches you different ways to get help with Paint in Windows 10. Learn how to perform different tasks in Paint and Paint 3D – manage canvas, draw, erase, and do more.
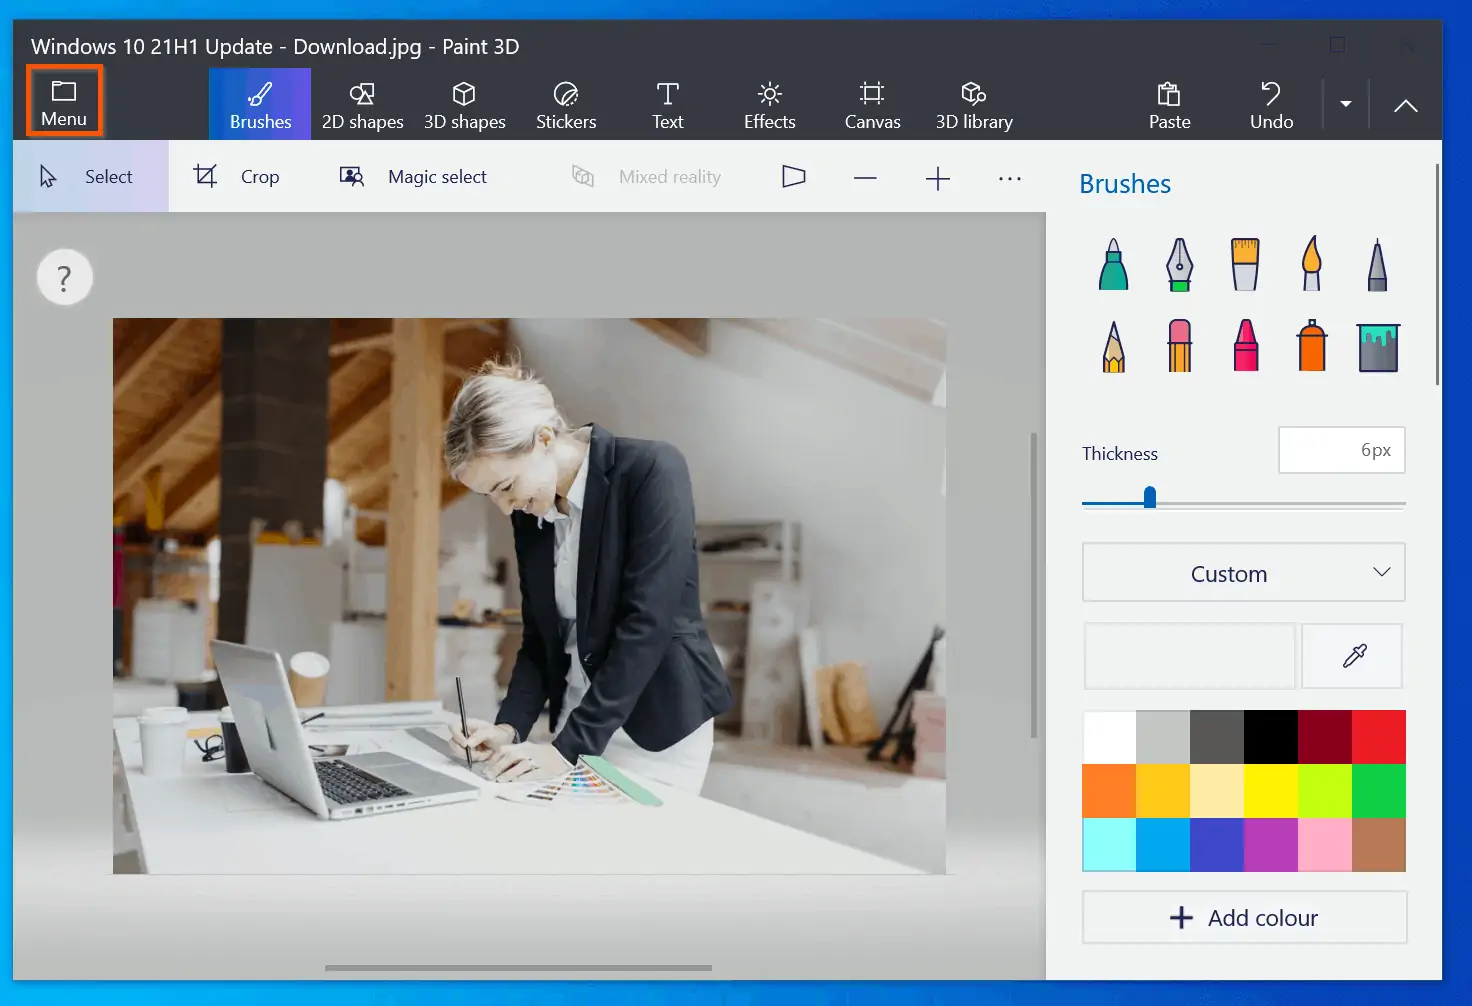
How to Open Paint and Paint 3D
If you are entirely new to Paint or Paint 3D in Windows 10, then you will need help with opening the Apps. This section teaches you various ways to open Paint or Paint 3D in Windows 10.
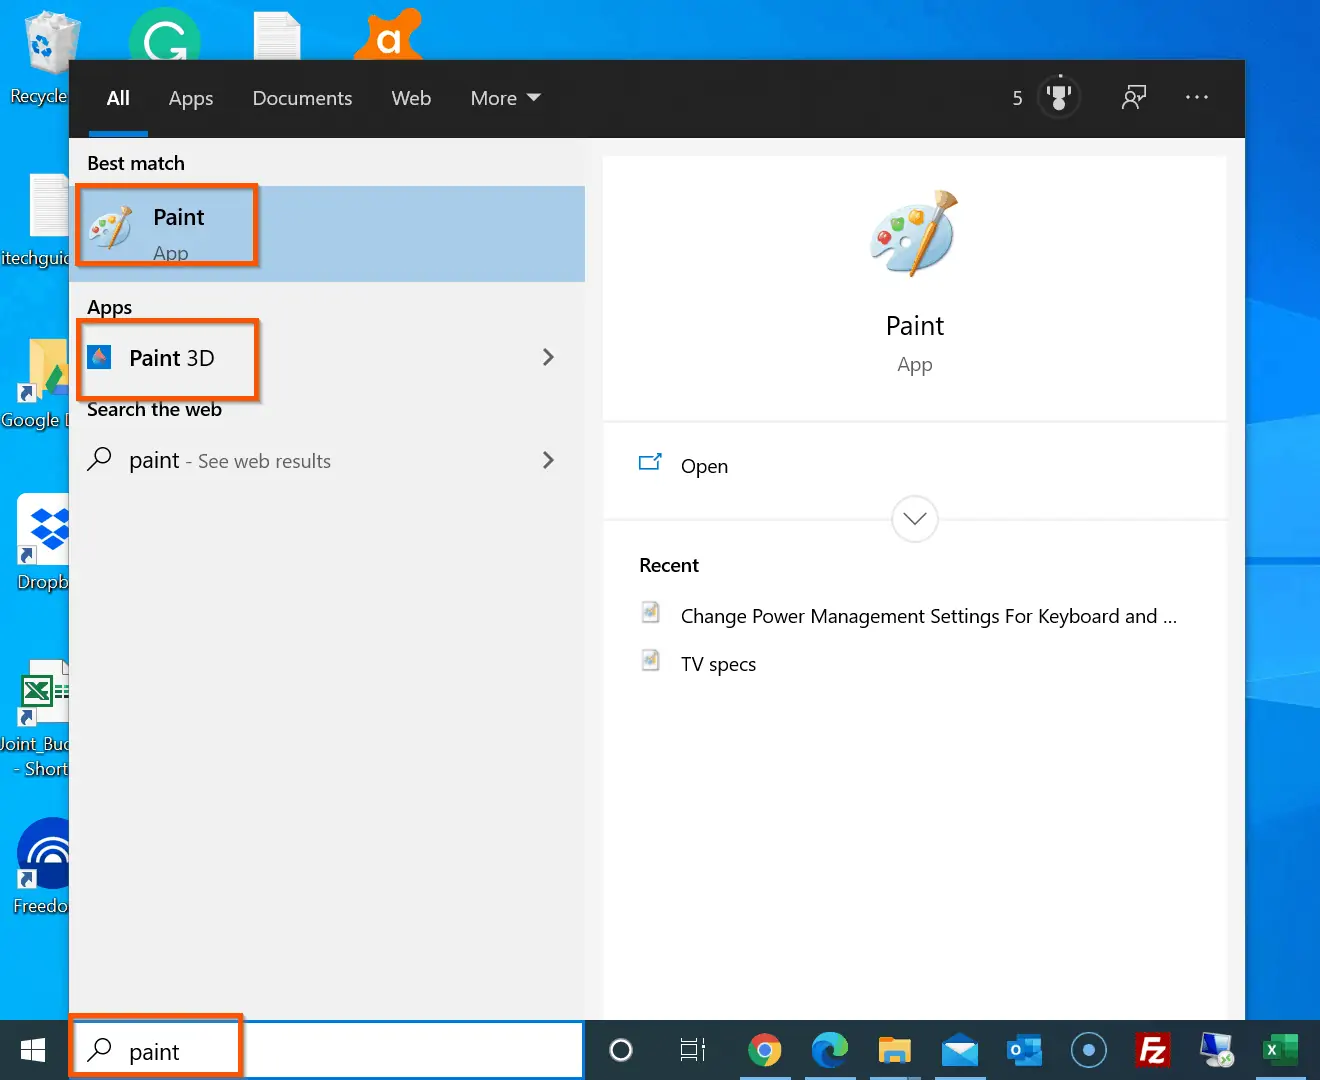
Method 1: Open Paint or Paint 3D Via Search
Type paint in the Windows 10 search box – the search box is at the bottom left of the taskbar. Then, from the search result, open Paint or 3D Paint.
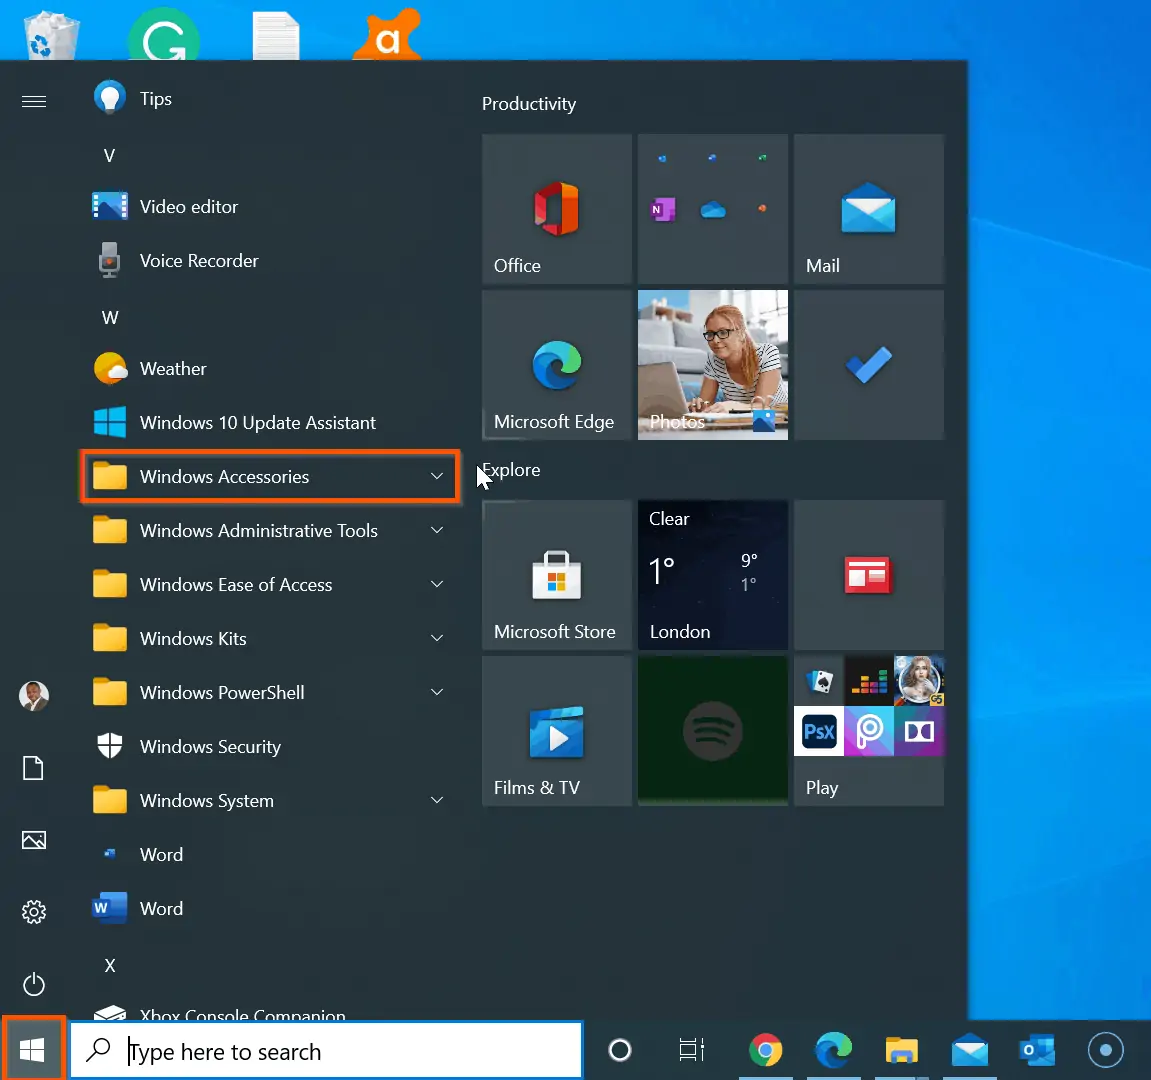
Method 2: Open Paint or Paint 3D From Start Menu
- Click the Start Menu. Then, to open Paint, locate and expand Windows Accessories.
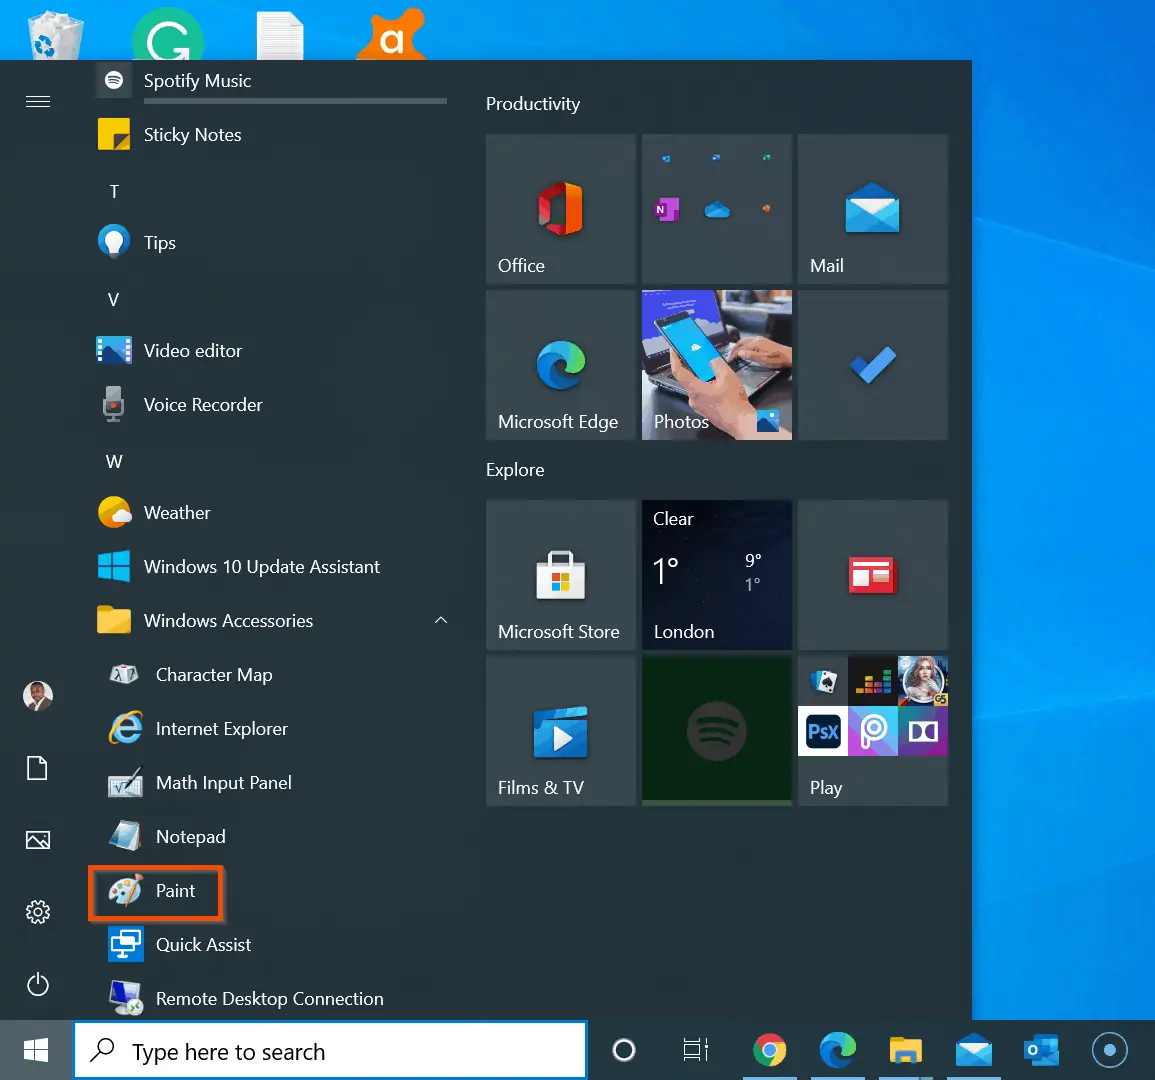
- Finally, from the Windows Accessories list, click Paint.
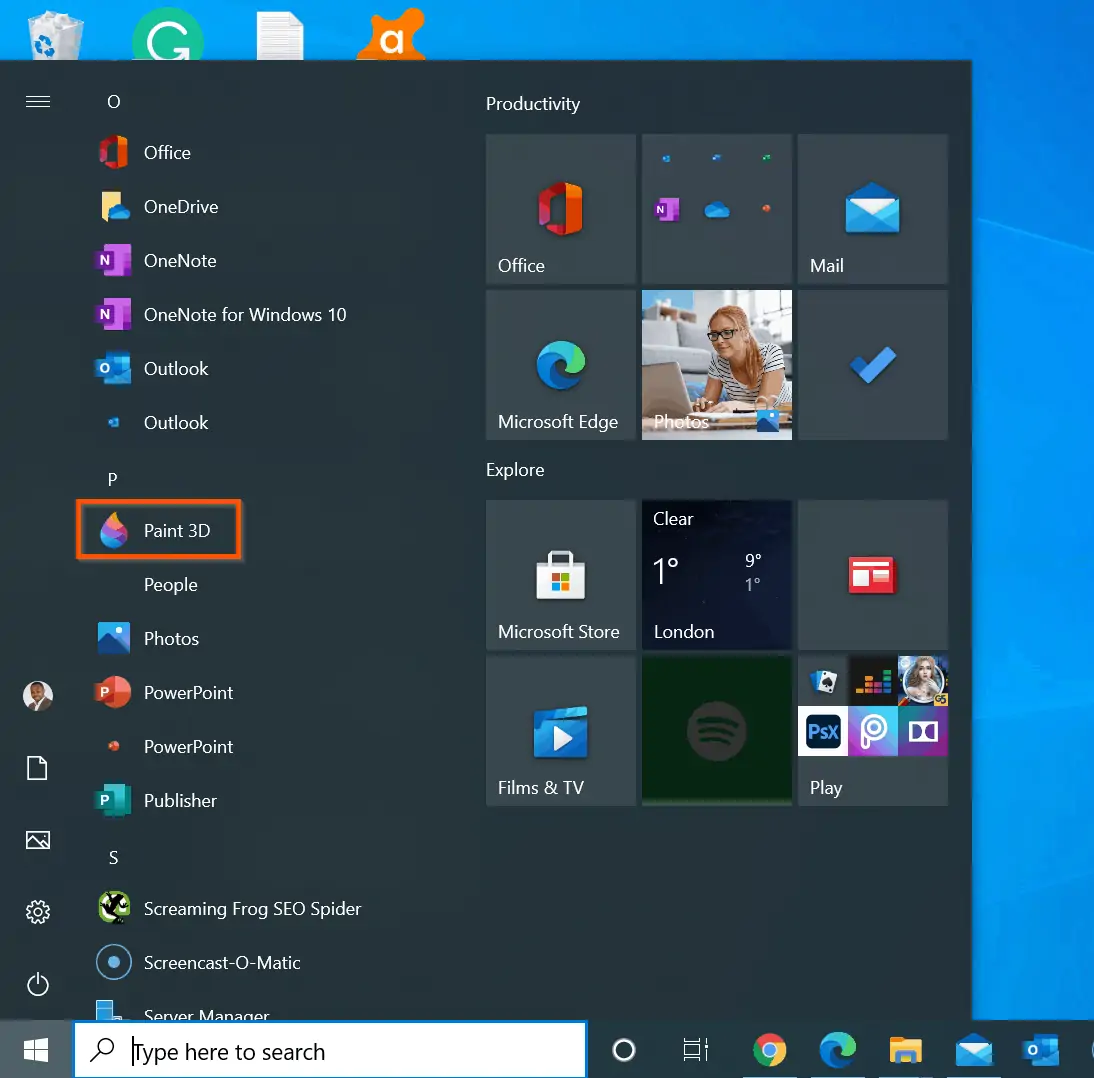
- To open Paint 3D, from the Start Menu, scroll to P (The Start Menu is arranged in alphabetical order). Then, click Paint 3D.
Still need help with other ways to open Paint in Windows 10? We have one more for you. If you are techi, you will love this one!
Method 2: Open Paint From Run Command
You can open Paint from Run. To open Paint from Run command, follow the steps below:
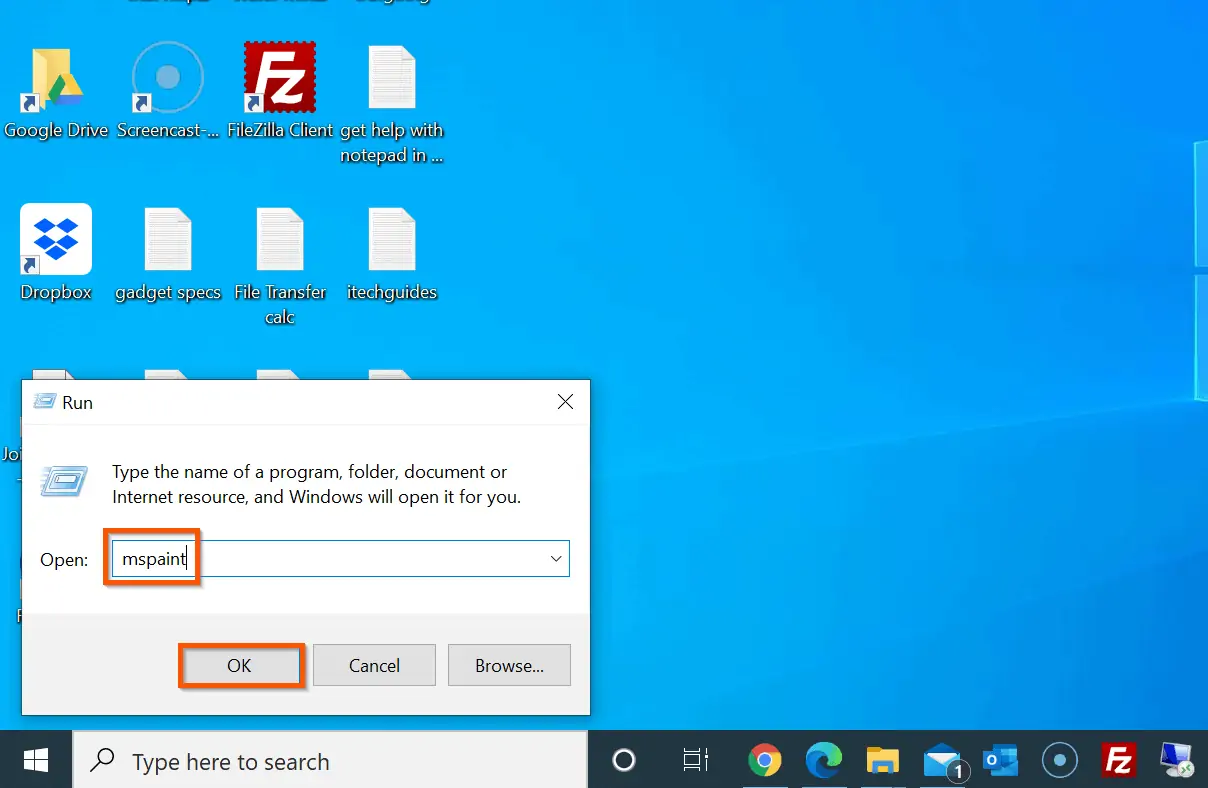
- Right-click the Start Menu, then click Run.

- Finally, on the Run command, type mspaint and click OK.
How to Resize and Manage Canvas in Paint and Paint 3D
Once you are comfortable with opening Paint or Paint 3D, the next important Windows 10 Paint help topic is managing the Paint Canvas.
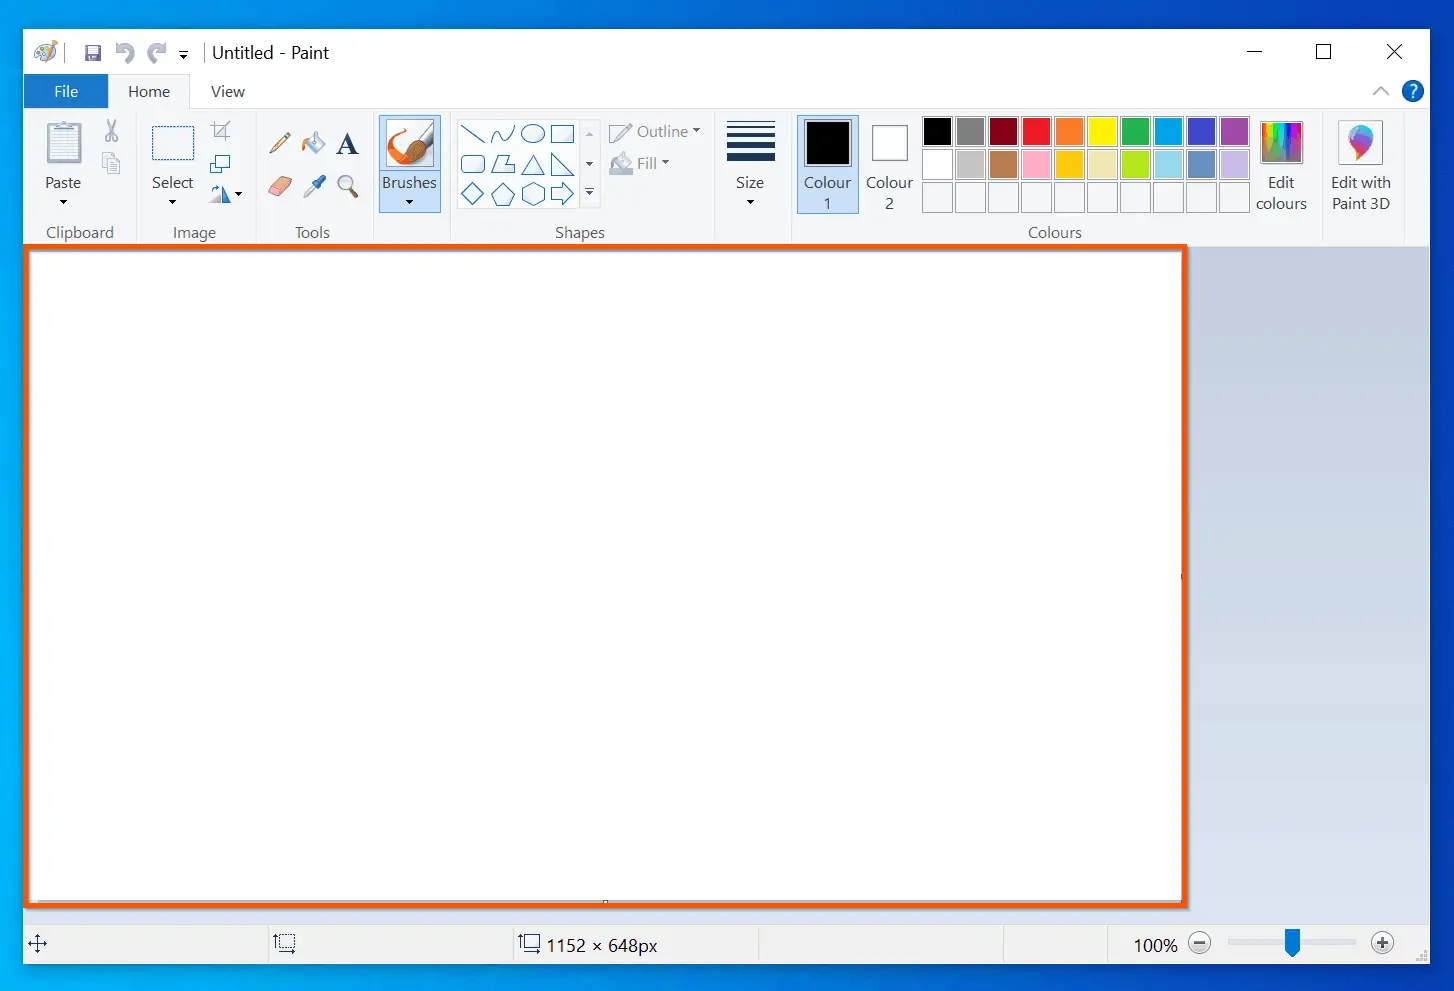
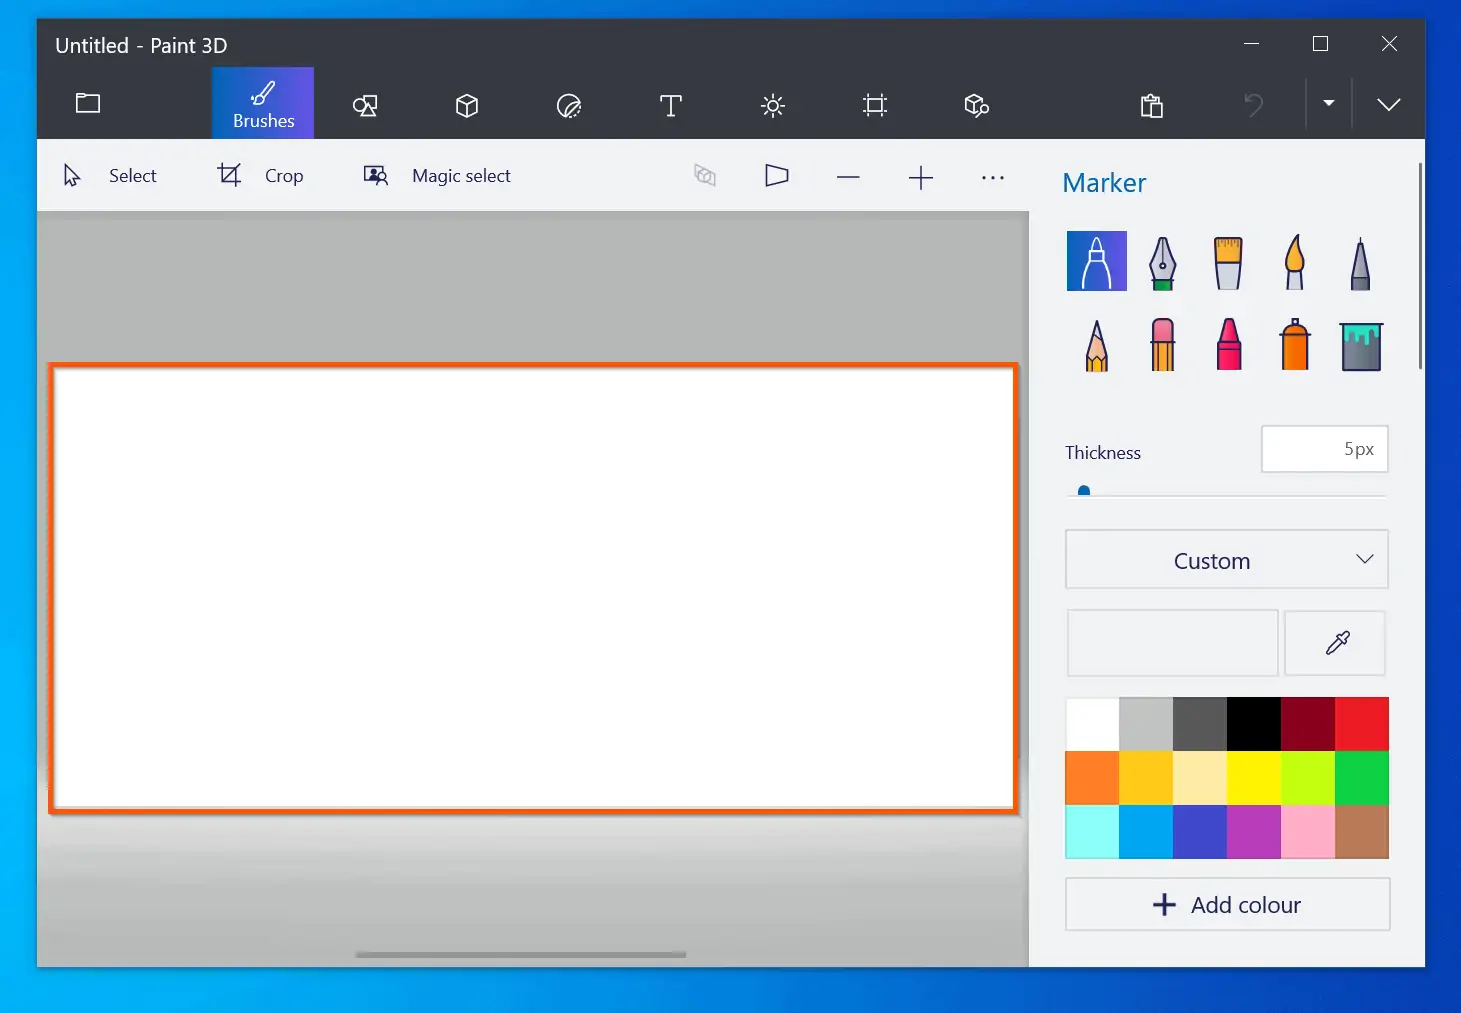
The Canvas is the portion of Windows 10 Paint or Paint 3D that “holds” your image.
See the highlighted portion of the screenshots below. The first screenshot shows the Canvas for Paint – the second screenshot is for Paint 3D.
In the following sub-sections, you will learn how to resize Windows 10 Paint and Paint 3D Canvas. You will also learn how to add Rulers, Gridlines, or Status Bar in Paint.
How to Resize Canvas In Microsoft Paint
There are multiple places to adjust and manage the size of Canvas in Paint. This section highlights these options.
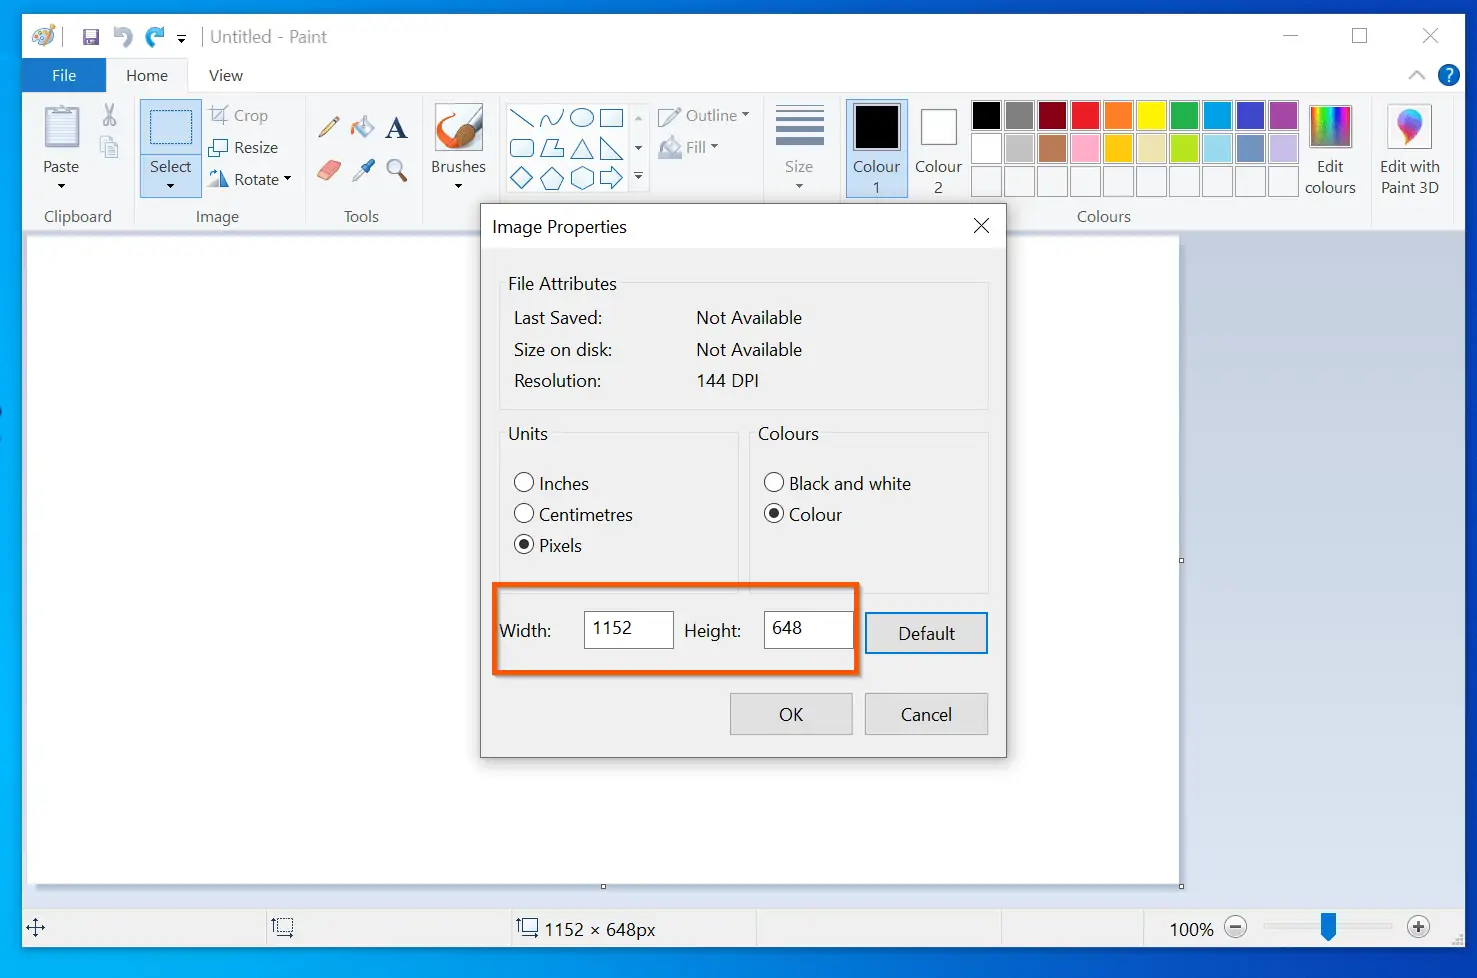
Adjust Paint Canvas From Paint Properties
- On the top left of Paint, click File. Then, select Properties.

- Then, when Paint Properties open, change the Canvas Width and Height – and, click OK. To adjust the Canvas to its default size, use the Default button.
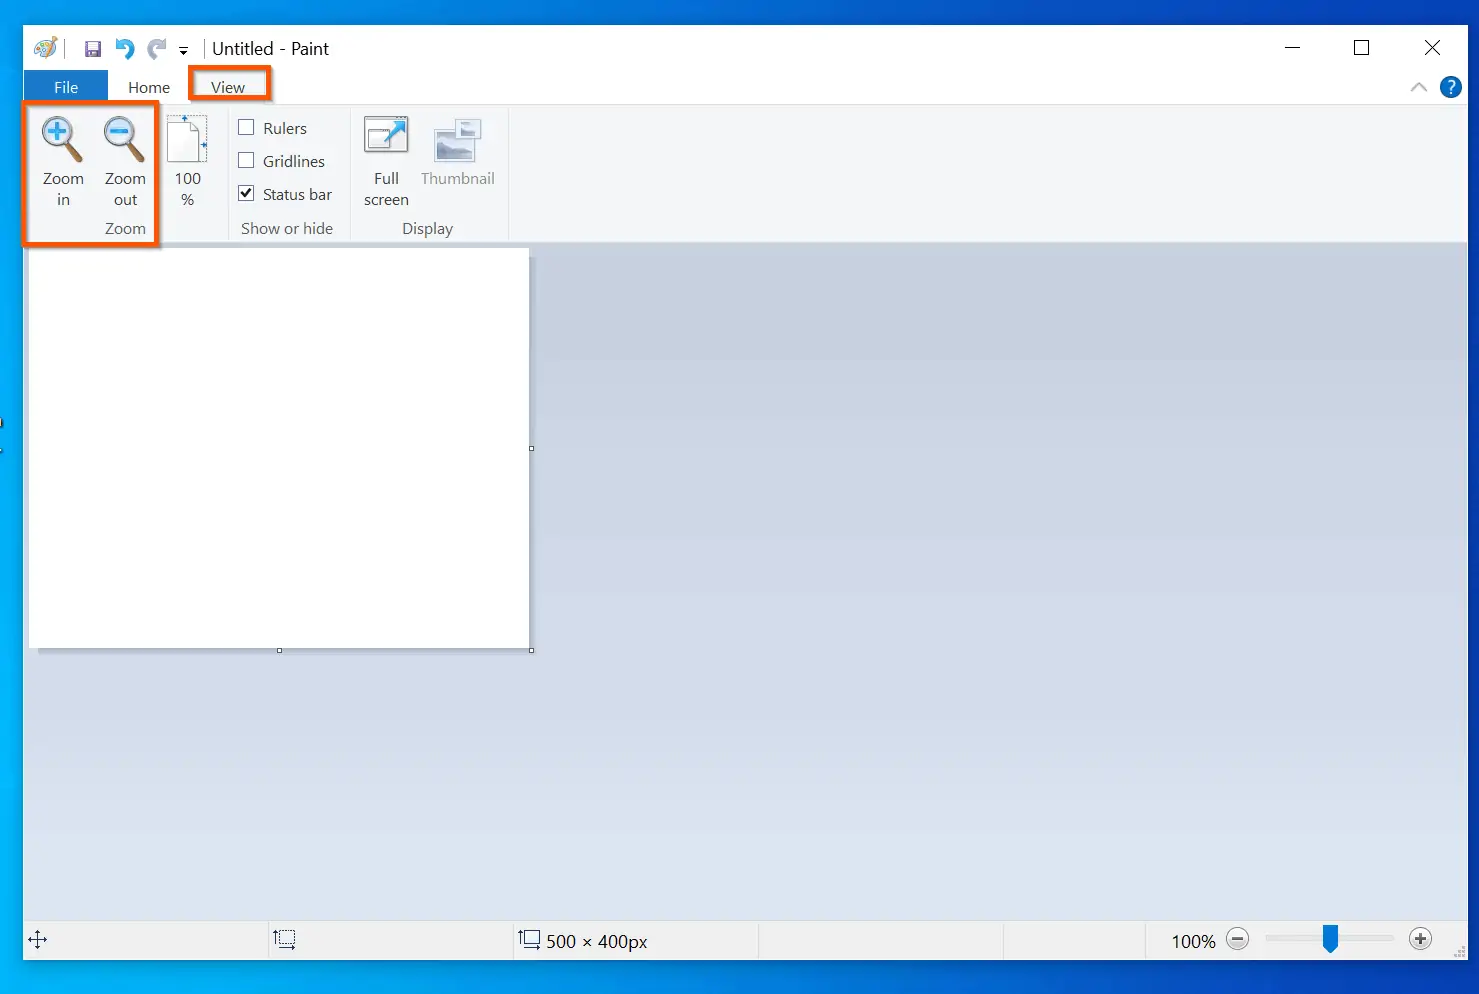
Adjust Paint Canvas From View Tab
You can also adjust the Paint Canvas size from the View tab.
To start, click the View Tab. Then, on the View tab, use the Zoom feature to either Zoom in (increase the size of the Canvas) – or use Zoom out to reduce the size of the Canvas.
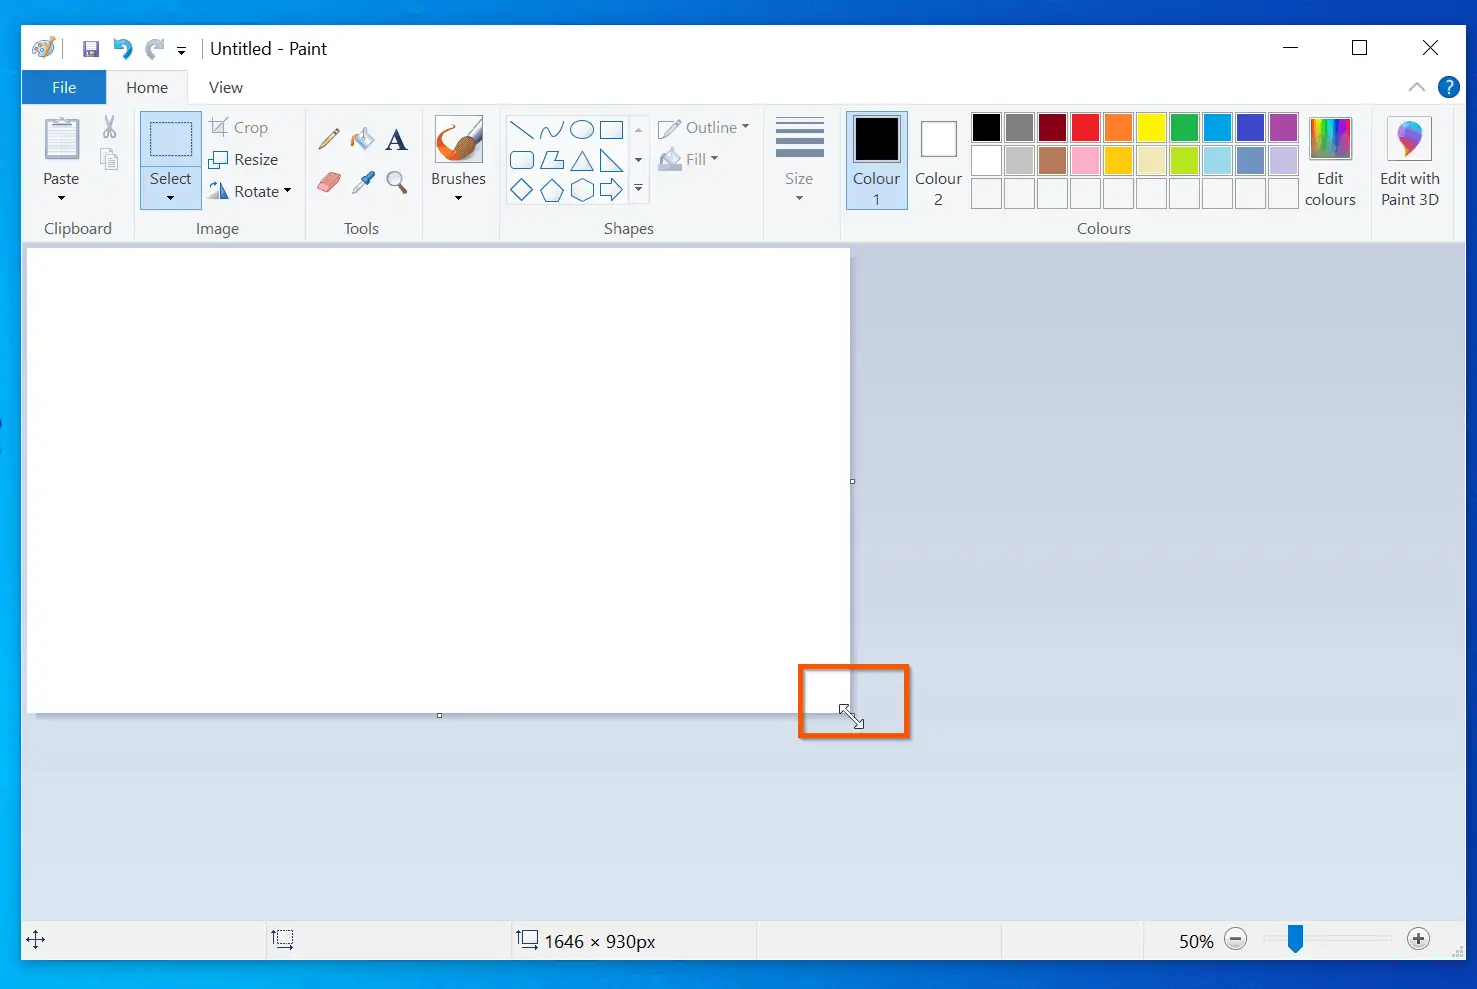
You can also quickly resize the canvas by hovering your mouse on the bottom right of the canvas. When you hover, your mouse will turn to 2 pointing arrows.
When your mouse pointer changes, drag downwards to increase the size of the canvas. Alternatively, to increase the size of the canvas, drag upwards.
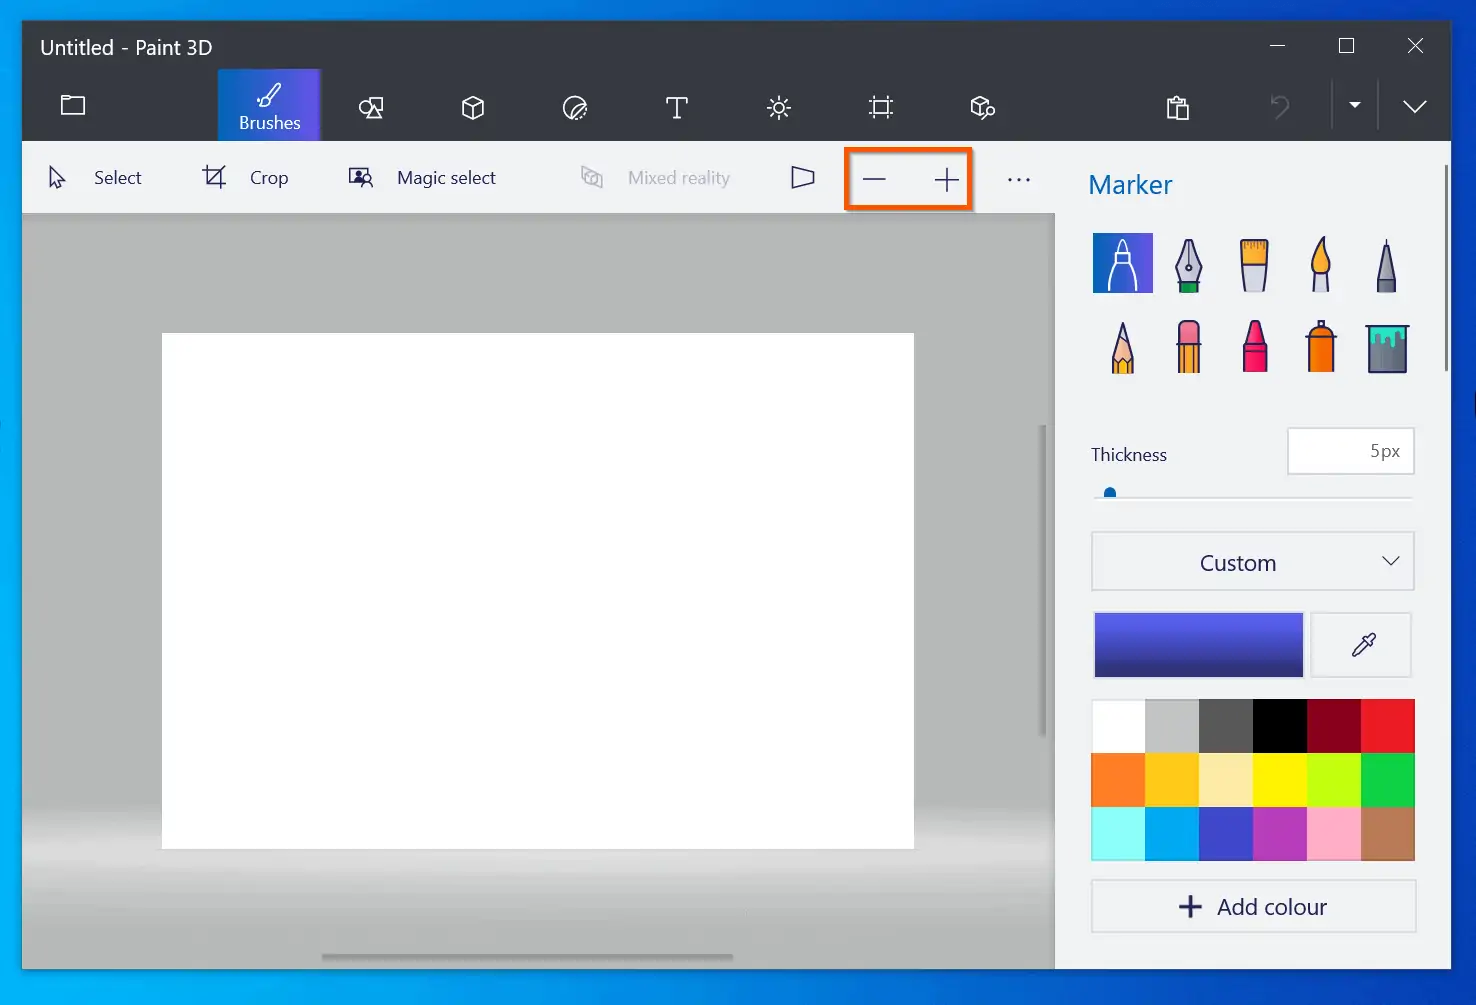
How to Resize Canvas in Paint 3D
Most users new to Windows 10 Paint 3D are keen to get help with learning how to resize canvas in this advanced Paint tool. Fortunately, it is easier than you would imagine!
To resize Paint 3D Canvas size, use the + and – signs on the second menu. To increase the Canvas size, click the + sign. However, if you wish to reduce the size of the canvas, click the – sign.
There is one more Windows 10 Paint help topic in this section. In this next sub-section, you will learn how to add Rulers, Gridlines, or Status Bar in Paint.
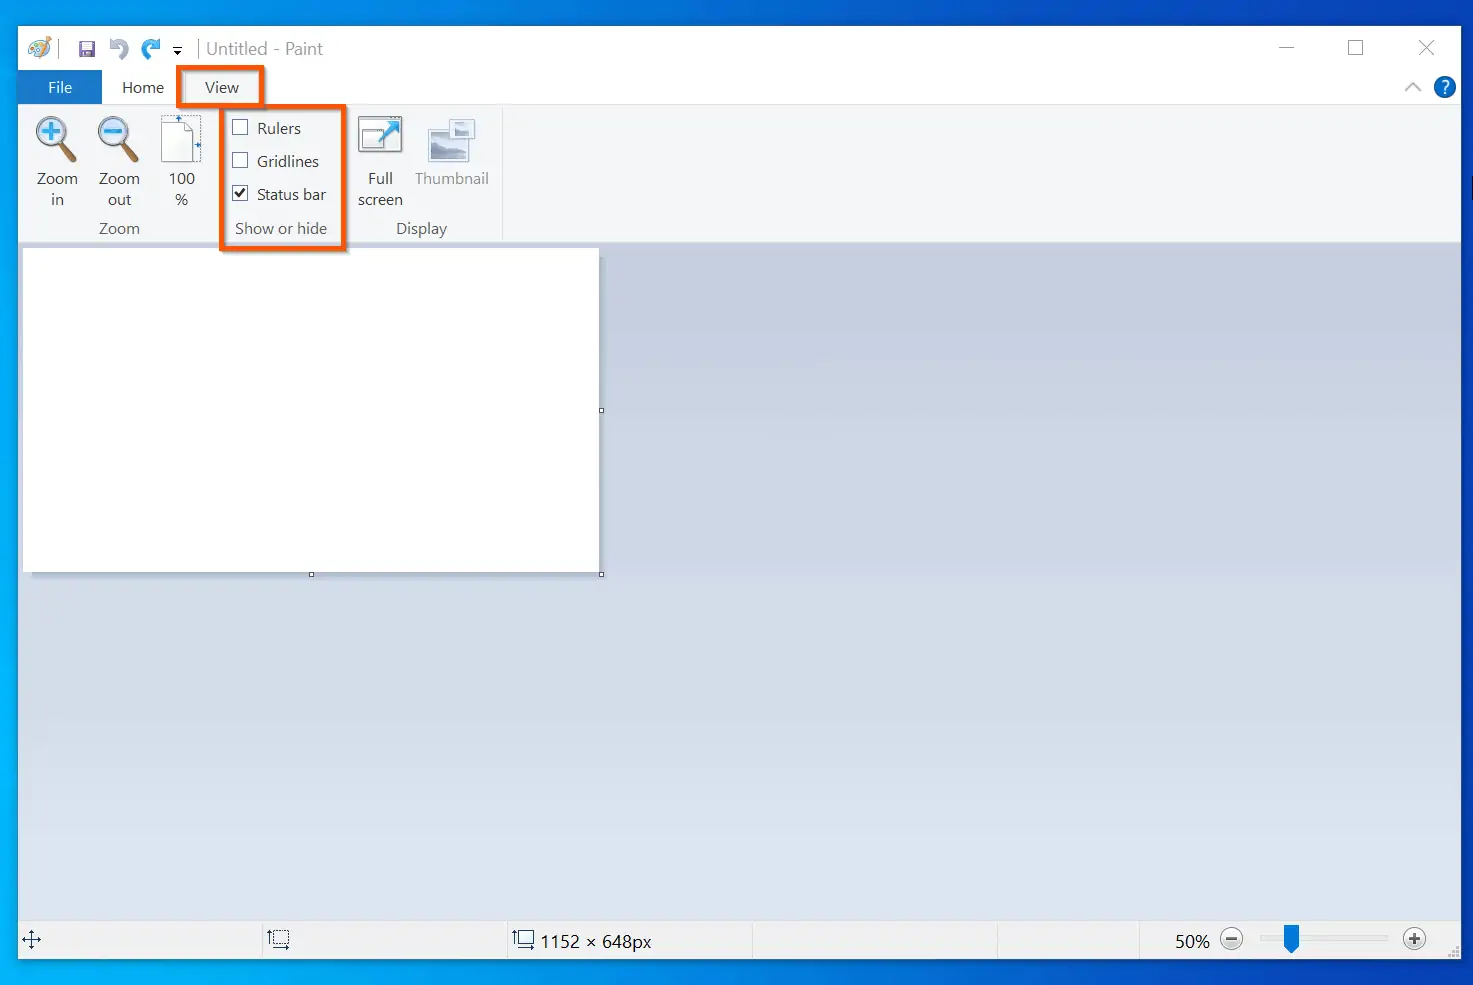
How to Add Rulers, Gridlines, or Status Bar in Paint
If you need to add Rulers, gridlines, or remove the Status Bar in Microsoft Paint, you can access these features from the View tab.
How to Draw and Erase in Paint and Paint 3D
Need help leaning how to draw or erase in Windows 10 Paint or Paint 3D? This section covers these topics.
How to Draw Free Lines in Windows Paint
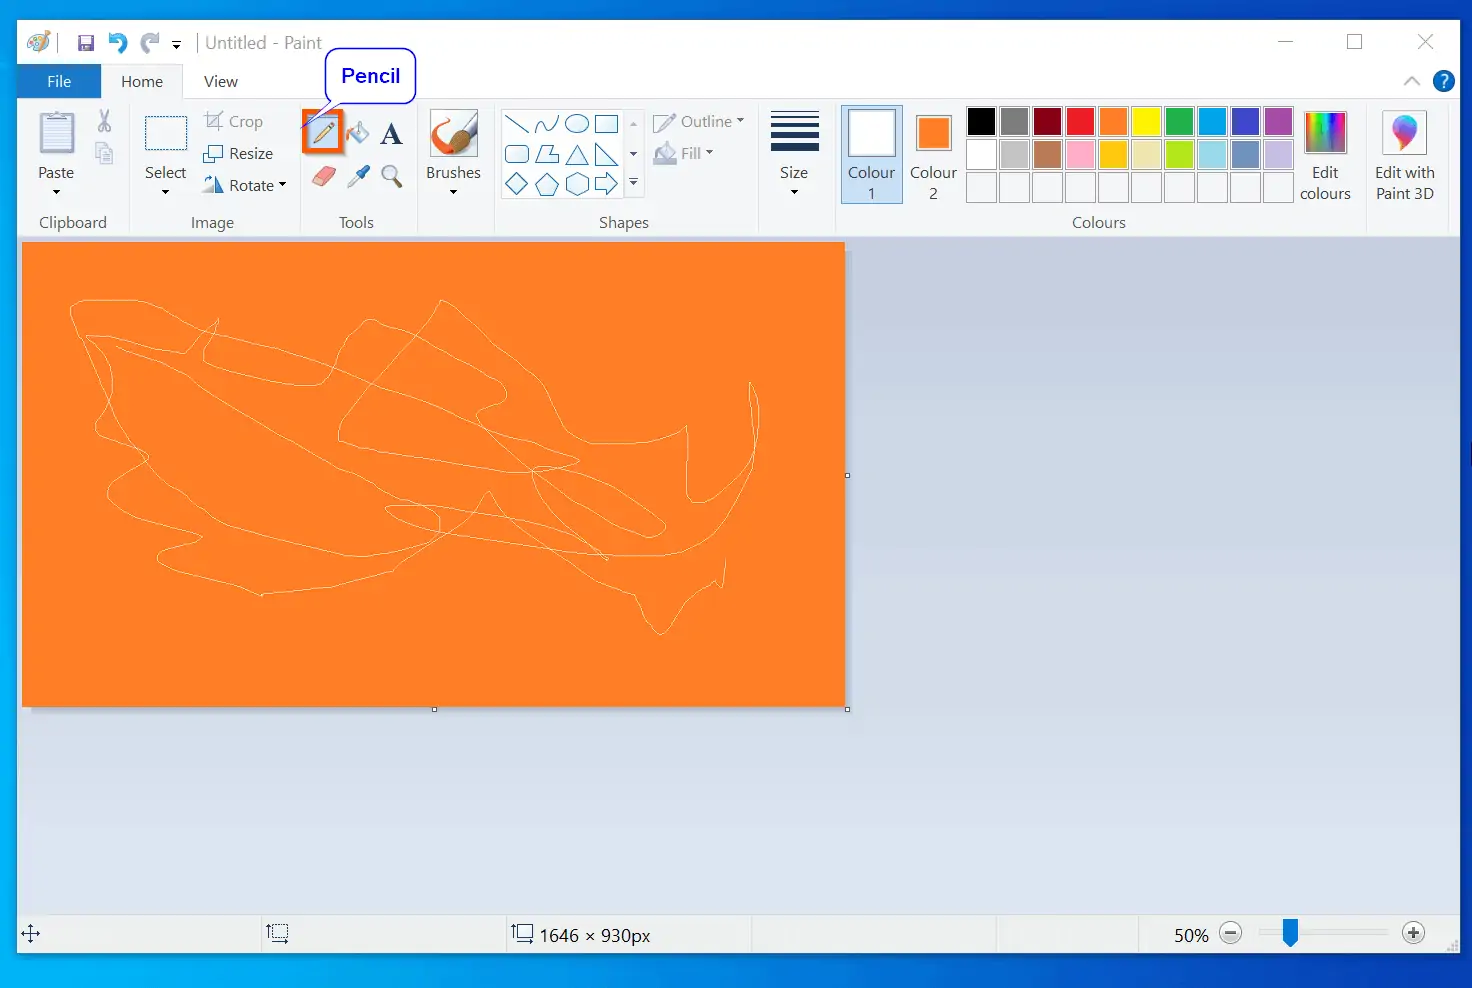
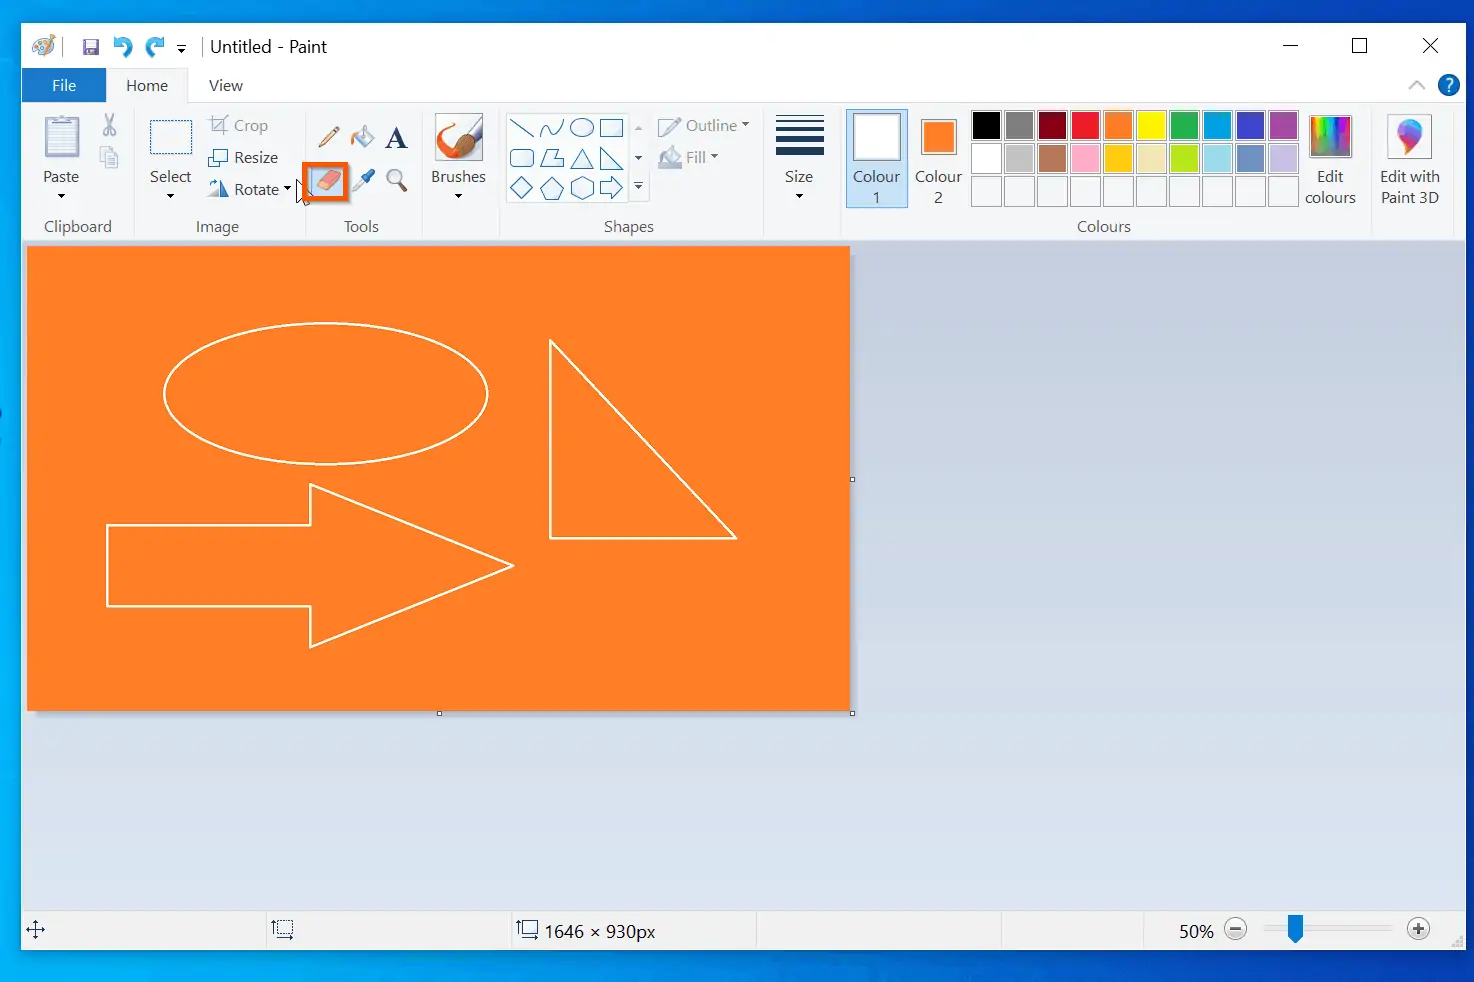
Before you start drawing in Windows 10 Paint, you may need help understanding the available drawing features. The features you need are highlighted in the screenshot below.
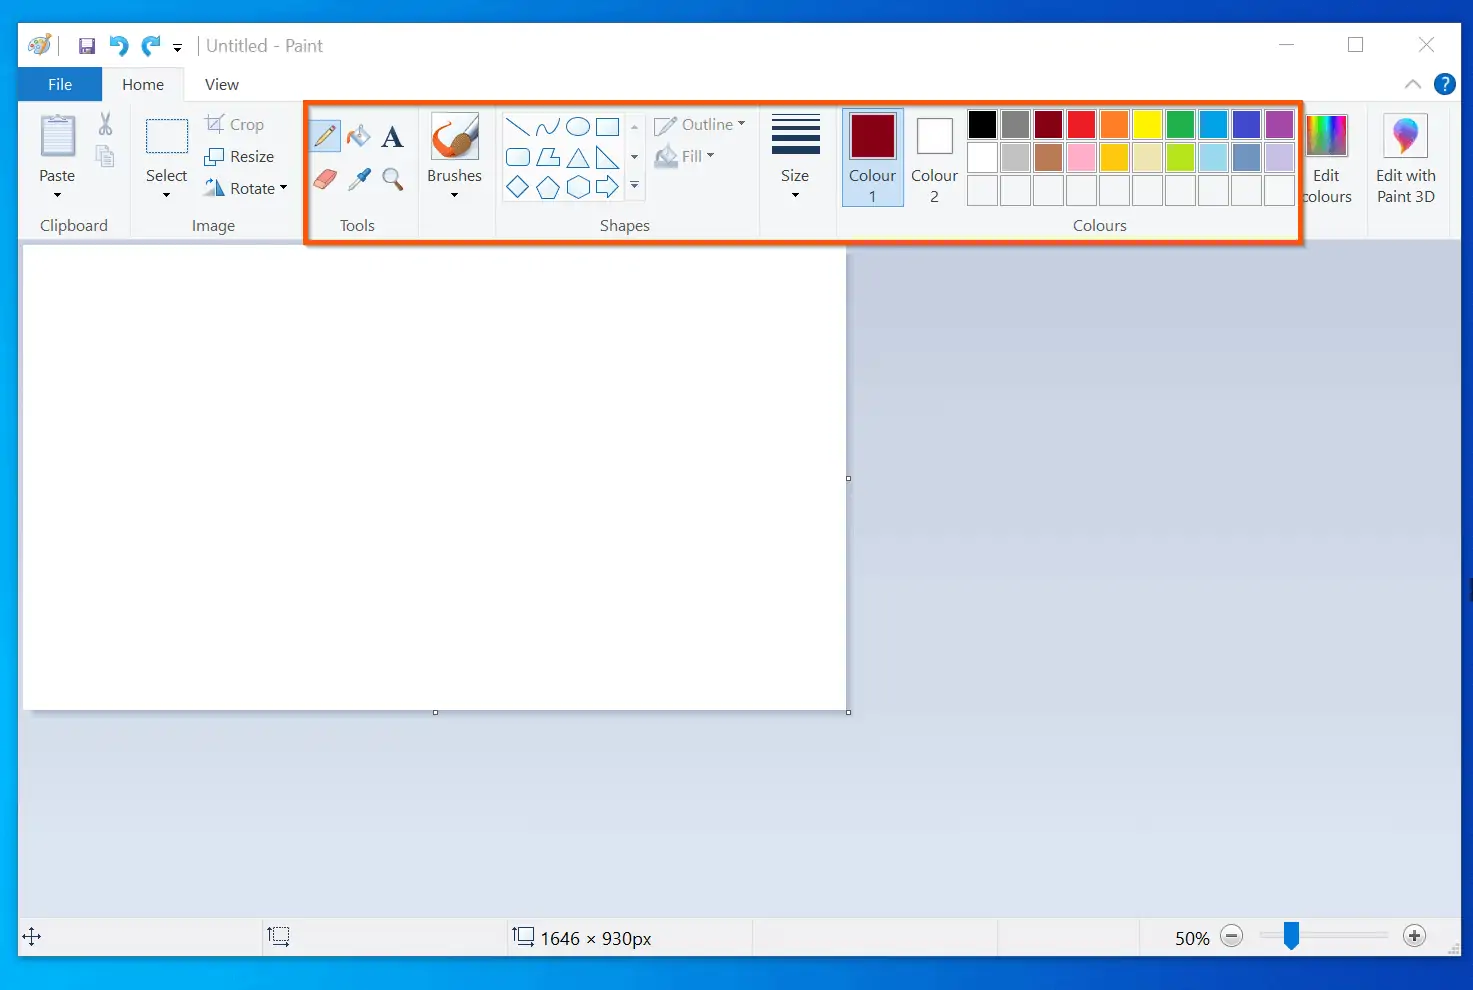
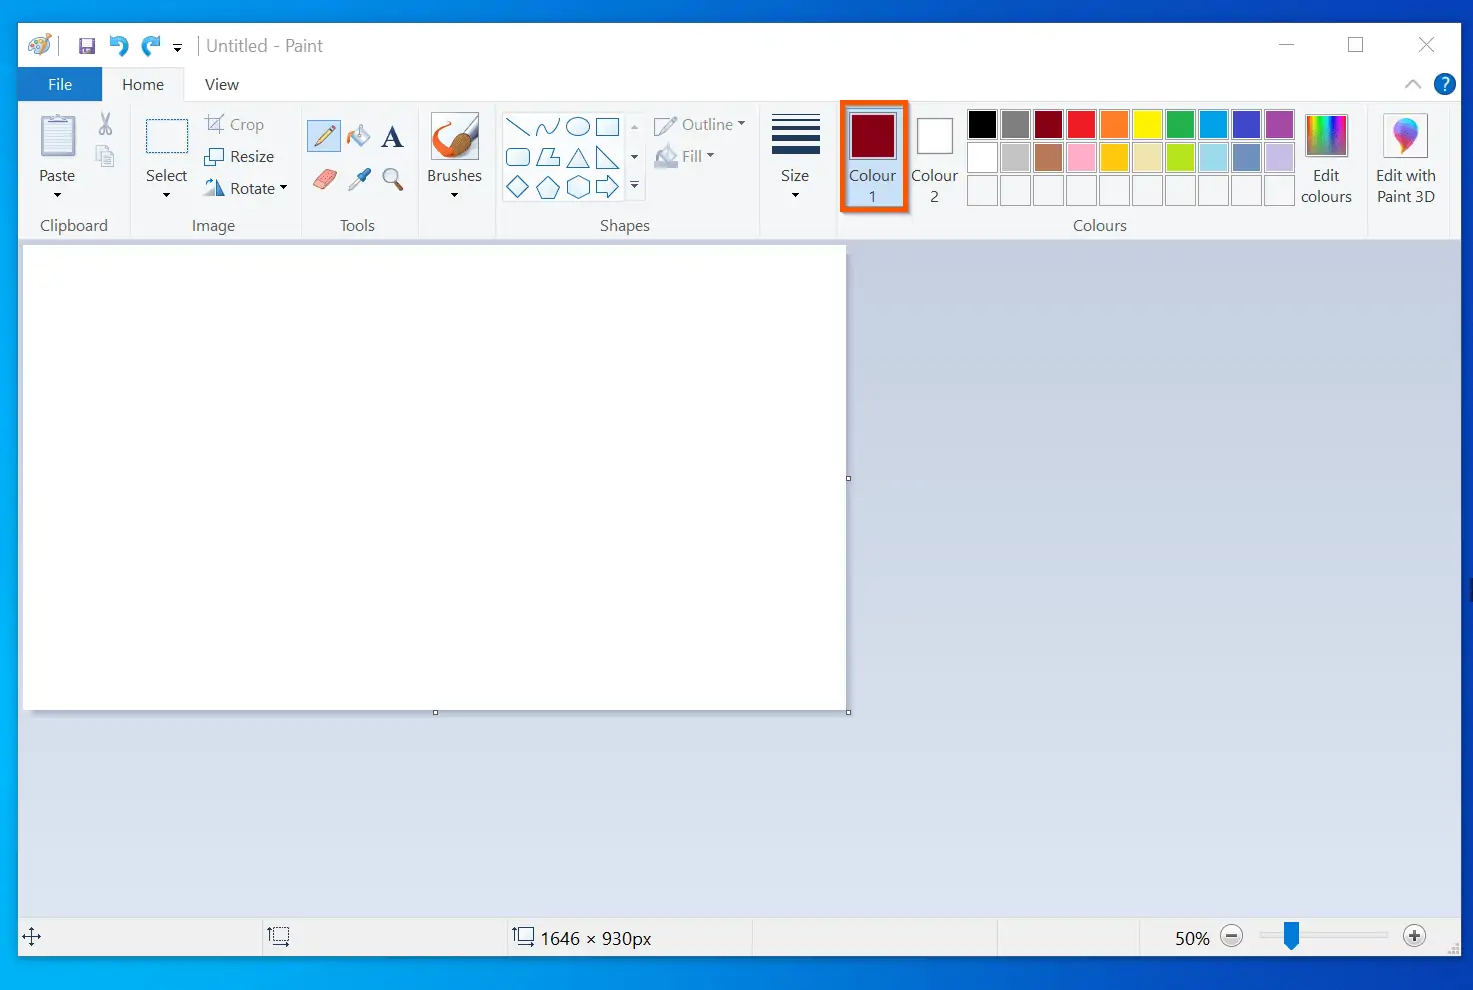
Before you start drawing, your first task is to modify the foreground and background colors. The foreground color is highlighted in the screenshot below – deep red.
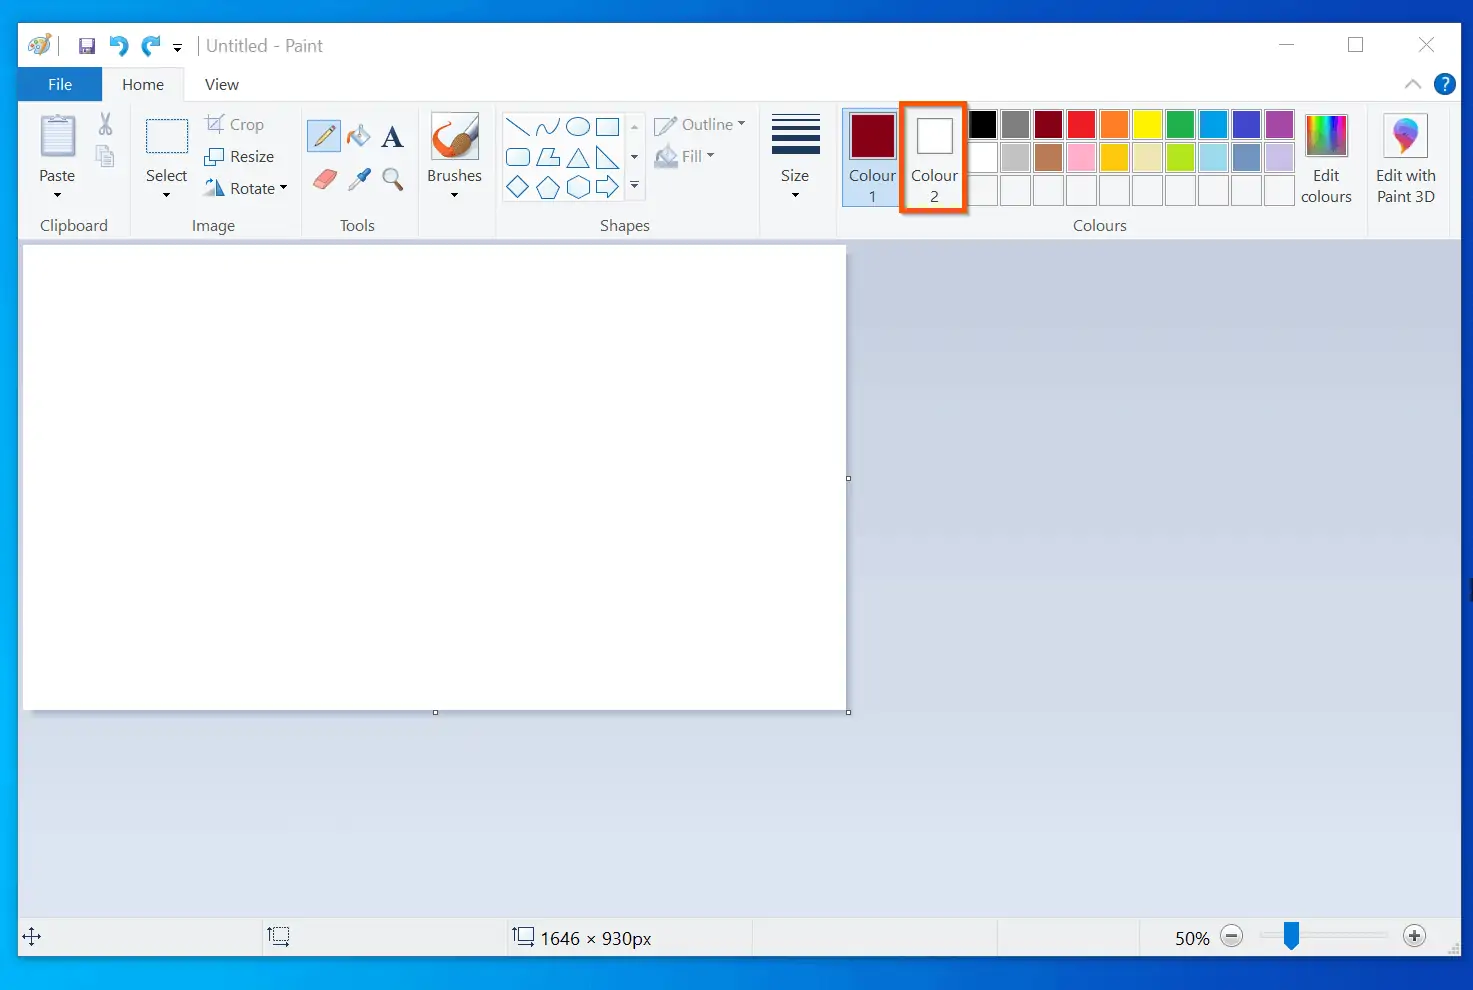
This is the primary color of your drawing. The second screenshot below highlights the background color – white.
To change any of these colors, click on it. Then, from the displayed colors, select your preferred color.
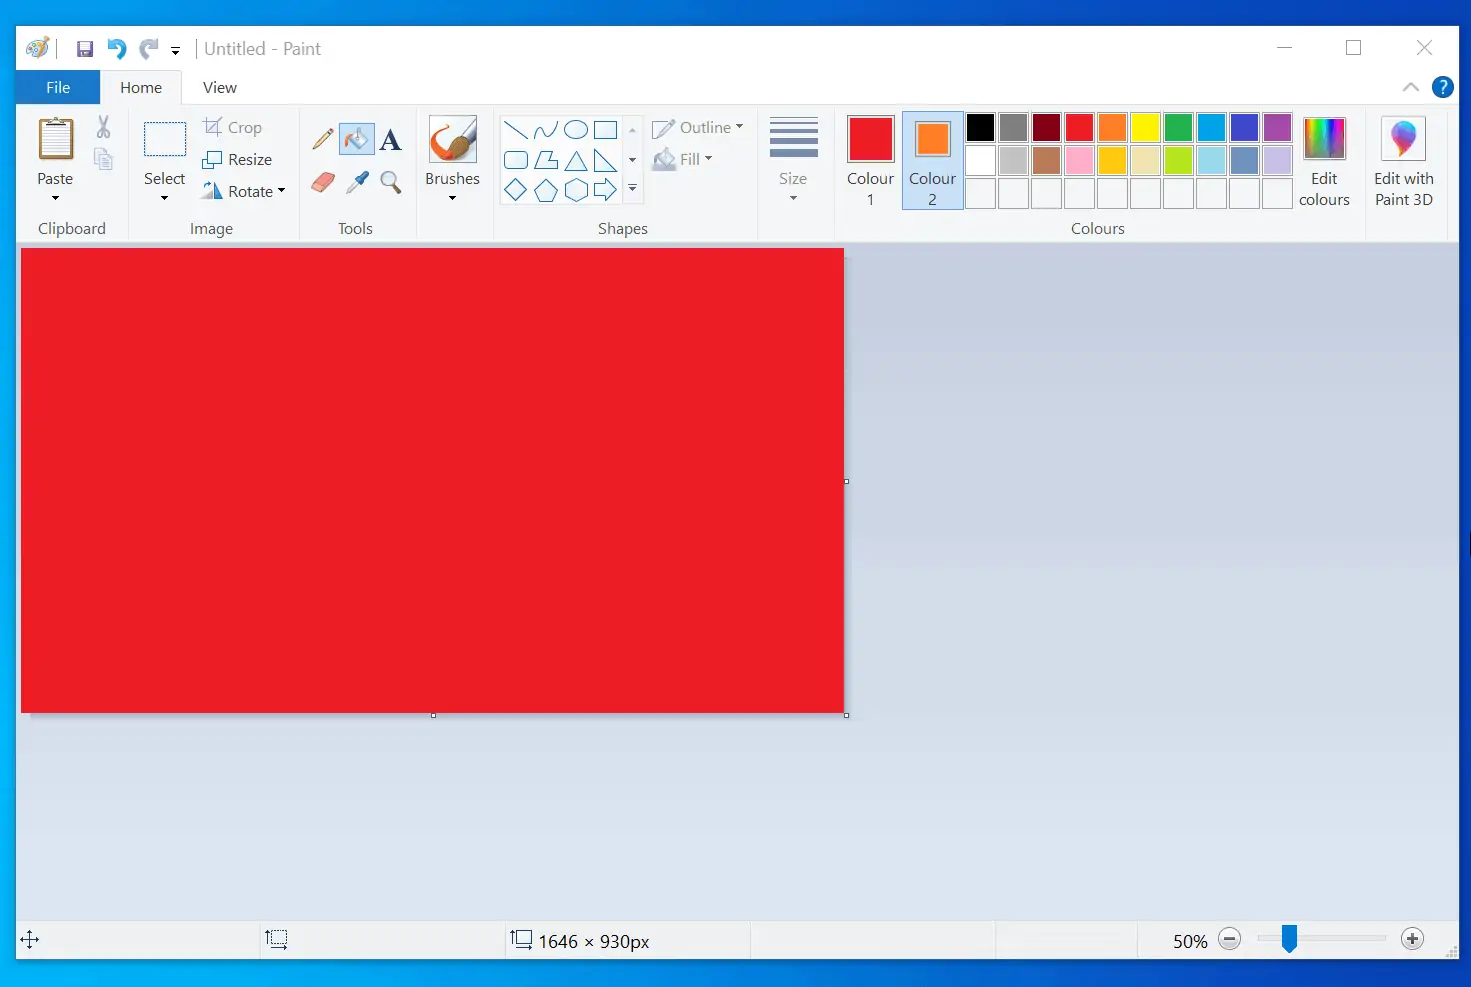
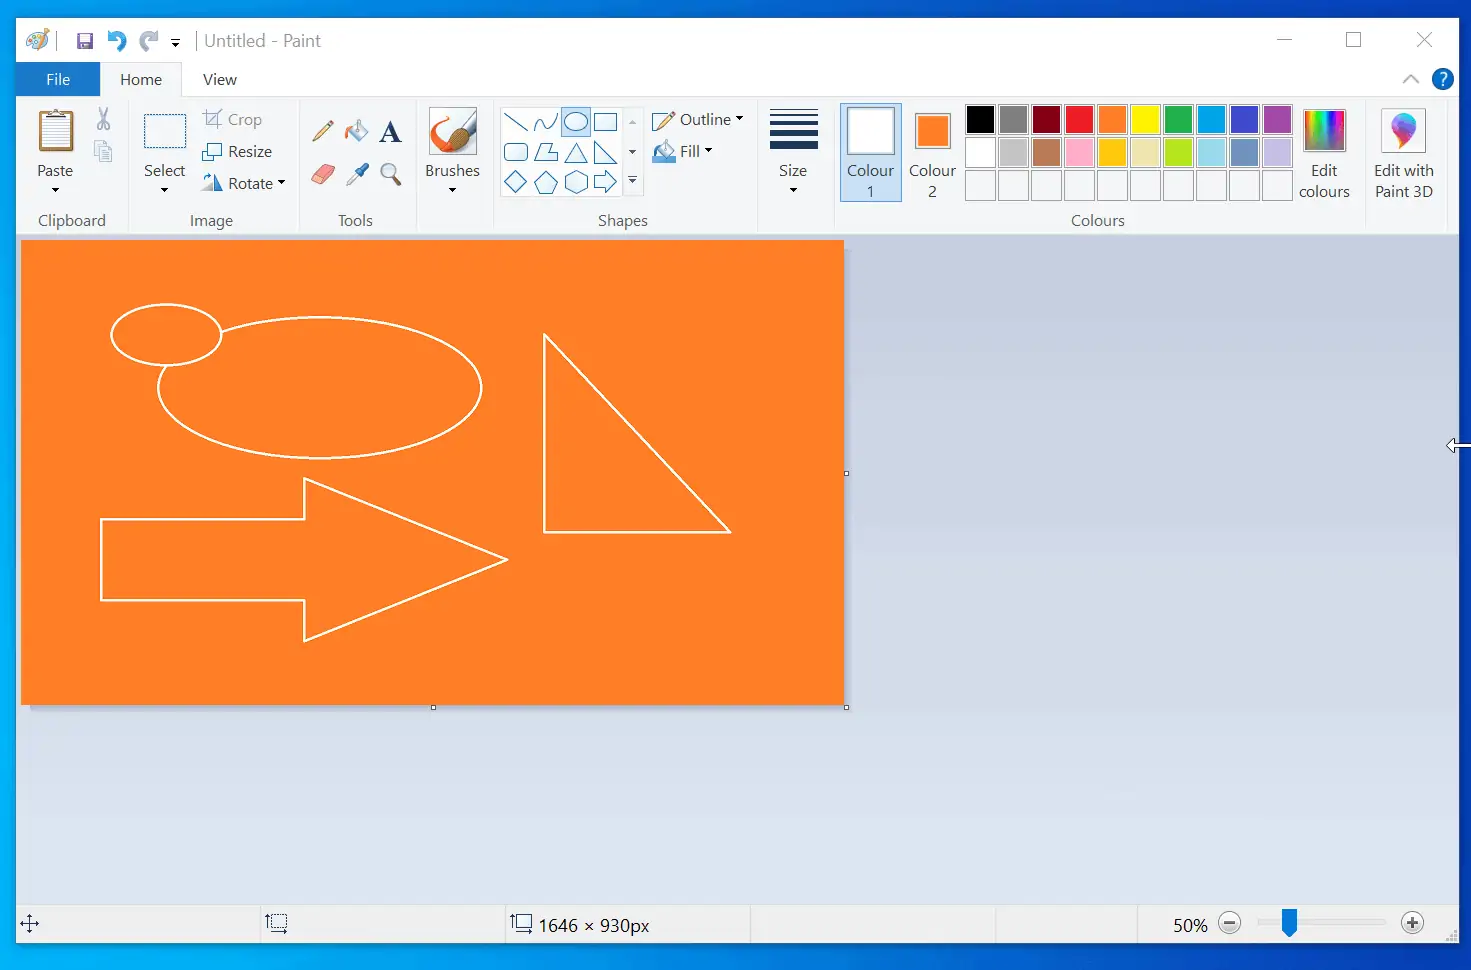
After selecting your preferred colors, you may want to change the color of the canvas. To change the color of your canvas:
- Click on Color 1 or Color 2 to select it. Then, on the Tools section, click on the Color-filler.
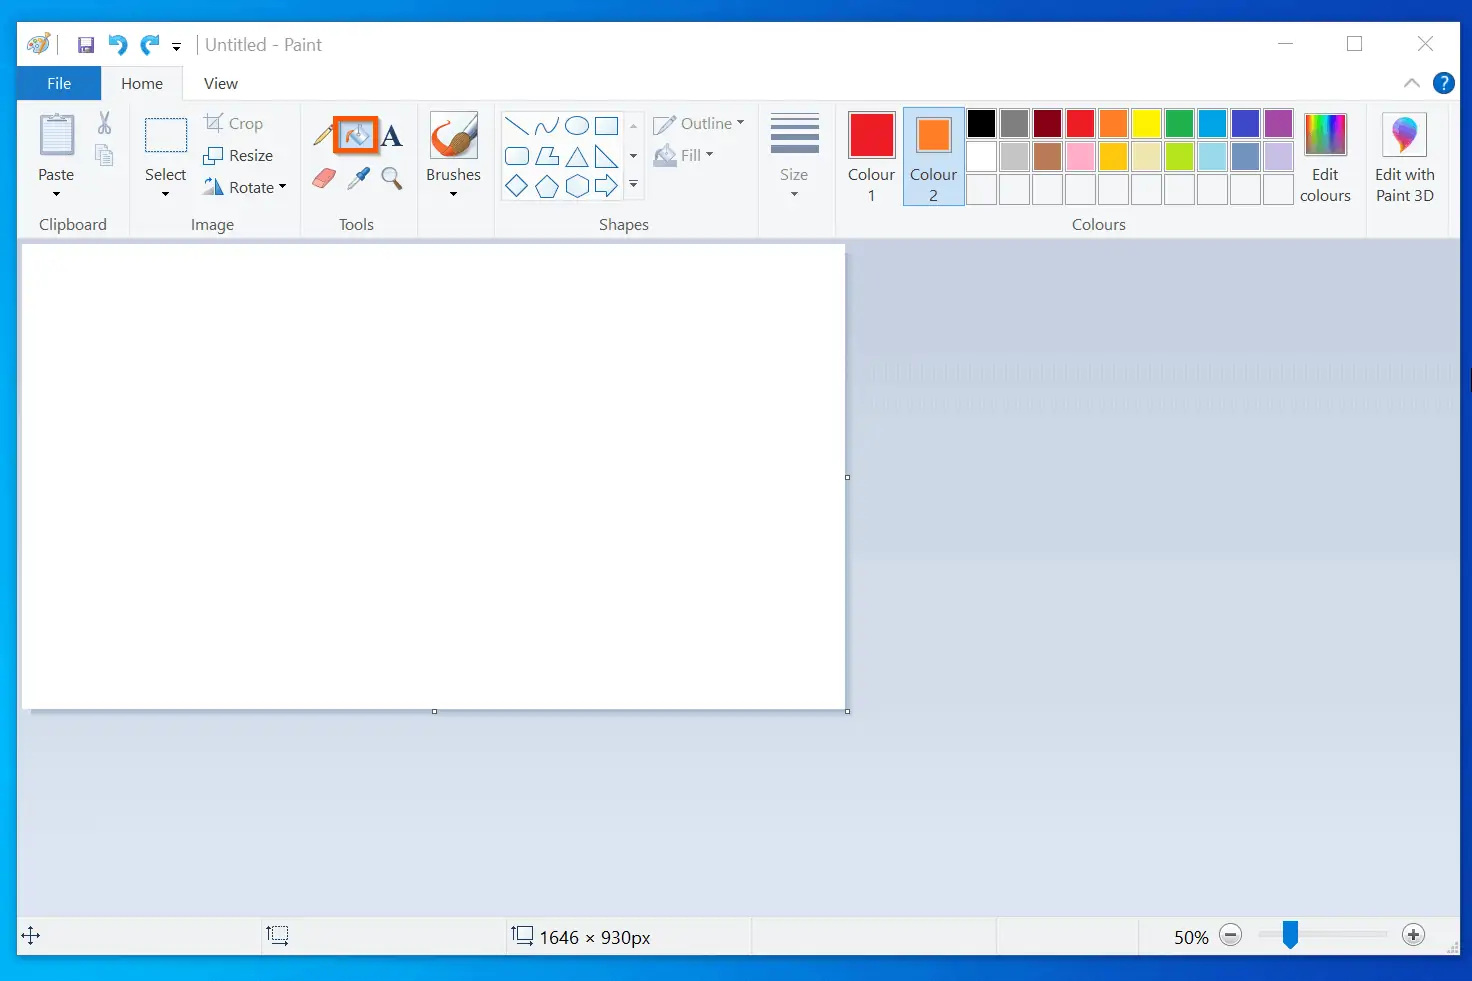
- Next, to fill the canvas with your foreground color, left-click the canvas. Alternatively, if you want to fill the canvas with the background color, right-click on the canvas.

Now, to the Windows 10 Paint help for this section – learning to draw!
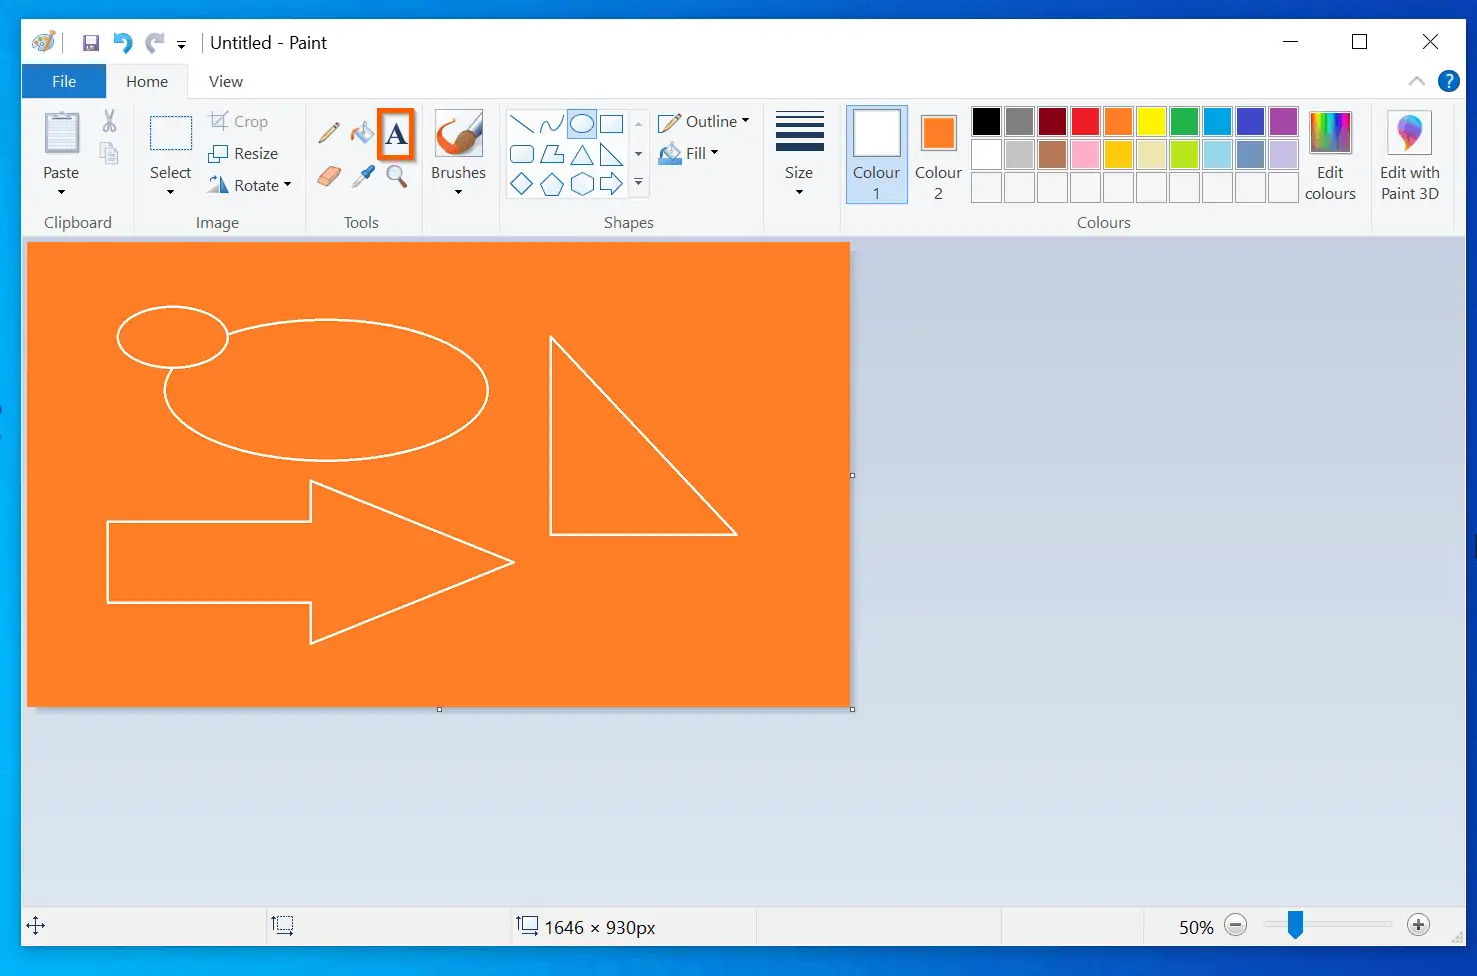
To draw free-hand, select a foreground color, and click the pencil tool. Then, draw freely within the canvas.
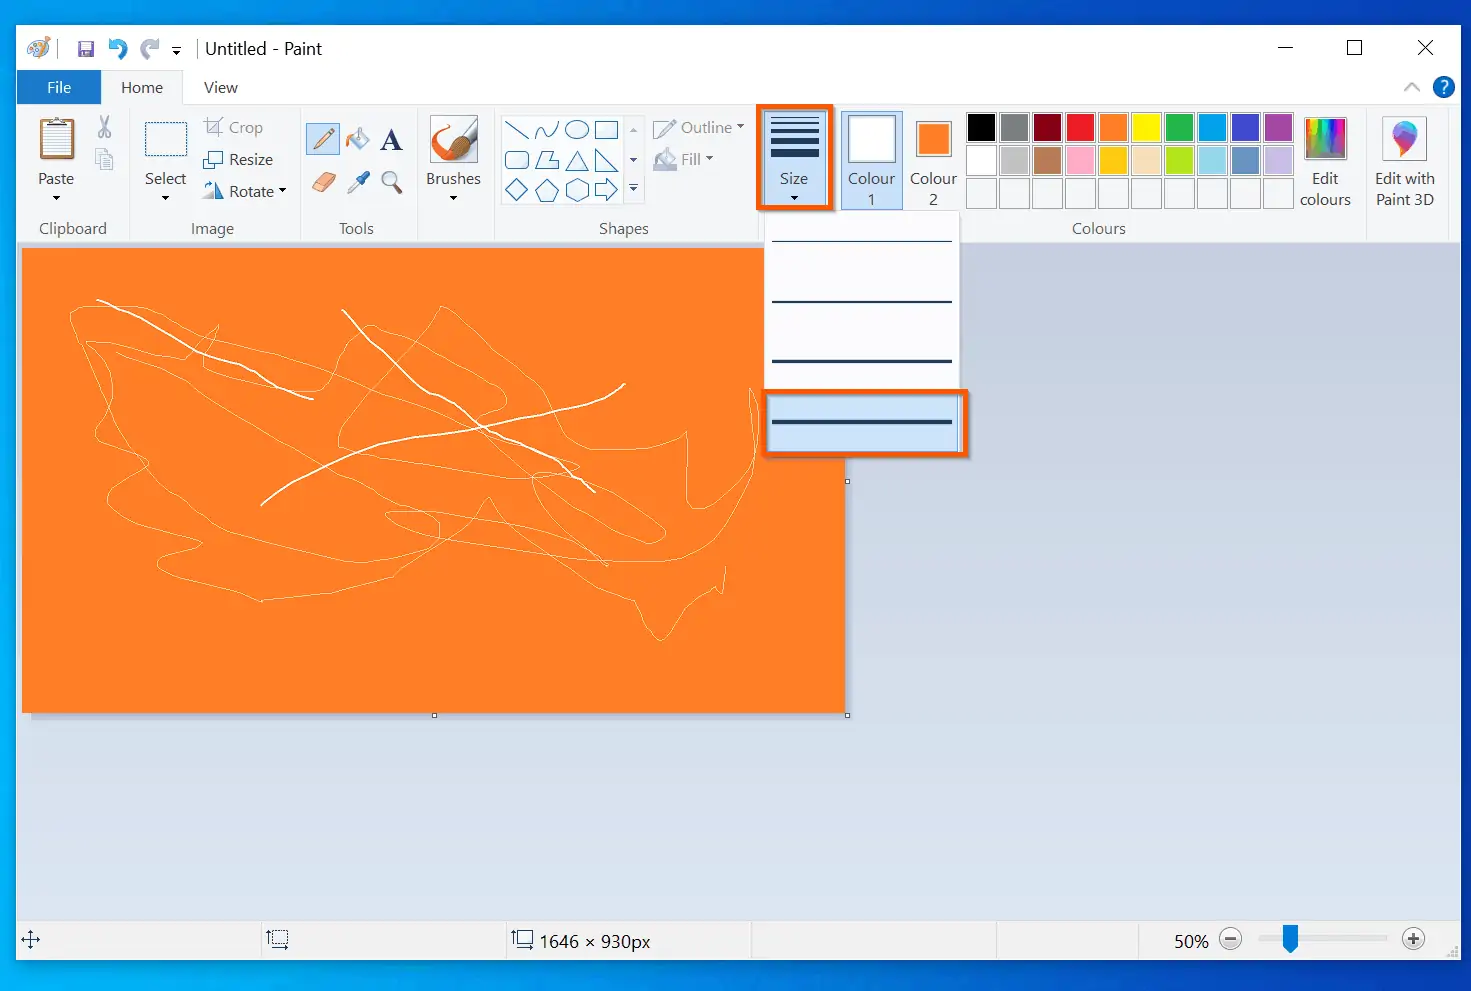
To adjust the line width, before you start drawing, click the Size drop-down and select a desired line width. In the screenshot below, the thicker white line is drawn with the wider size I selected.
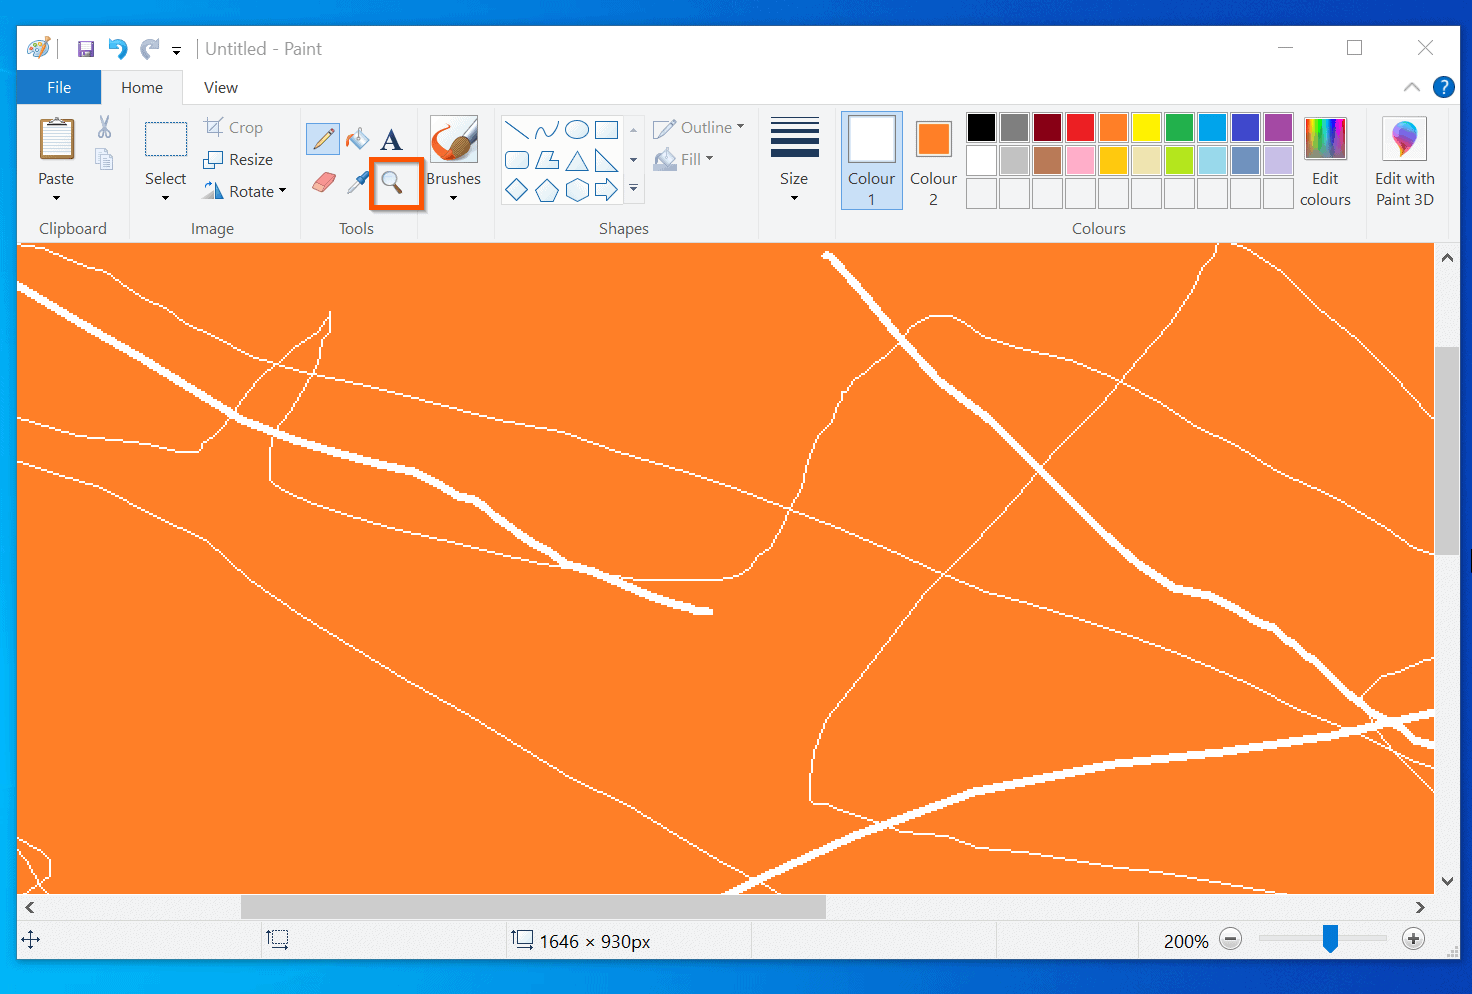
Finally, to expand your work, click the magnifier tool.
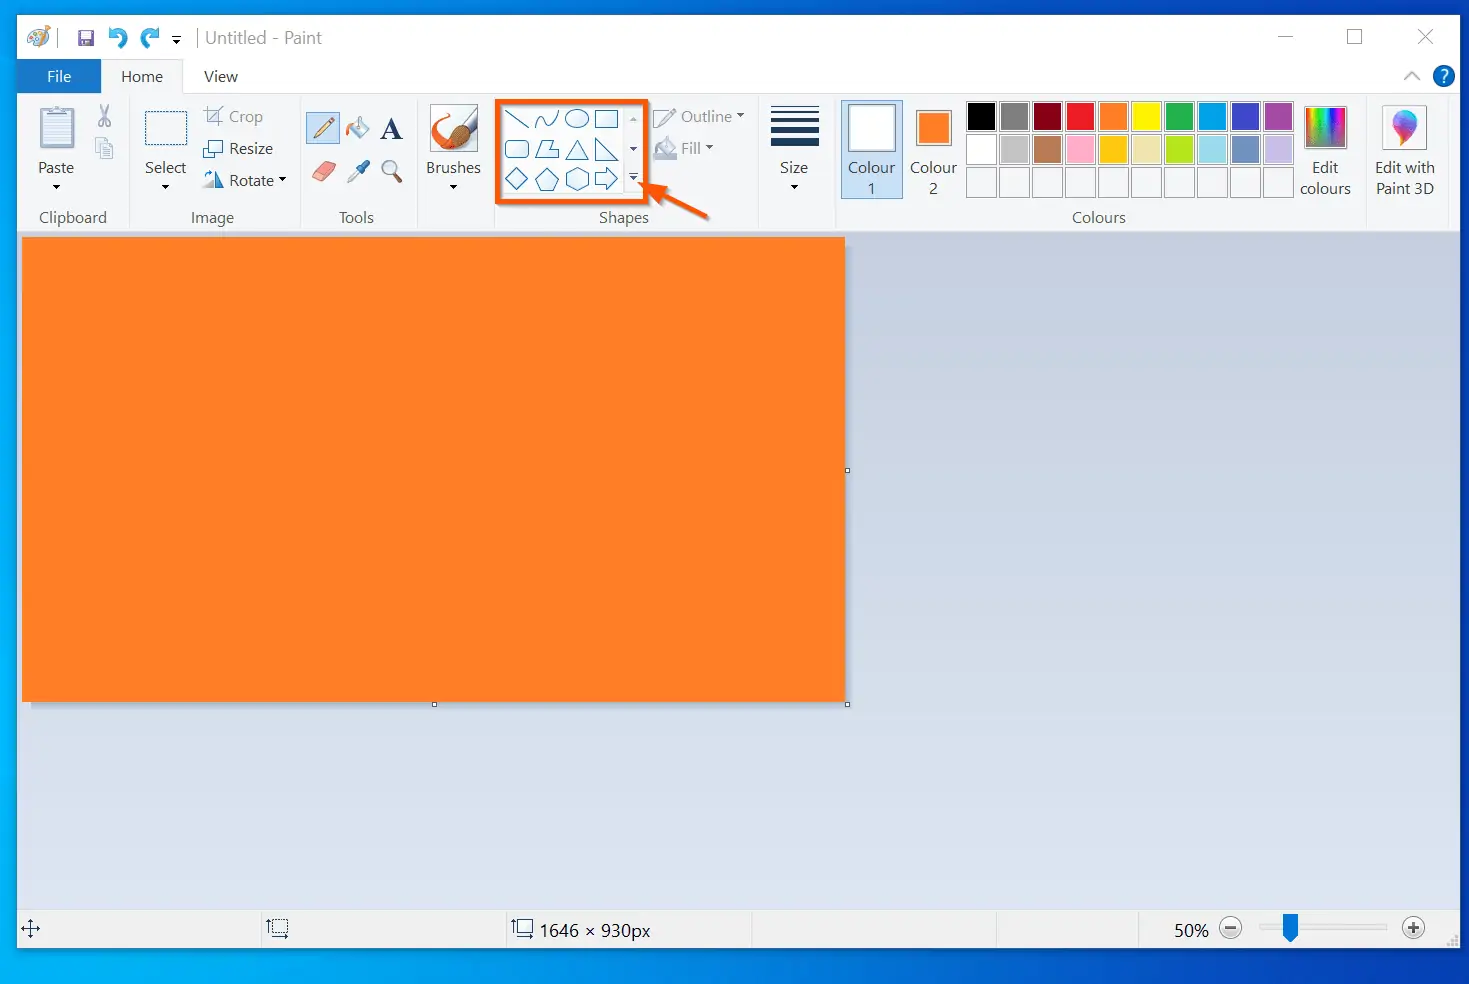
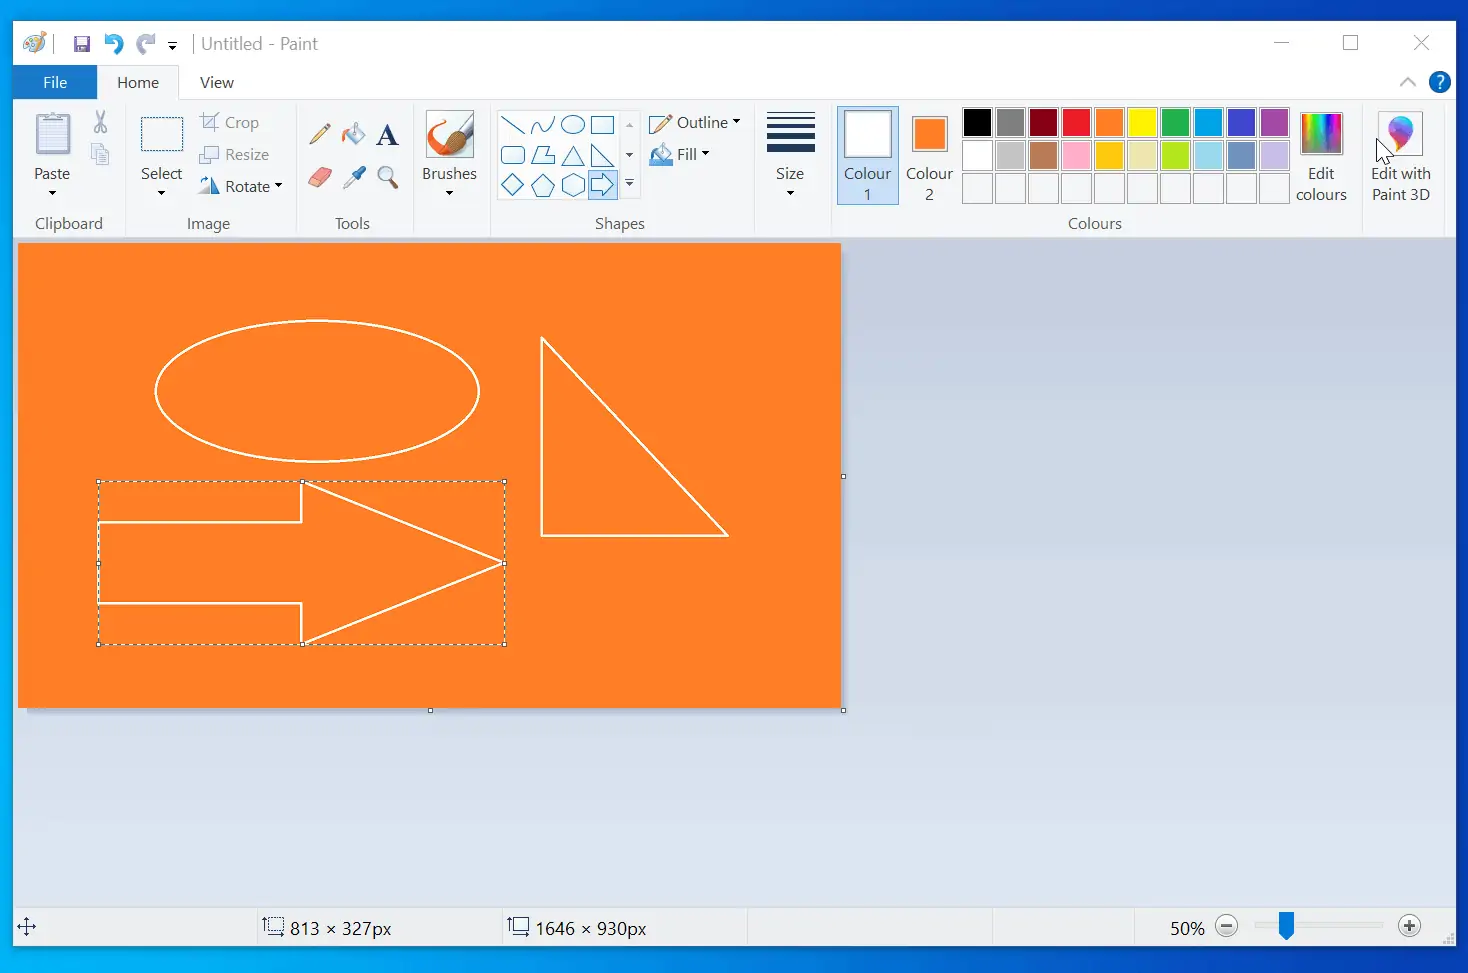
How to Draw Shapes in Windows Paint
Another important Windows 10 help topic is learning how to draw shapes with Microsoft Paint.
To draw shapes, click the shape you want to draw. Then, drag your mouse on the part of the canvas you want to draw the shape.
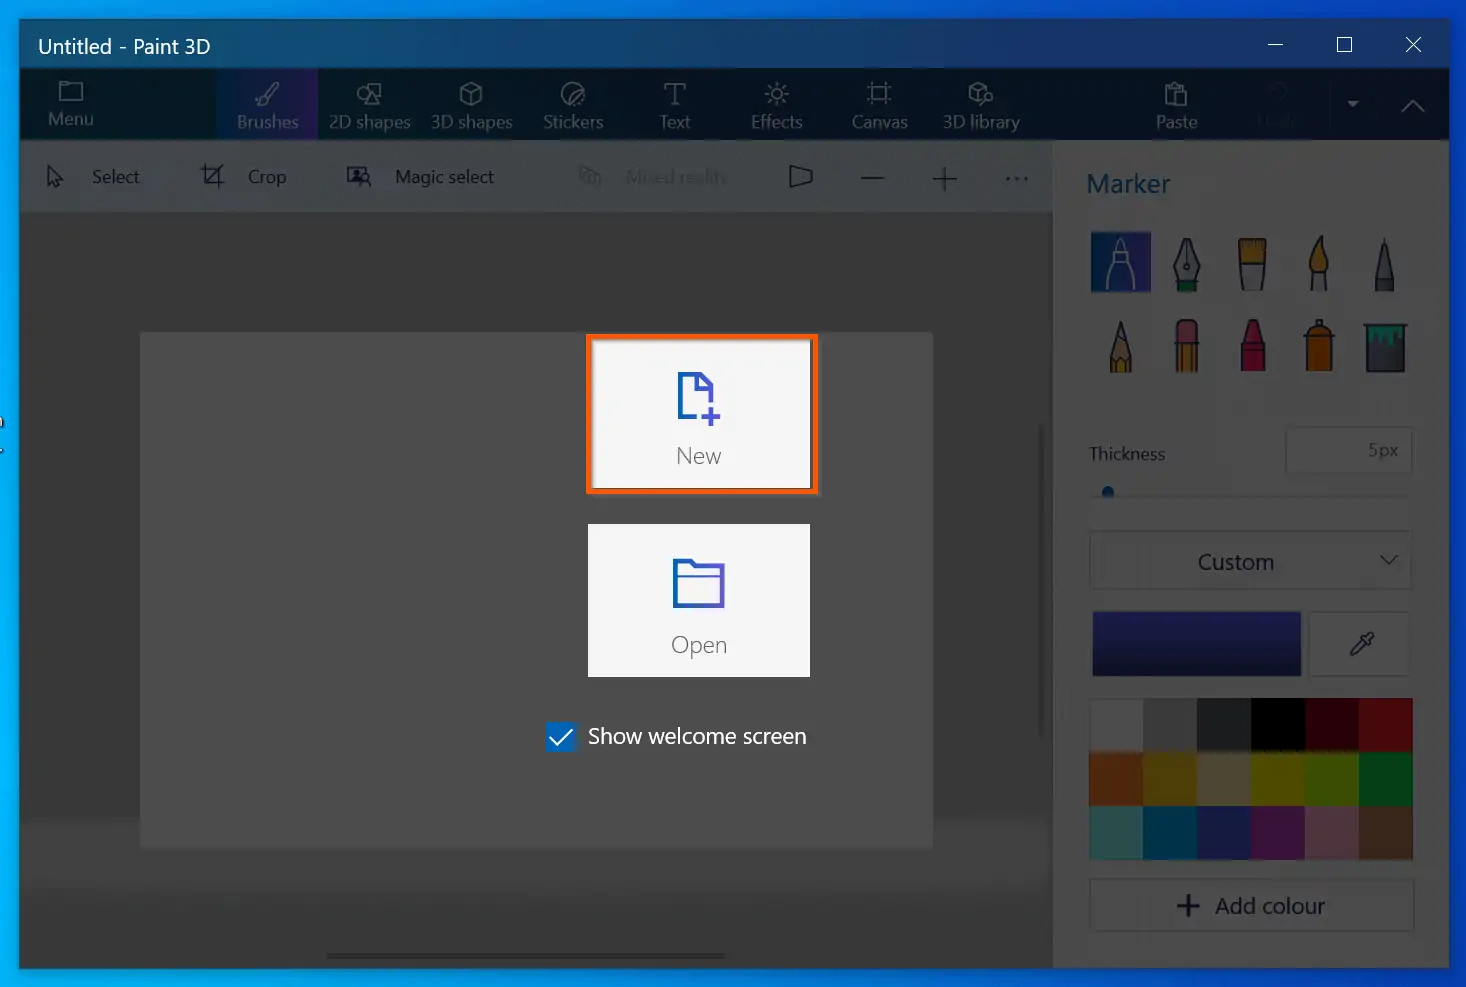
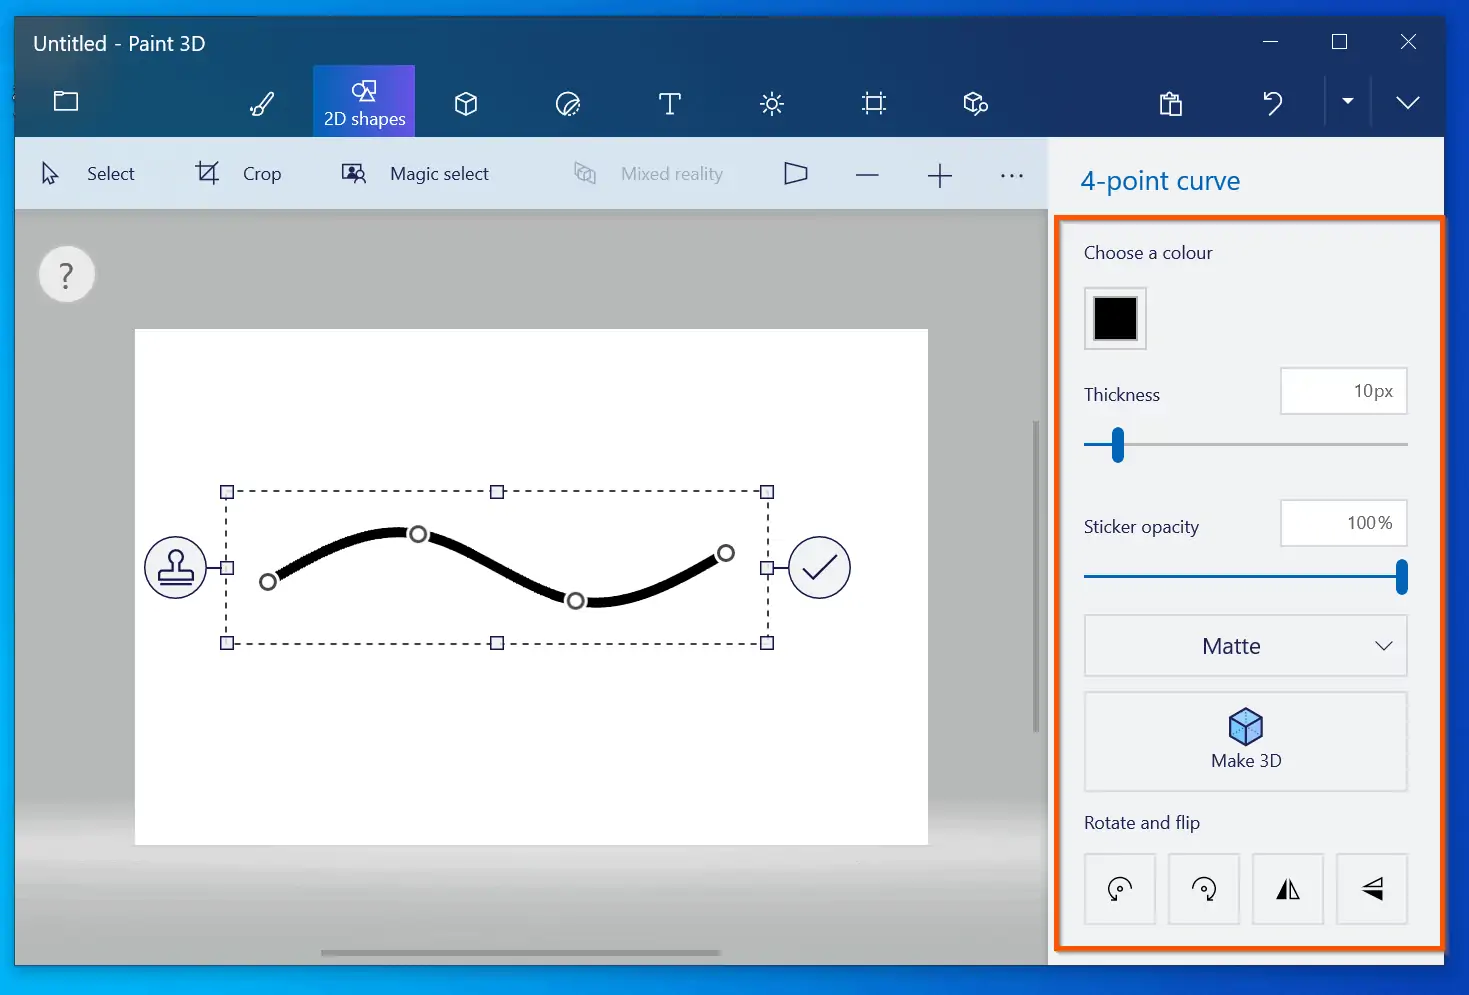
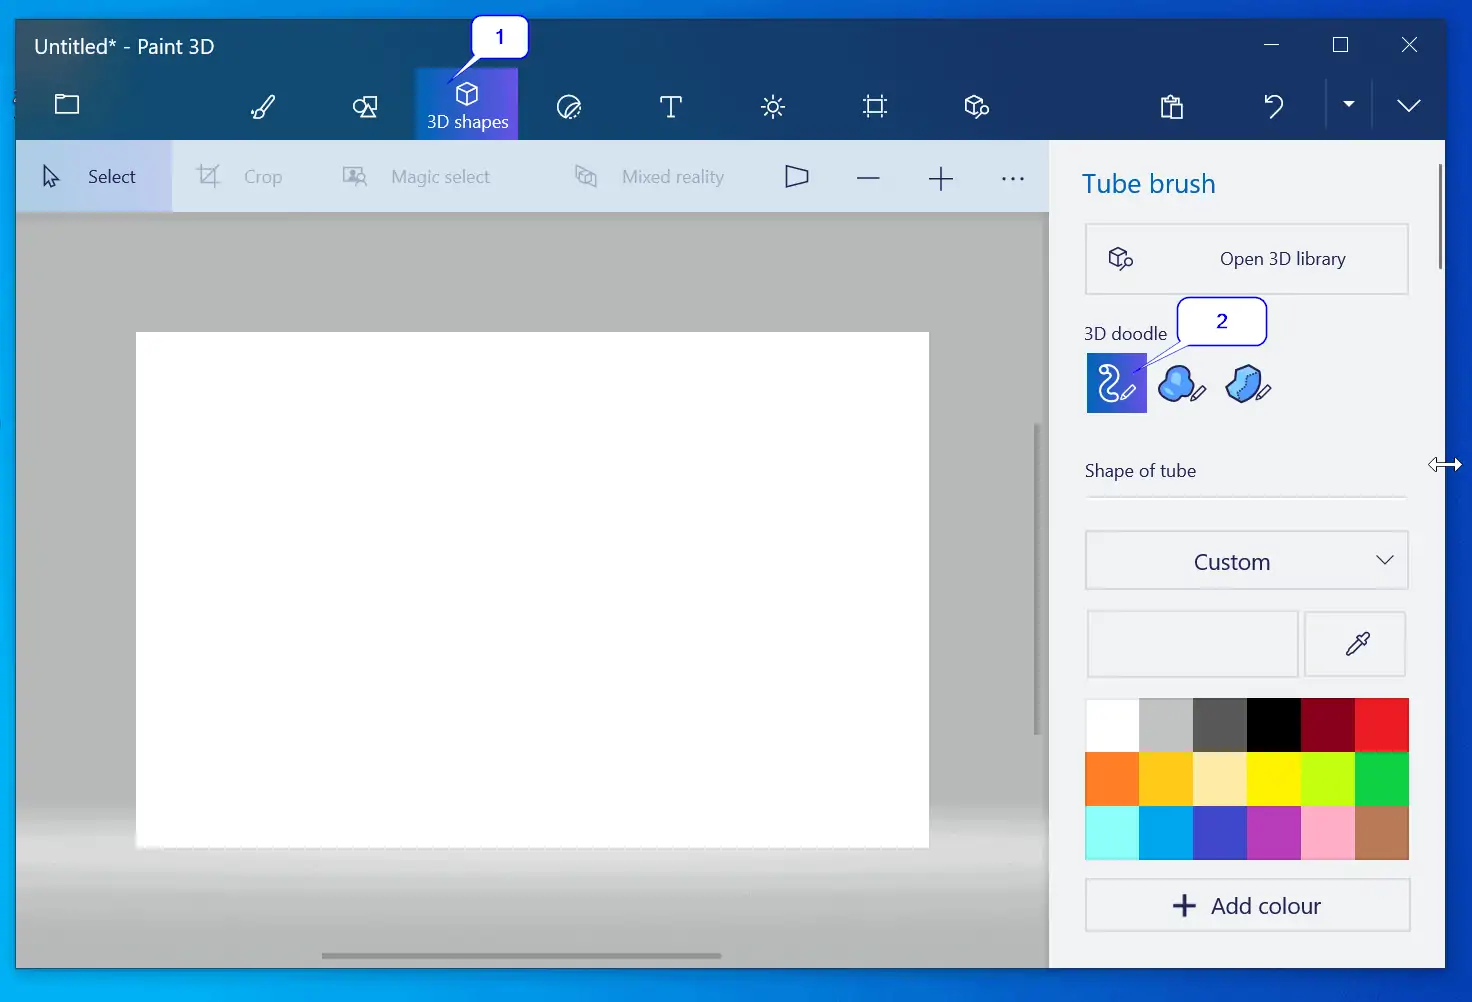
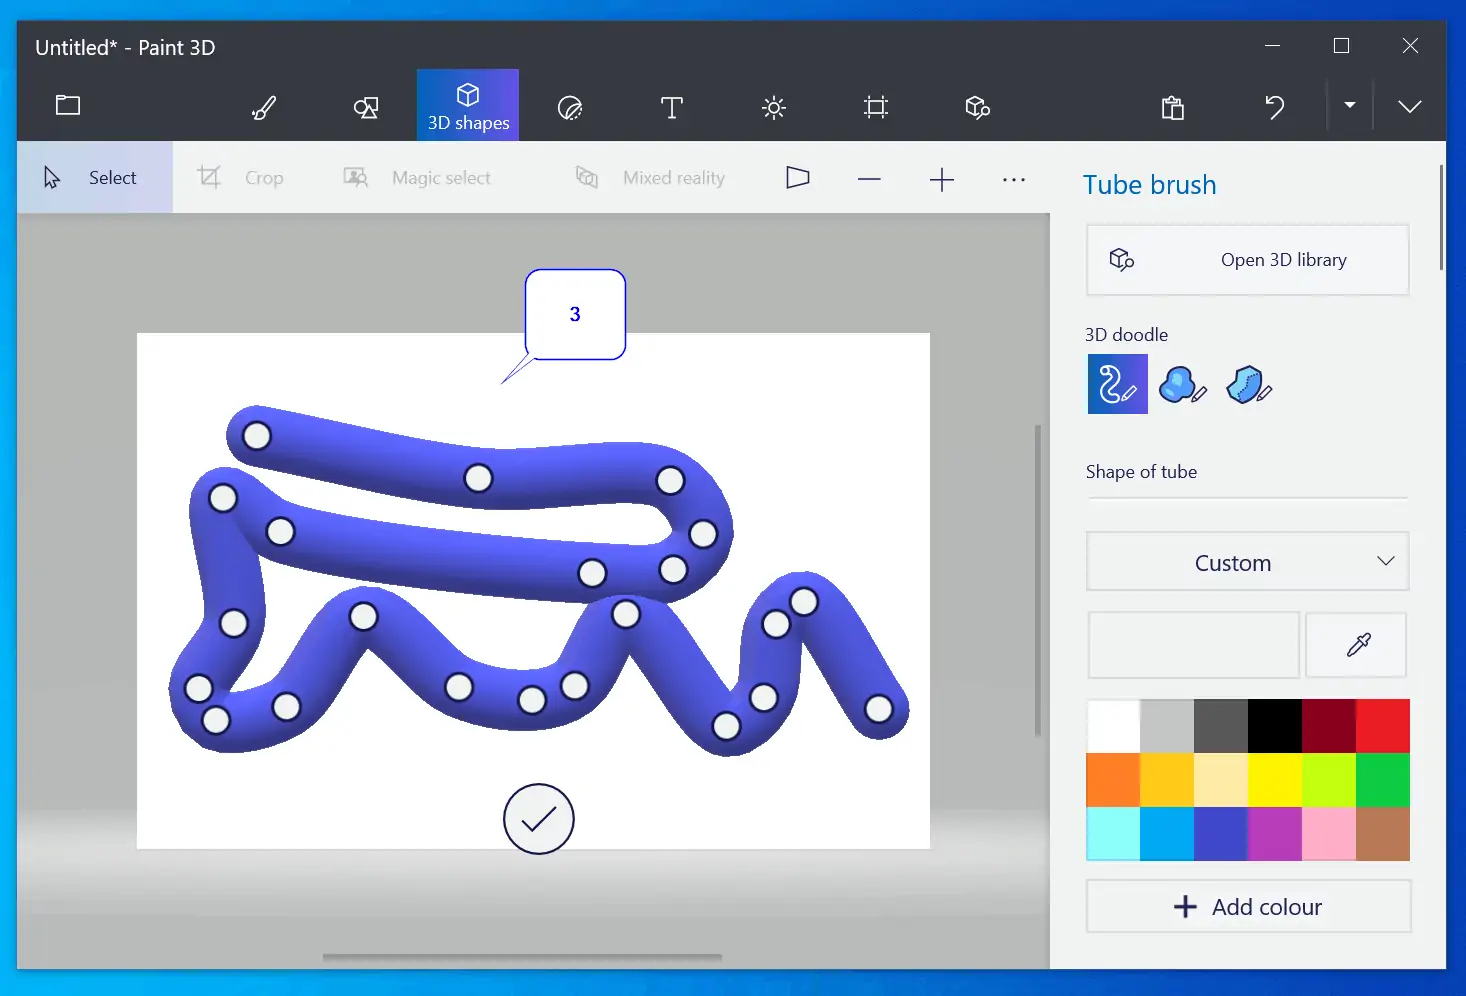
How to Draw Free Lines in Windows Paint 3D
- Open Paint 3D, then click New – to open a new document. Alternatively, if you have an existing image, click Open instead.
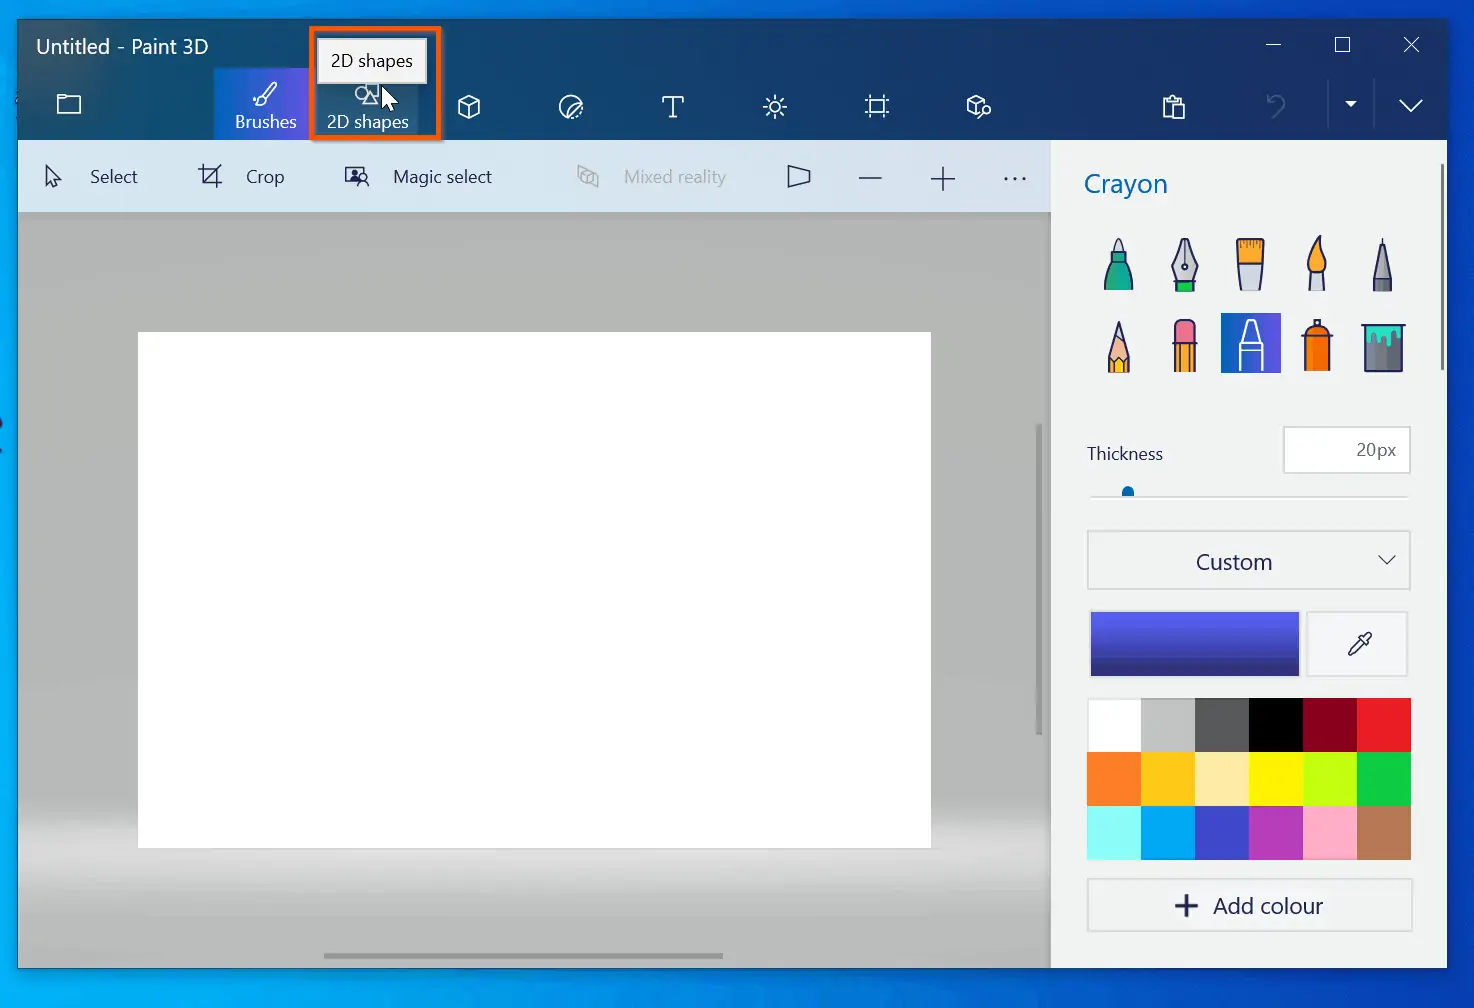
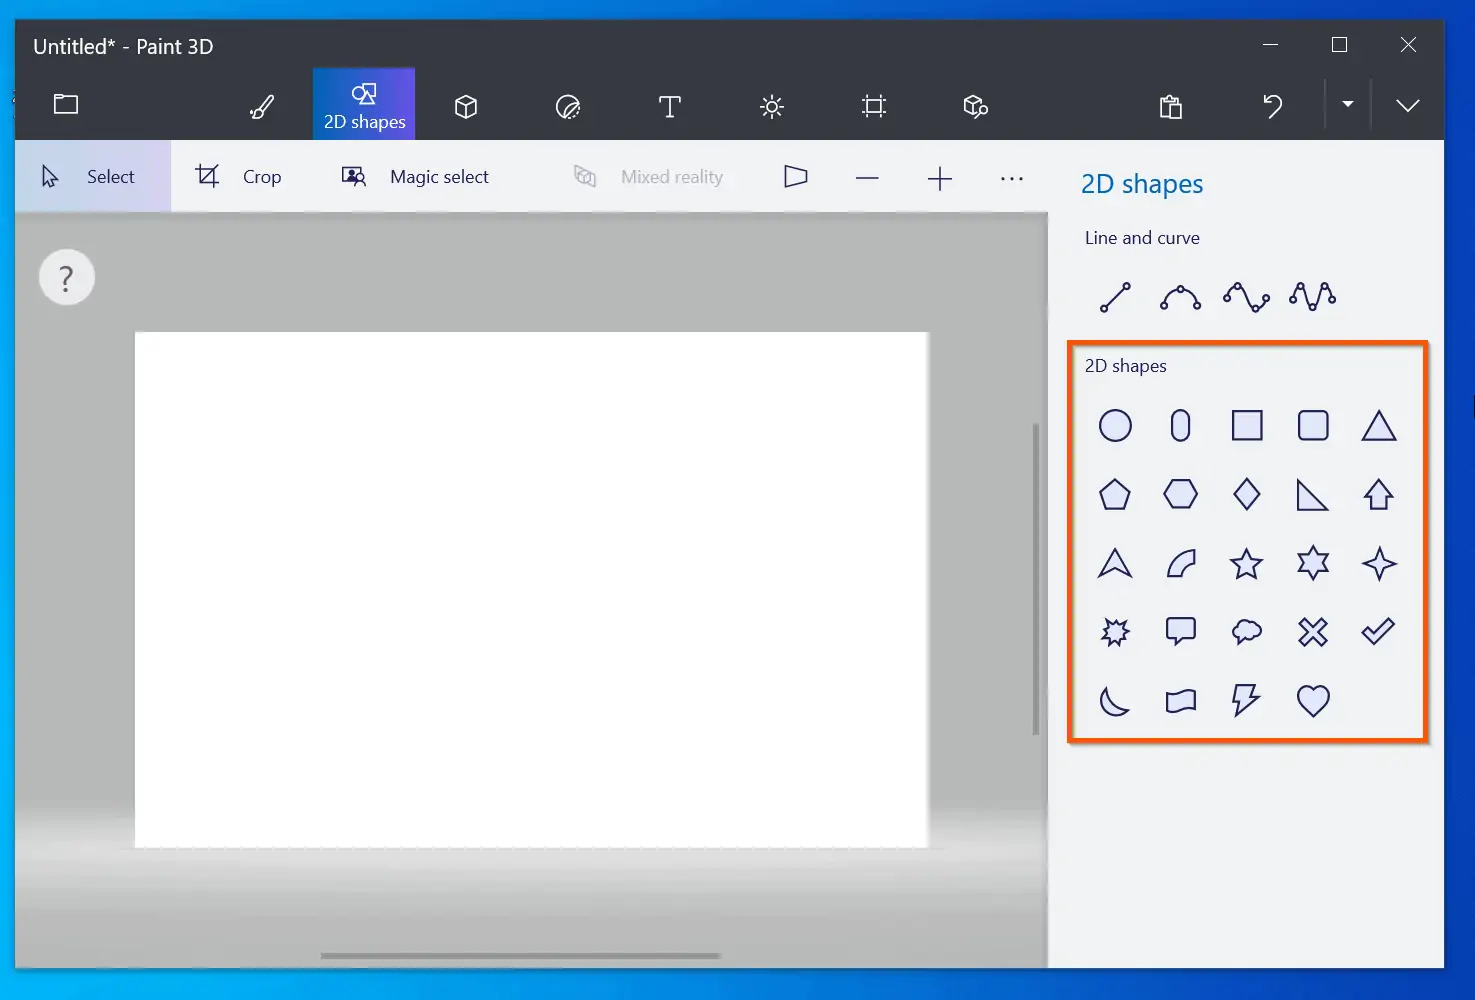
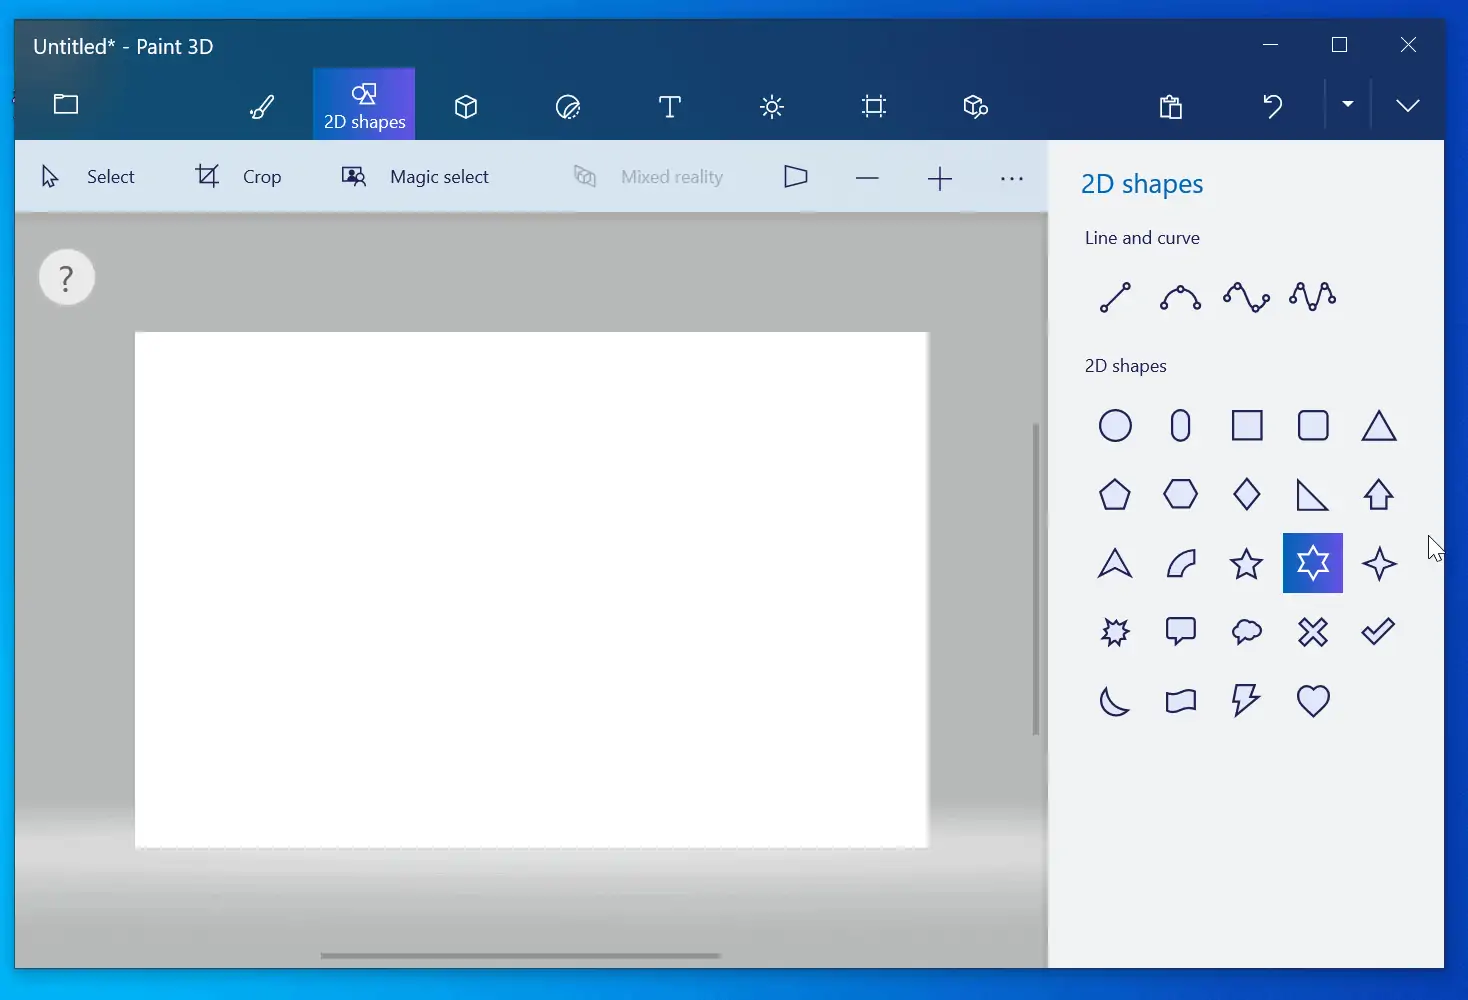
- Then, on the top menu of Paint 3D, click the 2D icon. When you click the 2D icon, Line and Curves will be displayed on the right pane.
- Click the line shape you want to draw. Then, within the canvas, draw freely.

- Once you draw your line, Paint 3D will display additional customization options on the right pane (highlighted in the screenshot below).
How to Draw 2D and 3D Shapes in Windows Paint 3D
This sub-section of the Windows 10 Paint help guide includes steps to create shapes in Paint 3D. Follow the steps below to create 2D or 3D shapes:
- On the top menu, click on the type of shape you want to draw – 2D or 3D. See the highlighted portion of the screenshot below. When you click on the icon, additional options will be displayed on the right pane of Paint 3D.
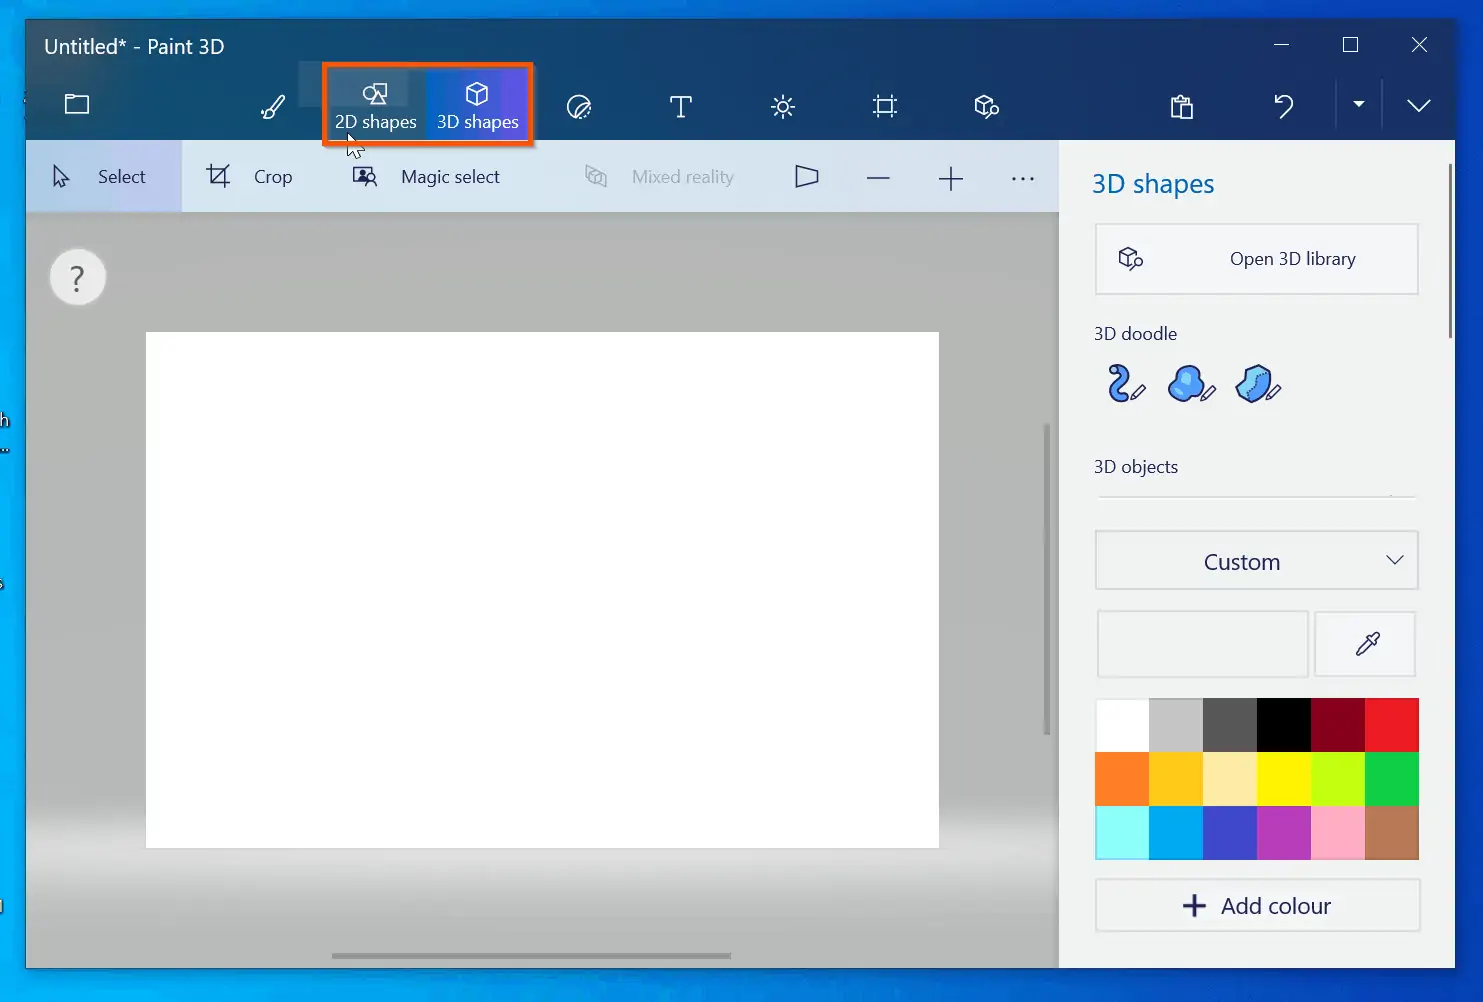
- Then, from the displayed options, click on the shape you wish to draw.
- Finally, to draw the 2D shape, click your mouse once at the location you want the shape in the canvas.
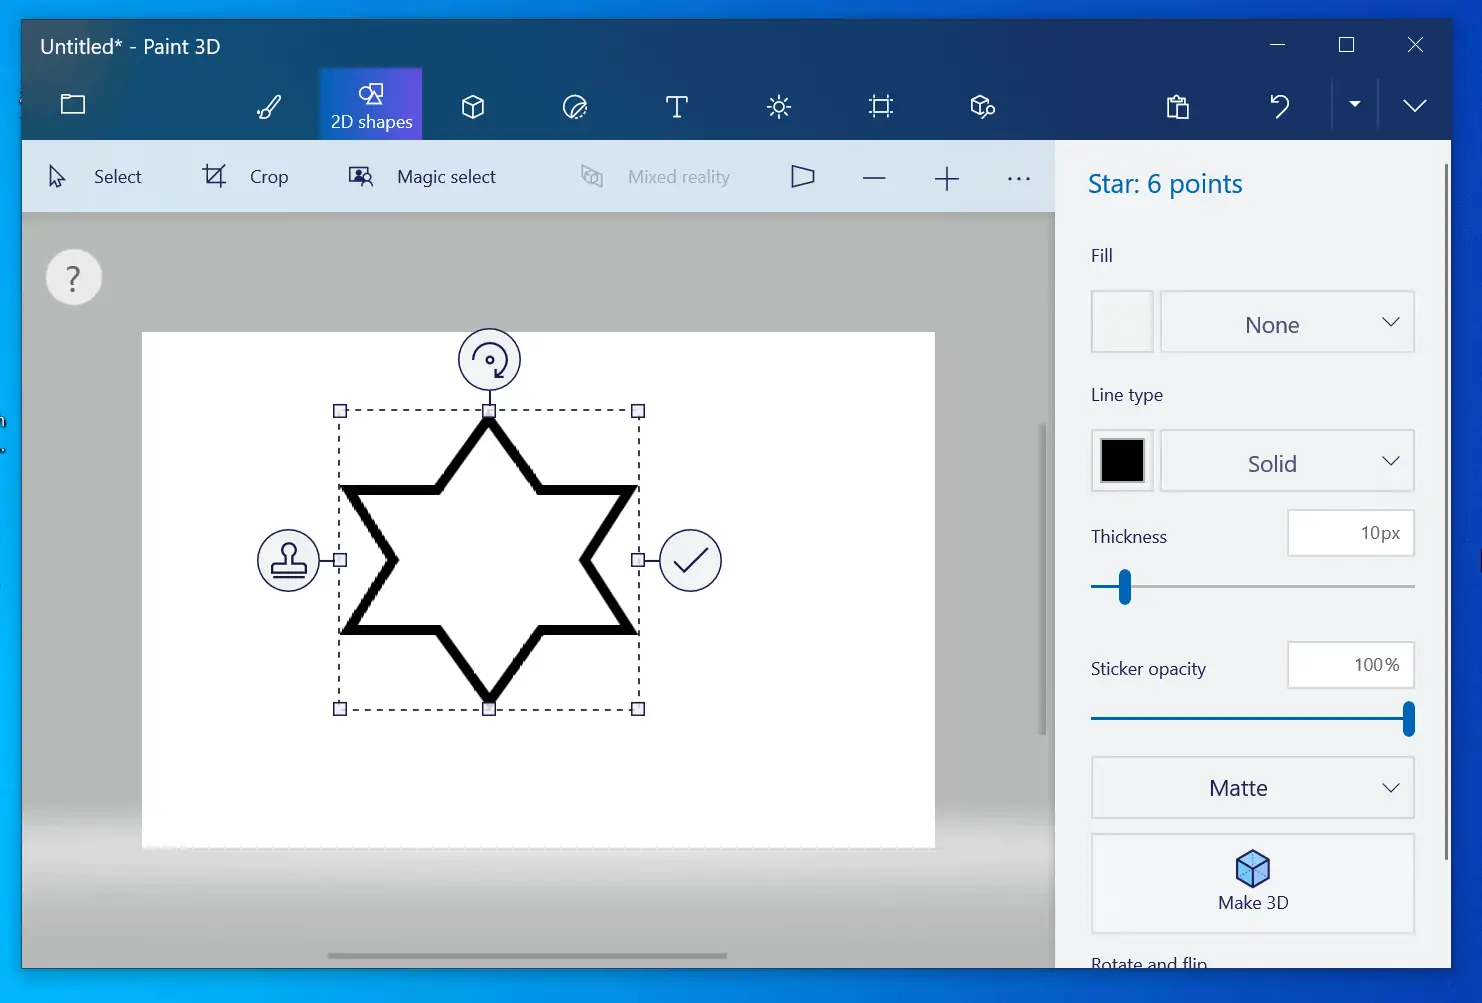
- Moreover, to draw 3D shapes in Paint 3D, on the top menu, click the 3D icon. Then, on the right-pane, click on the 3 shape you wish to draw. Finally, click anywhere within the canvas to draw the shape.
If you need help with drawing lines and shapes in Windows 10 Paint, you may also need help erasing drawings.
The next 2 sub-sections offer detailed help to erase drawing from Microsoft Paint and Paint 3D.
How to Erase in Windows Microsoft Paint
To erase portions of your drawing in Paint, follow the steps below:
- On the Tools section, click the Rubber tool.
- Then, run your mouse on the part (s) of the drawing you want to erase.

How to Add Texts in Paint and Paint 3D
Have you been trying to figure out how to add text in Paint? Lighten up as this part of our Windows 10 Paint help guide simplifies this topic.
This section is divided into 2 sub-sections – the first sub-section covers steps to add texts in Microsoft Paint. Furthermore, the second sub-section covers steps to add texts in Microsoft Paint 3D.
How to Add Texts in Microsoft Paint
- On the Tools section, click the Text tool.
- Then, drag your mouse on the portion of the canvas you want to add some texts.

- To add a text, within the text tool in the canvas, type as normal.
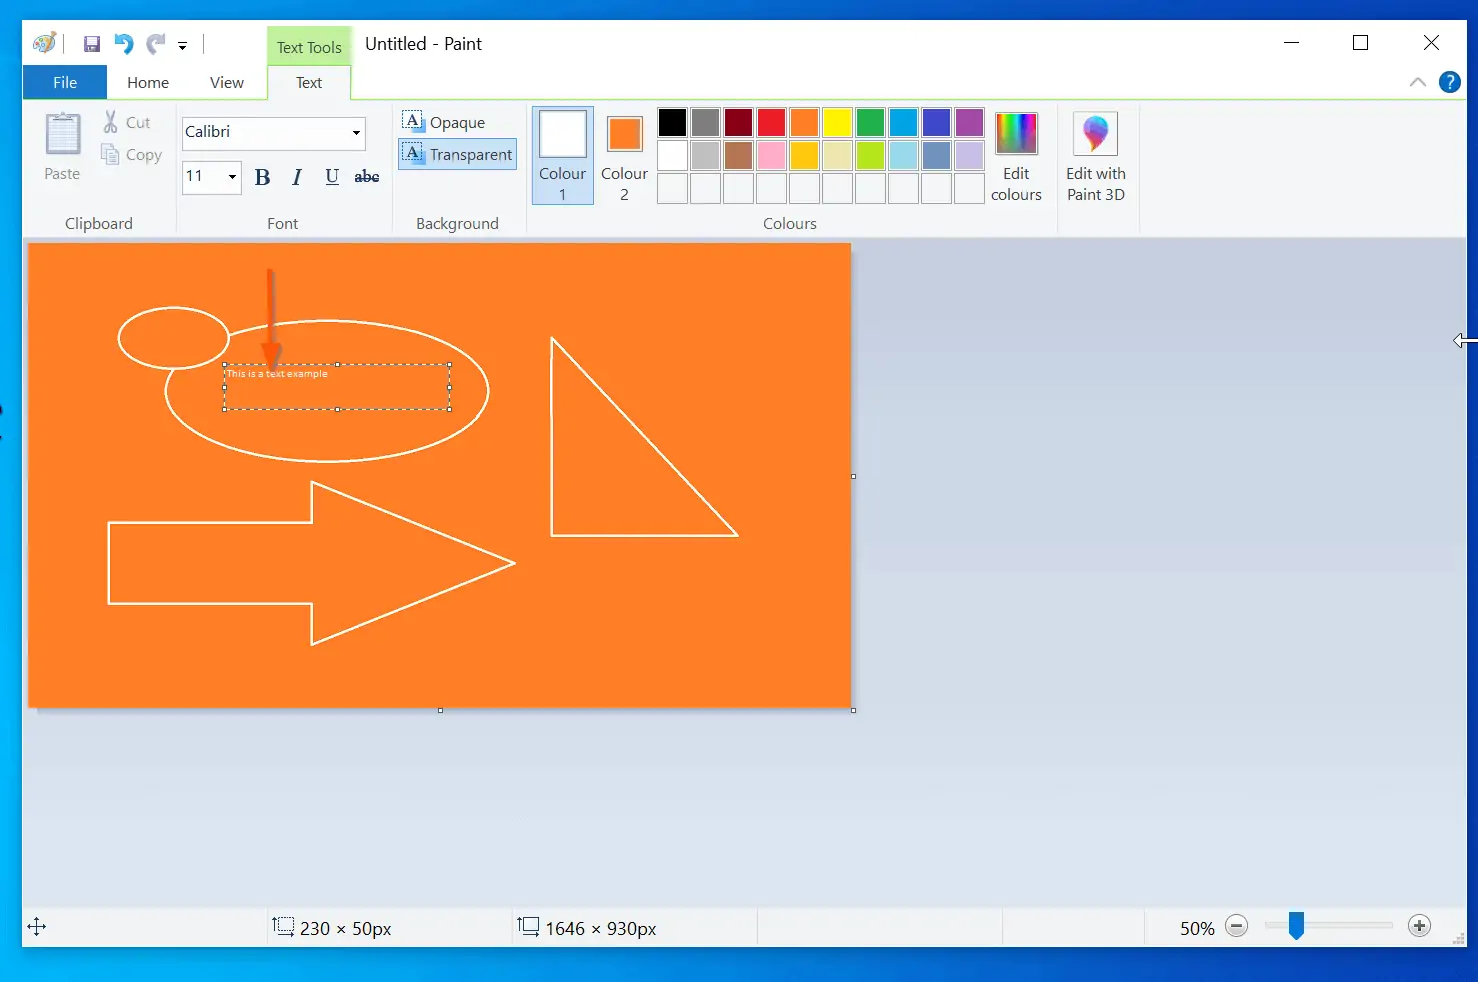
- Initially, the text font size may be very small. To increase the font, highlight the whole text (click and drag). Then, click the font size drop-down (mine is displaying 11 in the screenshot below), and select a bigger font size.
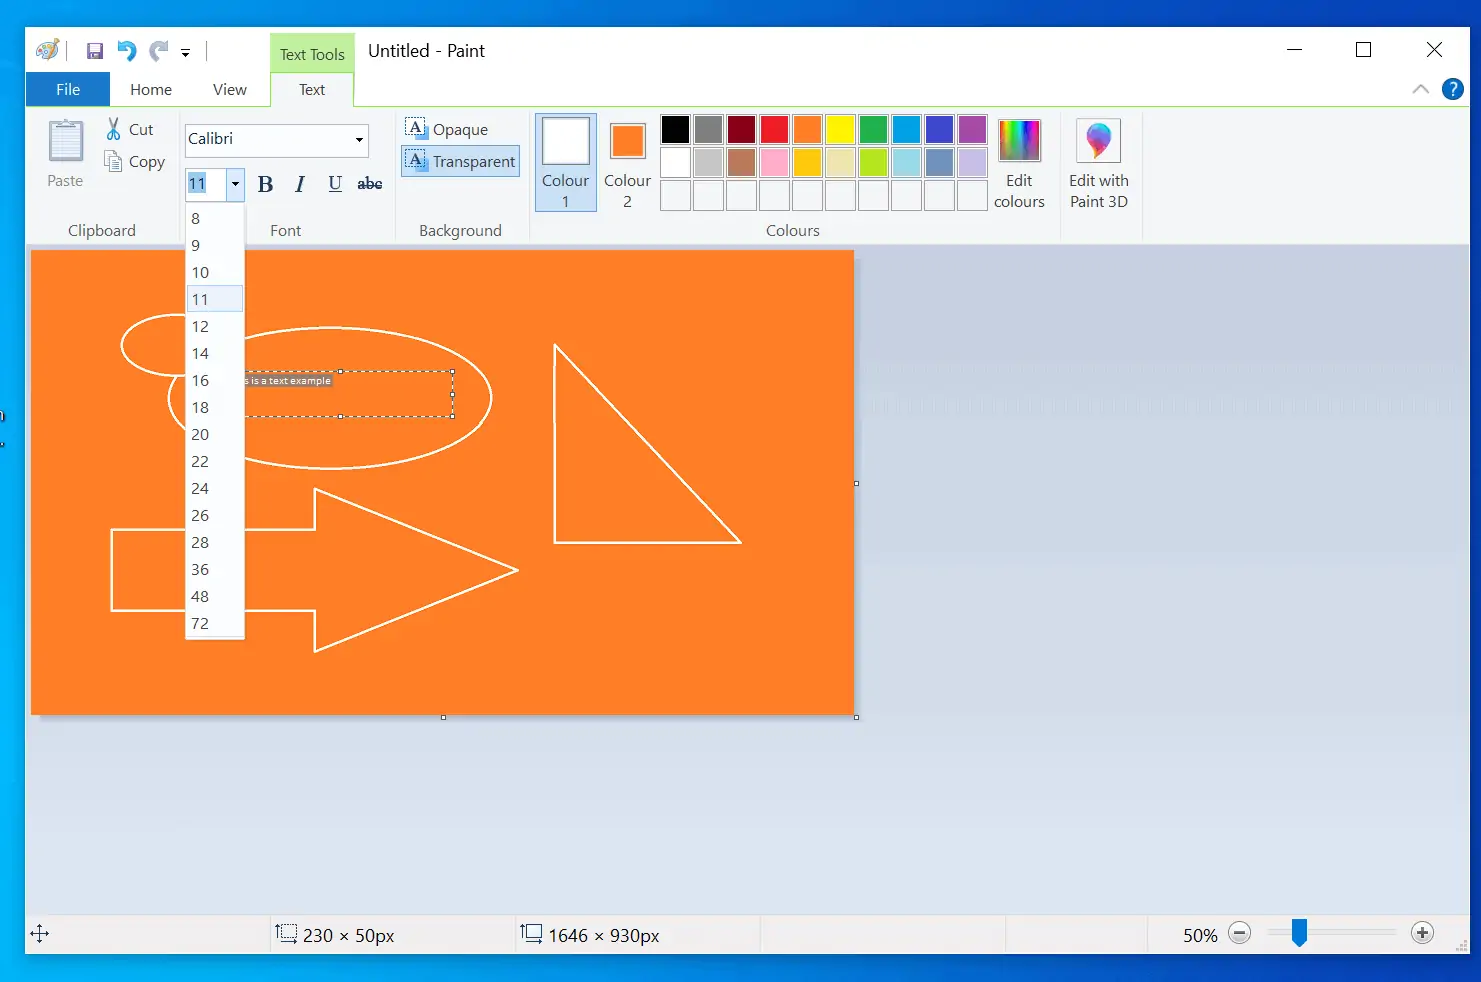
- You can also change the text color – to do this, select a different color. As you can see in the screenshot below, my text size is now 20 while the color has changed from white to yellow.

That is your Windows 10 Paint text help crash course!
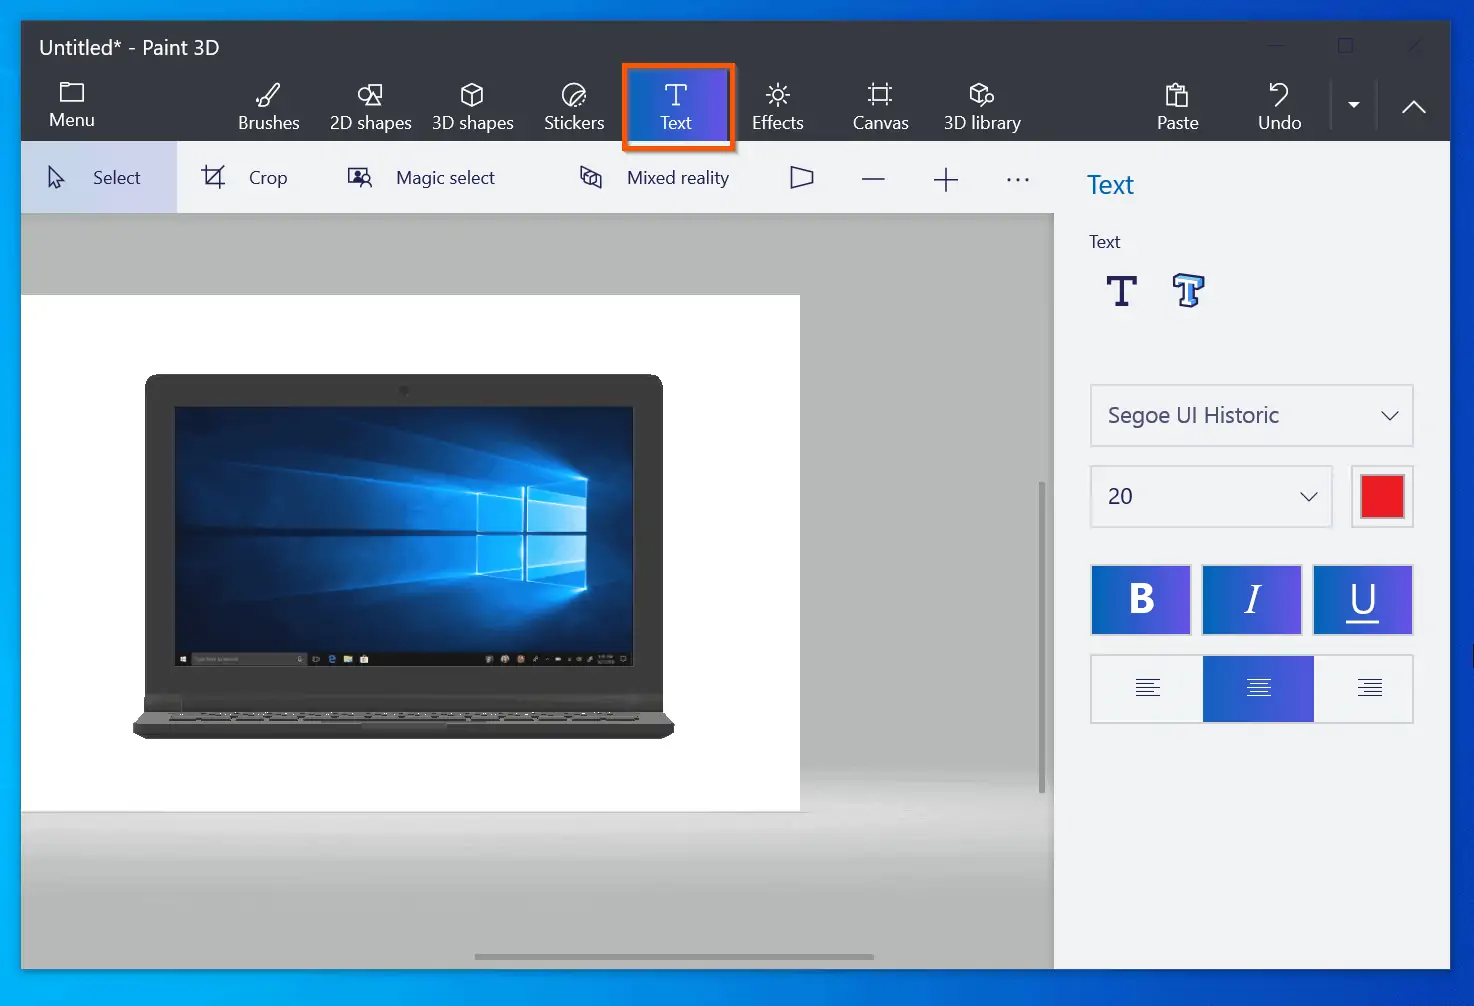
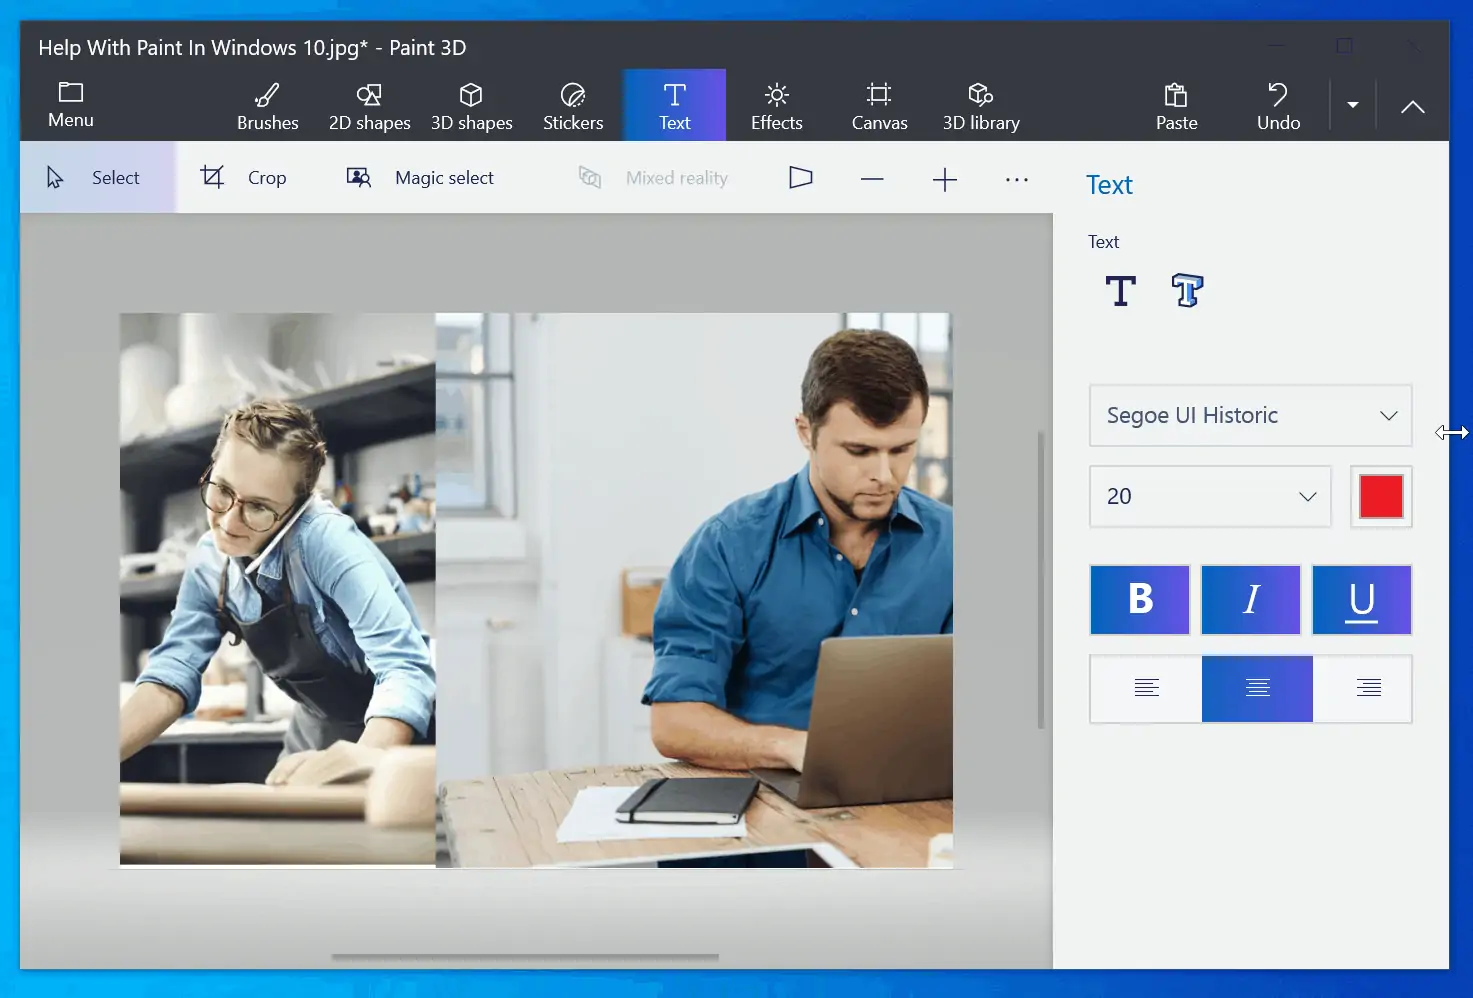
How to Add Textsin Microsoft Paint 3D
- On the top menu of Paint 3D, click the Text icon. The word “Text” beneath the “T” may be hidden for you.

- Once you click the Text icon, drag on the portion of the canvas you wish to add a text.
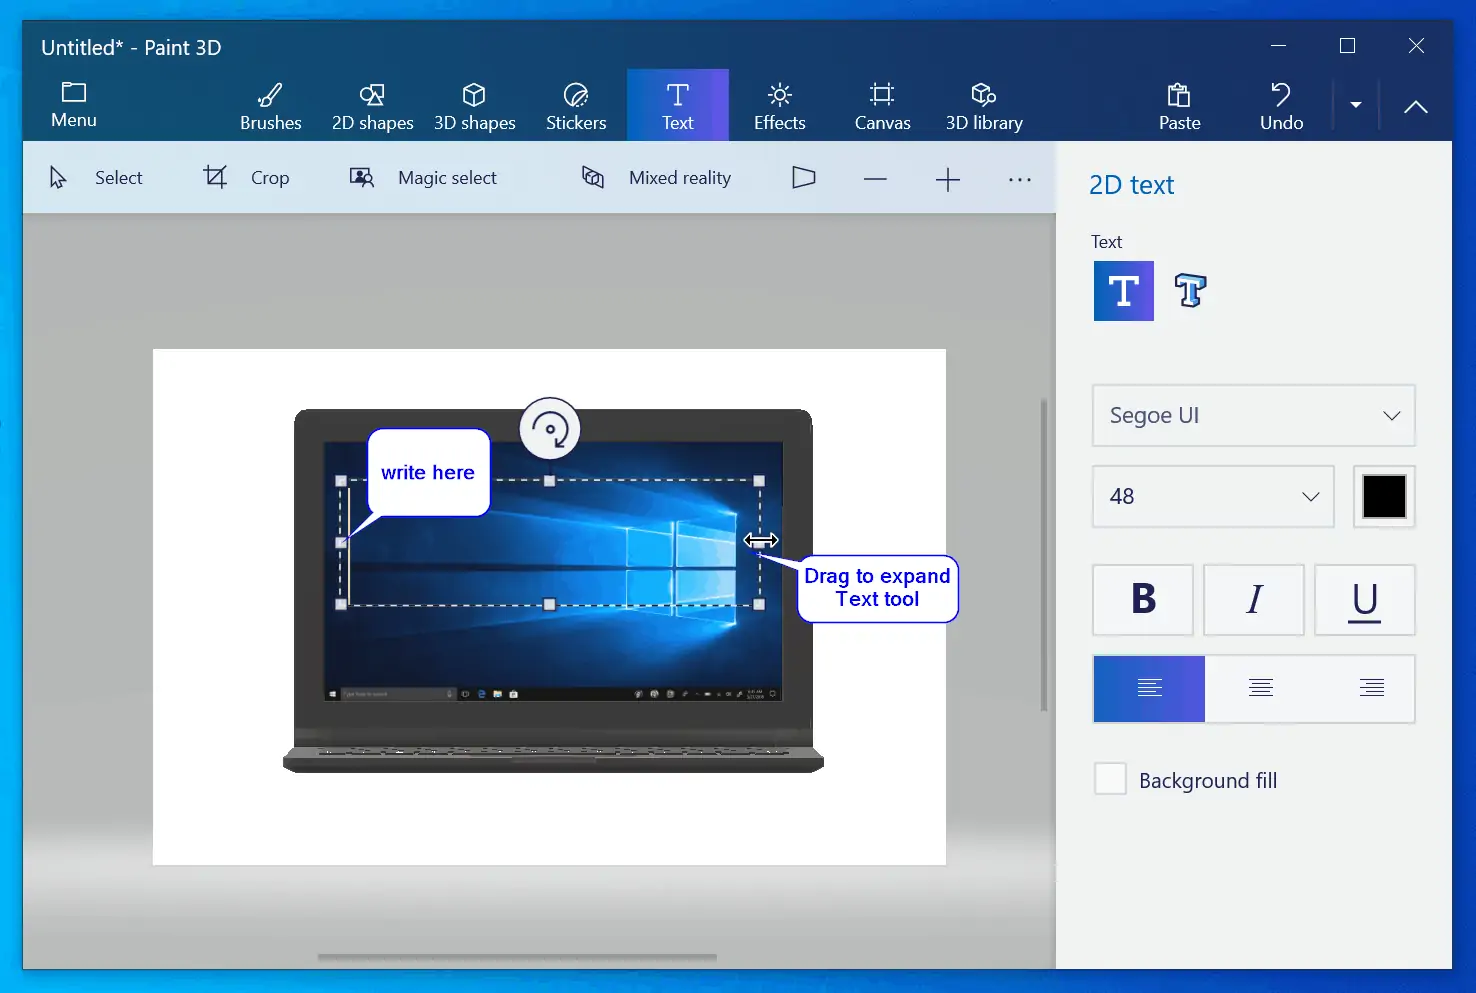
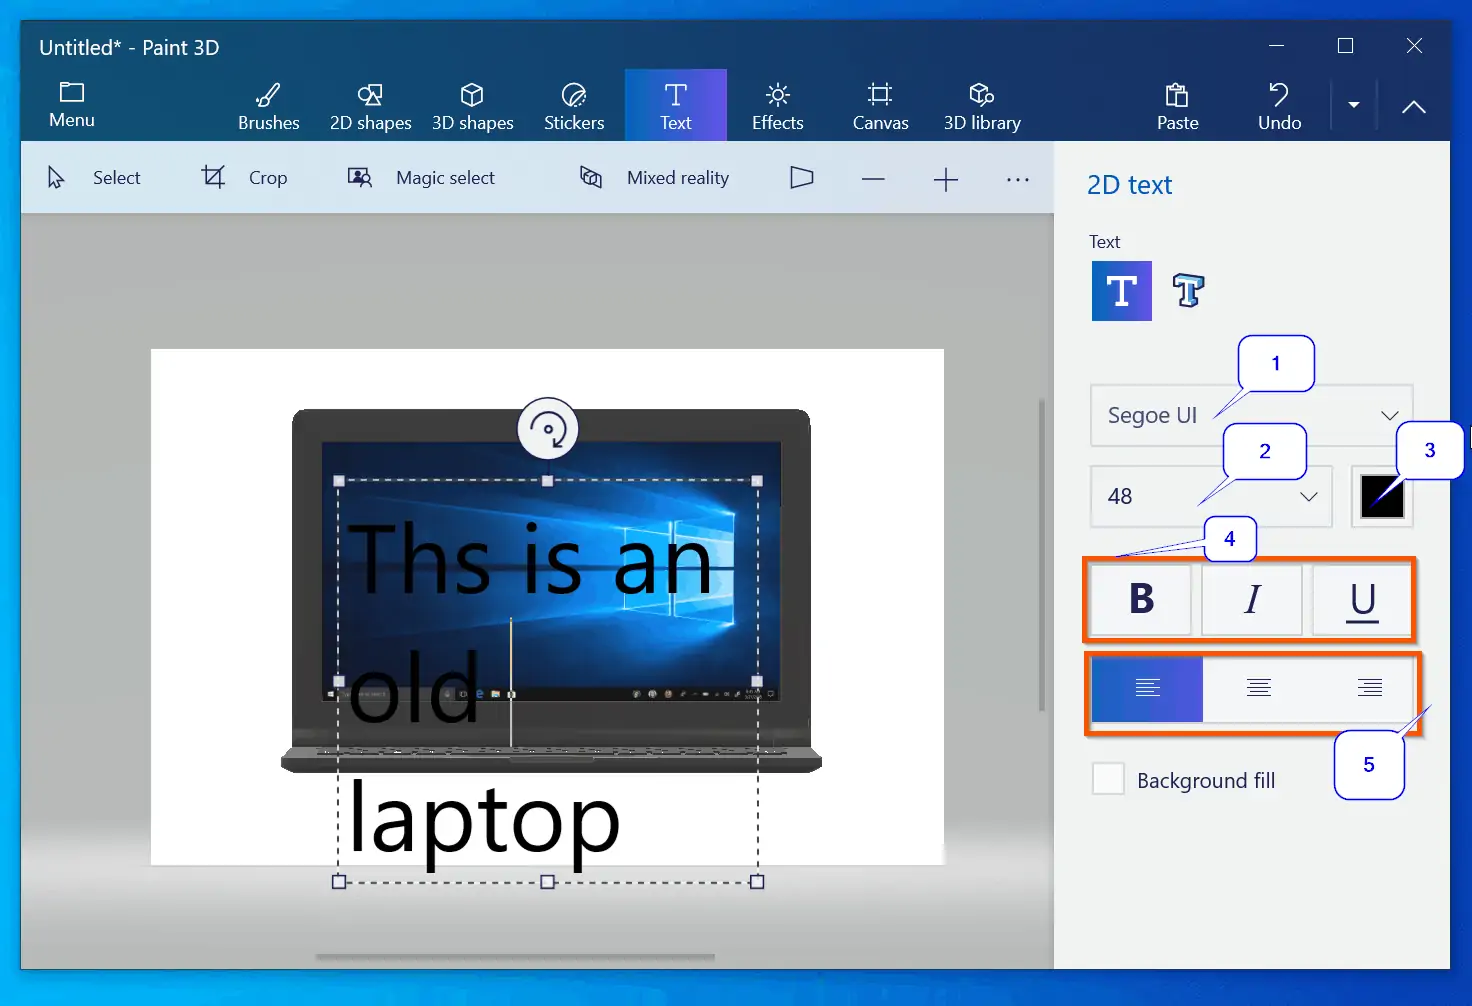
- After adding your texts, you can adjust its fonts with the font tools on the right pane.
1 – is used to change the font name of the text
2 – is for adjusting the text size
3 – Use this to adjust the color
4 – Make text bold, italics, or underlined
5 – Left, Center, or Right align the texts
How to Copy and Paste Images n Paint and Paint 3D
This section of our Windows 10 Paint help teaches you different ways to Copy, Cut and Paste in Paint and Paint 3D.
How to Copy and Paste in Microsoft Paint
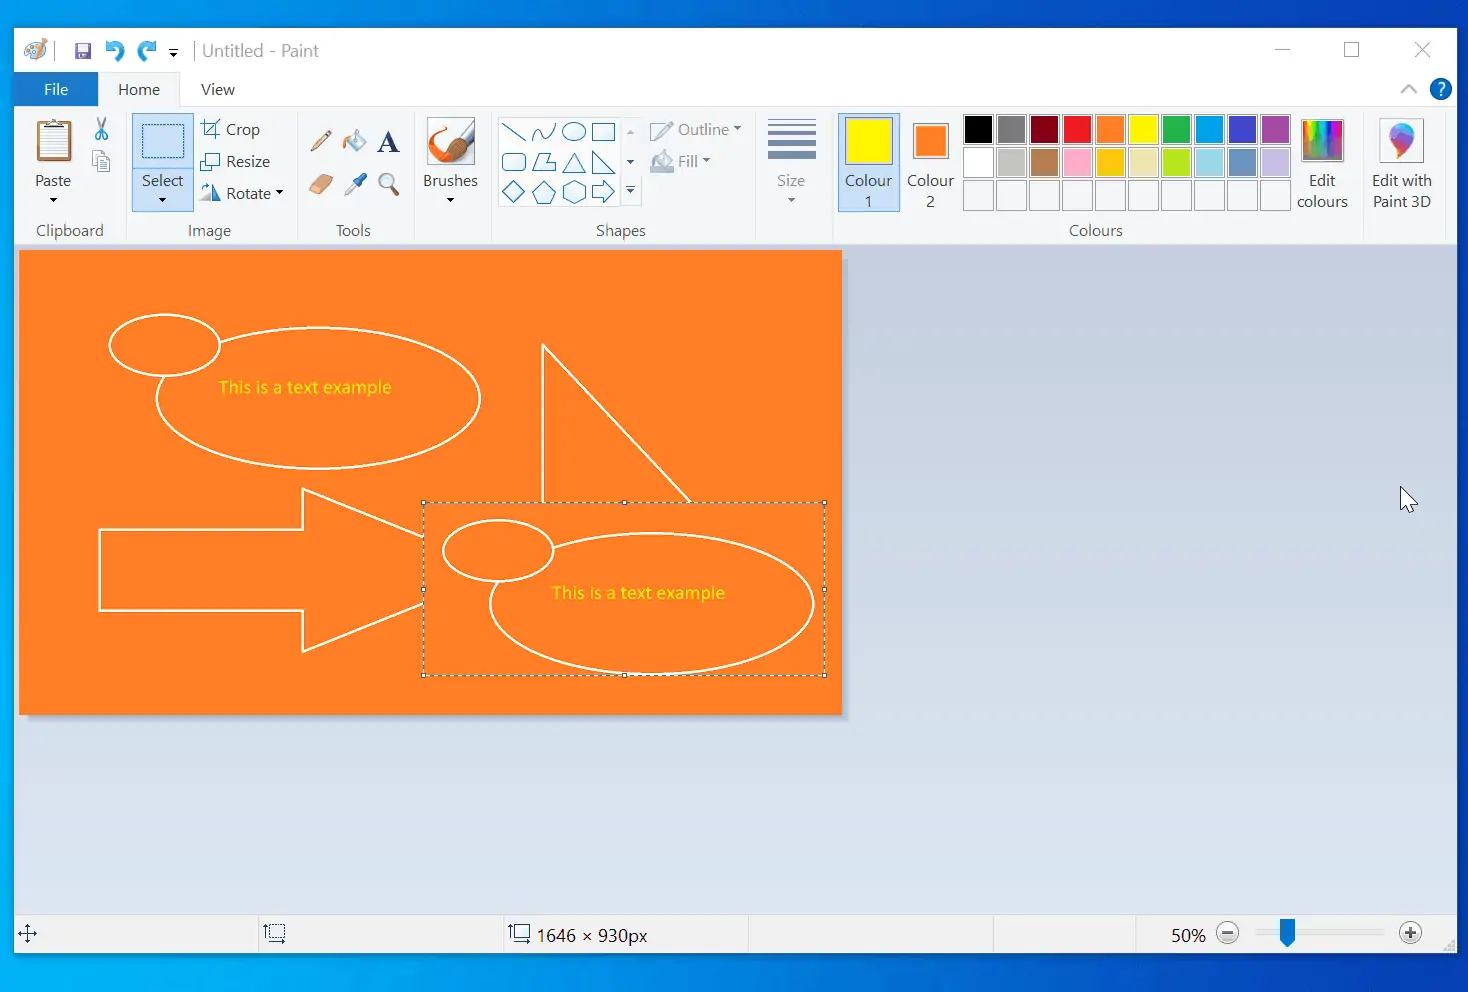
There are various copy and paste operations that you can perform in Microsoft Paint. Firstly, you can copy a line or shape you previously drew in Paint. Then, paste it somewhere else within the canvas.
In this example, I want to copy my Oval shape and paste it in another part of the canvas.
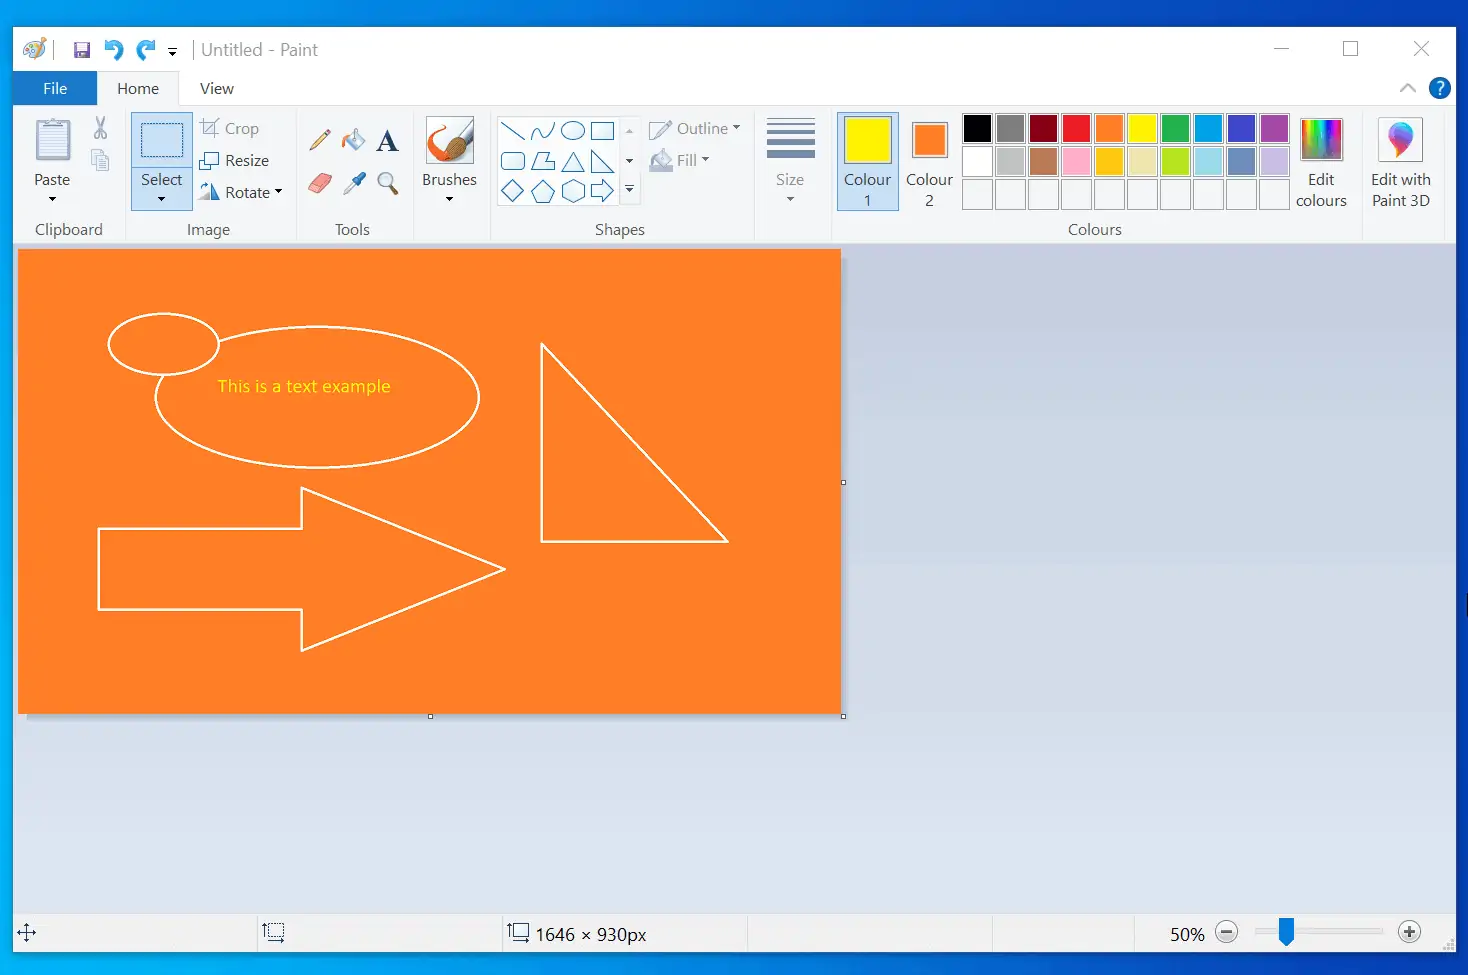
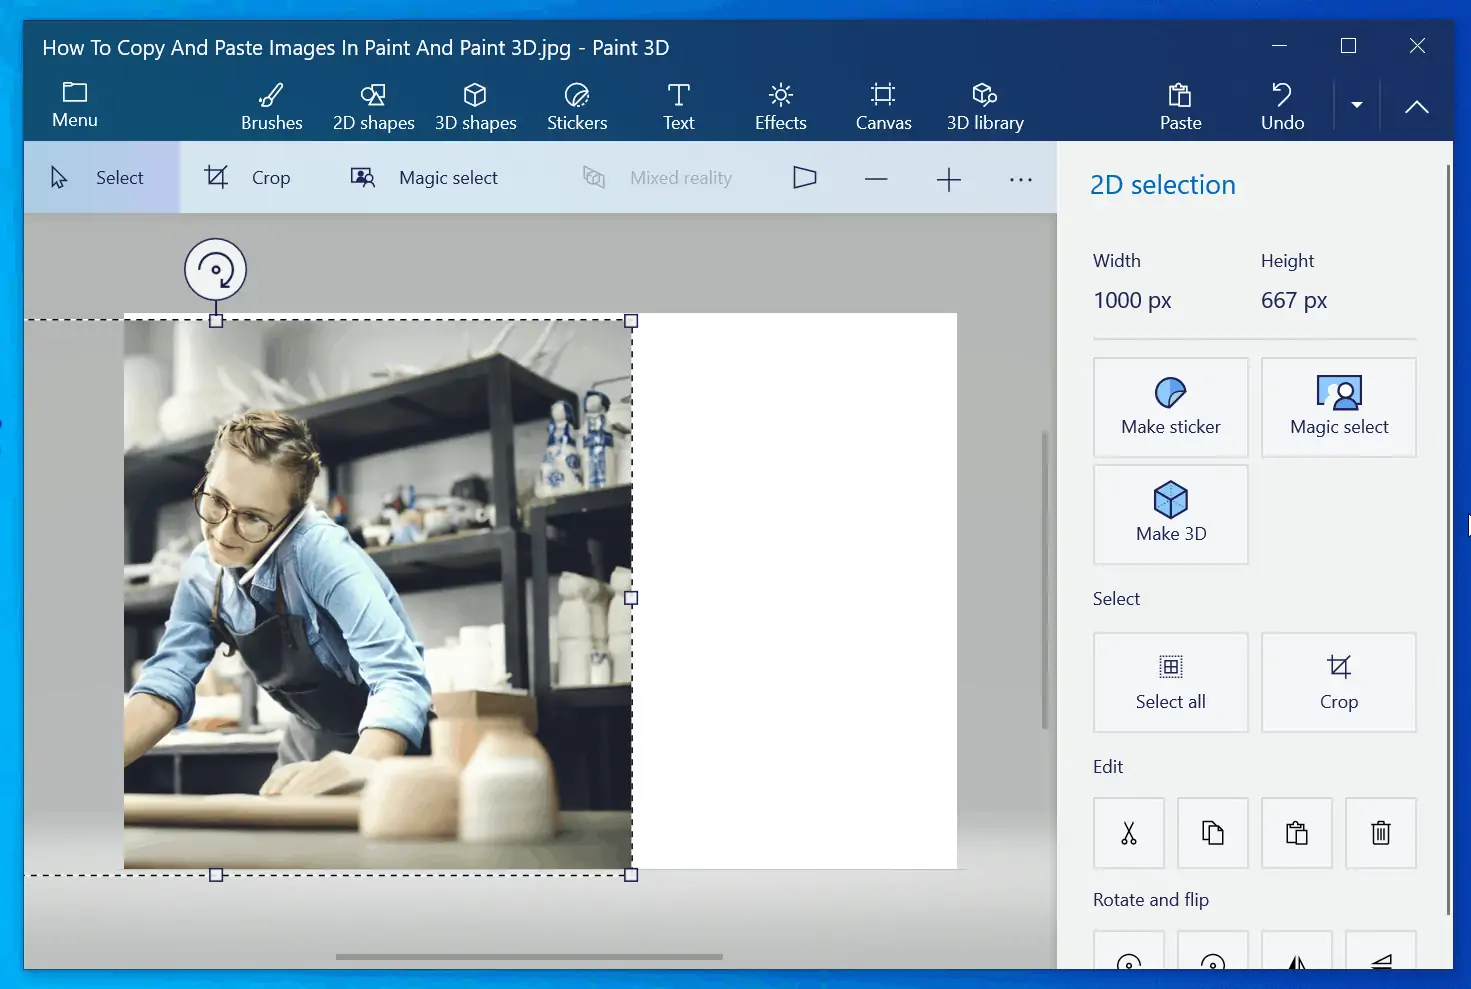
- To begin, click the Select tool drop-down.
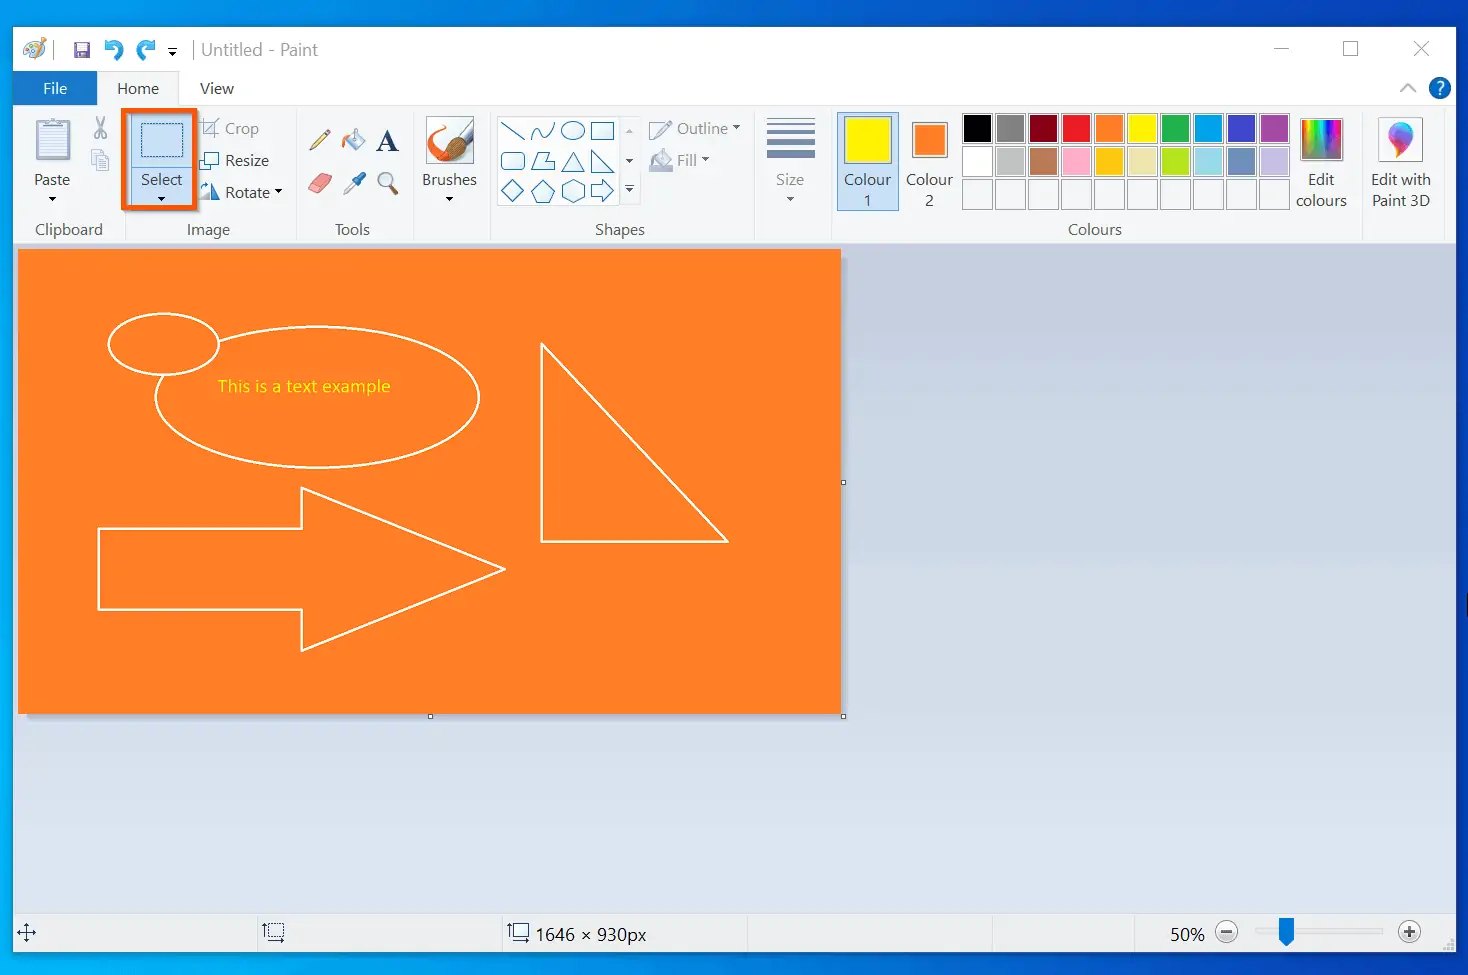
- Then, from the Select drop-down, click the Rectangular selection tool.

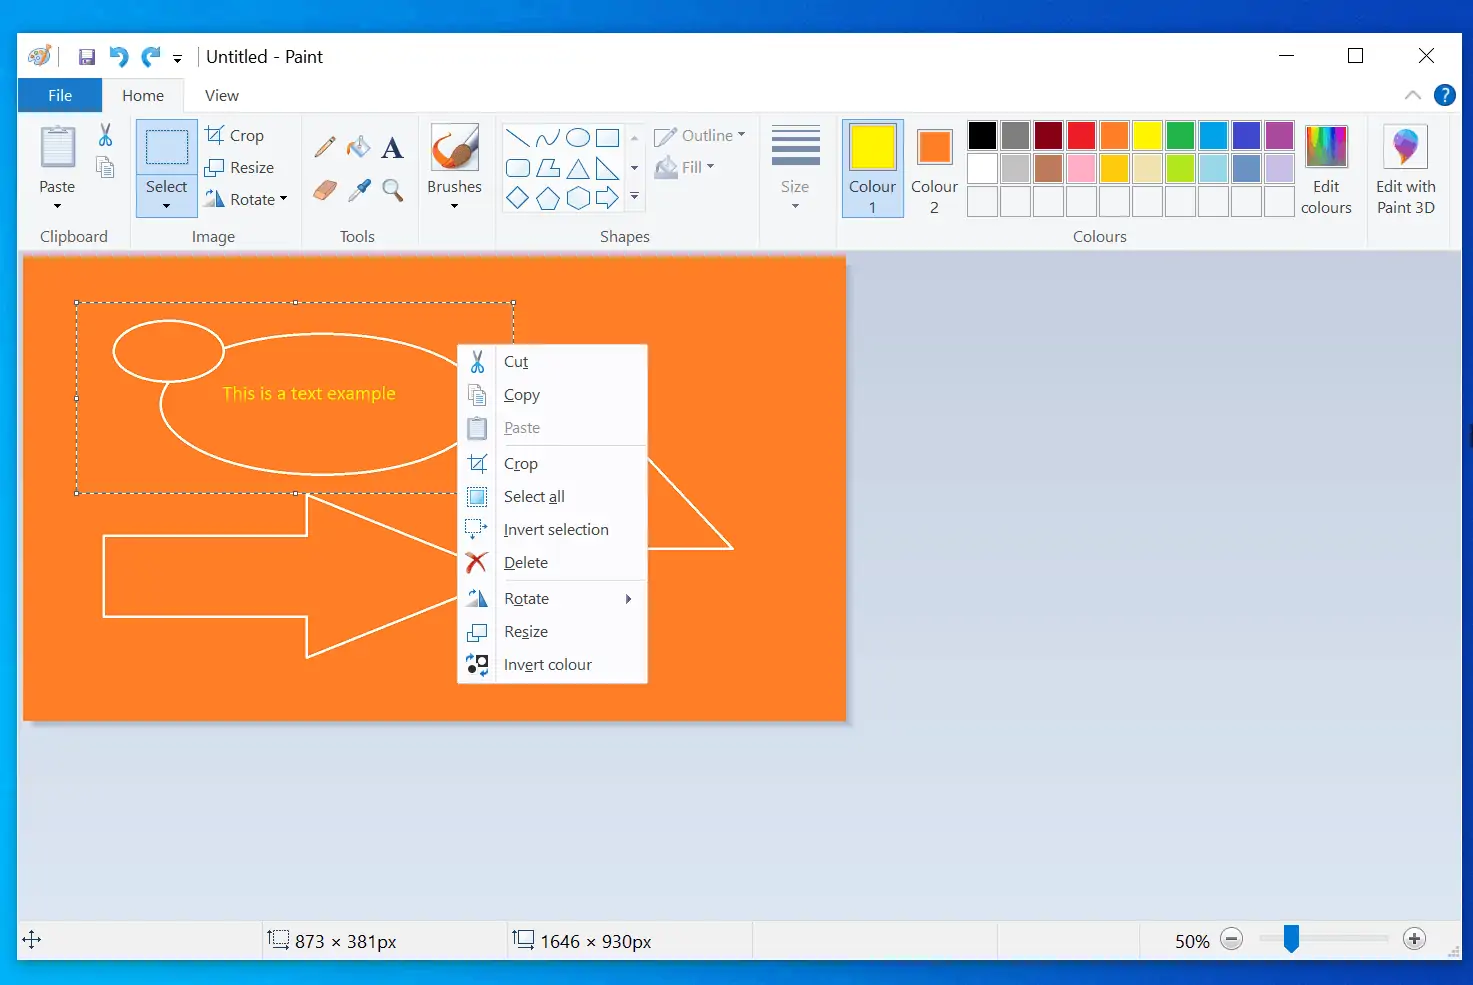
- With the select tool, drag around the object (or part of an object) you want to copy – the object will now have some dotted rectangular lines around it.

- Finally, to copy the highlighted object in Paint, right-click it and click Copy.
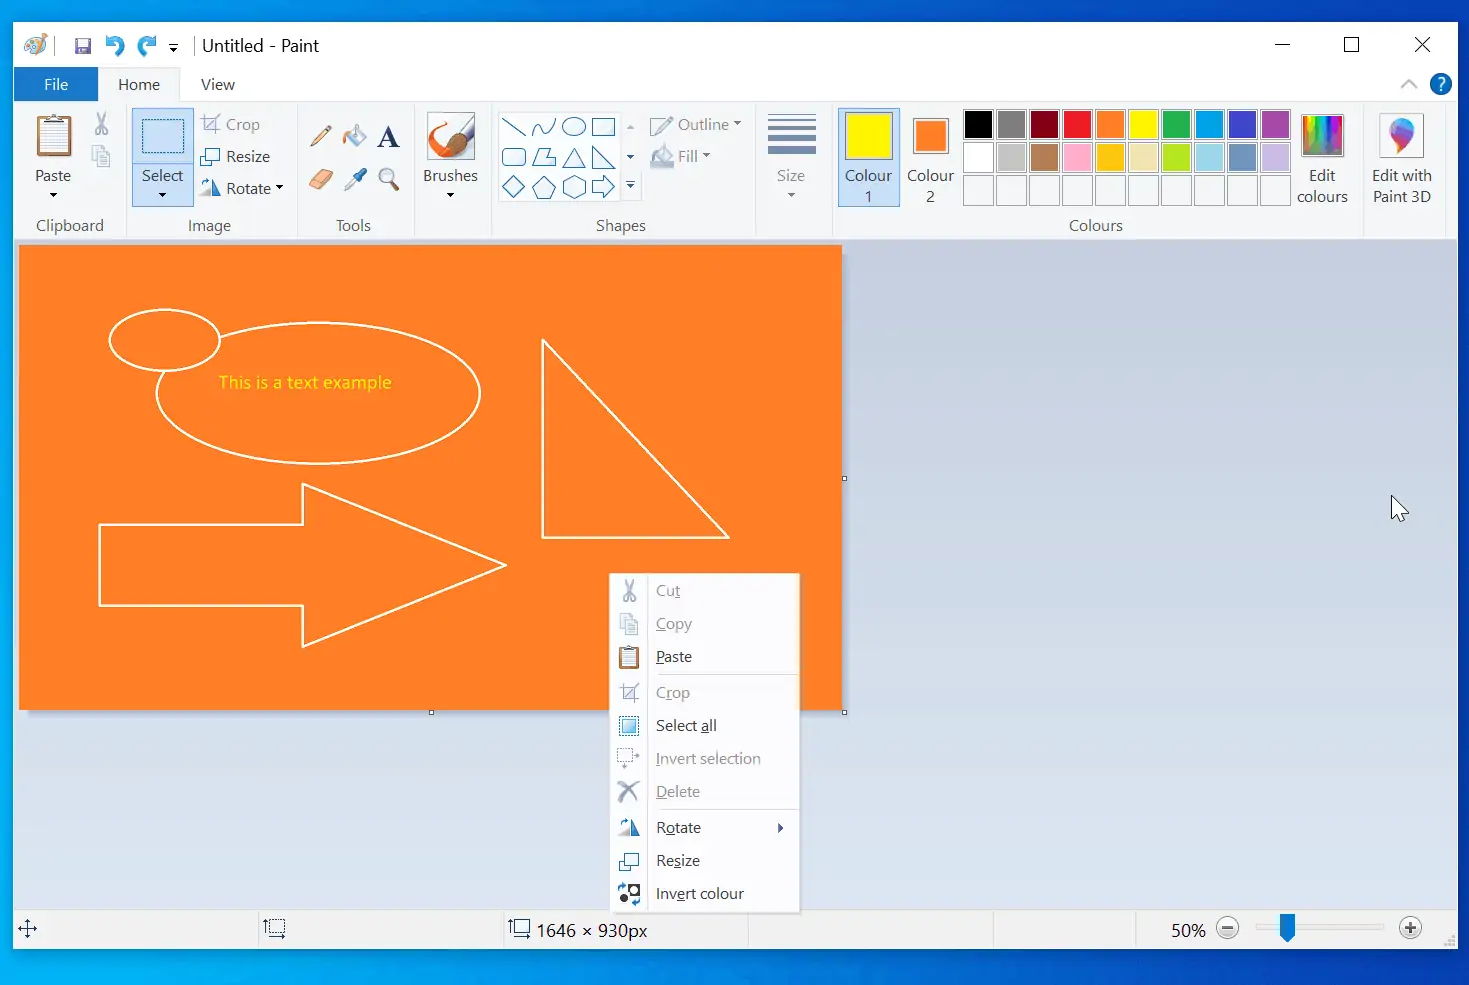
- Furthermore, with the copied item on the clipboard, right-click anywhere on the canvas you want to paste the item – and select Paste. Then, drag the newly pasted item to where you want it on the canvas.
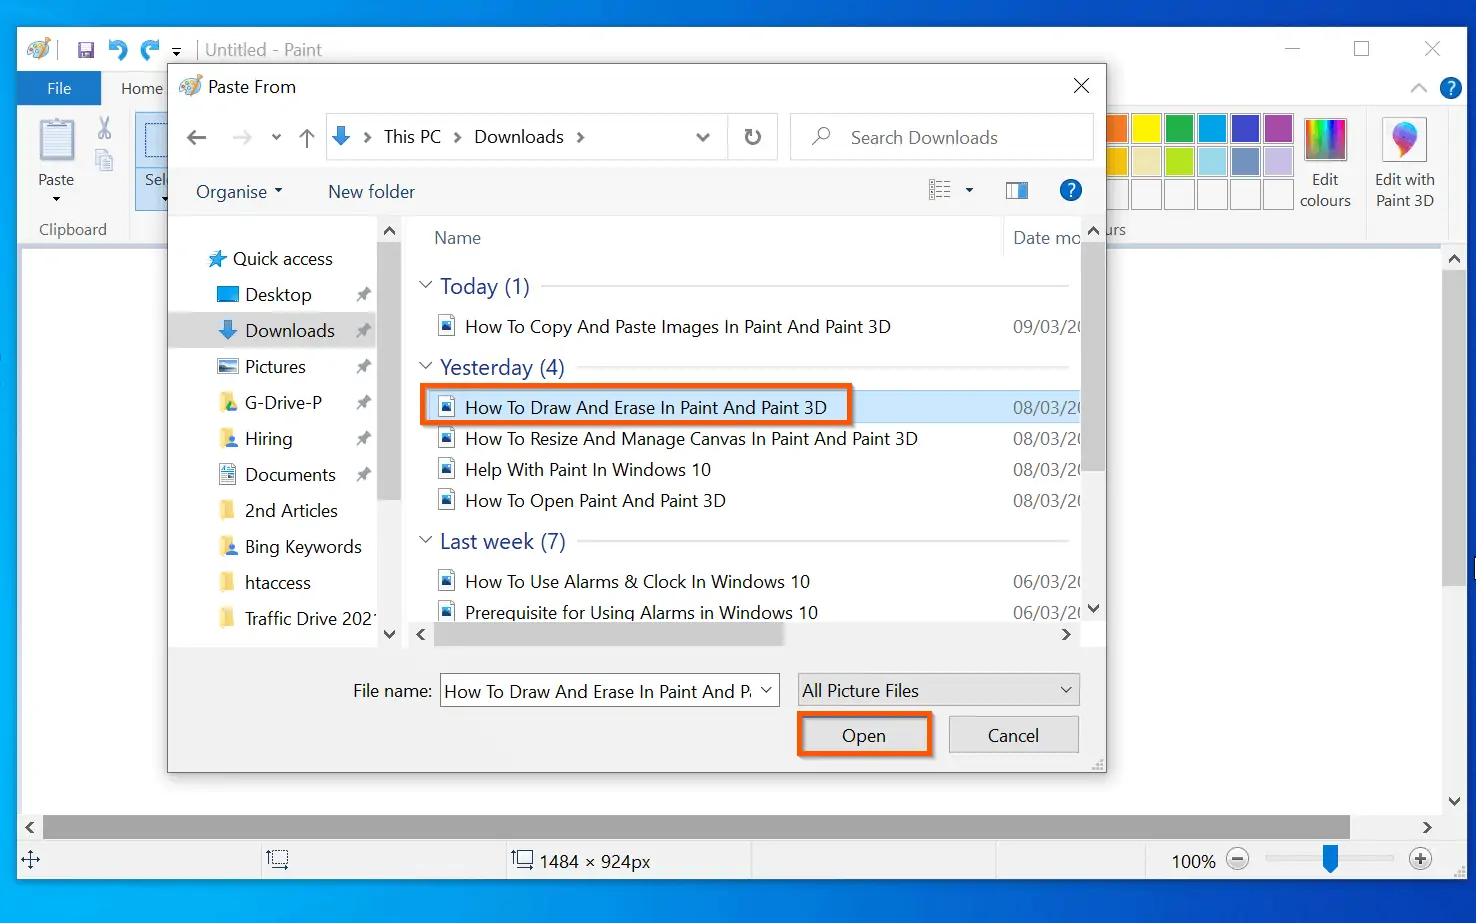
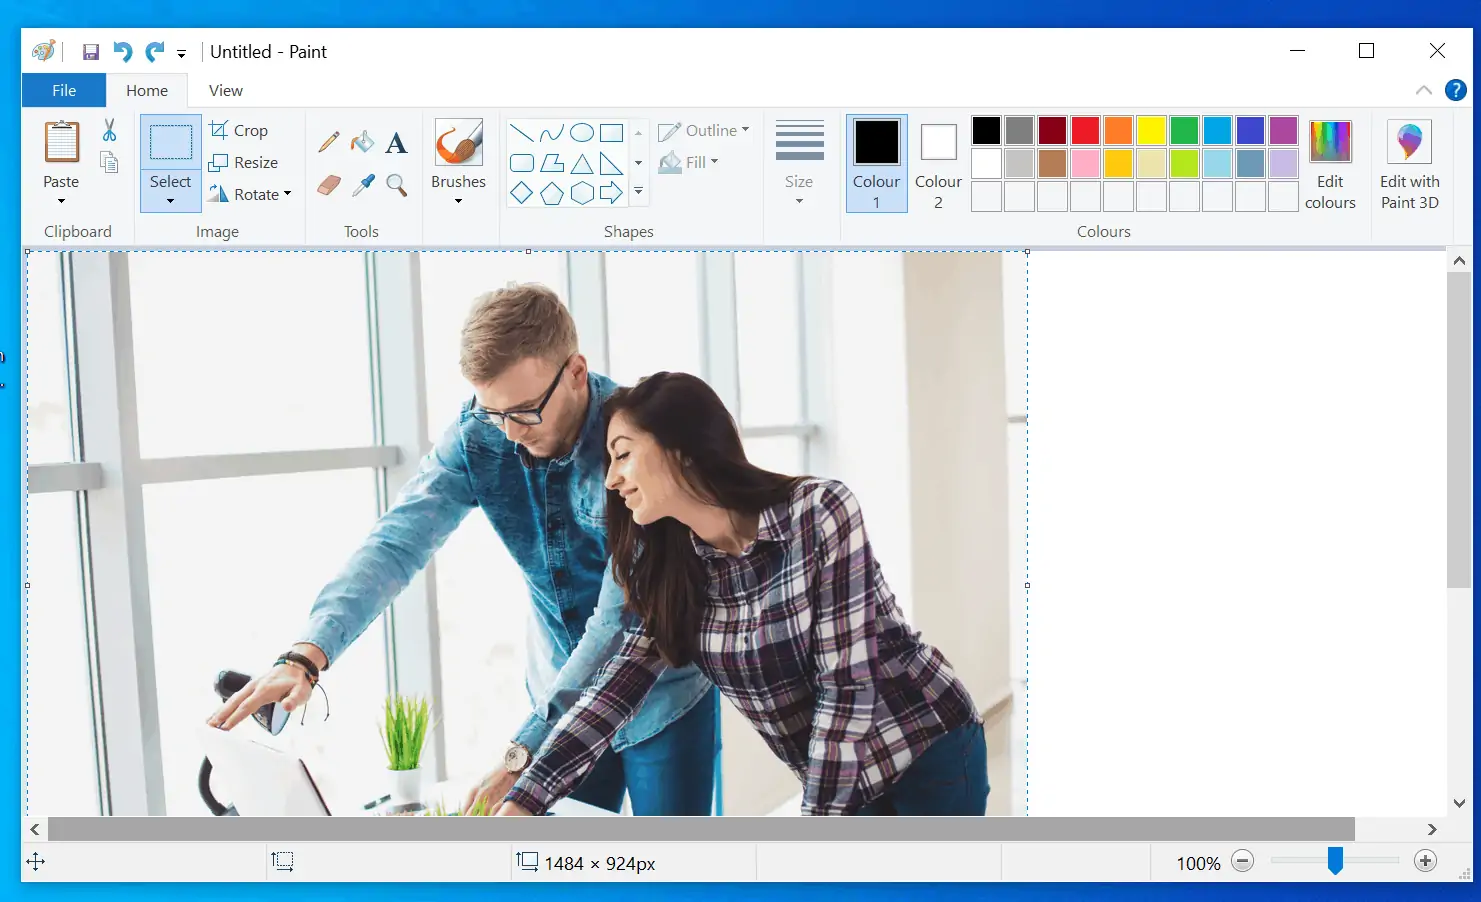
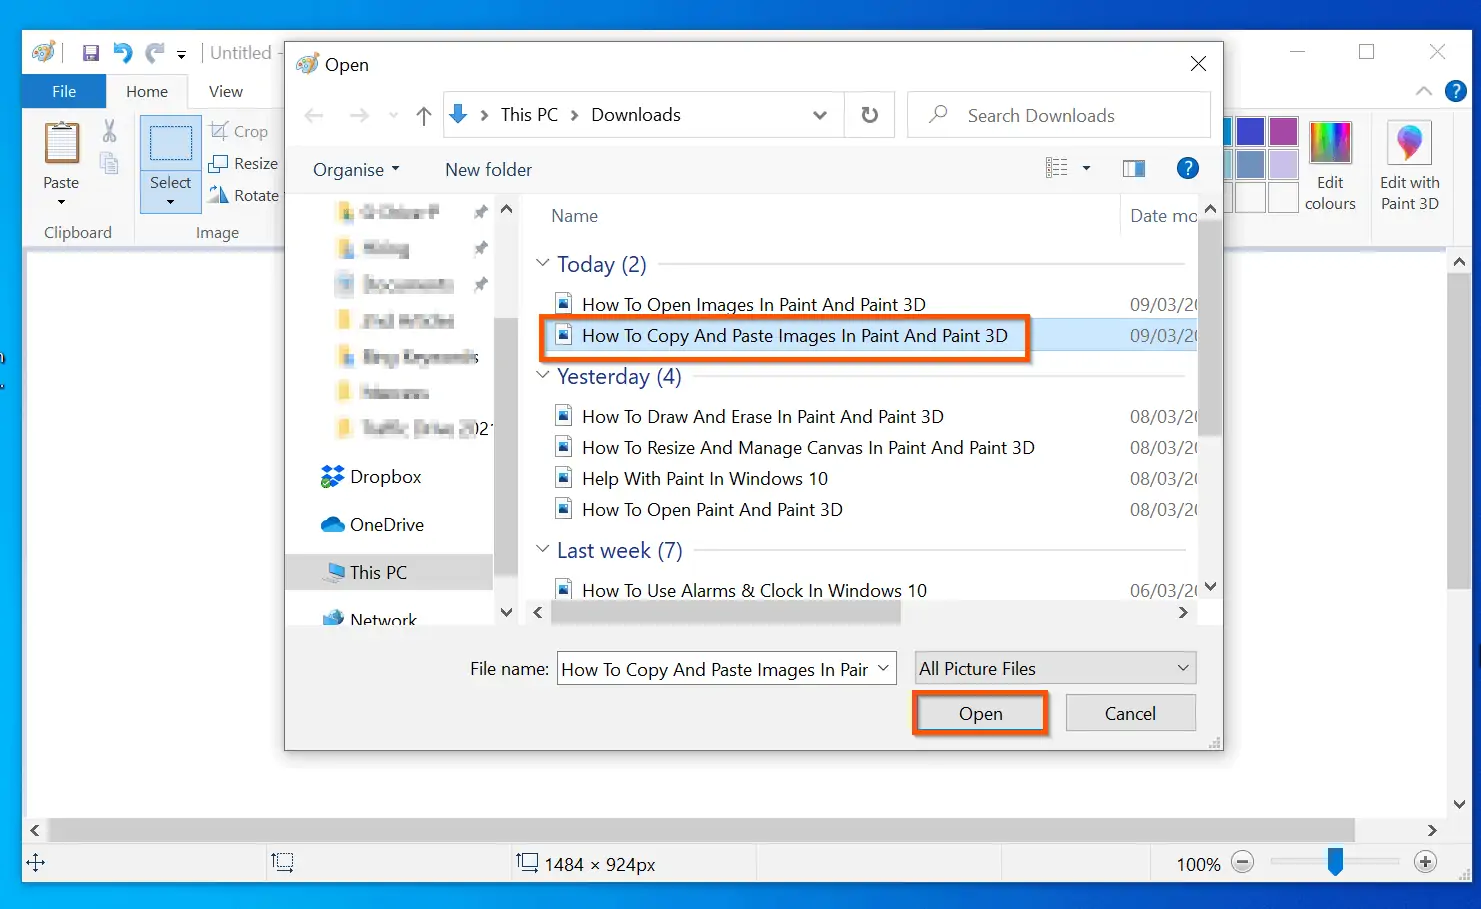
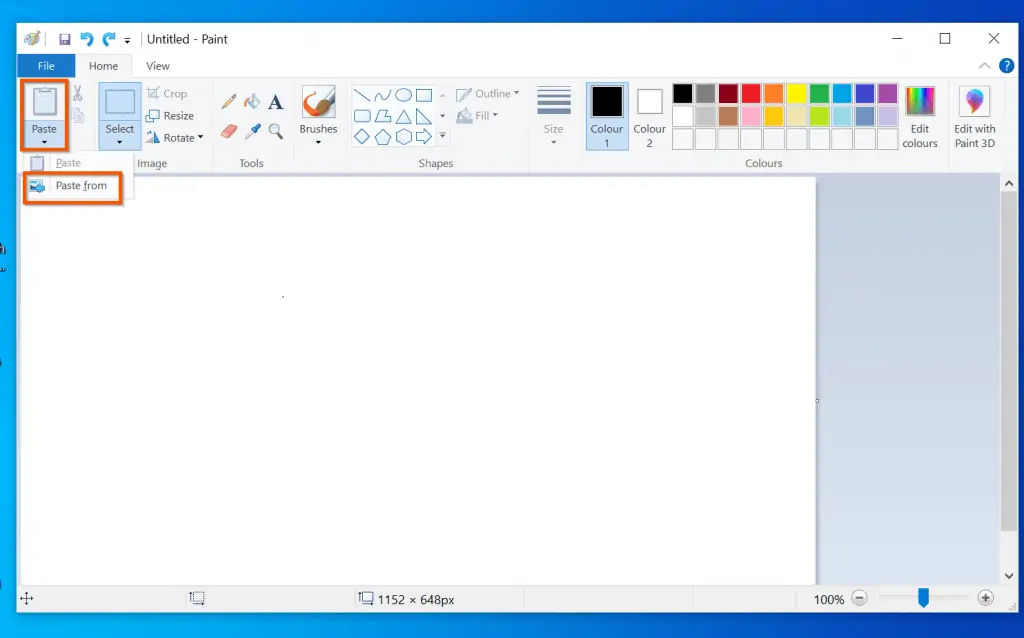
You can also copy an image from outside Microsoft Paint and paste the image in Paint. To do this, on the top left of Microsoft Paint, click the Paste drop-down and select Paste from.

Finally, on the Paste from dialogue, open the folder with the photo or image you want to paste. Then, select the image and click Open. The image will be pasted in Paint.
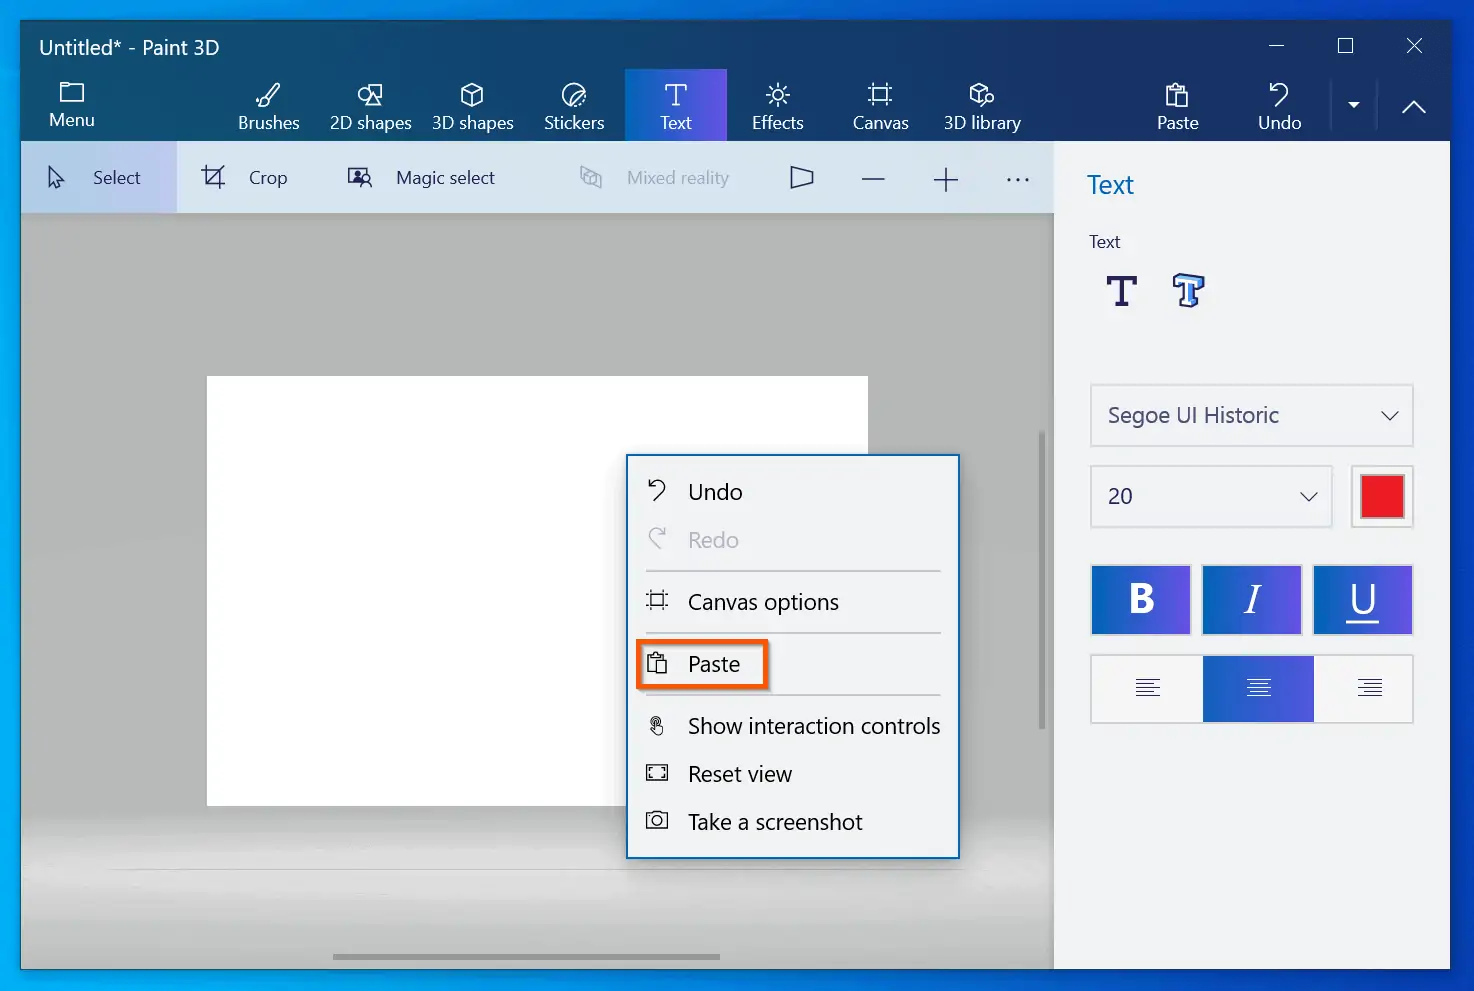
How to Copy and Paste in Paint 3D
Paint 3D offers more advanced copy and paste options. For example, you can right-click an image outside Paint 3D and select Copy.
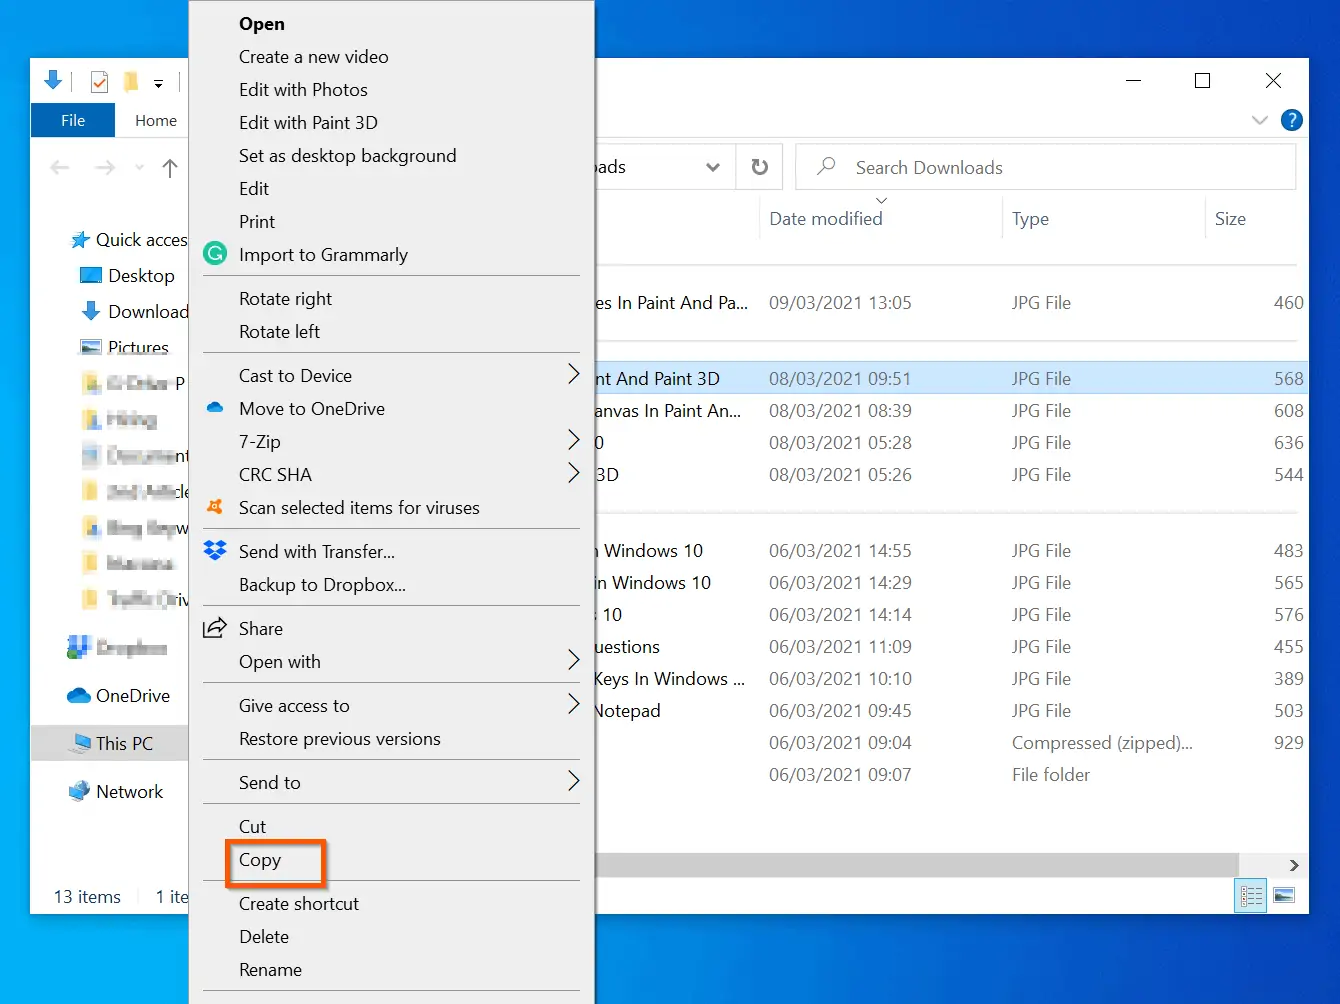
Then, open Paint 3D, right-click anywhere on the canvas and select Paste.
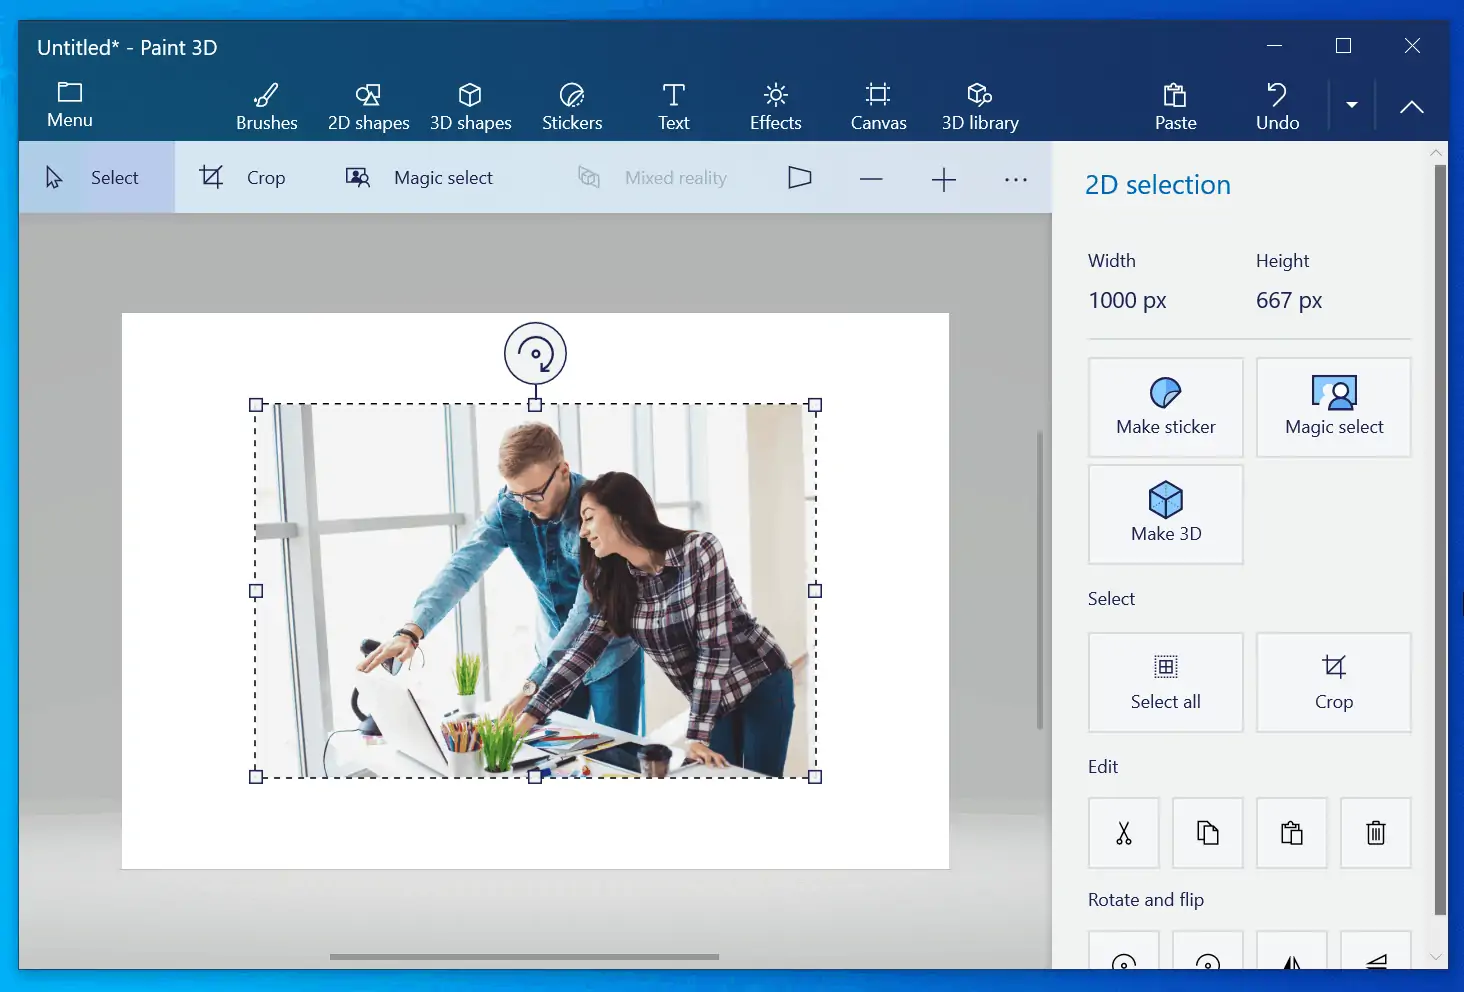
How to Open Images in Paint and Paint 3D
Want to open an existing image in Paint or Paint 3D? This section of the Windows 10 Paint help covers how to do that.
To Open an image in Microsoft Paint, on the top left click File. Then, from the available options, click Open.

Finally, open the folder with the image, select the image and click Open.
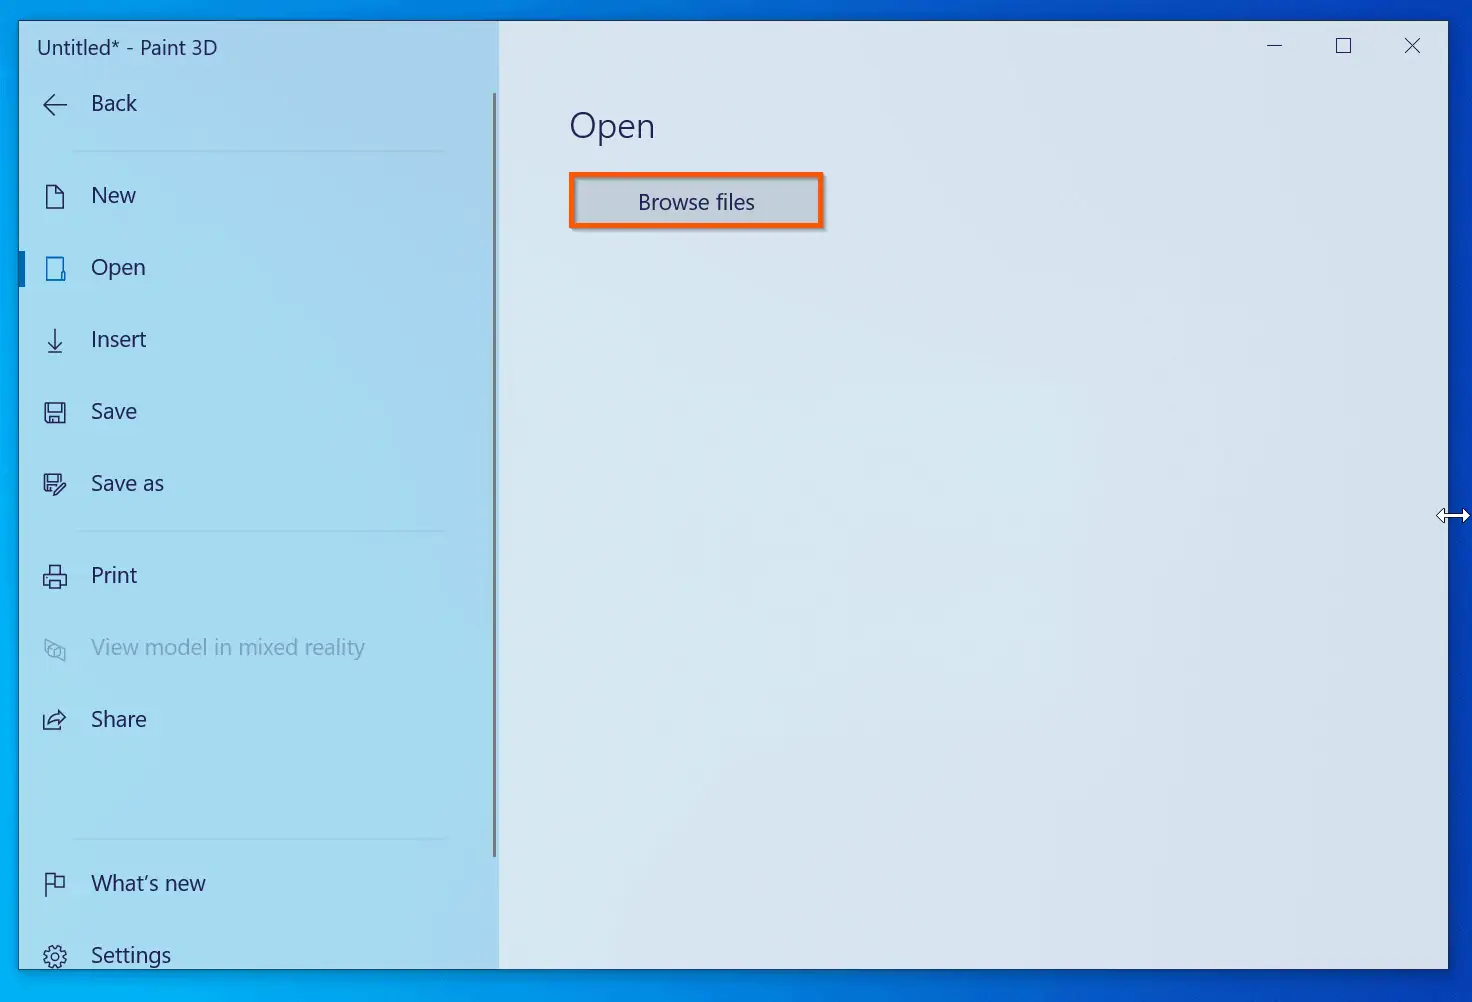
You can also open an image in Paint 3D by clicking the Menu – on the top left.
Then, from the displayed options, Open is selected by default. On the details pane, click Browse files. Finally, navigate to the folder with the image you want and open it.
How to Delete Objects in Paint and Paint 3D
This section of the Windows 10 Paint help guide teaches you how to delete images in Paint and Paint 3D.
To delete an object or a portion of an object in Microsoft Paint, click the Select Tool drop-down. Then, from the drop-down options, click Rectangular selection.
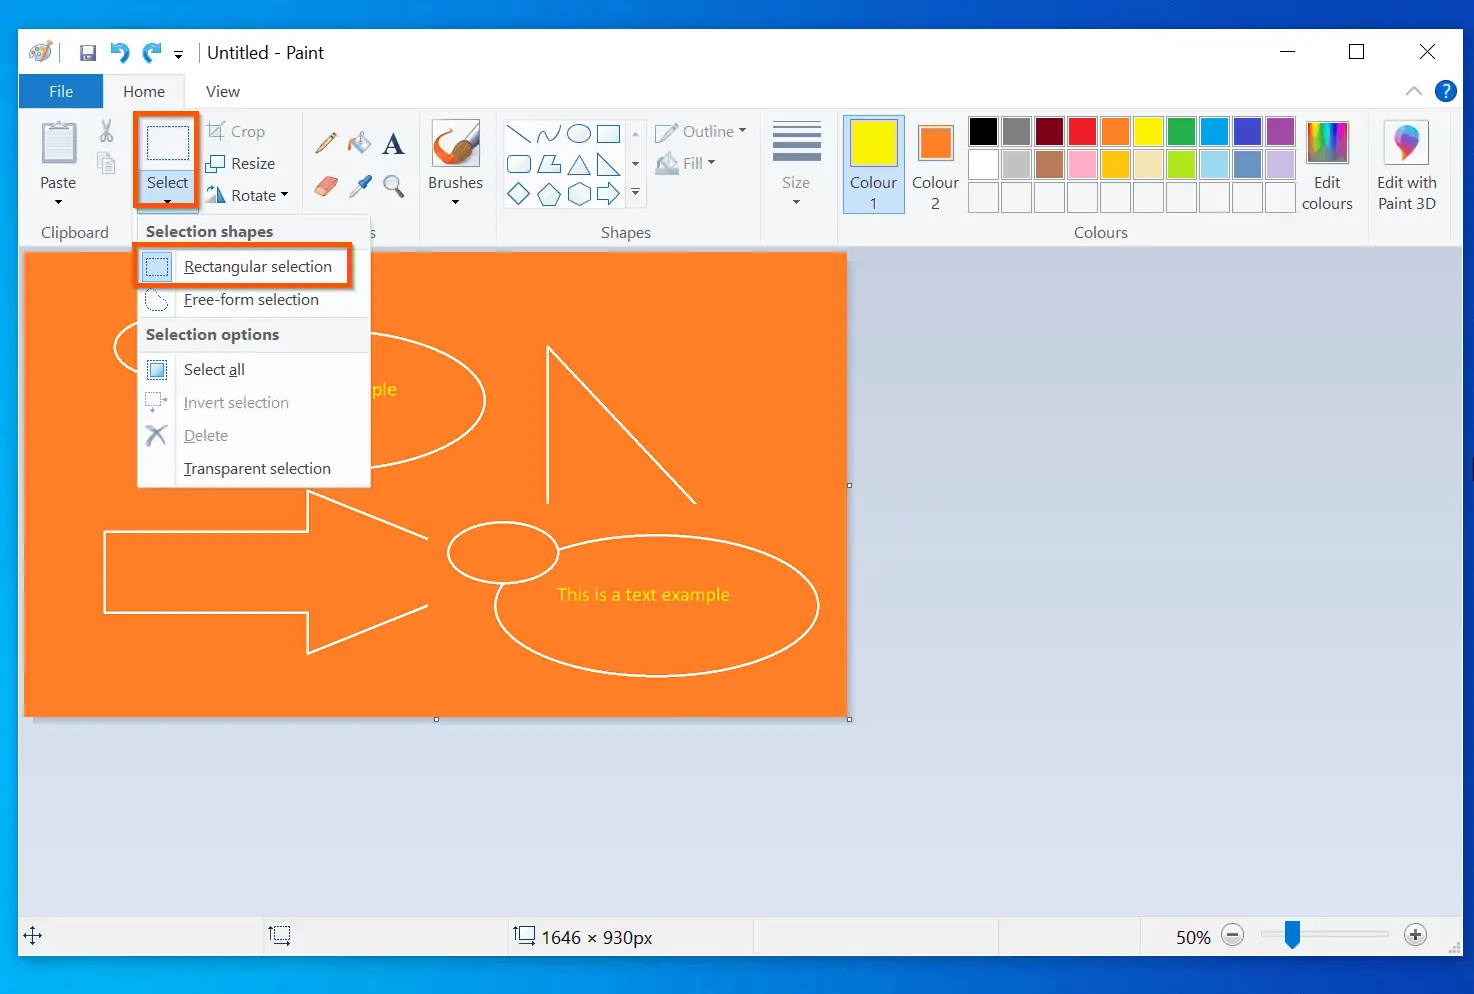
With the Rectangular selection tool, drag your mouse on the object (or part of the object) you want to delete. The portion of the image you dragged the Selection tool through will have dots around it.
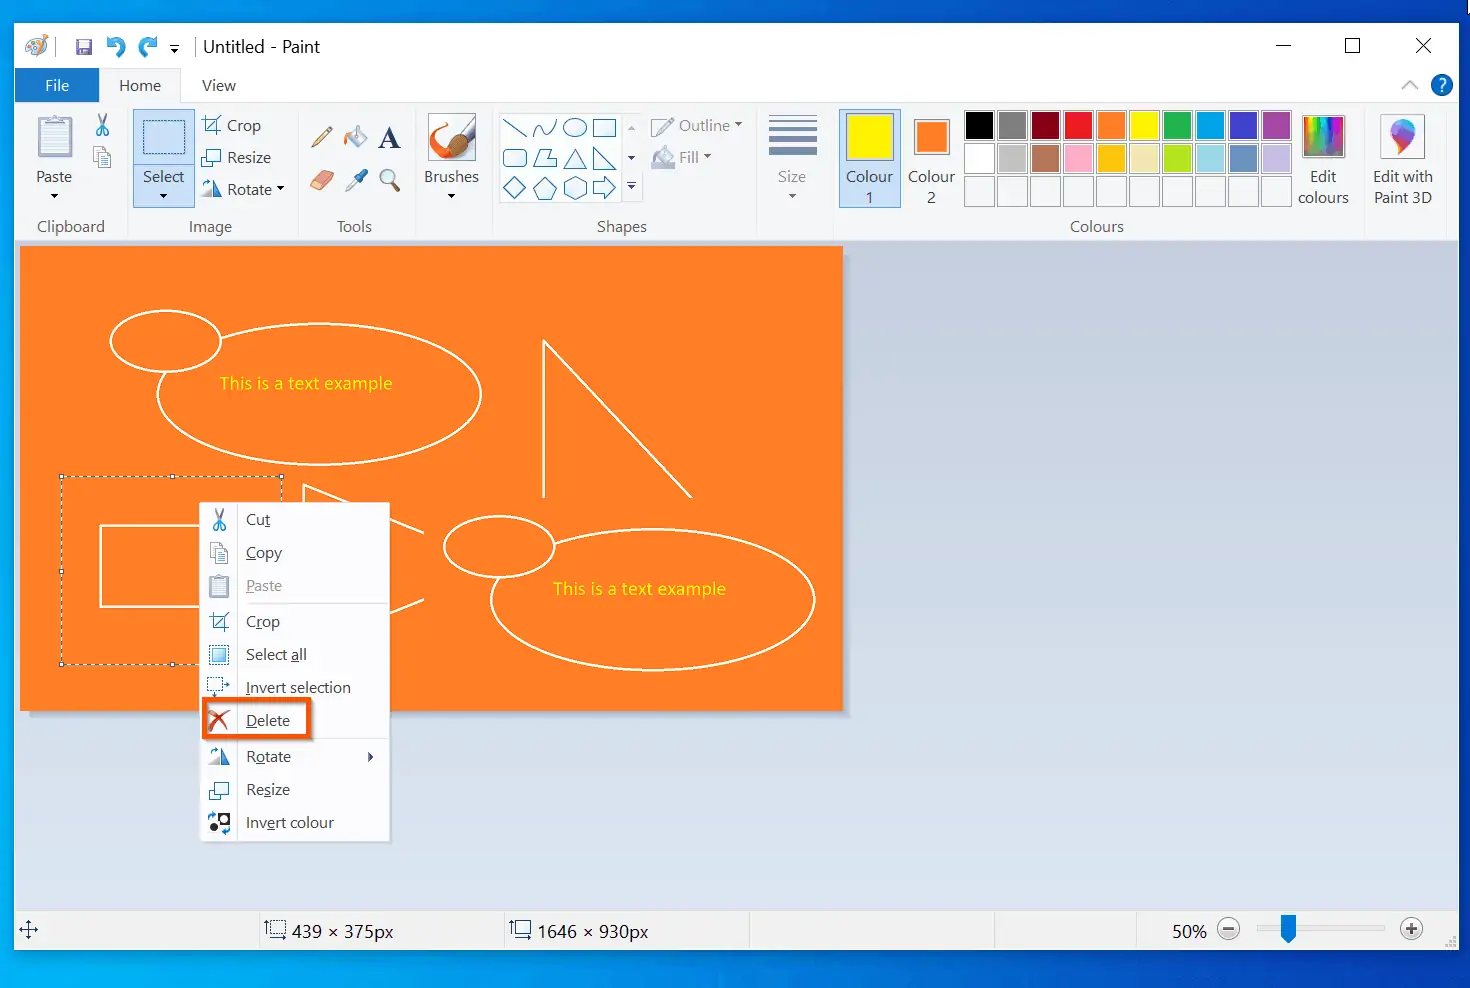
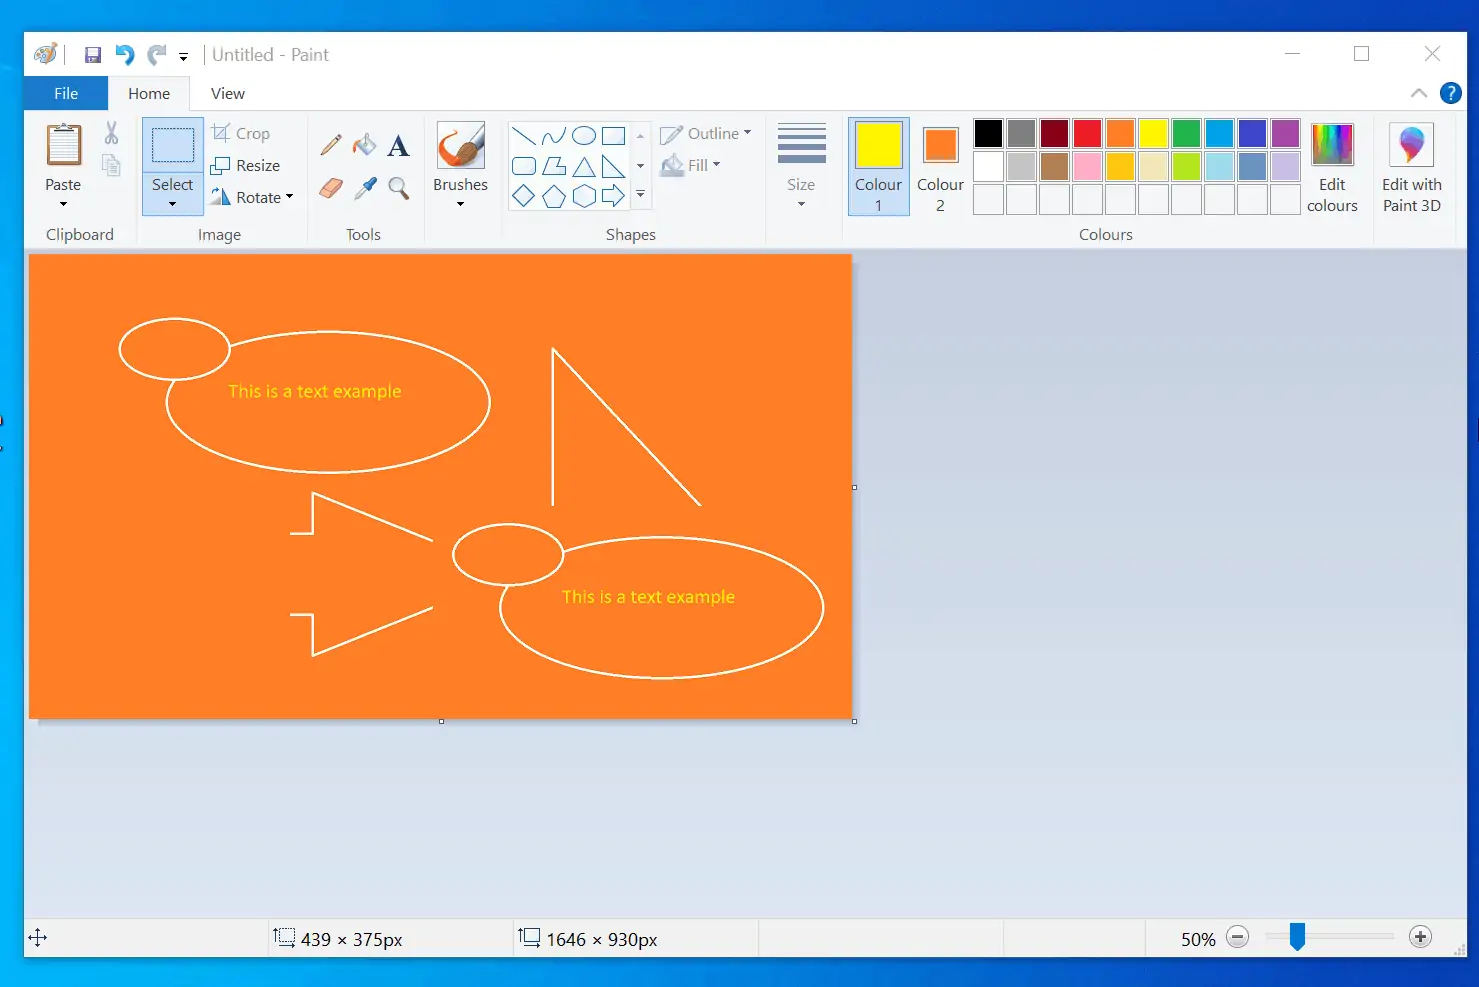
To delete, you can press the Delete key on your keyboard. Alternatively, right-click the area and select Delete.
That portion of the image will be deleted – see the second screenshot below.
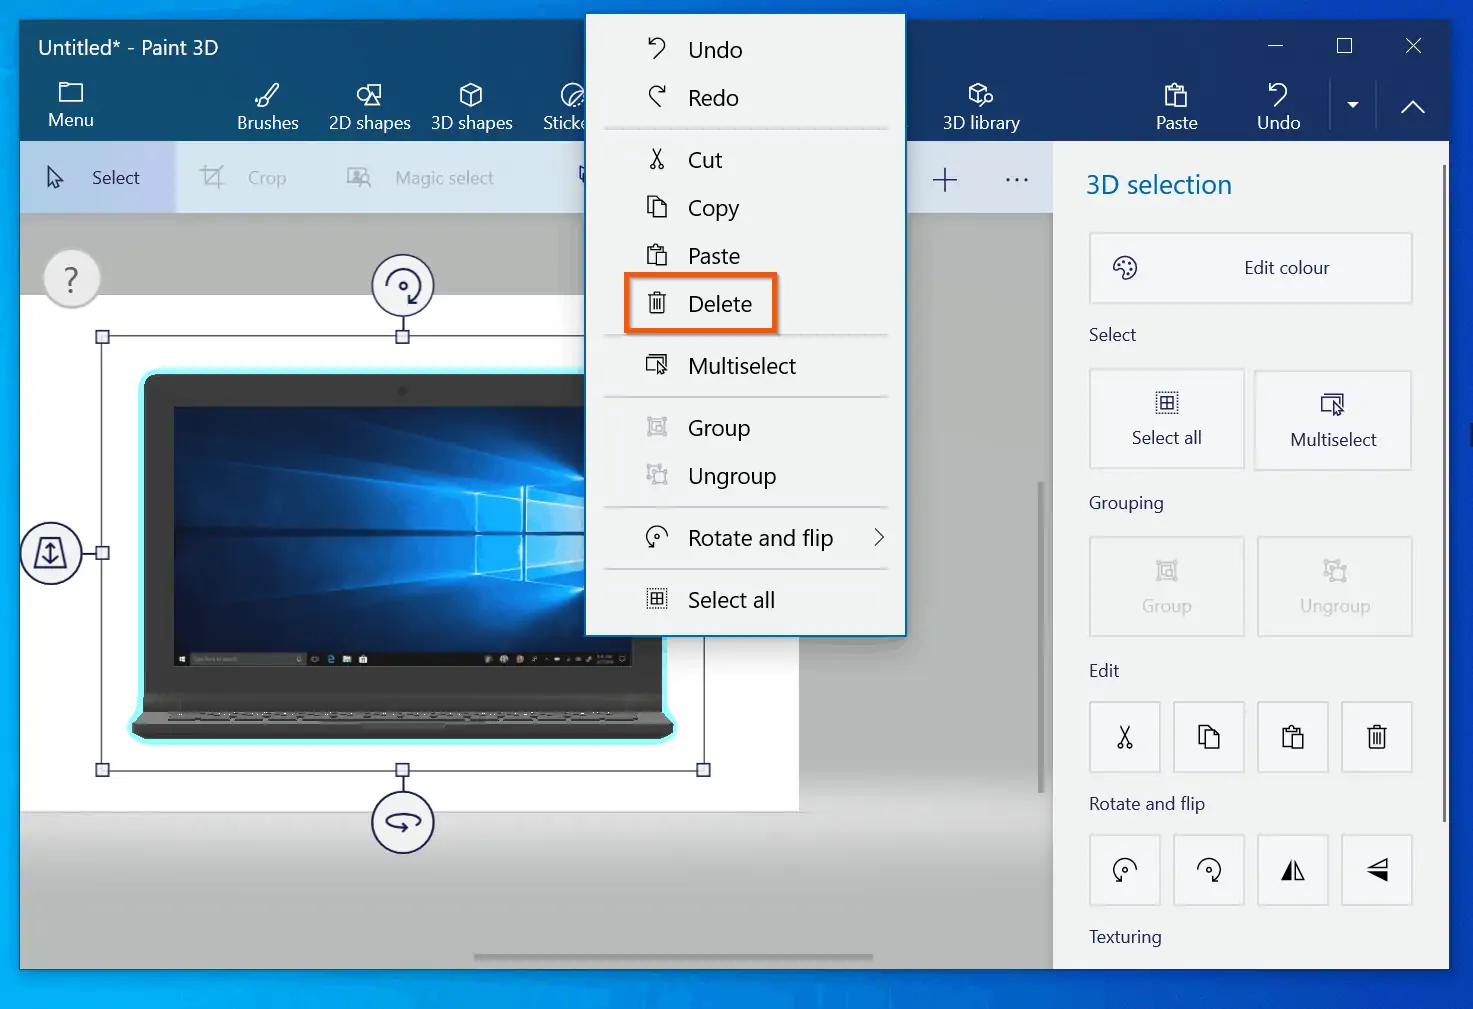
To delete in Paint 3D, click the Text icon on the top menu.
Then, drag your mouse through the image or part of it. Finally, press the Delete key on your keyboard. Alternatively, right-click the highlighted area and select Delete.
How to Merge Pictures in Microsoft Paint and Paint 3D
In my writing career, from time to time, the need to merge two pictures in Microsoft Paint has arisen. Whenever I need to, I use Microsoft Paint to merge photos.
In this section of the Windows 10 Paint help guide, I will show you how to merge photos with Microsoft Paint or Paint 3D.
How to Merge Pictures in Microsoft Paint
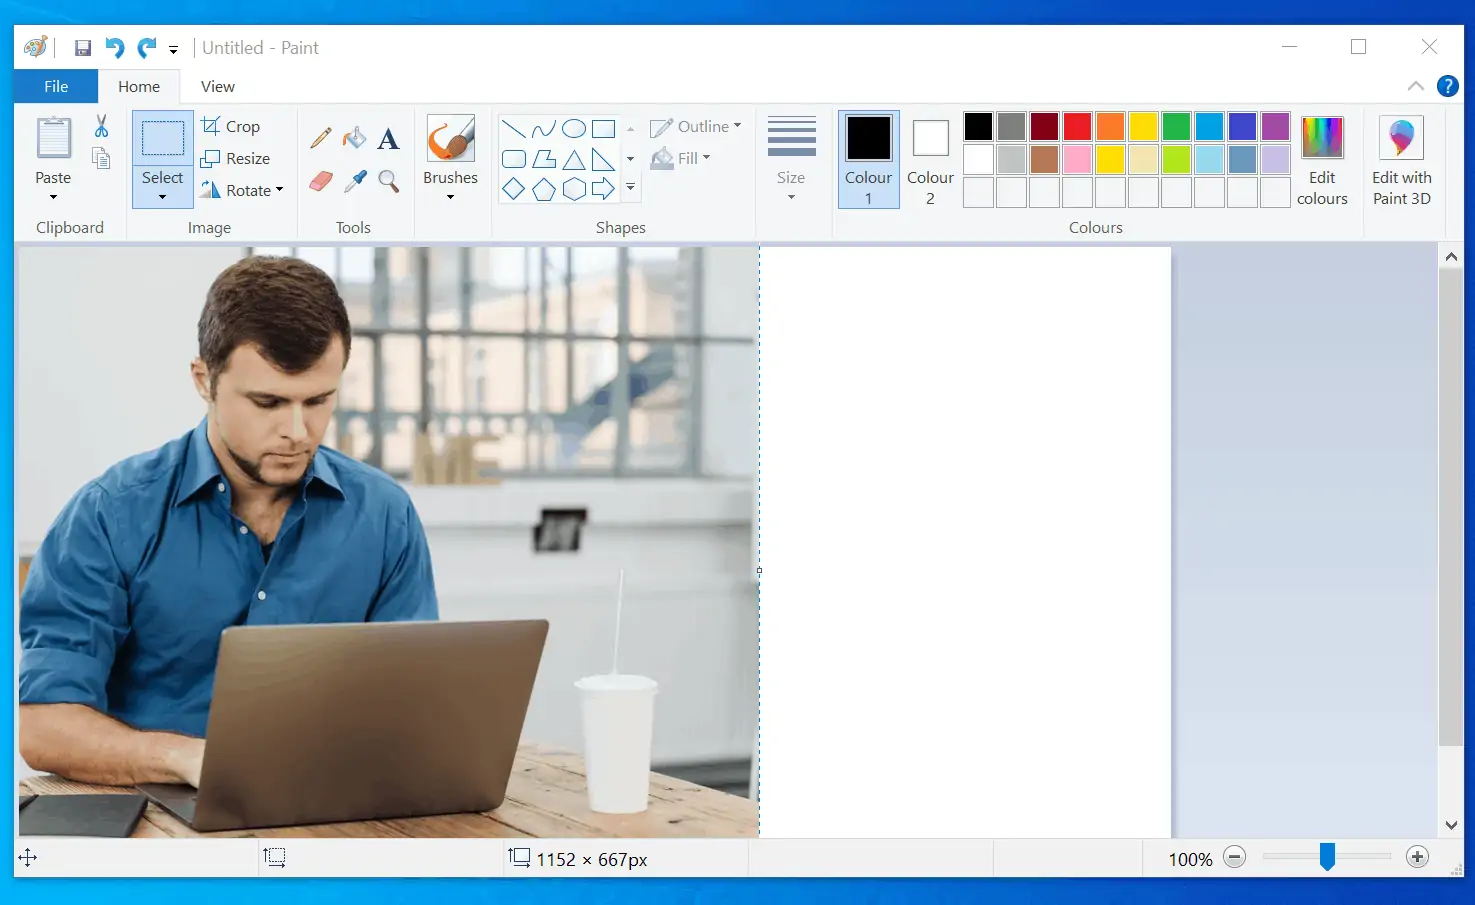
- To import the first photo to Paint, click the Paste drop-down and select Paste from.
- Then, select the photo and open it. To create space for the second photo, drag the first photo to the left or to the right – depending on where you want it to be in the new merged photo.
- Repeat steps 1 and 2 to import the second photo. Then, drag the second photo to where you want it in the canvas.
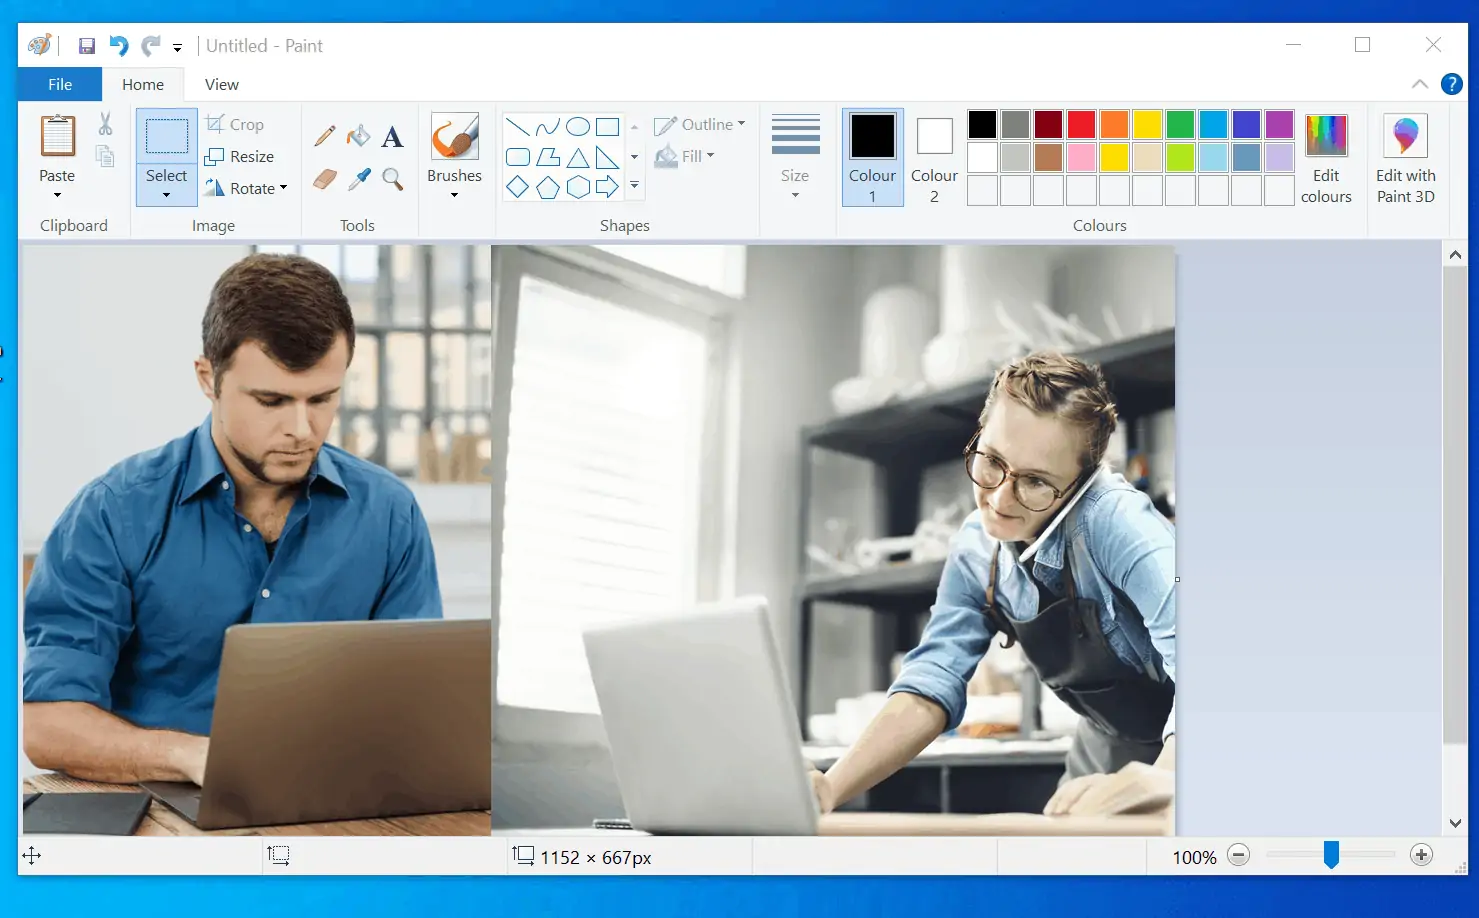
- Finally, you can save the new merged photos (File -> Save). Alternatively, use Ctrl + A to select the photo and copy. Here is my merged photo below – I simply selected all, copied, and pasted it here!

How to Merge Pictures in Paint 3D
If, on the other hand, you prefer working with Paint 3D, here are the steps to merge photos in Paint 3D:
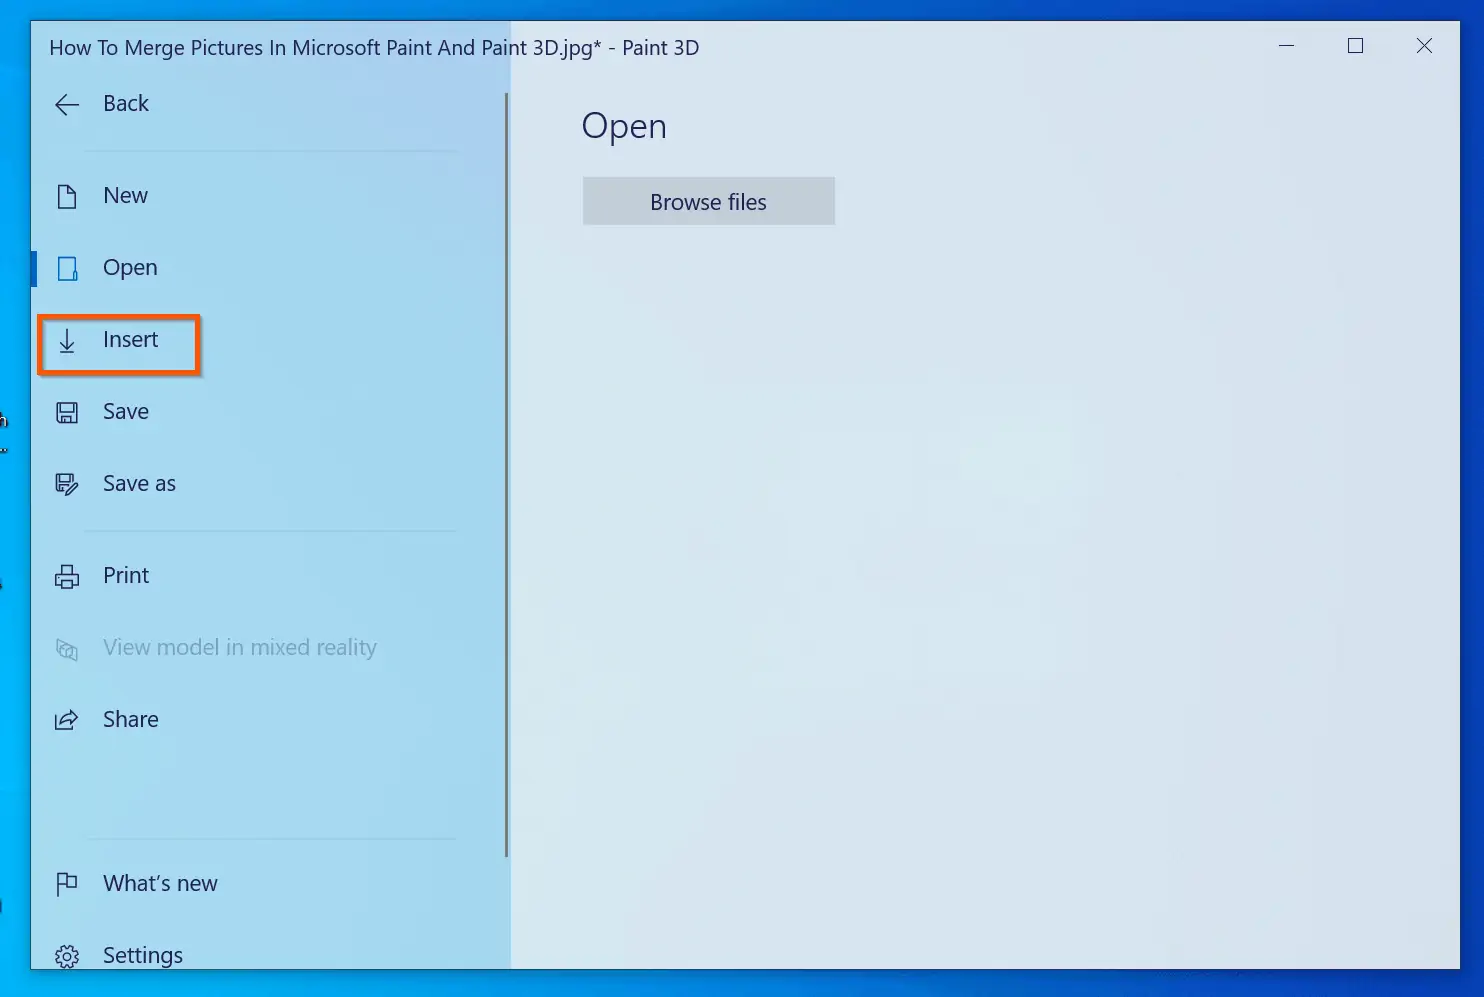
- On the top left of Paint 3D, click Menu.
- Then, from the displayed options, click Insert – locate the photo and insert it into Paint 3D.
- After inserting the first photo, press Ctrl and A keys to select it. Then, drag it to the part of the canvas you want it in the merged photo.
- Repeat steps 1-3 to insert the second photo. Then, drag it to where you want it in the merged photo.
Here is my merged photo!

How to Crop, Rotate and Resize Images in Paint and Paint 3D
We are now in the 9th section of this comprehensive Windows 10 Paint help guide. In this section, we will cover cropping, rotating and resizing images in Paint and Paint 3D.
How to Crop Images inMicrosoft Paint
To crop an image in Microsoft Paint, follow the steps below:
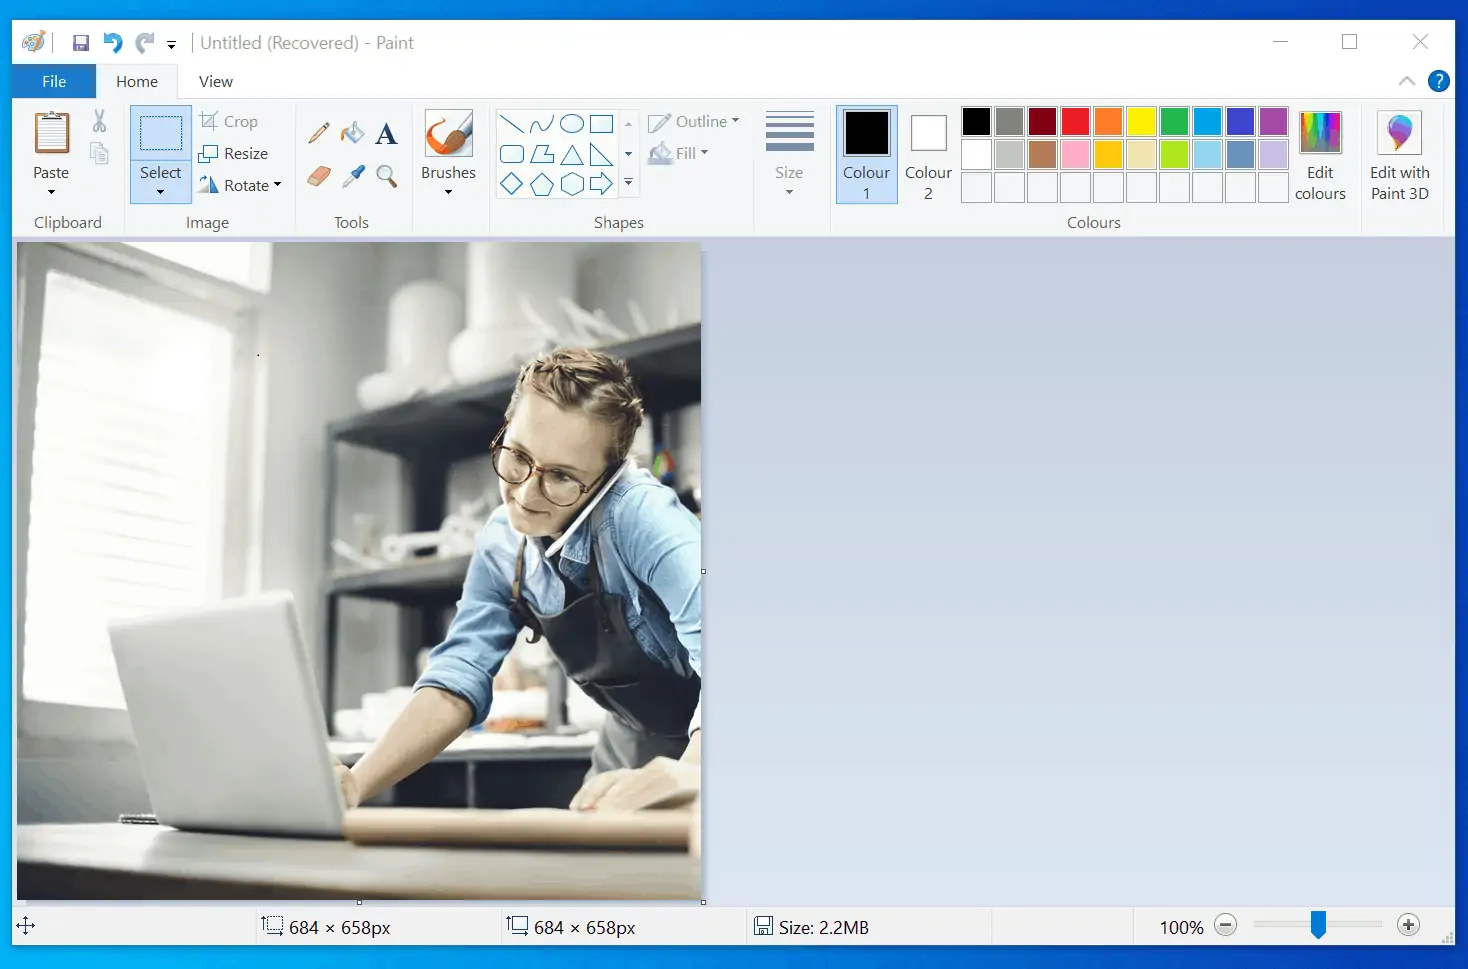
- Click the Select drop-down. Next, click on your selection tool. In this example, I will use the Rectangular selection tool.
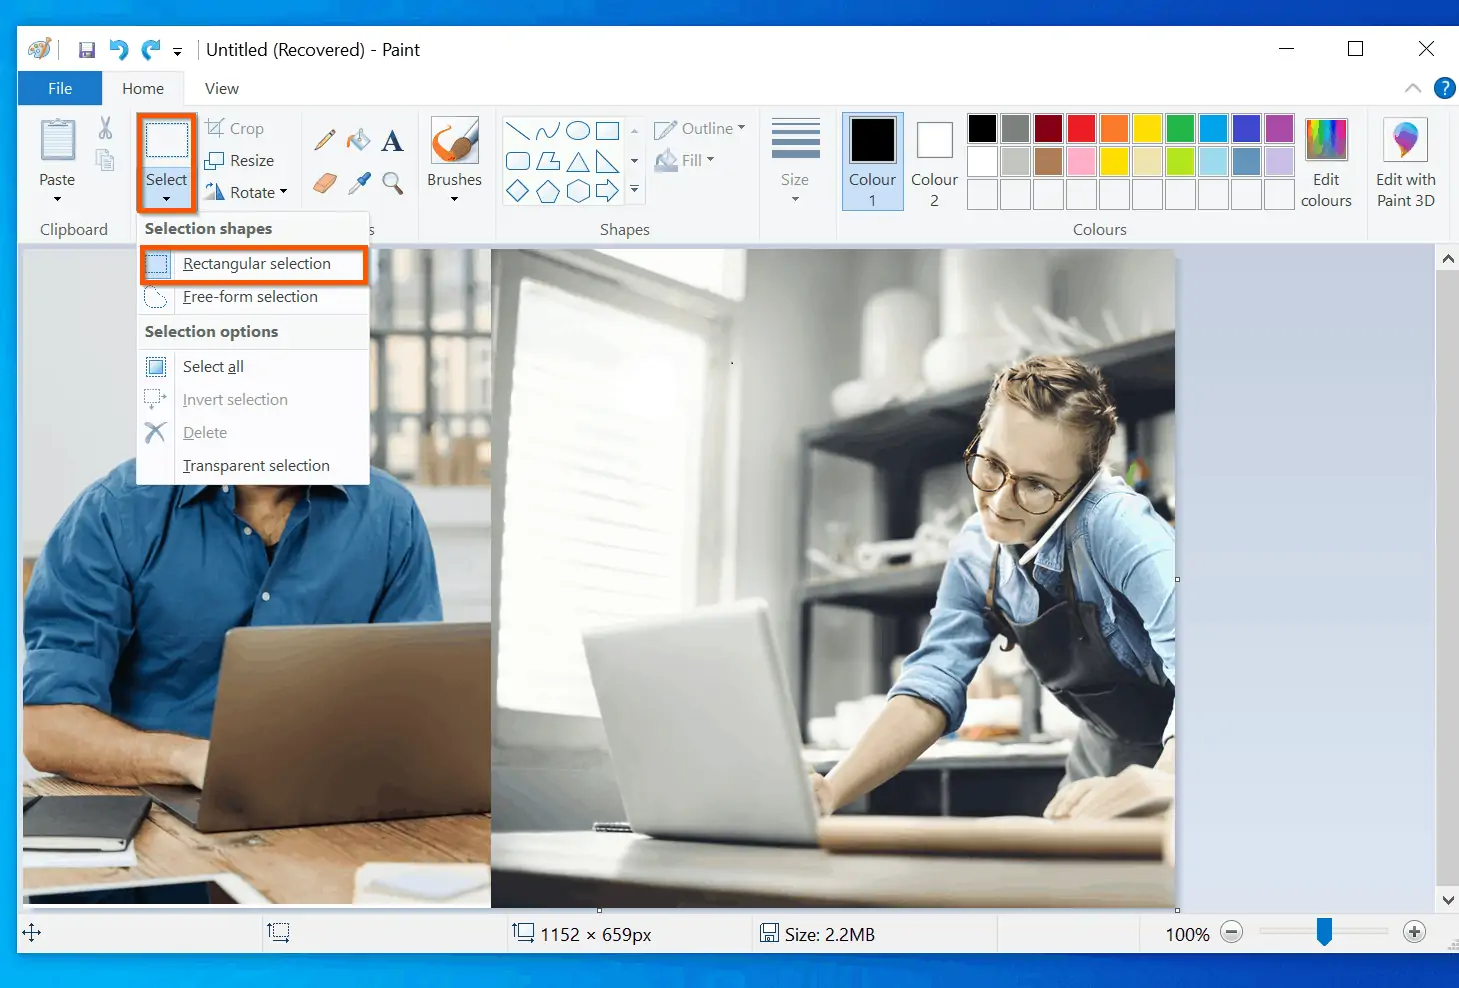
- With the selection tool selected, click around the image you want to retain. In this example, I want to retain the image on the right and remove the one on the left. I will drag my mouse around the image on the right.
- Then, on the Image section of the Microsoft Paint menu, click Crop.
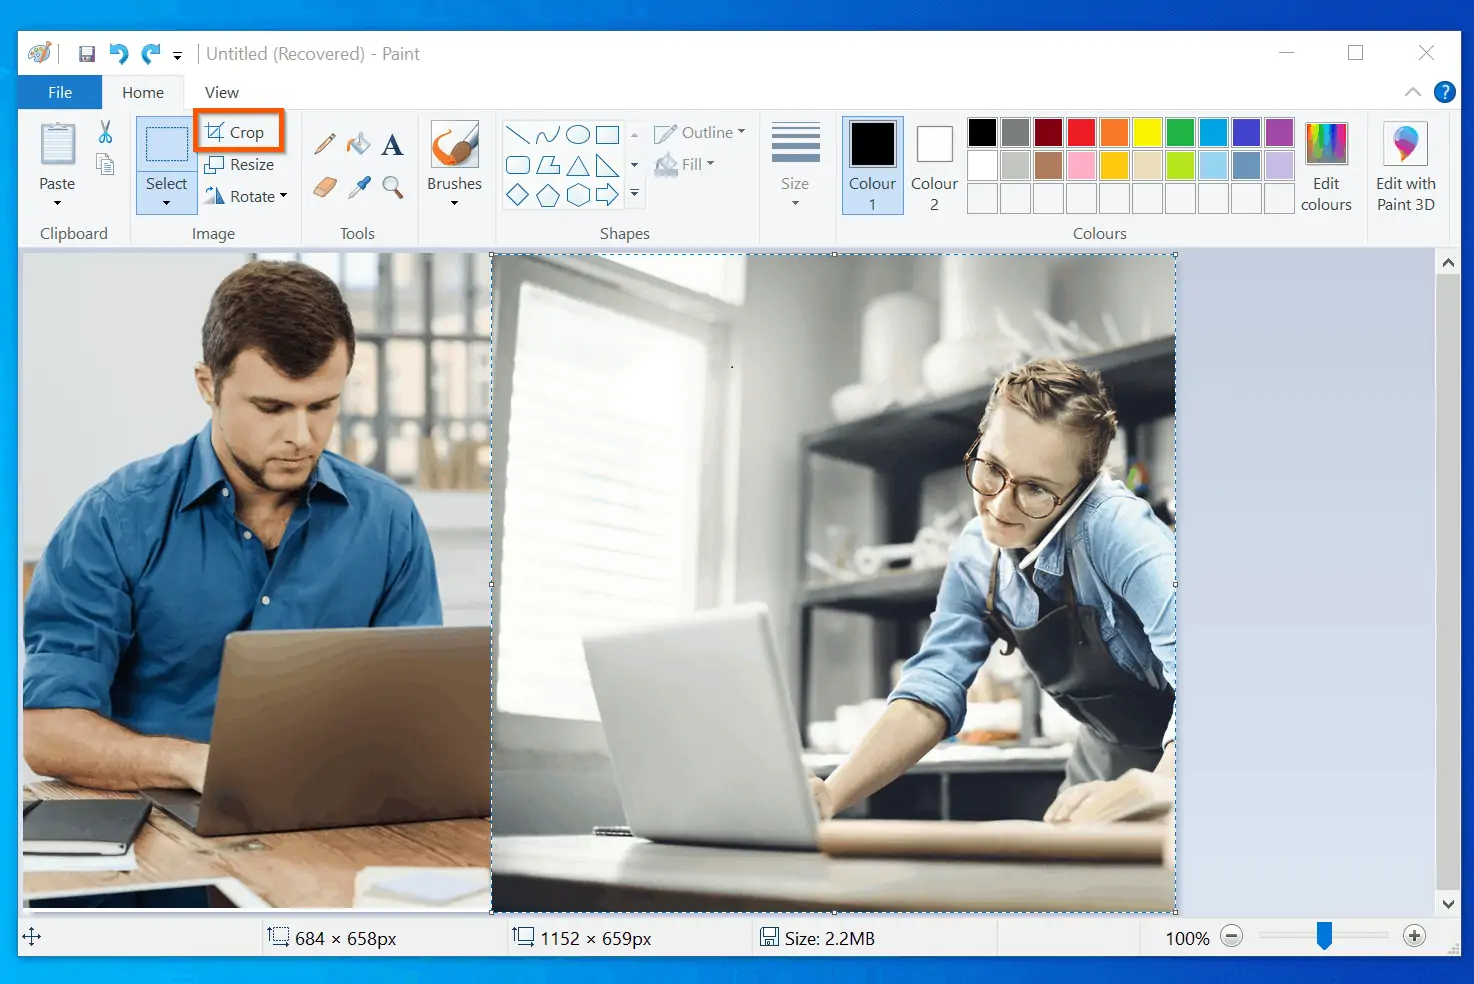
My image cropped and now shows just the part I want to retain.
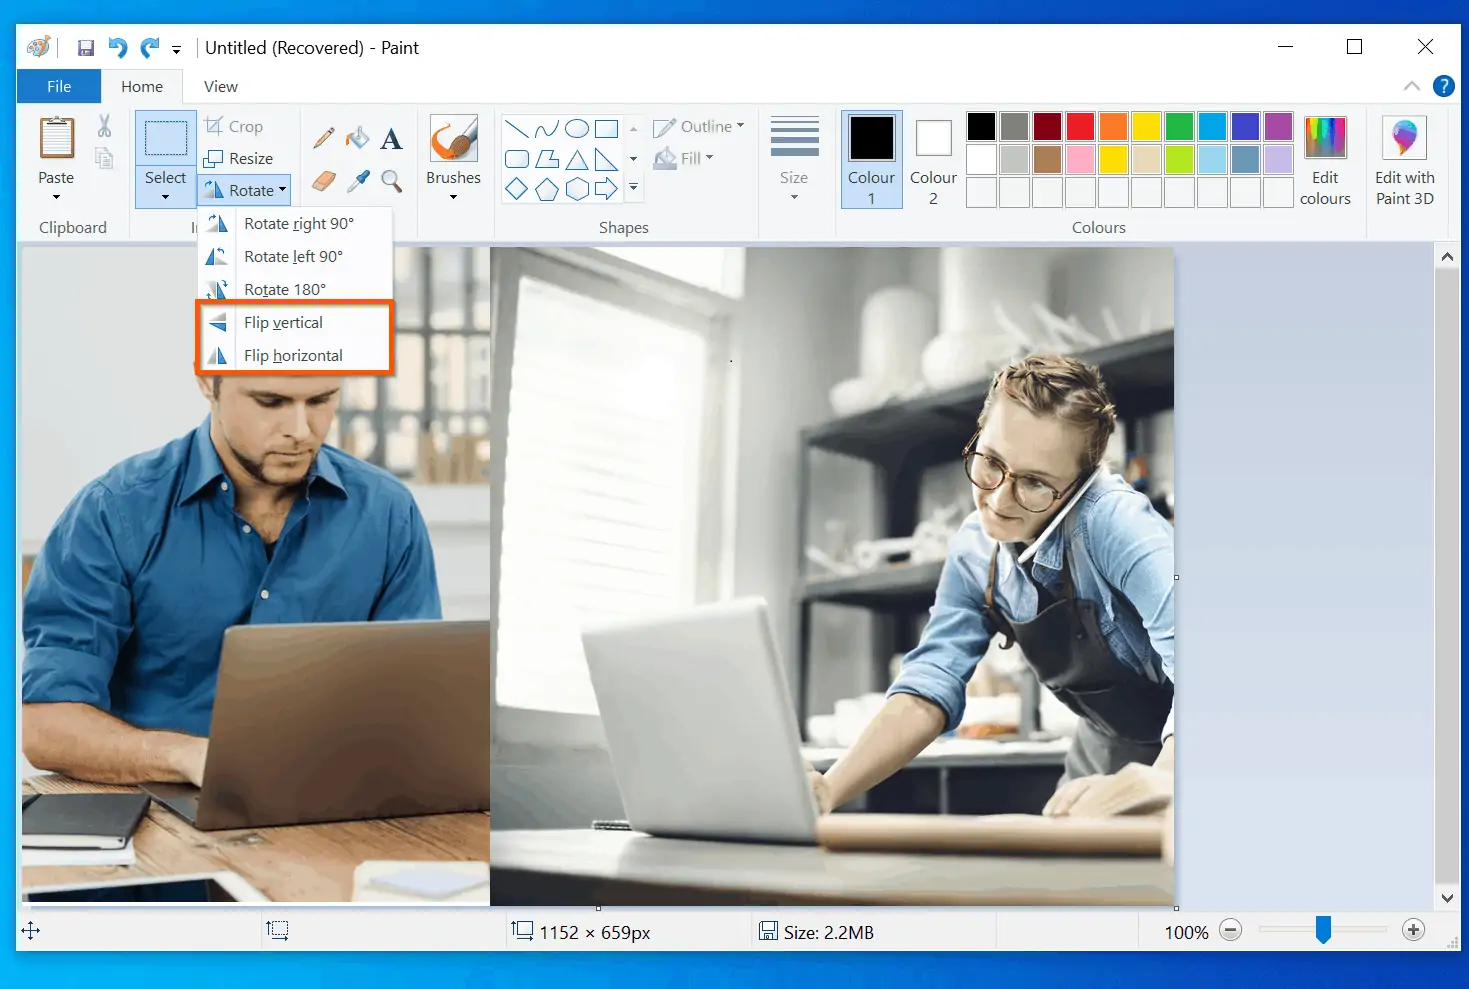
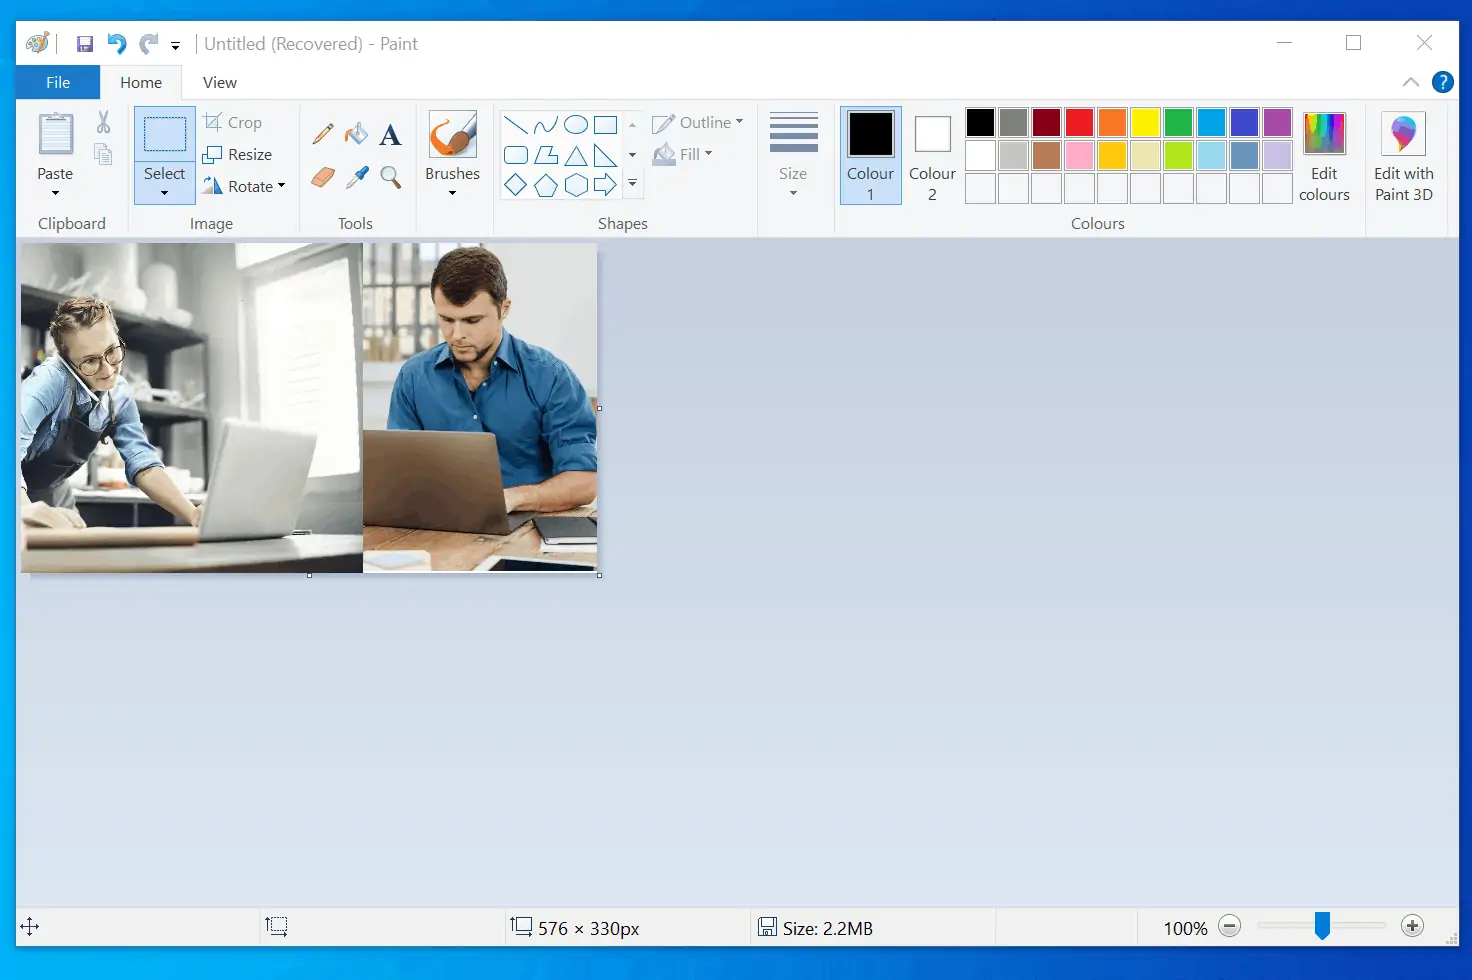
How to Rotate or Flip an Image in Microsoft Paint
Rotating an image is another essential Windows 10 Paint help. Here are the steps to rotate an image in Microsoft Paint:
- On the Image section of the Paint menu, click the Rotate drop-down.
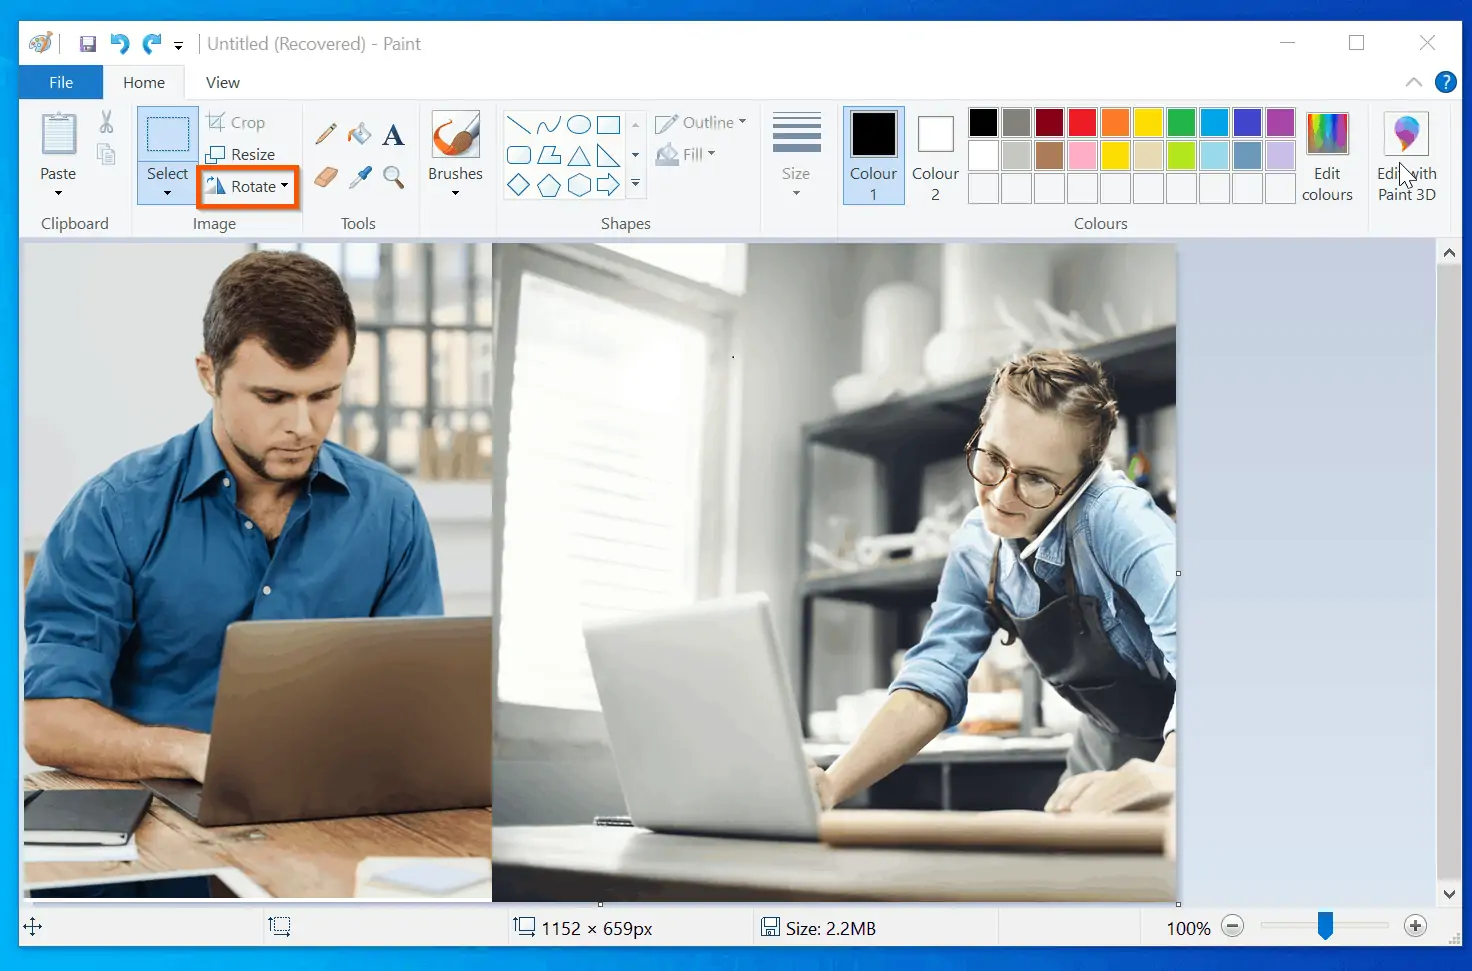
- Then, select the degrees you want to rotate the image by.
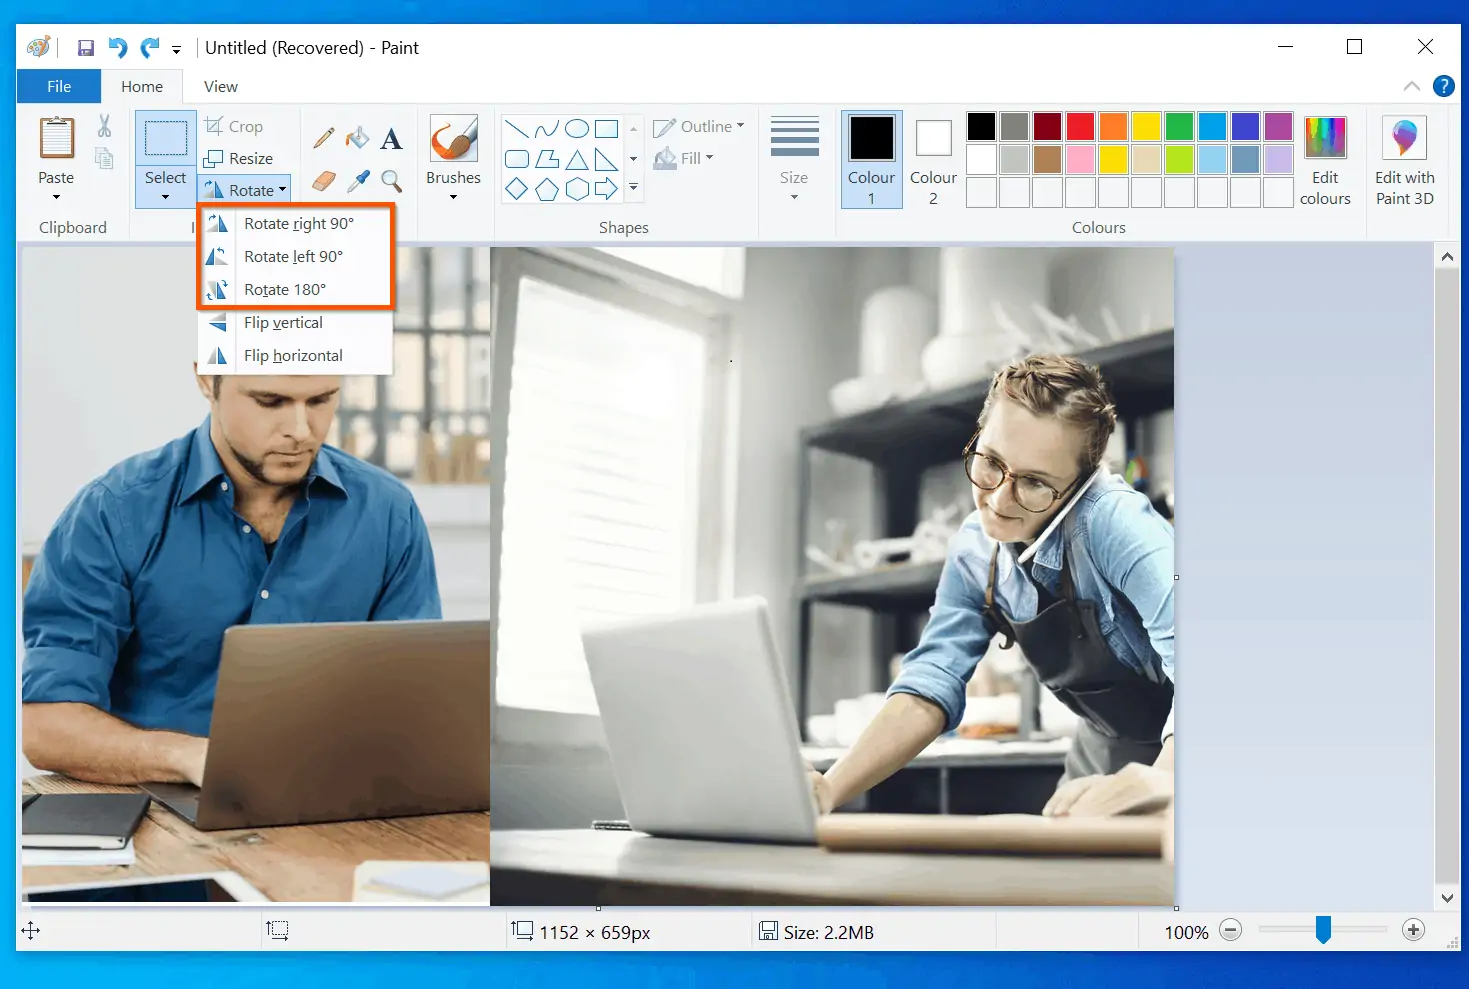
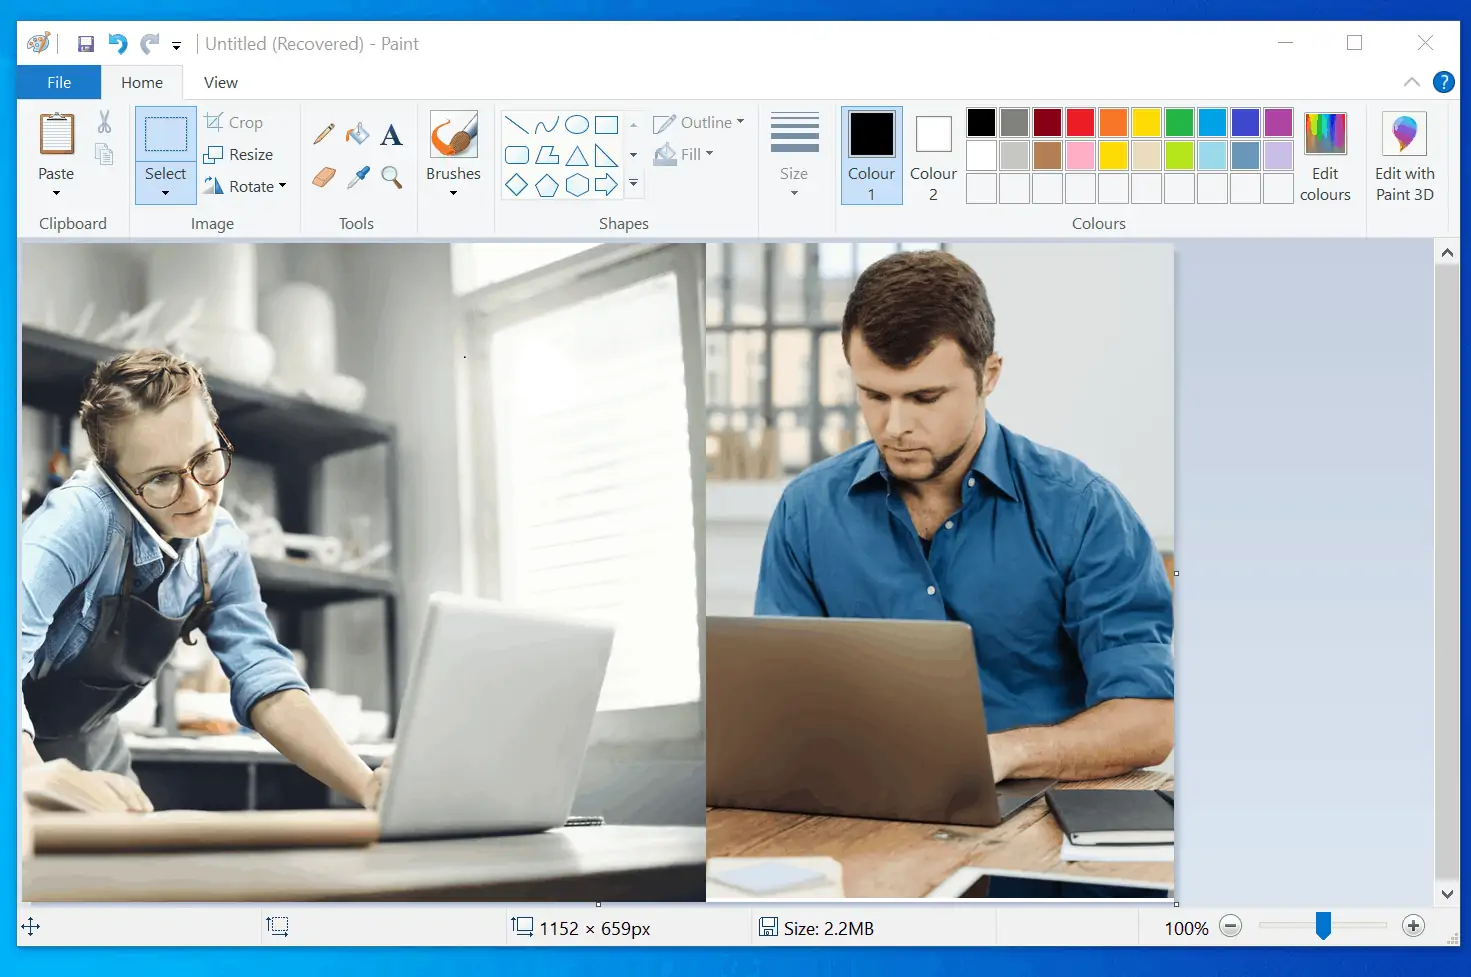
You can also flip the the image vertical or horizontal.
Here is the above image flipped horizontal – effectively changing the position of the 2 people in the image!
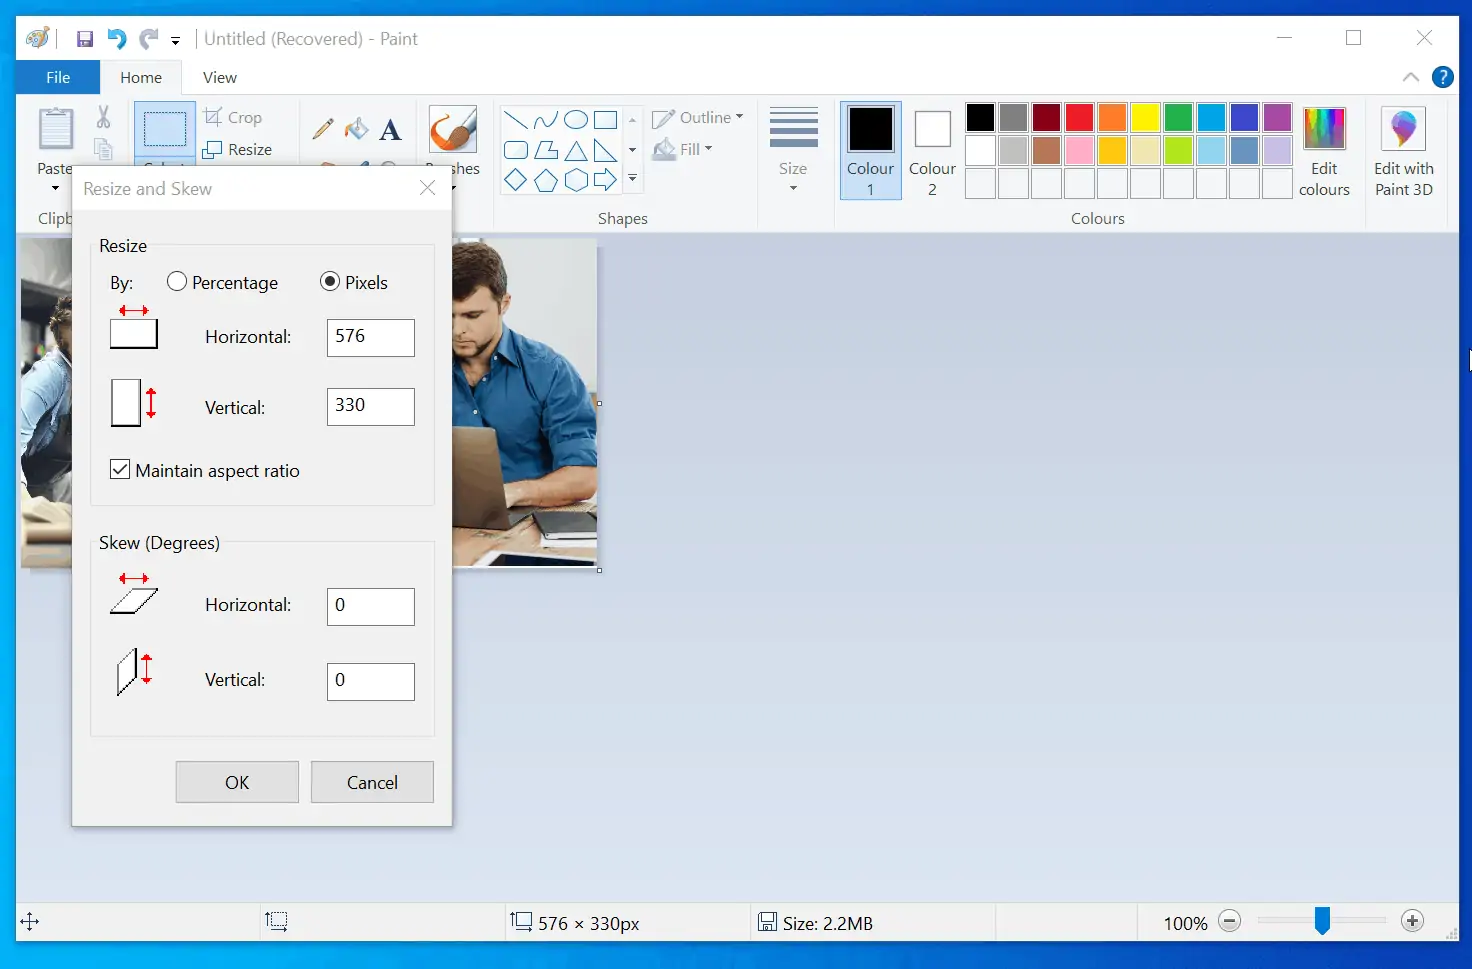
How to Resize Images in Microsoft Paint
To resize an image in Microsoft Paint:
- Click Resize in the Image section of the Paint menu.

Microsoft Paint offers 2 resize options. You can either resize by Percentage (default), or by Pixels.
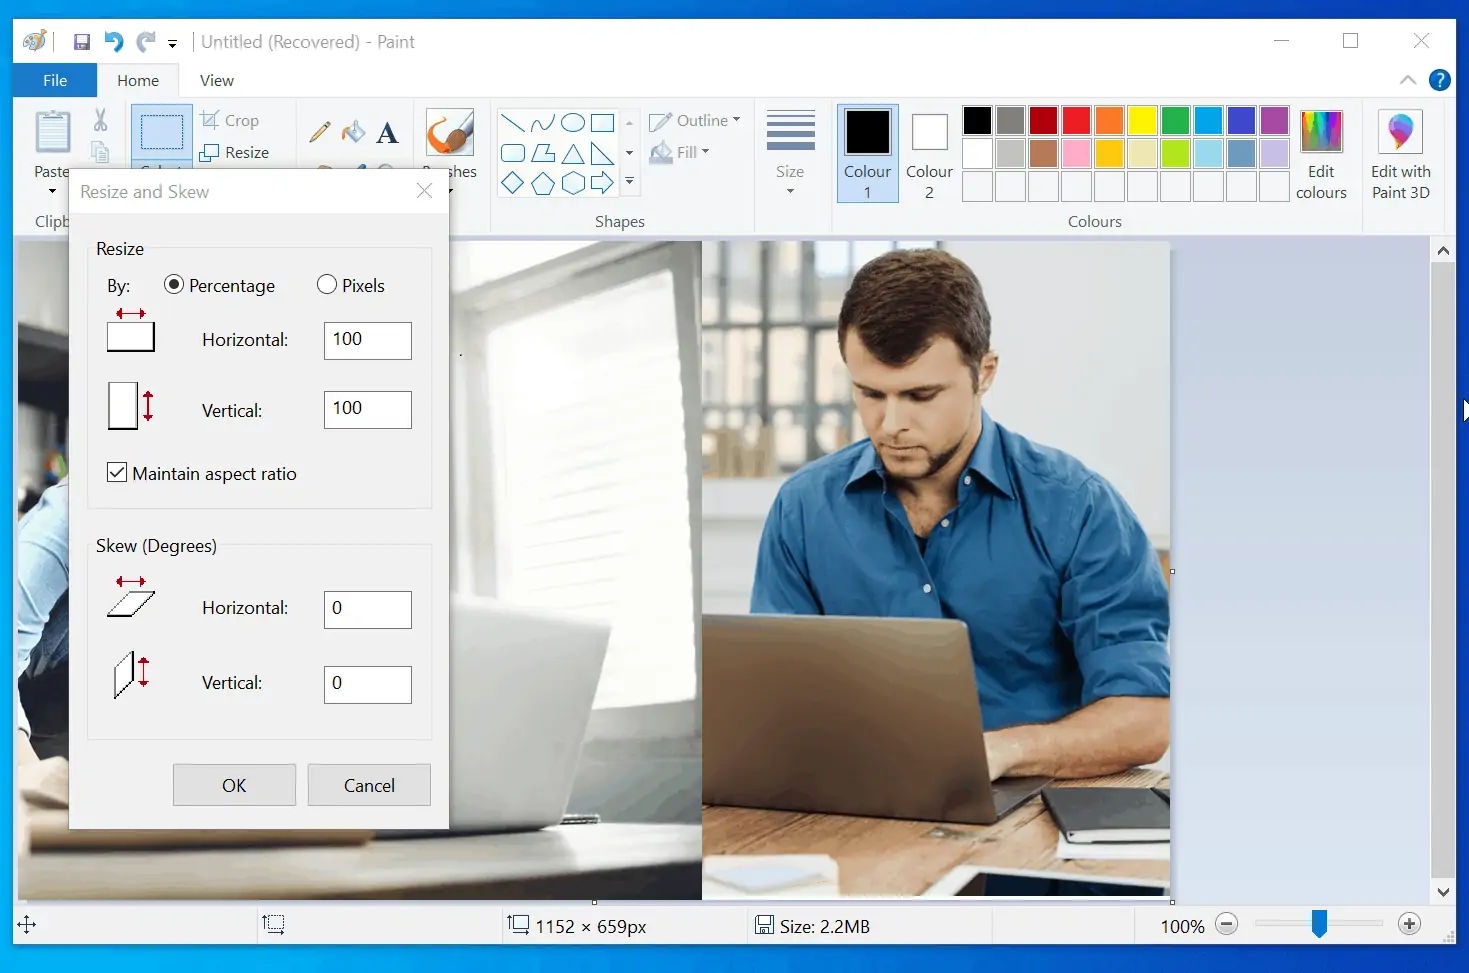
To adjust the size of the image using the Percentage feature, change the Horizontal and Vertical % values. The default is 100. In this example, I want to reduce the image to 50% of its current size. I will change the Horizontal % values to 50.
Because the Maintain aspect ratio checkbox is checked, when I enter 50 in the Horizontal field, 50 will also be displayed in the Vertical field. Finally, to save the new size, click OK

As seen in the screenshot below, the image has reduced by 50% on both sides.
You can resize any image by any % value.
Additionally, you can resize an image using the Pixels option. To do this, select Pixels in the Resize options screen. Then, enter the new Pixel values and click OK.
How to Crop and Resize Images in Paint 3D
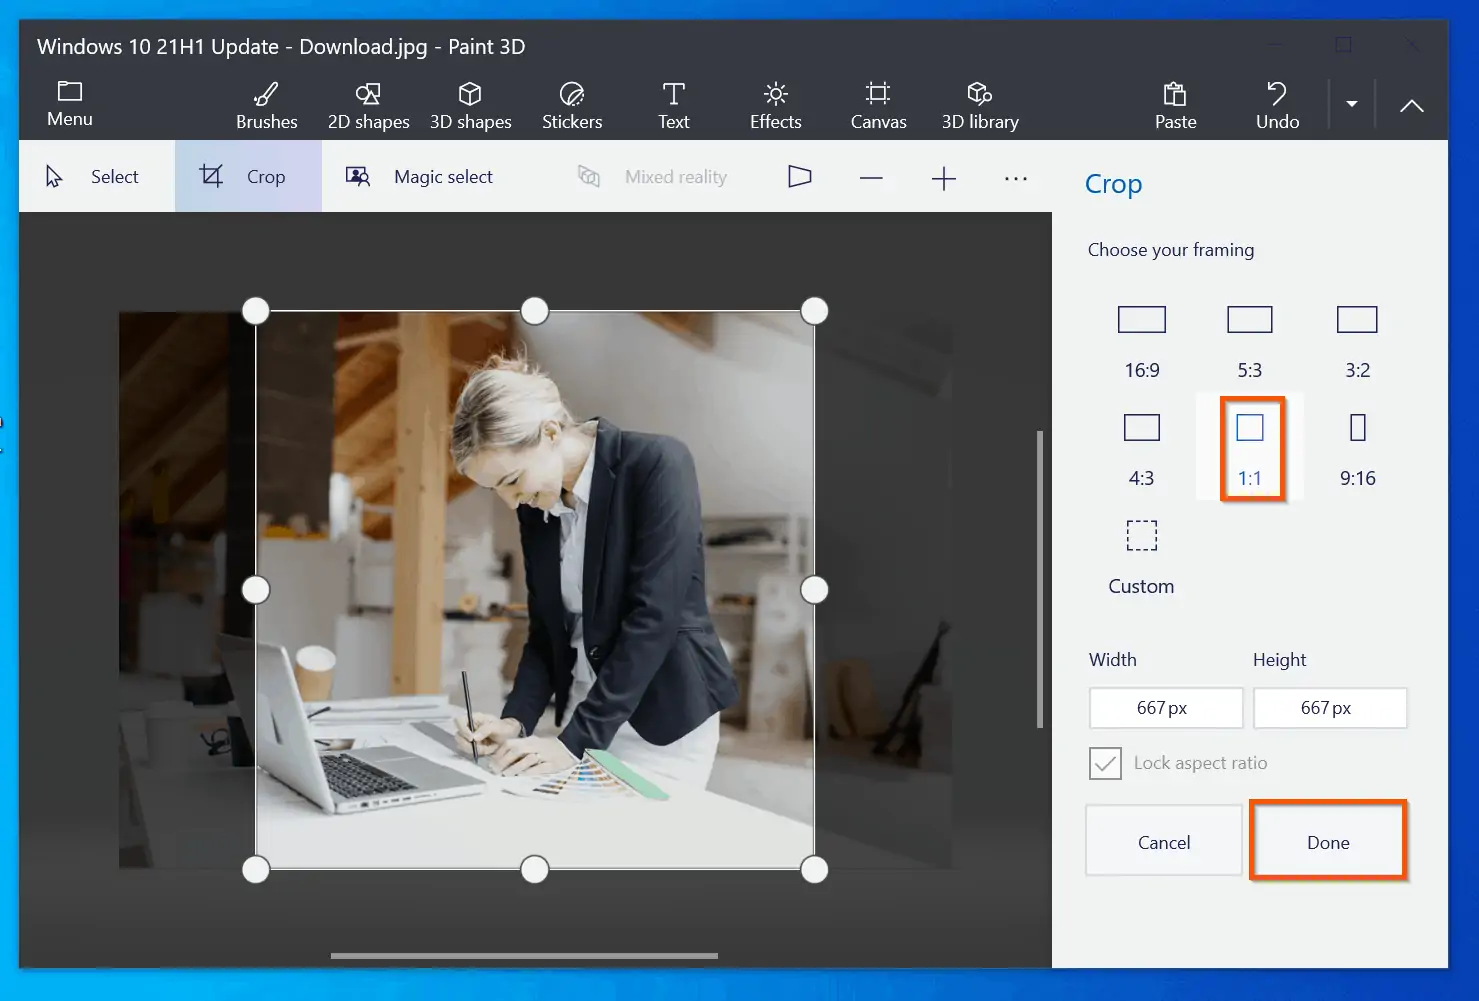
Compared to Microsoft Paint, it the cropping tool in Paint 3D is more advanced. Here is how to use the cropping tool in Paint 3D:
- On the top menu of Paint 3D, click Crop. The image will be highlighted and additional cropping options will be displayed on the right pane.
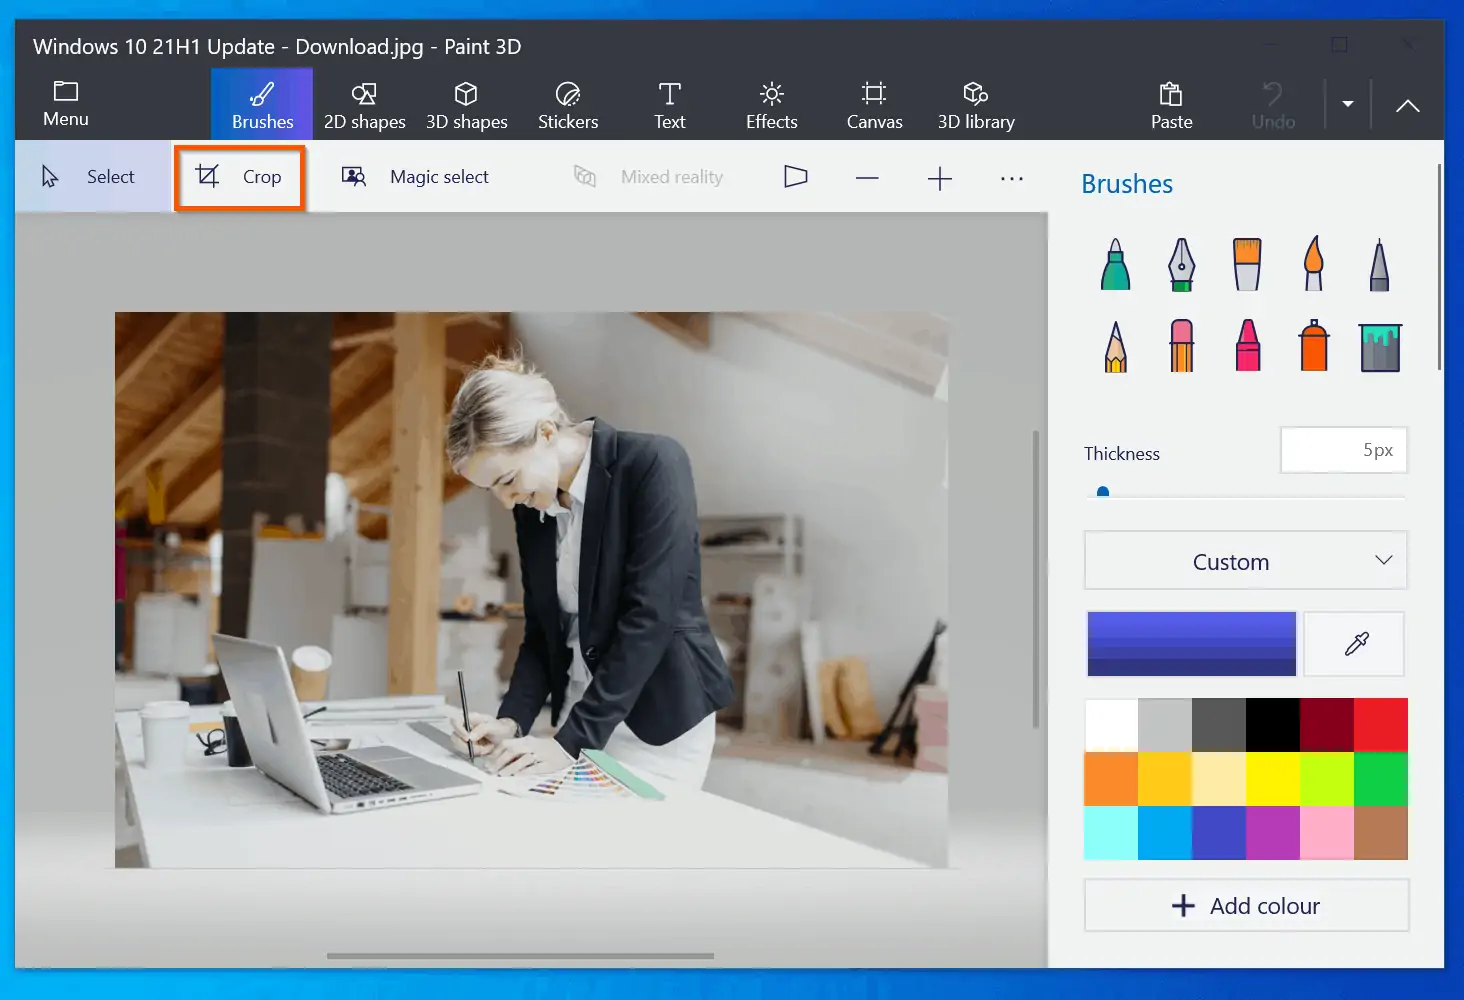
- For fast cropping, select one of the predefined options in “Choose your framing” section. You could also click Custom to add a your custom frame. Further down that pane, you may amend the Width and Height of the mage. There is also an option to Lock aspect ratio.
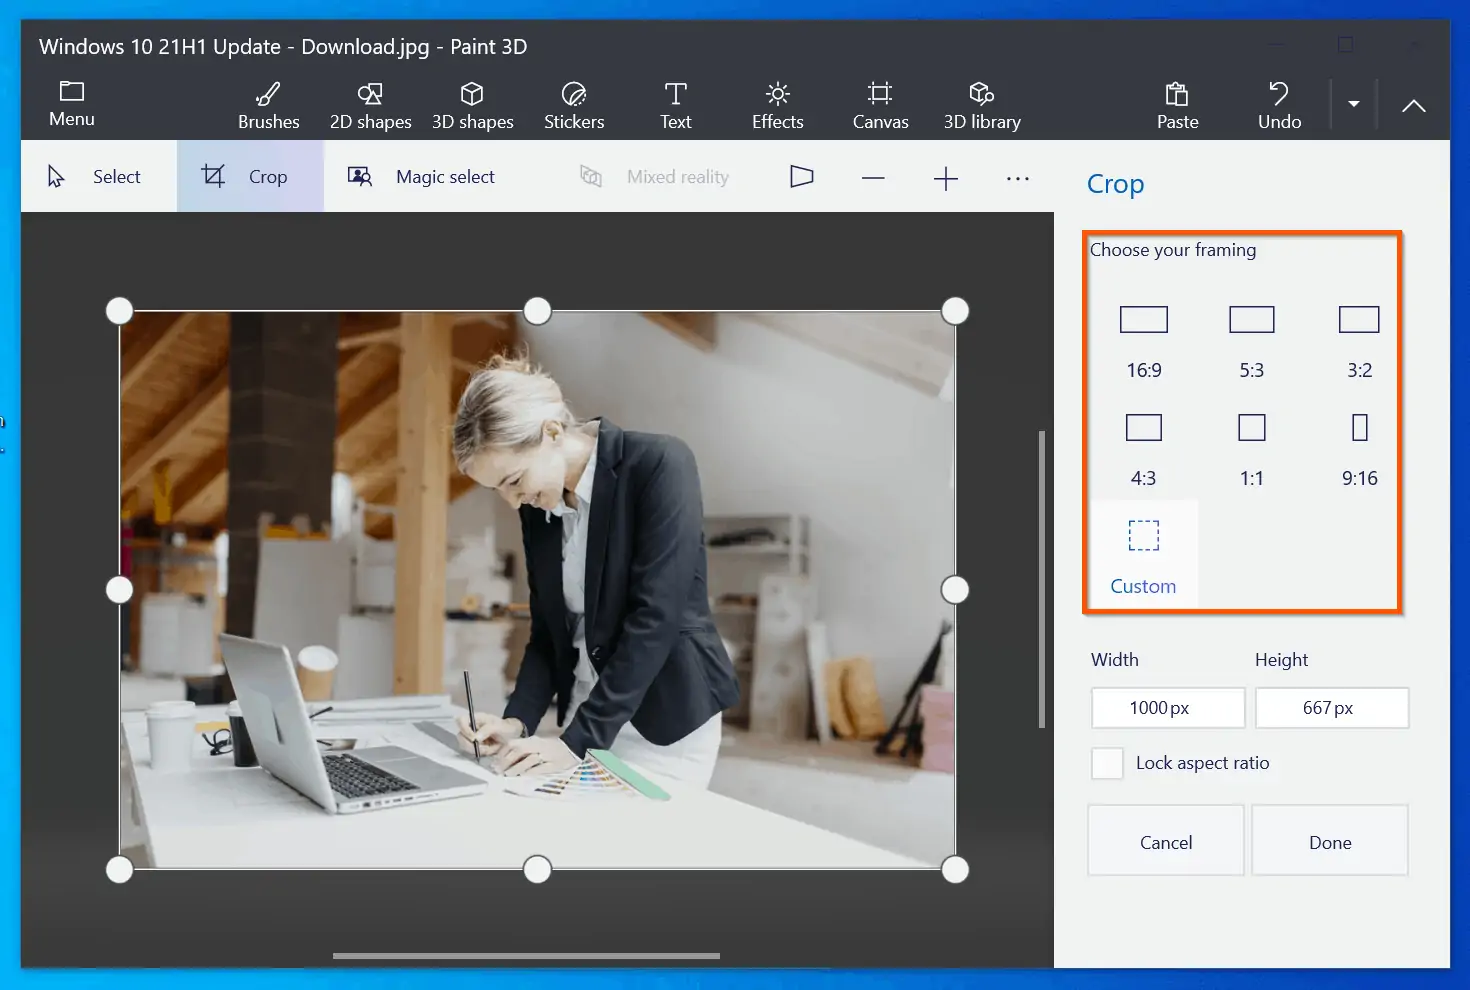
- Finally, when you finish with selecting your cropping options, at the bottom of the right pane, click Done.
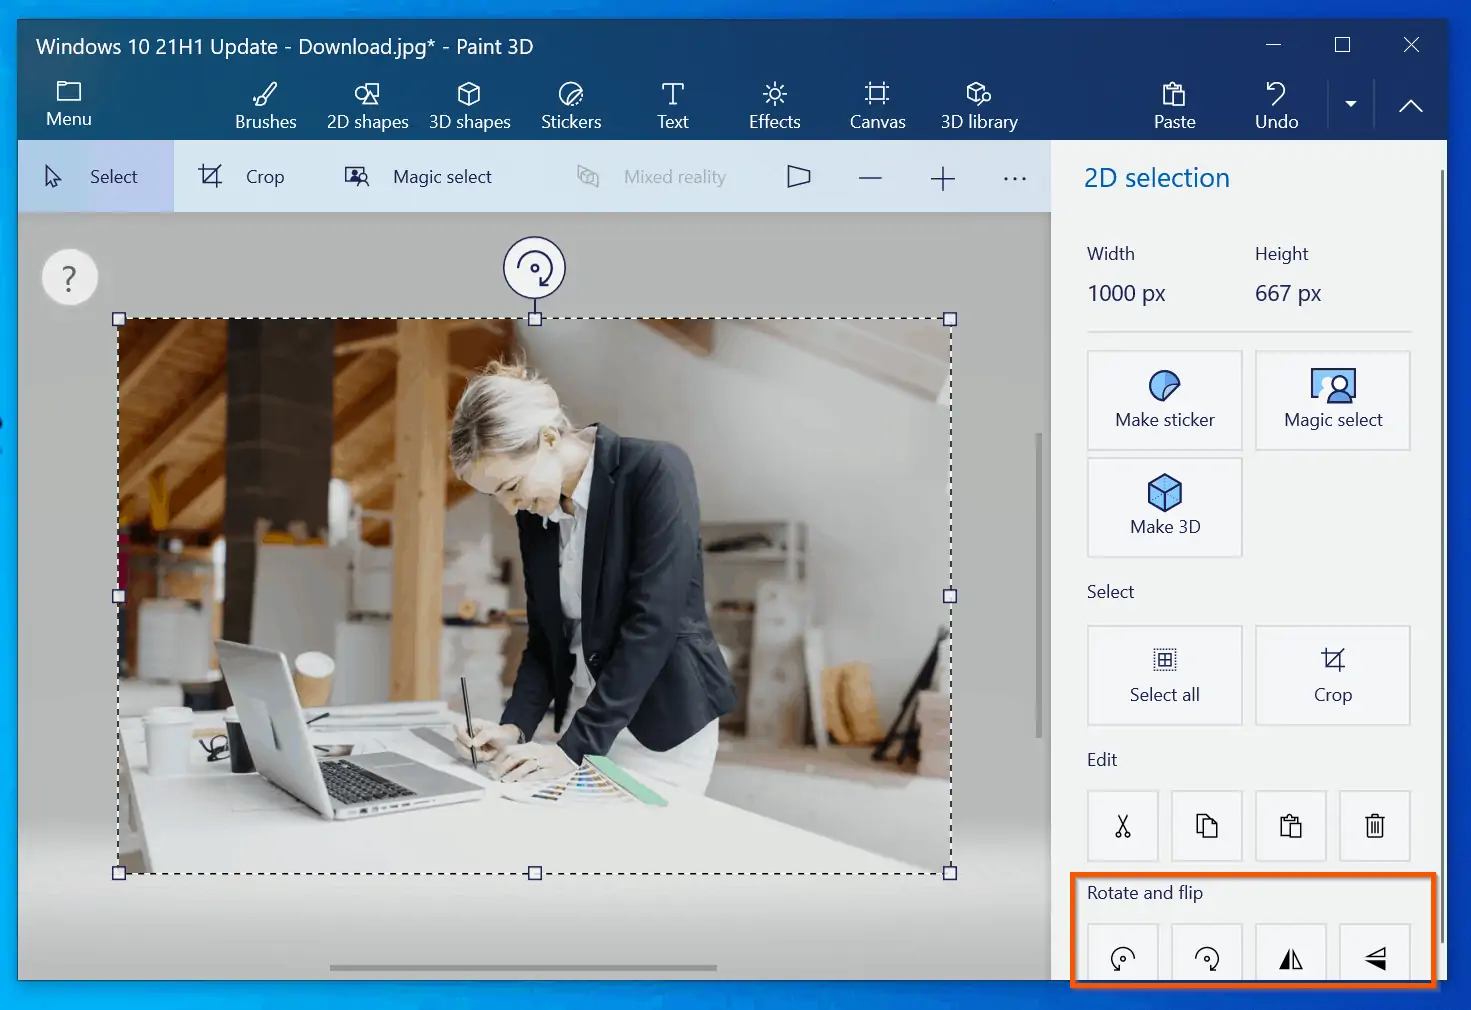
How to Rotate or Flip Images in Paint 3D
Follow the steps below to rotate or flip an image in Paint 3D
- Open the image you want to rotate or flip in Paint 3D. Then, press Ctrl and A keys on your keyboard to select the image. Once the image is selected, additional options will be displayed on the right pane of Paint 3D.
- At the bottom of the right pane, use the first 2 icons to rotate the image – and the last 2 to flip.
How to Save in Paint and Paint 3D
After doing all the hard work in Windows 10 Paint or Paint 3D, you will definitely need help saving it. This section shows you how to save in Microsoft Pain and Paint 3D.
How to Save in Microsoft Paint
There are 2 methods to save your work in Microsoft Paint. You can press the Ctrl and S keyboard shortcut or use the File menu. When you press Ctrl + S keys, if you are saving the image for the first time, the Save As dialogue will be displayed.
However, if you had previously saved the image, when you press Ctrl + S keys, all recent changes will be saved.
To access the Save or Save As option via the File menu, click File on the Microsoft Paint menu.

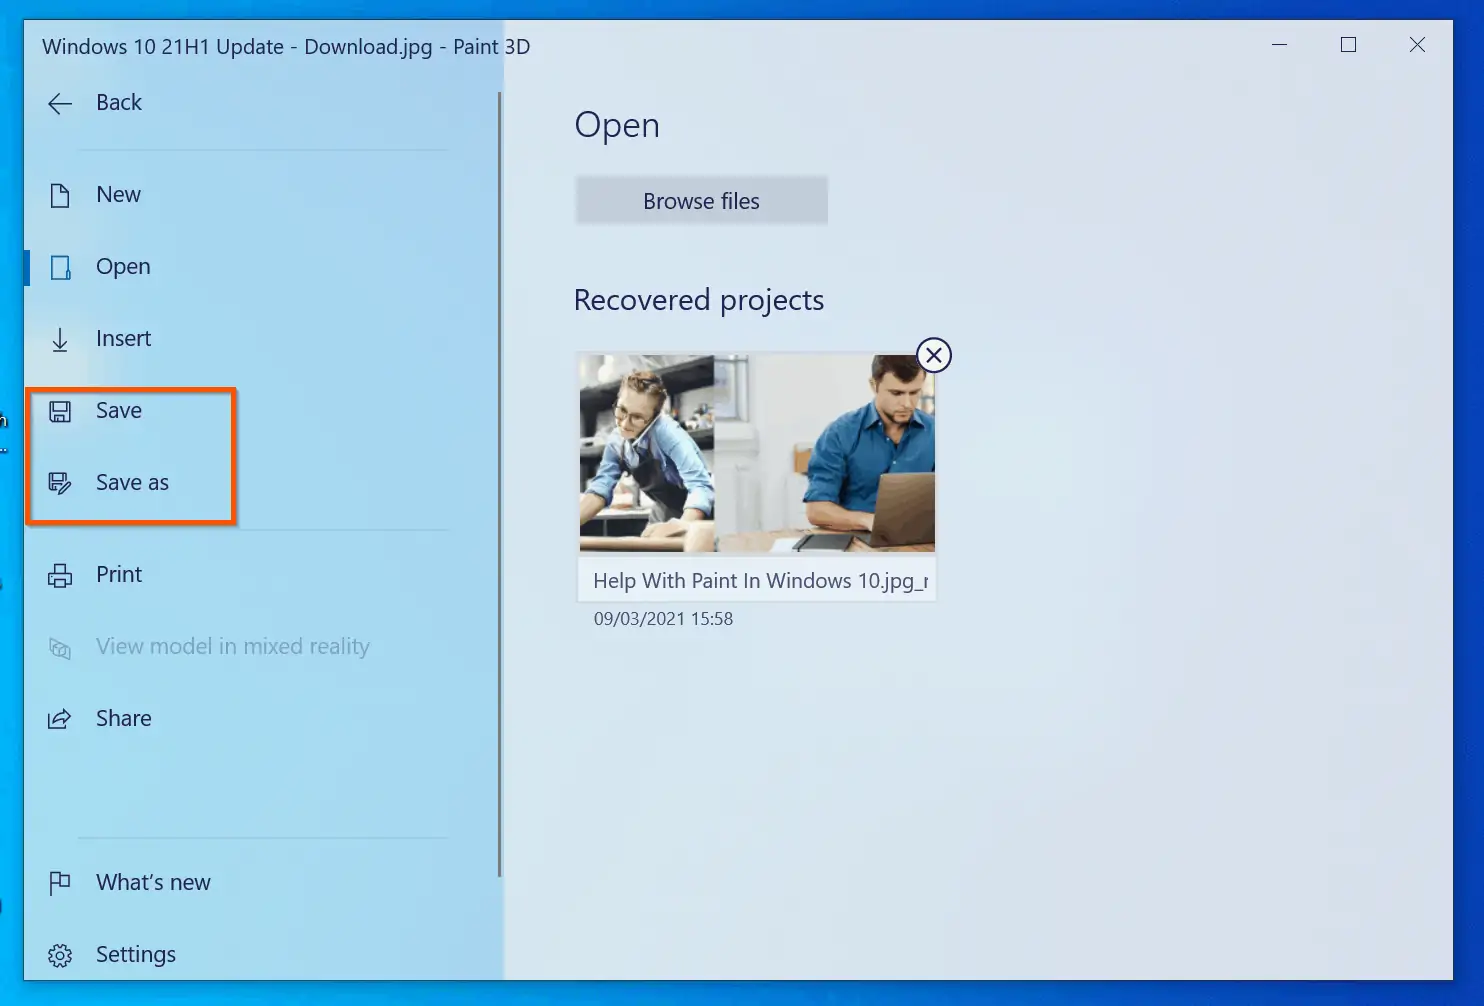
How to Save in Paint 3D
Like in Microsoft Paint, pressing the Ctrl and S keys in Paint 3D opens the Save As dialogue if you are saving the image for the first time. However, if you previously saved the image, pressing Ctrl and S keys saves recent changes.
To access the Save As and Save opens without the keyboard shortcut, click Menu.
Then, from the displayed options, select Save or Save As. If you select the Save
How to Print in Paint and Paint 3D
A number of Windows 10 users also want to get help with printing in Paint or Paint 3D. This section offers help for this topic.
How to Print in Microsoft Paint
To print an image in Microsoft Paint, you can use the Windows Print shortcut – Ctrl and P keys, pressed simultaneously. However, you may also access the print option from the File menu.
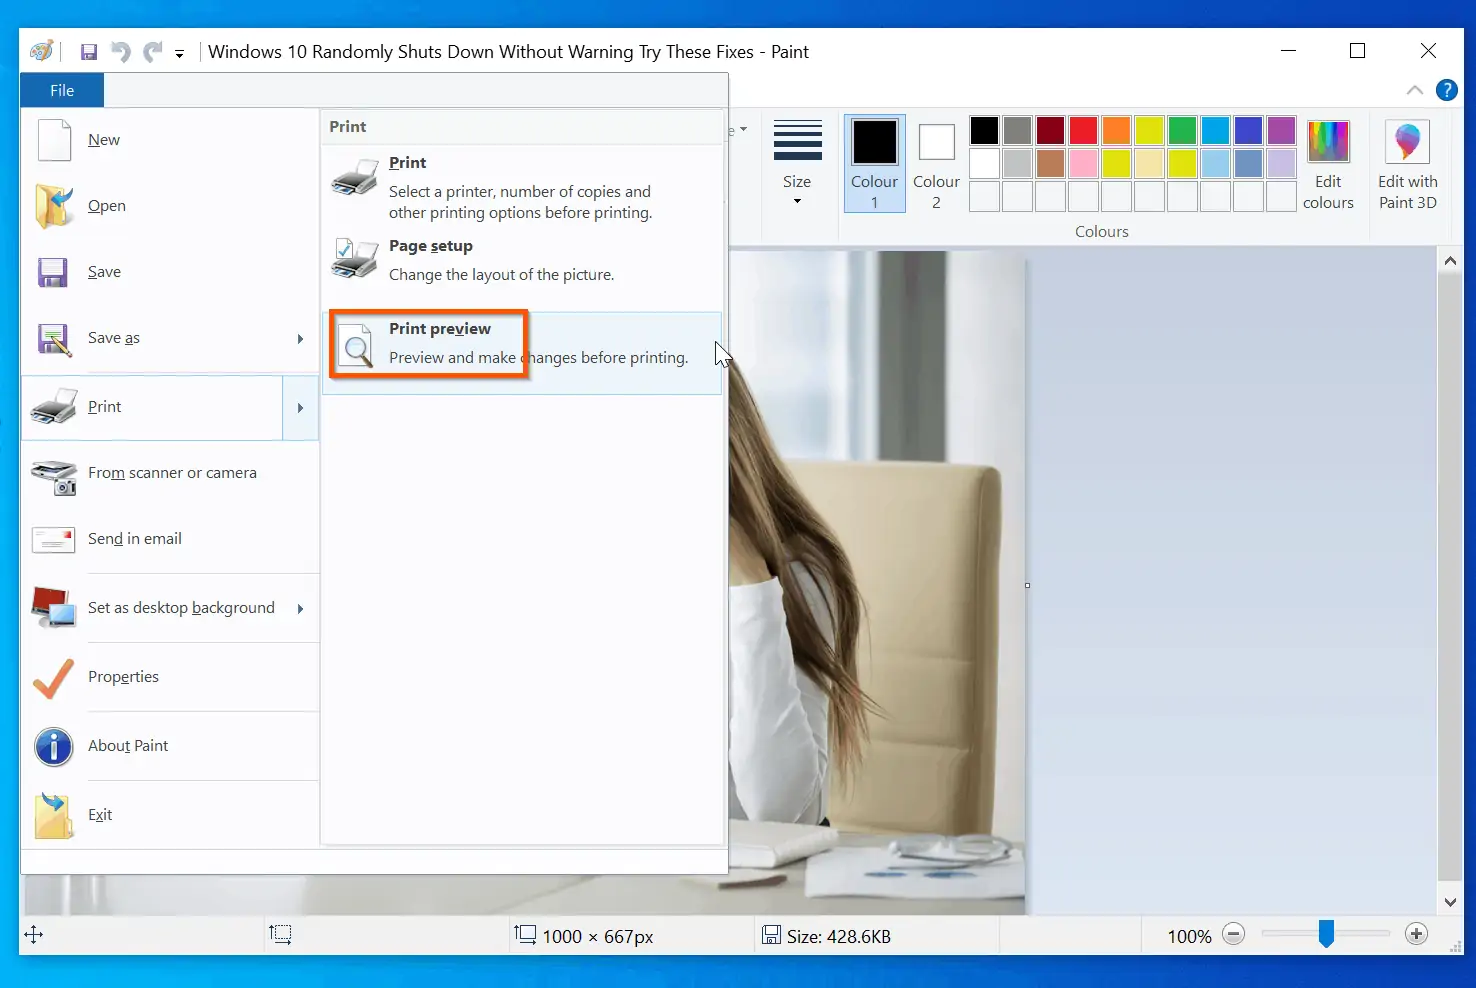
When you hover over Print (via File menu), Microsoft Paint offers 3 options – Print, Page setup, and Print preview.
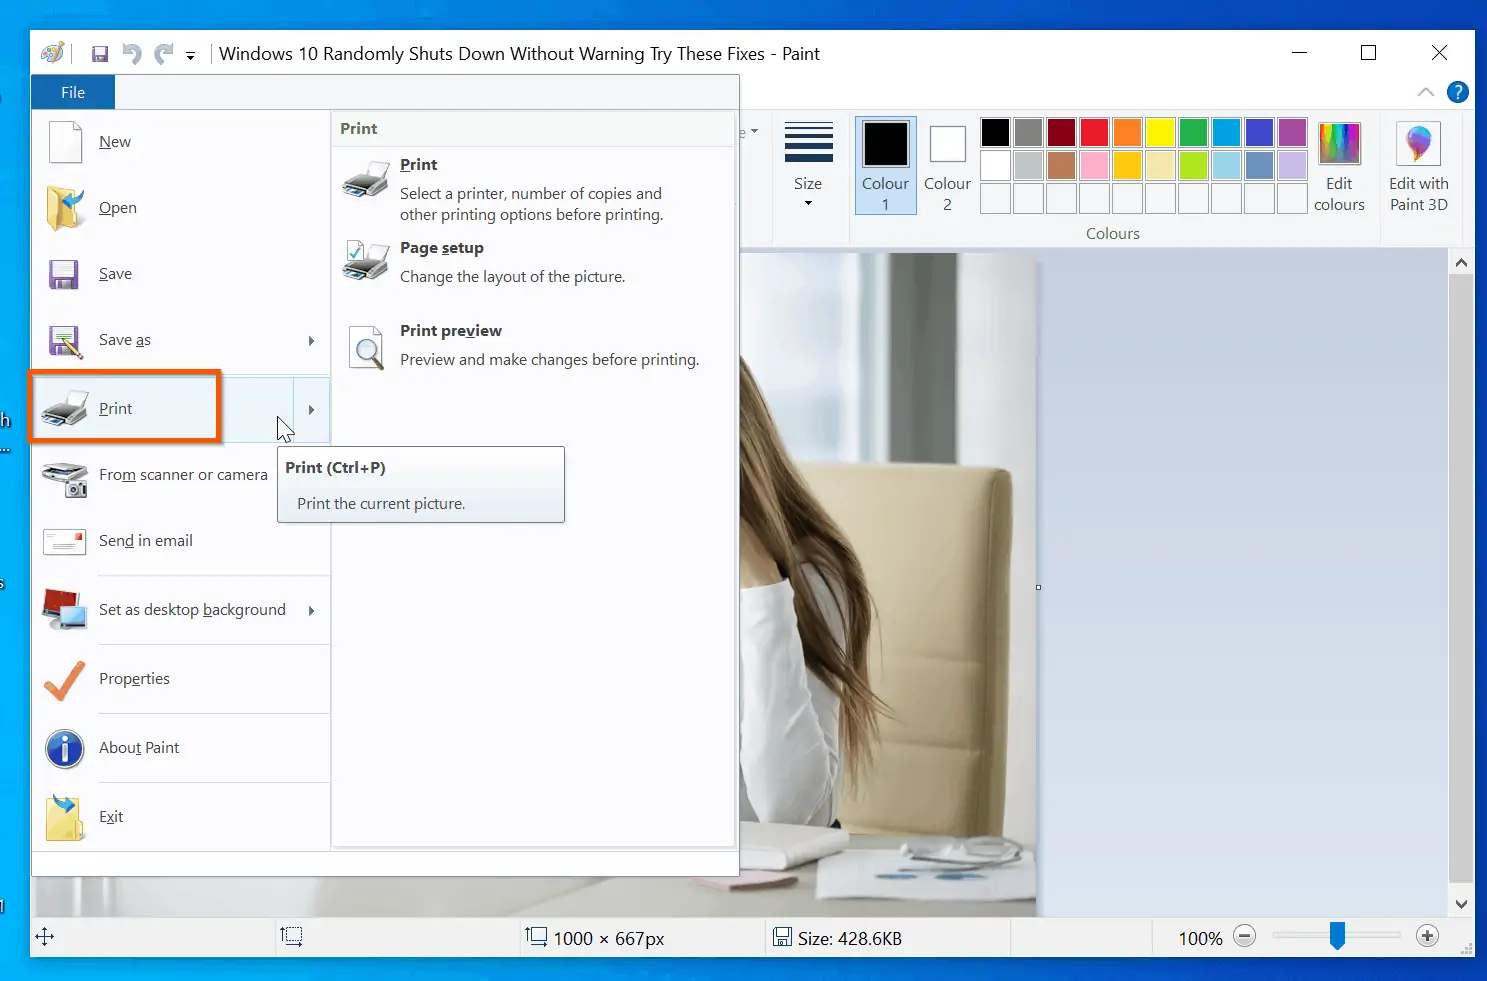
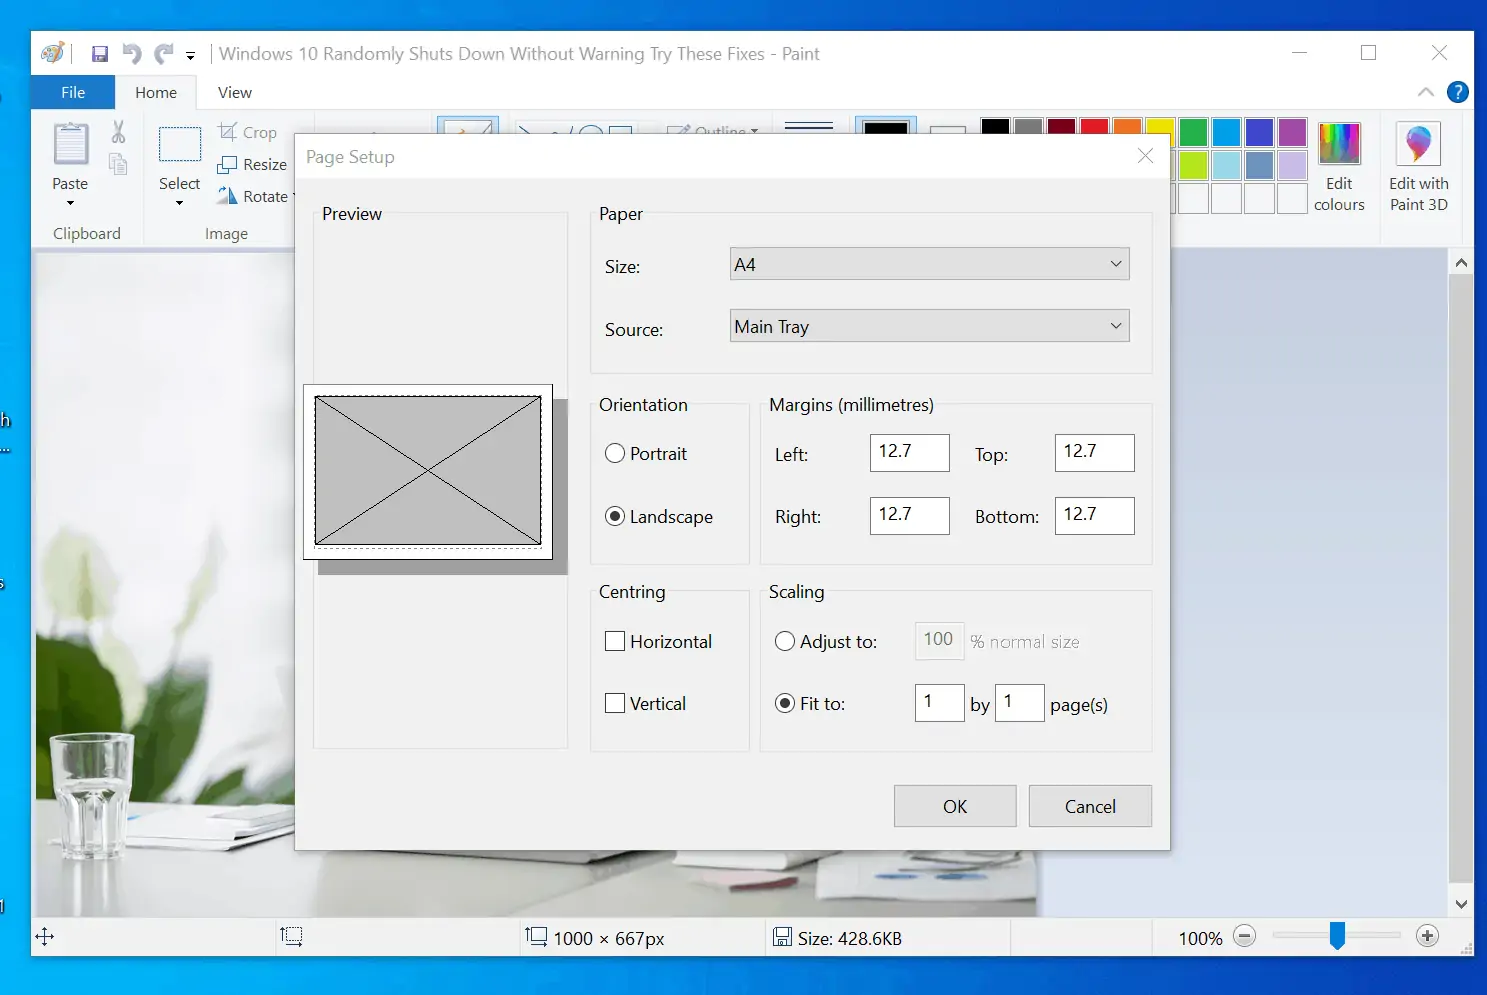
To open the Print dialogue, click Print. However, to adjust the print settings, Page setup. Within Page setup (see the screenshot below), you can adjust the paper size, and change the printer paper Source.
Additionally, you can select whether to print the image in Landscape (default) or Portrait. Finally, you can modify the image print Centering and/or Scaling.
Back to the Print options, you can also select Print preview.
How to Print in Paint 3D
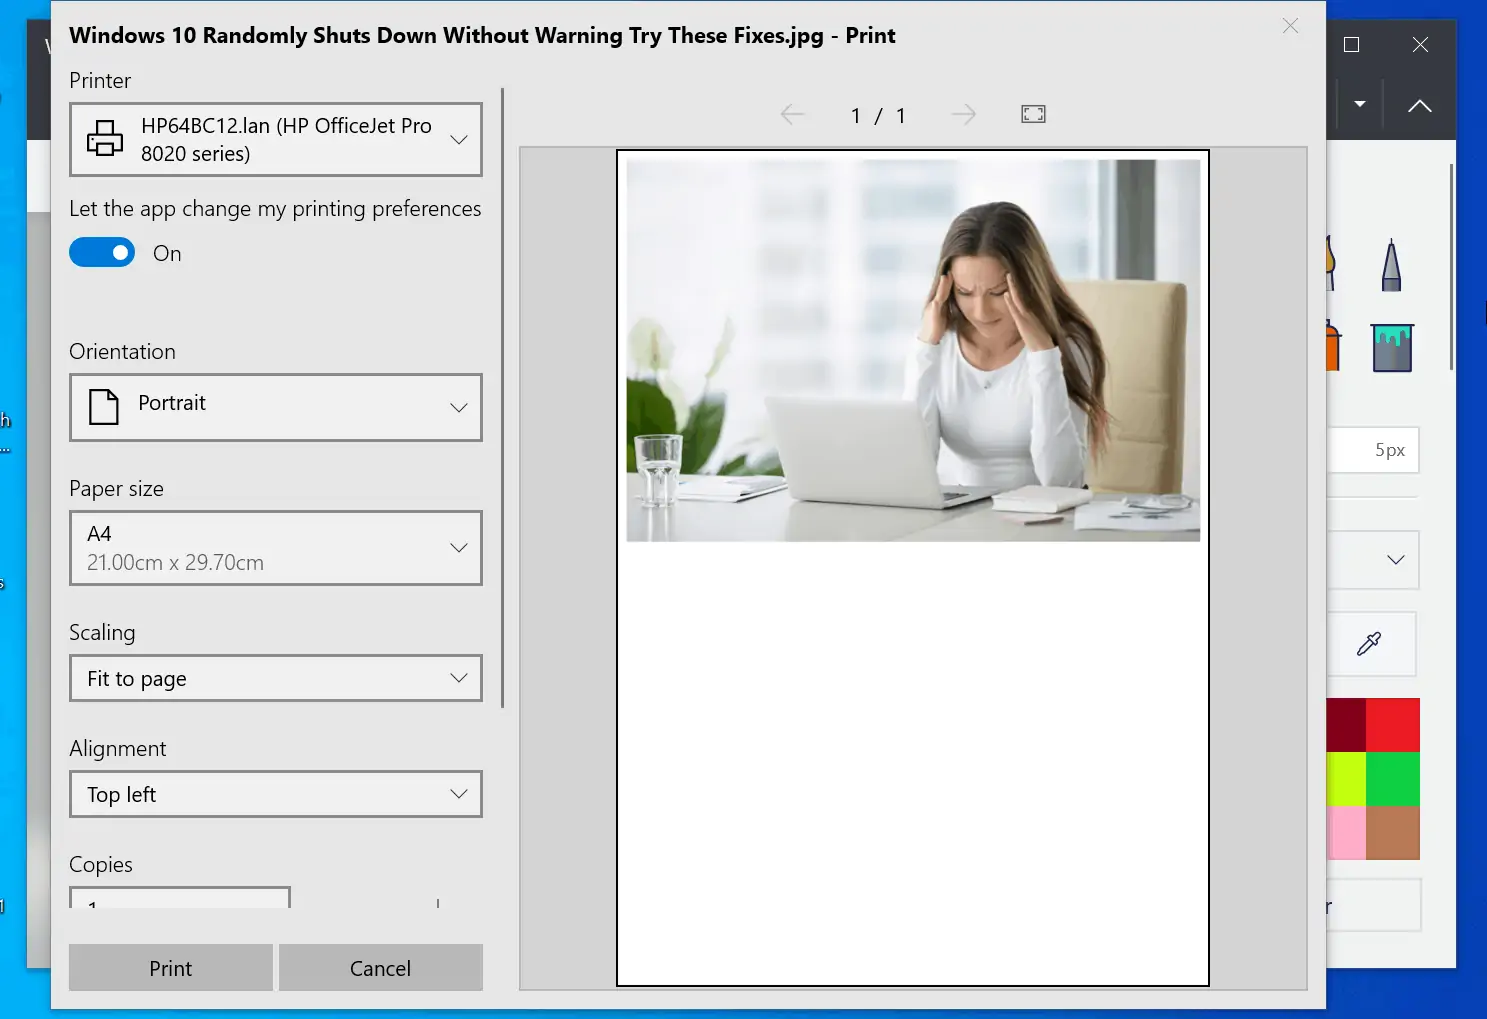
Like in Microsoft Paint, you can print in Paint 3D by pressing Ctrl and P keys simultaneously. This opens the print dialogue.
The Paint Print dialogue box has all the standard print options. You can change the image print orientation and Paper Size.
The Print dialogue box also offers other options Scaling, Alignment and number of copies. When you are ready to print, on the bottom left, click Print.
How to Send Image Via Email and As Desktop Background in Paint
This is yet another Windows 10 Paint help topic – sending an image via email or setting and image as desktop background.
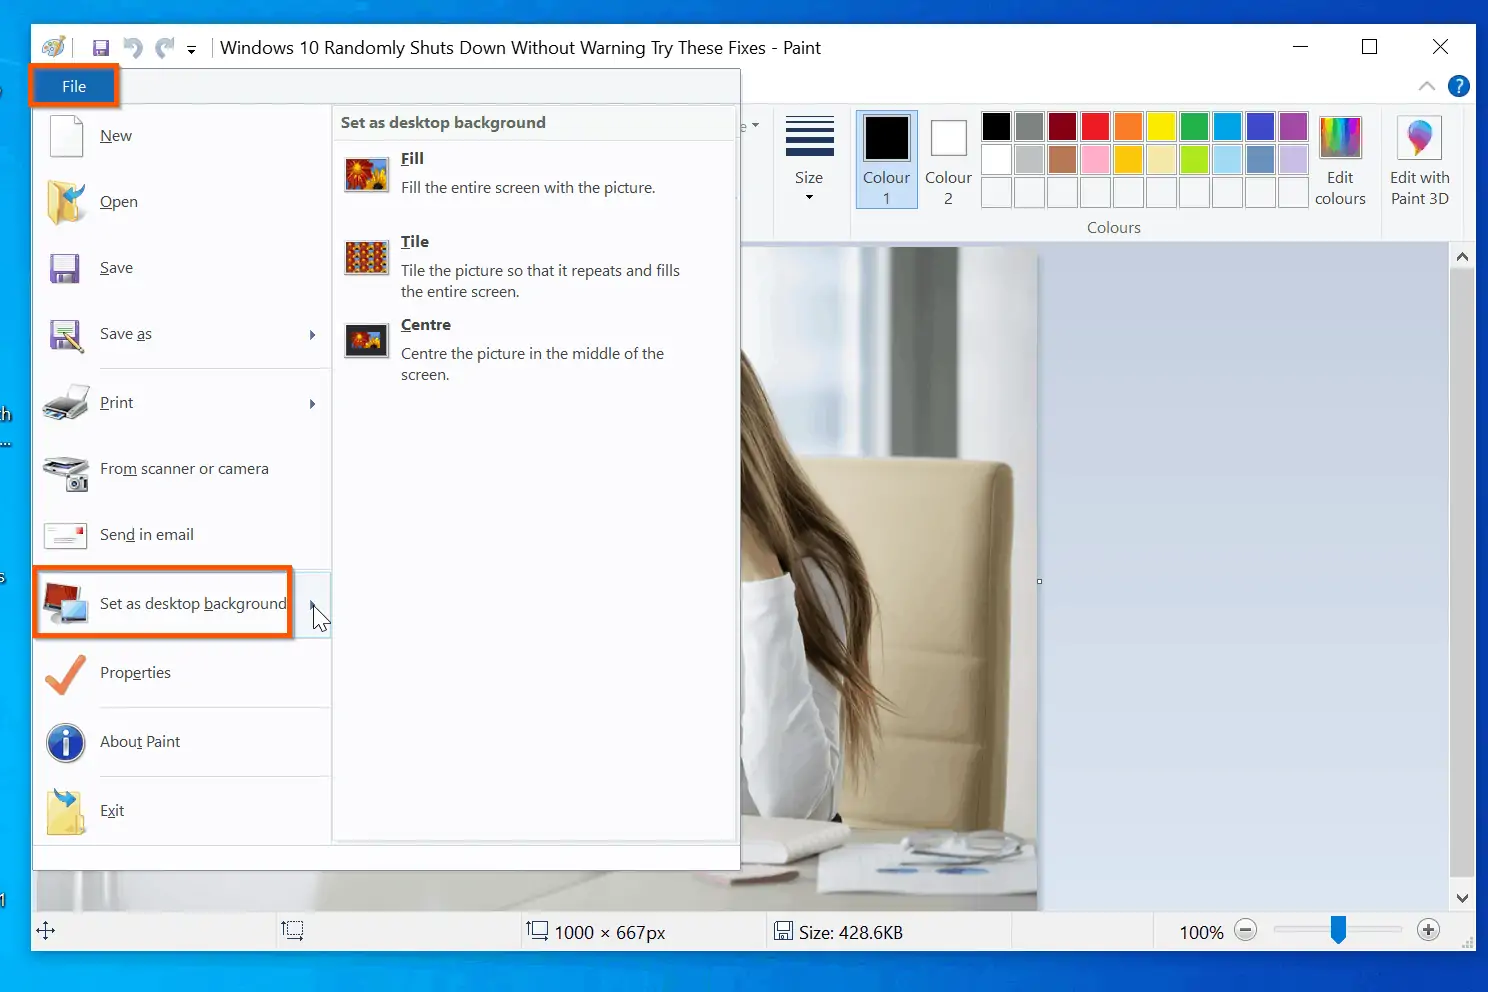
How to Set Image as Desktop Background in Microsoft Paint
To set an image as desktop background from Microsoft Paint:
Click File and hover over Set as desktop background. Then, select a background option.
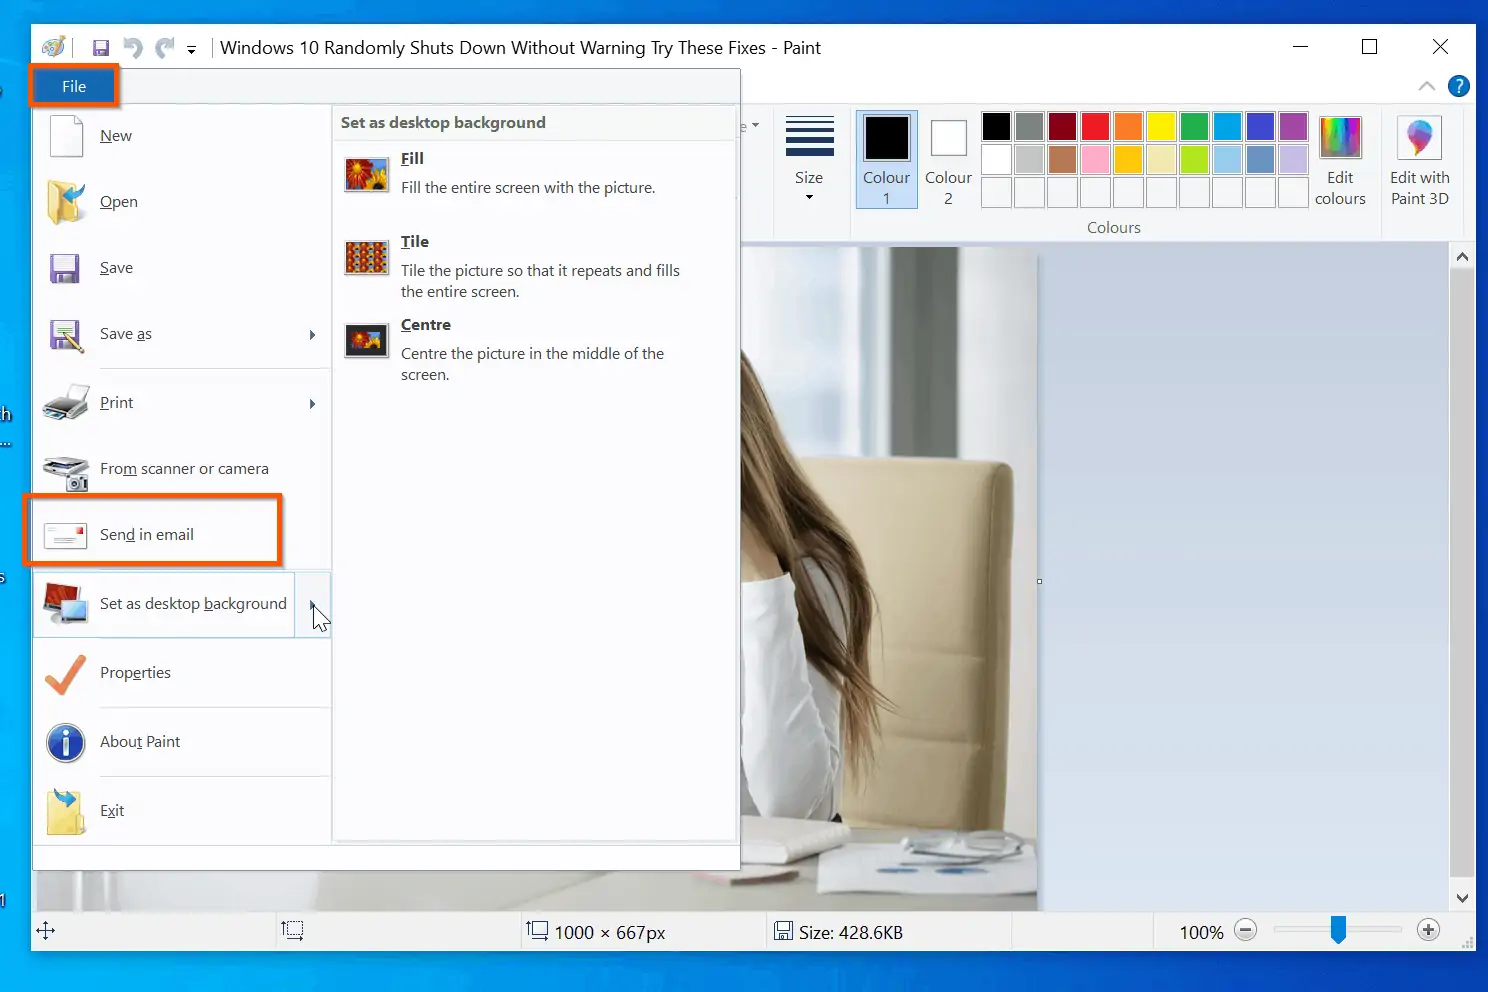
How to Send Images via Emailin Microsoft Paint
To send an image via email from Microsoft Paint, click File. Then, select Send in email. Paint will open the image in your default email client.
Windows Paint Keyboard Shortcuts
We are now getting to the end of our Windows 10 Paint help guide. This section is a full list of Paint keyboard shortcuts and what they do.
| S/N | Keyboard Keyboard Shortcut | What the Shortcut Accomplishes |
|---|---|---|
| 1 | Ctrl and W keys | Opens the Resize and Skew settings screen |
| 2 | Ctrl and N keys | Closes the current picture and open a new empty canvas |
| 3 | Alt and V keys | Switch to Paint View tab |
| 4 | Alt and H keys | Switch to Paint Home tab |
| 5 | Ctrl and O keys | Opens the Paint “Open” dialogue box – so you can open an existing image in Paint. |
| 6 | Ctrl and S keys | Saves changes made in Microsoft Paint. |
| F12 key | Opens the Save As dialogue | |
| 7 | Ctrl and R keys | Shows or hides Ruler – also accessible via the View menu. |
| 8 | Ctrl and P keys | Opens the Print dialogue box to print the image in Paint |
| 9 | Ctrl and G keys | Adds or removes the Gridlines |
| 10 | Alt and F4 keys | Close Microsoft Paint |
| 11 | Ctrl and E keys | Displays the Image Properties |
| 9 | Ctrl and Z keys | Undo the last action |
| 10 | Ctrl and A keys | Selects the entire canvas in Microsoft Paint |
| 11 | Ctrl and C keys | Copies a selected area |
| 12 | Ctrl and V keys | Pastes the item in the clipboard – Ctrl + V pastes an item whether it was copied from within Paint or another app |
| Alt and F keys | Opens Paint File menu | |
| 13 | Ctrl and Page Up keys | Zoom In. Similar to Ctrl and Mouse scroll up |
| 14 | Ctrl and Page Down keys | Zoom Out. Similar to Ctrl and Mouse scroll Down |
| 15 | Ctrl and U keys | Underline selected text |
| 16 | Ctrl and B keys | Bold selected text |
| 17 | Ctrl and I keys | Italicize selected text |
| 18 | F1 key | Opens search results for “help with paint in windows 10” in Bing.com |
| 19 | F11 key | View image in Full Screen mode |
| 20 | Esc key | Cancel existing selection |
| 21 | Delete key | Delete a selection |
Frequently Asked Questions
Microsoft Paint is installed in Windows 10 by default. However, if you search Paint and cannot find it, follow the steps below to get paint back on Windows 10:
1 – Enter manage optional features in Windows 10 search, then, open it from the search result
2 – When the Manage Optional features screen opens, click add a feature, search for Microsoft Paint, and install it.
Microsoft Paint does not have a short key to open it directly. However, you can open it via the Run command. Here are the steps:
1 – Right-click the tart Menu and click Run.
2 – When Run opens, enter MSPaint and click OK.
See the screenshots below: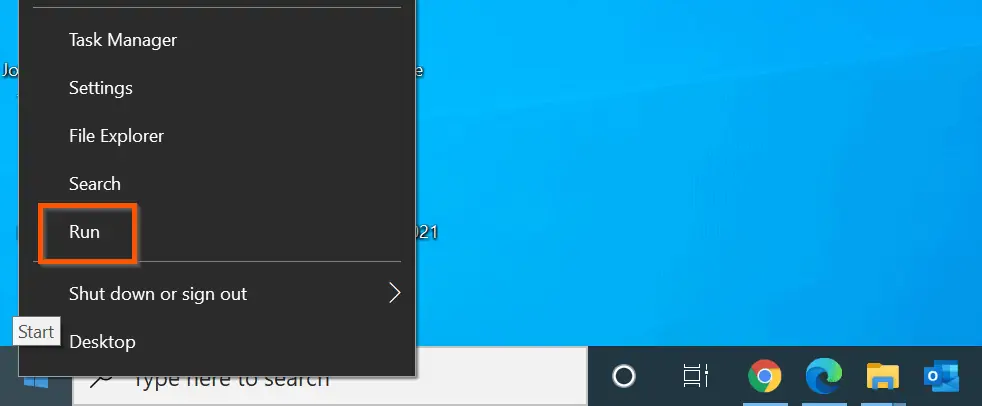

Windows Paint is not replaced in Windows 10. Windows 10 still has Microsoft Paint installed by default. However, Windows 10 has an advanced Paint app called Paint 3D.
You can use Microsoft Paint or Paint 3D in Windows 10. If for any reason Microsoft Paint is not available in your Windows 10 copy, install it via Manage Optional features.
Follow the steps below to start MS Paint in Windows 10:
1 – Press the Windows logo and R key simultaneously to open Run.
2 – When Paint opens, type MSPaint and click OK.
To open a saved drawing in Microsoft Paint, on the top left of Paint, click File. Then, from the displayed options, click Open. Finally, navigate to the folder you saved the drawing, select it and click OK. The drawing will open in Paint.
Conclusion
I hope you found this Windows 10 guide helpful. If you found this guide helpful, kindly spare 2 minutes to share your experience by responding to the “Was this page helpful?” question below.
Finally, for more Windows 10 Itechguides, visit our Windows 10 How-To page.


![How To Run Sysprep (Generalize) In Windows 10 [2 Methods]](https://www.itechguides.com/wp-content/uploads/2022/05/8-2.webp)
I need to find out how to delete a background of an image.