This Itechguide teaches you how to use a remote desktop to connect to a Windows 10 PC. The guide begins with the steps to enable remote desktop on a Windows 10 PC.
How to Enable Remote Desktop in Windows 10
Before you can remote connect to a Windows 10 PC with Remote Desktop, it must be enabled on the PC you wish to connect to.
Use the steps below to enable Remote Desktop in Windows 10:
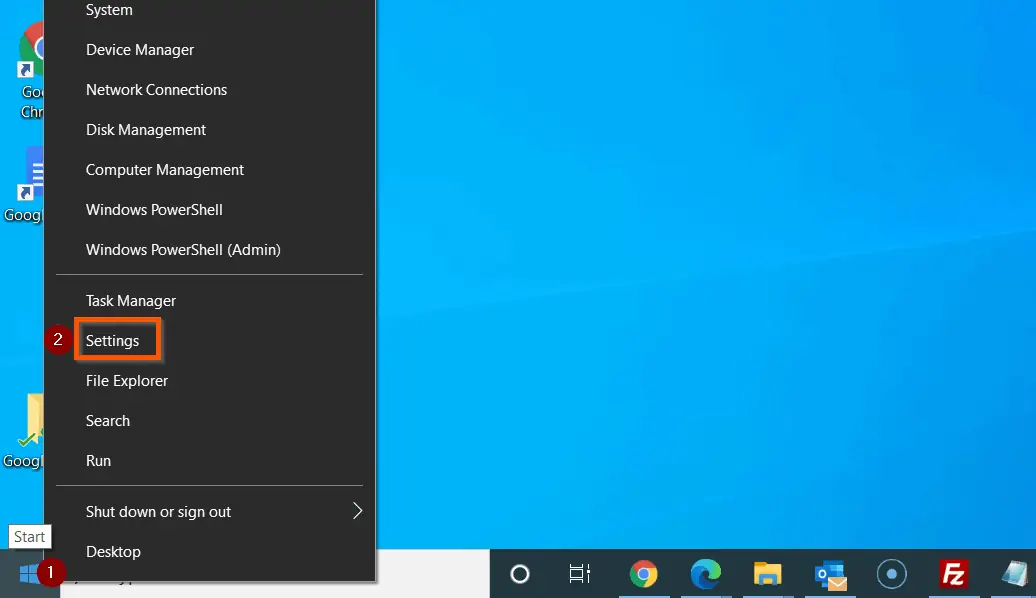
- Right-click Windows 10 Start Menu and select Settings.
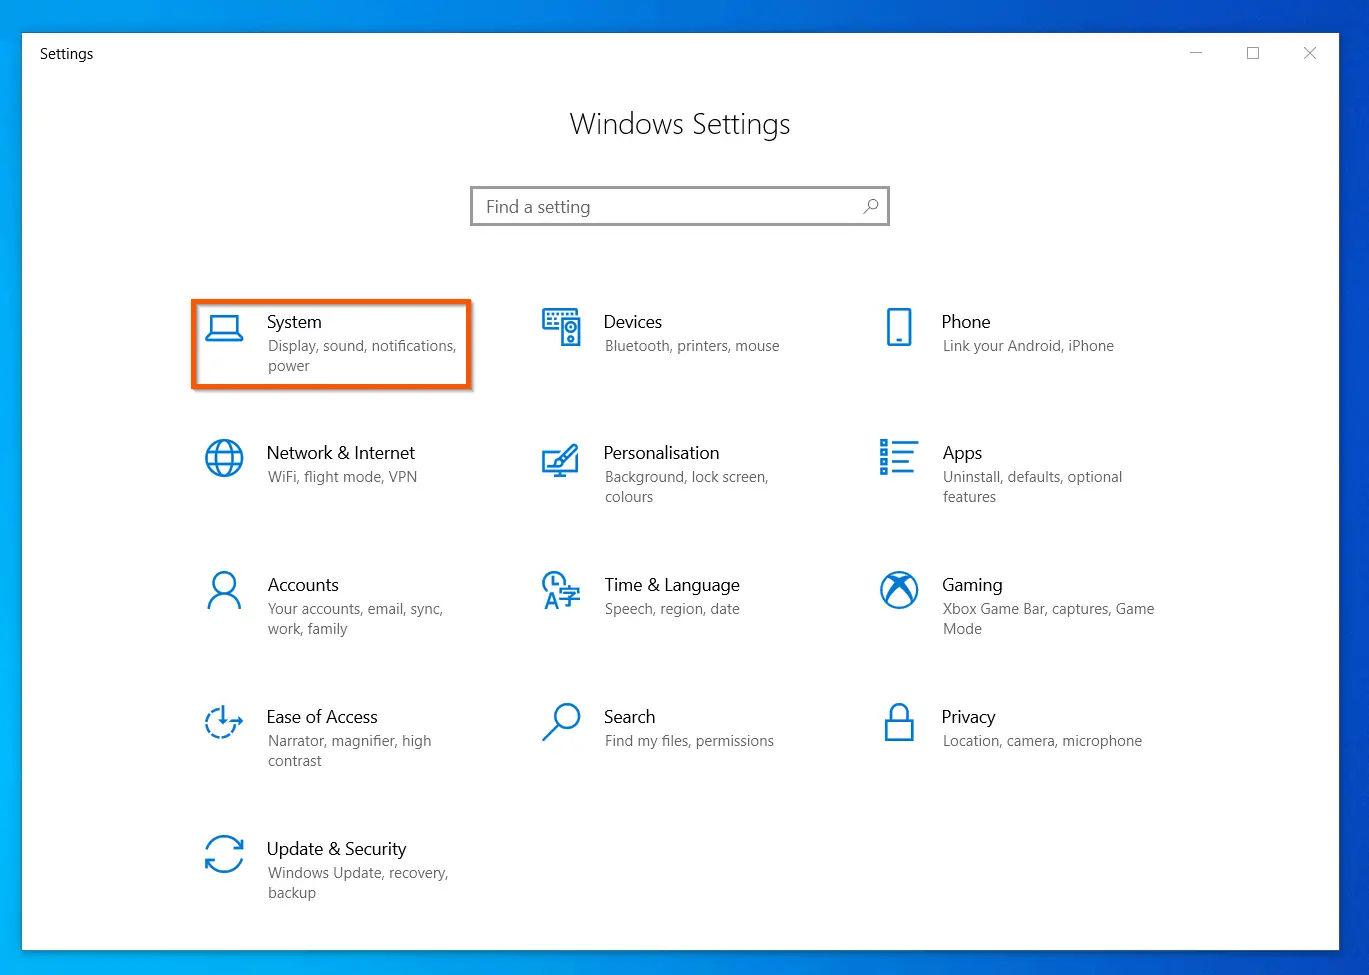
- Then, on Windows 10 Settings screen, click System.
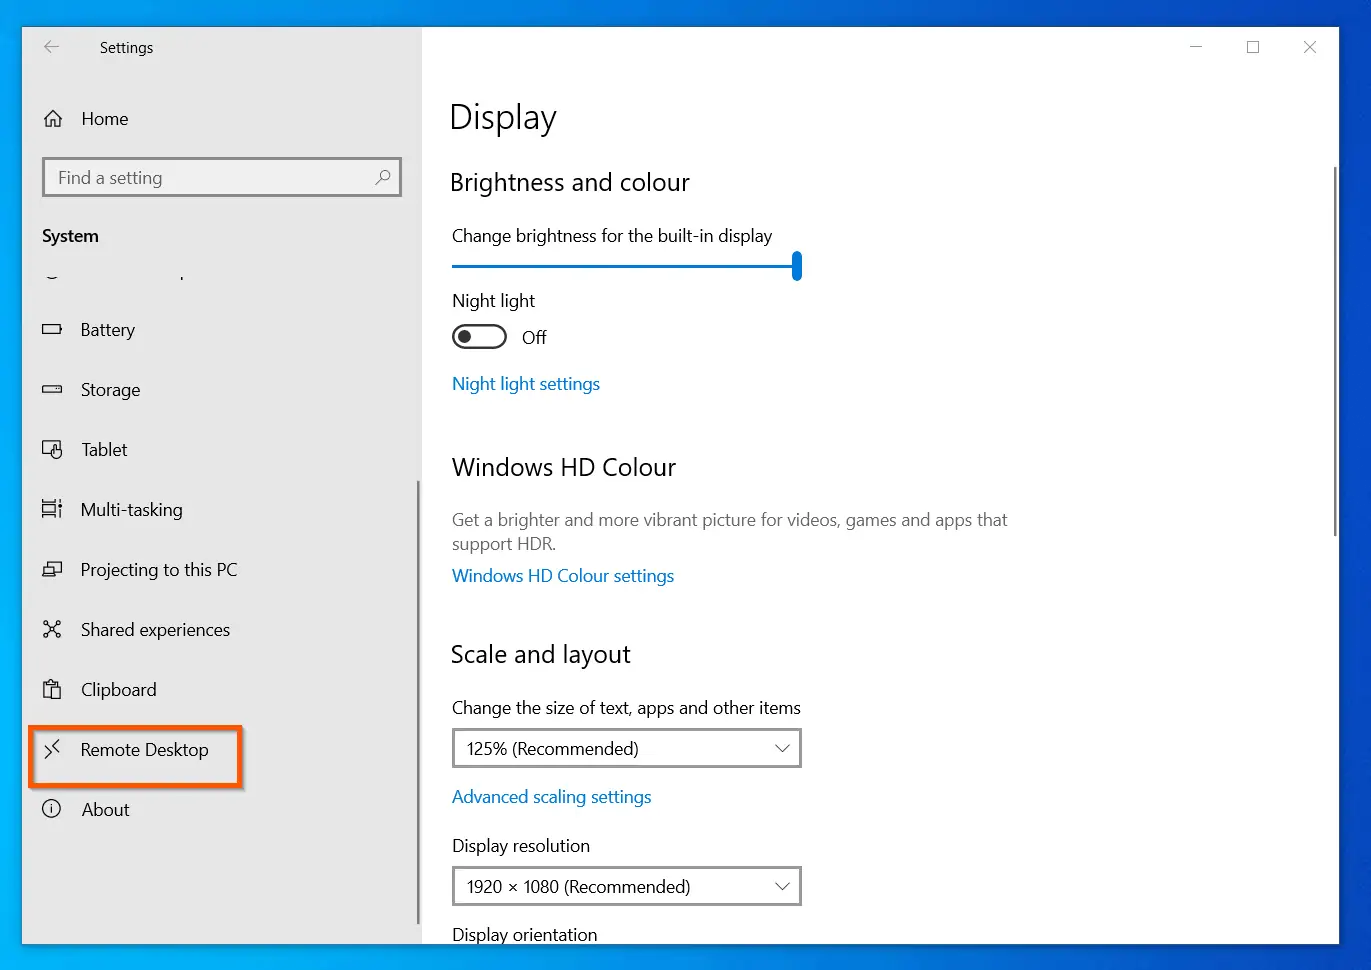
- On the left pane of System settings screen, scroll down and click Remote Desktop.
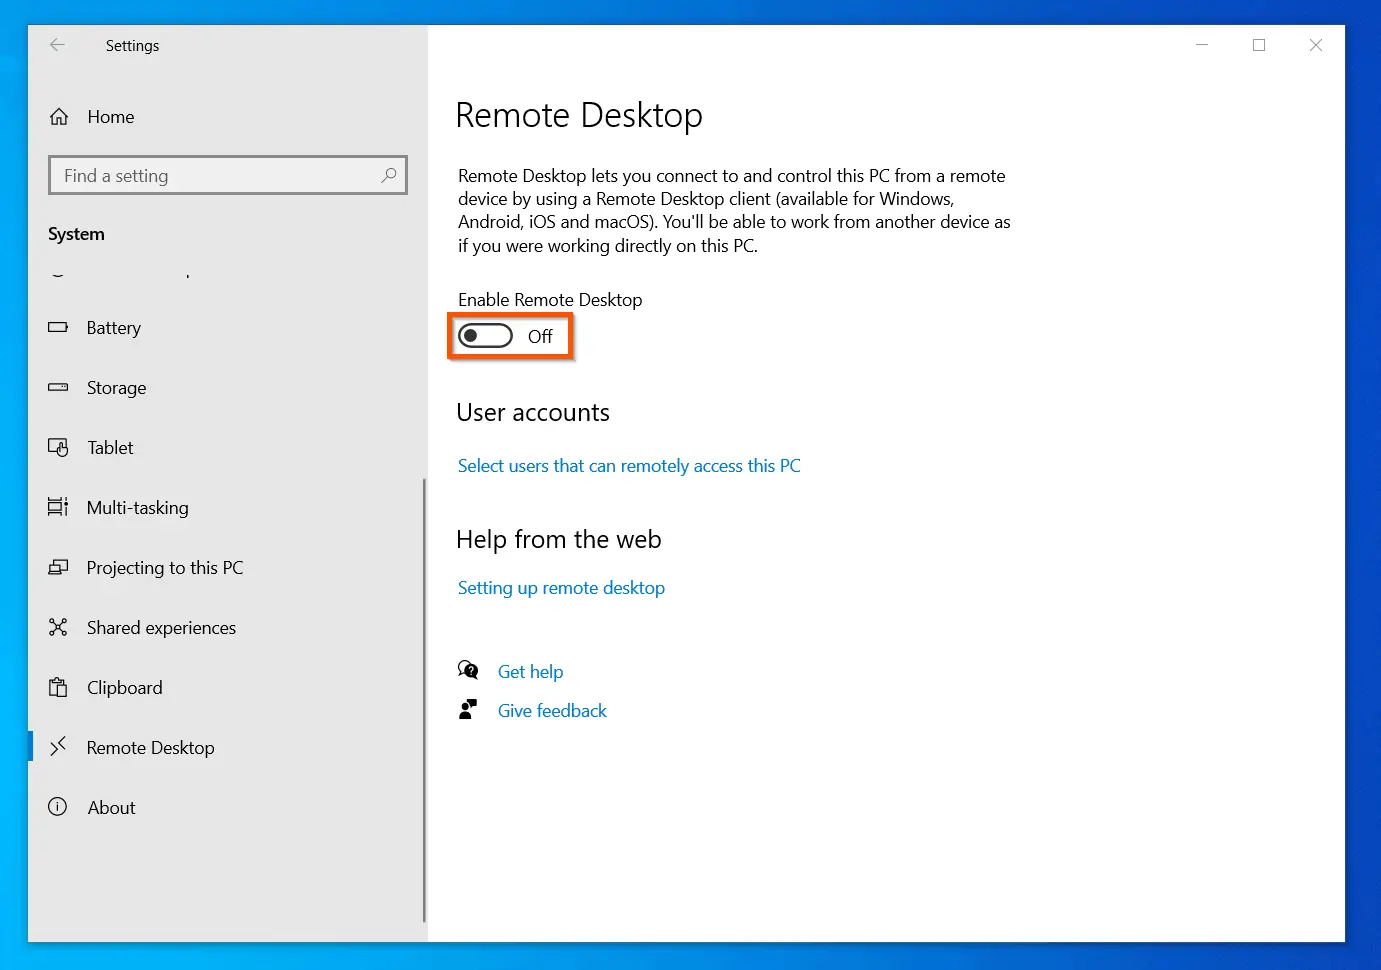
- Finally, on the Remote Desktop screen, flip the Enable Remote Desktop button from OFF to ON. Windows 10 will prompt for a confirmation – see the second screenshot below. To confirm and enable remote desktop, click Confirm.

Before you proceed to the next sections in this guide, note the name of the computer you have just enabled Remote Desktop on. You will need this name to connect to the computer. From the screenshot below, the computer name is ITGLT01.

RDP to a PC with the Remote Desktop Connection App
The quickest method to remotely connect to a Windows 10 computer is to use the Remote Desktop Connection App. To use this method, follow the steps below:
- Search remote desktop, then open the app from the search results.
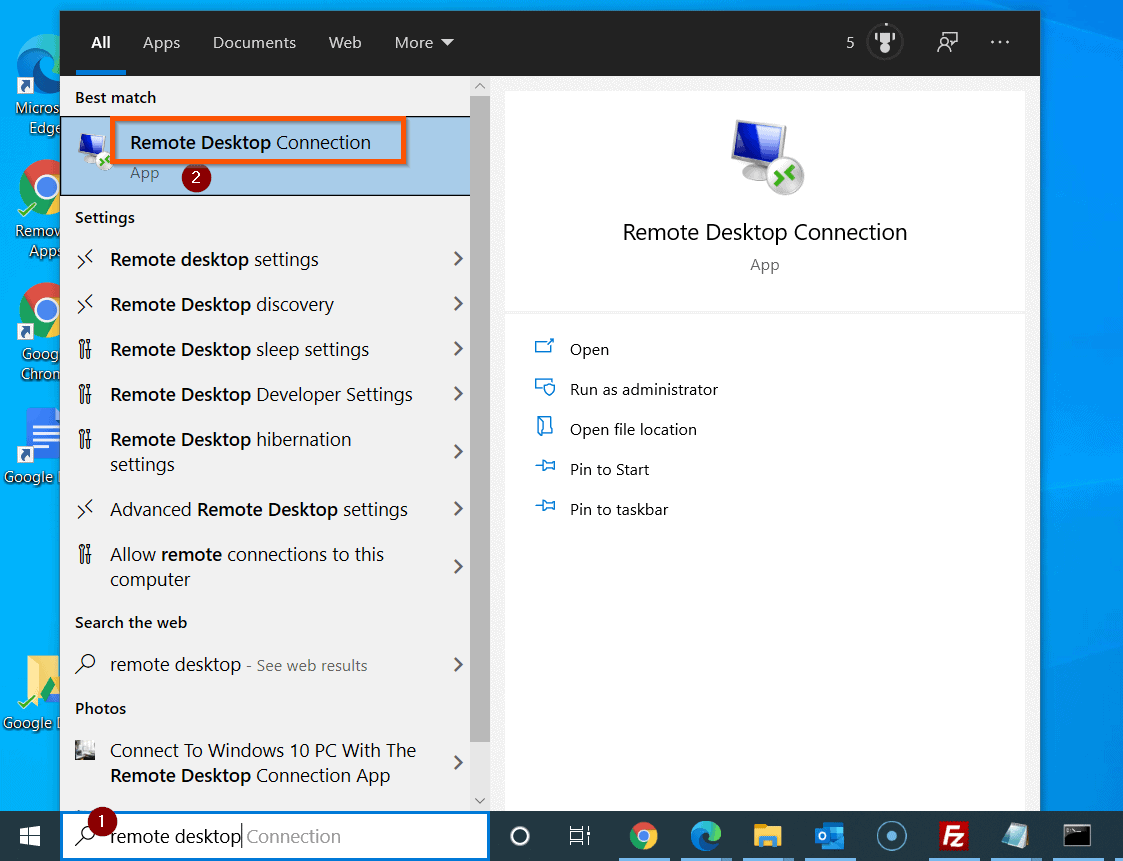
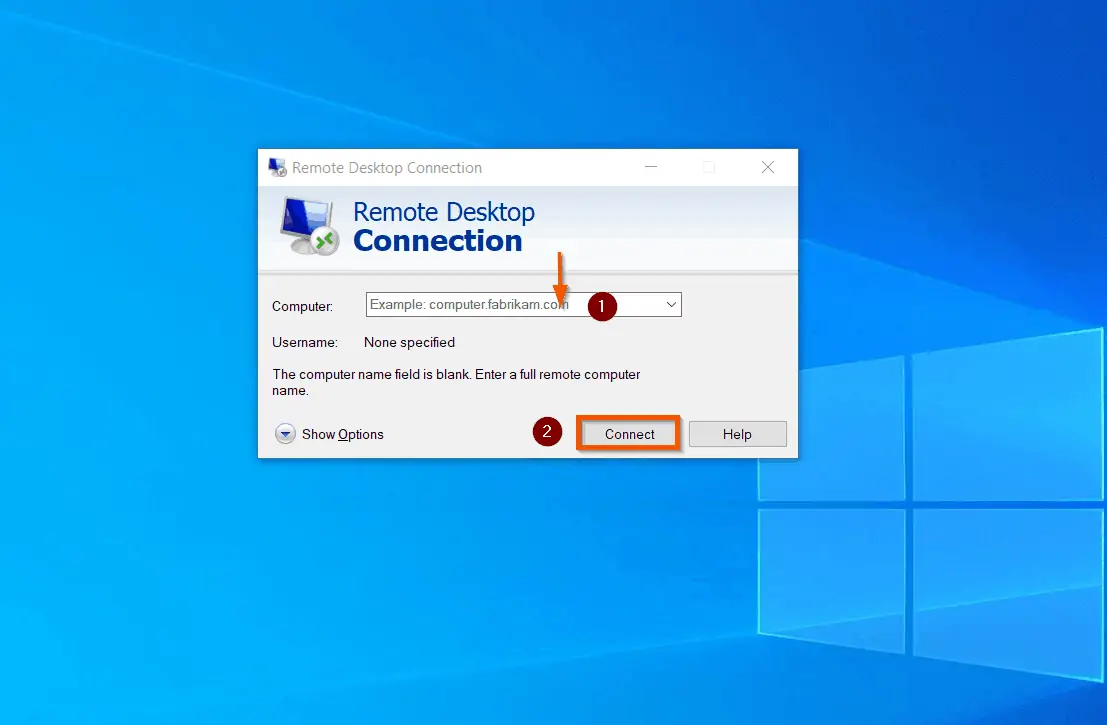
- Finally, in the Computer field, enter the name of the remote PC, then click Connect.
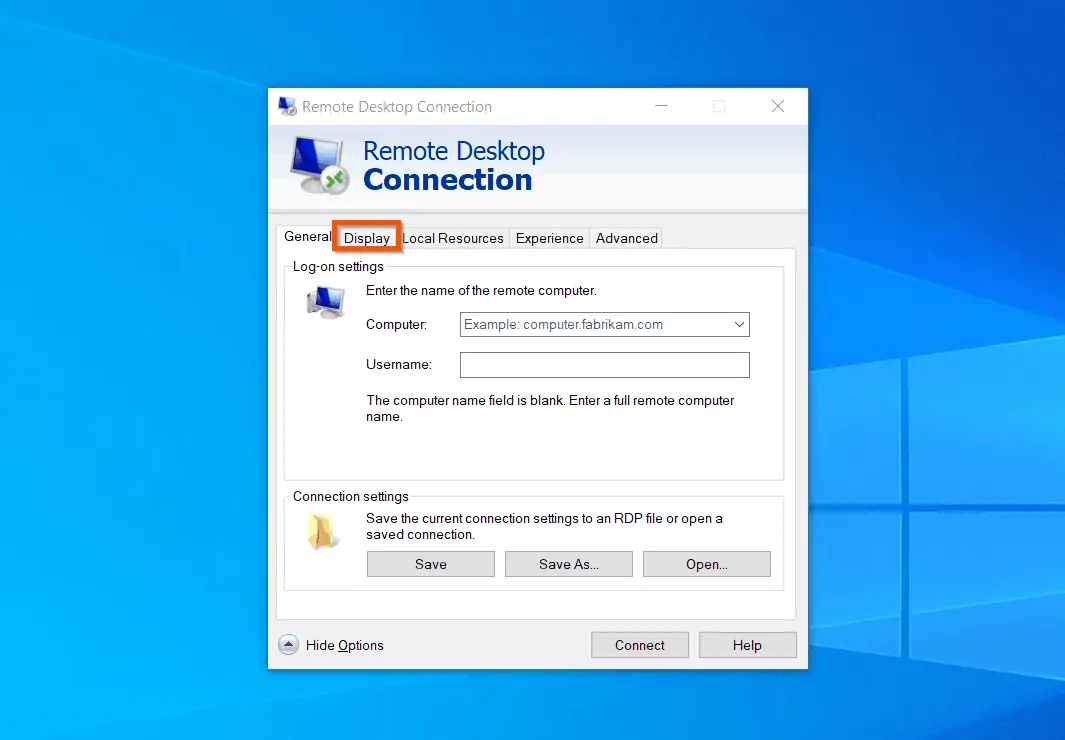
Configure Remote Desktop Connection General Options
As I mentioned earlier, before you connect to a Windows 10 PC with the Remote Desktop Connection app, you can adjust some of its options. One of these options is the General.
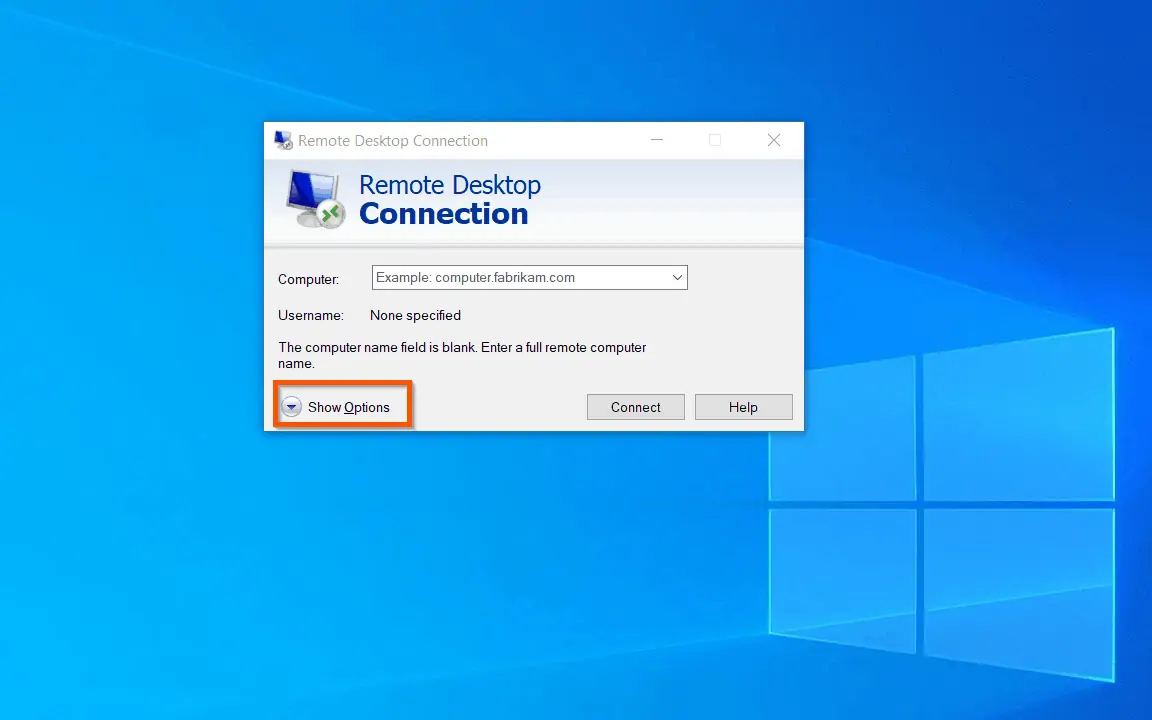
To change the General settings, on the bottom left of the app, click Show Options.
When the additional options open, by default the General tab is selected. The General tab has 2 sections – Login settings and Connection settings.
On the Login settings, you can enter the name of the remote Windows 10 PC (discussed in the last section). Additionally, you can enter a user name to connect to the remote computer.
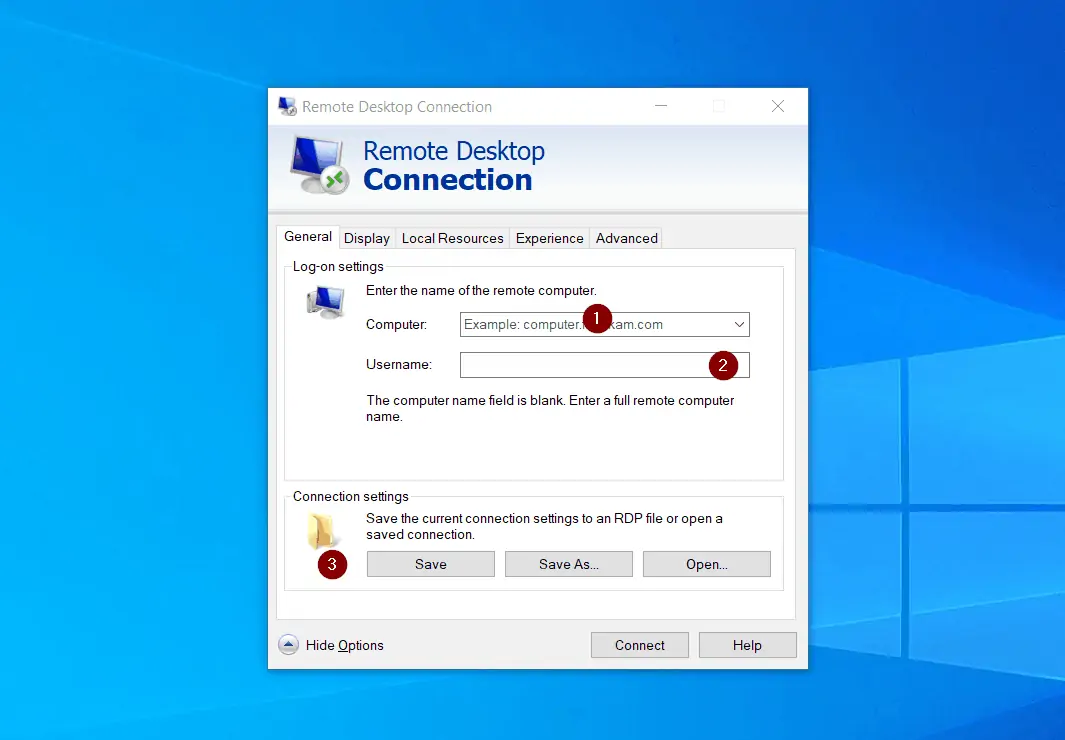
Finally, for the General tab, you can save the connection, or open an existing RDP file you saved earlier.
When you finish with the General settings, if you do not want to modify any other RDP connection setting, click Connect.
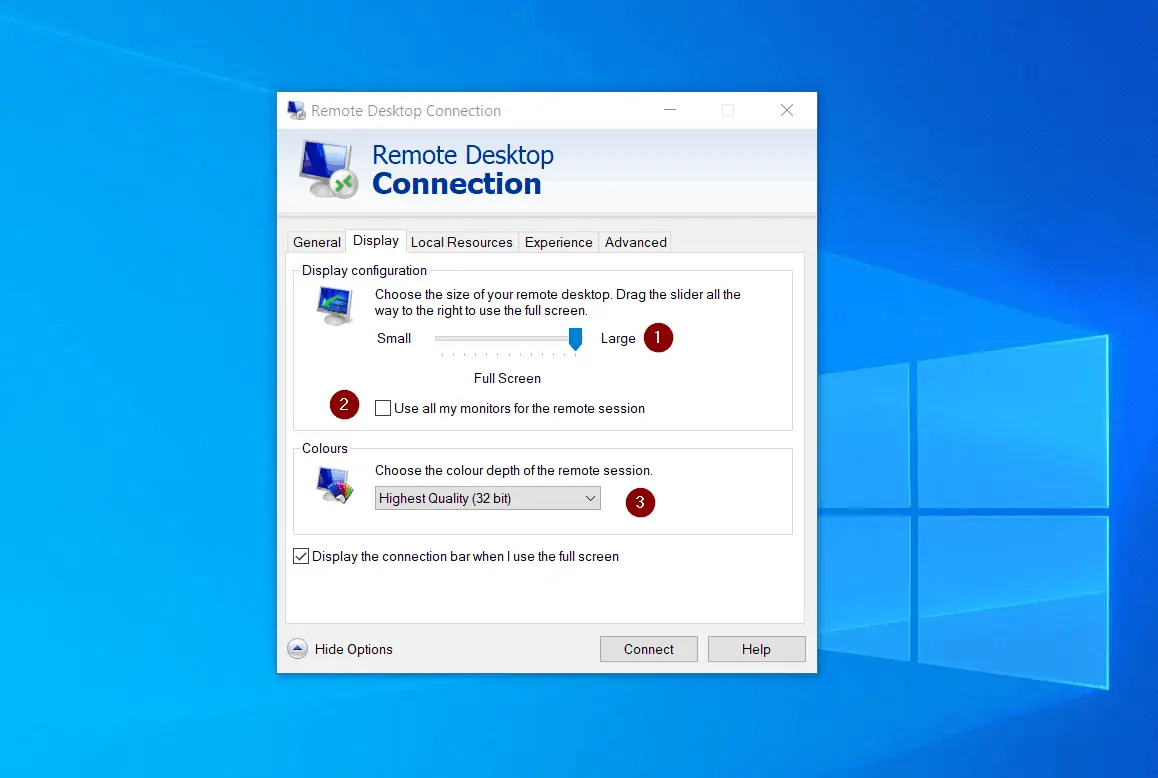
Configure Remote Desktop Connection Display Options
The next set of options you can configure are on the Display tab. To see these options, click the Display tab.
On the Display tab, you can change the size of the remote desktop screen (1). Moreover, if you have more than one monitor connected to your PC, you can set Remote Desktop connection to use all the monitors in the RDP session (2).
Finally, you can determine the color depth of the remote session (3).
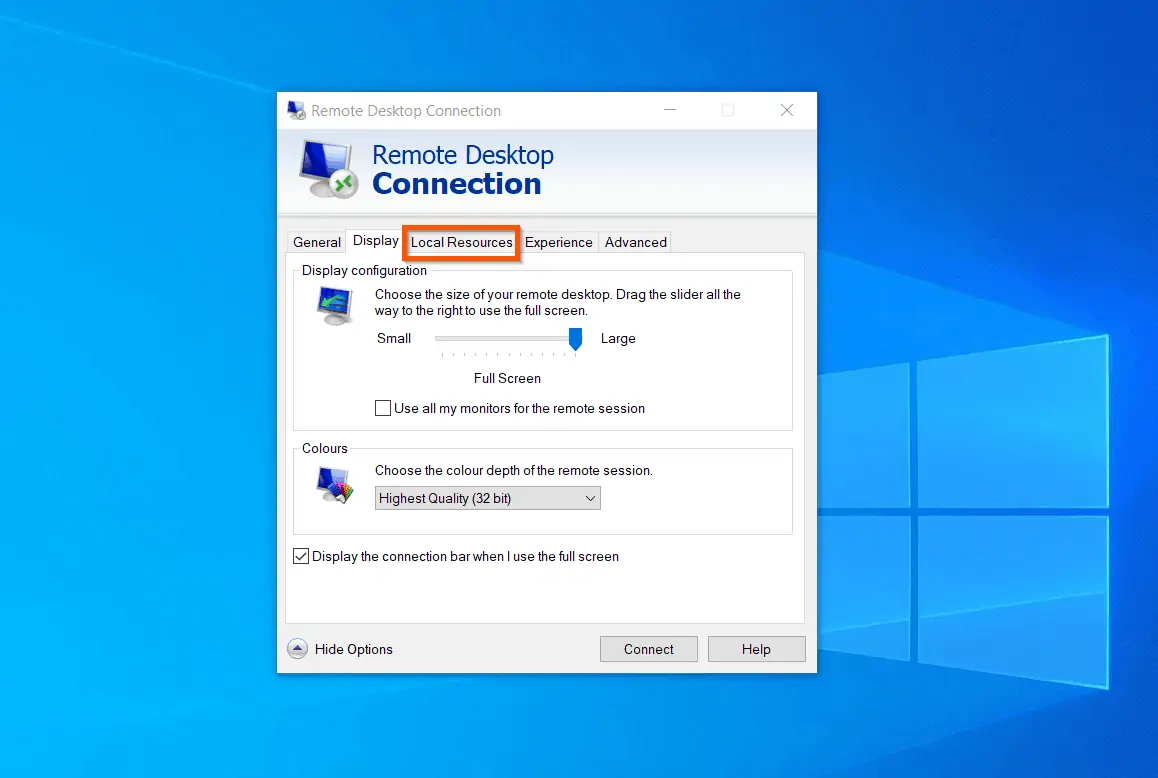
Configure Remote Desktop Connection Local Resources Options
Unlike the Display setting that you may not need to adjust, the Local Resources tab offers some useful features. Before you use remote desktop connection app to connect a Windows 10 PC, you may want to adjust audio, or keyboard settings.
Moreover, you may also want to connect other resources to the remote session. To see all the options you can configure, click the Local Resources tab.
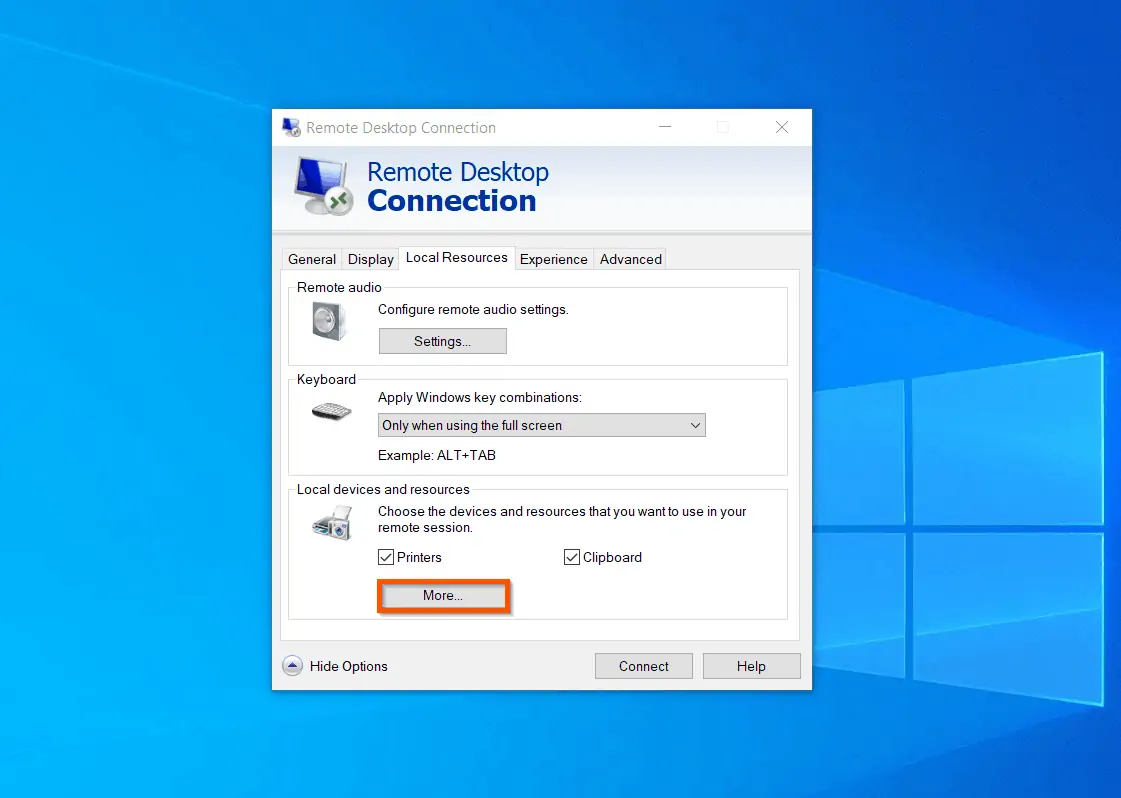
Based on my personal experience, the most important section of the Local Resources tab is the Local devices and resources section.
In this section, you can uncheck Printers. By default Printers are checked. With this option checked, you will be able to print from your remote desktop session.
Additionally, you may uncheck Clipboard. If Clipboard is checked, anything you copy in the remote desktop session will be available to paste in your local PC.
However, if you do not want to paste items copied from the remote desktop session on your PC, uncheck this option.
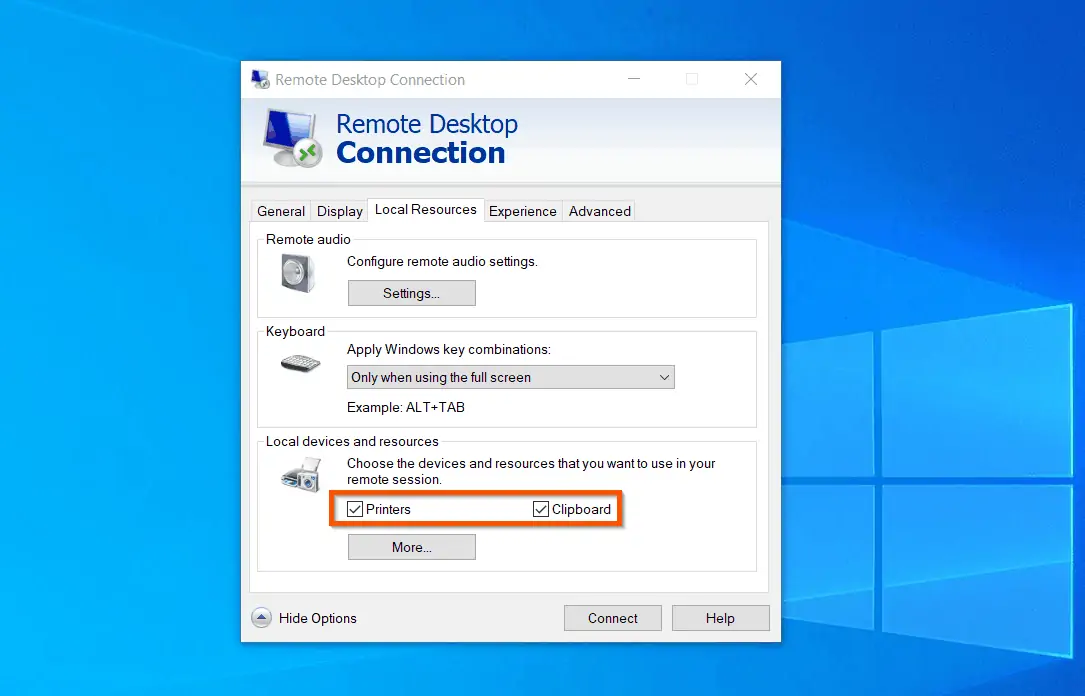
Finally, to connect other local resources, click the More button.
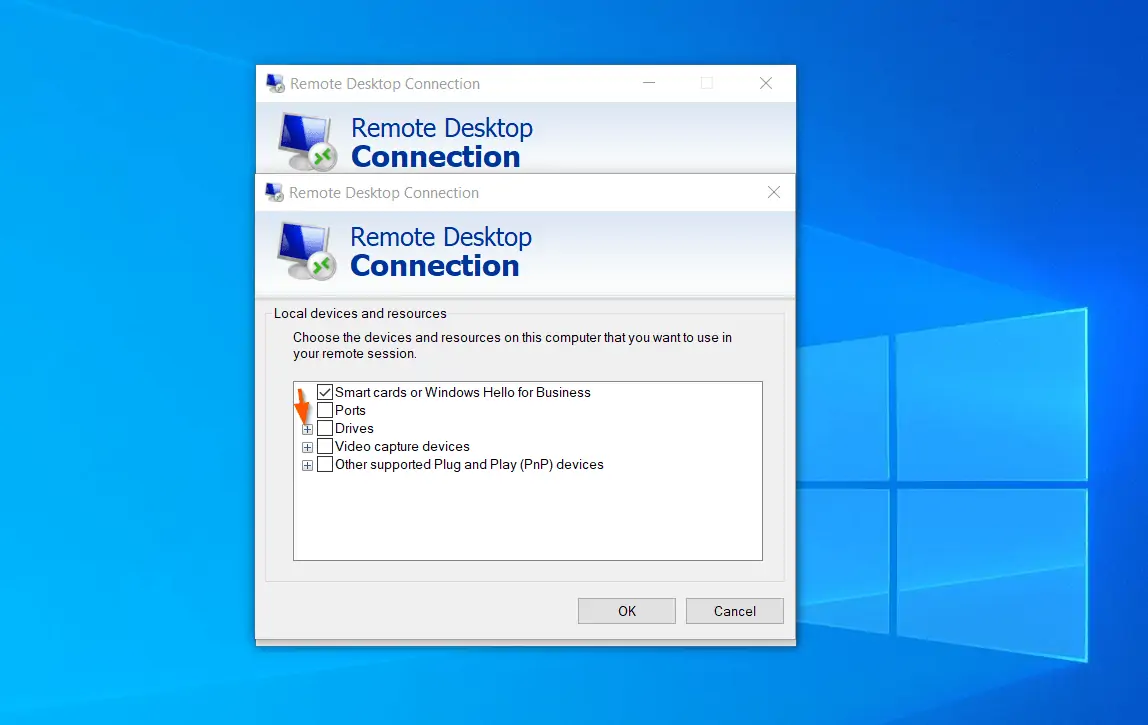
The screenshot below shows additional local resources you can send to your remote desktop session. The most important – and commonly used local resource are the local Drives.
To make all your local drives available in the RDP session, check the Drives checkbox.

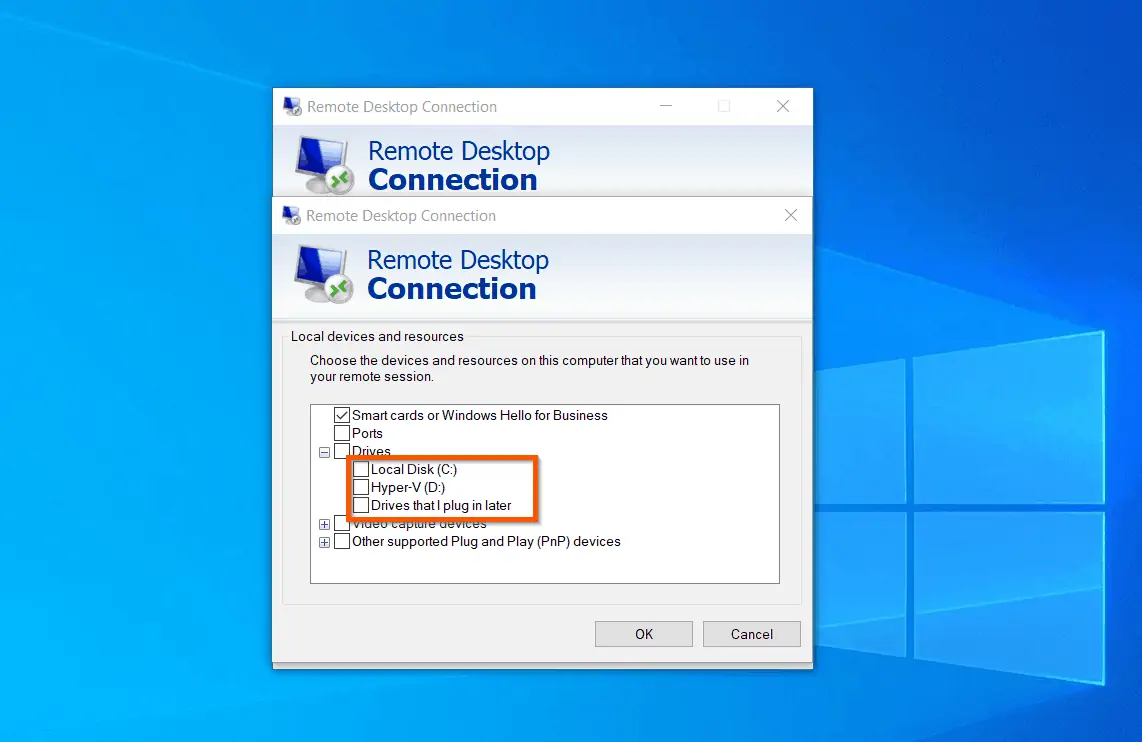
However, if you want to make some, but not all the local drives available in the remote session, expand the + sign beside Drives.
Finally, you can check the drive you want to use in the remote session. When you finish, remember to click OK.
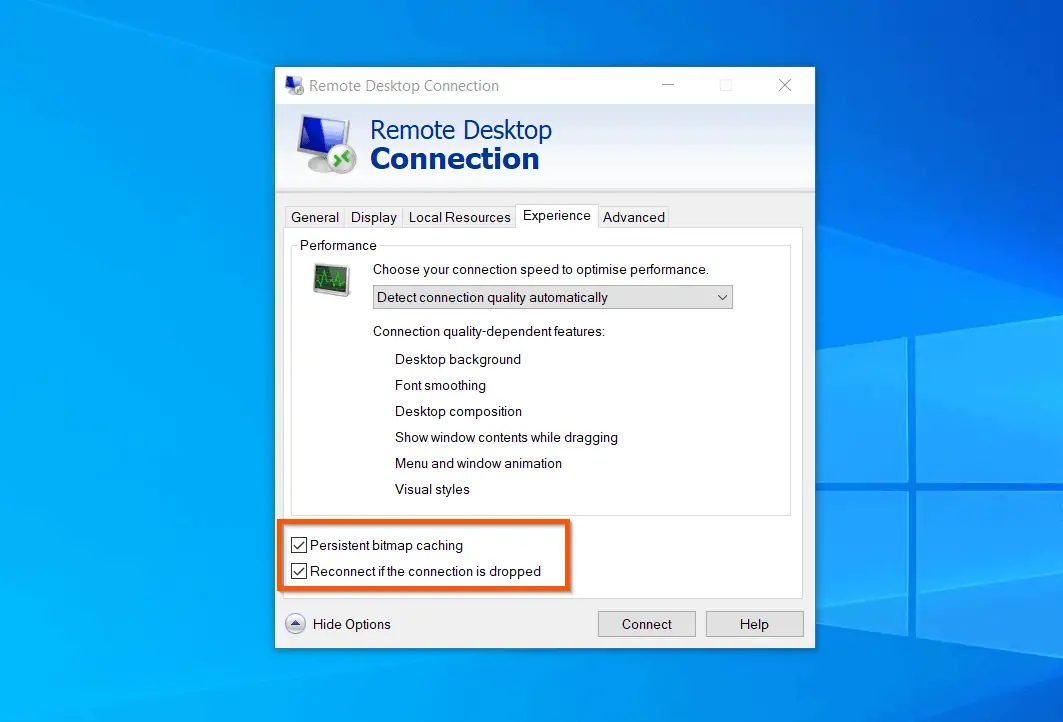
Configure Remote Desktop Connection Experience Options
The Remote Desktop Connection “Experience” tab offers yet another set of options you can configure. You can set Remote Desktop performance on the Experience tab. Refer to the screenshot below.
By default, Remote Desktop Connection is set to Detect connections quality automatically. However, you may select a specific connection type – see the second screenshot below.
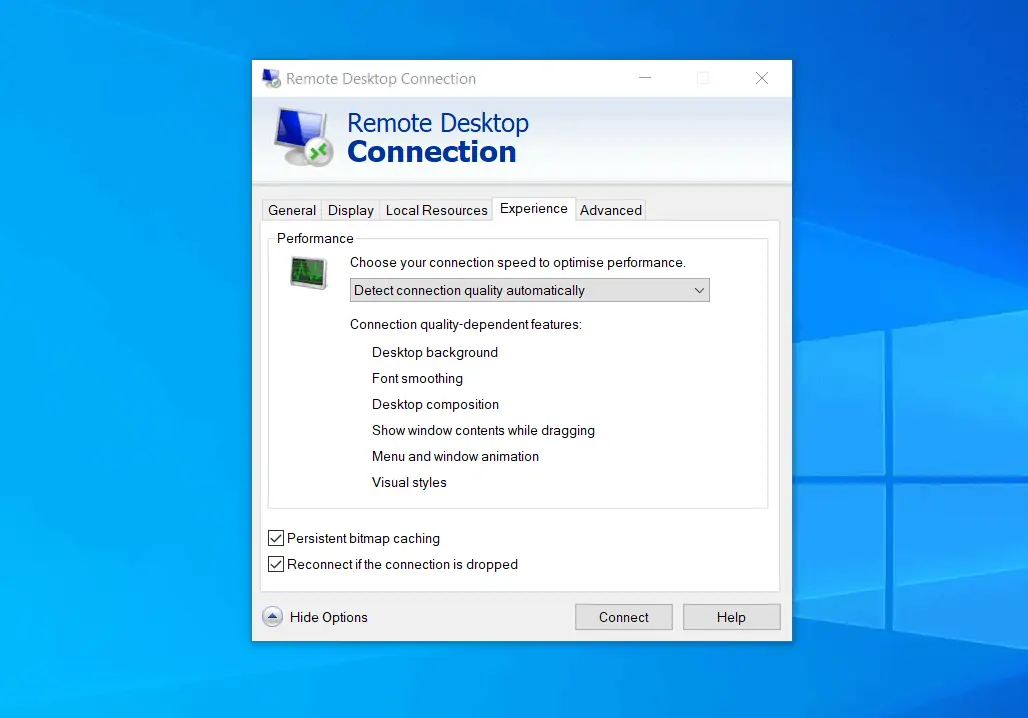
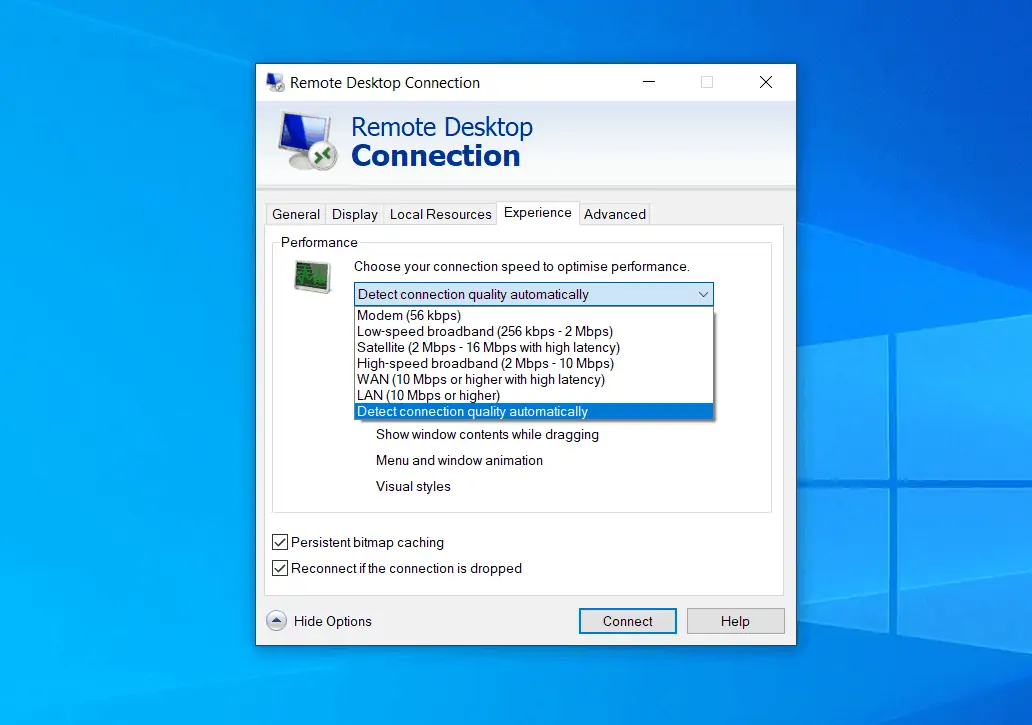
Apart from setting the connection type, you can also change the behavior of the RDP connection. At the bottom right of the Experience tab, you can uncheck Persistent bitmap caching, and/or Reconnect if the connection is dropped settings.
Configure Remote Desktop Connection Advanced Options
The Advanced tab of the Remote Desktop Connection features more configuration options.
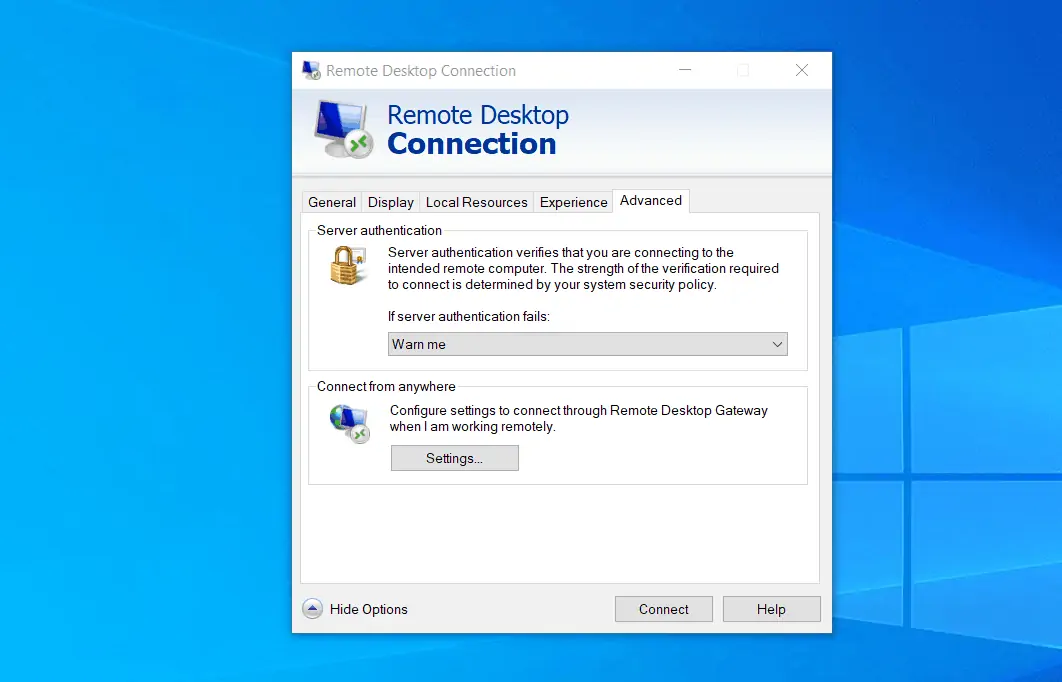
For example, you can set how Remote Desktop Connection responds if the Windows 10 PC you want to connect to fails authentication. By default, it is set to “Warn me”.
However, you can change this setting by clicking the drop-down.

RDP to a PC with the Microsoft Remote Desktop App
In the last section, I showed you how to use Remote Desktop Connection app to connect to a Windows 10 PC. I also explained some of the App features and how you can configure those features.
In this section, you will learn how to use Microsoft Remote Desktop App to connect to a Windows 10 PC. I will highlight the difference between the pre-installed Windows 10 Remote Desktop Connection app and the Microsoft Remote Desktop app.
Additionally, in the first sub-section of this section, I will walk you through the steps to install Microsoft Remote Desktop App. Finally, in the last subsection, you will learn how to use the Microsoft Remote Desktop app to remotely connect to a Windows 10 PC.
How to Install Microsoft Remote Desktop App
Follow the steps below to install Microsoft Remote Desktop app in Windows 10:
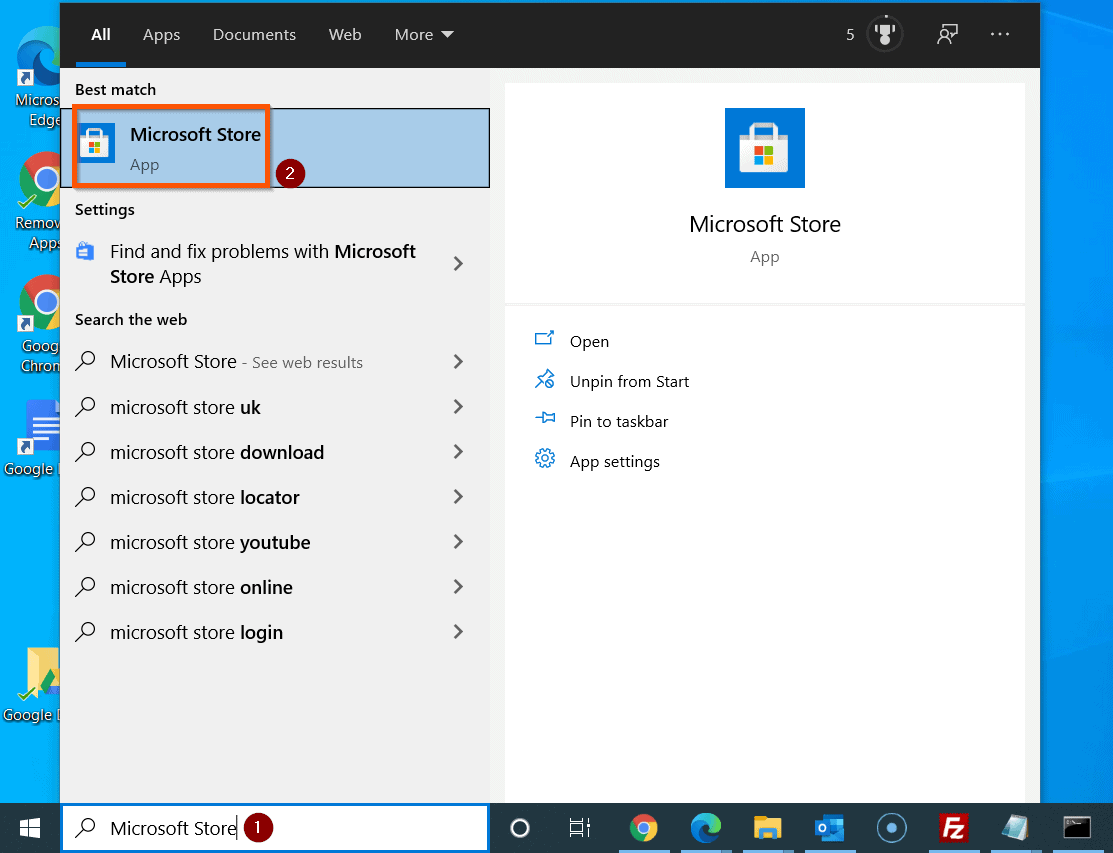
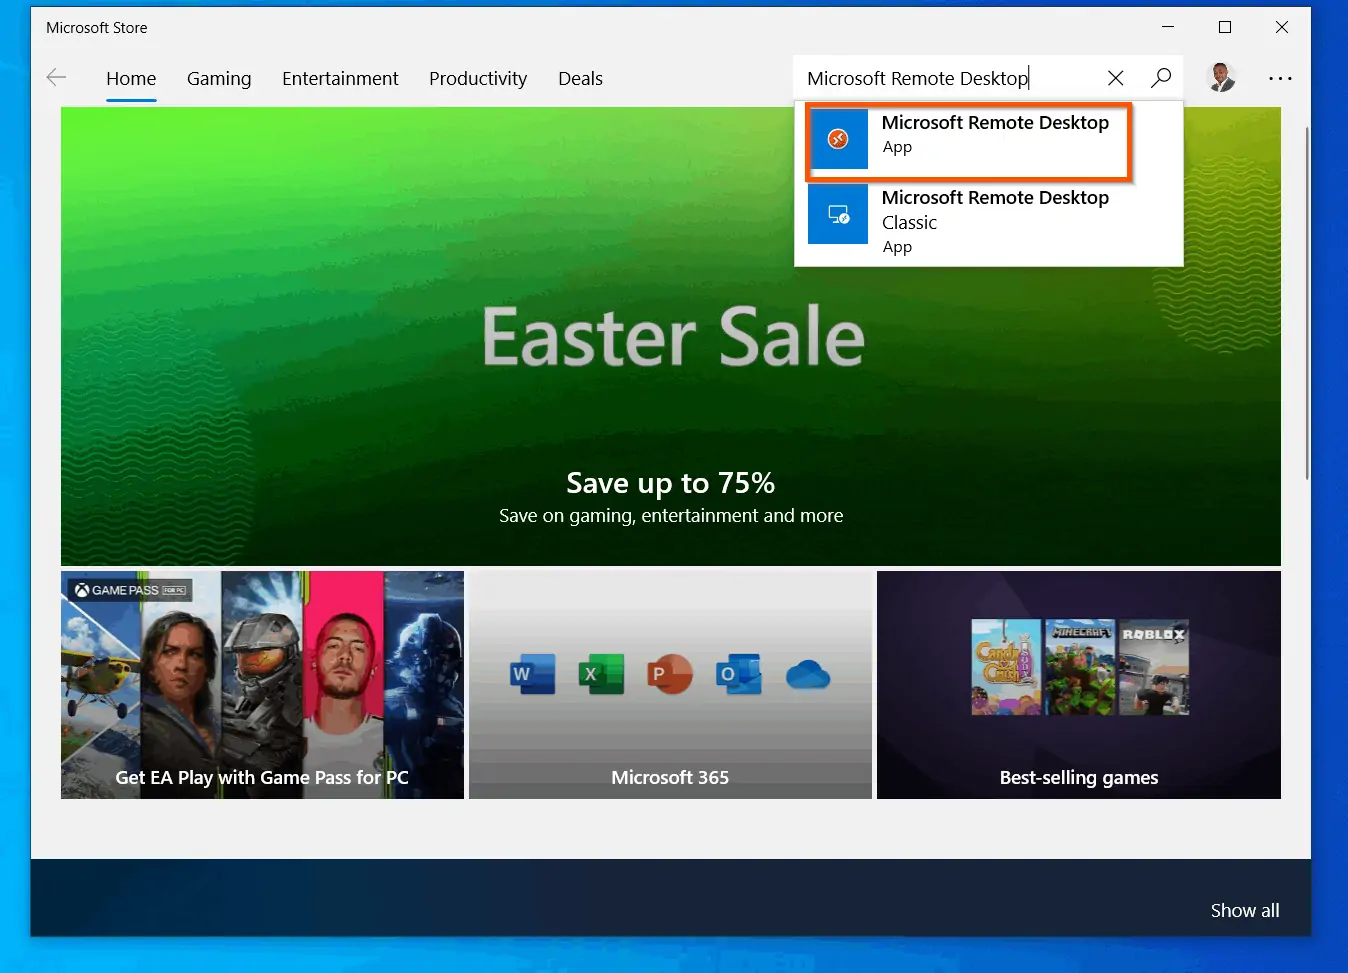
- Search Microsoft Store. Then, from the search result, click the Microsoft Store app.
- When the Microsoft Store app opens, enter Microsoft Remote Desktop in the search box. The search result will display two options. Select the first one, with the red logo.
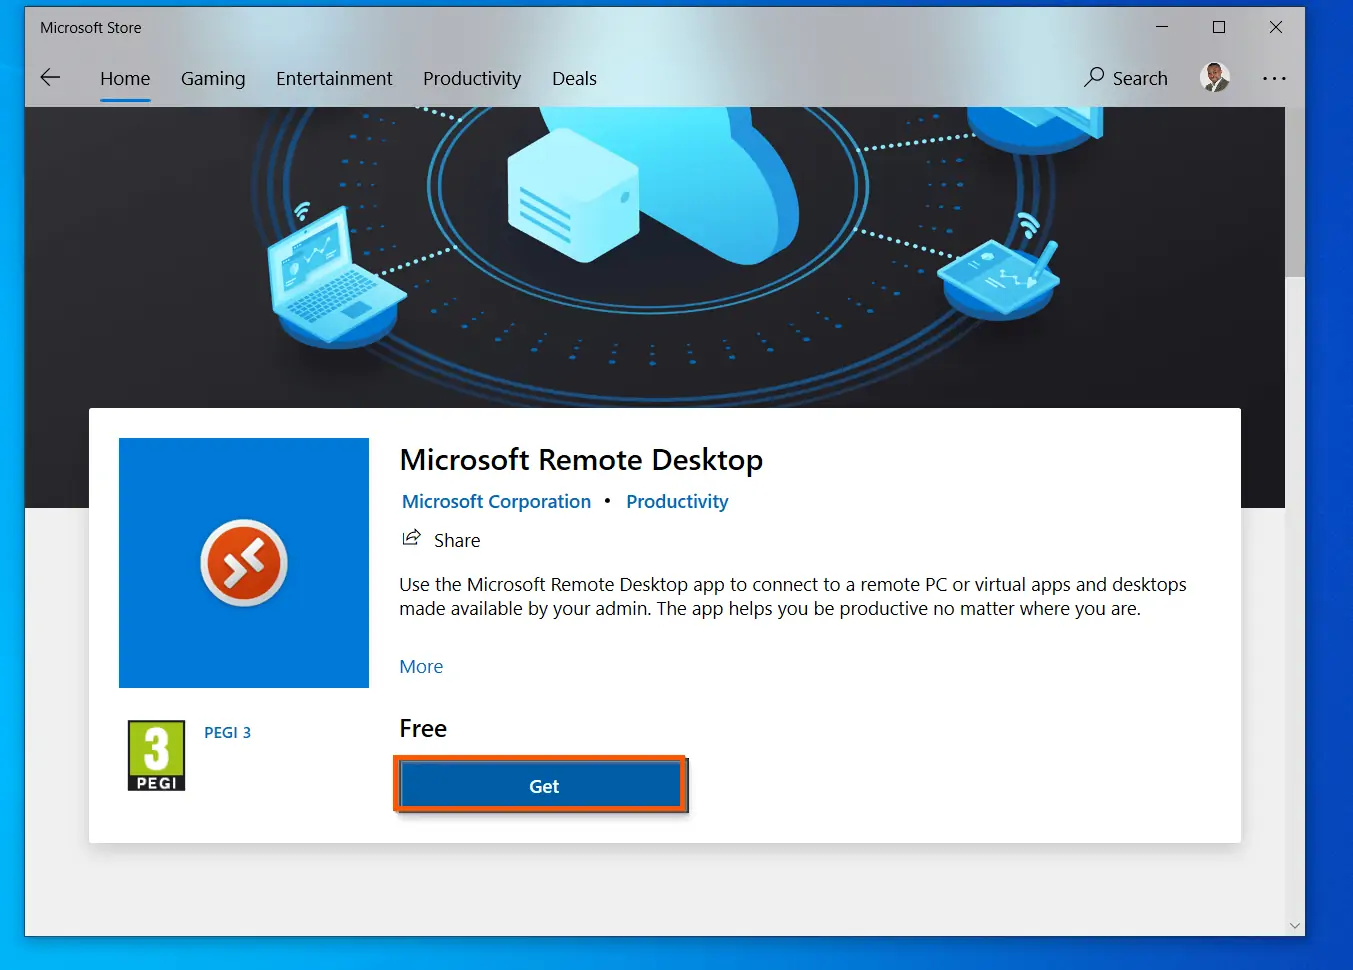
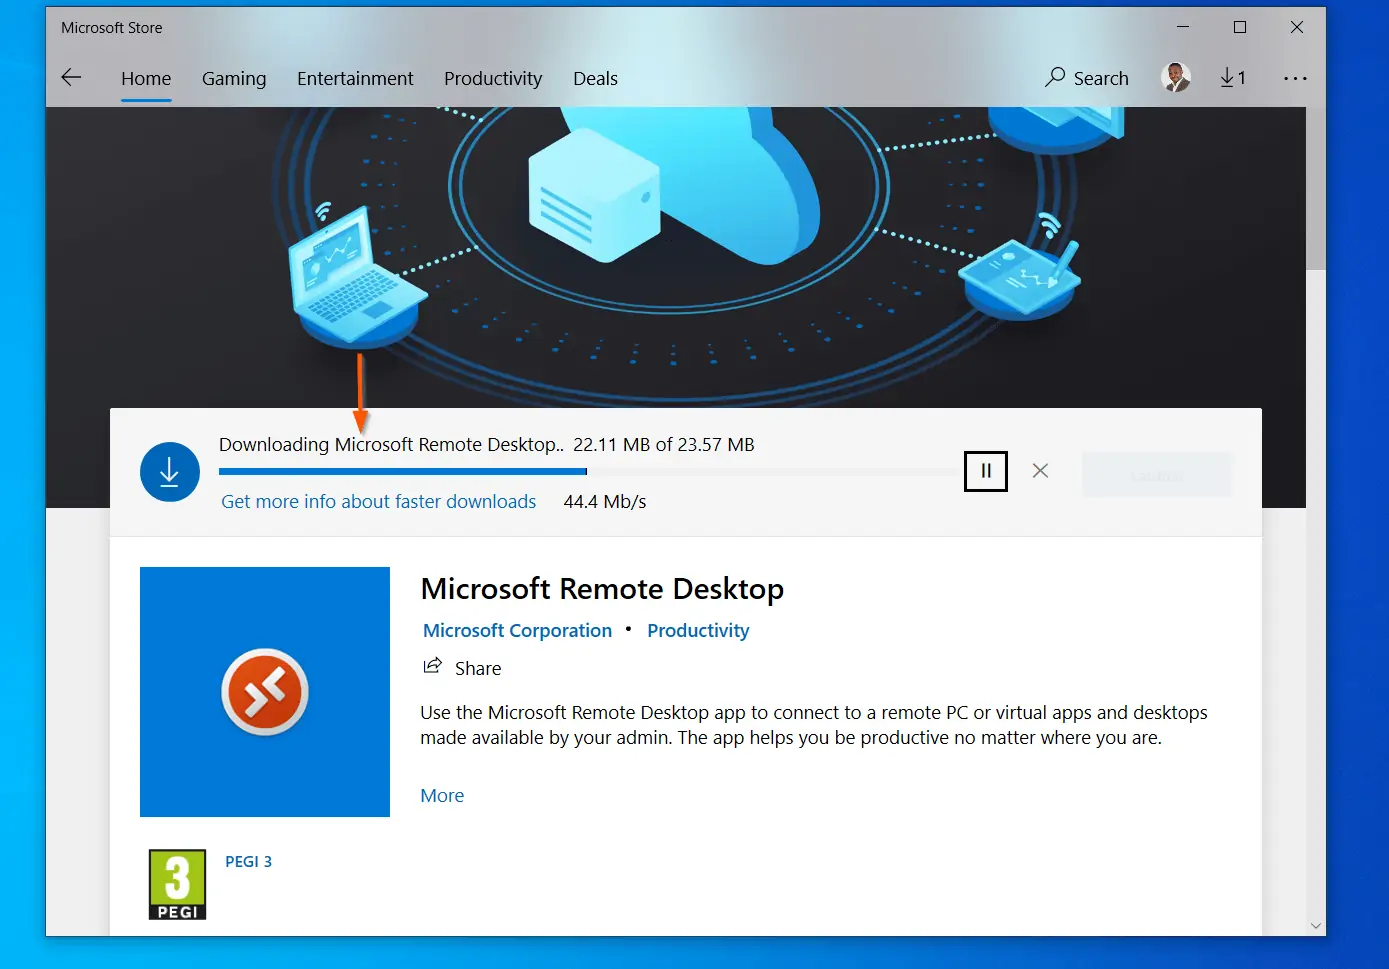
- When the app opens, scroll down and click Get. Then, wait for the app to download and install. When the app is fully installed, proceed to the next sub-section.
How to Use Microsoft Remote Desktop App
Once you have installed the Microsoft Remote Desktop app, follow the steps below to use the app:
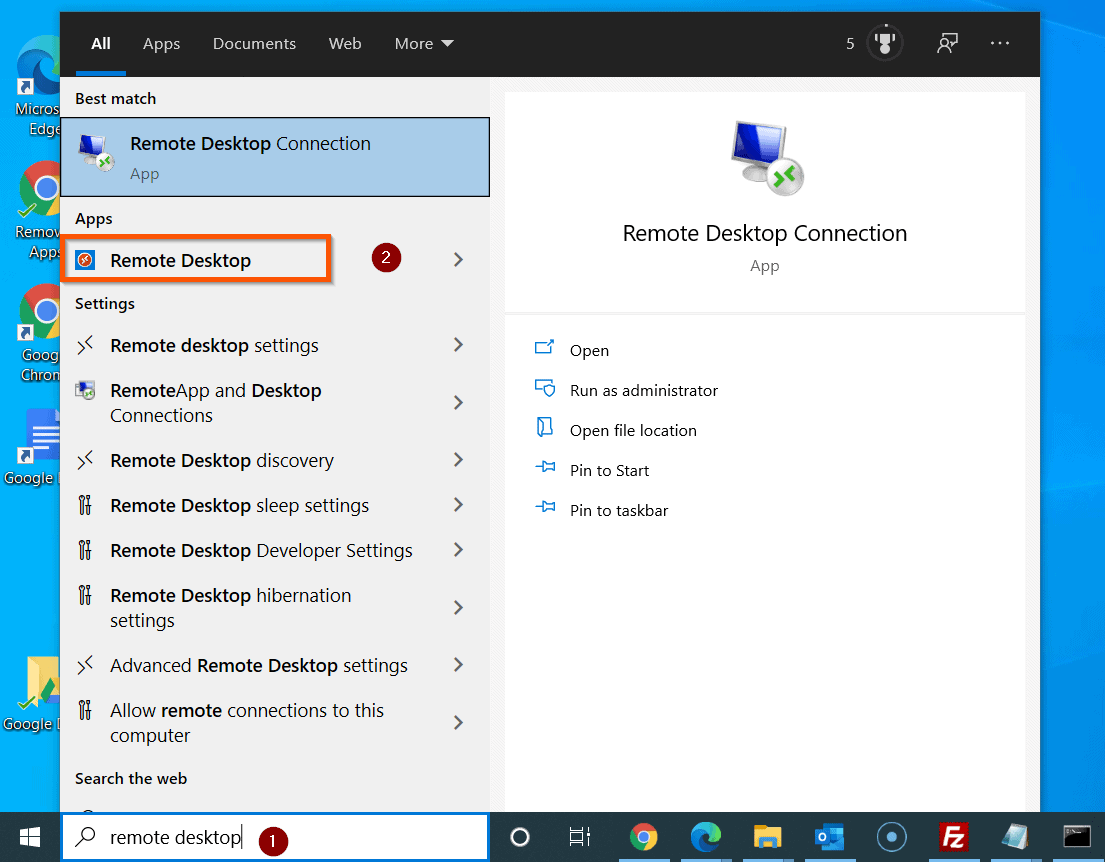
- Search for Remote Desktop. Then, from the search result, click Remote Desktop app with the red logo.
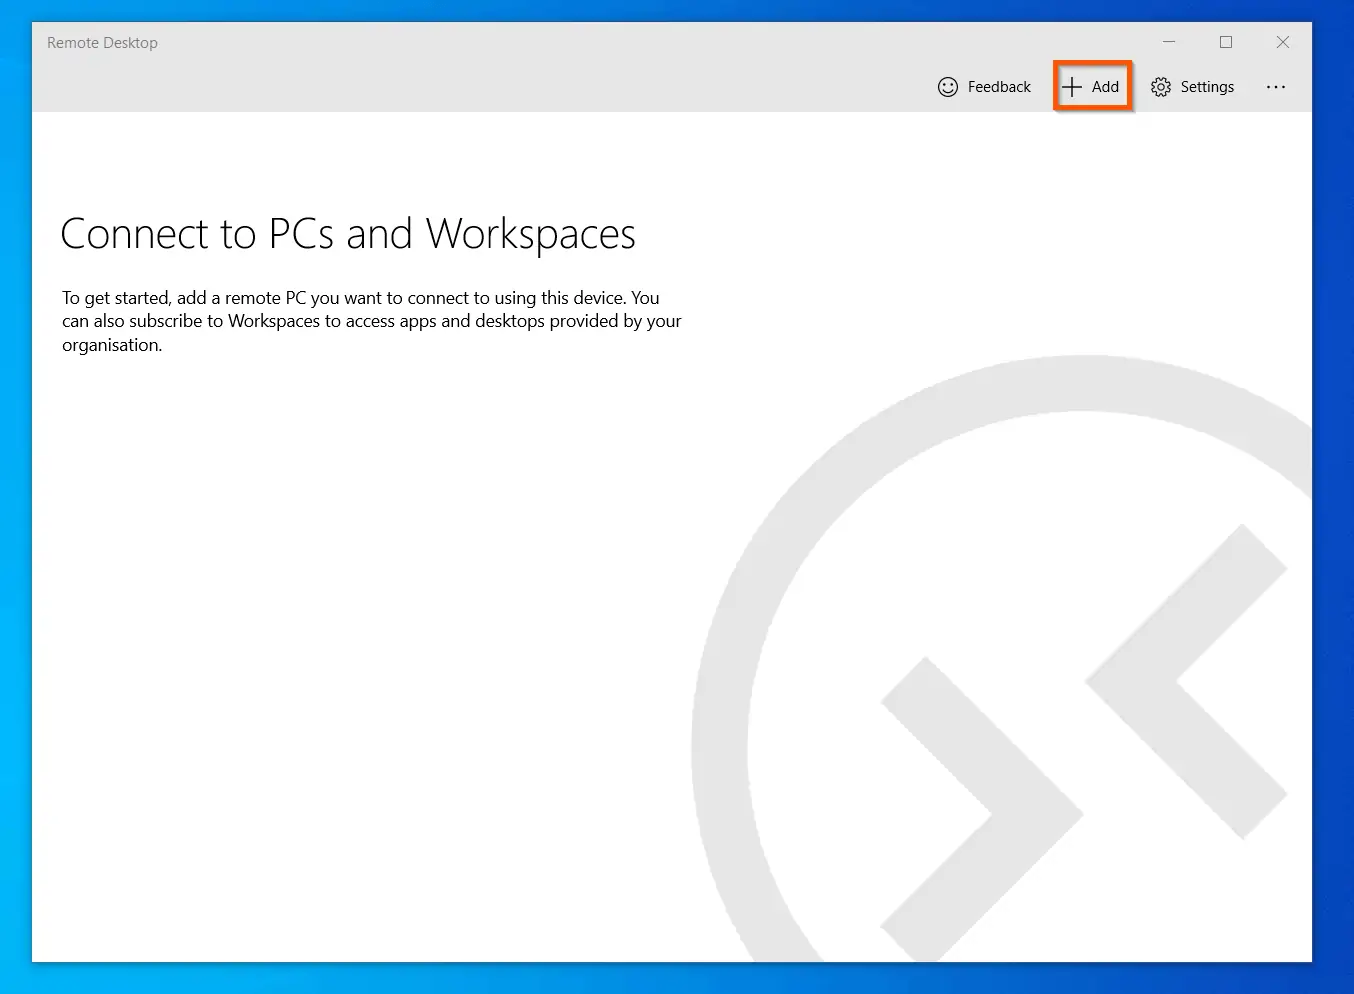
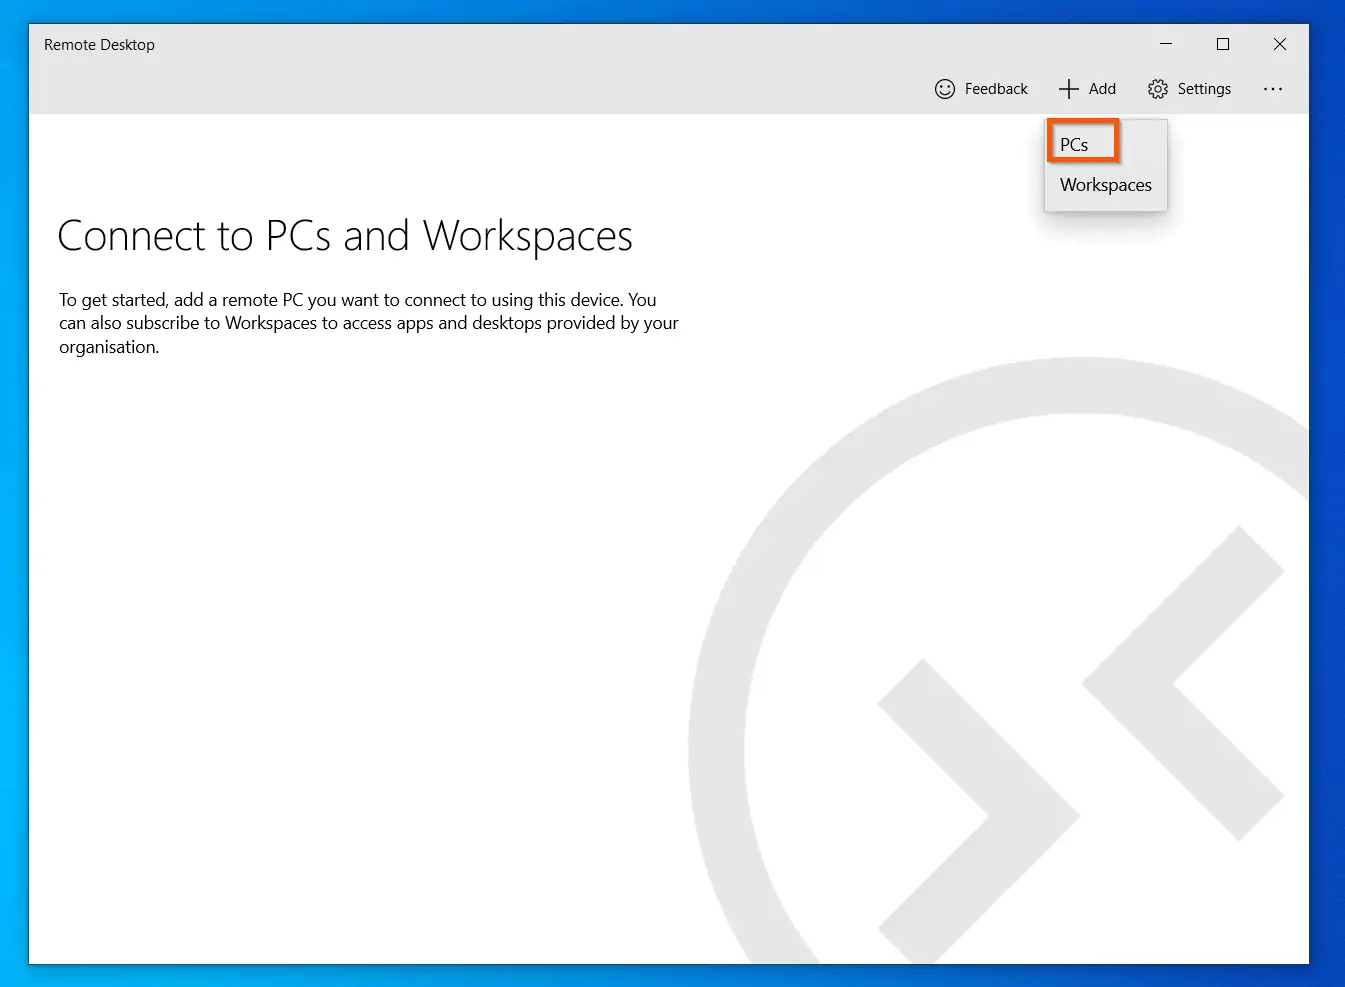
- When the app opens, to add your first PC to the app, click the + Add button. When you click + Add, two options will be displayed – select PC (see the second screenshot below).
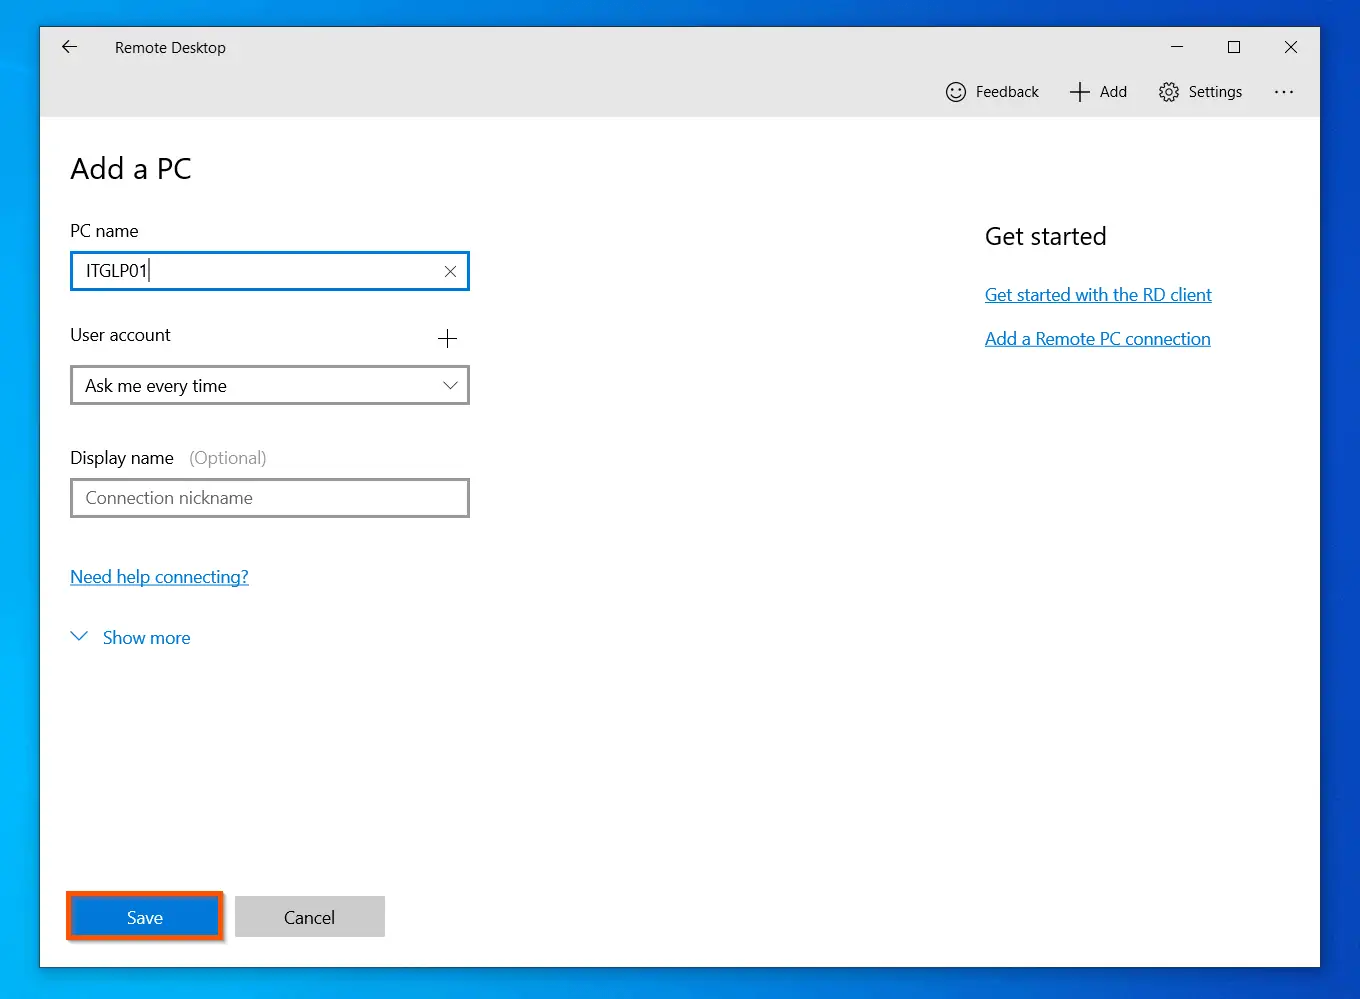
- Then, on the Add PC options screen, enter the name of the Windows 10 PC you want to connect to. Furthermore, you could select the option to ask you to enter a user name and password every time you want to connect to the PC. Alternatively, to add a valid user name and password, click the + sign above the User account field.
- When you finish adding the details of the Windows 10 PC, on the bottom left of the screen, click Save.
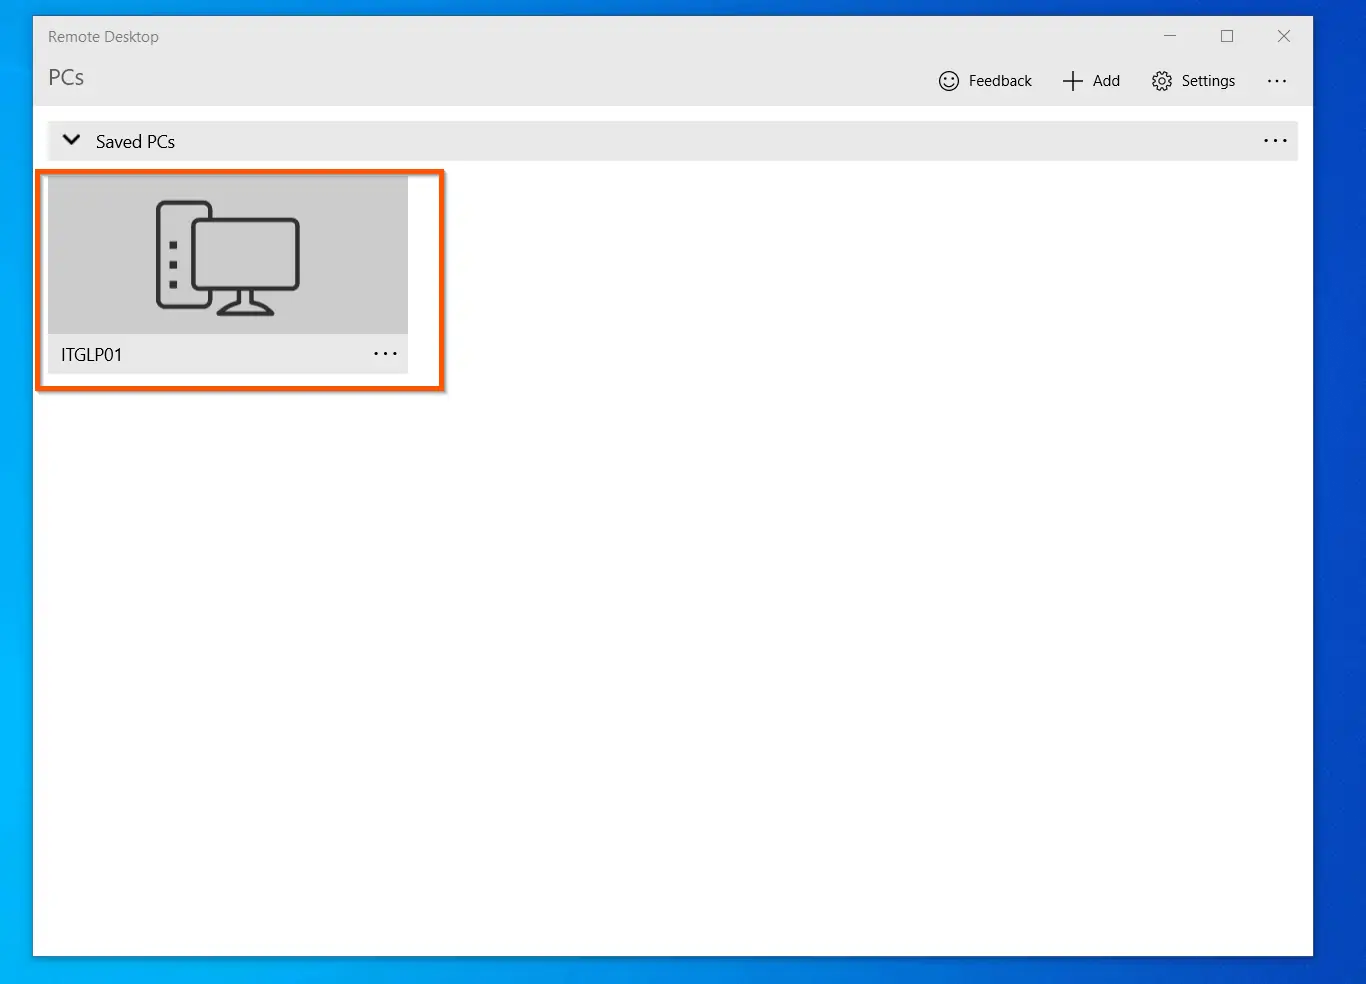
- Finally, to use Microsoft Remote Desktop app to connect to a Windows 10 PC, click the PC in the Saved PCs list. If the PC exists, it can be reached and you have the permission to RDP to the PC, it should be connected.
How to Change Microsoft Remote Desktop App Settings
In this final section of this guide, you will learn how to change the setting of Microsoft Remote Desktop app.
- To open the app settings, on the top right, click Settings.
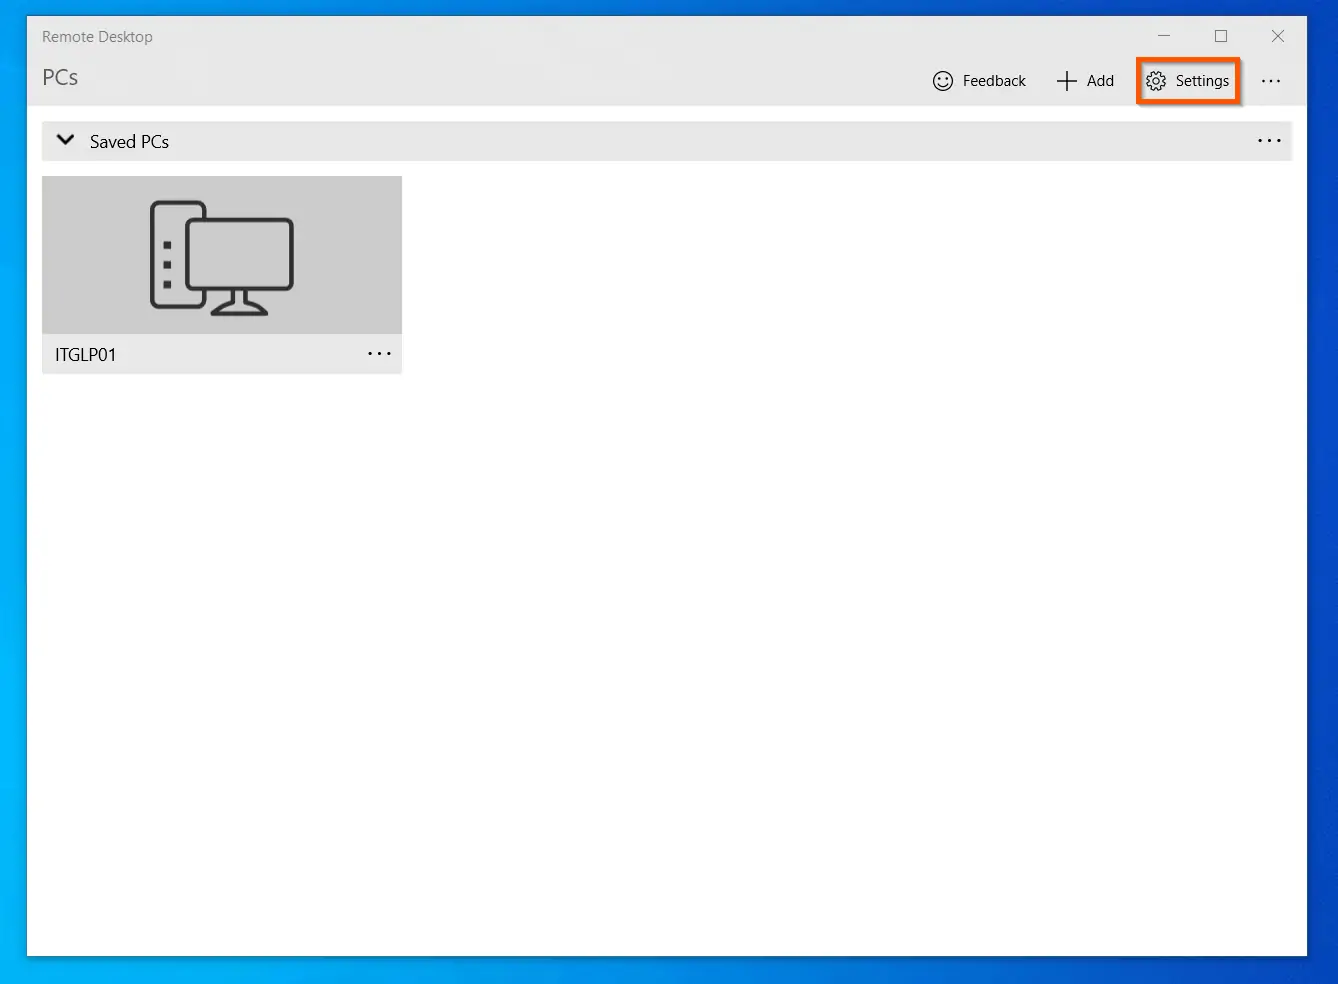
- On the Settings screen, you can modify the following settings:
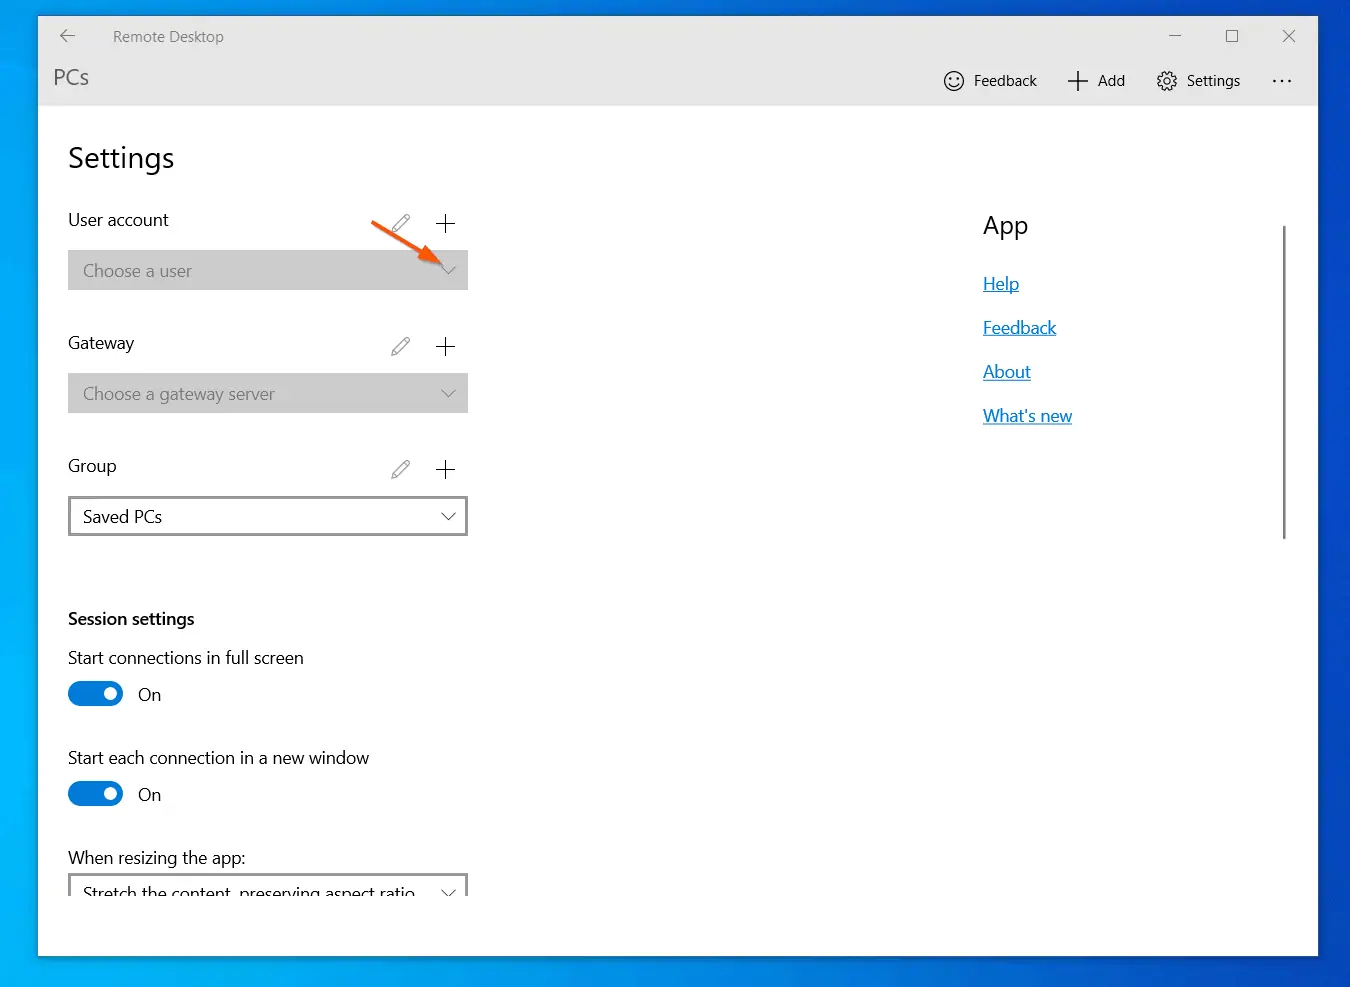
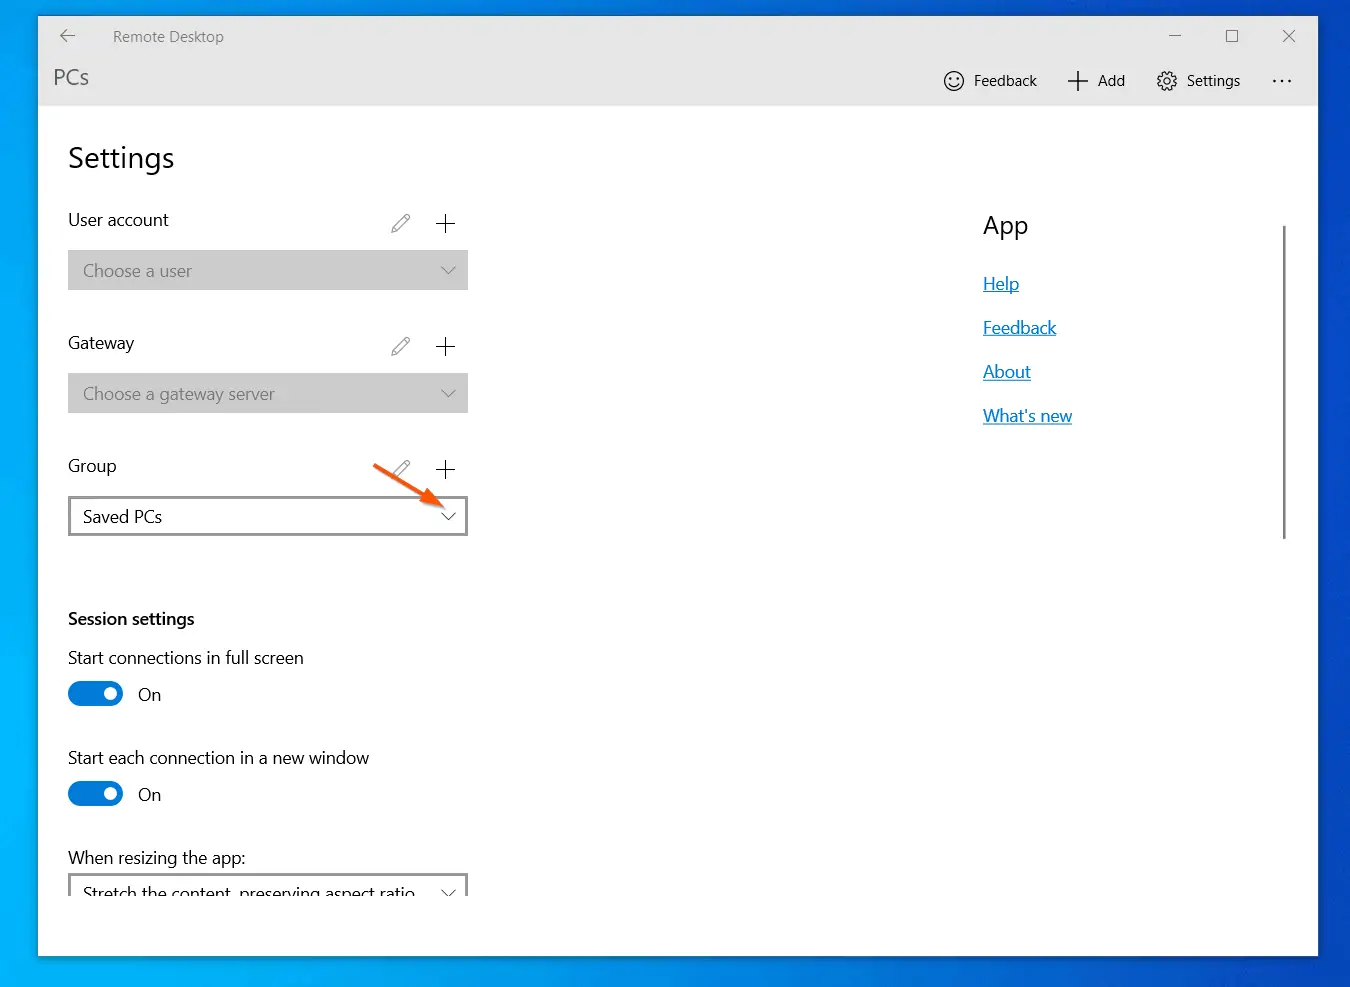
Change User Account, Gateway & Group Settings
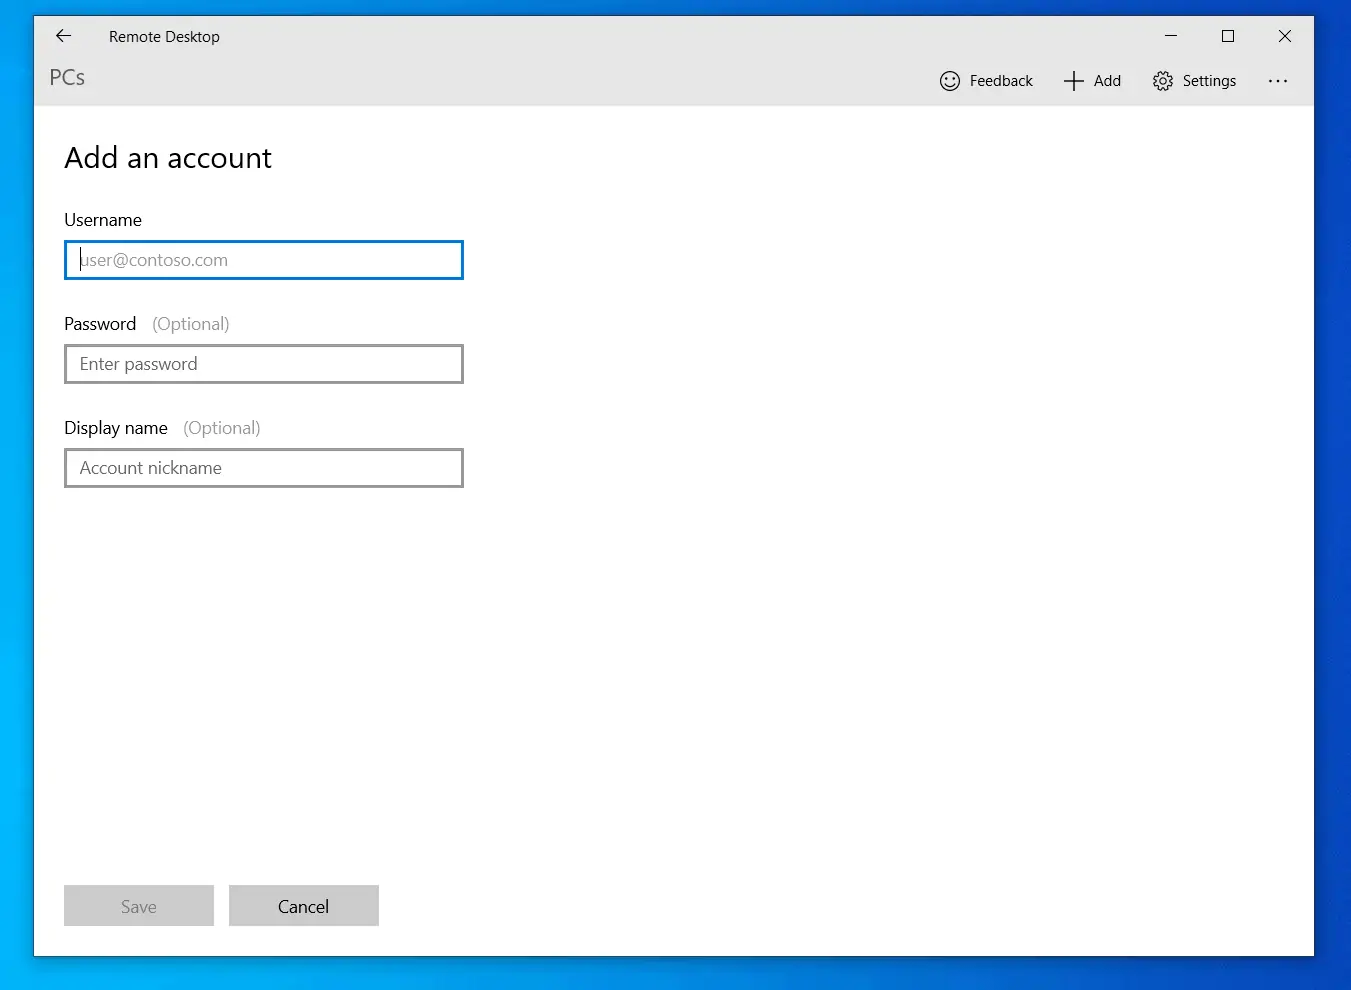
If you have added user accounts, the User account drop-down will be active. However, to add a new user, click the + sign above the Choose a user drop-down.
Finally, add the user details and click Save.
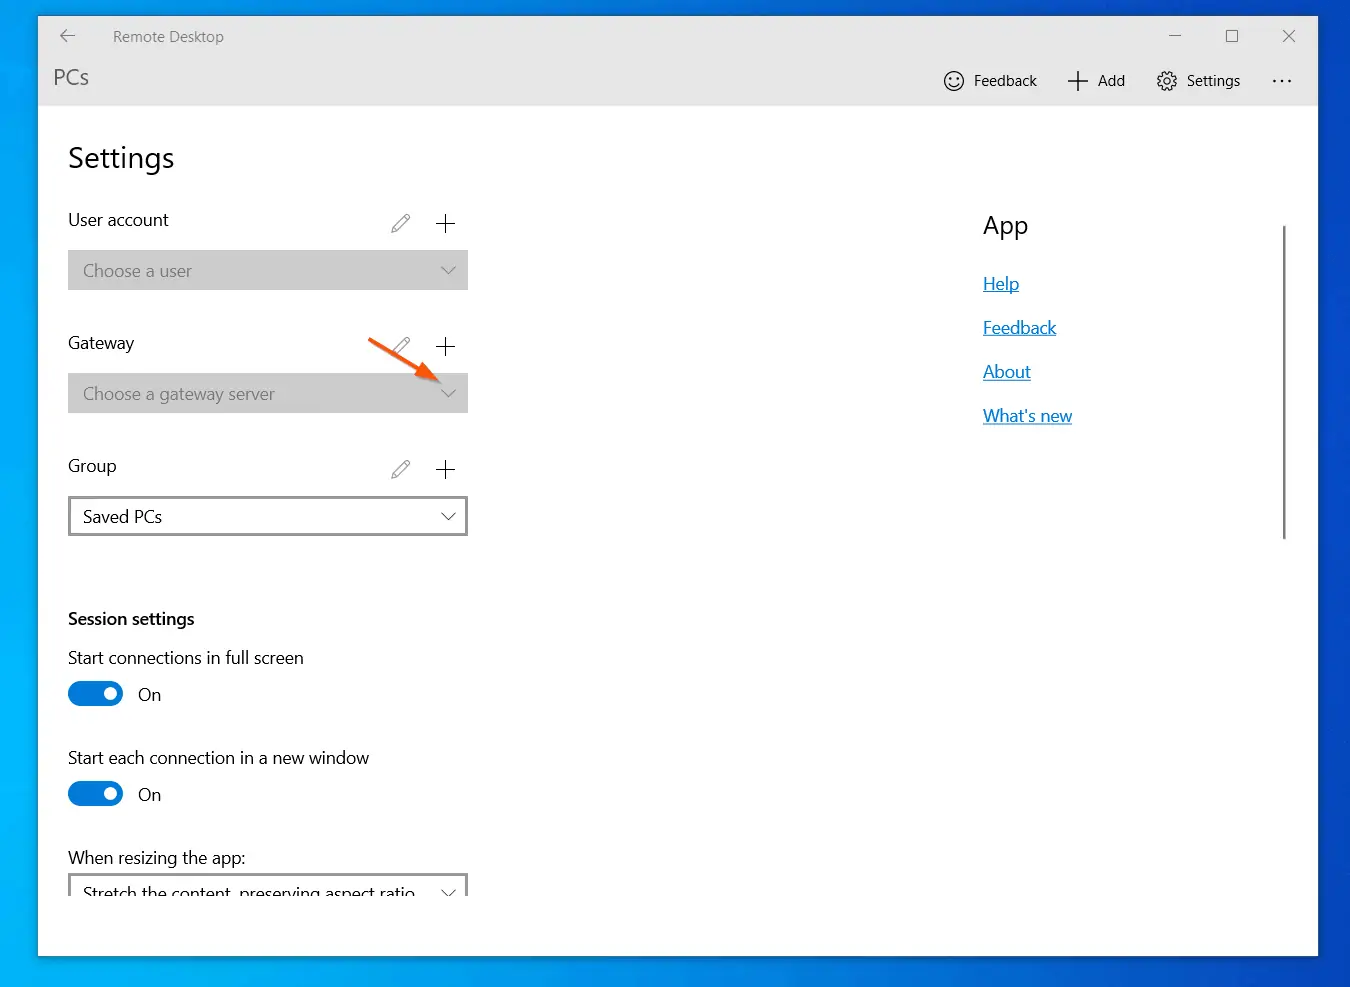
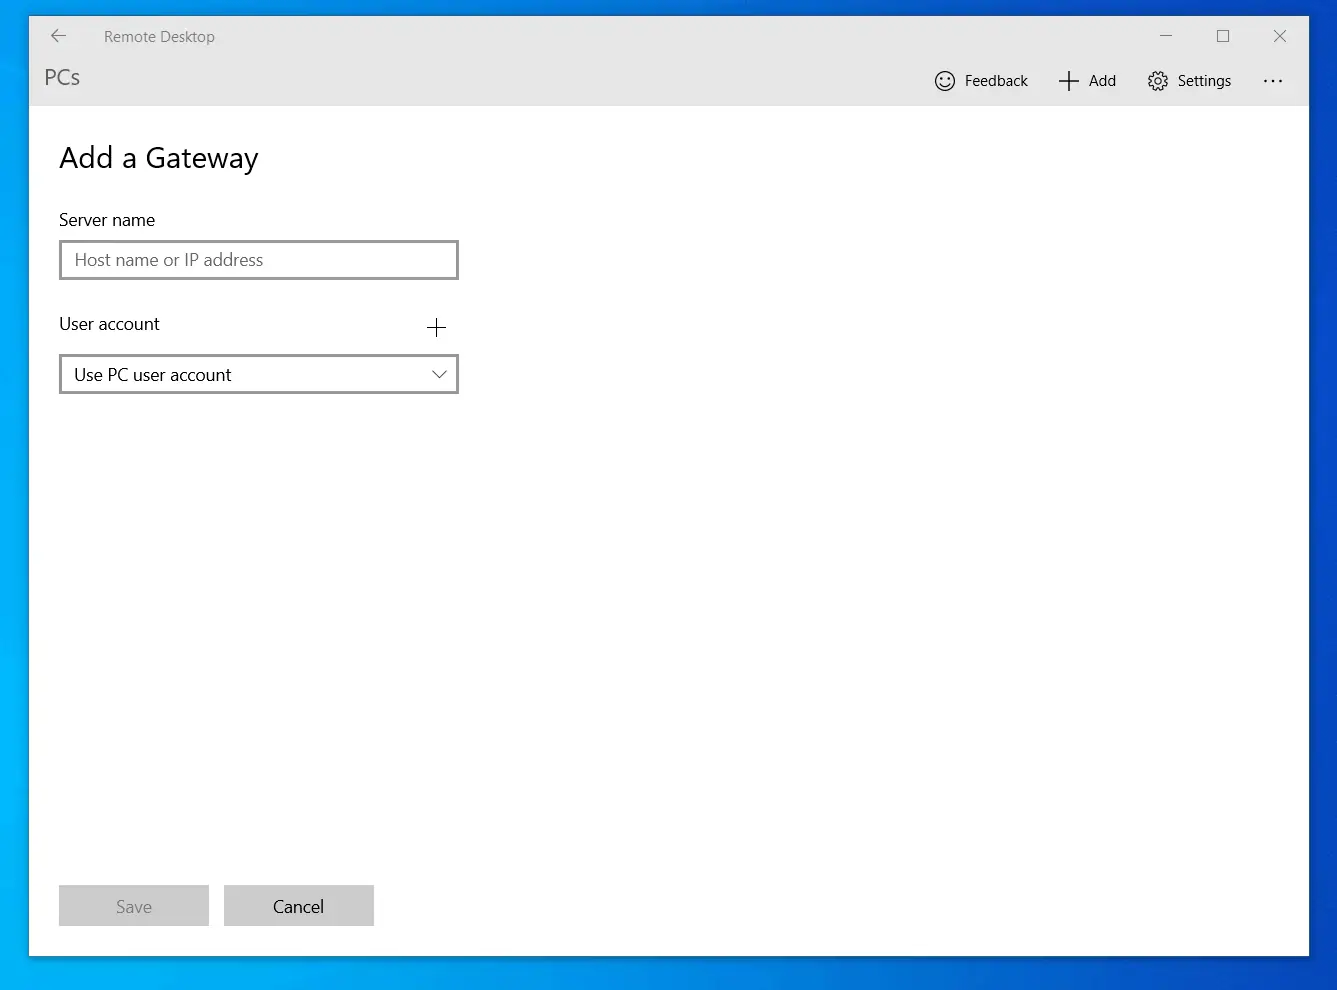
Still on the User Account, Gateway & Groups section of the settings screen – if you already added any Gateways – you will be able to select the default Gateway by clicking the Choose a gateway server drop-down.
However, if you need to add a new RDP gateway, click the + sign above the Choose a gateway server drop-down. Then, add the RDP gateway details and click Save.
Finally, you can select a default group to add PCs you add to Microsoft Remote Desktop. However, like the User account and the Gateway, you can add a new group by clicking the + sign above the Group drop-down.
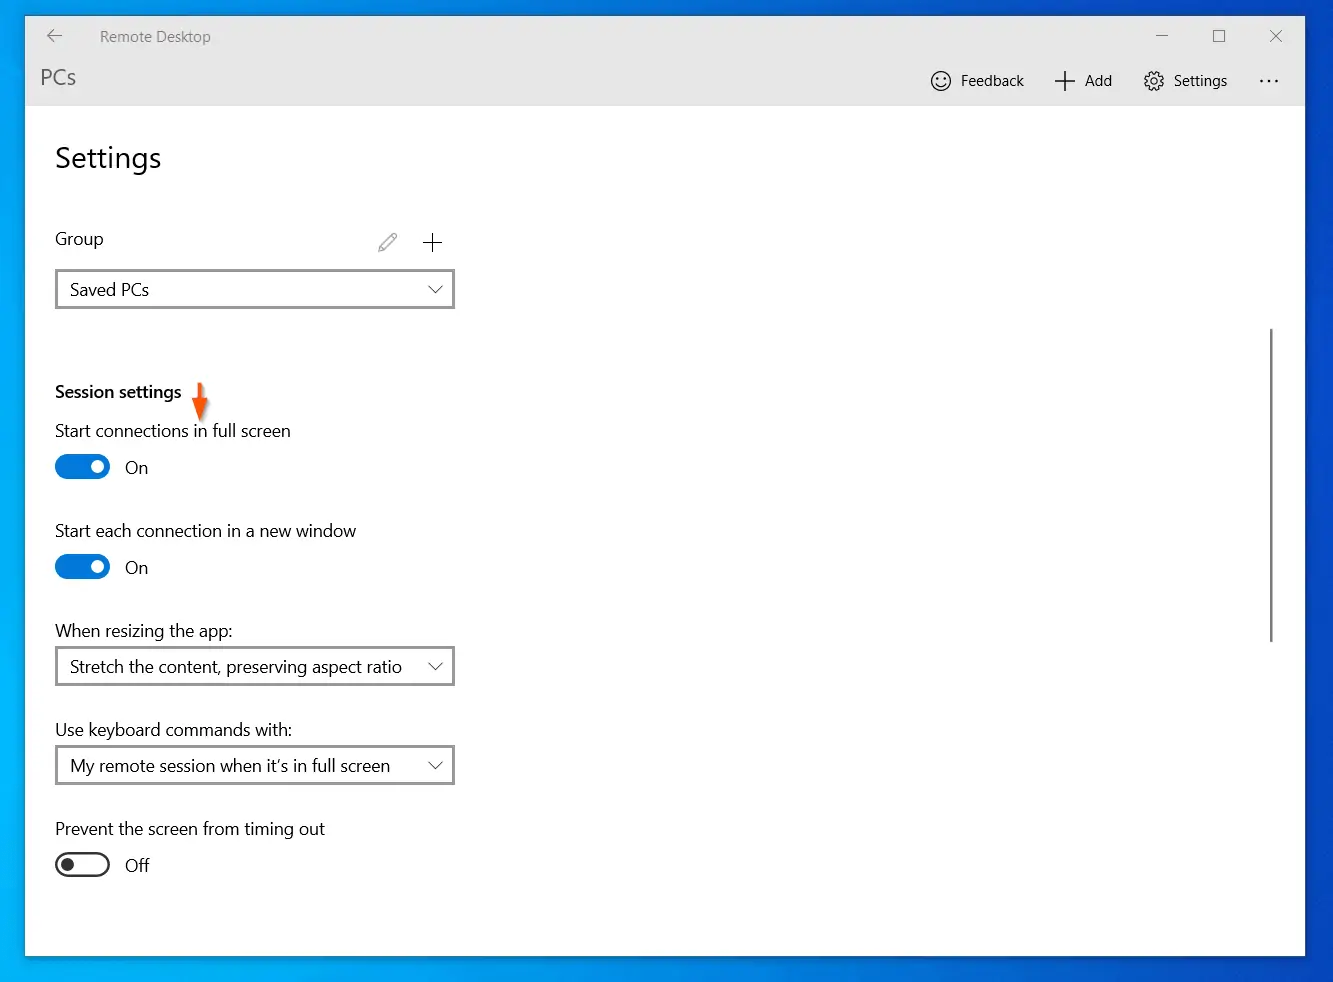
Change Sessions Settings
In this section of the Microsoft Remote Desktop app settings, you can set disable Start connection in full screen (default is enabled). Additionally, by default, RDP sessions are set to start each connection in a new window – you can disable this option.
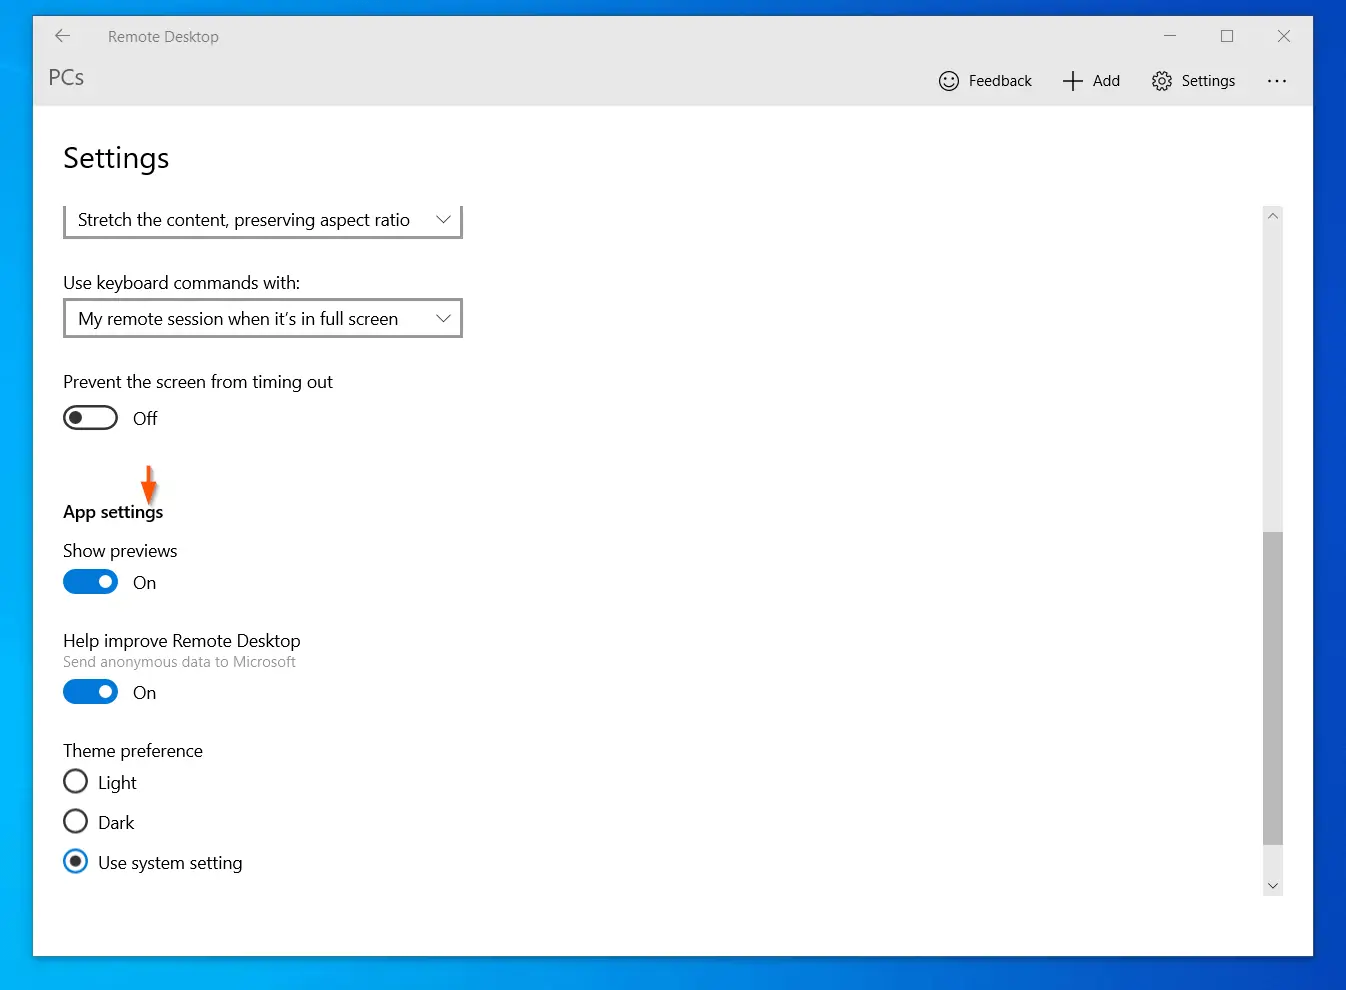
Moving down the Session settings, you have the option to set the sizing of the session. Additionally, you can also set keyboard settings.
Finally, you can flip the Prevent the screen from timing out switch from Off (default) to On.
Change App Settings
Finally, for this section, you have some options to adjust Microsoft Remote Desktop app settings. In the app settings section, you can disable Show previous, Help improve Remote Desktop, or select Light, Dark modes.
Frequently Asked Questions
Here are the frequently asked questions about Remote Desktop in Windows 10:
No, Remote Desktop is NOT available in Windows 10 Home. If you need Remote Desktop, you need to upgrade to Windows 10 Pro or Enterprise.
Alternatively, to enable Remote Desktop in Windows 10 Home, follow the steps in this Itechtics.com guide.
To enable Remote Desktop or connect to another Windows 10 PC via Remote Desktop, you need either Windows 10 Pro or Enterprise. Windows 10 Home does not support Remote Desktop
No, Windows 10 does allow multiple remote desktop connections. You can make one RDP connection per time.
If you try to make a second RDP connection, you will be prompted to log off the existing session.
Right-click Start Menu and select Settings. Then, open System -> Remote Desktop (Found at the bottom of the left pane of System settings). The switch beneath Enable Remote Desktop will be set to On.
To disable Remote Desktop Connection in Windows 10, search remote desktop. Then, from the search results, select Remote Desktop Settings. Finally, flip Enable Remote Desktop off.
Conclusion
If you were able to connect a remote desktop to your Windows 10 PC with the aid of the steps in this guide, share your experience by responding to the “Was this page helpful?” question below.
Finally, for more Windows 10 Itechguides, visit our Windows 10 How-To page.


![How To Run Sysprep (Generalize) In Windows 10 [2 Methods]](https://www.itechguides.com/wp-content/uploads/2022/05/8-2.webp)