Do these 3 things before closing this tab:
1Scan for outdated or missing drivers - takes under a minute2Clear out junk files and repair common Windows errors3Fix the driver behind crashes, sound loss and screen glitchesiTechGuides is reader-supported. When you buy through links on our site, we may earn an affiliate commission. As an Amazon Associate I earn from qualifying purchases. Learn more
This Itechguide teaches you how to untag yourself on Facebook. The guide offers steps to untag yourself on Facebook from a PC or the App.
If you have been tagged in a picture or post but you do not want it, you can untag yourself.
| # | Preview | Product | Price | |
|---|---|---|---|---|
| 1 |

|
My Facebook for Seniors | $6.75 | Buy on Amazon |
| 2 |

|
My Facebook for Seniors | $24.17 | Buy on Amazon |
| 3 |

|
My Facebook for Seniors | $22.00 | Buy on Amazon |
| 4 |

|
My Facebook for Seniors | $33.21 | Buy on Amazon |
| 5 |

|
My Social Media for Seniors | $27.00 | Buy on Amazon |
Option 1: Untag Yourself Using a PC
- Open Facebook.com from your PC. Then sign in with your Facebook account.
- Open the picture you want to untag yourself from. You can search for the name of the person that posted the photo. You could also search for any related text in the post.
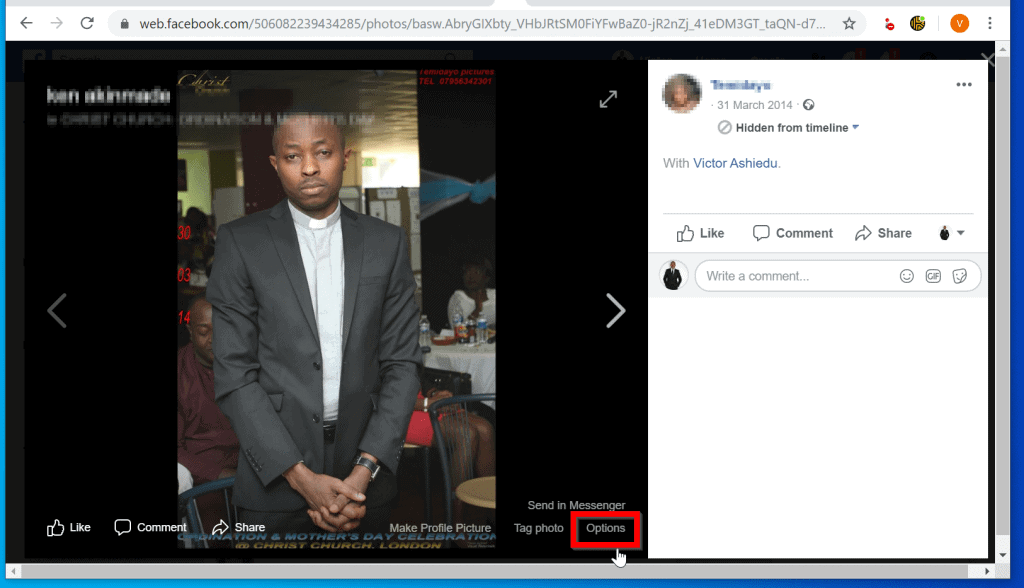
- When the picture opens, hover over it then click Options.
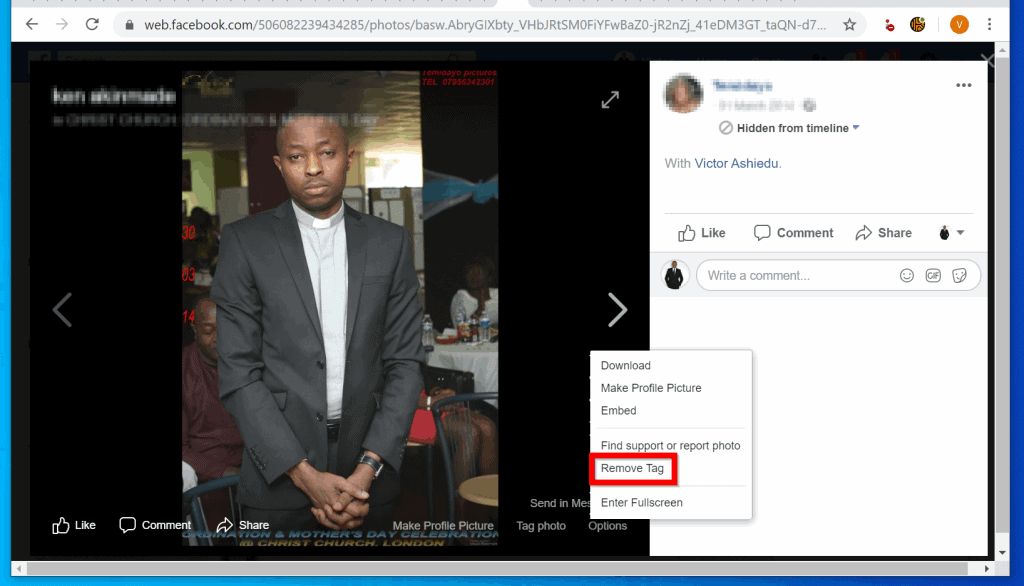
- A list of options will be displayed. To untag yourself click Remove Tag.
- You will receive a confirmation pop up with some information. If you wish to continue, click OK. You could also check the I also want to report this post check box before you click OK.

Option 2: Untag Yourself via the Facebook App
If you use Facebook mobile App, here is how you untag yourself from a post…
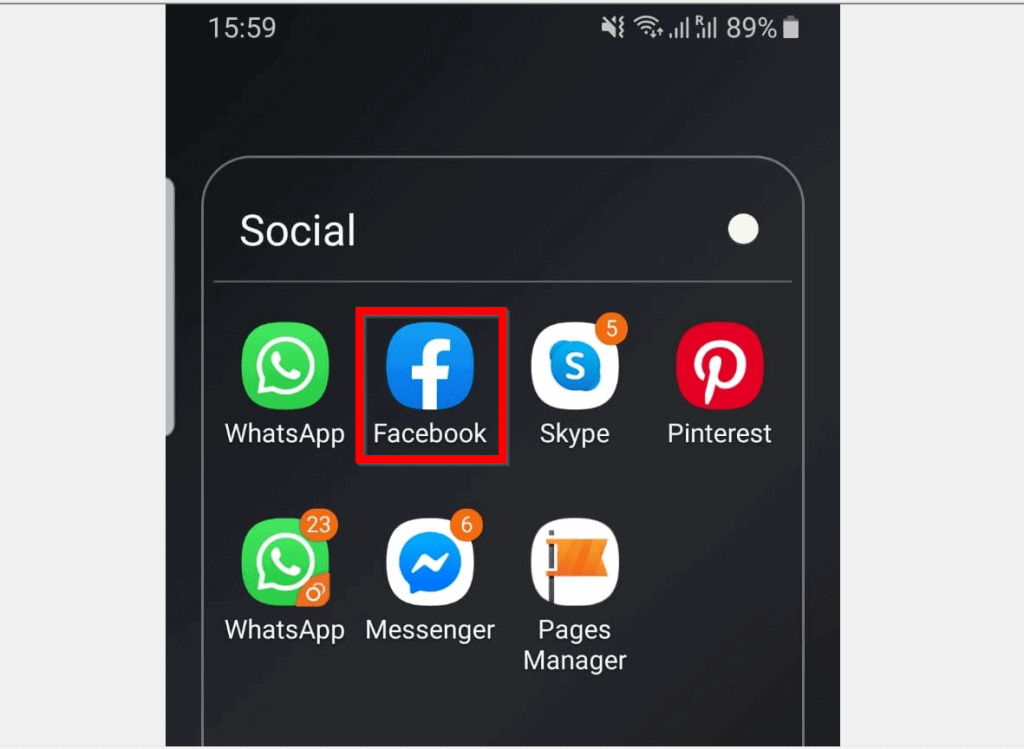
- Open the Facebook App from your phone.
- Then open the post with the picture you want to untag yourself from.
- To display more options, tap on the picture.

- Then on the top right of the picture, tap the 3 vertical dots.

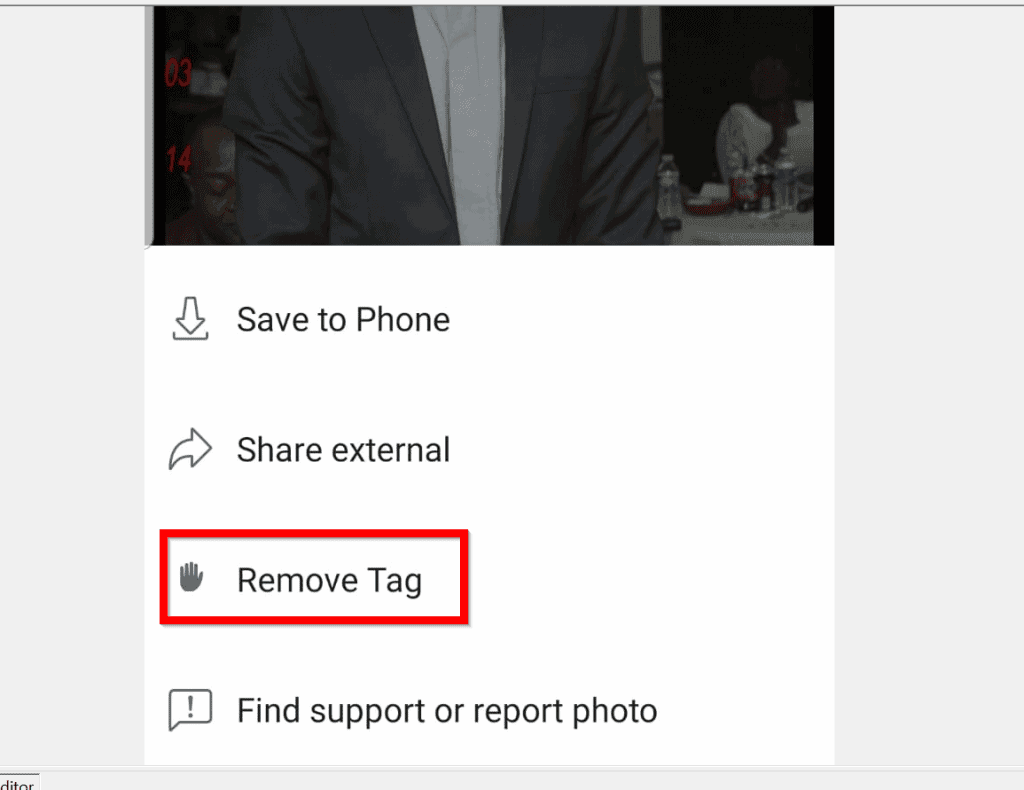
- Tapping the 3 dots displays more options, including Remove tag. To untag yourself, tap Remove tag.
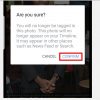
- Finally, at the pop up requesting confirmation, tap CONFIRM. If you changed your mind and no longer with to go through with it, tap CANCEL.
I hope you found this Itechguide helpful and easy to follow. If you did, click on “Yes” beside the “Was this page helpful” question below.
Popular on Amazon
You may also express your thoughts and opinions by using the “Leave a Comment” form at the bottom of this page.
Finally, to read more Social Media guides, visit our Social Media page.