This Itechguide teaches you how to take a screenshot on Samsung Galaxy devices. The guide offers 5 methods to a screenshot on Samsung Galaxy devices.
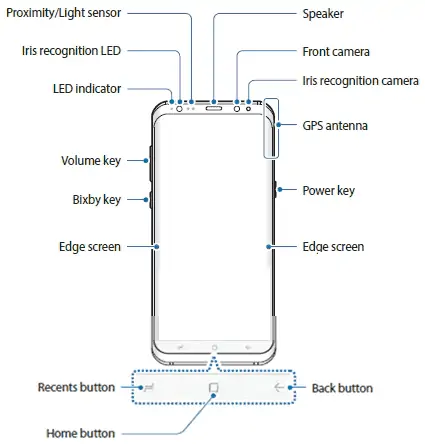
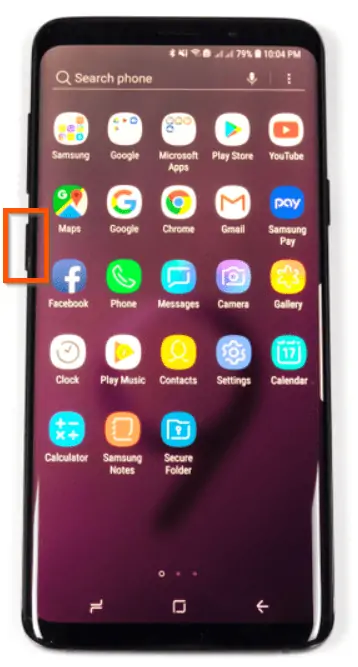
The image below is a typical key of a Samsung device. This image is for Samsung Galaxy S8. In this guide, I will use the key names shown in the diagram below.
Option 1: Screenshot with Power Key and Volume Down Key
This is the most common way to take a screenshot in Samsung Galaxy devices. To take a screenshot with this method:
- Open the item you want to screenshot.
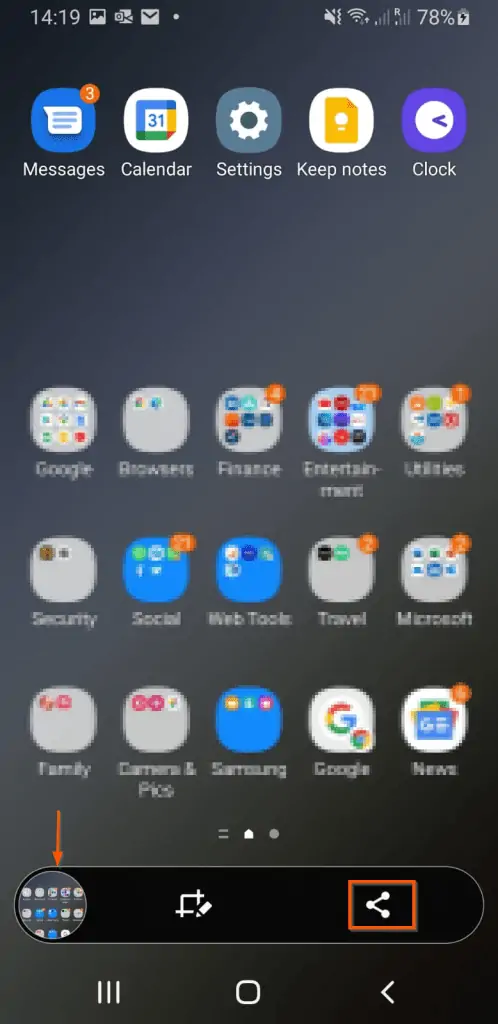
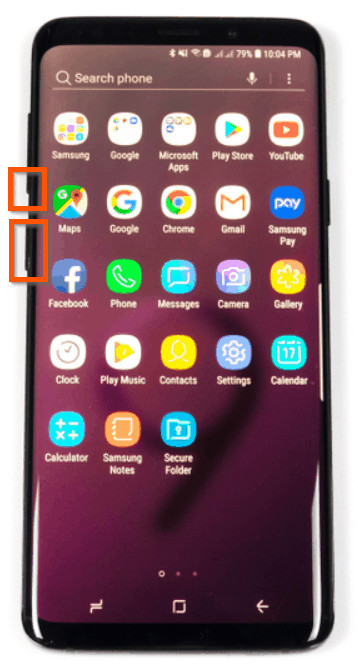
- Then, press the volume down key (left side of the phone) and the power key (on the right side of the phone) simultaneously. Immediately you press these two keys, the screenshot will be taken and a display additional item at the bottom of the screen
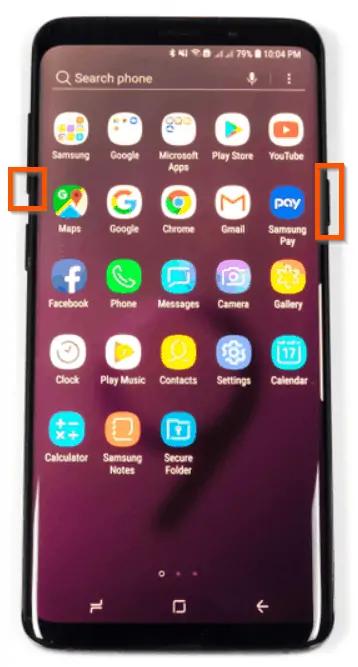
- If you wish to share the screenshot immediately, tap the share icon (highlighted in the image below).
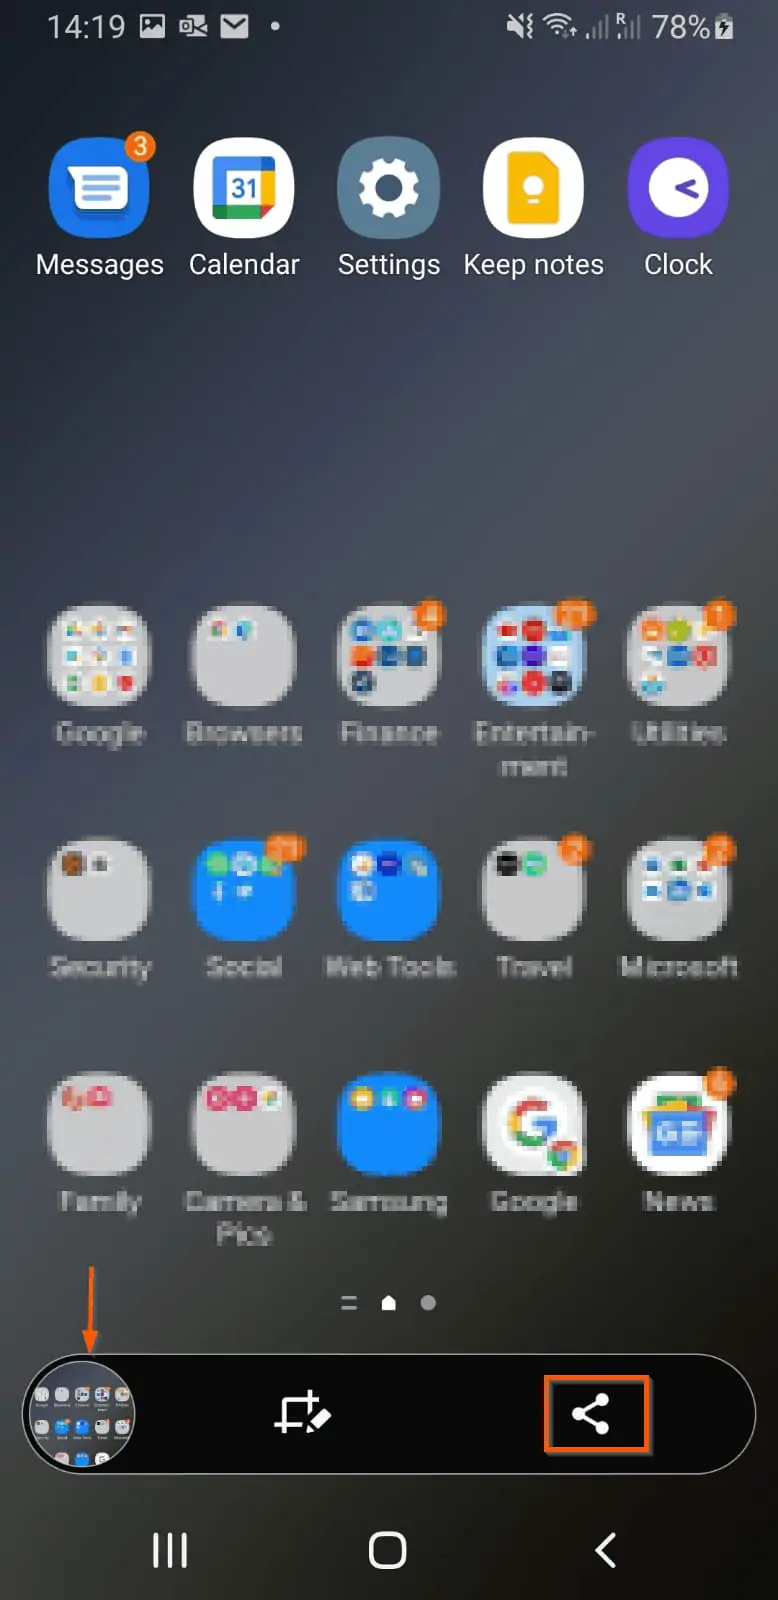
- Alternatively, you can access the screenshot from the Samsung Gallery app.
Option 2: Screenshot on Samsung with Google Assistant
One easy way to take a screenshot on Samsung or any other Android device is via Google Assistant.
However, before you can ask Google Assistant to take screenshots, you have to first enable “Use Screen context” in Assistant Settings. In the first sub-section below, I will walk you through the steps to enable “Use Screen context”.
In the second sub-section, you will learn how to take screenshots with your voice using Google Assistant!
How to Enable “Use Screen context” in Assistant Settings
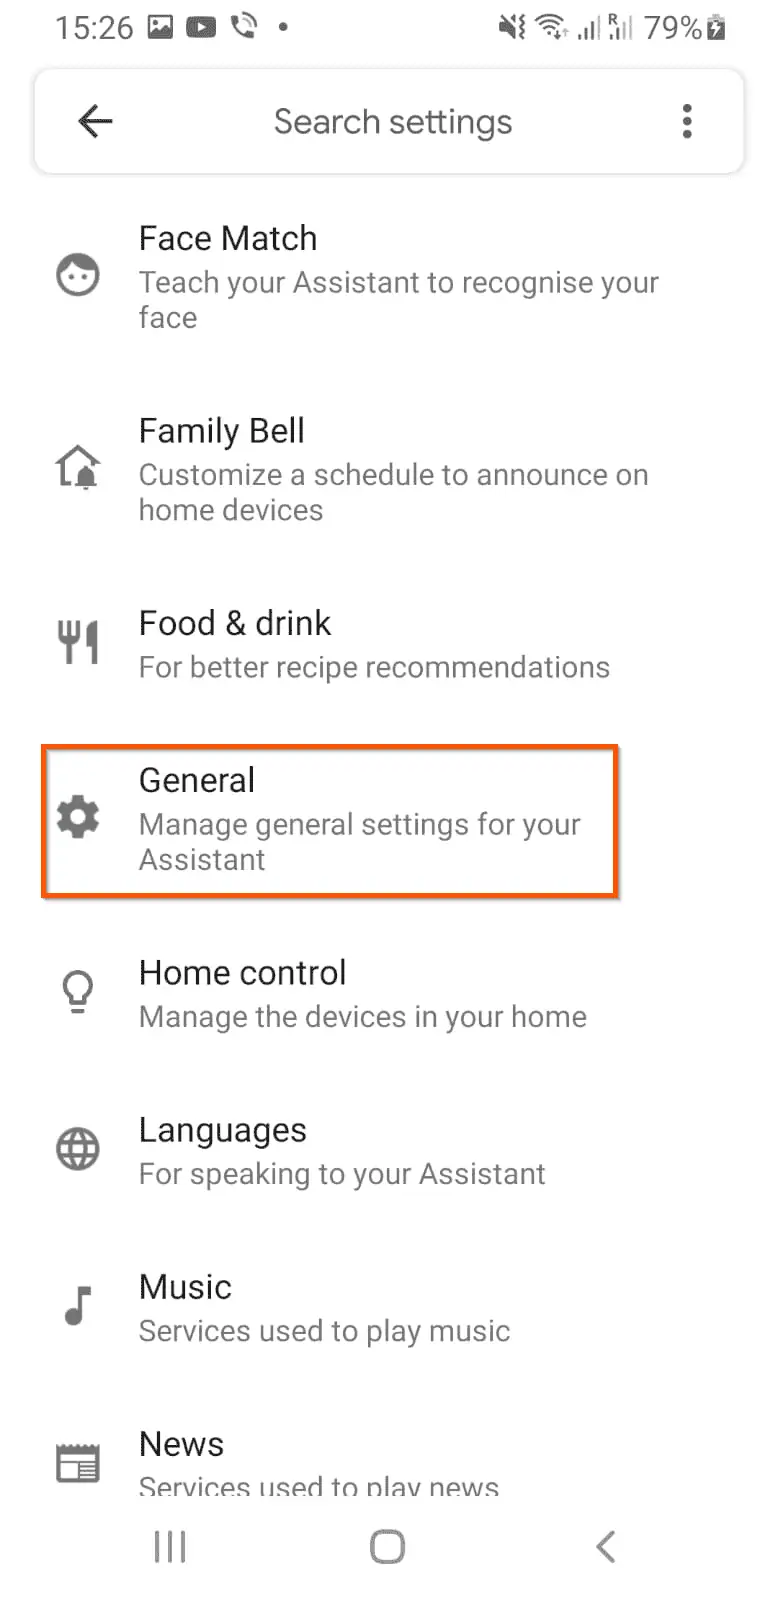
- Tap the Settings app on your Samsung phone.
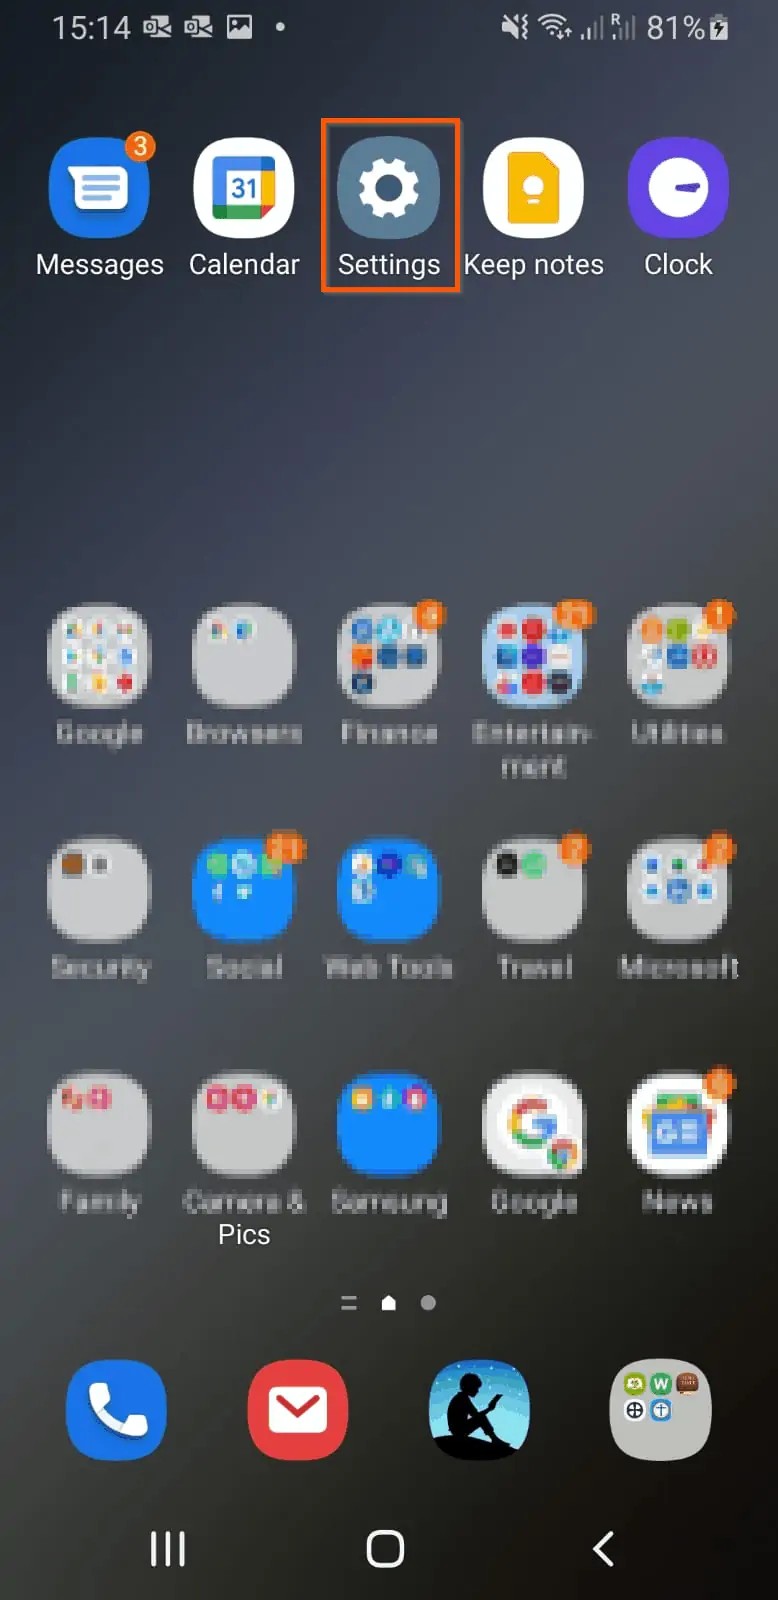
- Then, on the Settings screen, scroll down and tap Google.
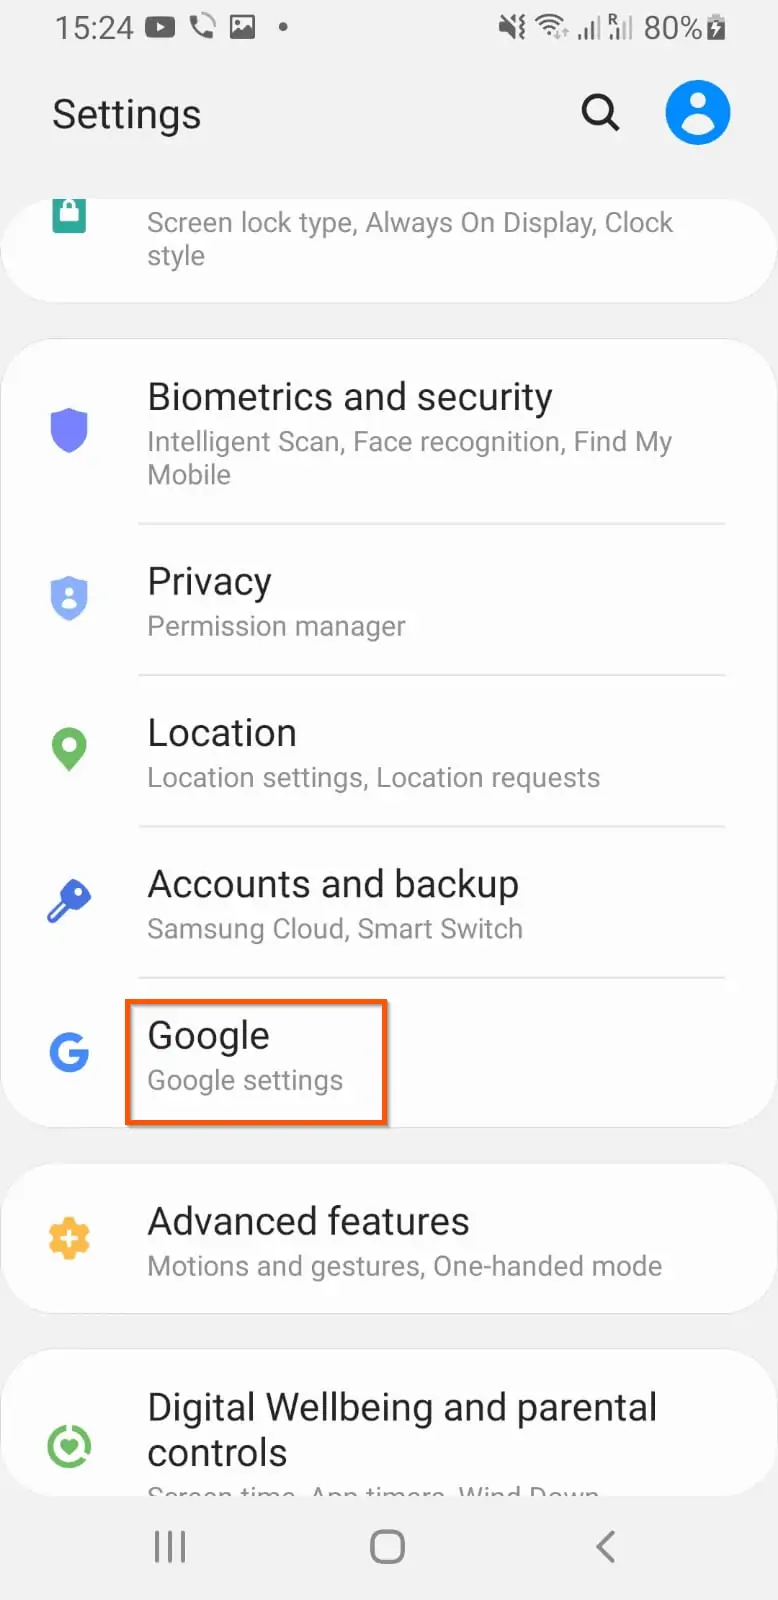
- When Google Settings screen opens, tap Account services.
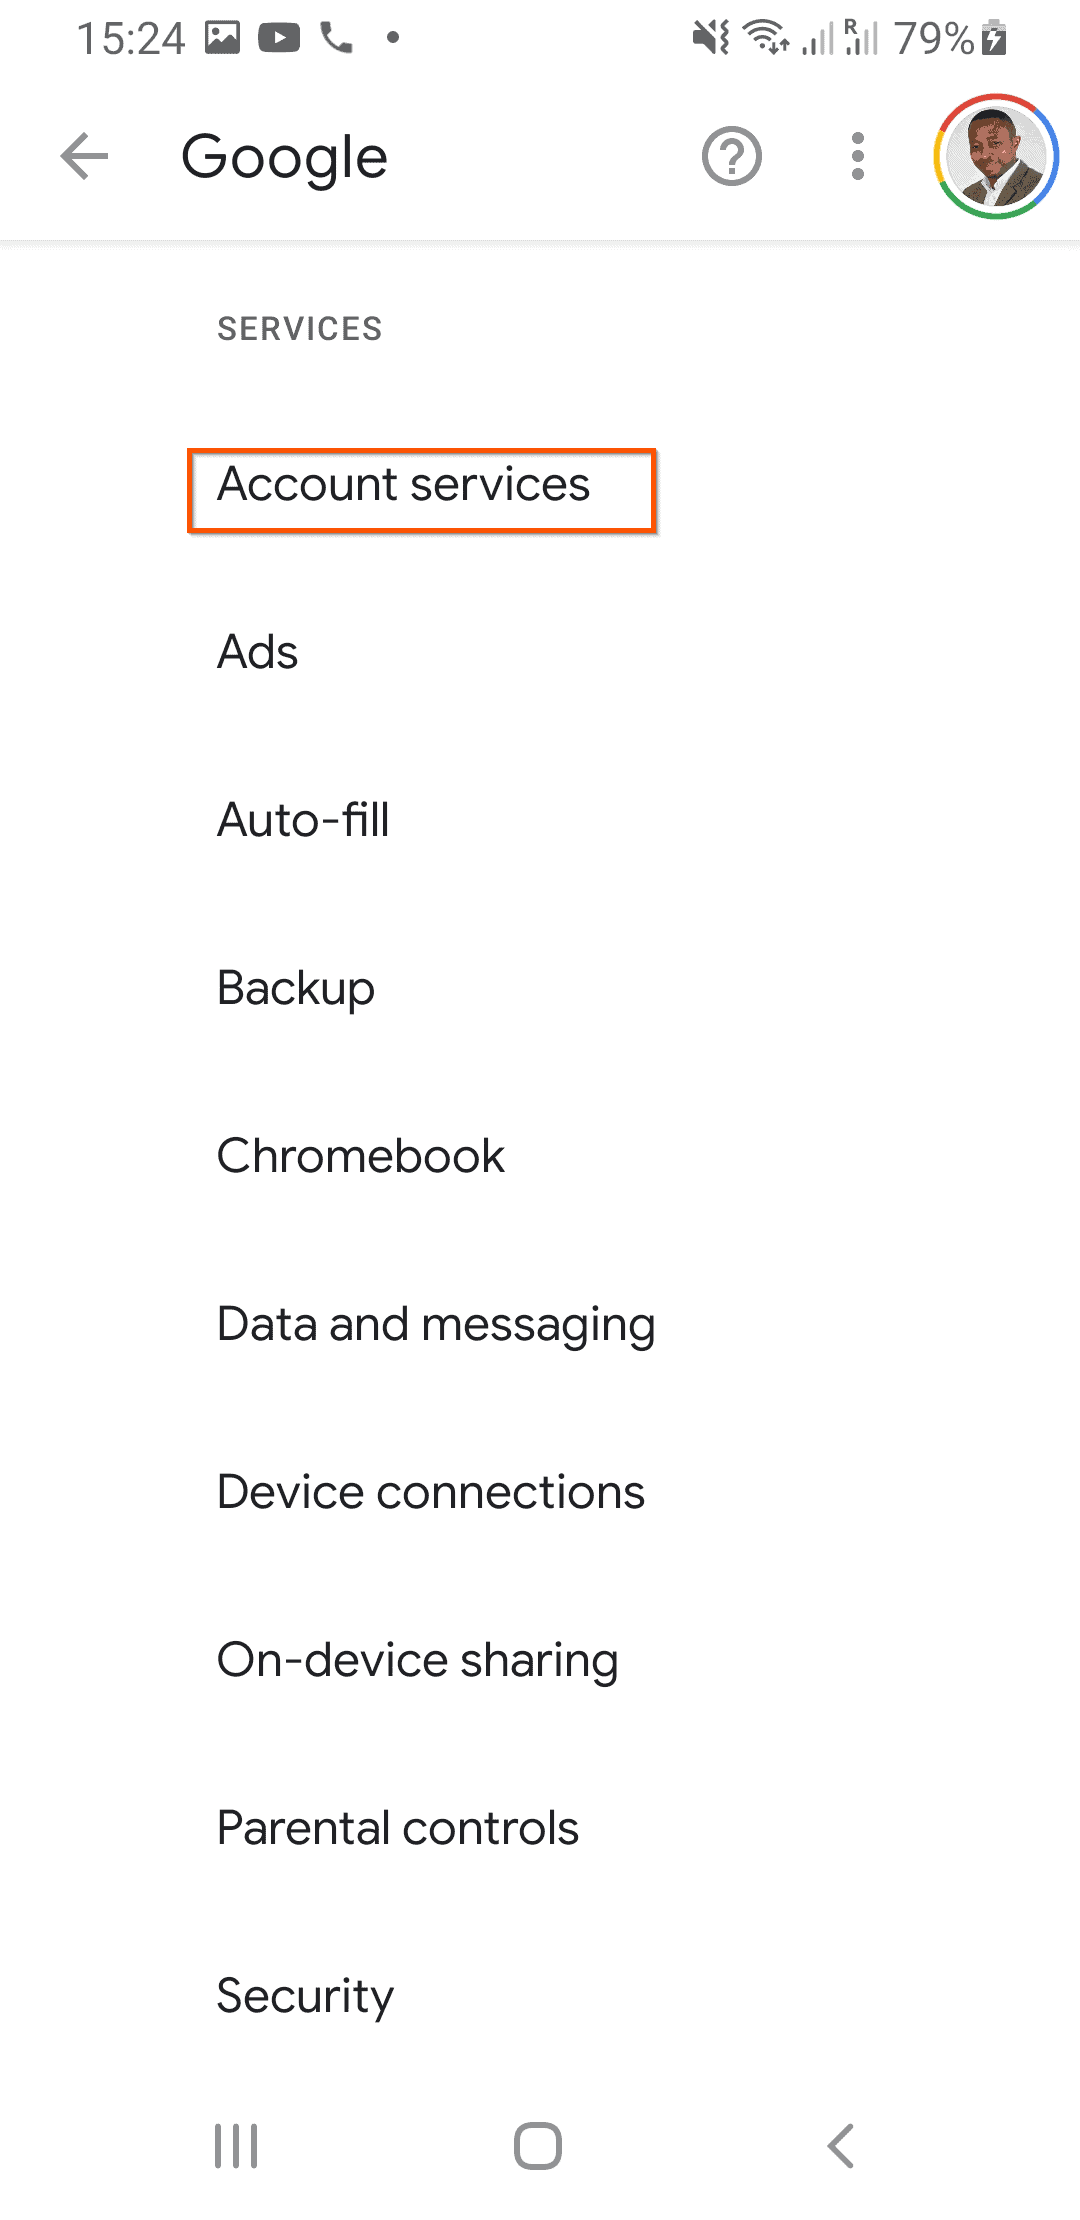
- Then, scroll down and tap Search, Assistant and Voice.

- When the Search, Assistant and Voice Settings screen opens, tap Google Assistant.
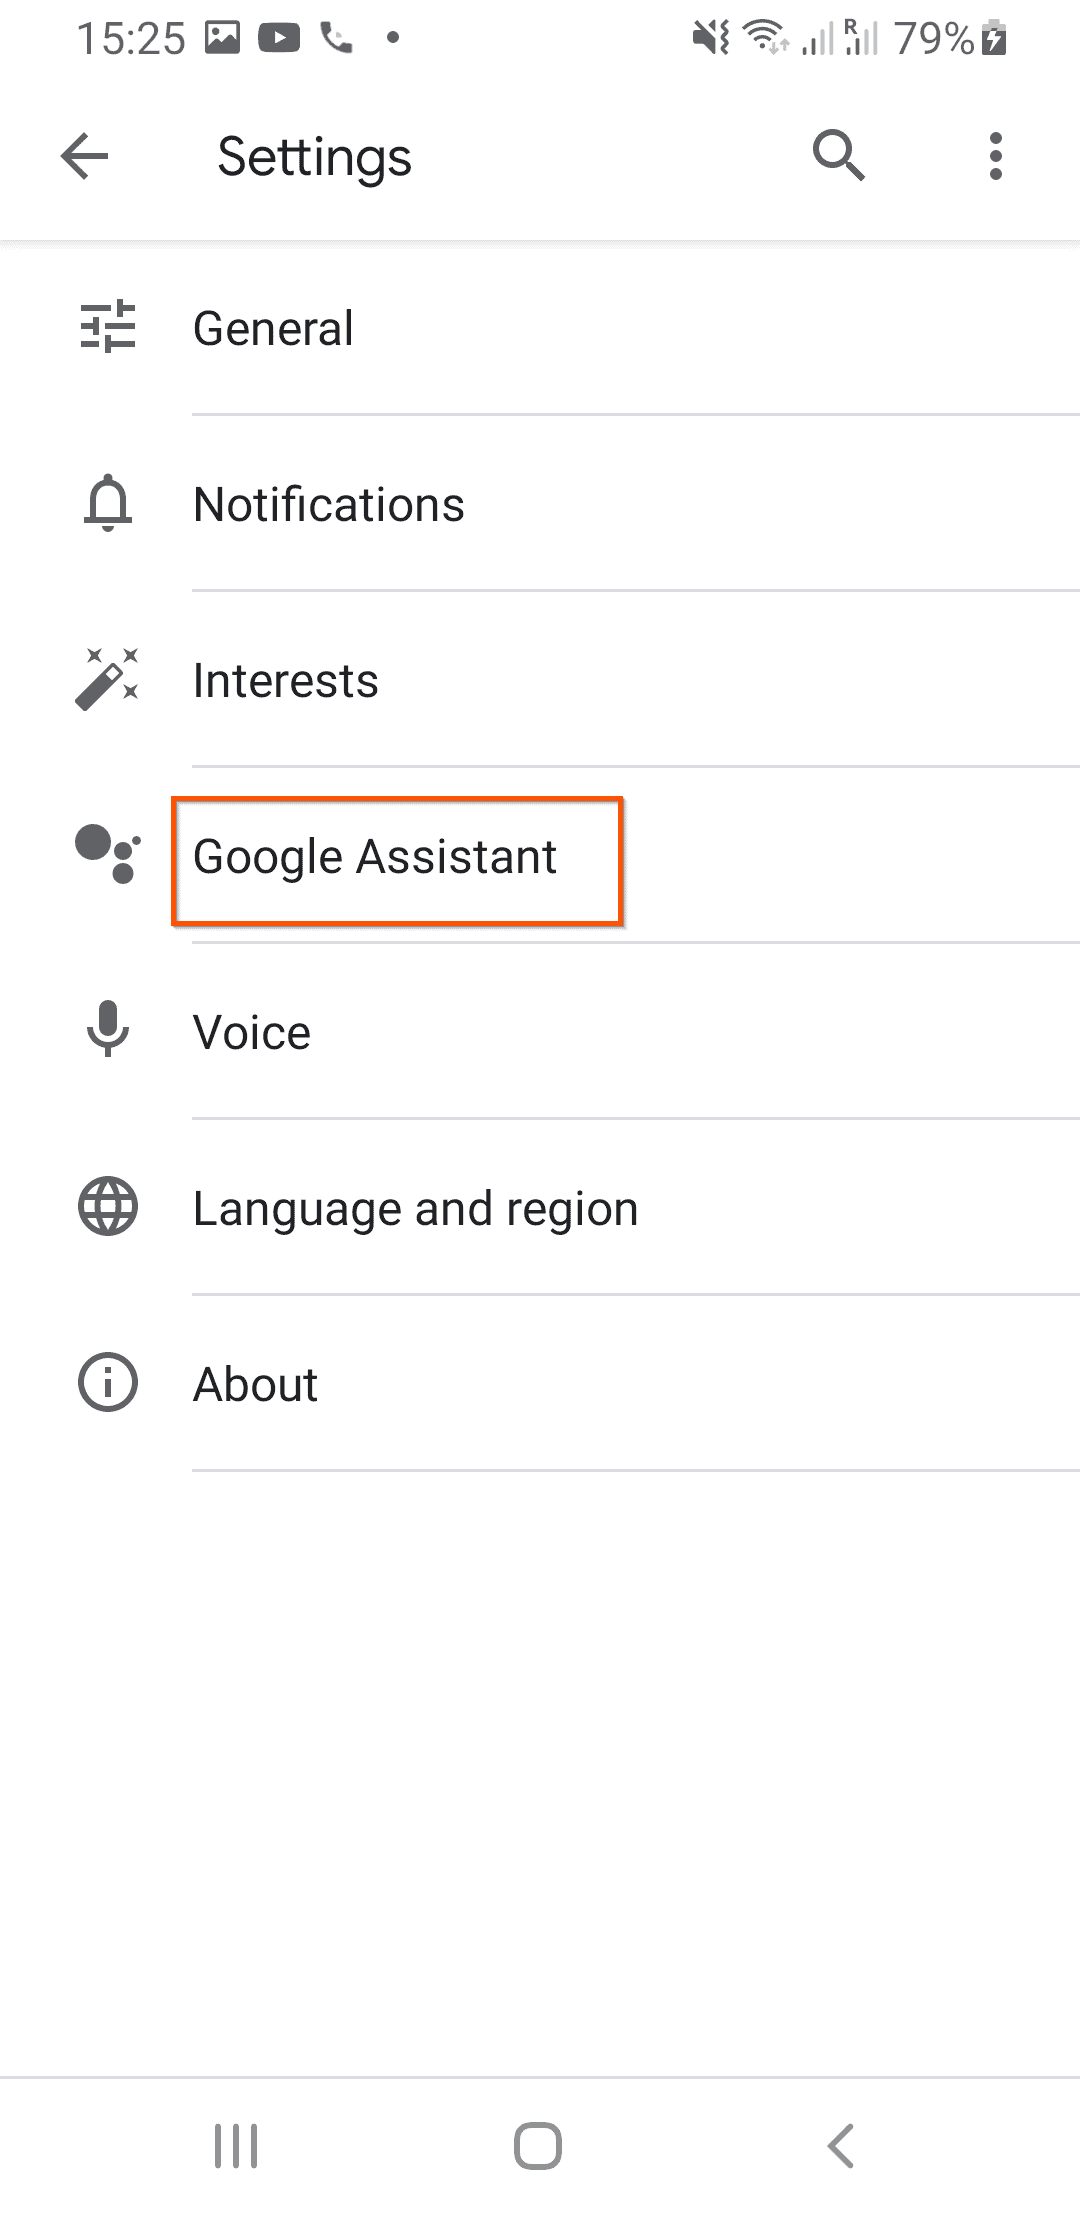
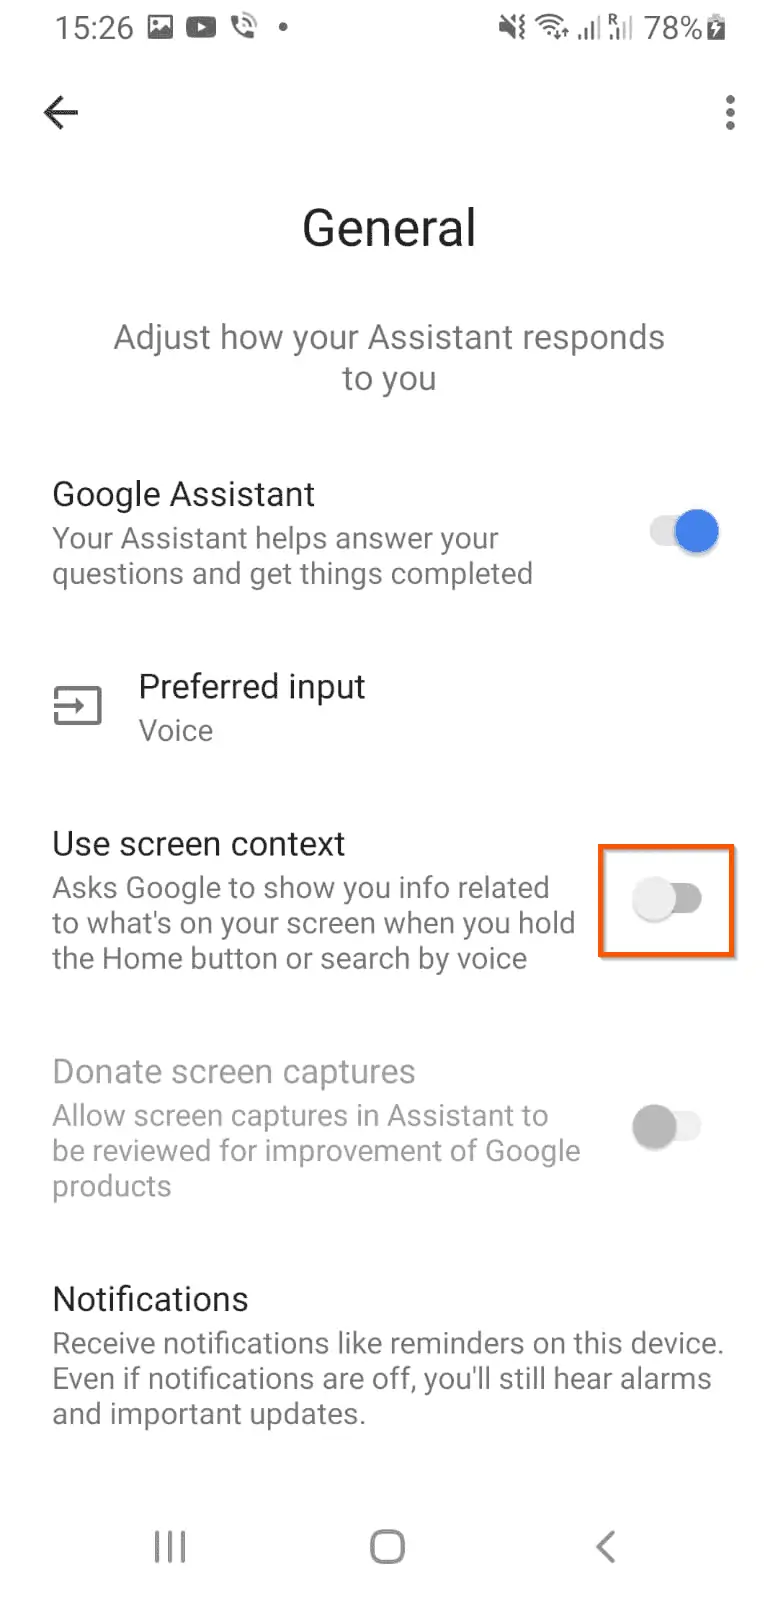
- Finally, tap the General settings – then, when the General settings opens toggle the “Use Screen context” On.
How to Take a Screenshot on Samsung with Google Voice Assistant
Once you have enabled “Use Screen context”, follow the steps below to take a screenshot with your voice:
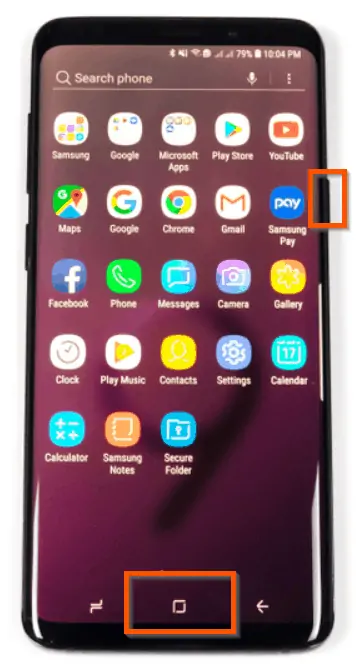
- Press and hold the Home button at the bottom of your phone – until Google Voice assistant is displayed.
- Then, to screenshot say “Take a screenshot”. See the next steps beneath these images.

- Once you say “Take a screenshot” or “Take screenshot”, Google Voice assistant will say “Sure, taking a screenshot”. Then, it will take a screenshot and display the option to share the screenshot.
- If you wish to share the screenshot, select the app you want to use. Alternatively, if you do not want to share the screenshot, tap the back button. Then, access the screenshot in the Samsung Gallery app.
Option 3: Screenshot on Samsung with Bixby
Bixby is Samsung’s virtual assistant. It works like Google Assistant, Amazon Alexa, and Microsoft Cortana. You can issue voice commands to Bixby to do stuff on your phone – including taking screenshots.
Setup Bixby for First Time Use
If you have not used Bixby before, you will need to run through the initial setup. Follow the steps below to complete this task. However, if you have used Bixby before, skip to the next sub-section.
- Press and hold the Bixby button on the left side of the phone. Then wait for Bixby to load.
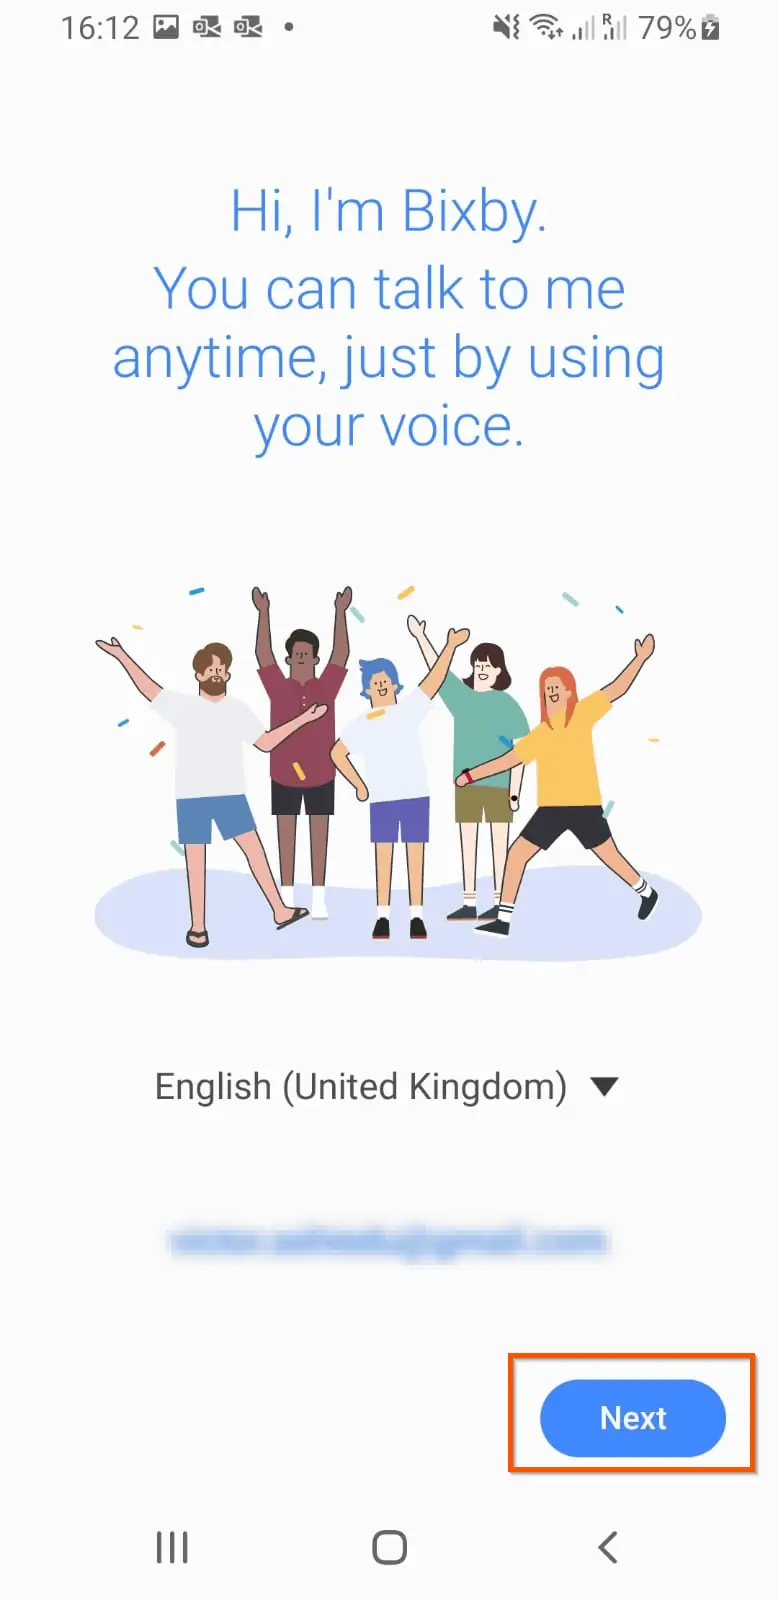
- If you have not setup or used Bixby before, it will display a screen similar the screenshot below. To set it up, confirm that your language is correct. Then, tap Next.
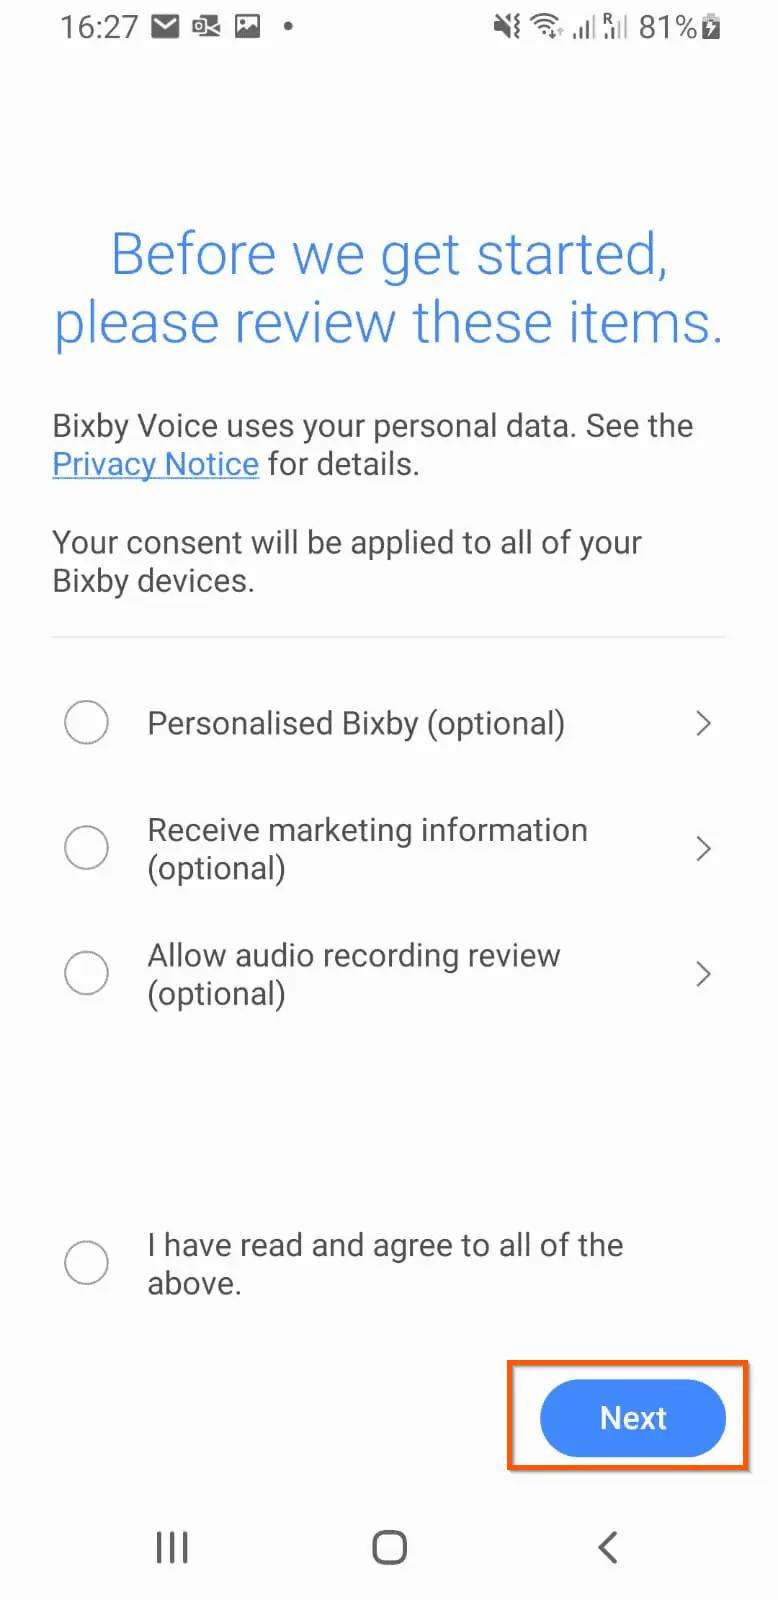
- In the next screen, review the options and tap Next.
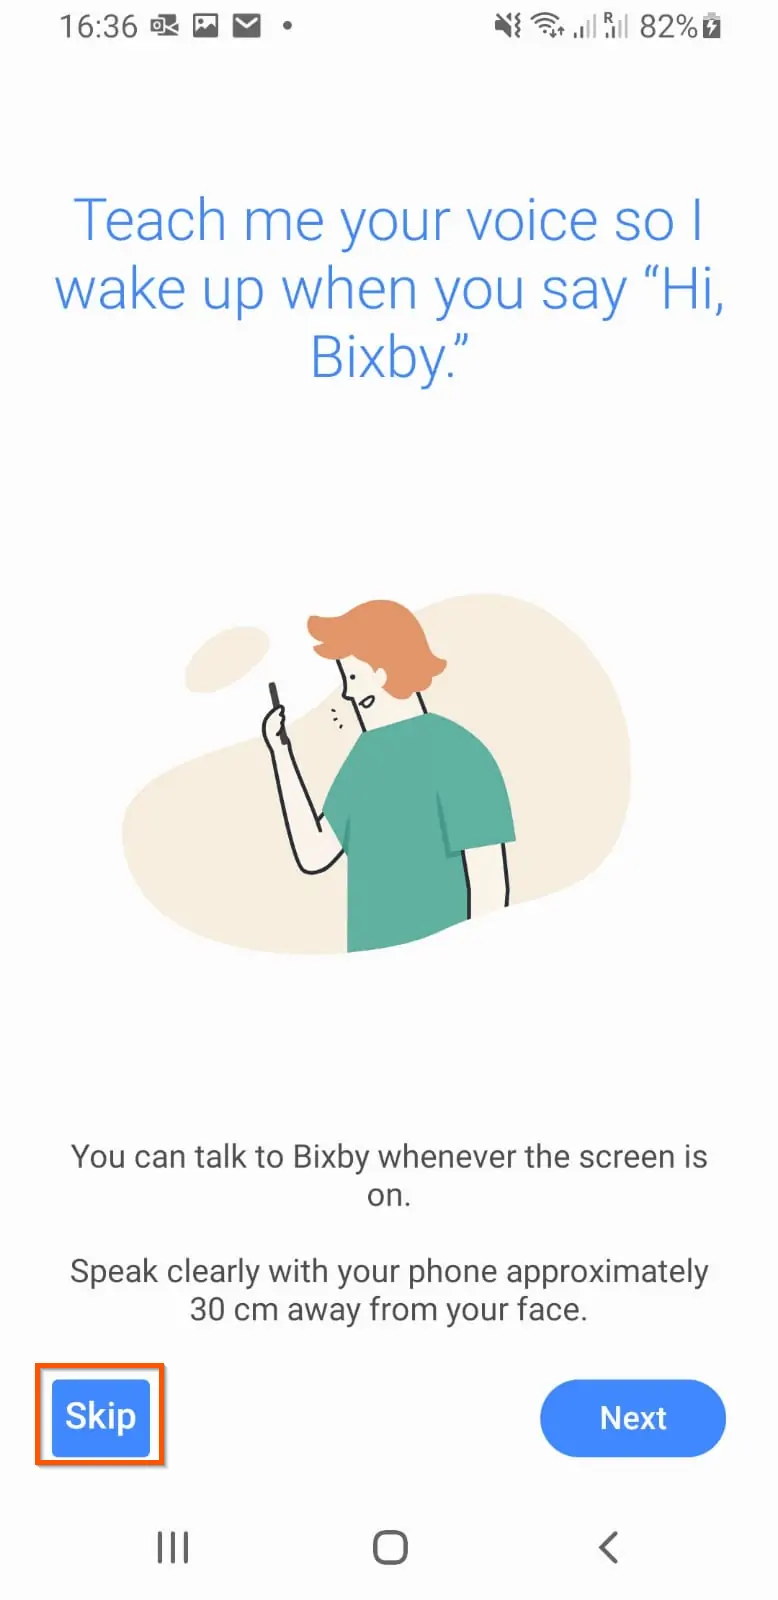
- Then, in the next screen, if you want to train Brixby to understand your voice better, tap Next. Otherwise, tap Skip. In this example, I am skipping this step.
- Finally, tap Done. Then, proceed to the next step…
How to Take a Screenshot on Samsung with Bixby Voice Assistant
Once you have setup Brixby for first time use, to take a screenshot with Bixby, follow the steps below:
- Press and hold the Bixby button on the left side of the phone. Then wait for Bixby to load.
- Then, say the words “take a screenshot”. Bixby will take a screenshot and display the option to share the screenshot. You can also access the screenshot via the Gallery app.
Option 4: Screenshot on Samsung with Palm Swipe
Samsung Galaxy devices has a feature that allows you to take screenshots by swiping your hands. However, before you can use this feature, you have to enable it.
The first sub-section below has the steps to enable palm swipe to capture. Then, in the second sub-section, you will learn how to use this feature to capture screenshots in Samsung Galaxy devices.
How to Enable Palm Swipe to Capture in Samsung Galaxy Devices
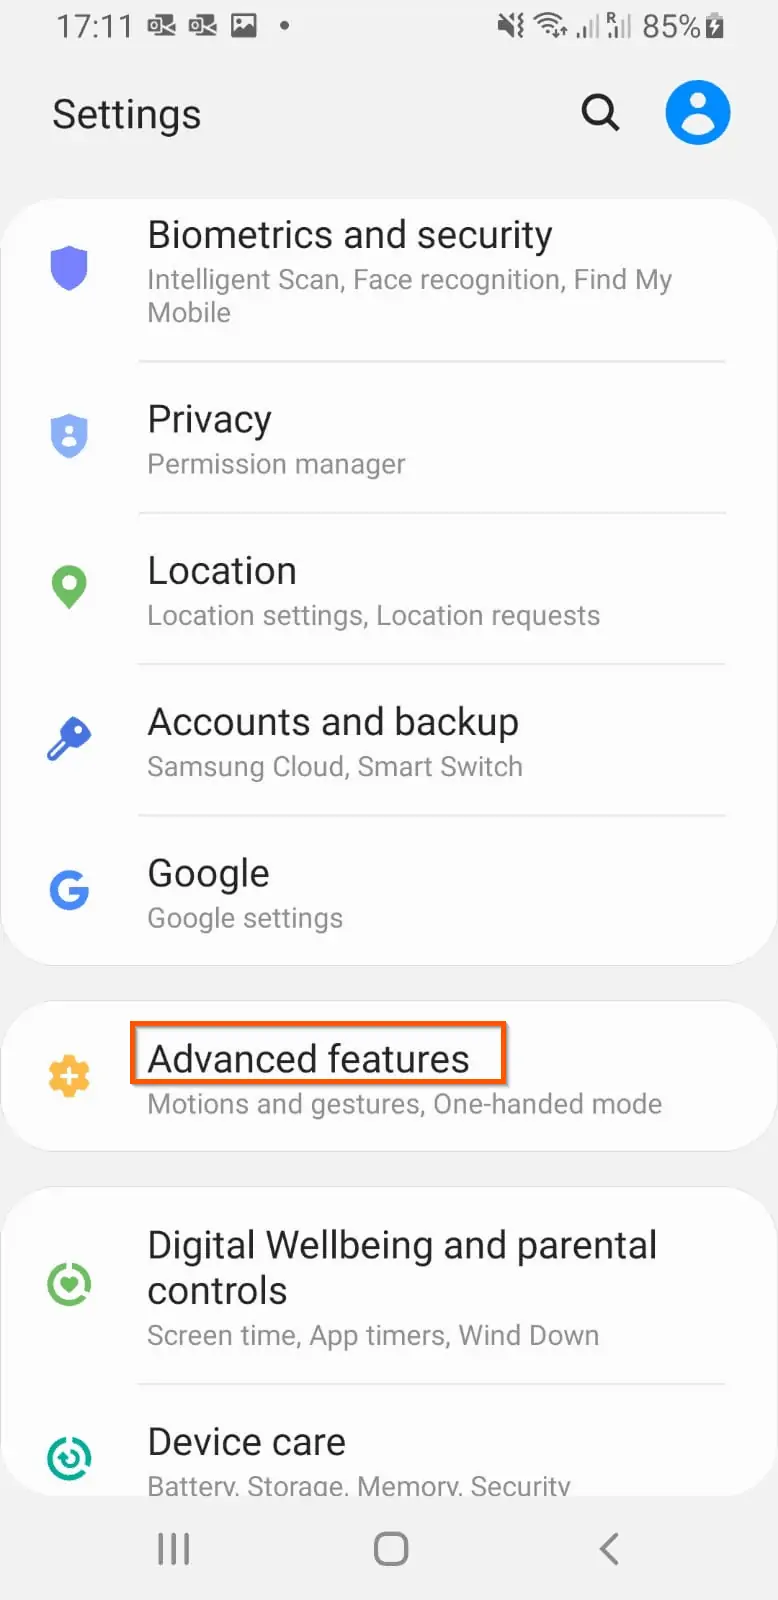
- Tap the Settings app on your Samsung phone.
- Then, on the Settings screen, tap Advanced features.
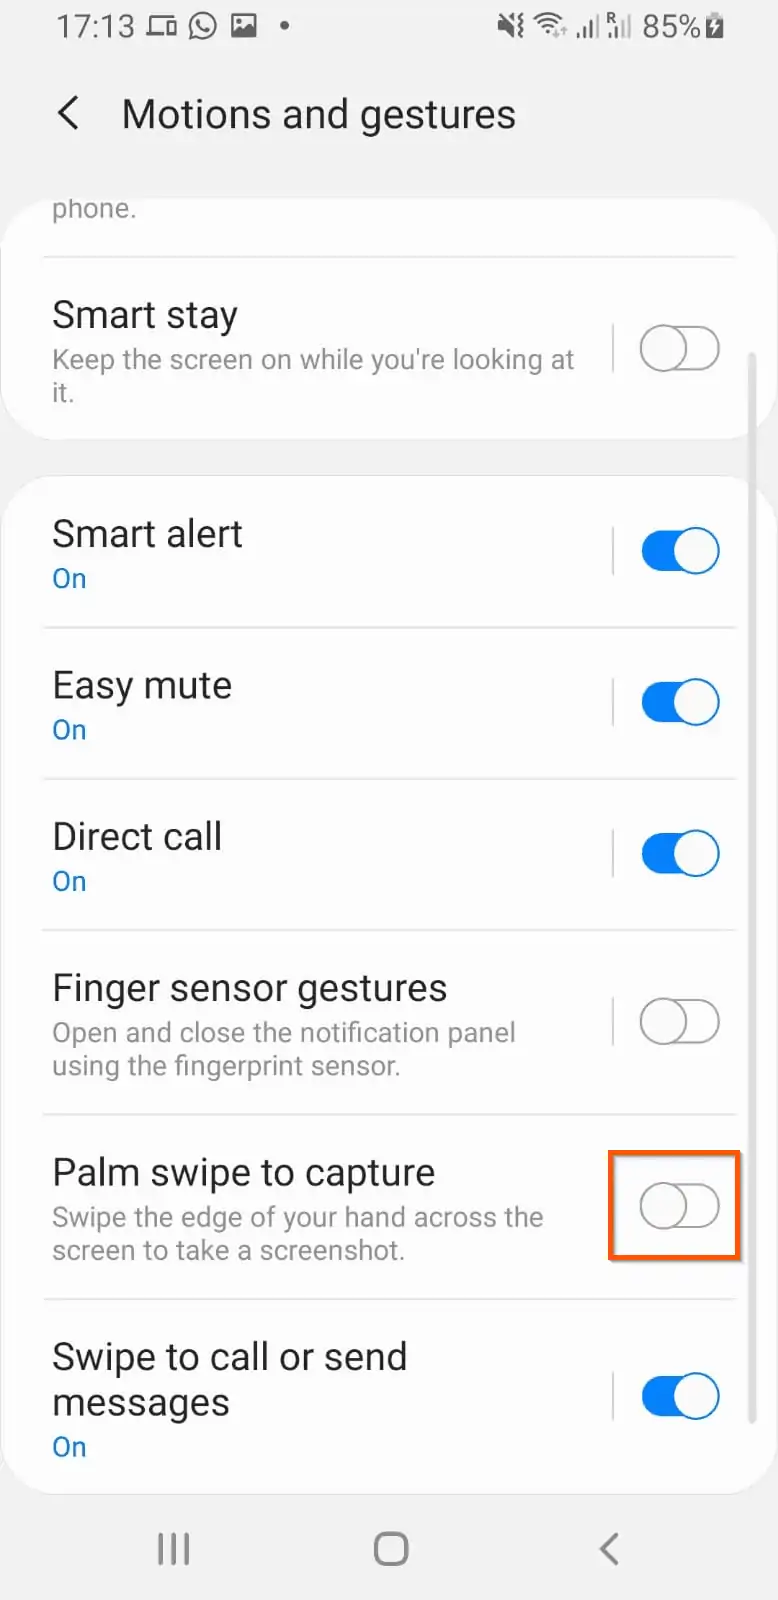
- On the Advanced features screen, scroll down and tap Motions and gestures.
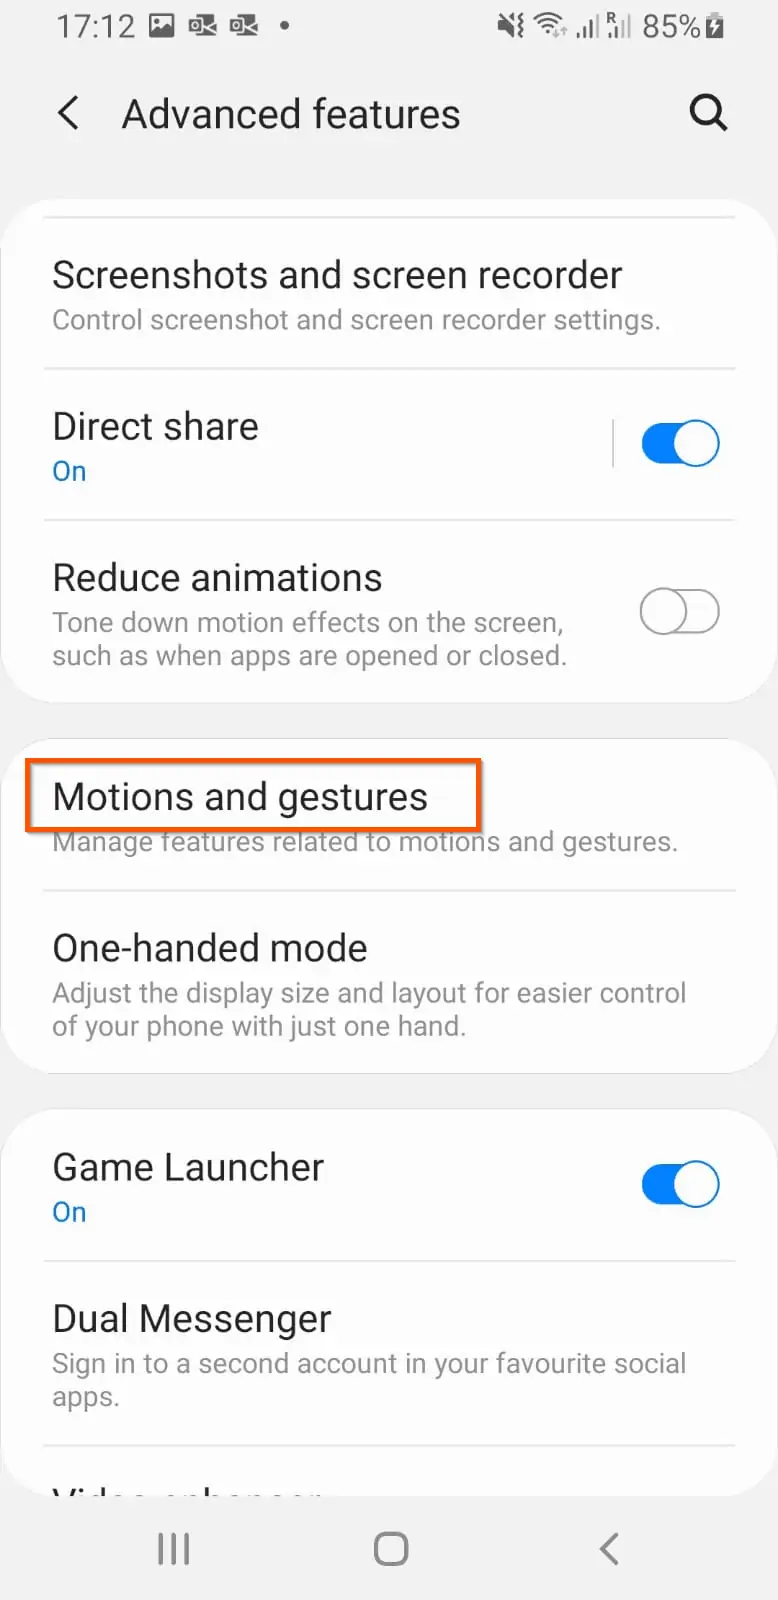
- Finally, if the switch next to Palm swipe to capture is off, tap it to turn it on. Then, proceed to the next sub-section with steps to capture screenshot on Samsung Galaxy with
How to Take a Screenshot on Samsung with Palm Swipe
Once this feature is enabled, you can take a screenshot by swiping the edge of your hand across the screen of your phone from one side to the other.
To see how to swipe your hand, expand then Palm Swipe Feature section of this Samsung page.
Other Ways to Take a Screenshot on Samsung Devices
Here are other ways you can take screenshot on Samsung:
By Pressing Side Key and the Volume Down Key
If your Samsung phone has a side key, you can press it and the volume down keys simultaneously.
By Pressing the Power Button and the Home Key
Another way to take screenshot in some Samsung phones is to press the power key and the home key simultaneously.
I hope you found this guide helpful? If you found it helpful, we would love to hear from you.
Kindly spare two minutes to share your thoughts with our community using the comments form below.
Alternatively, simply respond to the “Was this page helpful” question below and provide us with your feedback.
Finally, for more Android and Samsung Itechguides, visit our Android How-To Guides page.