Do you wish to be more efficient in multitasking when working with Windows 11? This guide teaches you how to split screens on Windows 11 – one of the many ways you can multi-task.
Step 1: Enable “Snap Windows”
As I have mentioned earlier in my introduction, before you can start to split your computer screen, you must enable Snap windows on your PC. Even though Snap Windows is enabled by default, it is advisable to confirm that the settings have not been disabled.
Here are the steps to make your confirmation:
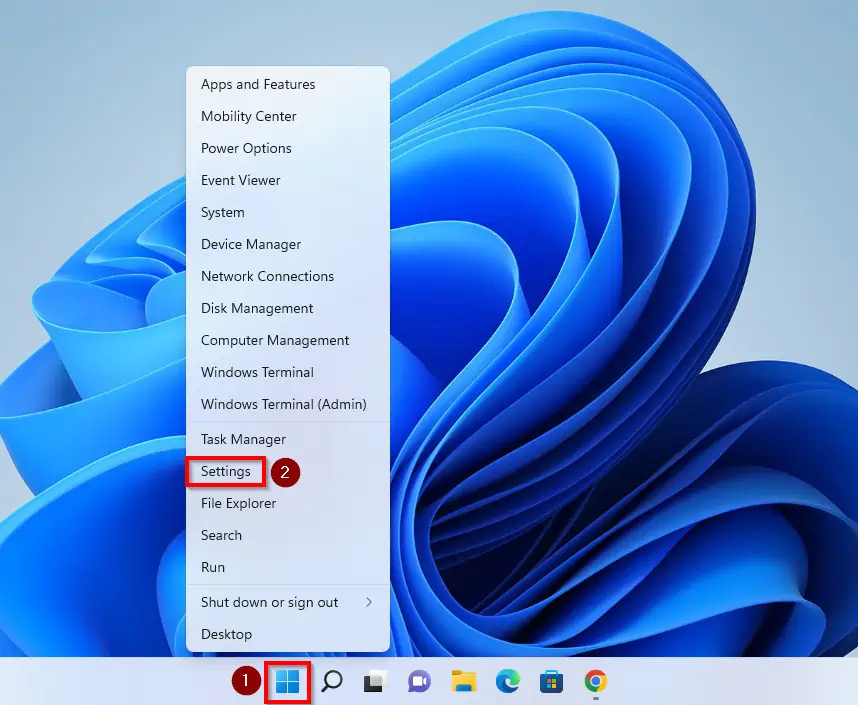
- Right-click on the Windows 11 Start menu and select Settings, as shown below.
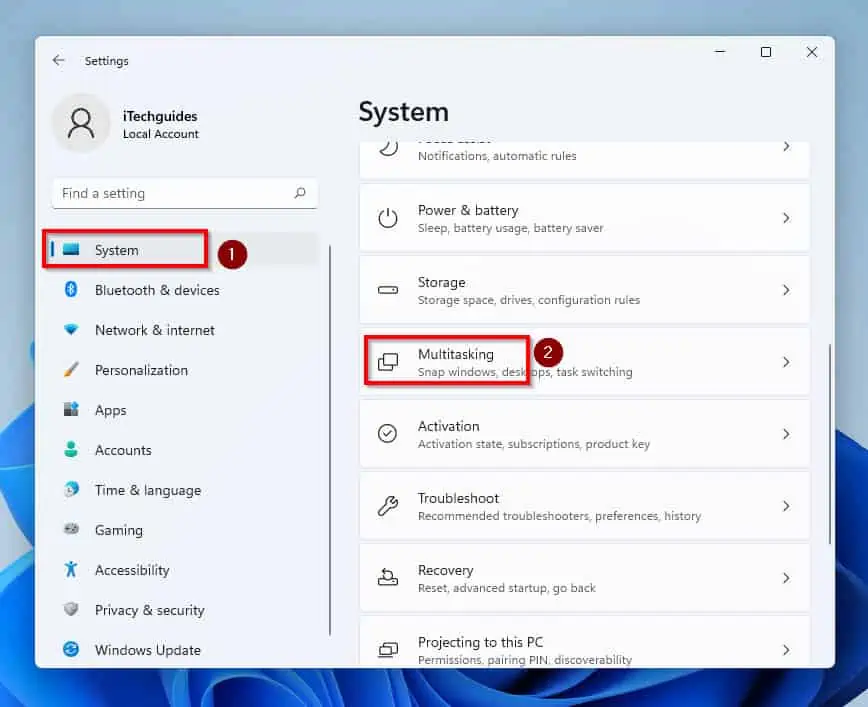
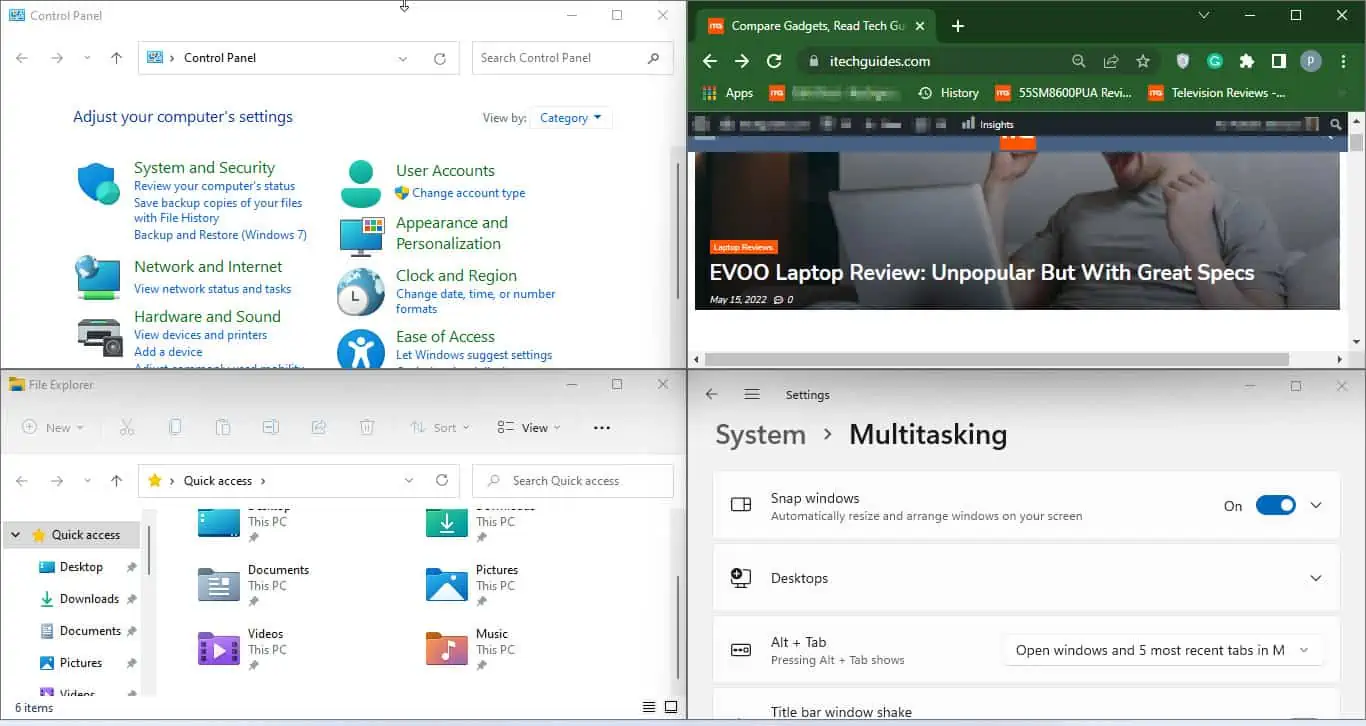
- Once the Windows Settings page opens, click on System on the left pane of the page. In this case, System settings will be highlighted automatically because it is the first setting selected on the left pane.
- Then, select the Multitasking option on the right pane of System settings.
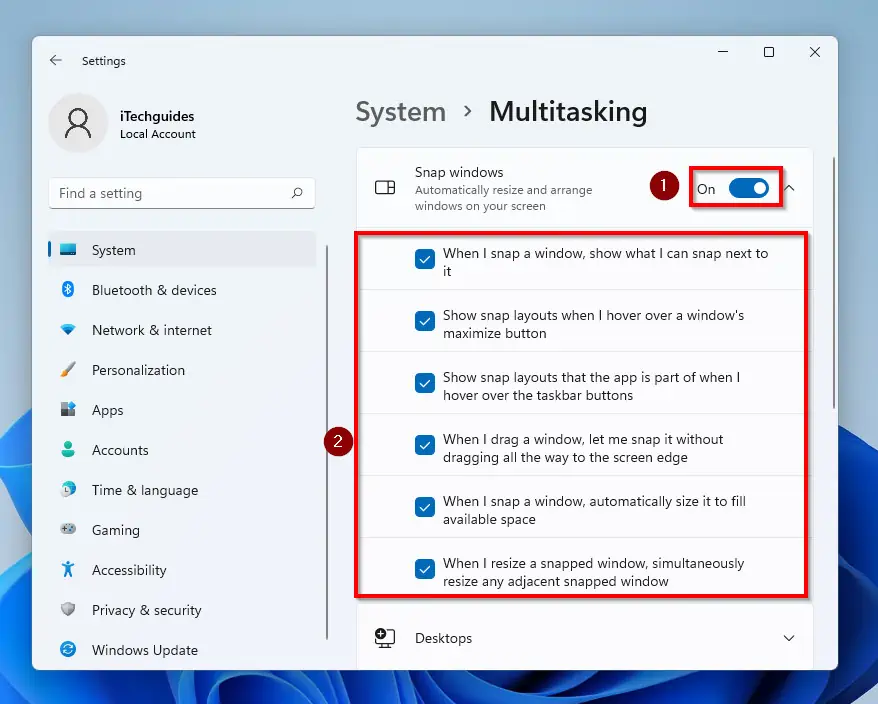
- On the Multitasking settings page, confirm that Snap windows is turned on. In addition to that, make sure to check all the checkboxes underneath the Snap windows.
Step 2: Split Screen into 2, 3, or 4 Screens

You can proceed with the steps to split screen on Windows 11 once you are sure that Snap windows is turned on. I will show you how to split screens into 2, 3, or 4 screens in the next few subsections.
Option 1: Split the Screen into 2 Screens
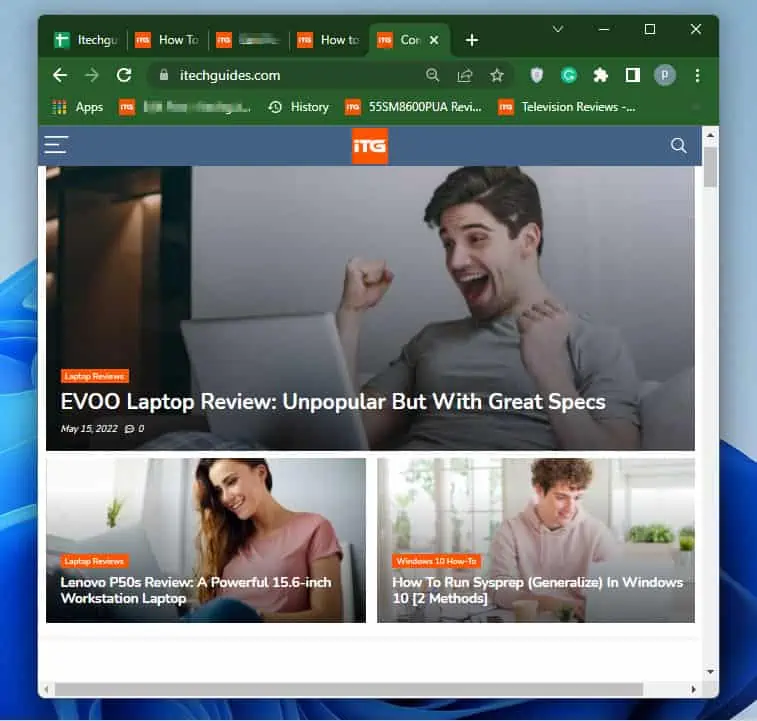
- To begin with, open the first Window you want to split. For this example, I will be using the www.itechguides.com Home page as my first window on the split-screen.
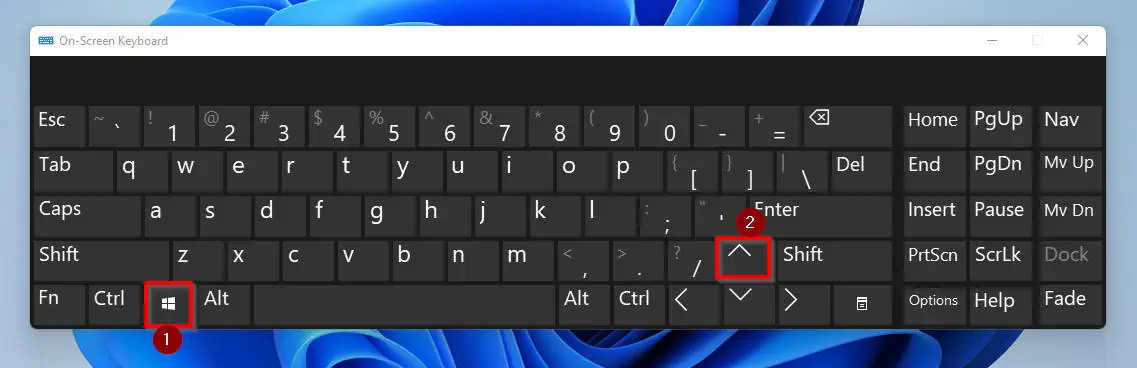
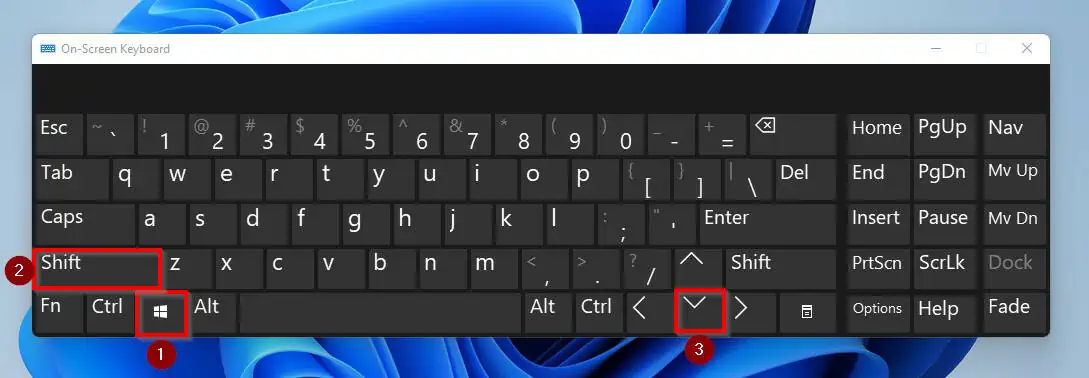
- Next, press and hold the Windows key on your keyboard. Then, if you want the first screen on your split screen to be displayed on the right, press the right arrow key on your keyboard, as shown below.
On the other hand, if you want the first screen to be on the right then press and hold the Windows key and the right arrow key together.
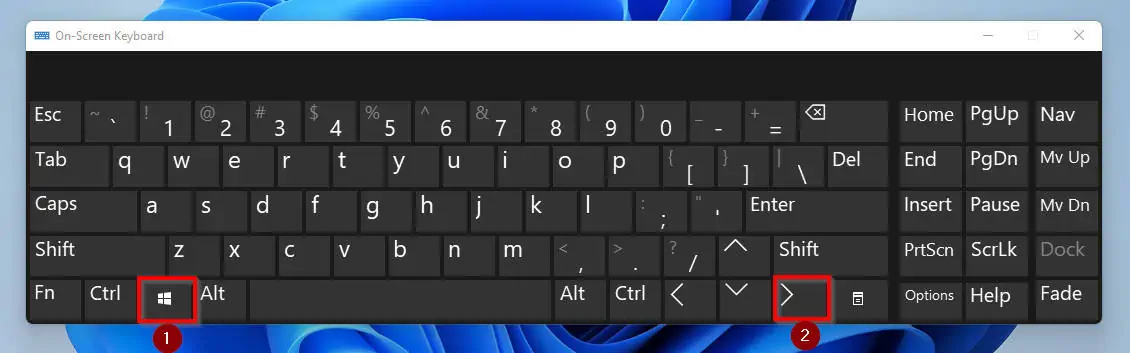
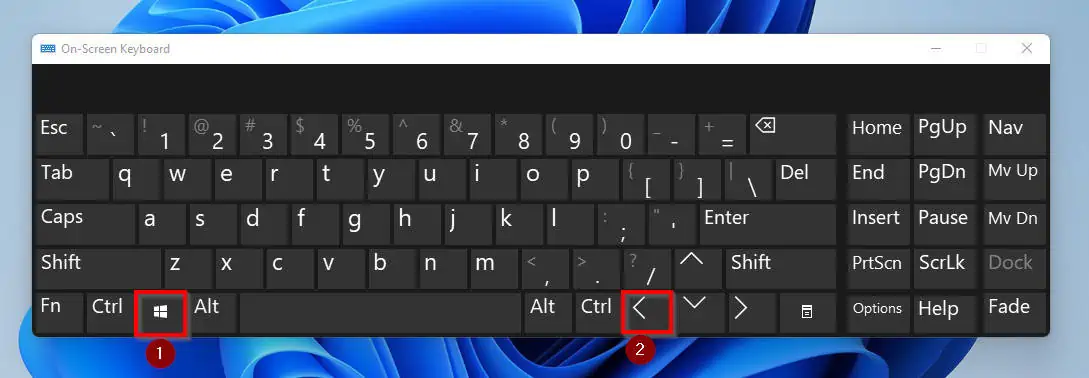
- Once you enter this command, the open window will move to the right or left. Then, release your hand from the Windows key on the keyboard to display all other available Windows on the other side of the screen.
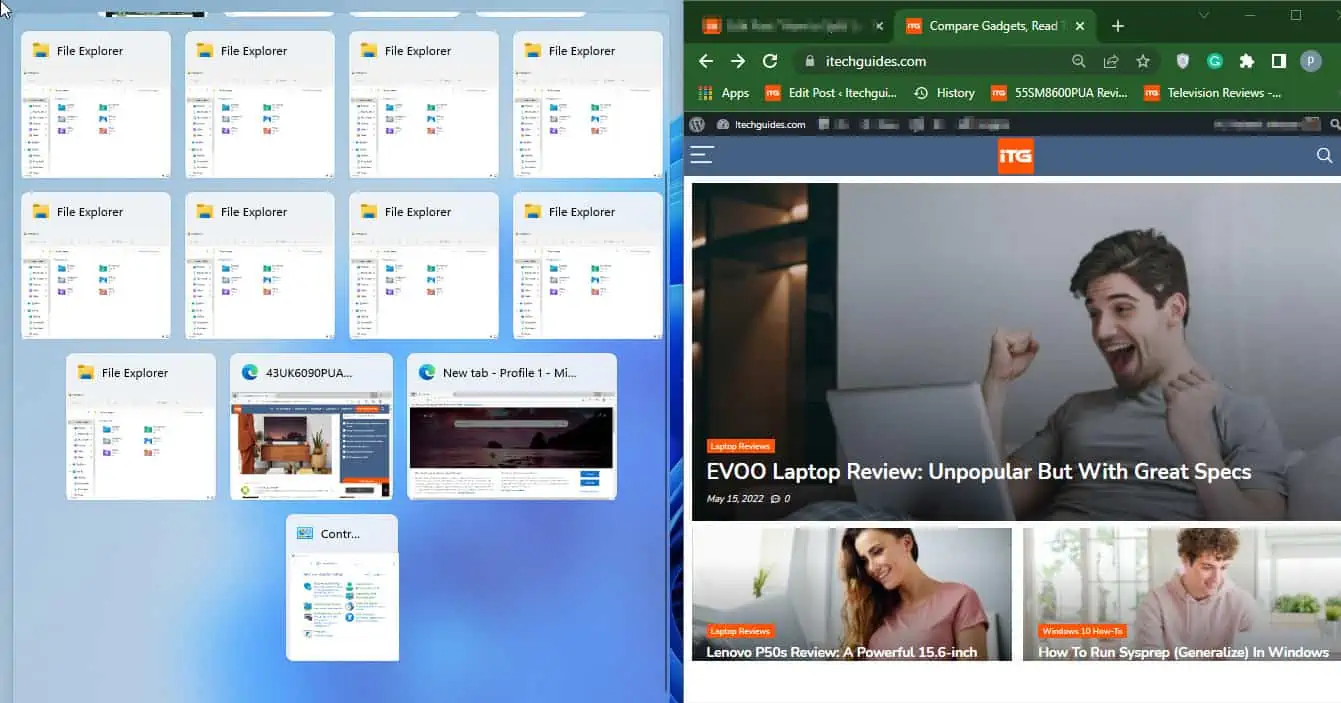
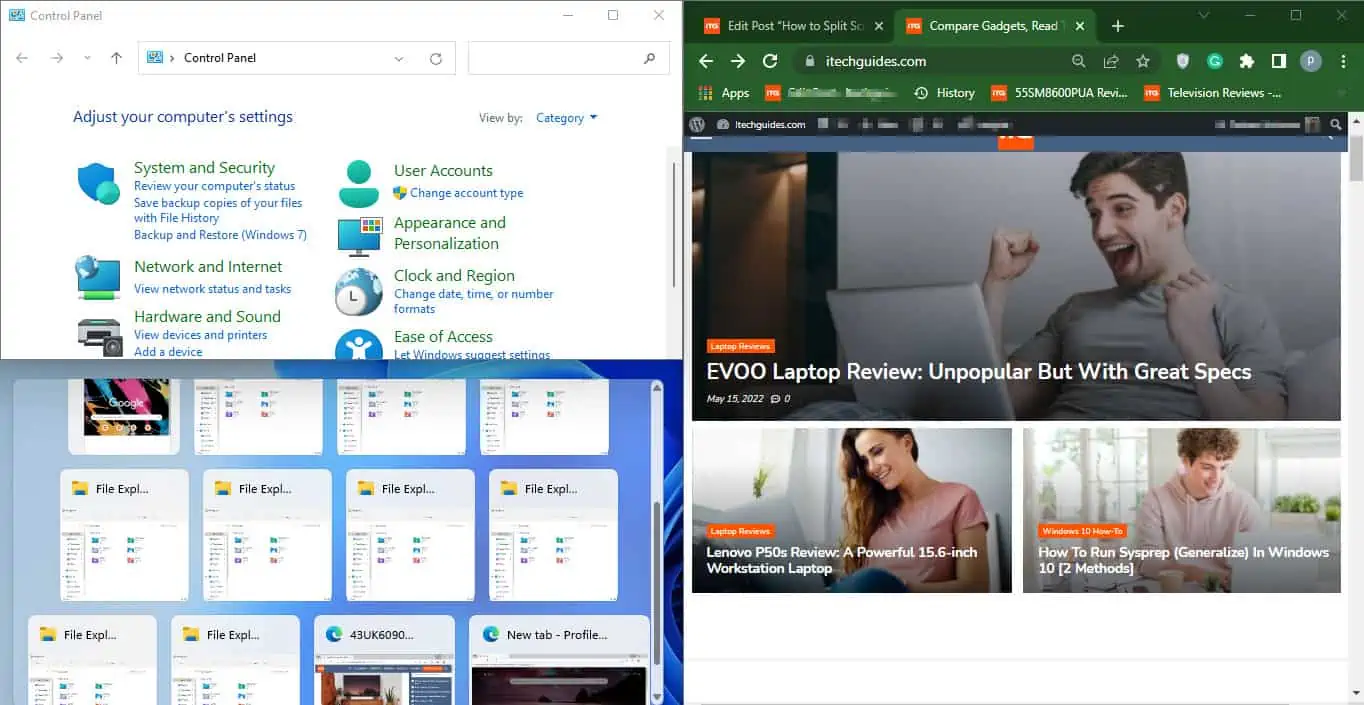
- To display the second Window, click on any of the other open windows shown on the left side of the display. For this example, the Control Panel menu is my second screen.
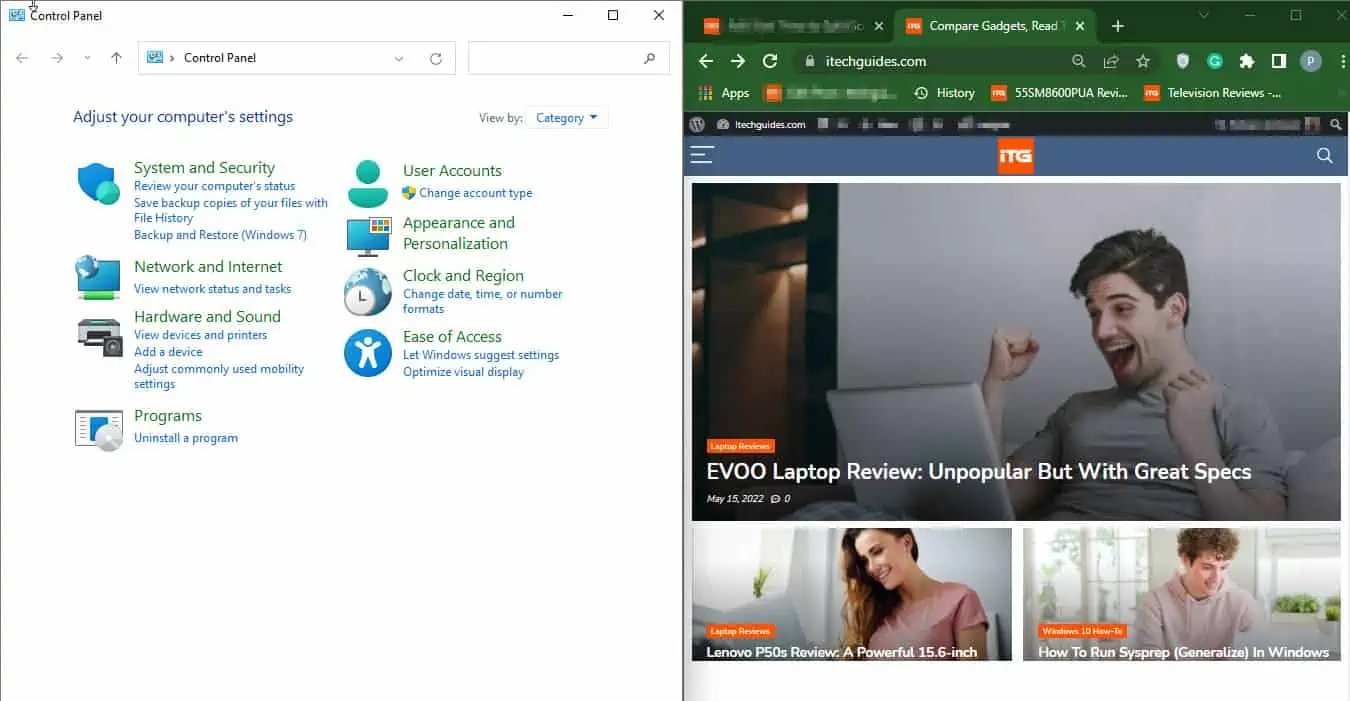
Hence, you have successfully split your screen in Windows 11 into 2!
Option 2: Split Screen into 3 Screens
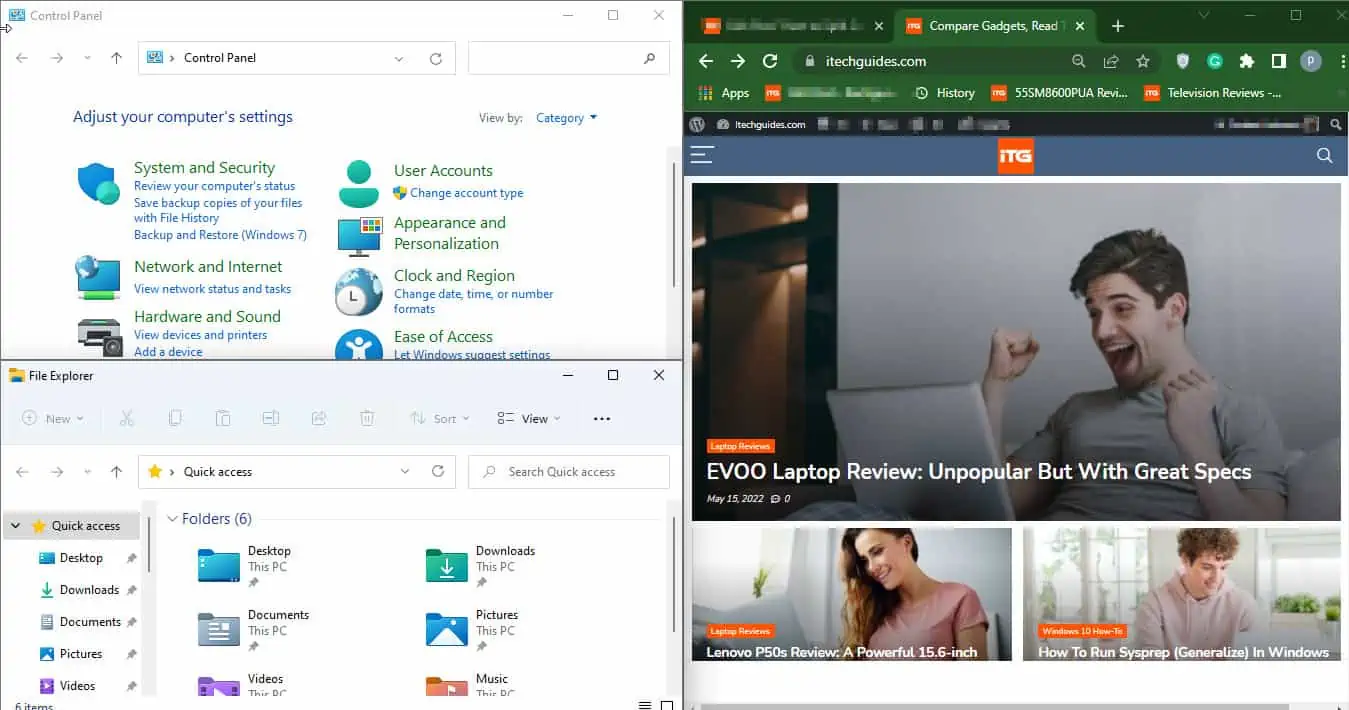
- While the first 2 screens are still open, click on the left window to select it. Then, press and hold the Windows key on your keyword board and also press the up arrow key to split the third screen.
- By doing this, the Window on the left side of your screen splits into 2. The first Window will move to the top while the bottom of the screen will show other available Windows you can display.
Here is what it looks like.
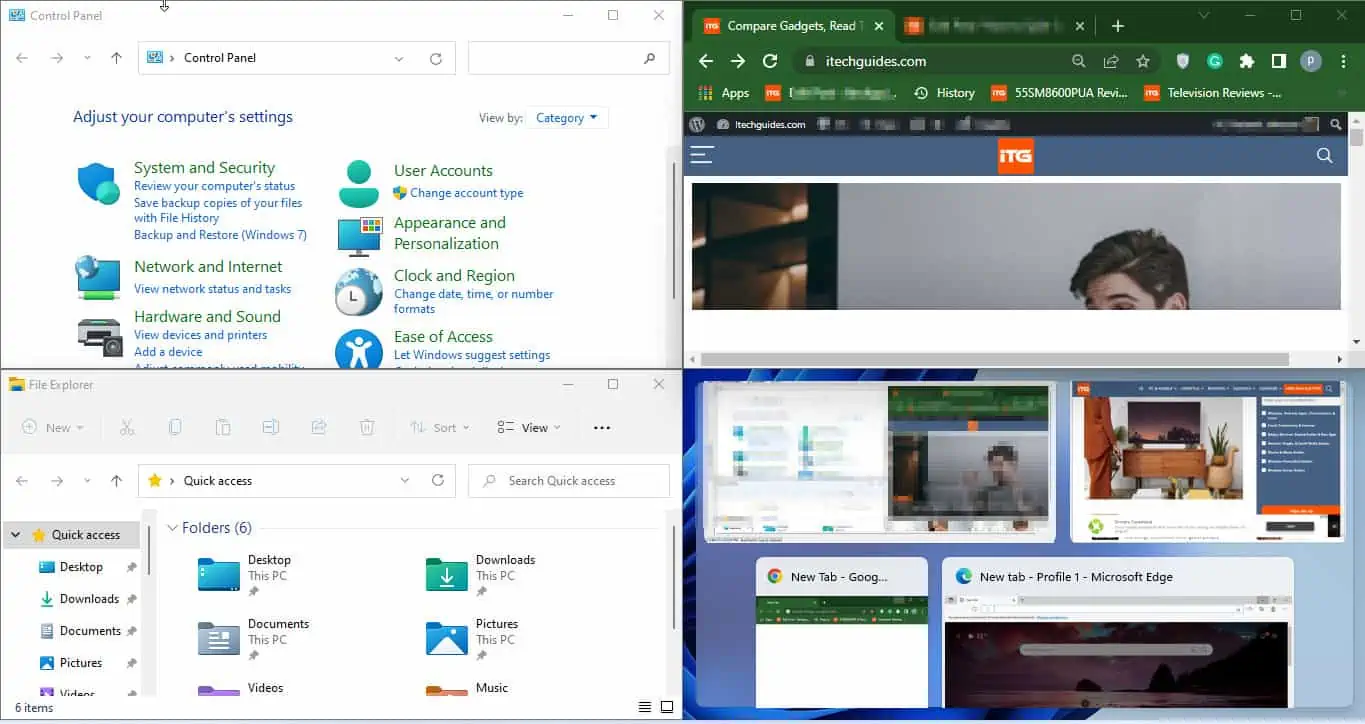
- Finally, to split your screen on Windows 11 into 3, click on any of the Windows displayed at the bottom left of the screen.
- Thus, you have successfully split the screen into 3.
Option 3: Split Screen into 4 Screens
- With the initial 3 Windows still open, click on the Window on the right side of the screen to select it. Next, press and hold the Windows key followed by the arrow up key on your keyboard.
- This step splits the screen on the right side into 2. The window on that display will move to the top, while the bottom will display other available windows.
- Finally, to split your screen into the fourth part, click on any of the available windows.
- Click on any of the available Windows on the bottom right screen to get the fourth screen.
- Hence, you have successfully completed the task of splitting your screen into 2, 3, and 4.
Option 4: Remove Split Screen
- With your split screens still open, click on the screen you want to remove. Then, press and hold the Windows and shift; afterward, press the down arrow key twice.
- While you are still holding the Windows and the shift keys, continue pressing the down arrow key to remove all other split screens.
Frequently Asked Questions
To easily switch from the current Window you are working on to the recently viewed Windows, simply press “Alt-Tab” together on your keyboard. This command will display your recent Windows – simply select the one you desire to work on next.
To open multiple tabs on your browser without wasting time clicking with the mouse, follow these steps below:
a) Go to the application you wish to use (say Chrome browser).
b) Press the Ctrl and T keys together on your keyboard. Pressing these keys together opens a new tab on the application.
c) Keep pressing the command to open as many tabs as you want.
Follow the steps below to split your PC screen into two screens to make your work more efficient.
a) Ensure that “Snap windows” is enabled on your computer. To enable Snap windows, navigate to Setting-> System settings-> Multitasking-> Snap windows.
b) Once you have confirmed that “Snap window” is turned On, open an application on your computer.
c) On the opened application, press and hold the Windows key and press either the left or right arrow keys on your keyboard.
d) This command will automatically split your screen into two.
e) To get the second screen, click on any of the other open applications opposite the already split Window. This action will bring about the second screen and your Windows display will be split into two.
By pressing the Alt key + the F4 keys on your keyboard together, you are giving the computer a command to close the window you are currently working on. Furthermore, when you press these keys repeatedly, you close all other active Windows.
Once all active Windows are closed pressing these keys again will request for you to shut down, restart, or sleep the computer.
When you press and hold the Alt key and the F5 keys together on your keyboard, you give your PC a command to restore what you have closed previously.
Conclusion
Working all day on your computer is not necessarily a sign of productivity. However, productivity is a consequence of how much you can achieve in a small amount of time.
Hence, to become more productive while working with your PC, you need to know how to multitask. Consequently, this article teaches you how to split screens on your Windows 11 computer display into 2, 3, or 4 screens.
Nevertheless, before practicing the steps on your own, make sure “Snap windows” is active on your computer.
I hope this Windows 11 how-to guide was helpful to you. If it was, click on “Yes” beside the “Was this page helpful” question below.
You may also express your thoughts and opinions by using the “Leave a Comment” form at the bottom of this page.
Also, you may find more by visiting our Windows 11 How-To guides page.


