Free tools Windows power users keep installed
One-click scans. No signup required.
iTechGuides is reader-supported. When you buy through links on our site, we may earn an affiliate commission. As an Amazon Associate I earn from qualifying purchases. Learn more
If you receive a lot of emails that you do not wish to read, you may want to mark all of them as read in your Gmail. Learn the various options to perform this important email management task
Option 1: Mark All Emails as Read (Desktop)
Follow the steps below to mark all email as read:
- Login to your Gmail account. Your inbox will open by default.
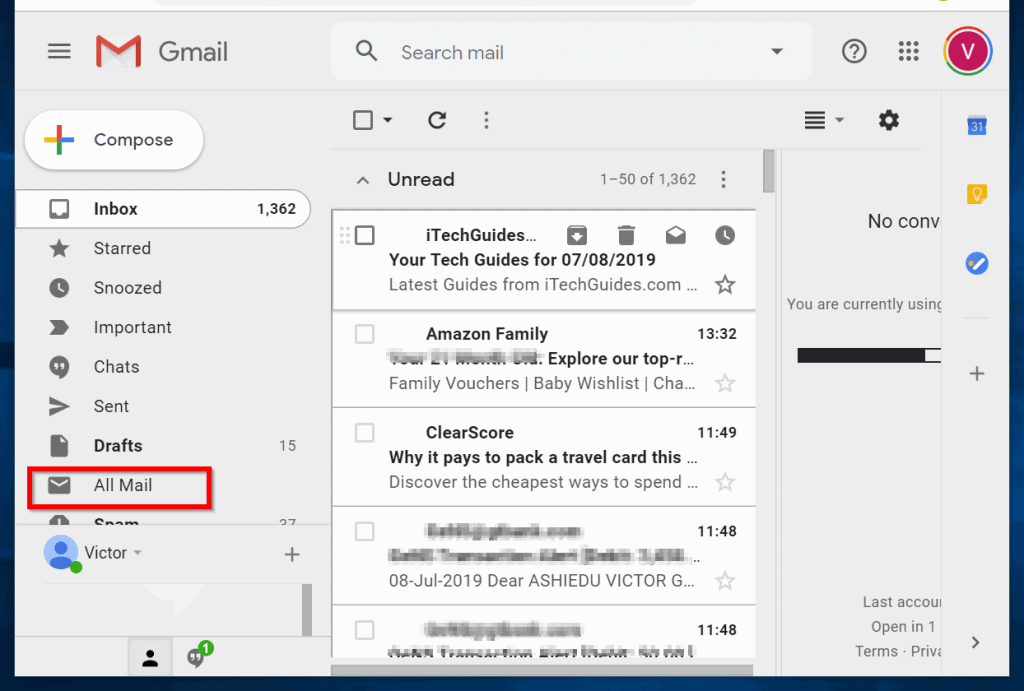
- Next, on the left hand side scroll down to All Mail and click on it.

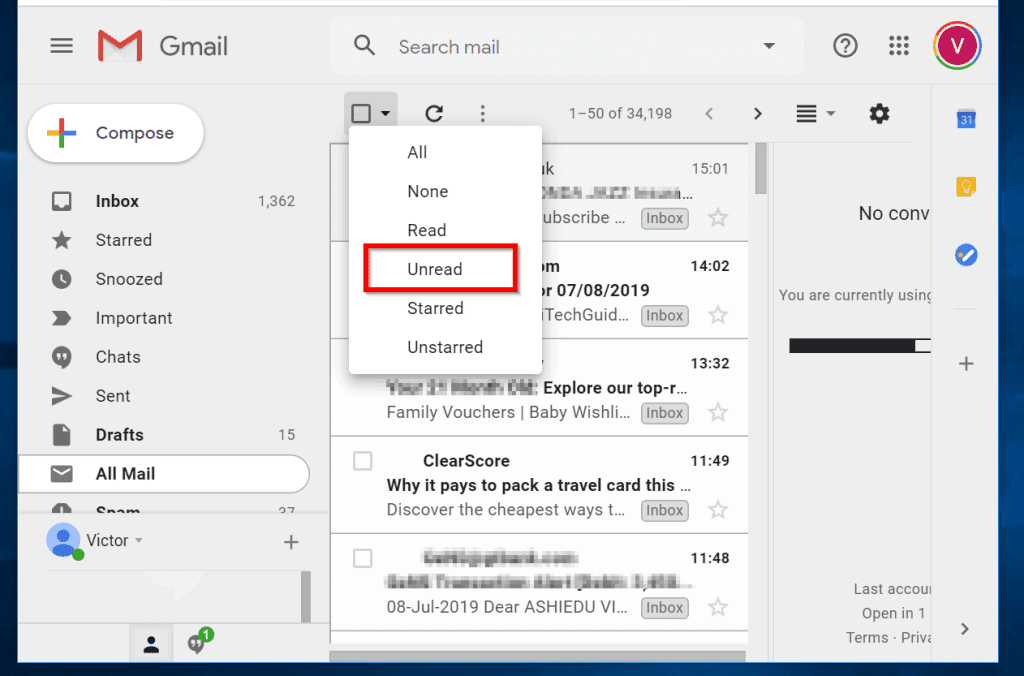
- Then, click the arrow pointing downwards beside the check box above all emails. (highlighted in the image above). Select Unread. All Unread emails will be selected. See the second image below.
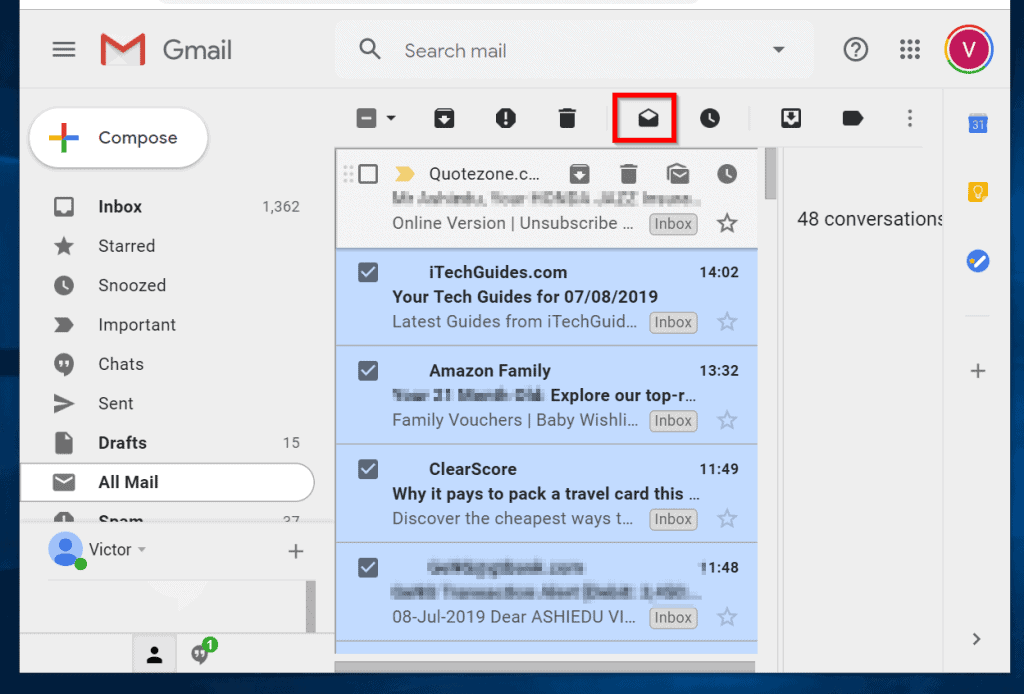
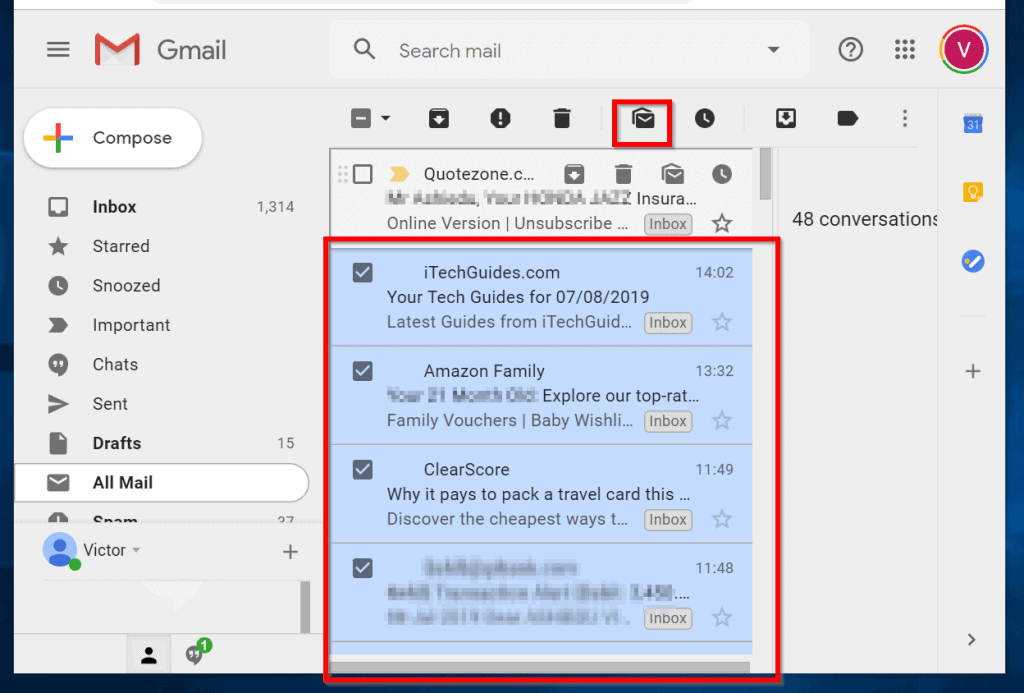
- Finally, to mark all emails as read on Gmail click the 5th icon (counting from left to right, in red above).
Option 2: Mark Some Emails as Read (Gmail App)
Here are the steps:
- Open Gmail app on your mobile device.

- Next, on the search bar on top, type the following “label:all mail is:unread” (without the quotes) as shown below:

- Then click on the circle beside each email you wish to mark as read. Finally, on top of your Gmail App, click the 3rd icon from left.


Conclusion
I hope you have been able to organize your Gmail with this guide. Kindly share your thoughts about this guide using the “Was this page helpful” question below.
Quick Recap


Also popular on Amazon
Also popular on Amazon
Also popular on Amazon
Also popular on Amazon
Popular on Amazon
Product prices and availability are accurate as of the date/time indicated and are subject to change. Any price and availability information displayed on Amazon at the time of purchase will apply.