iTechGuides is reader-supported. When you buy through links on our site, we may earn an affiliate commission. As an Amazon Associate I earn from qualifying purchases. Learn more
This guide demos how to insert multiple rows in Google Sheets from a PC – Sheets.Google.com
Step 1: Open Your Preferred Google Sheet
- You can open the document either from Sheets.Google.com or from Google Drive.
- If you are not logged into your Google Account you will be required to sign in. Enter your account email and password to login.
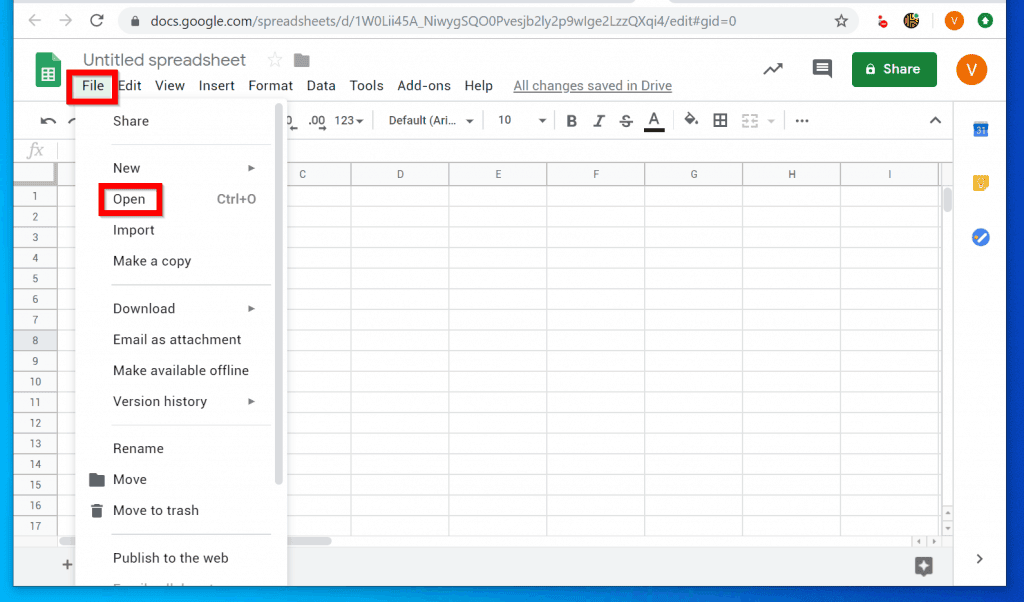
- If you opened Google Sheets directly (Sheets.Google.com), you may open an existing document by clicking File -> Open
Step 2: Select the Row you Want to Insert Multiple Rows Before or After
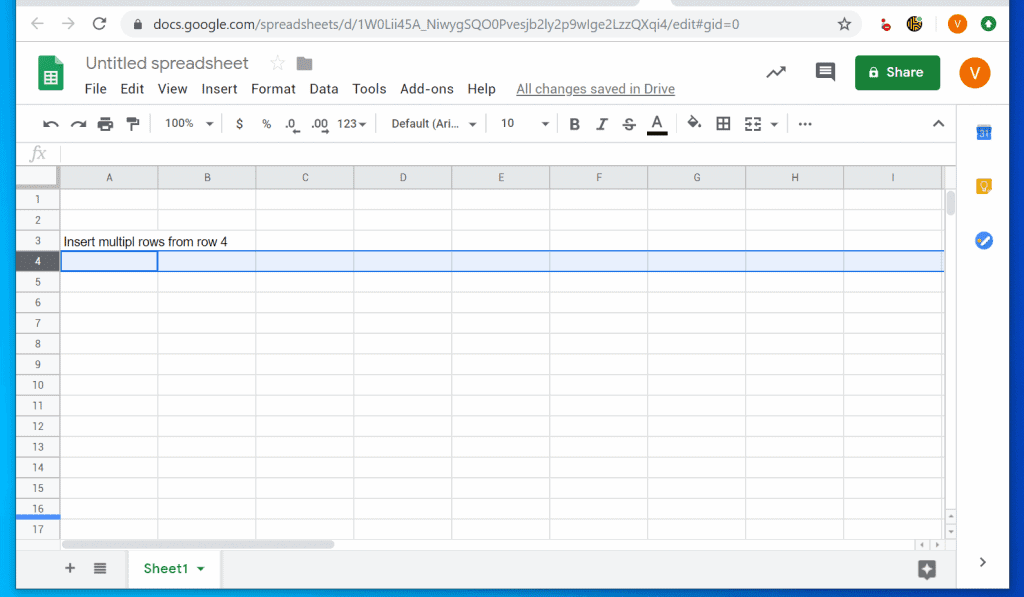
To select a row, left-click on the row number. For this example I want to insert multiple rows above rows 4 – I will left-click on row number 4.



Step 3: Insert Multiple Rows Above or Below the Selected Row
- Once you have selected the row, hold the shift key in your keyboard.
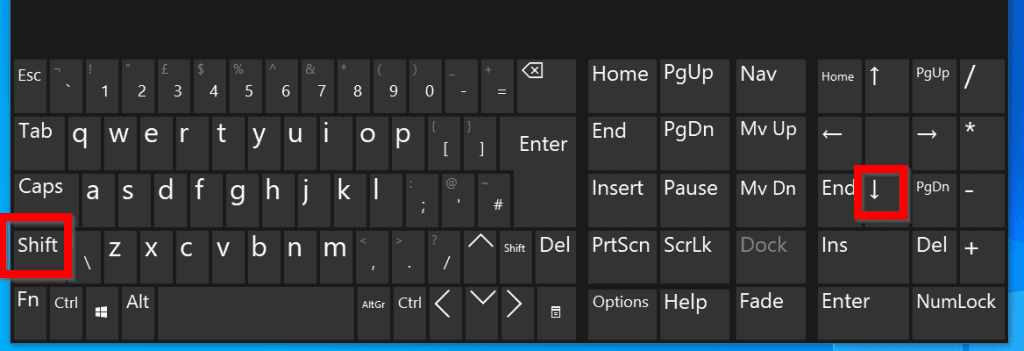
- With your Shift key pressed down, press the down arrow key to select the number of rows you want to insert in Google Sheets. The rows will be selected as shown in the image below. In this example I want to insert 8 rows above row 4.
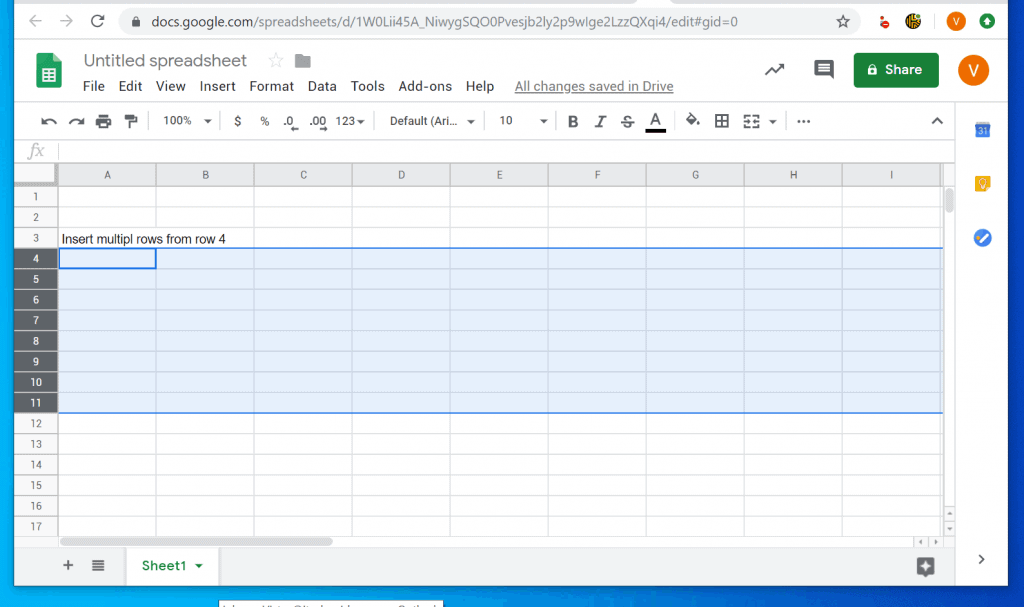
- Then right-click the row number column you want to insert rows above or below. In this example, I will right-click row number 4. Finally, to insert 8 rows above row 4 select Insert 8 above.
- Alternatively, to insert the rows below the reference row select Insert 8 below. For this demo, I will select Insert 8 above.
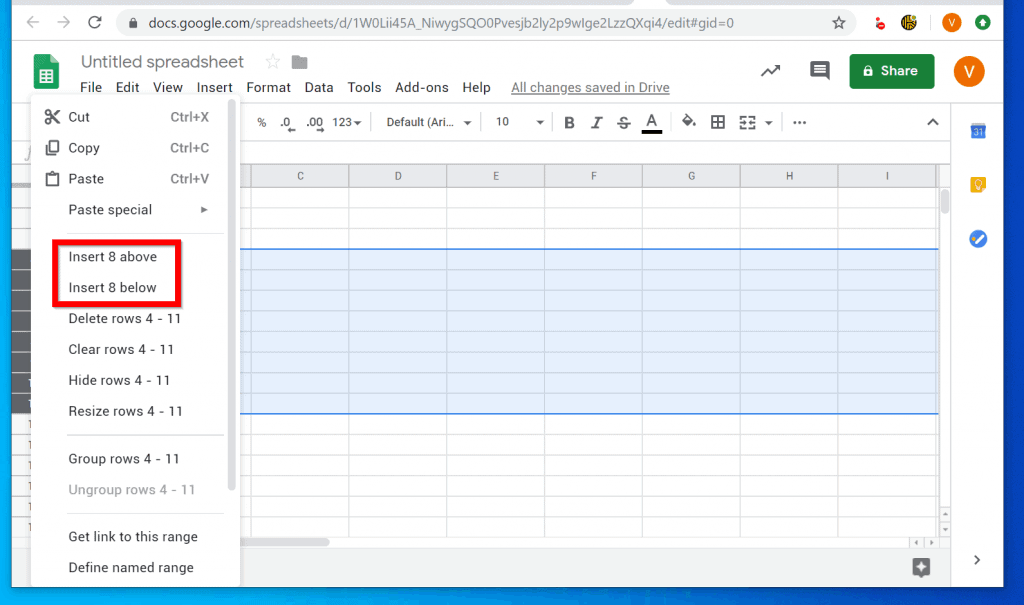
- The multiple rows will be inserted!
It is that easy to insert multiple rows in Google Sheets! As you can see from the last image you can also Delete, Clear, Hide or Resize rows from the right-click.
I hope you found the guide helpful and easy to follow. If you did, click on “Yes” beside the “Was this page helpful” question below.
Popular on Amazon
You may also express your thoughts and opinions by using the “Leave a Comment” form at the bottom of this page.
For more Google guides visit our Google How To page.
Quick Recap
Also popular on Amazon
Also popular on Amazon
Also popular on Amazon
- hole punched
- high quality card stock
- 4 pages
- made in USA
- keyboard shortcuts
Also popular on Amazon
Product prices and availability are accurate as of the date/time indicated and are subject to change. Any price and availability information displayed on Amazon at the time of purchase will apply.