In this Itechguide, Victor teaches you how to host a website. The guide covers 4 simple steps to host a website.
Step 1: Decide a Hosting Type
This is your starting point for hosting your website. There are different types of web hosting available but the top and most common 4 are:
- Shared hosting (SH)
- Cloud hosting (CH)
- VPS hosting (VH)
- Dedicated server hosting (DSH)
Shared Web Hosting
For most beginners, it is recommended to start with shared hosting. “Shared” means that your website will be hosted on the same server with other websites. To learn more, read Shared Web Hosting Explained.
Shared web hosting providers use smart technologies to “share” and assign resources to the websites hosted on the server. But the implication is that if your website starts growing, you may run out of resources. Though most providers offer “unlimited” shared hosting, in reality when it comes to resources, there is nothing “unlimited”.
Cloud Hosting vs VPS Hosting
If you are looking to migrate an existing website currently in shared hosting, you may want to consider Cloud or VPS hosting. The purpose of this Itechguide is not to crack technical jargons, so I will explain cloud and VPS hosting in the simplest possible terms.
Cloud hosting can be considered “shared” but the difference is that the provider combines multiple servers into a big, single server with a massive amount of computer resources. The provider will then use smart hosting technologies to assign computing resources to each customer that signs up for this hosting plan.
In CH, the provider assigns each customer server resources like hard disk space, RAM and processor cores. In effect, each website has its “own server”.
VPS hosting is slightly different from CH in that, in VPS a customer is assigned her own server. The server is not a physical server, it is virtual – meaning that it is a server in another server.
The implication is that there will be other virtual servers in the same physical “owned” by other customers. In reality, VPS hosting is very robust. Even though there are multiple virtual servers hosted on the same physical server, it works well and your site will perform better than if you were using a shared hosting package.
As at the time of writing this Itechguide, www.itechguides.com is hosted on a VPS.
Dedicated Server Hosting
DSH is the bigger brother of VPS. In DS, a customer is assigned a physical dedicated server. Most users reading this guide, may not need to host their website on a Dedicated Server.
Step 2: Find a Hosting Provider
Once you have decided on a hosting plan, the next step to host a website is to find a provider. With so many hosting providers, this is not as easy as it may look.
Here are some factors to help you make this very important decision:
- Disk space – If it is “unlimited”, be sure to read the small prints for the conditions. You may also speak to the provider’s customer service rep and request for the conditions attached to the “unlimited” disk space.
- Bandwidth – what bandwidth is offered? Most shared hosting plans offer unlimited or unmetered bandwidth.
- Backup – Does the hosting plan come with backup and at what frequency – do not go for any backup frequency less than 24 hours. This means that if you lost your website, you should be able to restore your site and lose just a day’s information.
- SSL – Is SSL (Secure Socket Layer) included in the plan? Most web hosting plans today include a free Let’s Encrypt SSL. Using an SSL certificate makes your website HTTPS instead of HTTP.
- CDN – Check whether the plan includes a Content Delivery Network. Like SSL, most hosting plans will include a CDN – some will offer it for free, others at a cost.
- Caching – Most bloggers use WordPress. If you use WordPress, check that the hosting plan you are considering offer some sort of catching technology.
- Free Emails – Does the package include free emails? Also, find out how many emails you can create.
- Dedicated IP Address – Some hosting providers offer dedicated IP addresses at a cost. This is optional but it is a good idea to have the option to purchase a dedicated IP address.
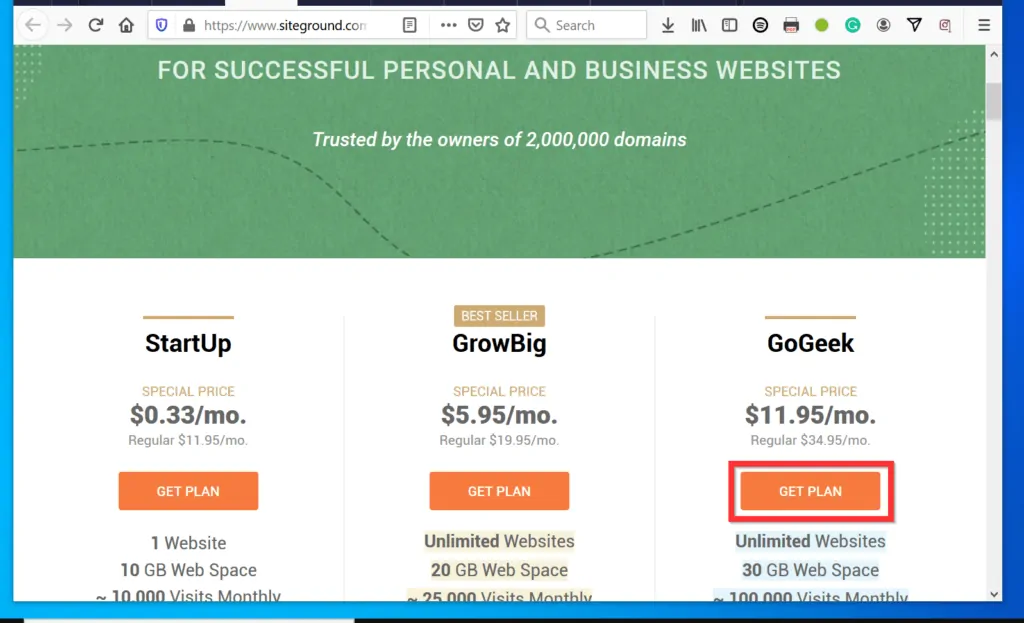
To make it easy for you, if you are looking for a starter hosting plan, I will recommend SiteGround’s GoGeek. This is the hosting plan we used for www.itechguides.com before we moved to VPS.
However, if your website has grown and you need to move, I will recommend NameHero’s VPS. As I said earlier, this is the plan we use for this site.
Step 3: Purchase Hosting
Once you have decided on the type of hosting plan you want to purchase and the provider, the next step is to buy a hosting plan. The steps will differ from one provider to another.
For this Itechguide, I will demonstrate how to buy web hosting from SiteGround.com.
- Open the provider’s website (for this example, SiteGround.com). Then, open the hosting package you want to purchase.
- To proceed with the purchase, click the package you want.
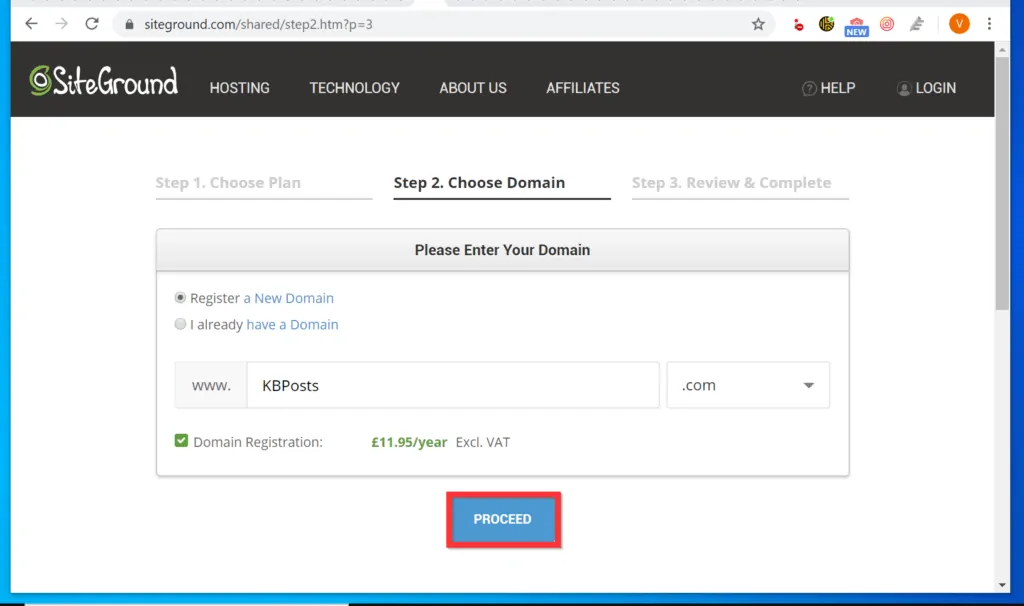
- To register a domain, select Register a New Domain (default), enter the domain name and the extension (.com, .co.uk, etc). Then, click PROCEED.
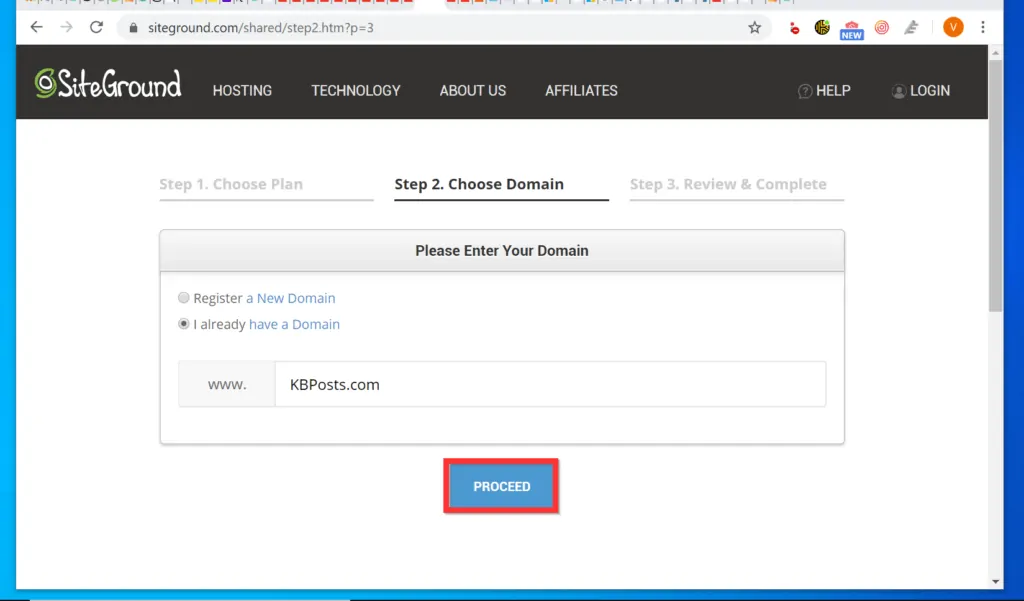
- Alternatively, if you already registered a domain, select I already have a Domain. Then, enter your existing domain name and click PROCEED – see the second image below.
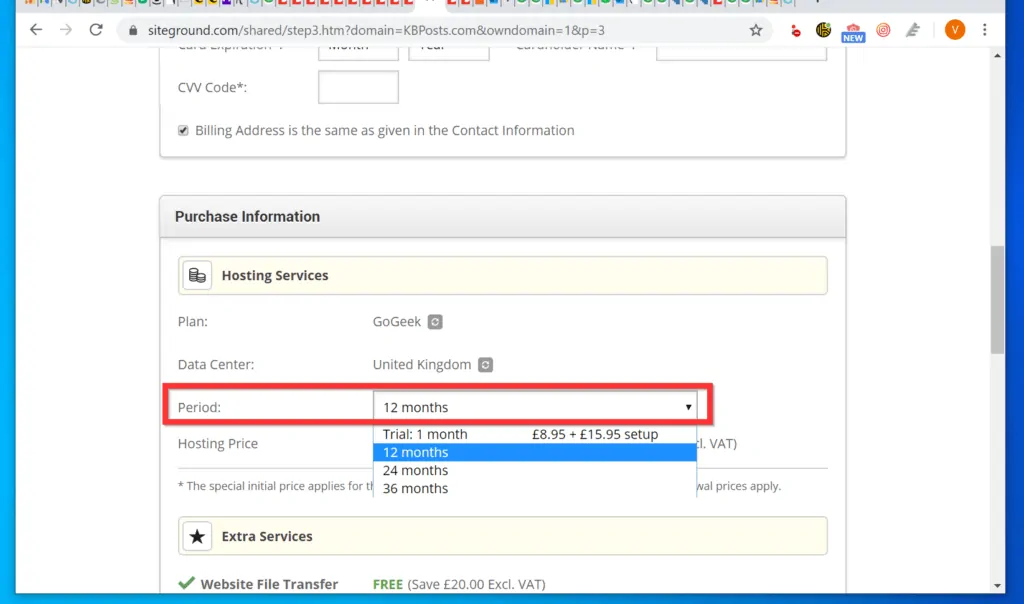
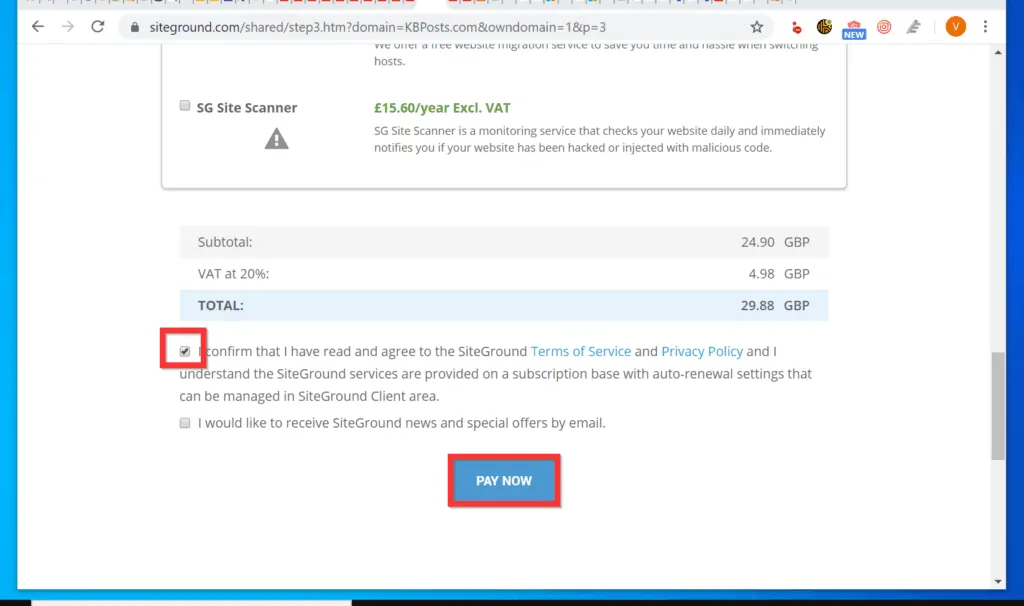
- In the final part, complete all the information on the page, including payment details. Then, scroll down, accept all the license agreements and click PAY NOW.
Step 4: Change Name Servers
There are 2 basic parts to hosting a website – the domain and the hosting. Your domain, like www.itechguides.com, is what visitors type into a browser to come to your website. However, the actual website is the information displayed to the visitors when the website opens.
In most cases, your domain name and hosting will be provided by the same provider. If your domain and hosting are with the same provider, you DO NOT need to perform the steps in this section.
However, if your domain name is registered with another registrar, you need to log in to the portal where your domain is hosted and point the domain to the Name Servers of your hosting provider.
In this example, I am assuming that SiteGround.com provides your hosting while your domain is registered with GoDaddy.com.
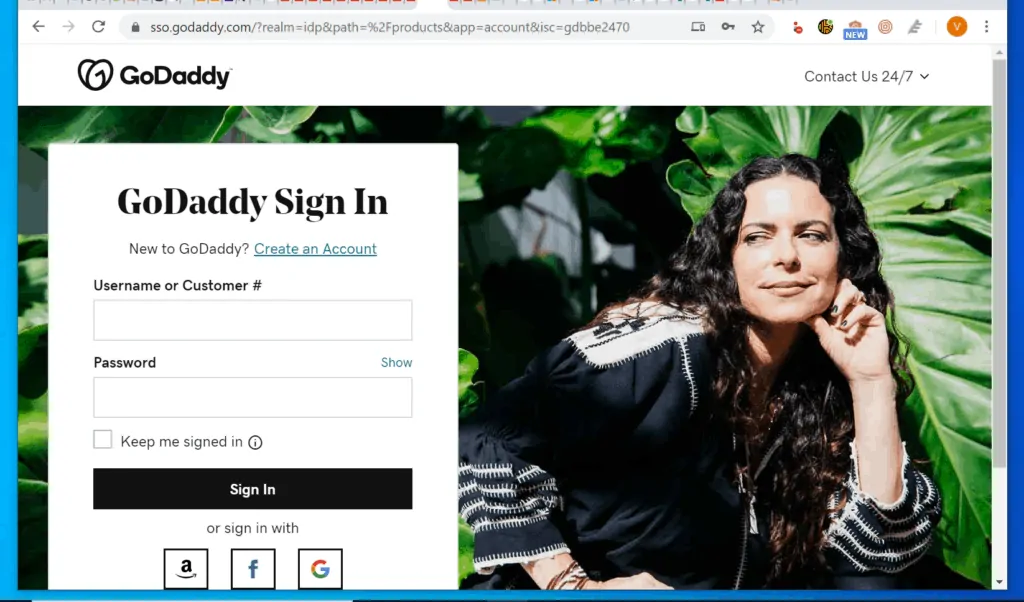
Here are the steps to change Name Servers on GoDaddy.com.
- Log in to your hosting account and copy the Name Servers into a text file. There will be a minimum of 2 – usually, NS1.domainname.com and NS2.domainname.com
- Then, sign in to your GoDaddy account.
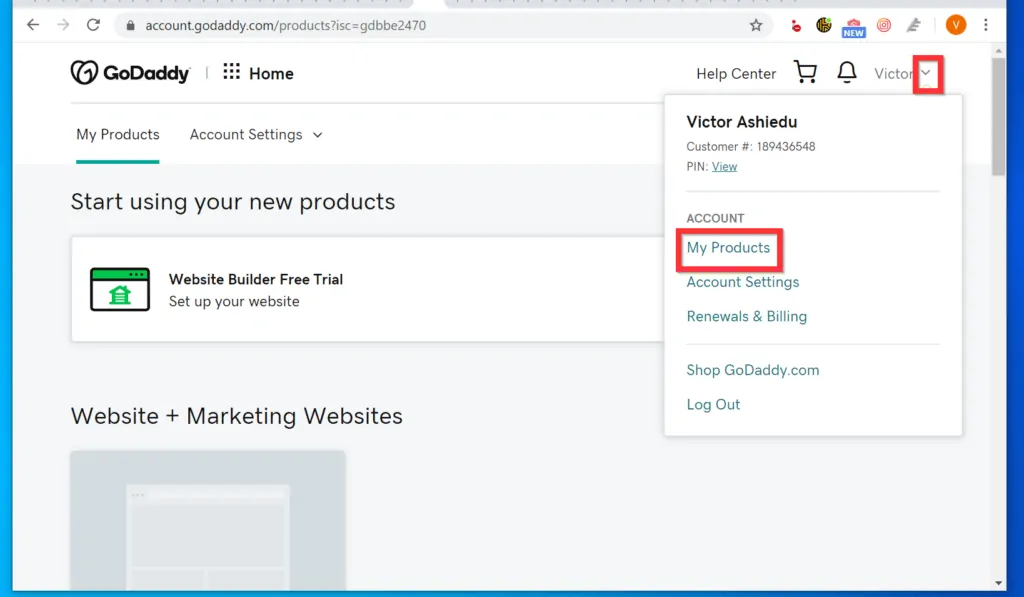
- On the top right of the page (on the right side of your account name), click the drop-down button and select My Products.
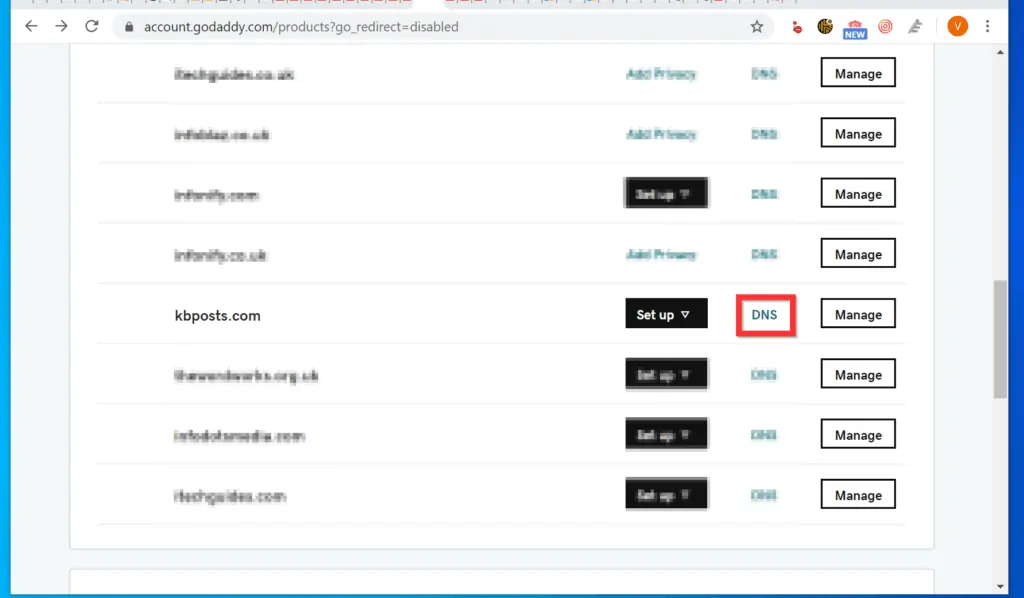
- Scroll down to All Products and Services, under Domains, beside the domain you want to change Name Servers for, click DNS.
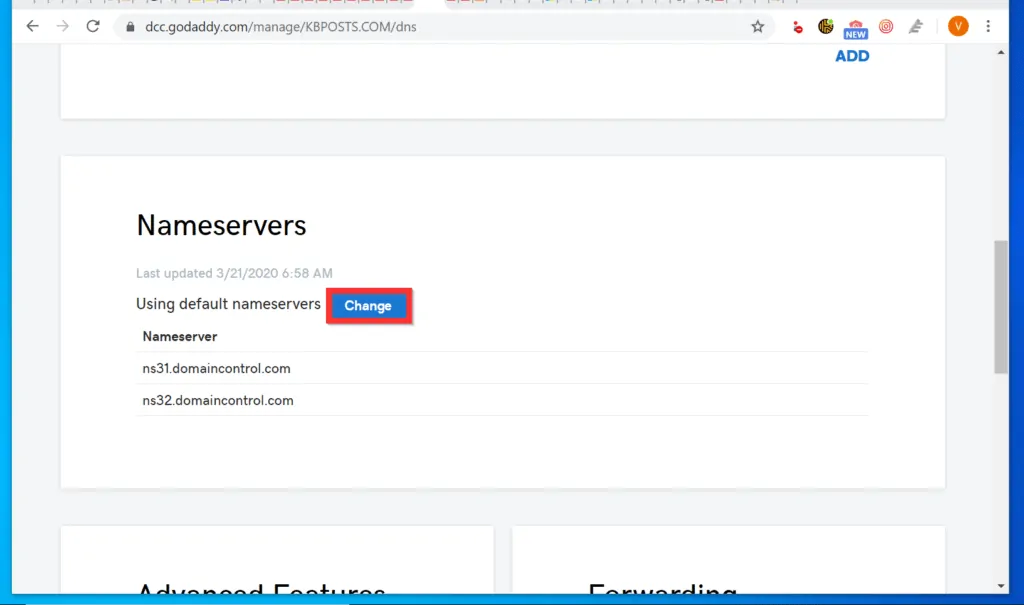
- When DNS settings page opens, scroll down to the Nameservers section. Then, click the Change button.
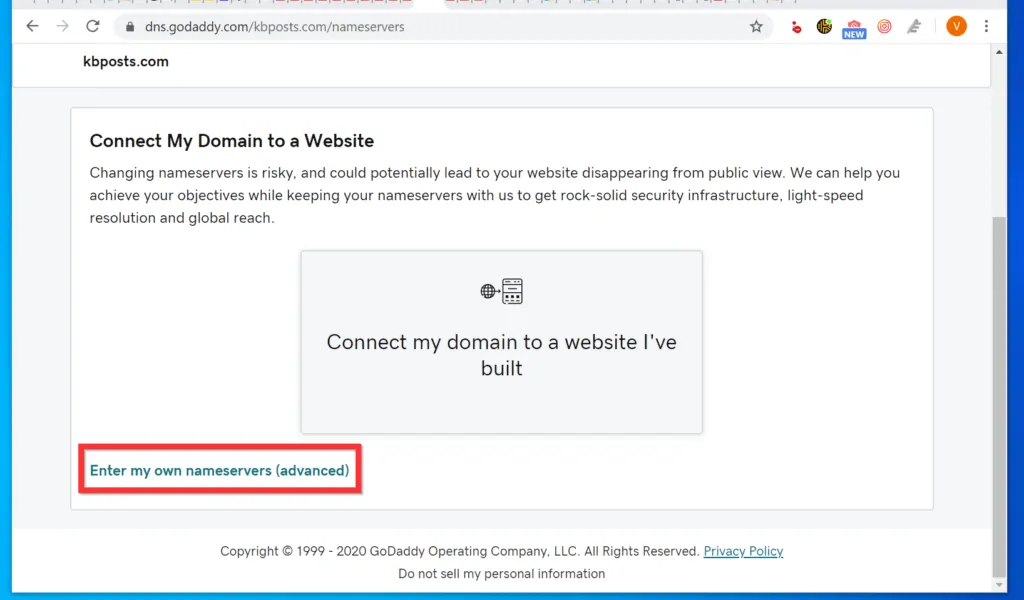
- If GoDaddy displays a page like the one shown in the image below, click Enter my own nameservers (advanced).
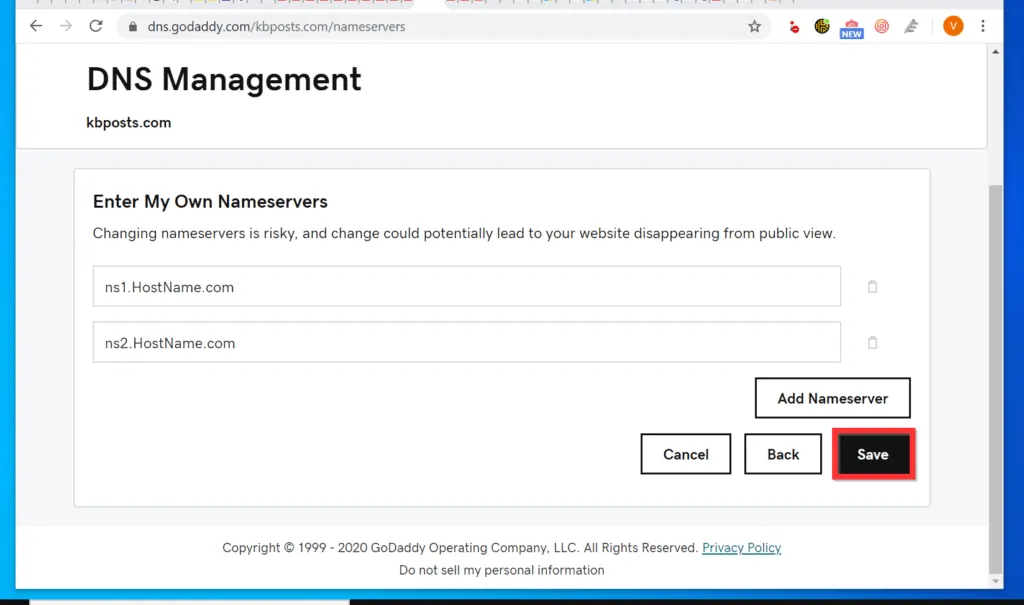
- Finally, enter the Name Servers in the space provided. Then, on the bottom right, click Save.
As you can see, it is very easy to host a website! I hope you found this Itechguide helpful.
If you did, click on “Yes” beside the “Was this page helpful” question below. You may also express your thoughts and opinions by using the “Leave a Comment” form at the bottom of this page.
Finally, for more domains, websites & internet Itechguides, visit our Domains, Websites & Internet page.