This Itechguide teaches you how to check VRAM on Windows 10. The guide covers steps for 2 methods to check VRAM on Windows 10.
Expand “Browse Post Topics” below to go straight to a topic.
How to Check VRAM on Windows 10 from Windows Settings
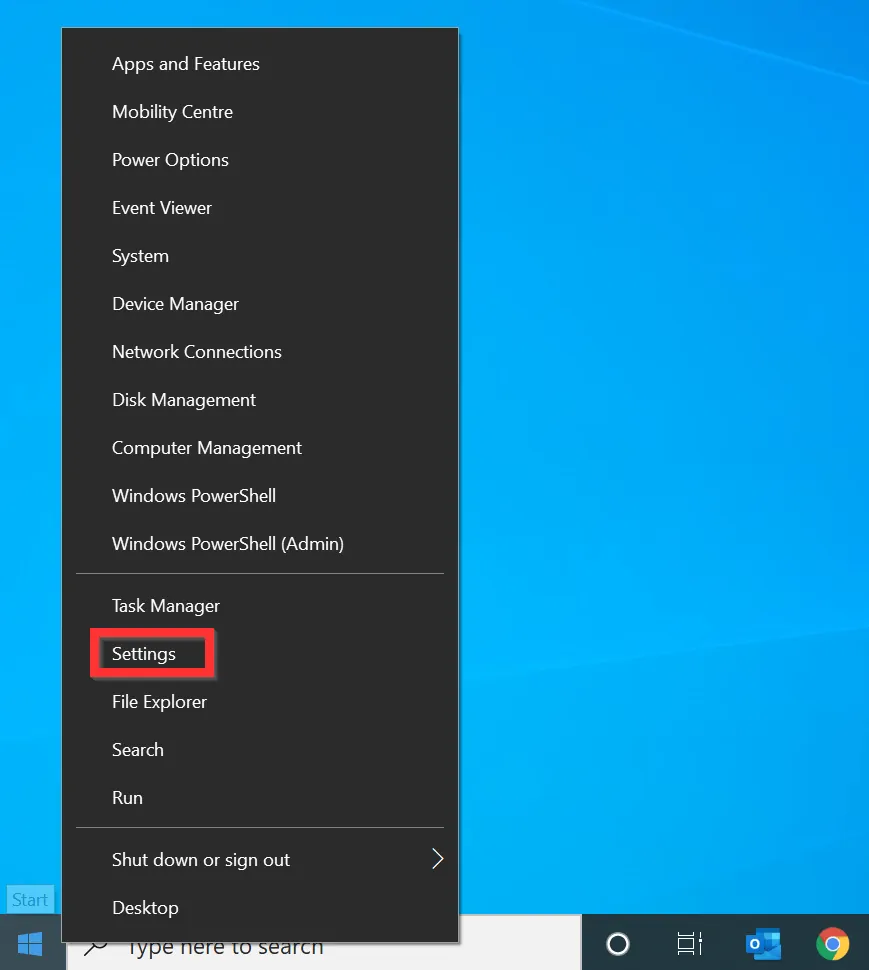
- Right-click Windows 10 Start menu and click Settings.
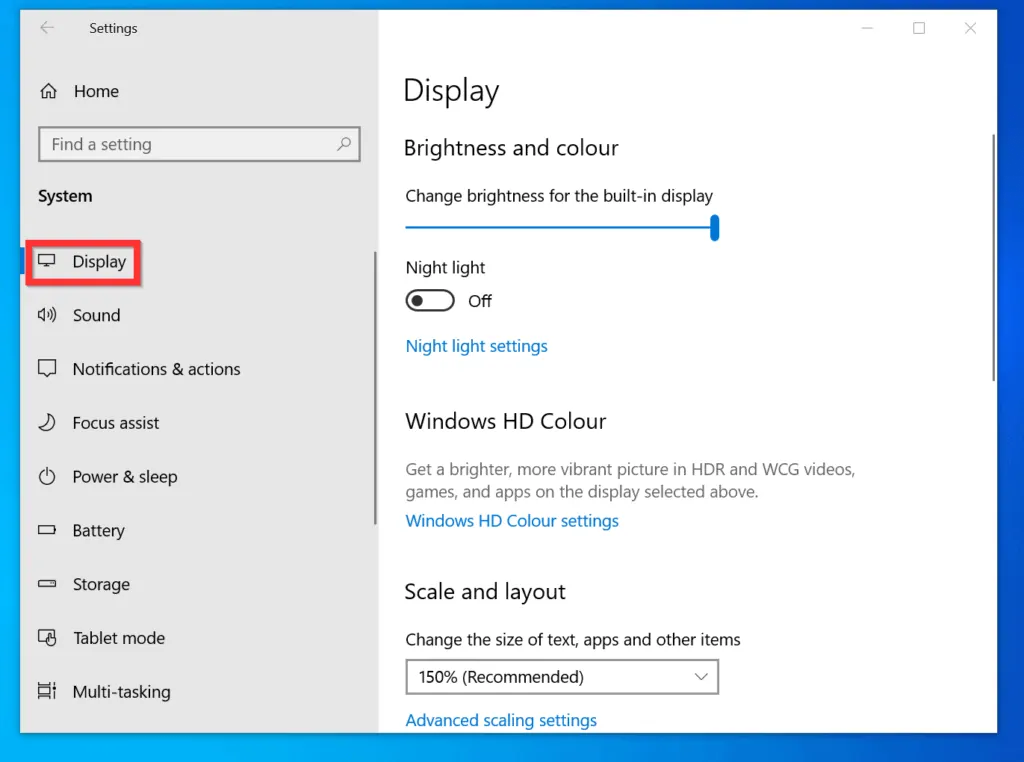
- When Windows Settings opens, click System.

- Then, on the System settings, the Display settings will open by default.
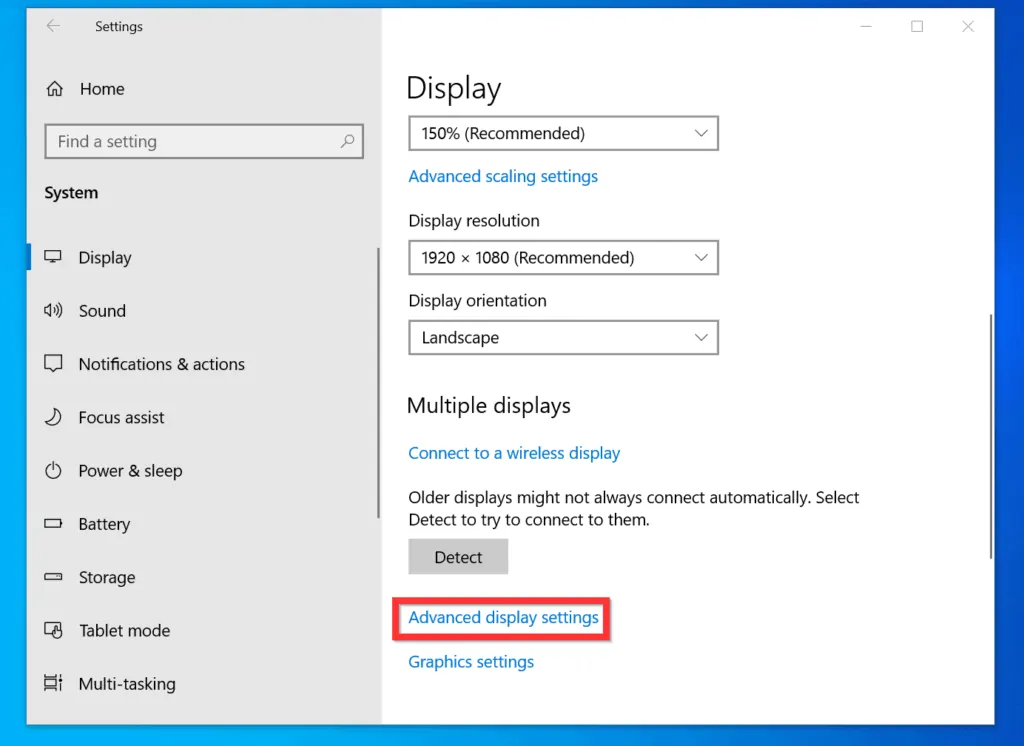
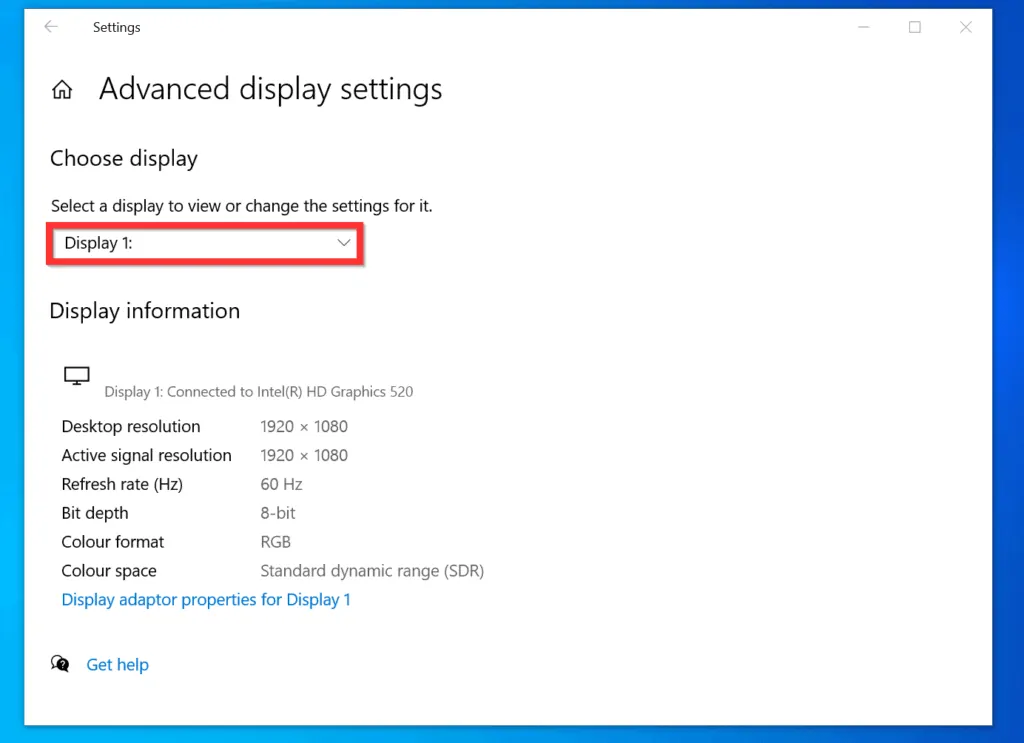
- Scroll down to the Multiple displays section – below Detect, click Advanced display setting.
- On the Advanced display setting screen, if you have more than one monitor connected to your PC, click the Select a display to view or change the settings for it drop-down and select the monitor you want to change the VRAM.
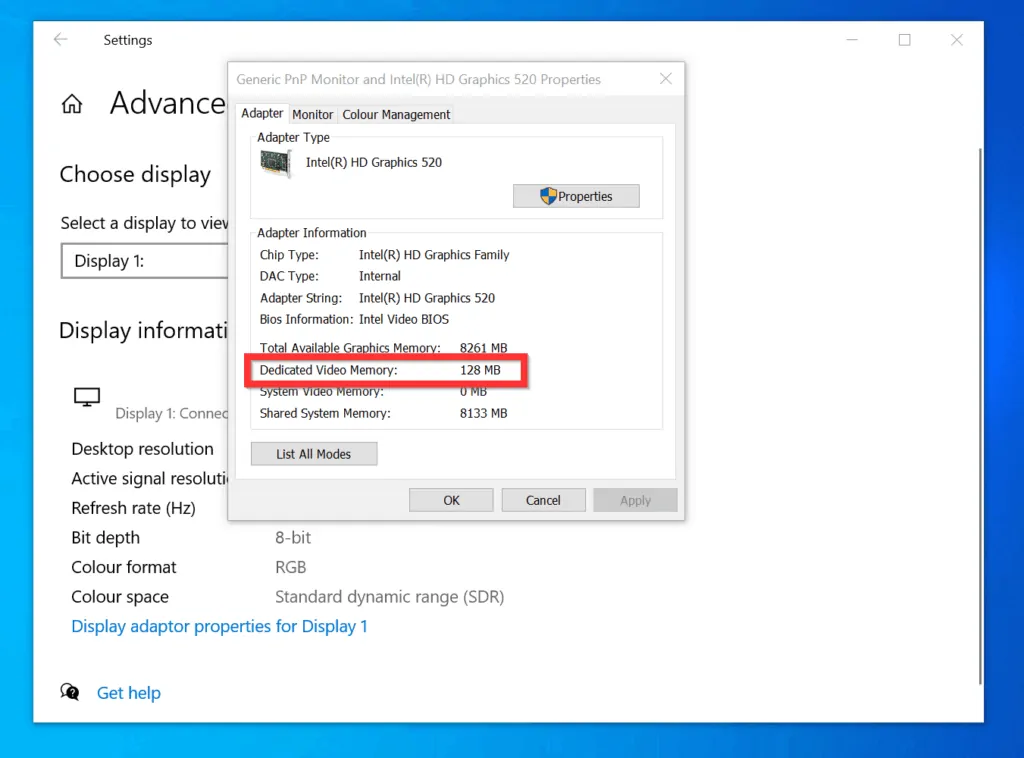
- Then, below the Display information, click Display adapter properties for Display #. The properties of the monitor will open.
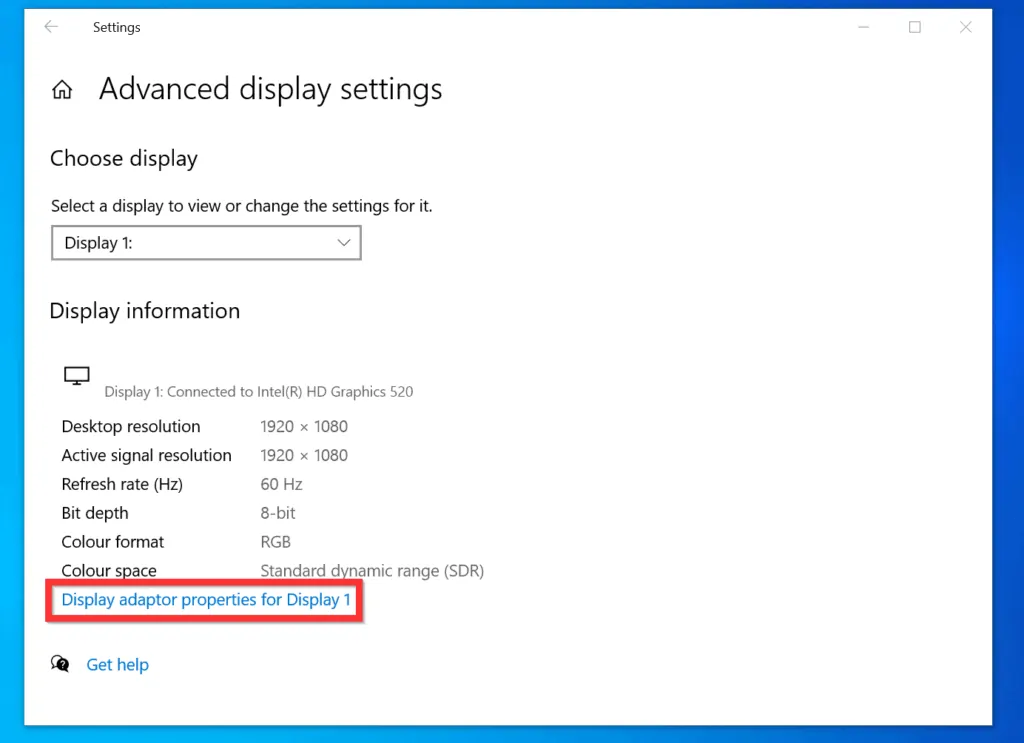
- The VRAM for your display is displayed as Dedicated Video Memory, beneath the Adapter Information section.
How to Check VRAM on Windows 10 from DirectX Diagnostics Tool
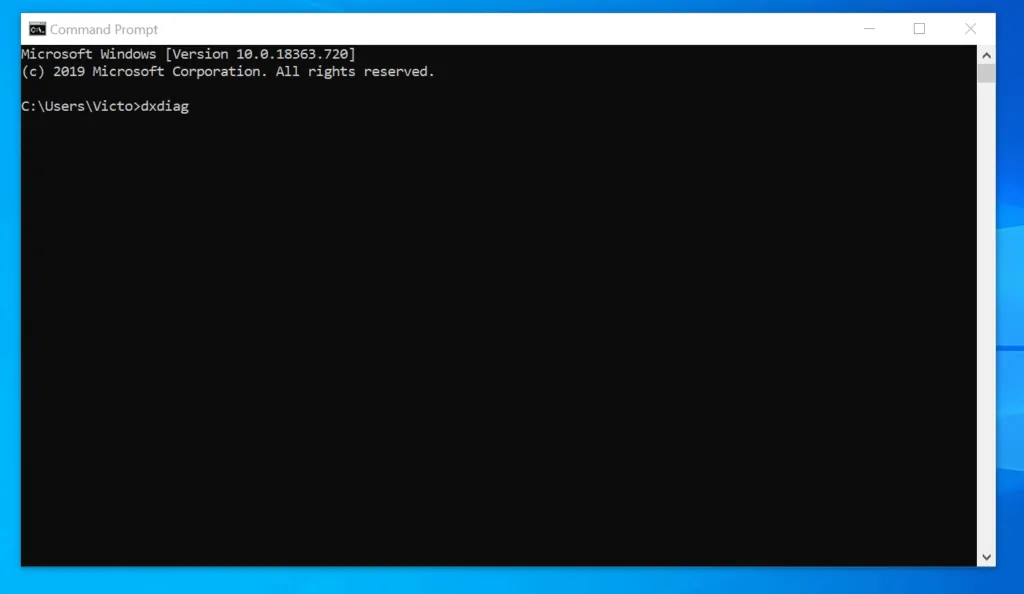
- Type command prompt in the search box. Then, from the search results, click Command Prompt.
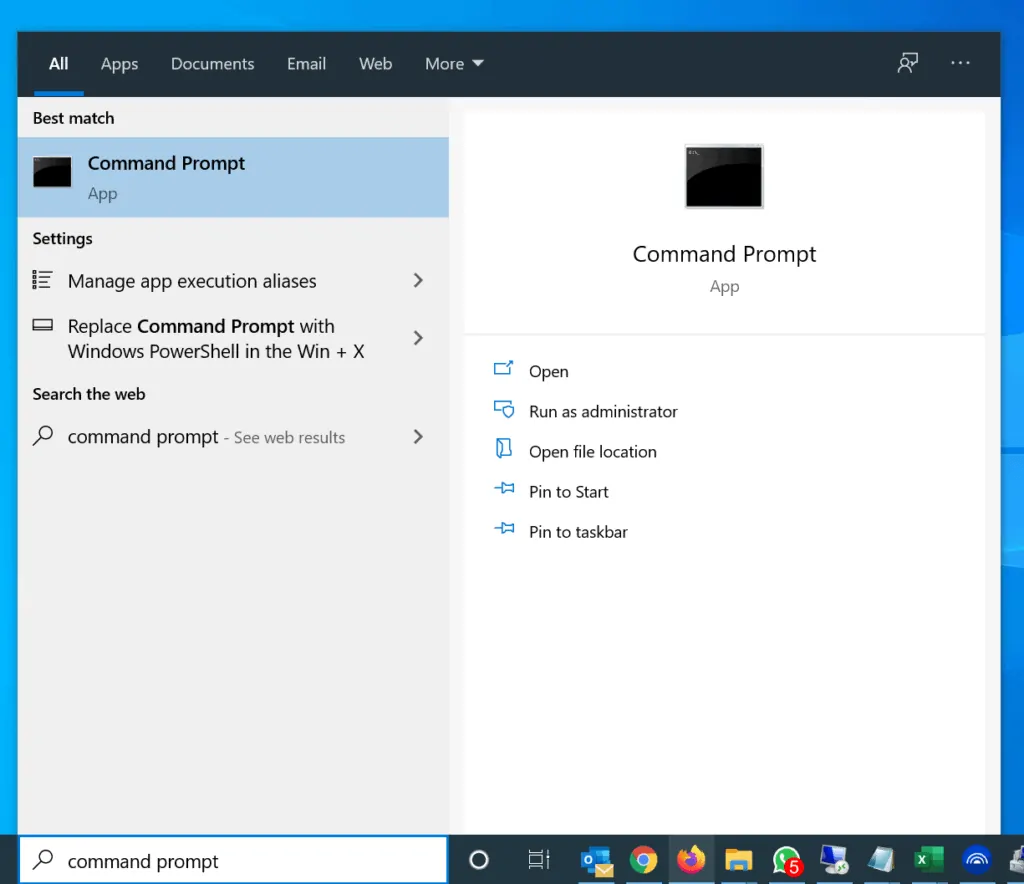
- On Command Prompt, type the command below and press enter.
dxdiag
The command will open DirectX Diagnostics Tool.
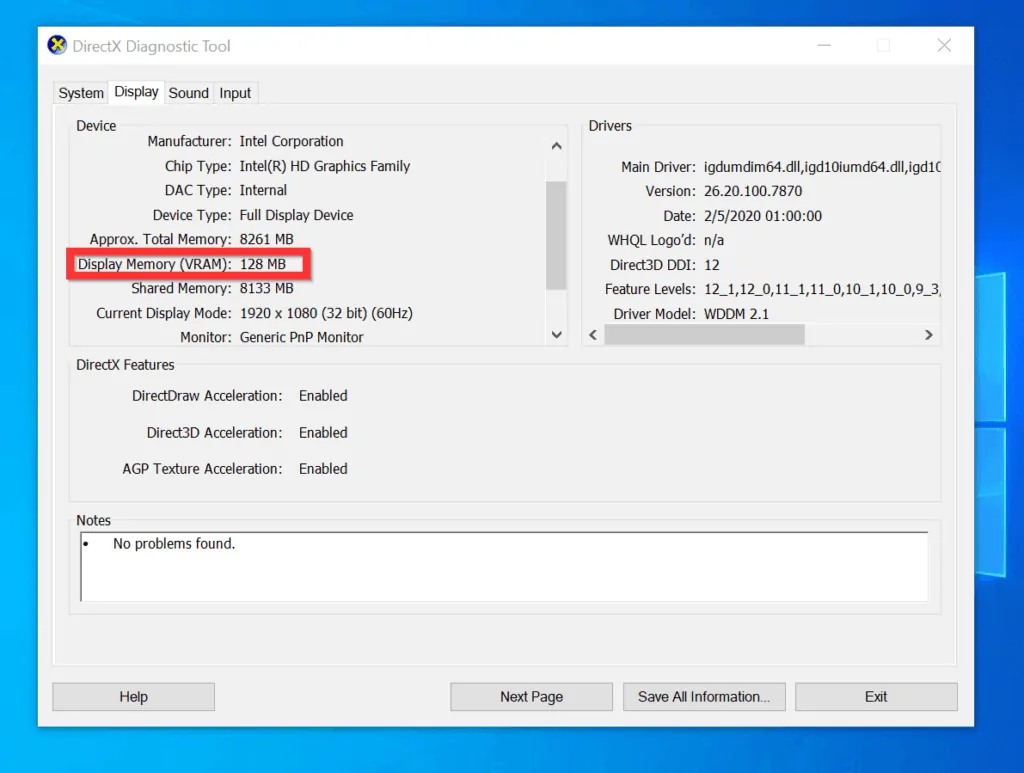
- When the DirectX Diagnostics Tool opens, click the Display tab.
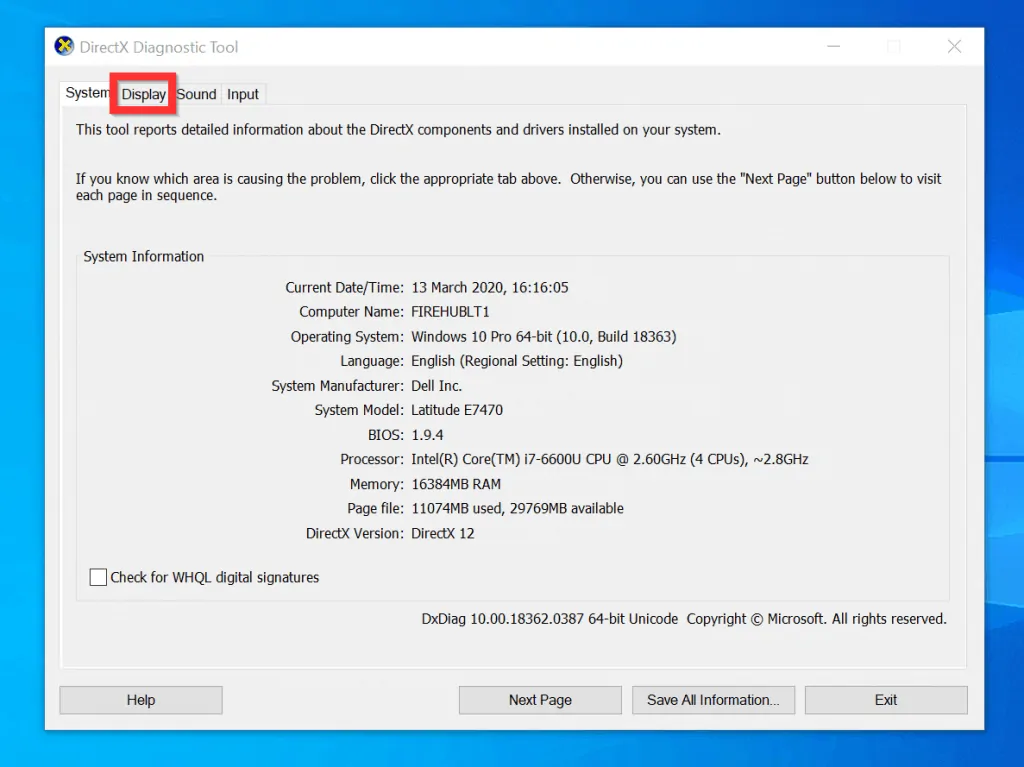
- The VRAM for your Windows 10 display card is on the Device section – Display Memory (VRAM).
As you can see, it is very easy to check the display memory for your PC. I hope you found this Itechguide helpful.
If you found it helpful, kindly spare 2 minutes to share your thoughts at [discourse_topic_url].
Alternatively, you could ask a question, leave a comment or provide feedback on the community platform at [discourse_topic_url]. The community team and members will be happy to assist you.
Finally, for more Windows 10 Itechguides, visit our Windows 10 How-To page.


![How To Run Sysprep (Generalize) In Windows 10 [2 Methods]](https://www.itechguides.com/wp-content/uploads/2022/05/8-2.webp)