Dropbox login allows you to sign in to and use Dropbox. But what is Dropbox? Let’s kick off this guide by answering this question.
What is Dropbox?
Dropbox is a cloud-based storage solution. It allows you to store your files on the internet instead of just storing them on your computer. To use this free service, you need a Dropbox login account.
One benefit of Dropbox is the ability to access your file from anywhere. This guide will show you how to set p a Dropbox login account, sign in to Dropbox, create and share folders and manage your Dropbox account.
How to Set Up a Dropbox Login Account
Before you can login to Dropbox, you have to first sign up for an account.
Use the steps below to create a Dropbox login account:
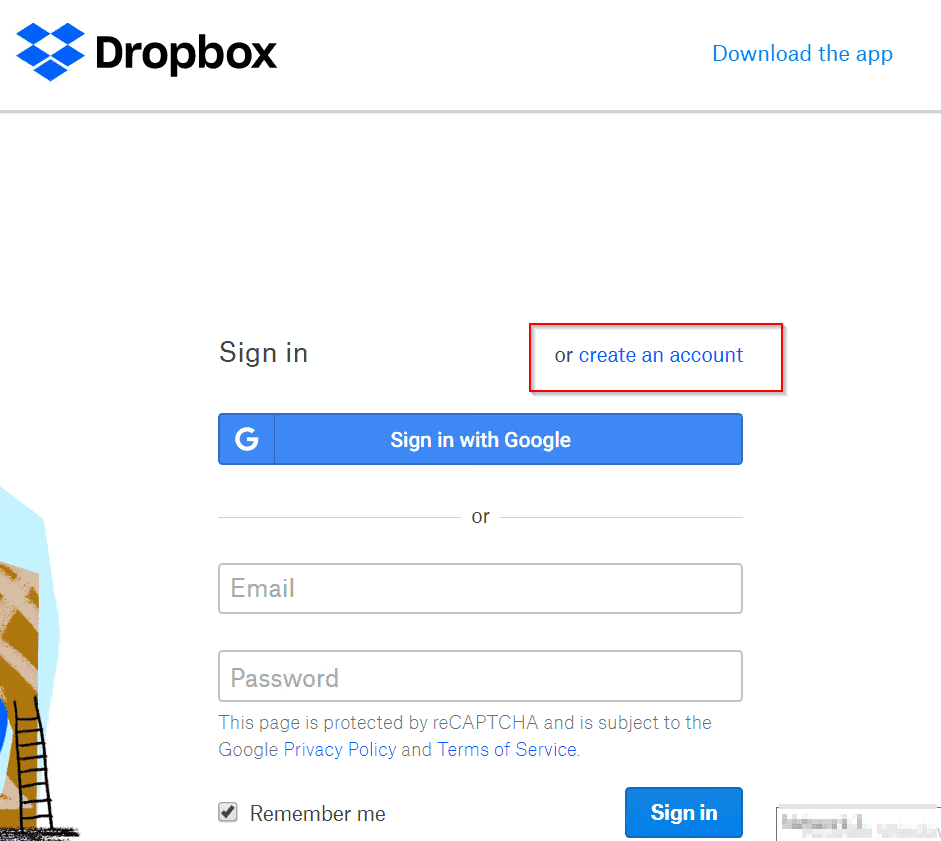
- Open this link https://www.dropbox.com/login from your browser. Here is what the page looks like below.
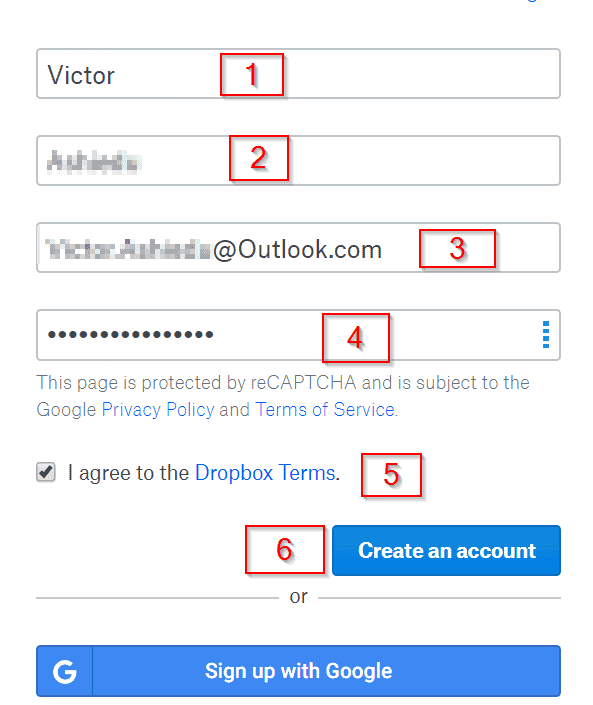
- From the previous image, click the Create Account link. Then complete the form presented as shown below. Finally, check the box to agree to Dropbox terms and conditions and click Create an Account [6].
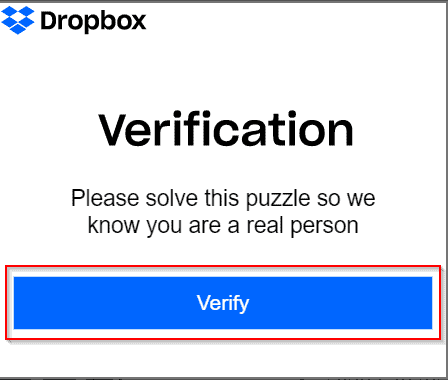
- If you are presented with a challenge as shown below, click Verify. Then respond to the challenge presented (it will have a clear instruction).
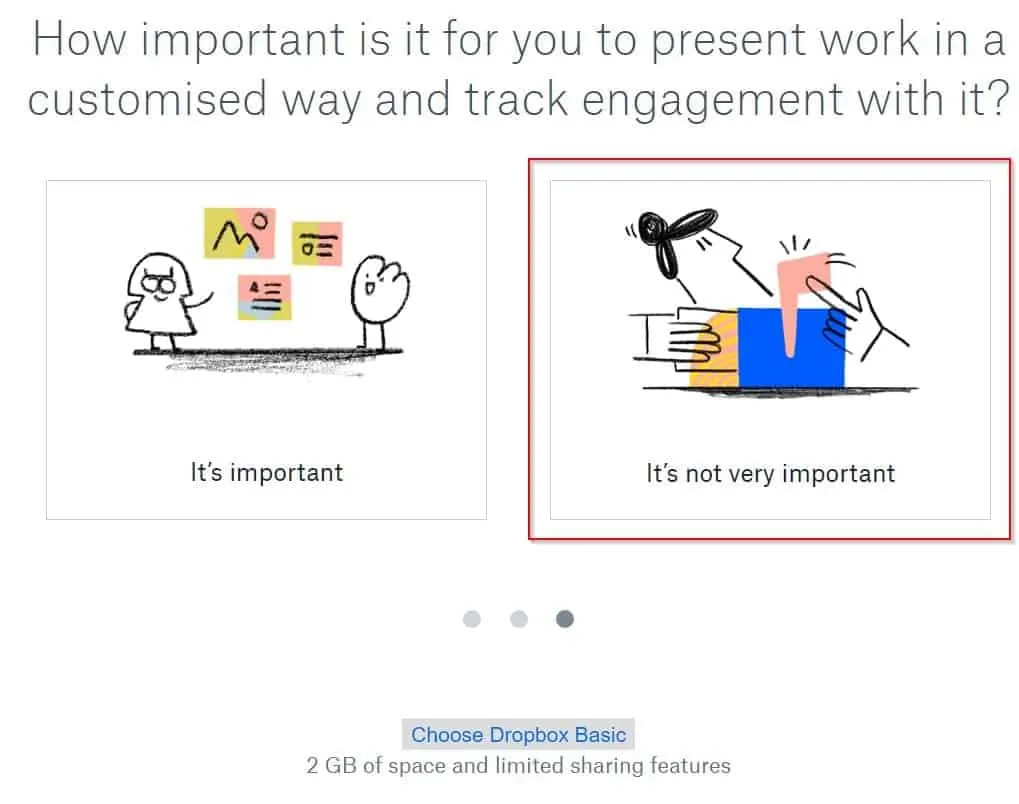
- You still have a few steps to complete your Dropbox login account set up. Next, select the highlighted option (As an individual). This will give you 2 GB of free storage.

- On the question whether you will need more than 2 GB of space, select Not now. Then select It’s not very important as your response to the next question.

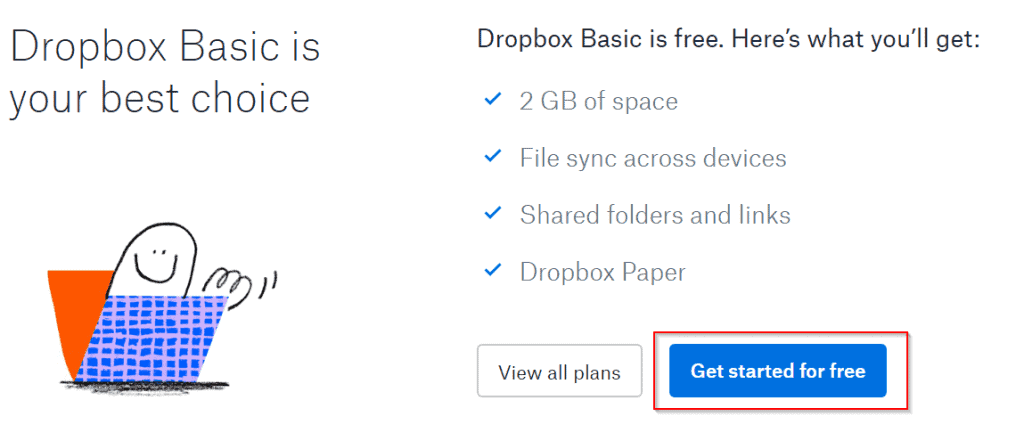
- Your free Dropbox login is ready! Dropbox Basic (the free version) features will be displayed. Click Get Started for free.
Later in this guide, I will cover paid Dropbox plans and additional benefits each of them may offer you. If you wish to explore available upgrade options, click Dropbox Login Upgrade Options (opens in a new window/tab).
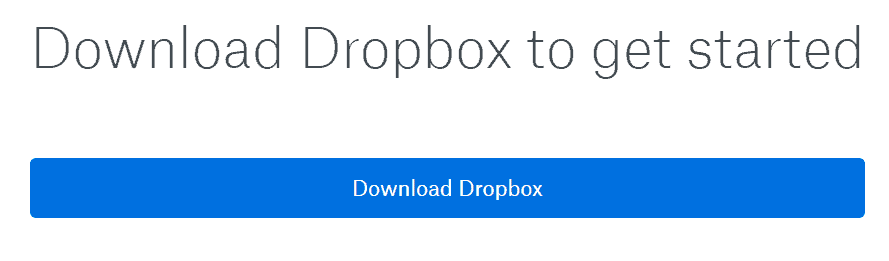
- When you click Get Started for free, you will be presented with a page to download Dropbox. Click Download Dropbox. Then save the installation file on your computer.
How to Install Dropbox Login App on Windows 10
Before you can use Dropbox login on Windows 10, you need to install the app. The steps below will guide you to install Dropbox App on Windows 10.
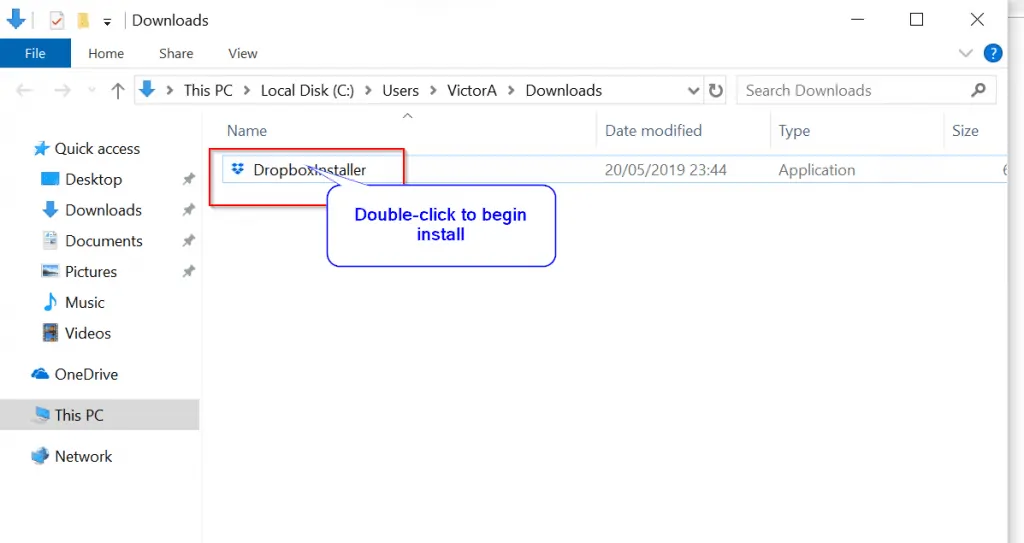
- In the last step, you downloaded Dropbox installation file. Locate where you saved the file on your computer. Then double-click the file to begin installation.
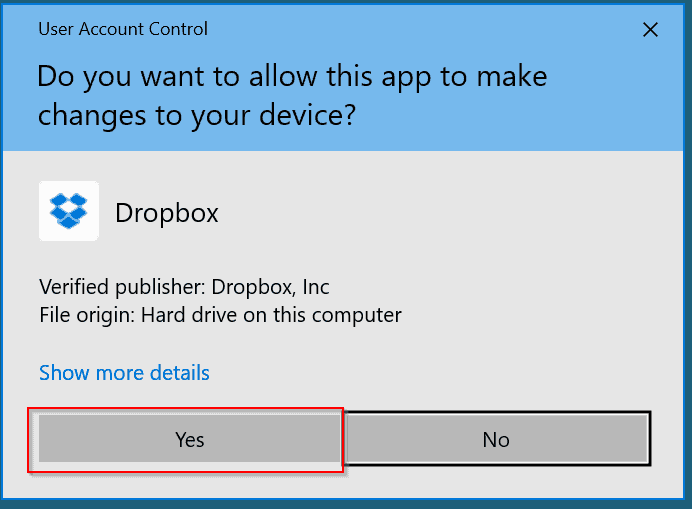
- On the User Account Control dialogue box, click Yes.
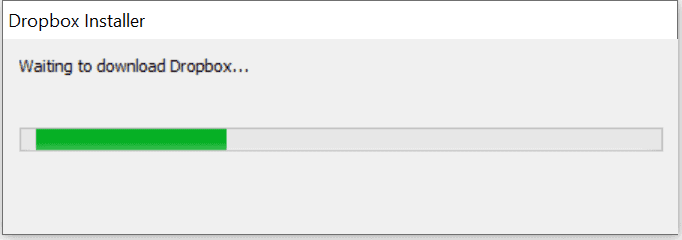
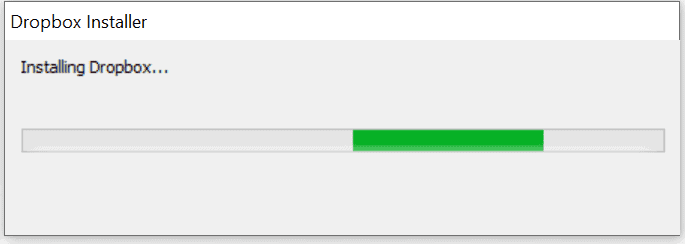
- The Dropbox installer will connect to the internet and download the files require for installation. This may take sometime, depending on your internet speed. When download is completed, Dropbox login app installation will begin (see the second image below).
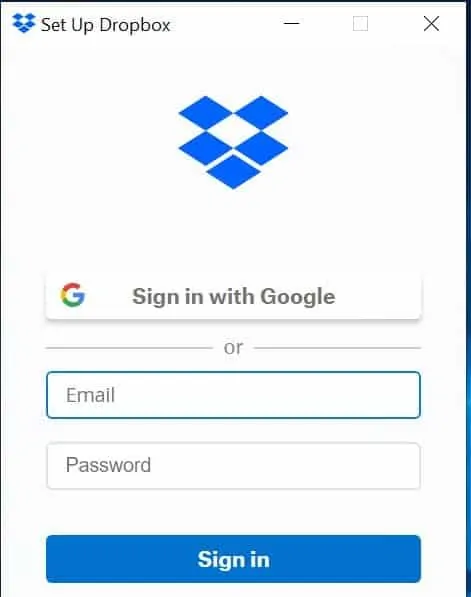
- When the installation completes, the Dropbox login/setup page will load automatically.
How to Setup and Login to Dropbox
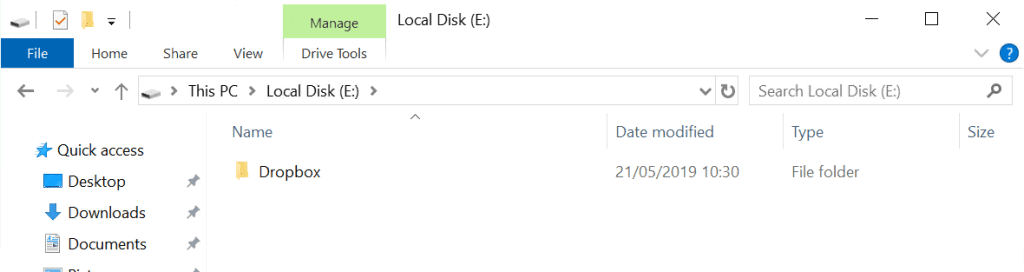
The next step is to set up the Dropbox App on your computer. Before you begin, create a folder called Dropbox on your computer. You may need to minimize the Dropbox set up pop up.
By default, Dropbox will be configured to sync files to your user profile. But I prefer (and recommend) using a different folder. I created a folder called Dropbox in my drive E. See image below.
How to Setup Dropbox
Now, follow the steps below to setup up Dropbox login on your computer.
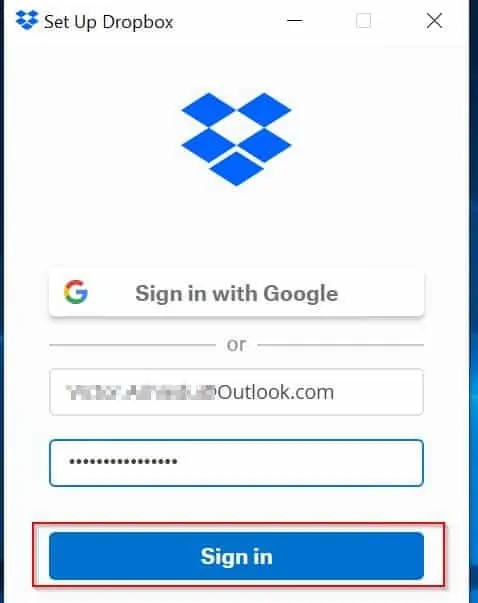
- Open the Dropbox login app you minimized earlier. Enter you Dropbox sign in details and click Sign in.
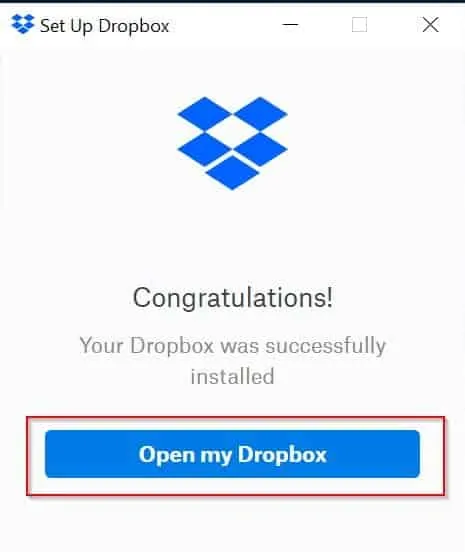
- When Dropbox logs in successfully, it will display a confirmation message as shown below. Click Open my Dropbox. You will receive a message to the second image below.
Before you proceed to the next step, check your email. Open an email from Dropbox and click Verify your email.

Setup Dropbox Login On Windows 10
The next step is to setup Dropbox sync. To set up Dropbox login sync, follow the steps below:
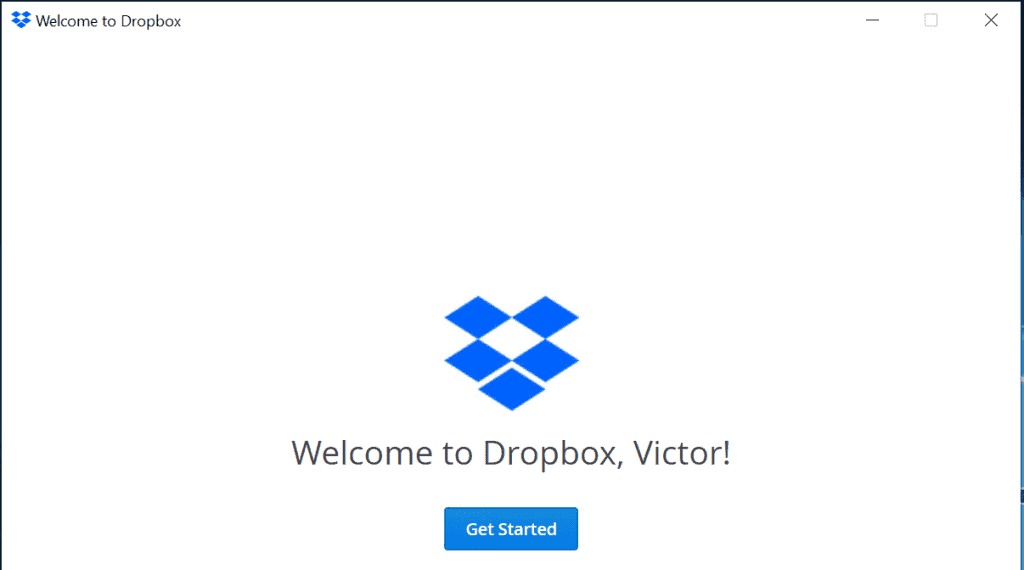
- From the last screen, click Get Started.

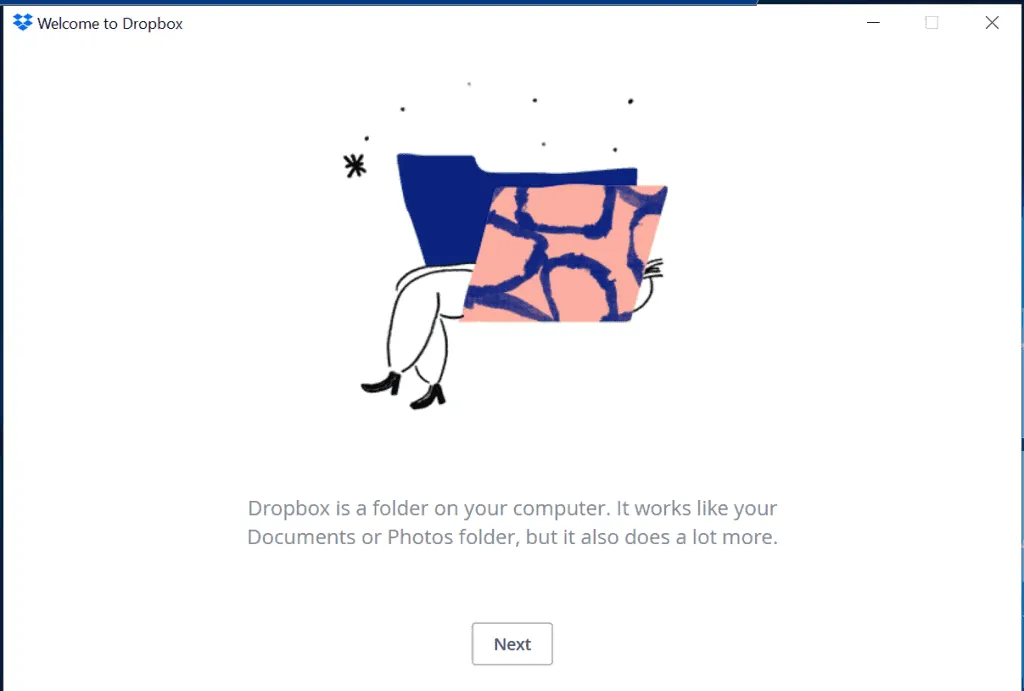
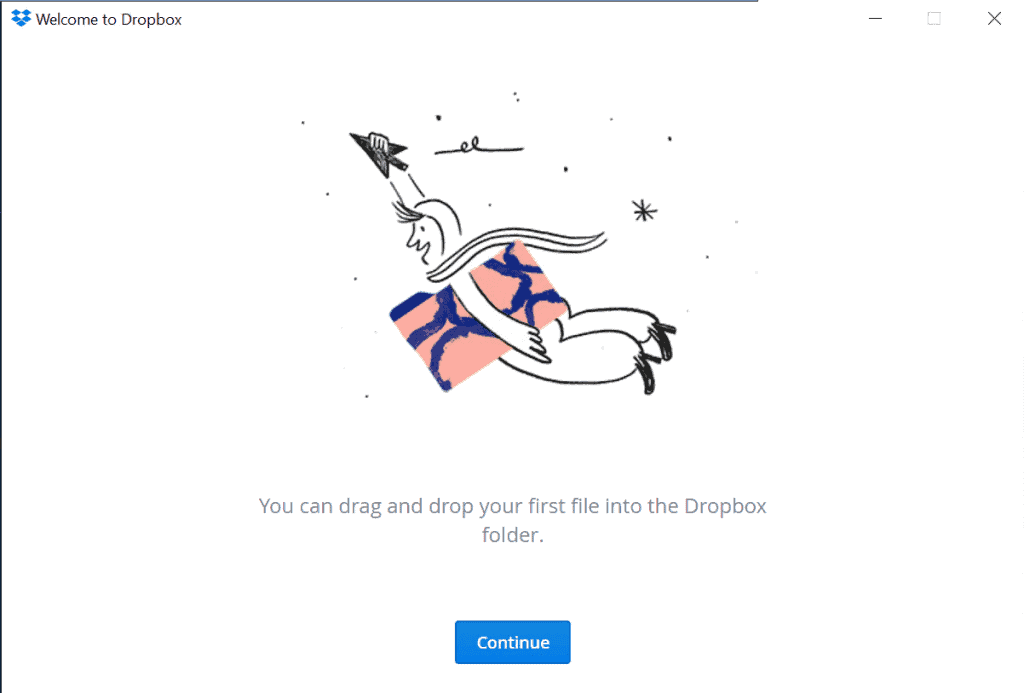
- On the welcome screen, read the information. Then click Next. Keep clicking Next until you see Continue. Then click Continue.
- Select Continue with Dropbox Basic.
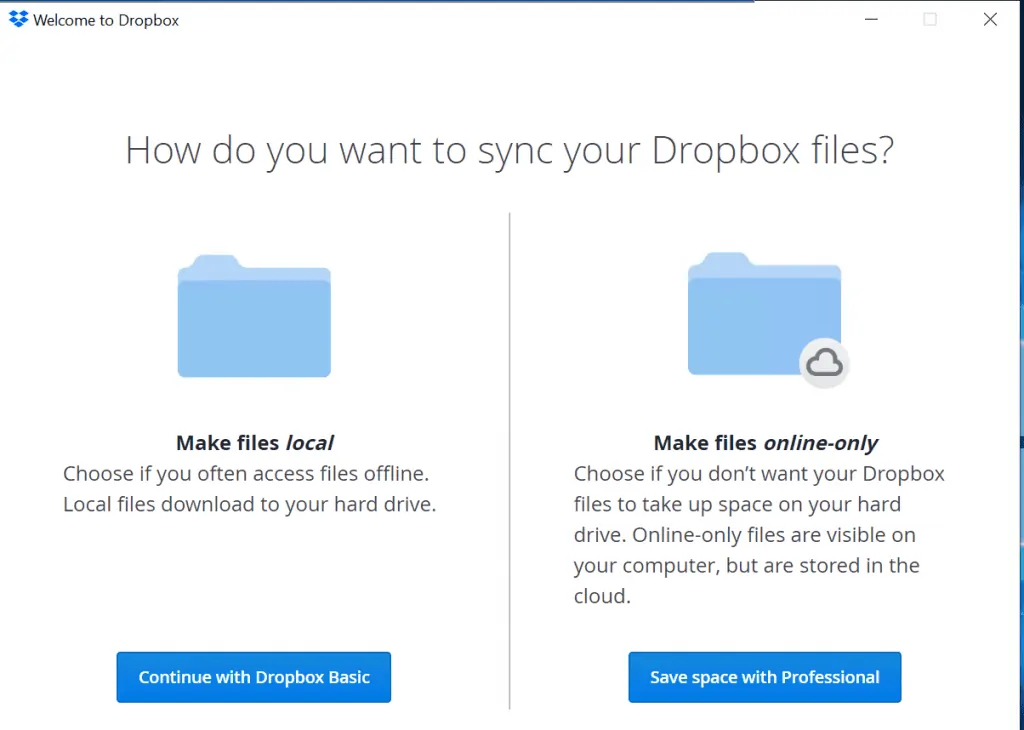
- When you clicked Continue with Dropbox Basic, the default location your Dropbox folder is opened. By default, Dropbox stores your files in YourProfile\Dropbox folder. Later in this guide, I will show you how to move your Dropbox to a different folder.
How to Login to Dropbox from Another Computer
The process to login to Dropbox from another computer is exactly the same as described in the last section. Below are the high level steps required:
- Install Dropbox App on the new computer
- Sign in to your Dropbox login account
Once you complete these two tasks, your Dropbox folders will sync to the new computer.
For the detailed step-by-step guide, read the last section. Click the link Setup Dropbox Login On Windows 10 to take you to the beginning of the last section.
Create and Manage Dropbox Folders
After you setup Dropbox login you may start copying files or folders into Dropbox right from your computer. You may also create folders in your Dropbox folder.
How to Create a Dropbox Folder on a PC
The steps below below will guide you to create a Dropbox folder on your desktop.
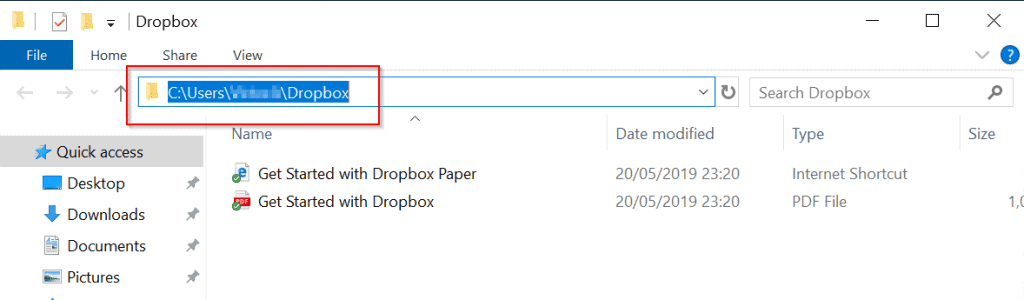
- Open the location of the Dropbox folder on your computer. As I said earlier, the default location is C:\Users\<your-username>\Dropbox.
“<your-username>” in the path C:\Users\<your-username>\Dropbox is your Windows login name.
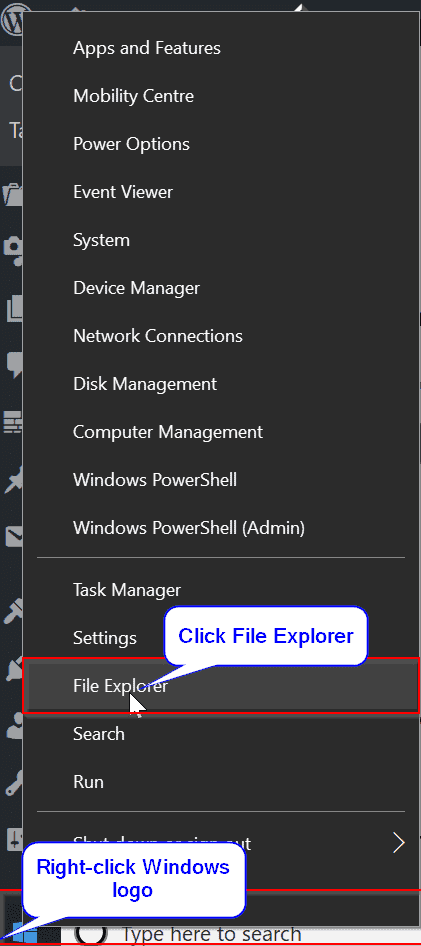
- To Locate where Dropbox stores data on your computer, open File Explorer – right-click the Windows logon on your taskbar then click File Explorer.
- On the left hand side of File Explorer, click Dropbox.

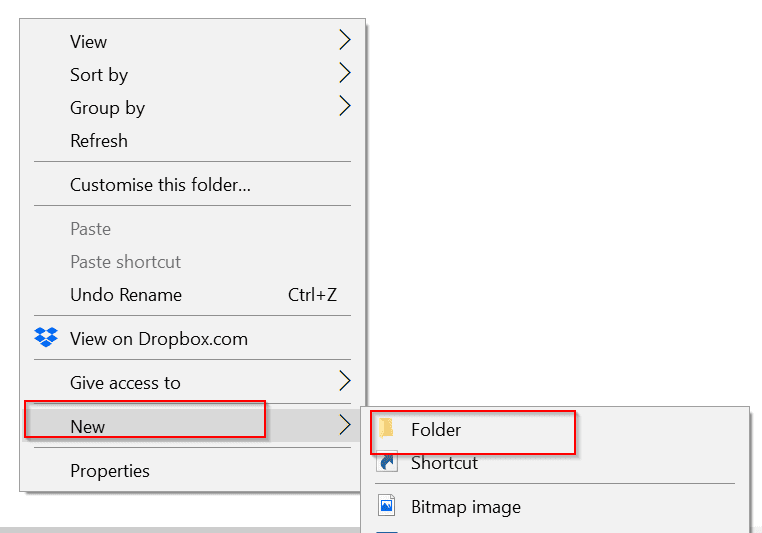
- Creating a Dropbox folder on your Desktop is a simple as creating a folder within your Dropbox folder. Right-click the empty space with the Dropbox folder, click New then select Folder. Name the folder whatever you wish. I called mine TestFolder (See the second image below).
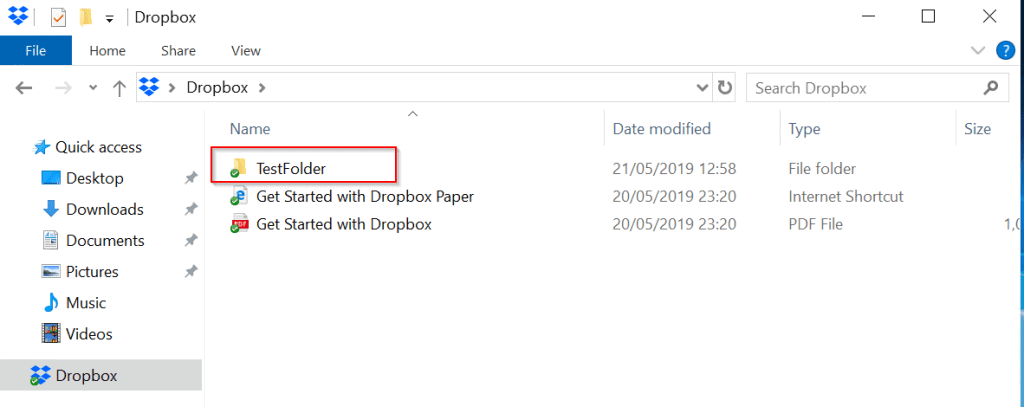
When you create a new folder (or copying a folder) in the Dropbox folder, after sometime, a green tick will appear beside the folder. This means that the folder has synced to your Dropbox login account in Dropbox.com.
How to Share Dropbox Folder on Desktop
You could share folders with other people right from your Desktop App.
Here is how:
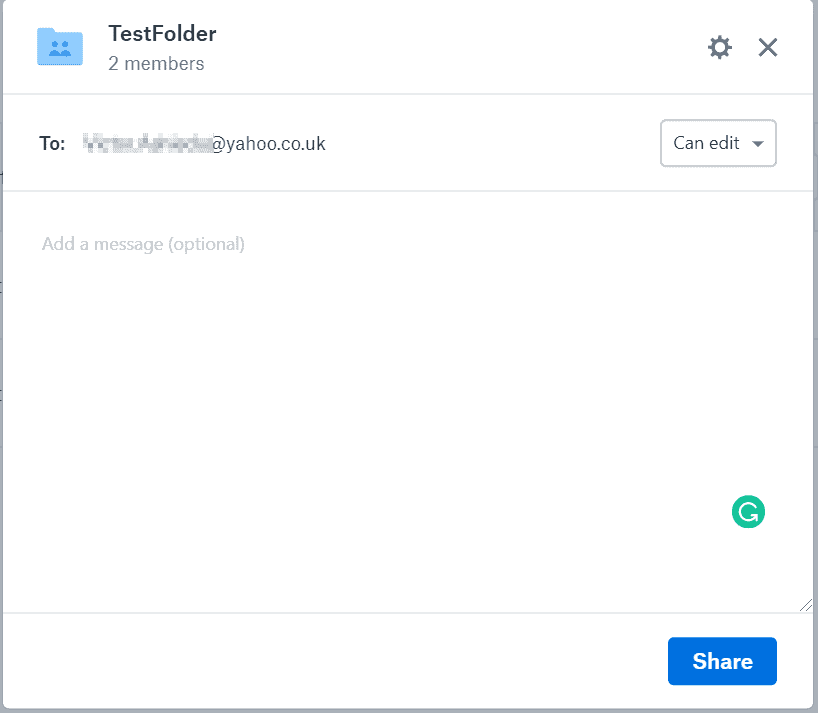
- Within your Dropbox folder, right-click the folder you wish to share, then select Share. The Share folder options window opens. See below for details.
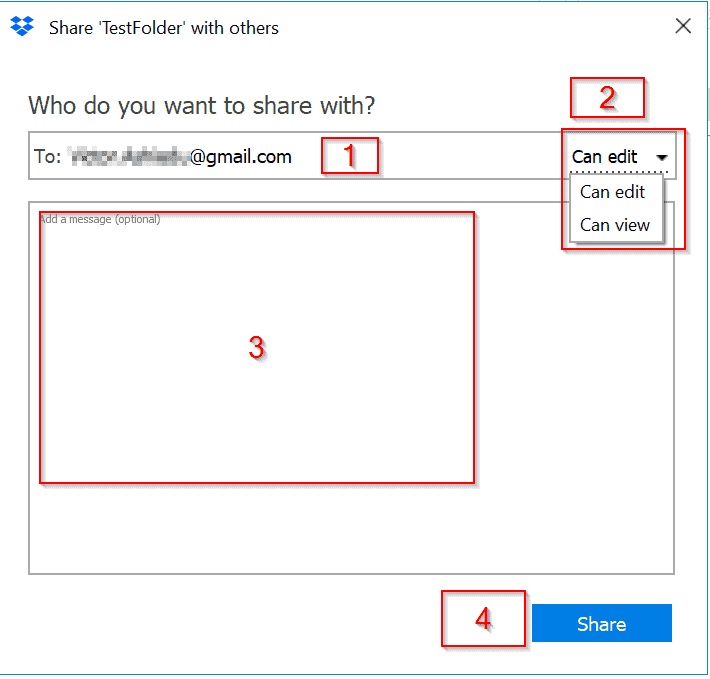
On the box labelled [1], enter the email address of the person you wish to share the folder with. Then in [2], click the can edit drop-down and and select the permission you wish to grant the person. You could include a message [3]. When you finish click Share [4]. Dropbox will send an email to the person letting them know that you have shared a folder with them.
Once you share a Dropbox folder, the folder will have a human icon next to it. See the image below.
How to Share Dropbox Folder on Dropbox Online
In the last step, I showed you how to share a Dropbox folder on your desktop. The steps below will show you how to share a folder on Dropbox online.
- Open Dropbox.com on your browser and sign in with your Dropbox login account. This will open your Dropbox login account online.
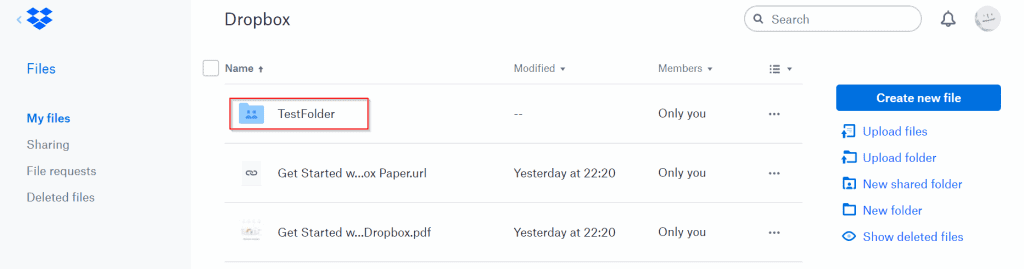
If you look closely the folder I created on my desktop, TestFolder is now on my Dropbox login account online!
- To share TestFolder with another user, hover over the folder and click the checkbox beside it.
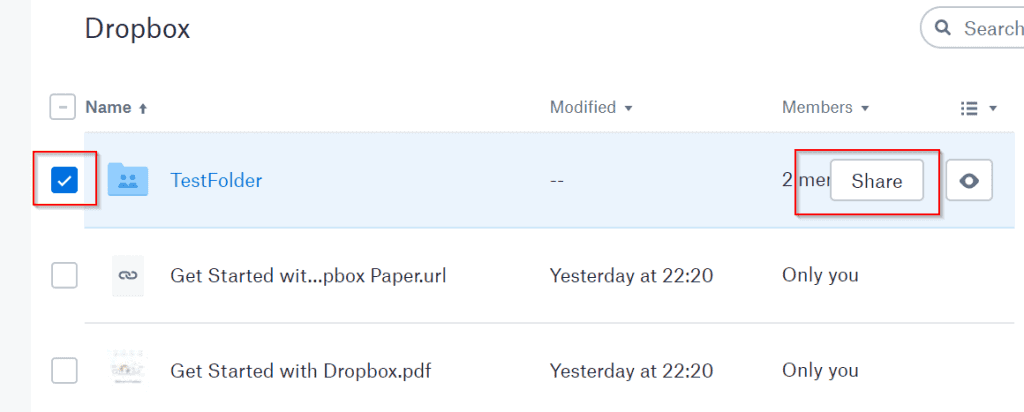
- Next, click Share. The online Share options are exactly the same as the desktop Share options. Enter the person’s email, select the permission, enter an optional message then click Share.
Setup Dropbox Login Sync
As you may already know by now, your Dropbox login automatically syncs to Dropbox online.
In this section, I will show you how to manage what is synced to your computer using Dropbox selective sync. I will also discuss how to fix Dropbox sync errors. Finally, for this section I will touch on Dropbox Smart Sync.
Dropbox Selective Sync
Dropbox Selective Syn allows you to select folders in your online account to be synced to your computer.
Follow the steps below to configure Dropbox selective sync.
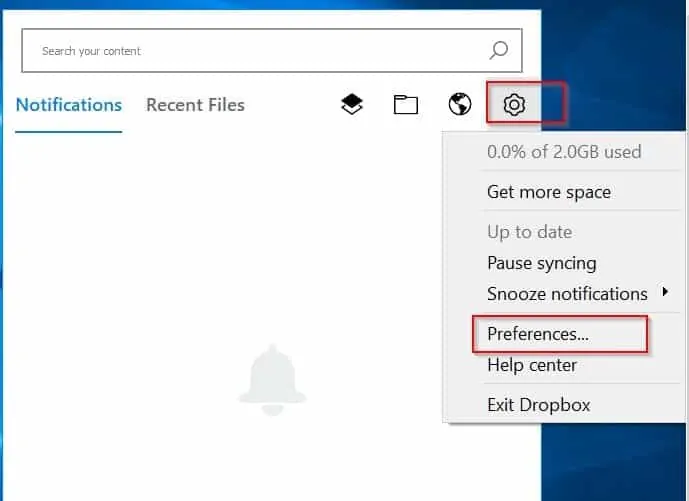
- Towards the right hand side of taskbar, locate the Dropbox logo. If you can’t find it, click on the icon highlighted in the image below (arrow pointing upwards), then click Dropbox icon.
- Next, click the circle gear (settings). Then click Preferences (second image below).
- When Dropbox Preferences opens, click the Sync tab.
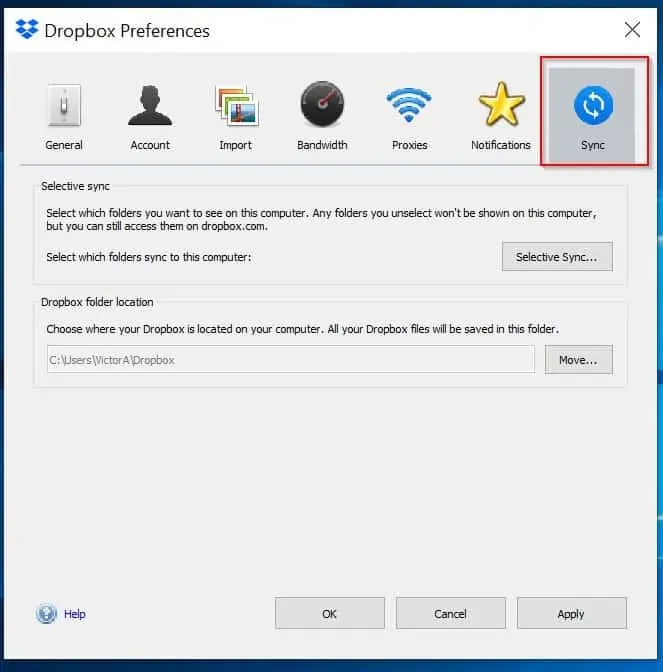
- Next, click Selective Sync (highlighted below). This will load the Selective Sync window.

Selective Sync, allows you to selectively determine which folders in your Dropbox login account that syncs to your computer.
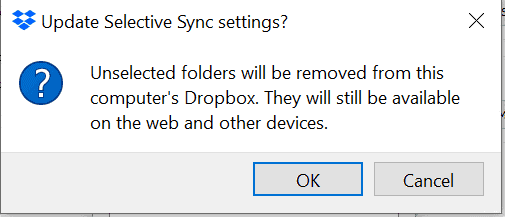
- Uncheck all folders that you do not wish to sync to the current computer. Then click Update. Finally, click Ok to confirm your changes.

What to Do if Dropbox is Not Syncing
Before I go on to discuss possible causes of Dropbox sync not working and potential resolutions, let me show you how to determine if Dropbox is syncing or not.
To determine the sync status of your Dropbox login account on your computer, click the Dropbox icon on the taskbar tray. If your Dropbox account is fully synced, it will have a green tick with the phrase Up to date.

If the status of your Dropbox is not Up to date, it may be syncing. In this case, it will show the number of files left to sync.
Possible Causes and Resolution for Dropbox Sync Issues
If the sync status is showing that Dropbox is not syncing, below are potential causes and what you can do to resolve it.
Possible Cause and resolution of No Sync 1: No internet connection. If Dropbox is not syncing, it may simply be because your computer is not on the internet. One way to confirm this is to visit a website on your browser.
Possible Cause and resolution of No Sync 2: Dropbox may not be running. Check your system tray (right hand side of taskbar). If Dropbox is running, the icon will be on the task bar. If the icon is missing, search for and open Dropbox.
Possible Cause and resolution of No Sync 3: Selective Sync may be on. If some of your files or folders are not syncing but others are, you may have configured Selective Sync. If Selective Sync is configured but you wish to sync all folders, reconfigure to sync all folders.
Possible Cause and resolution of No Sync 4: Your computer may need a restart. Sometimes restating your computer may resolve your Dropbox sync problem.
Possible Cause and resolution of No Sync 5: Dropbox App on your computer may need to reconnect to Dropbox online. Signing out and back into your Dropbox account may resolve this problem.
Possible Cause and resolution of No Sync 6: Your computer may not have enough free disk space. Check and if you require more space, free up some space.
Dropbox Smart Sync
Dropbox Smart Sync allows you to access every file and folder in your Dropbox account from your computer, without using any space on your computer disk.
Sounds exciting! Unfortunately, Smart Sync is only available in Dropbox Professional and Dropbox Business. To read more about this Dropbox feature, click Smart Sync link.
Save to Dropbox from Excel, Outlook, or Word
Dropbox has a really cool feature that allows you to save to Dropbox directly from Excel, Outlook, Word and other Microsoft Office Apps. Before you use this feature you have to first enable it in the Dropbox login app.
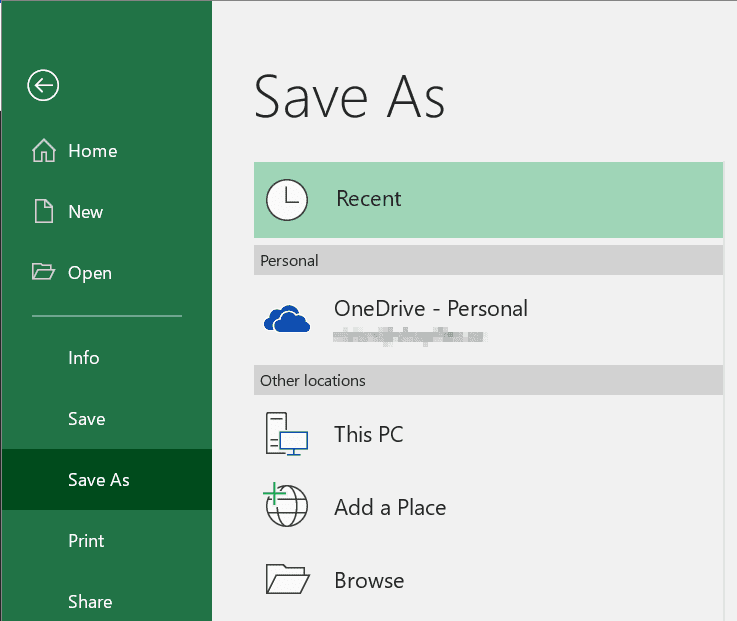
Before you configure Dropbox to show Dropbox as a save location, it will not be available in Microsoft Office Apps. Below is the Save As option in my Excel. There is no option to save to Dropbox.
Here is how you enable Dropbox to allow save from Excel, Outlook, Word and other Microsoft Office Apps:
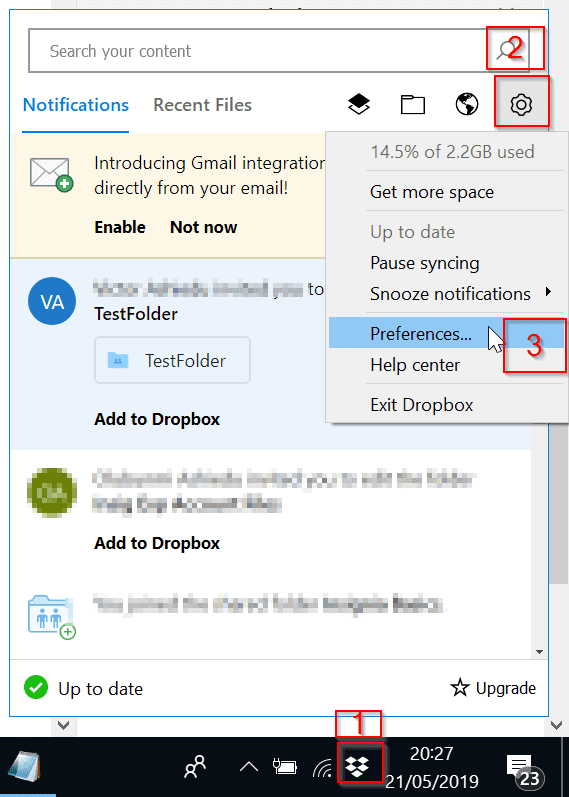
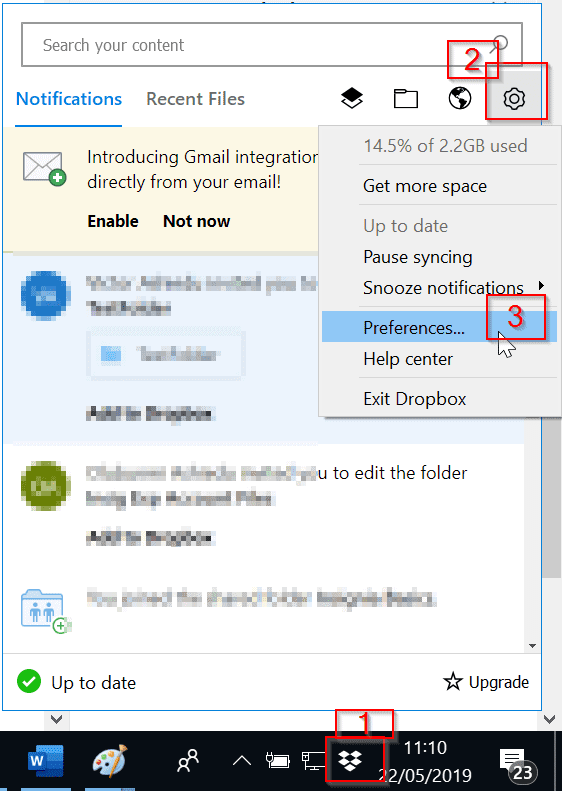
- Locate the Dropbox icon on the right hand side of your taskbar. Click it [1], then click Settings [2]. Finally, click Preferences [3].
- On the Dropbox Preferences, General tab, check the box beside Show Dropbox as a save location Microsoft Office. Note that for this to take effect, you have to close and reopen any Microsoft Office app open before this configuration change.

Now, if you open Save As in Excel, Dropbox is now available as a save location. How cool is that!
Save to Dropbox from Outlook
To demonstrate how you can save to Dropbox from a Microsoft Office App, I will illustrate with Outlook.
- Open the Outlook email you wish to save to Dropbox.
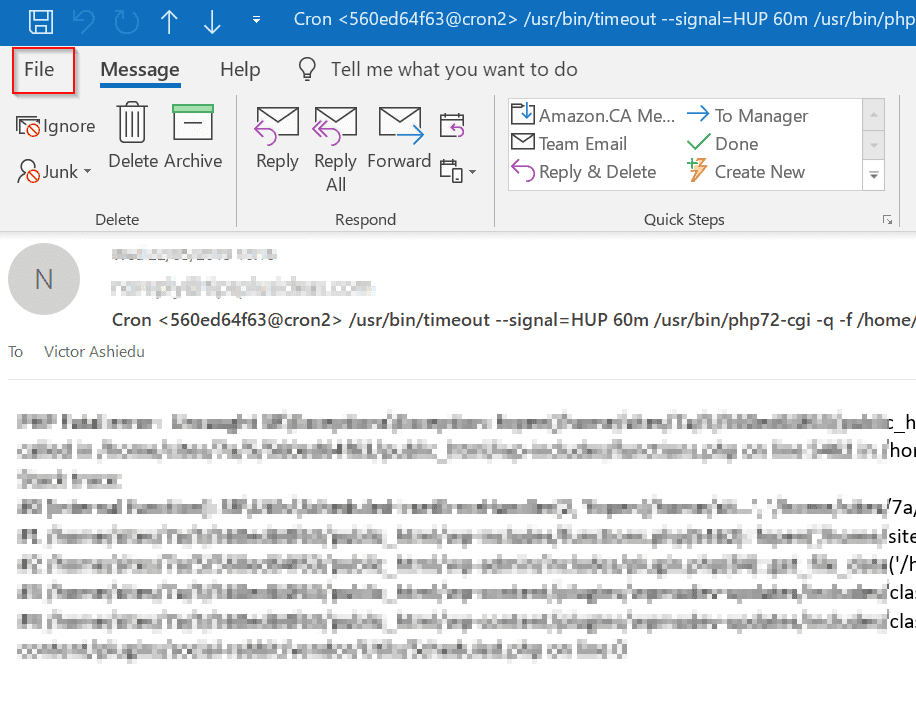
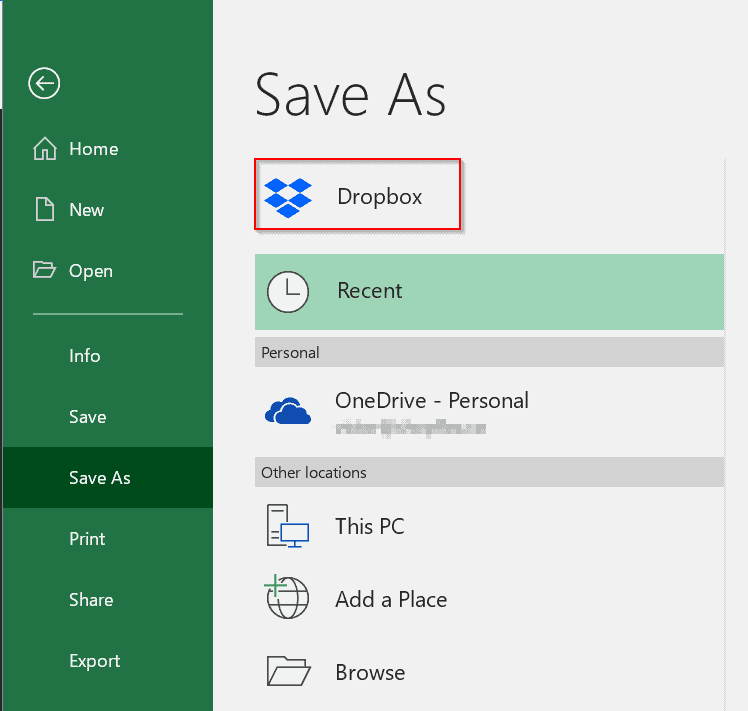
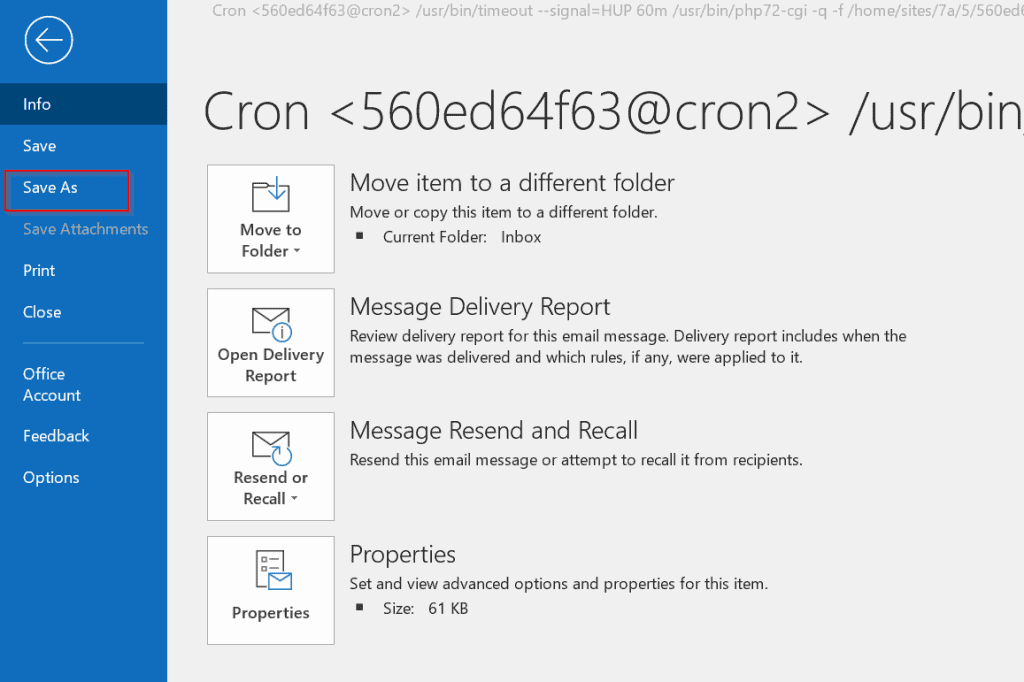
- Click File and select Save As.
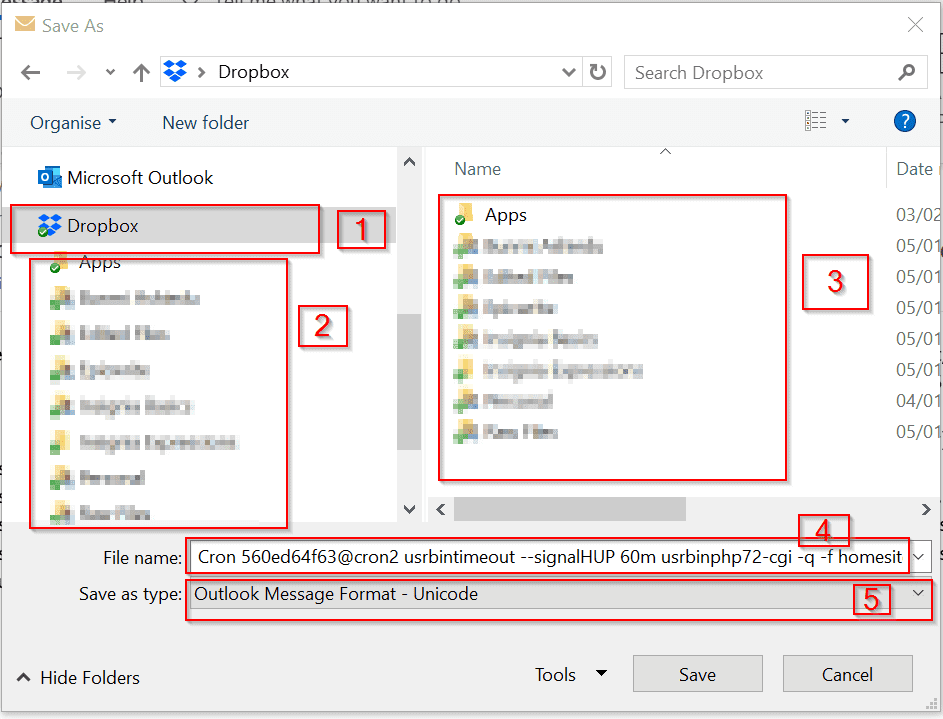
- Next, expand or select Dropbox to reveal available folders in your Dropbox [1]. Then select the folder you wish to save your email to [2] or [3]. Name your file [4] and finally, select a format using the drop-down in [5]. Then, click Save.
How to Save to Dropbox from Word
To save to Dropbox from Microsoft Word, follow the steps below:
- From the Word document, click File then select Save As.
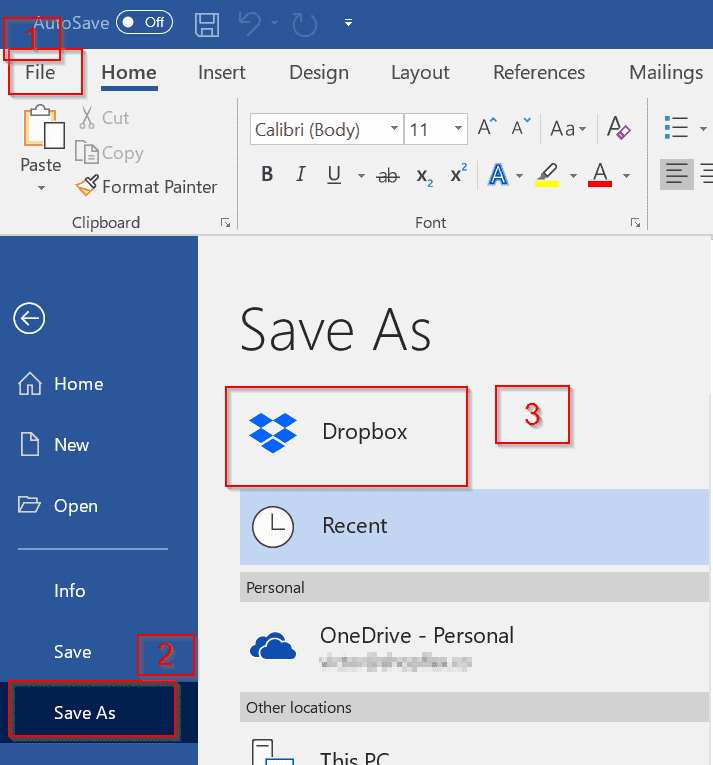
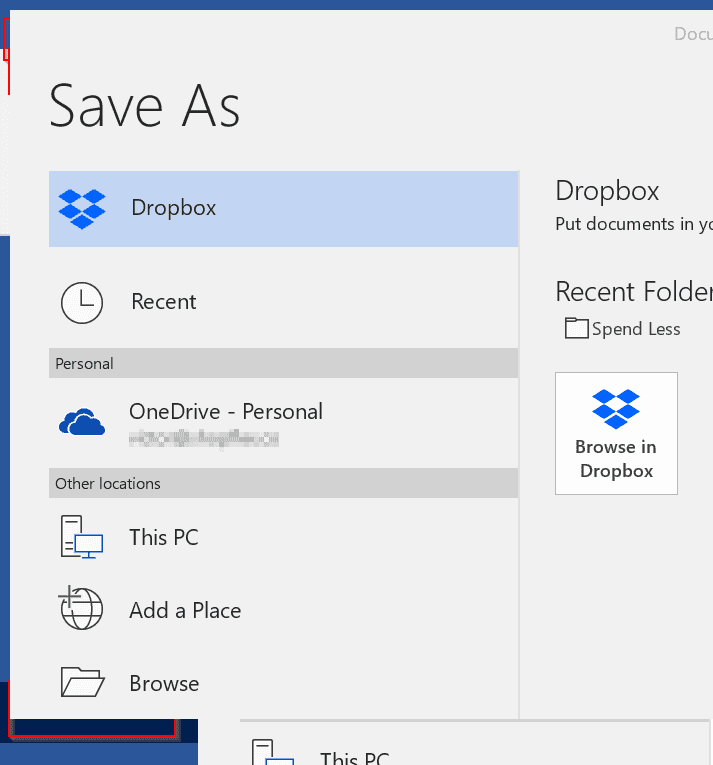
- Next, click Dropbox then click Browse in Dropbox.
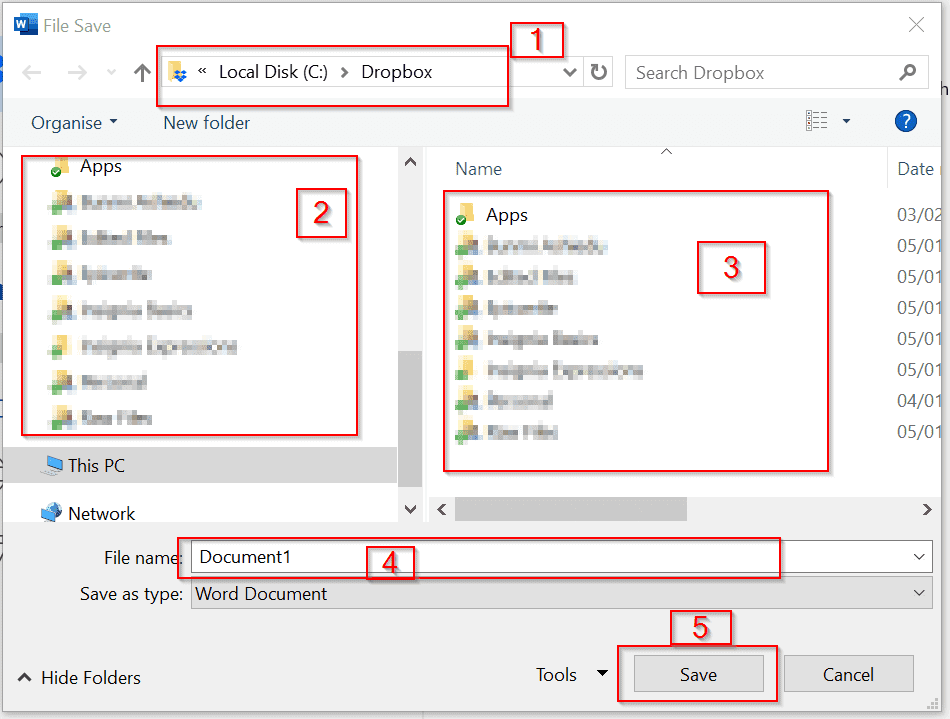
- When you clicked Browse in Dropbox, your Dropbox login folder opens automatically. Select a folder to save your Word file [2] or [3]. Then give the document a name [4]. Finally, click Save [5].
Change Dropbox Desktop Settings On Windows 10
Dropbox login app has a lot of other settings you can change or modify. This section of the guide will show you how to make changes to your Dropbox App settings for Windows 10.
Unlink Dropbox from Your Computer
Sometimes you may need to unlink your Dropbox login from your computer. The reasons for this may vary. One reason may be that you want to link another Dropbox account.
Follow the steps below to unlink a Dropbox account from your computer.
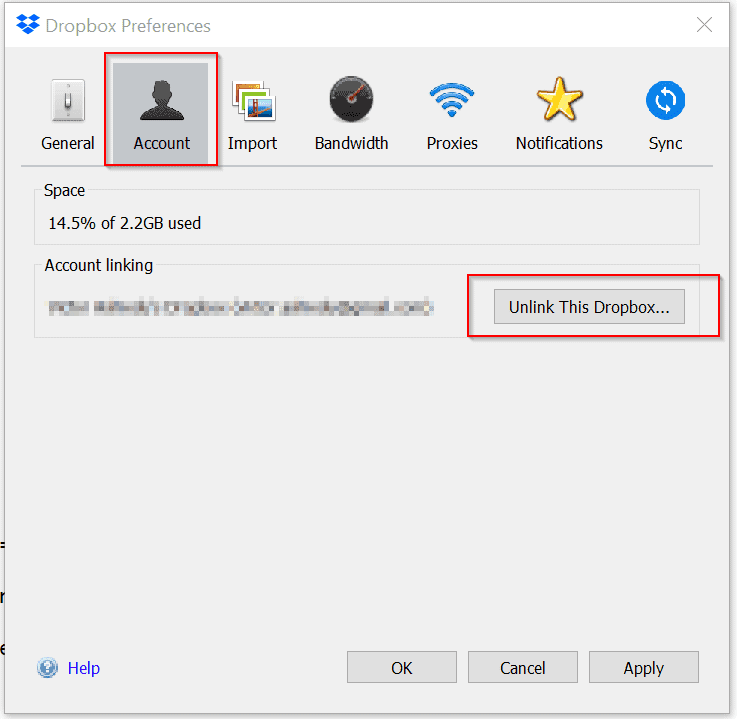
- Open Dropbox Preferences (Click Dropbox icon, then click Settings (circle gear), then click Preferences.
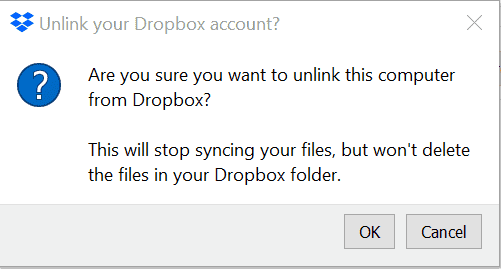
- When Dropbox Preferences opens, click the Account tab. To unlink the current Dropbox Sign in account, click Unlink This Dropbox then click Ok to confirm it.
Import Photos to Dropbox Settings in Dropbox Login App
You can configure how Dropbox interacts with devices that store photos and videos on your computer. For example, you can determine how Dropbox responds when you take a picture with camera on your computer.
This section will show you how to configure how Dropbox login App behaves with images and videos.
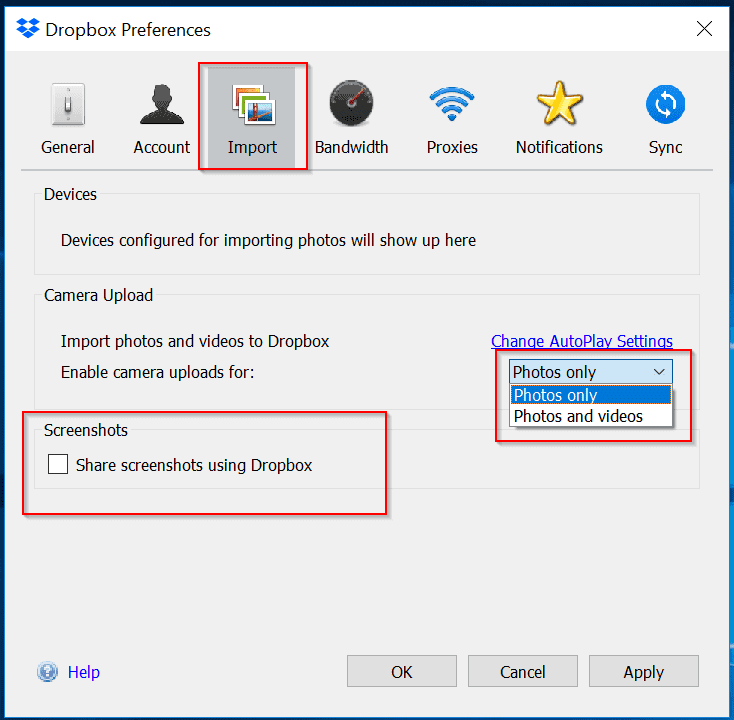
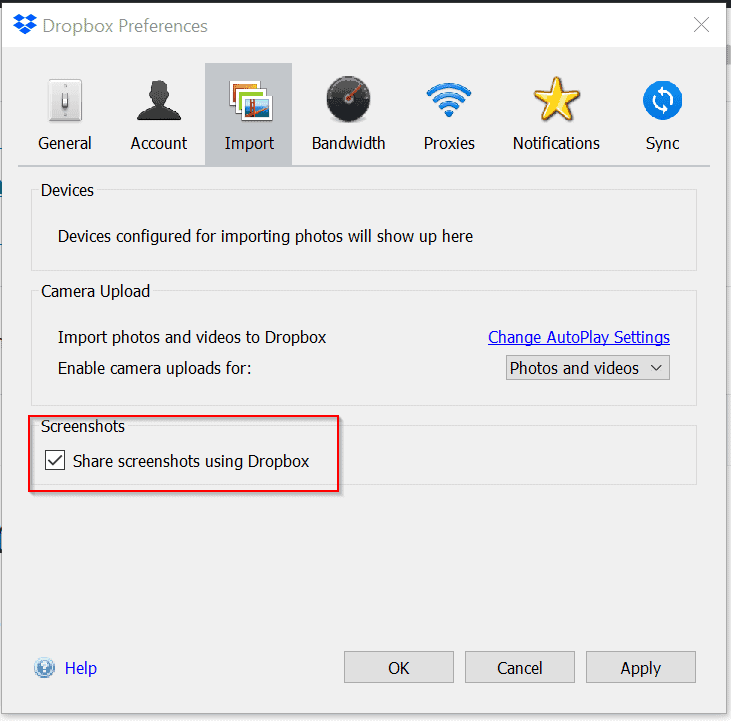
- From the Dropbox Preferences, click the Import tab. On the drop-down beside Enable camera uploads for:, select whether to enable for Photos only or for Photos and videos.
Share Screenshots Using Dropbox Login App
One other setting you can configure on the Imports tab of the Dropbox login app Preferences is whether you want to Share screenshots using Dropbox. If want Dropbox to prompt you to save your screenshots to Dropbox, check the box beside Share screenshots using Dropbox.
Limit Dropbox Bandwidth, Change Dropbox LAN Sync Settings
If Dropbox sync is taking more bandwidth than you would want, you can limit the bandwidth Dropbox sync uses.
Follow the steps below to limit Dropbox bandwidth:
- On the Dropbox login App Preferences, click the Bandwidth tab. On this tab you can limit the Download rate (the rate Dropbox downloads files from your Dropbox account) – box [1]. You can also configure the Upload rate (the rate Dropbox uploads files from your computer to your Dropbox account) – box [2].
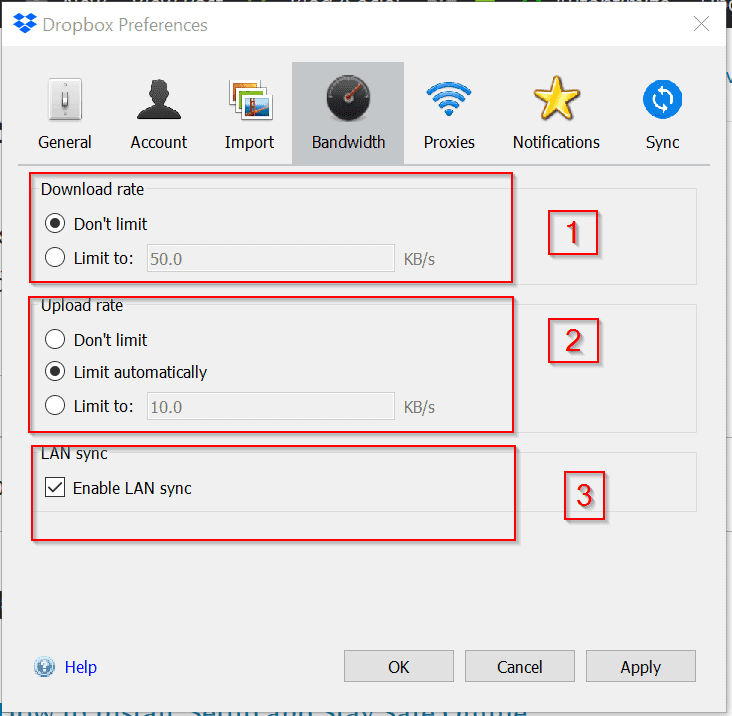
- Finally, you can Enable Dropbox LAN sync
What is Dropbox LAN Sync?
Dropbox LAN sync feature allows you to increase the speed Dropbox syncs file within a LAN. If Dropbox detects that files exists exists on your LAN (Local Area Network), it dramatically increases the rate at which the files are synced.
LAN sync only works if computers syncing files are on the same network subnet. An example is computers that connect to the internet using the same Wifi.
Dropbox Proxy Settings
If you connect to the internet via a proxy server, you may need to enter the proxy server name or IP address. This will enable Dropbox to connect to the internet via the proxy server.
To configure Dropbox proxy settings, on the Dropbox login app Preferences, click the Proxies tab.
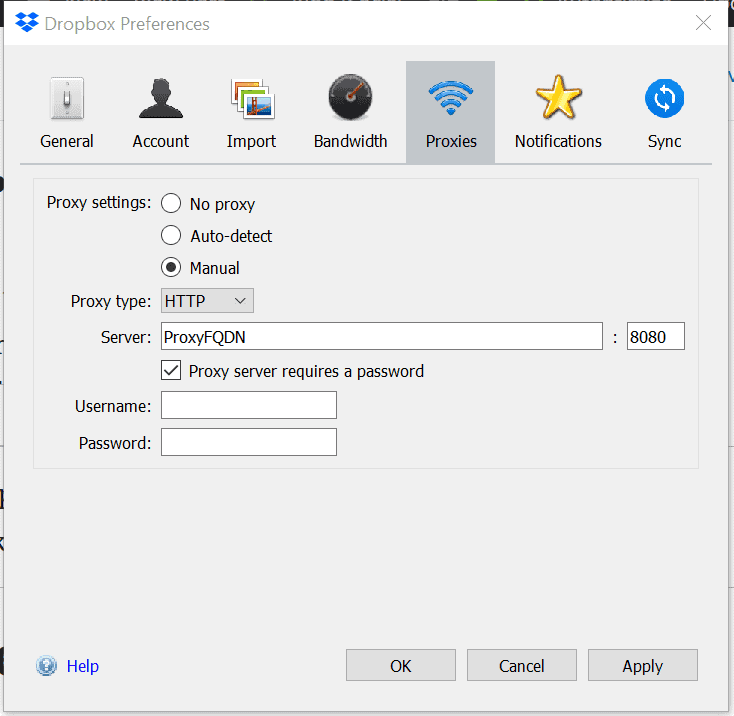
There are three options:
No Proxy: Select this option if you do not connect to the internet via a proxy server
Auto-detect (Default): This is the default setting. If this option is selected, Dropbox app will automatically detect your proxy server.
Manual: Chose this option if you wish to enter your proxy server manually. When you select the Manual option, you have an option to specify the proxy type. Then you specify the Fully Qualified Domain Name of the proxy server. You also need to specify the port – currently 8080 in the image above.
Finally, if your proxy server requires a password, check the box beside Proxy server requires a password. Then enter a username and password to connect to the server.
Change Dropbox Notifications Settings in Dropbox Login App
The Notifications tab of the Dropbox App Preferences setting is where you determine what notifications to receive from the App.
To configure Notifications, click the tab.
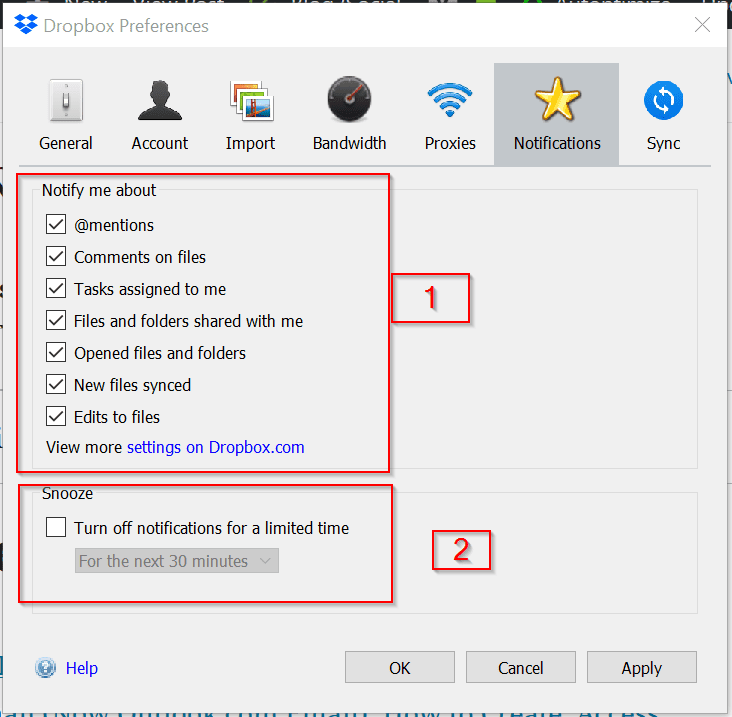
In the part labelled [1] Notify me about, check notifications you wish to receive. Then uncheck notifications you do not wish to receive.
Alternatively, if you wish to snooze (turn off notifications for a limited period of time, check the box Turn off notifications for a limited time. Then select how long you wish to stop notifications for.
Move Dropbox Folder
Earlier in this guide I mentioned that I strongly recommend changing the location of your Dropbox login App folder.
To change the location Dropbox login App syncs your files to:
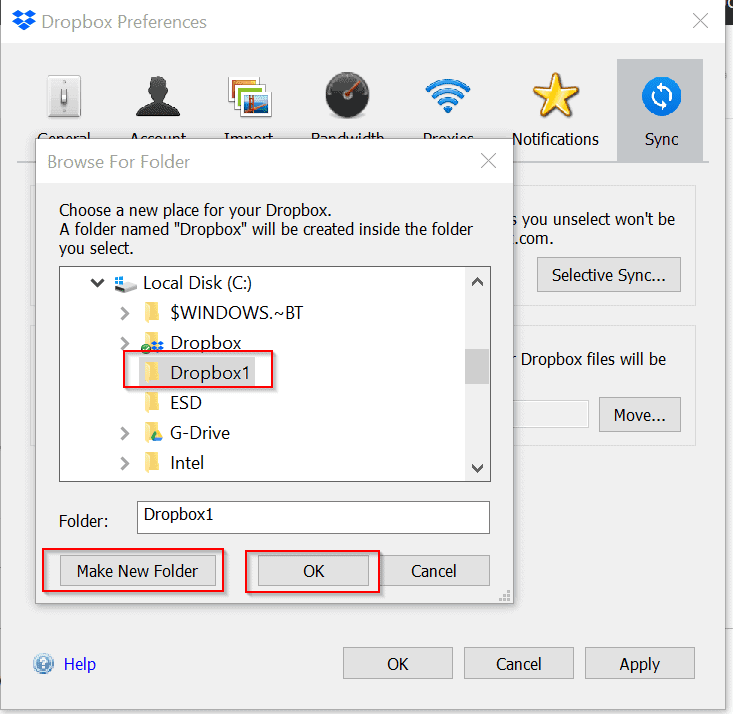
- On Dropbox Preferences, click the Sync tab.
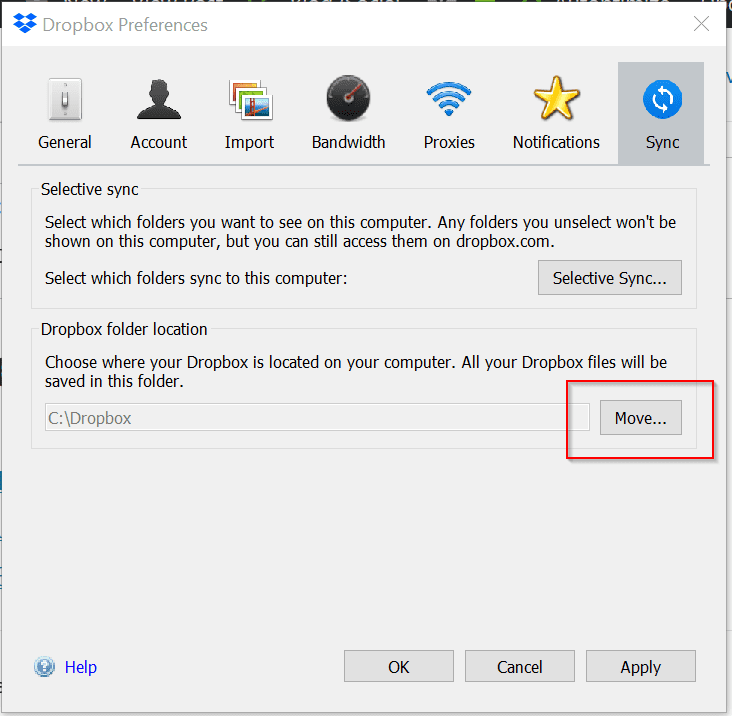
- Then click Move (highlighted). Navigate to the folder you wish to change to and highlight it. Then click Ok. You may also create a new folder. To save your changes, on the Dropbox Preferences Sync tab, click Ok.
Pause or Exit Dropbox Sync
Finally, for this section, I want to quickly show you how you can pause Dropbox sync or completely exit the Dropbox login app.
To complete any of these tasks:
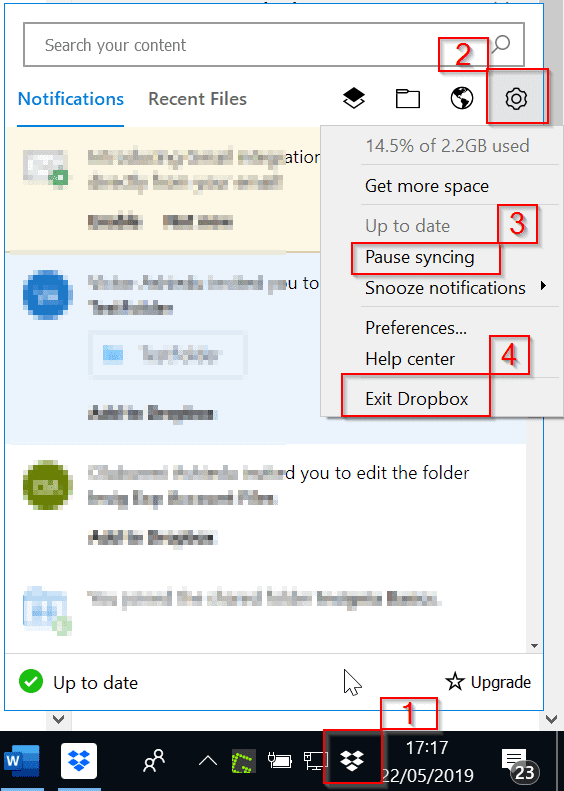
- Click the Dropbox app icon on the right corner of the taskbar [1]. Then click Settings [2].
- To pause Dropbox sync, click Pause syncing [3]
- To completely exit Dropbox app, click Exit Dropbox.
Dropbox Account Upgrade Options
In the final part of this guide, I will show you options available for Dropbox upgrade. The section will also answer the questions “Why Upgrade Dropbox”?, and “How Do I Upgrade Dropbox Storage”?
Available Upgrade Options Compared
As at time of writing, there are two Dropbox upgrade options available for individuals and two for teams (business).
Upgrade Options for Individuals
In the table below, I have compared Dropbox Basic (the free version), Dropbox Plus and Dropbox Professional. To make it easy to understand, I only showed features that will help you decide whether you need to upgrade or not.
| Dropbox Feature | Basic (free) | Plus | Professional |
| Cost (If you pay Monthly) | $0 | $9.99 / mo | $19.99 / mo |
| Cost (If you pay Anally) | $0 | $8.25 / mo | $16.58 / mo |
| Storage | 2 GB | 1 TB (1,024 GB) | 2 TB (2,048 GB) |
| Smart Sync | ✖ | ✖ | ✔ |
| Shared folders and links | ✔ | ✔ | ✔ |
| Camera upload | ✔ (Only with desktop client) | ✔ | ✔ |
| Remote device wipe | ✖ | ✔ | ✔ |
| File recovery | Up to 30 Days | Up to 30 Days | 120 Days Data Available |
Important Facts from the Comparison Table
Cost: If you chose to pay annually, you save $20.88 on the Plus subscription and a whopping $40.92 on the Professional subscription. If you have the cash to pay upfront for 1 year, the savings may well worth it.
Storage: With the Basic (free) subscription you get just 2 GB. You can store approximately 1,500 photos. If you upgraded to Plus, you get 1,024 GB of storage. This translates to about about 768,000 photos! The Professional subscription doubles this. For an extra $10 / mo you can store up to 1,536,000 (1.5 million) photos!
Smart Sync: Earlier in this guide, I discussed Smart Sync. The Professional subscription will give you this feature.
Remote device wipe: If you store sensitive files on your Dropbox and sync files to your mobile device, this feature may be very useful to you. Available in the Plus and Professional subscriptions, Remote device wipe gives you the ability to wide your data from a mobile device remotely.
File recovery: Most people do not think about data recovery until something goes wrong! If you mistakenly delete an important wedding photo from Dropbox and you want it back, Dropbox can allow you recover the photo. For the Basic (Free) and Plus subscriptions you can recover your file deleted in the last 30 days. If you sign up for Professional, Dropbox can keep your deleted files for up to 120 days!
Upgrade Options for Teams (Dropbox for Business)
Dropbox for Business gives advanced features specifically for managing teams. To compare the features of Dropbox Business, click Dropbox Business Plans Comparison link.
I hope you found this Itechguide Helpful. Take a few minutes to share your thoughts with the “Leave a Reply” form at the bottom of this page.
Alternatively, you can respond to the “Was this page helpful?” question below.