What is PortalOffice365?
PortalOffice365 (portal.office.com) is a Microsoft cloud-based portal that allows administrators to create and manage users and groups. The portal also provides option to manage billing, licenses, get support and more.
In this guide, you will learn how to:
- Login to PortalOffice365 (portal.office.com)
- Add License to Your PortalOffice365 Account
- Create New Users and Assign Licenses
- Reset User Password in PortalOffice365
- Create 365 Shared Mailbox
Login to portal.office.com
To login to PortalOffice365, follow the steps below:
- Open portal.office.com in your browser. Then login with your Office 365 admin account. A page similar to the one below will open.
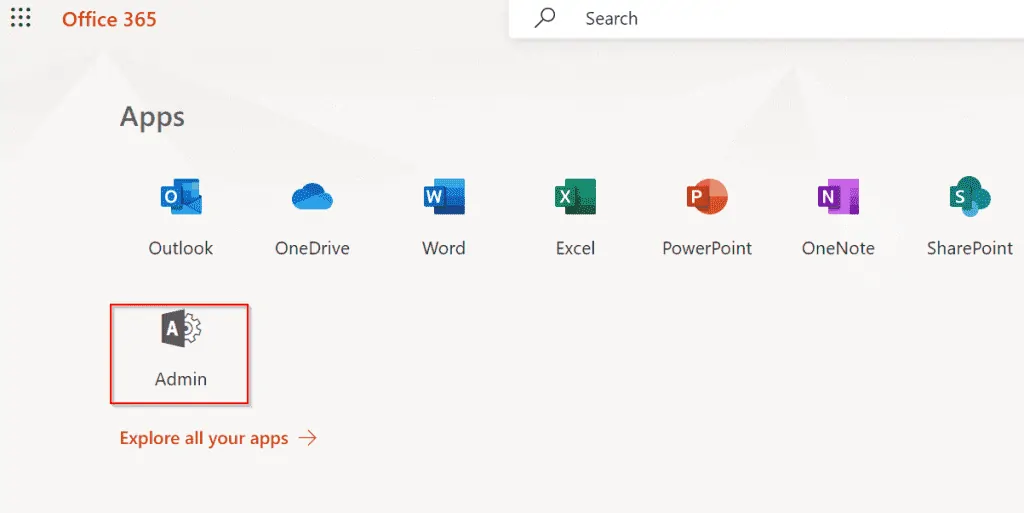
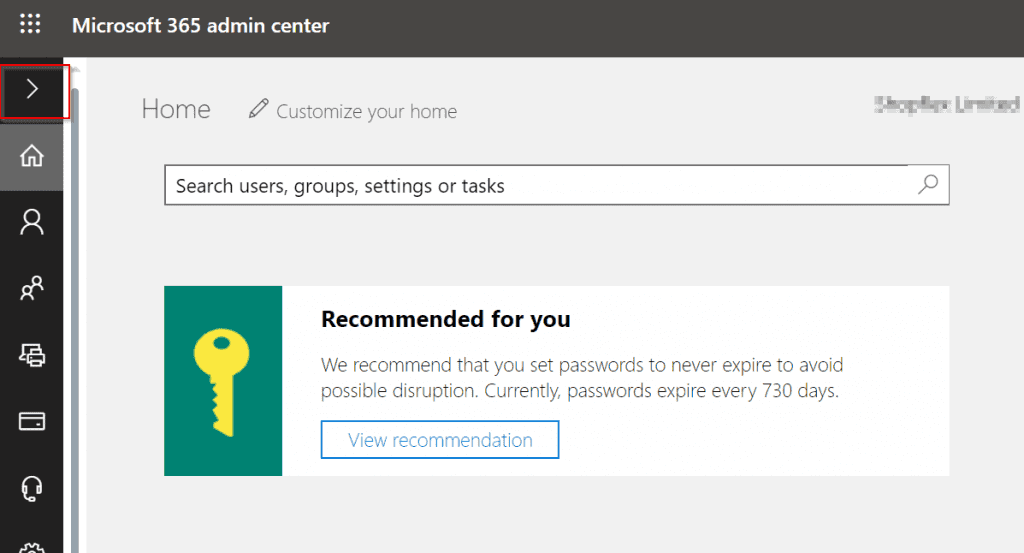
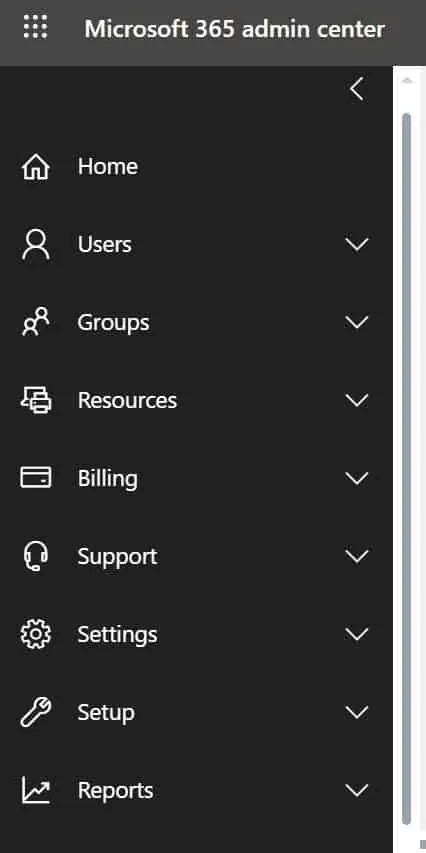
- To open admin center, click Admin. 365 Admin Center will open. Click the highlighted forward arrow to expand it. The admin center options will become visible (second image below).
How to Add 365 License in PortalOffice365
From time to time you may require additional office 365 licenses. A license is required for each user that accesses office apps and email.
Before you add additional licenses, you must have existing 365 product.
To add additional licenses, follow the steps below:
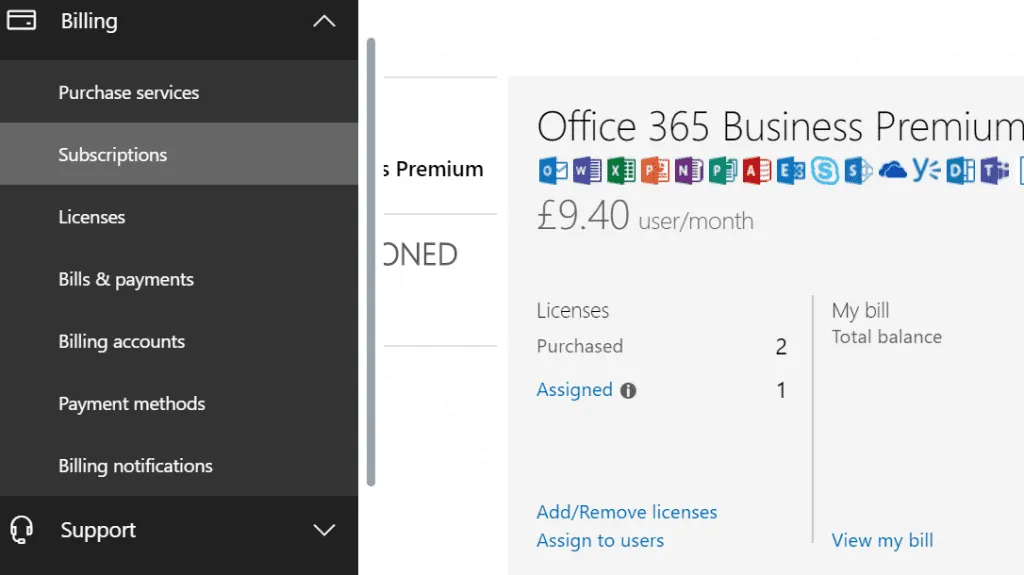
- Expand Billing [1], then click Subscriptions [2]. The part of the image labelled [3] is the available product. You will be adding additional licenses for this product.
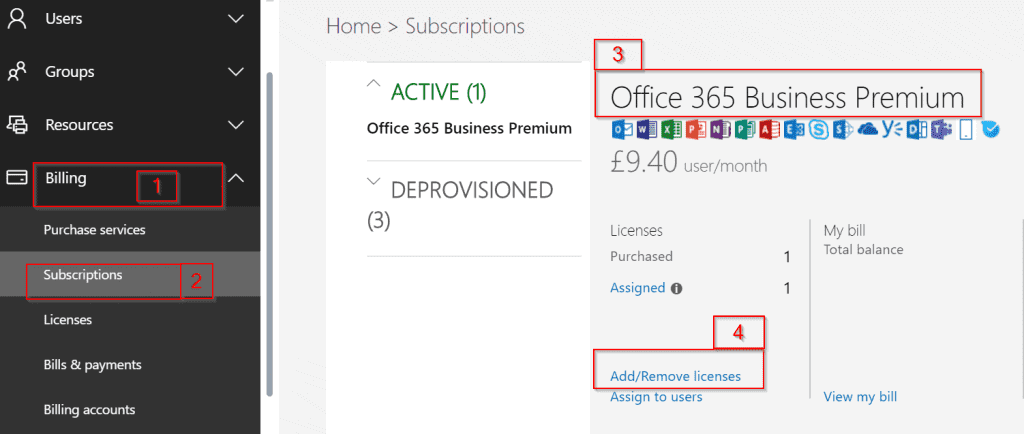
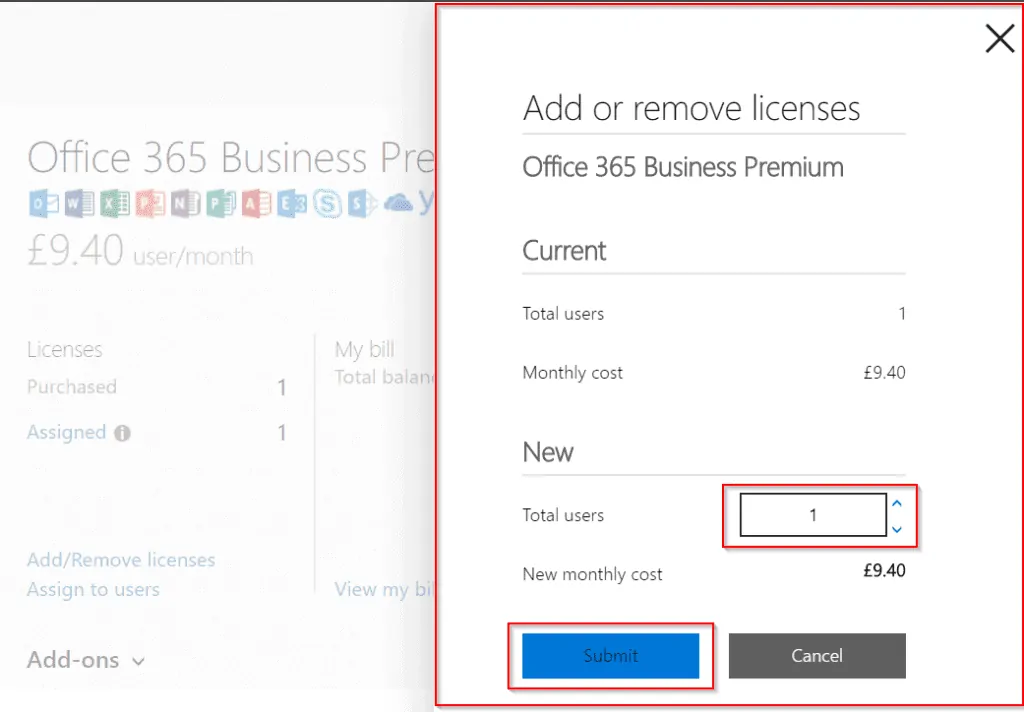
- To add additional license(s), click Add/Remove licenses [4]. When you click Add/Remove licenses the portion of the image highlighted below loads. Type the number of licenses (beside Total users) you wish to have and click Submit. You could also use the up arrow to increase the number licenses.
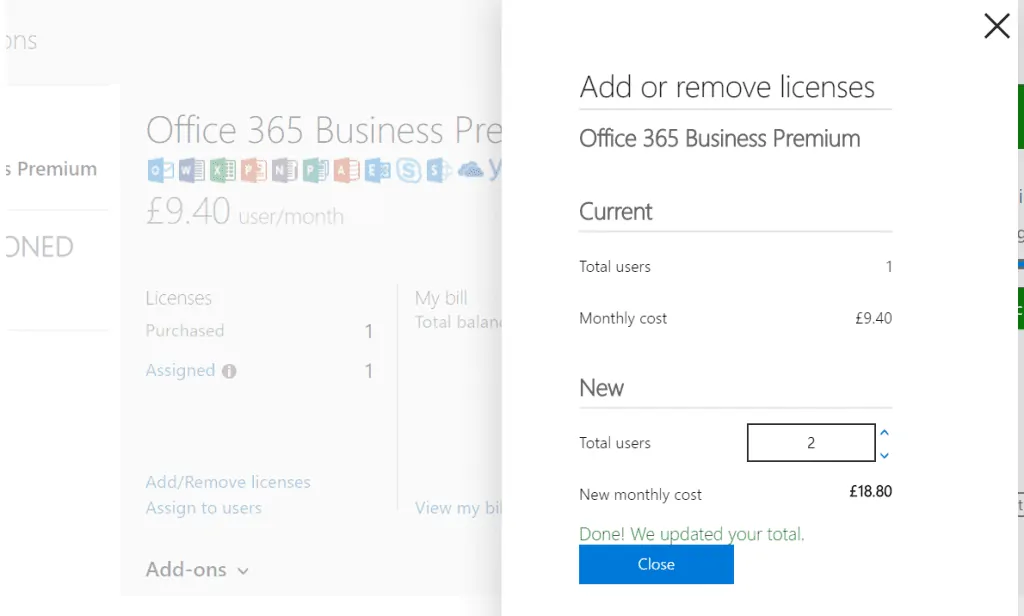
An additional license has now been added. Click Close. There are now 2 licenses but only one assigned license.
Create New Users and Assign Licenses
One common PortalOffice365 admin tasks is to create new users.
Below are the steps to create a new user:
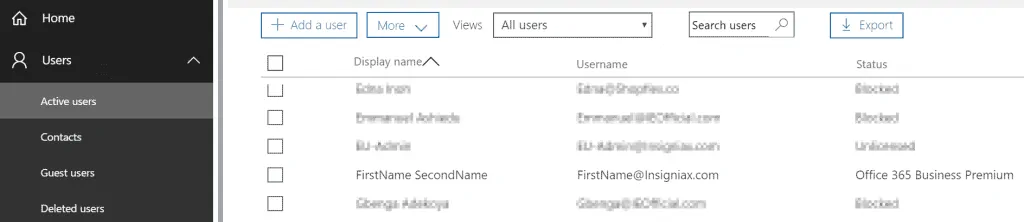
- In PortalOffice365 expand Users, then click Active users.
If you have created users in Active Directory, creating users in 365 is very similar.
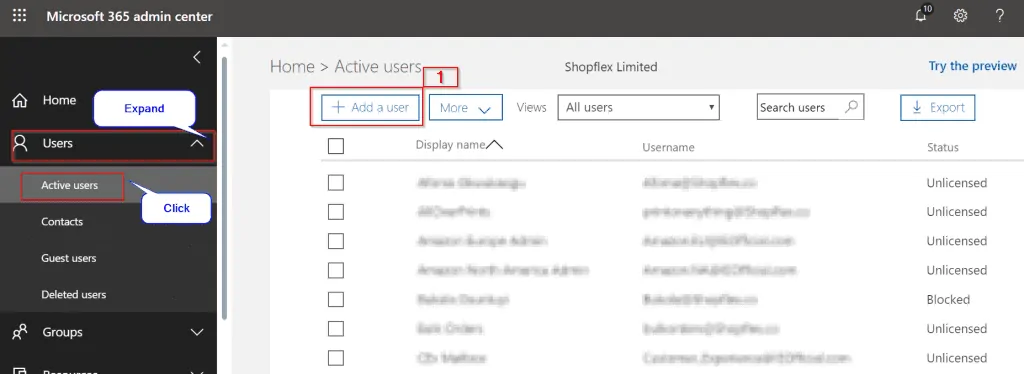
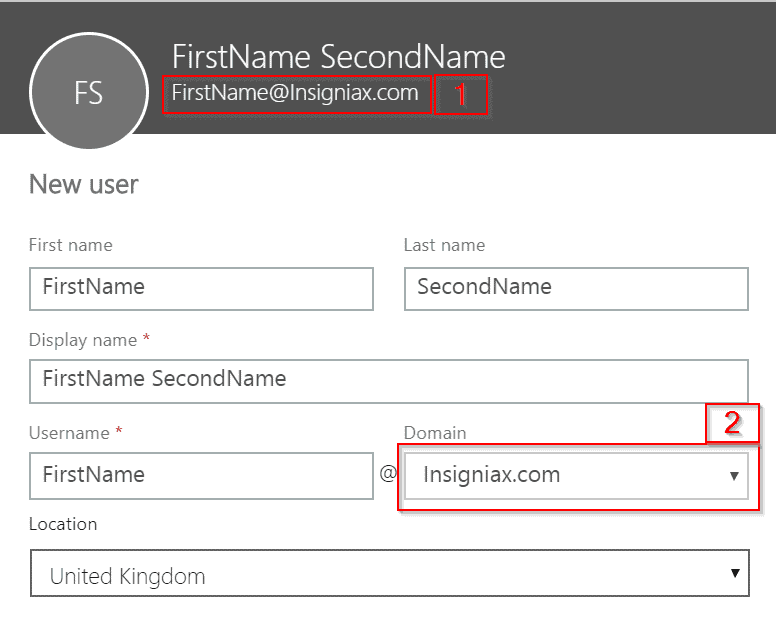
- Click Add user. The form shown below loads. Enter the details. Fields marked with asterisks are required.
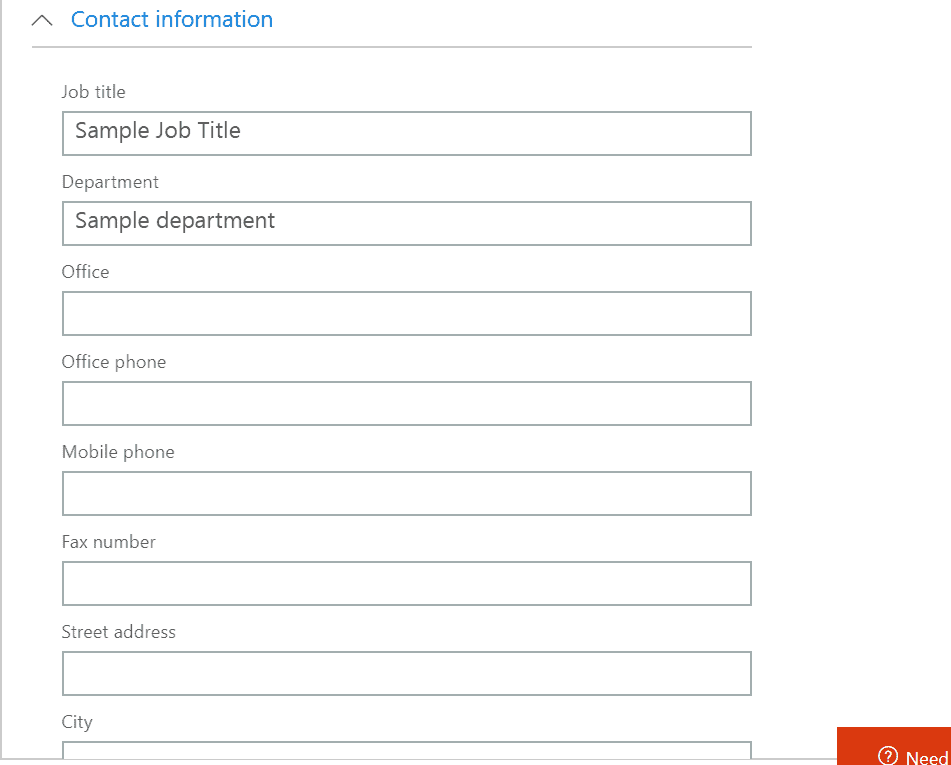
- Scroll down then click Contact Information. Enter details in the Contact Information section. Click it again to minimize the section.
- Scroll down and click Passwords. Then select Auto-generated or Let me create the password. If you wish to force the user to change their password at first logon (Recommended), check the box beside Make this user change their password when they first sign in.
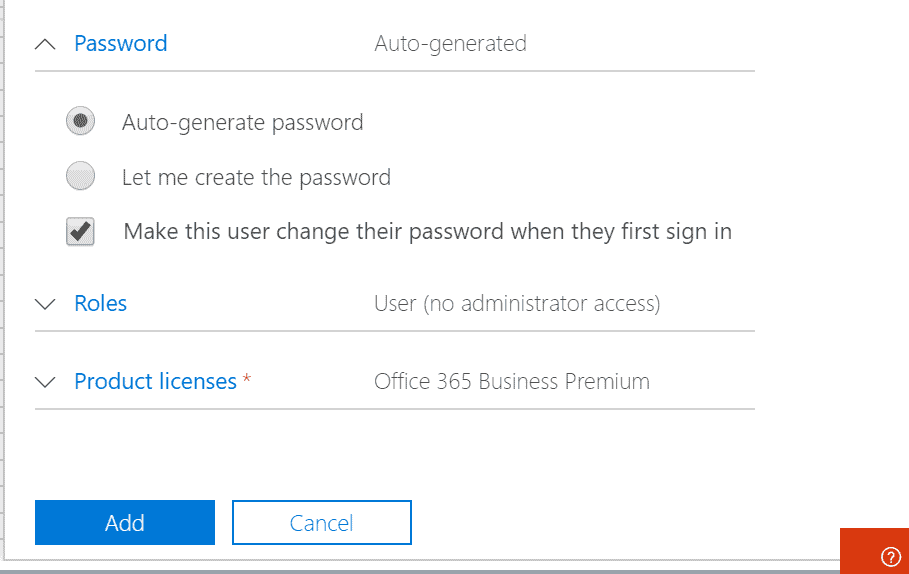
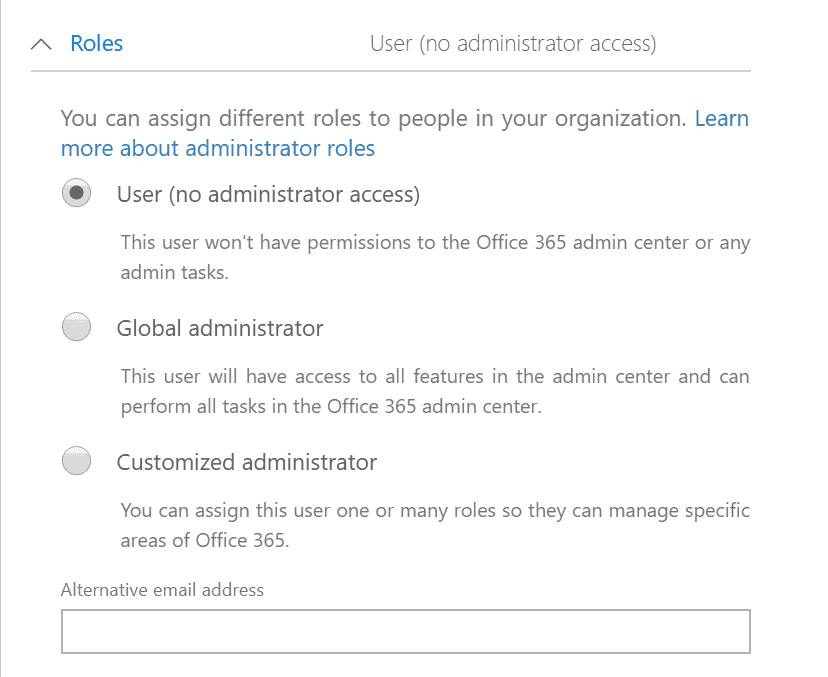
- Click Roles and assign the user a role. The role, User (no administrator access) is default. You could also assign the user Global administrator role. This is similar to Domain Admin role in Active Directory. Alternatively, you could assign the user a Customized administrator role.
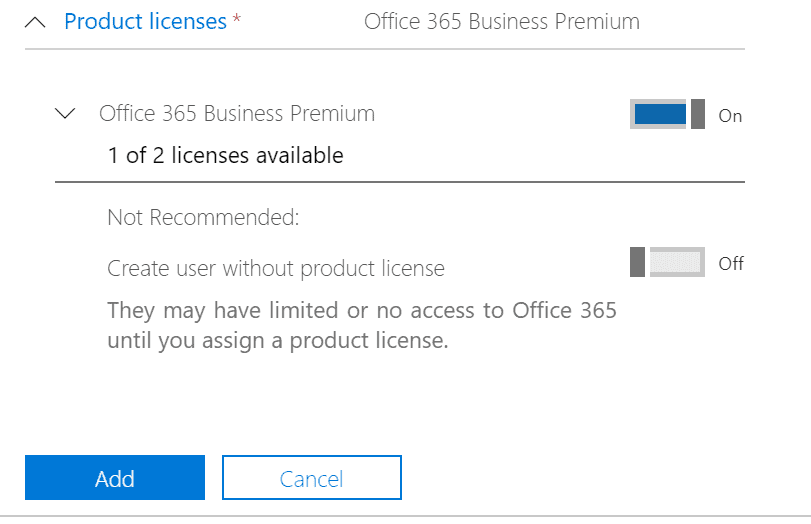
- Finally, click Product licenses. Here you could assign the user an existing license or create a user without a product license (Not Recommended). Once you have completed all steps, click Add.
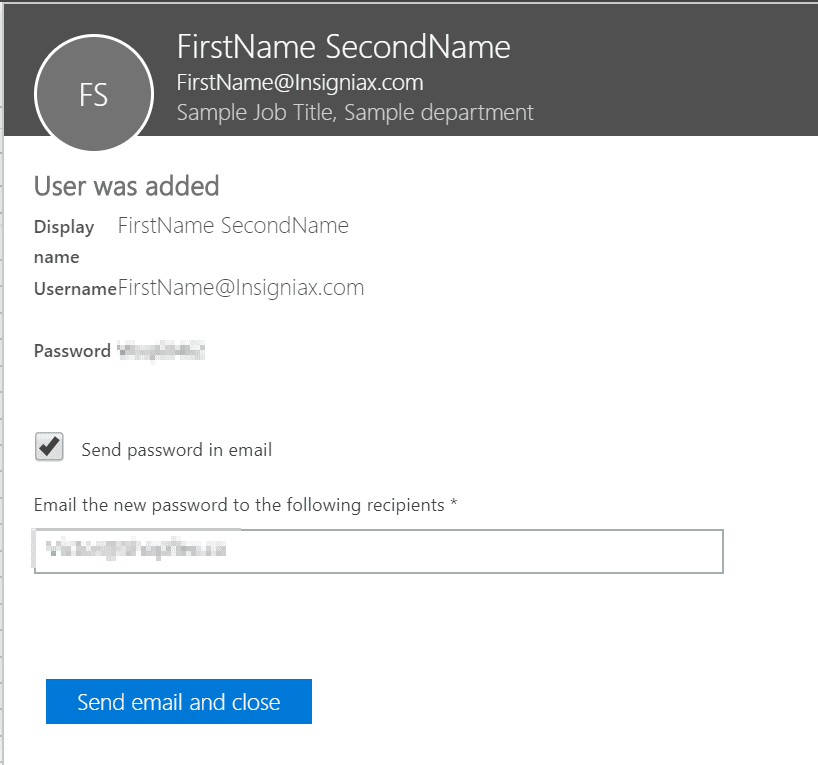
- When the user is created, you have the option to send the password to yourself or any email you chose. The user is now in the Active users list with a product license assigned (see the second image below).
Remove User License from PortalOffice365
If you need to remove a product license from a user, follow the steps below:
- Still on Active users node, click the user you wish to edit. The user’s information will be opened for editing.
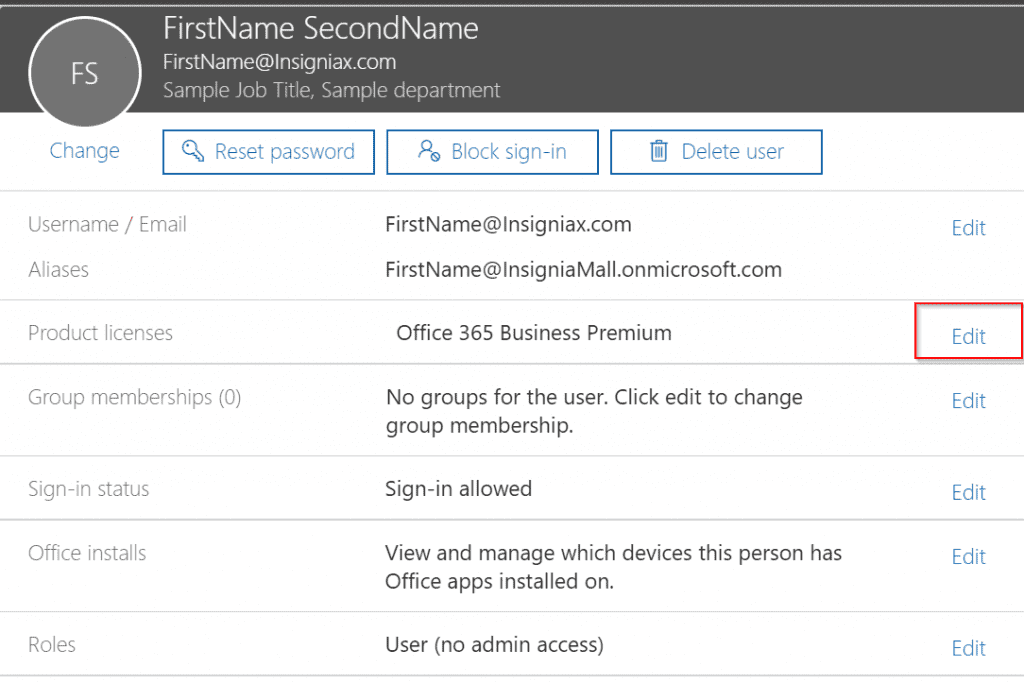
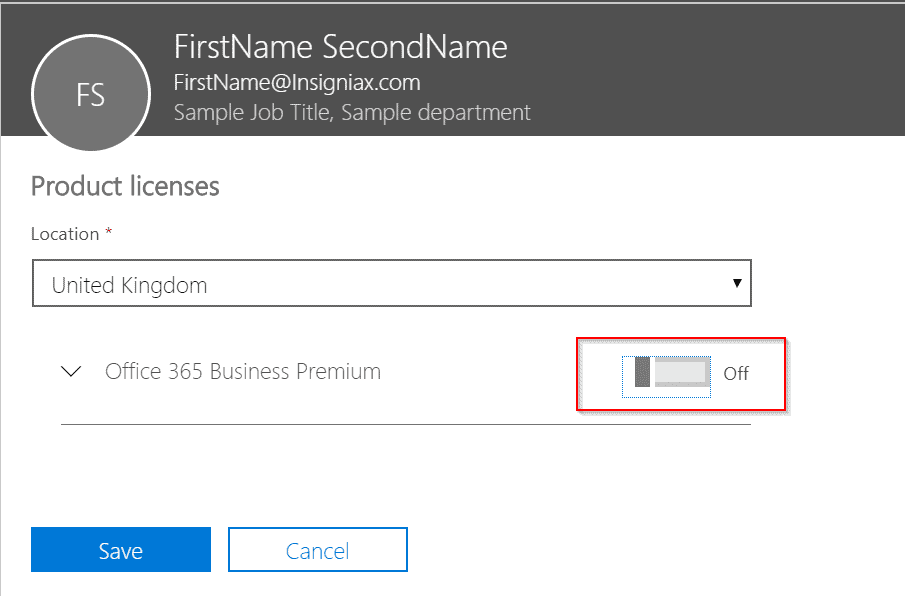
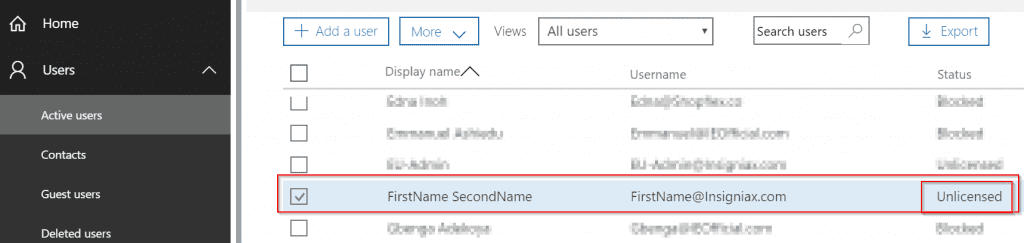
- Click the Edit button beside the product you wish to remove the license. Then flip the switch from on to off as shown below. Finally, click Save. The user is now unlicensed. See the second image below.
How to Block or Delete a User
If a user leaves your business and you do not wish to delete the user yet, you could block the user.
Below are the steps to block a user in PortalOffice365.
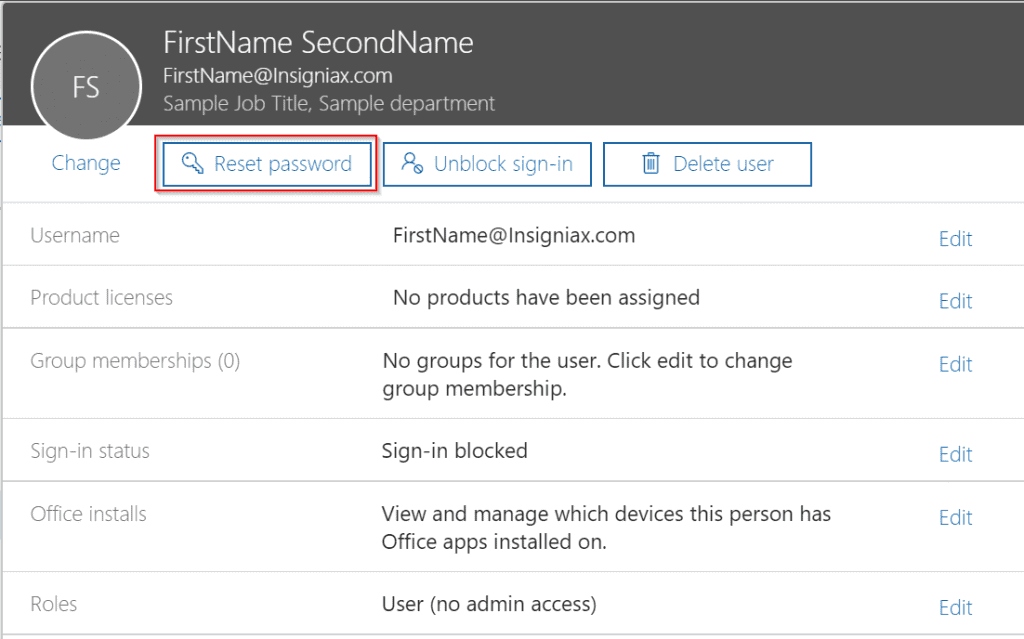
- From the Active users node, click the user you wish to edit.
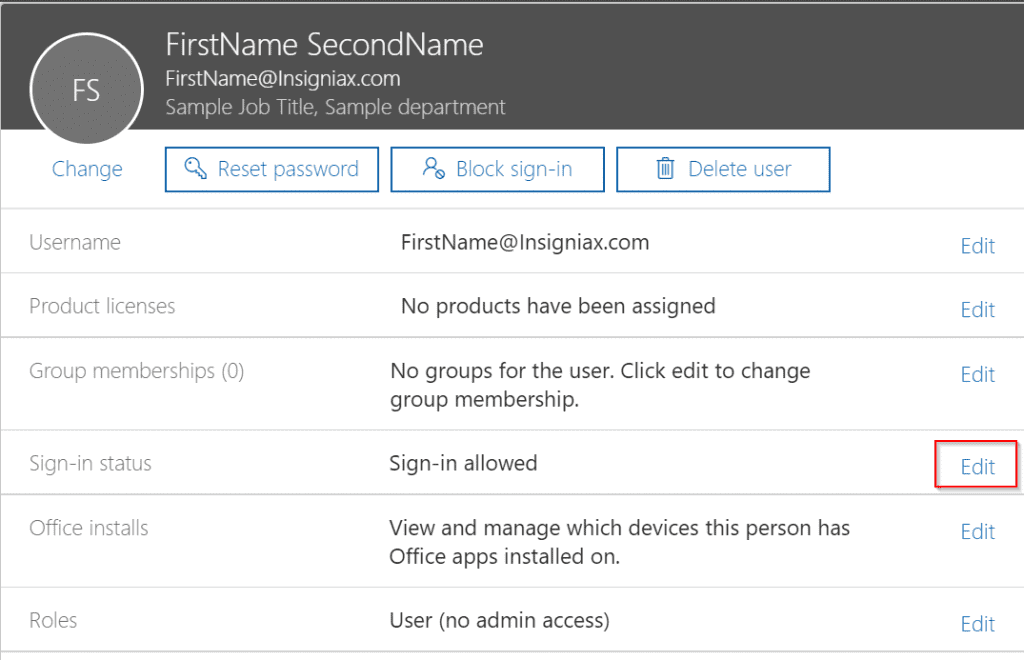
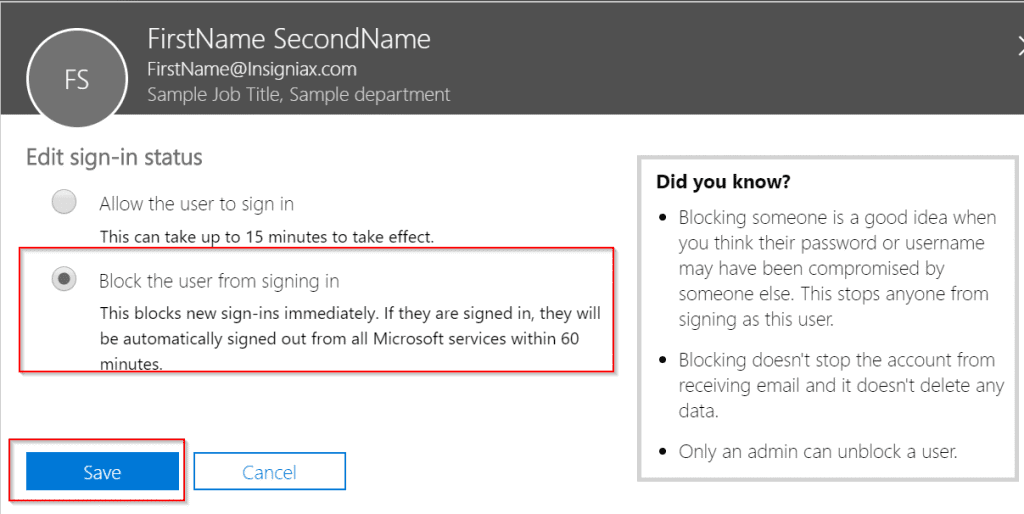
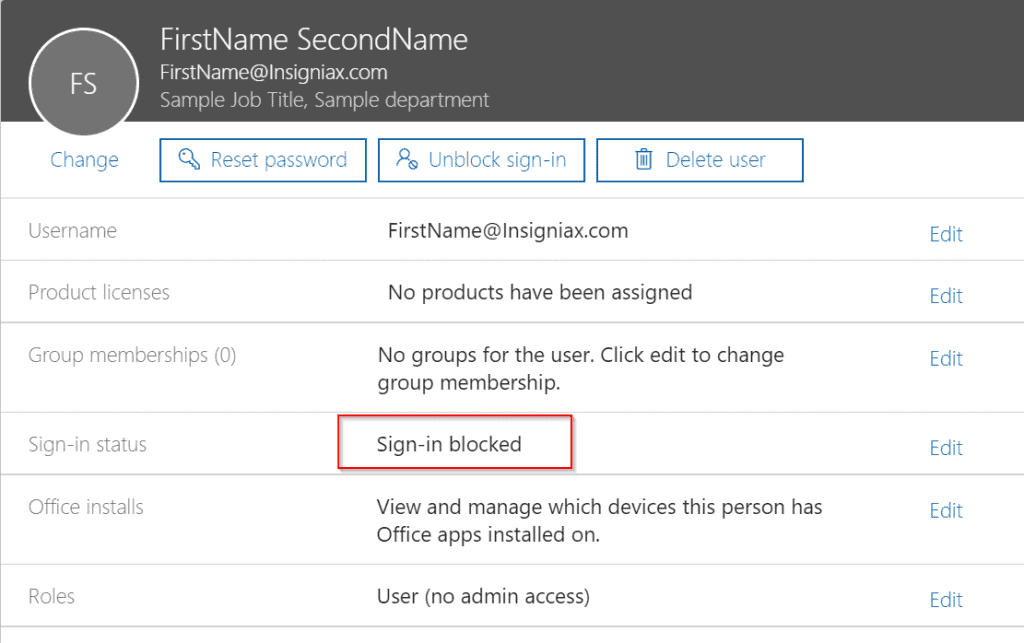
- Beside sign-in status, click the Edit button. Then select Block the user from signing in and click Save. Sign in status for the user is now Sign-in blocked (see the second image below).
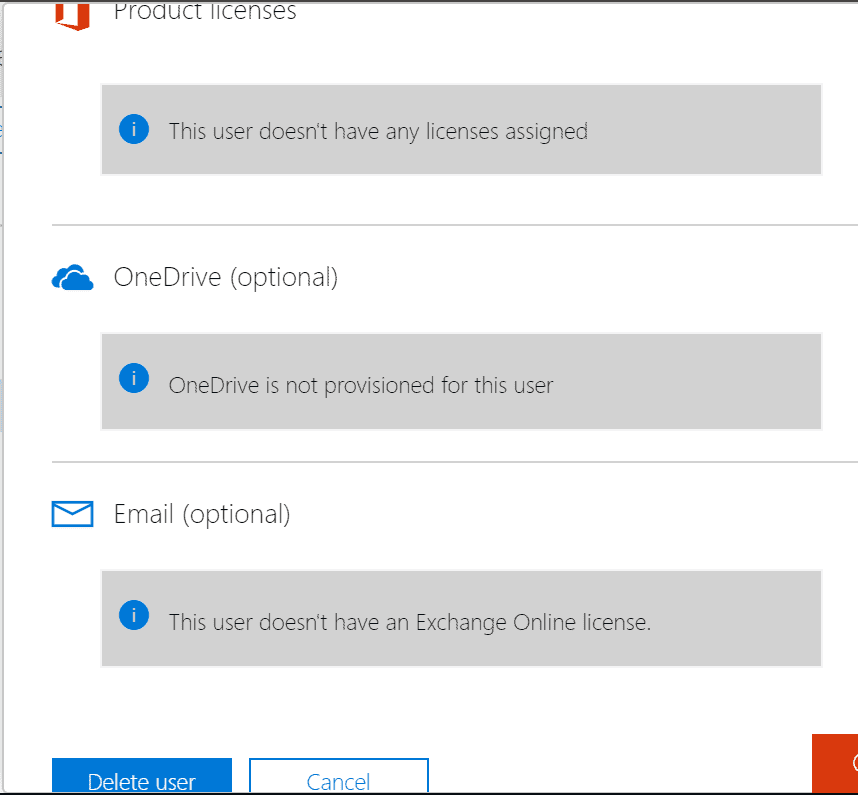
If you wish to delete a user, follow the steps below:
Before you delete a user, backup the users data first. For the full steps click Remove a former employee from Office 365
- Open Active users node then click the user you wish to edit.
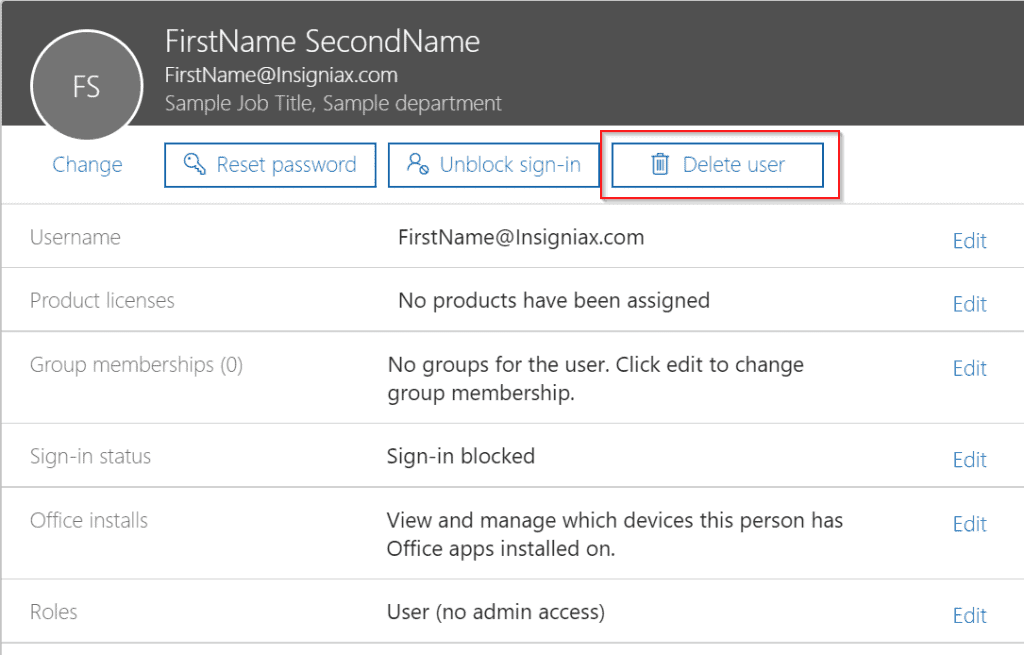
- To delete the user, click Delete user. Remove any licenses assigned to the user then click Delete user.
Perform User Password Reset in PortalOffice365
There are instances when you need to reset a user’s password. For instance if a user forgets her password. You may also need to reset a user’s password if they are no longer with the business.
To reset a users password, open the user for editing. Then click Reset password.
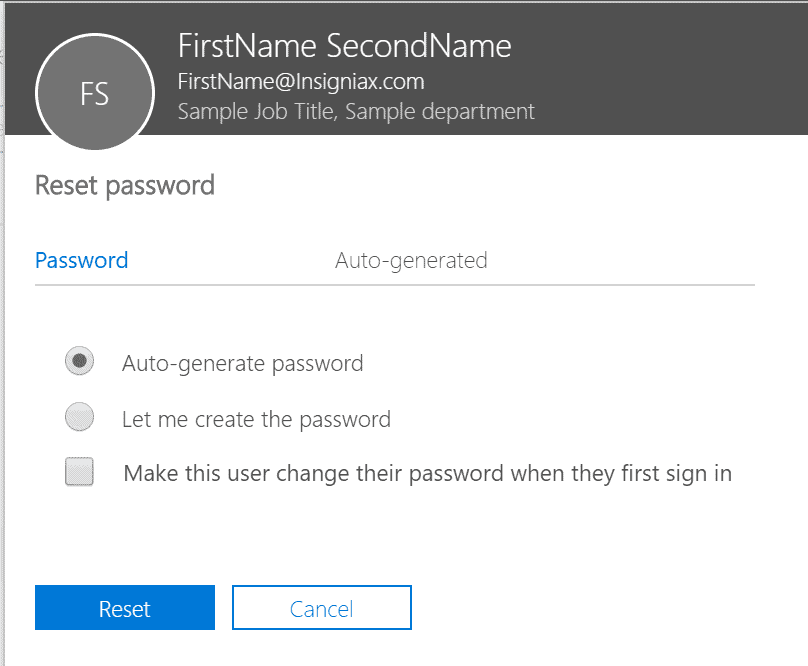
- You can then either Auto-generate password or create your own. Finally, click Reset.
How to Add Groups in PortalOffice365
Just like Active Directory, PortalOffice365 allows you to create groups and shared mailboxes. In this section, I will show you how to create a group. Next section will cover creating shared mailboxes.
Here is how to create a group in 365 portal.
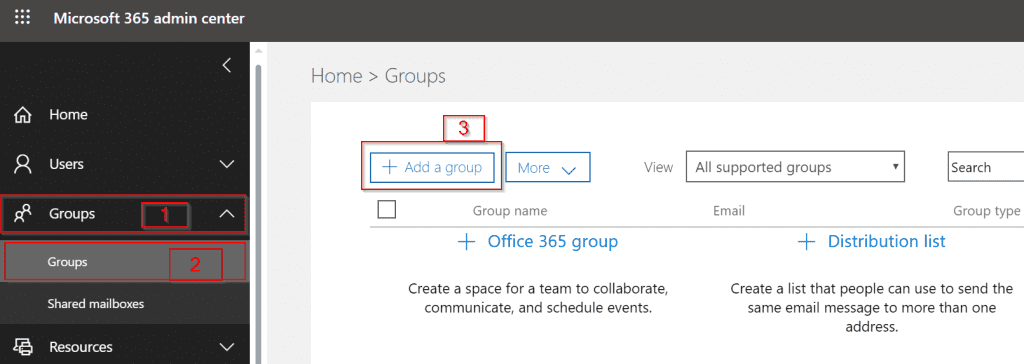
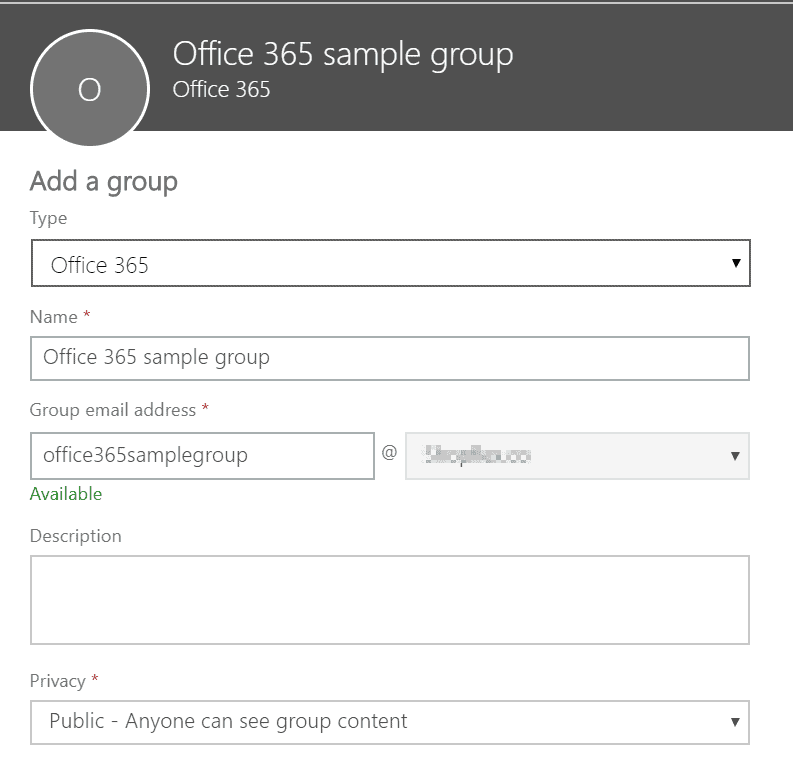
- Expand the Groups node [1], then click Groups [2].
- Enter the name and email address of the group.
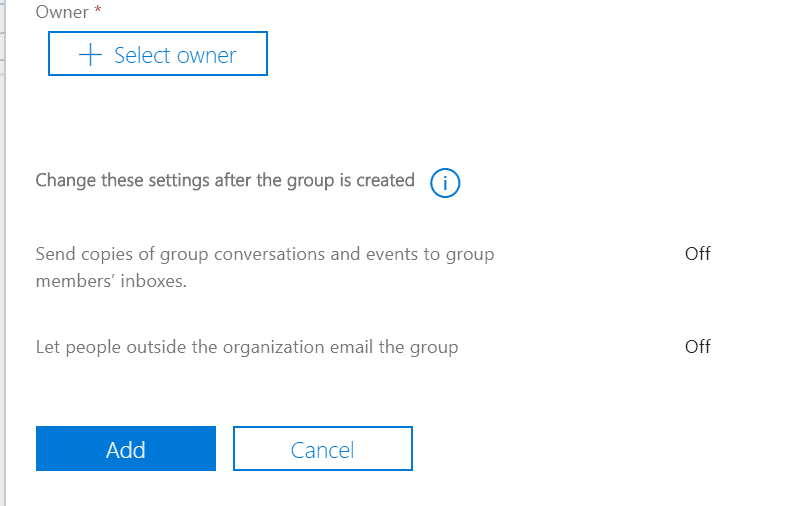
- Depending on the size of your screen, you may need to scroll down to click Select owner. Then select an existing user that will own the group. Finally, click Add.
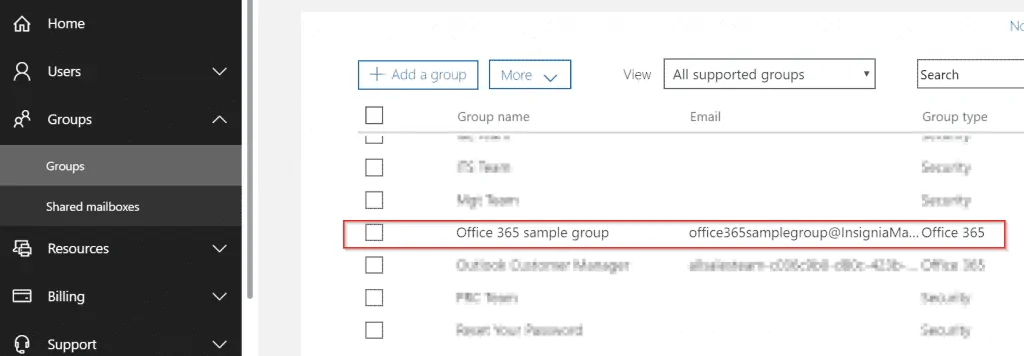
- The new group is now in the Groups list.
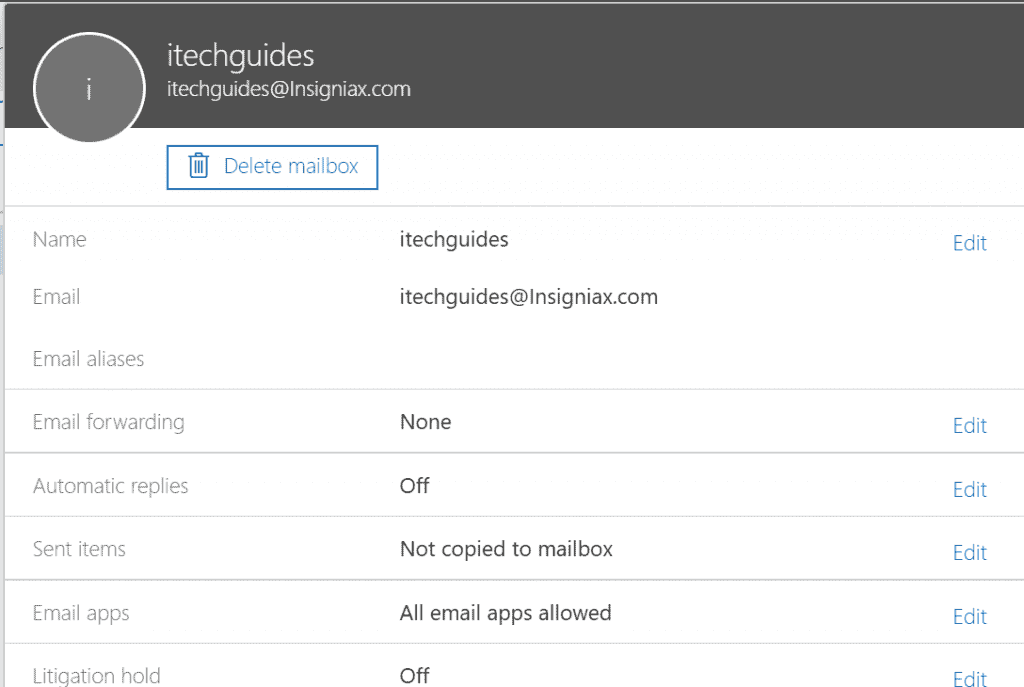
How to Create a Shared Mailbox
A shared mailbox allows multiple users to access the same mailbox. This is useful in a customer service situation where multiple people need to access a single mailbox.
For a user to access a shared mailbox, the user need to be granted access to the mailbox. Shared mailboxes automatically show up on Outlook for users with permission to access the mailbox.
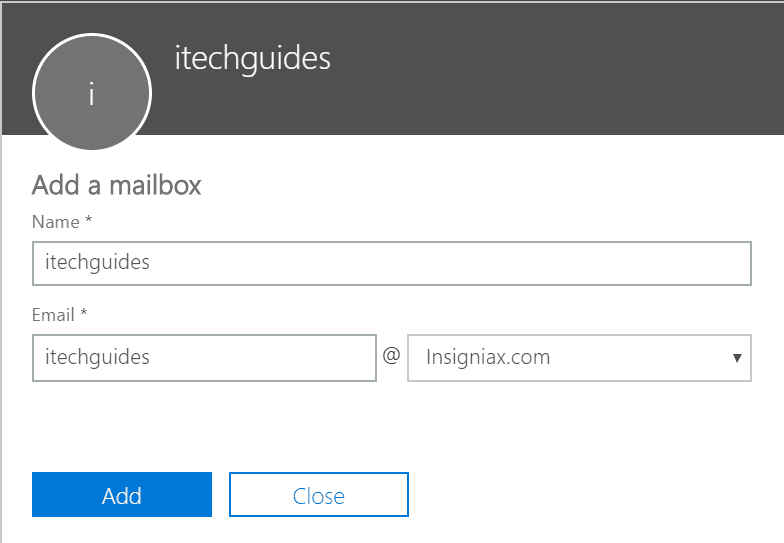
To create a shared mailbox, follow the steps below:
- Expand Groups [1], then click Shared mailbox [2].
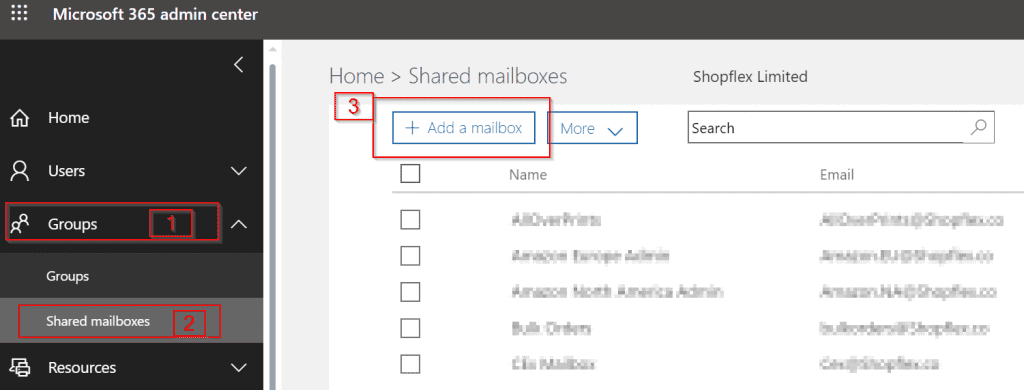
- To create a mailbox, click Add a mailbox. Then enter the name and email address of the mailbox . Finally, click Add.
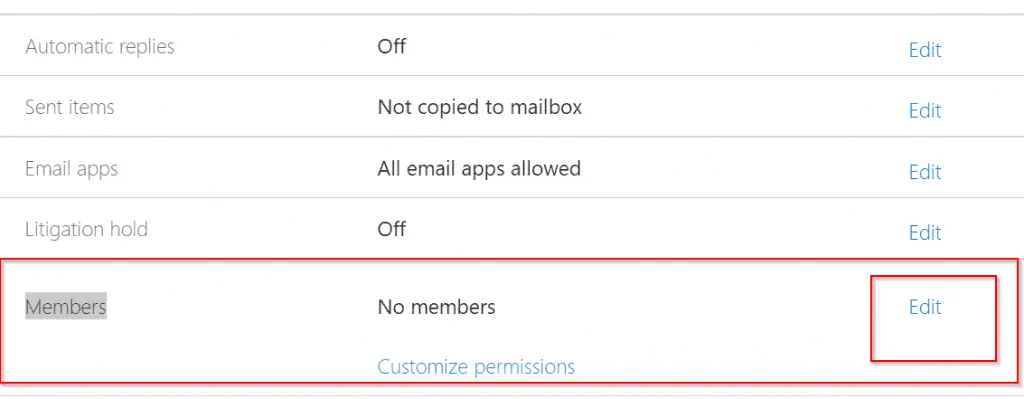
How to Grant Access to a Mailbox
As I said earlier, for a user to access a mailbox from outlook, the user need to be granted access to the mailbox.
Below are the steps to grant a user access to a shared mailbox:
- From the Shared mailbox node, click the mailbox you wish to edit.
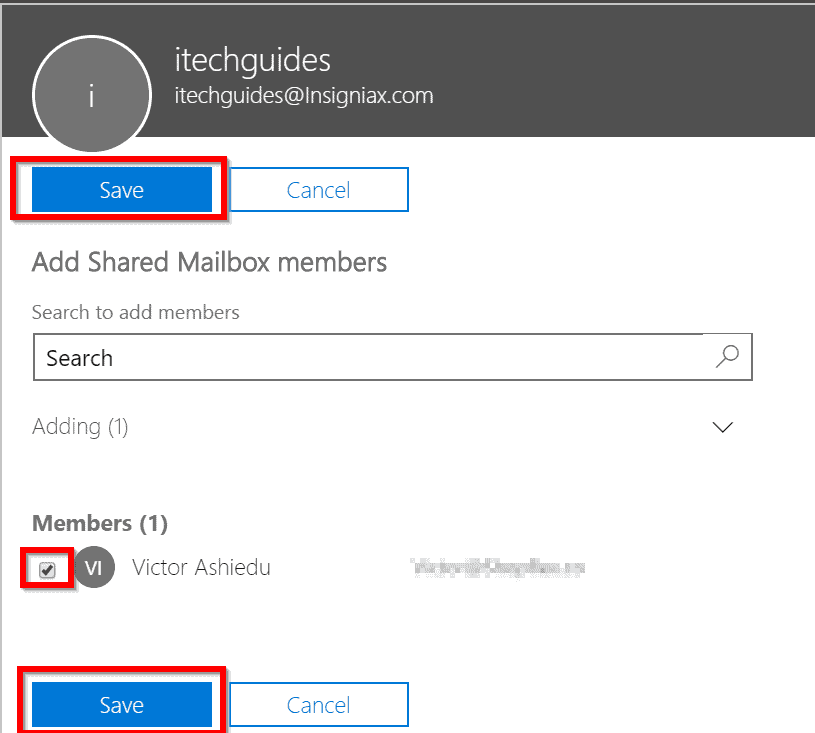
- Scroll down to Members and click Edit.
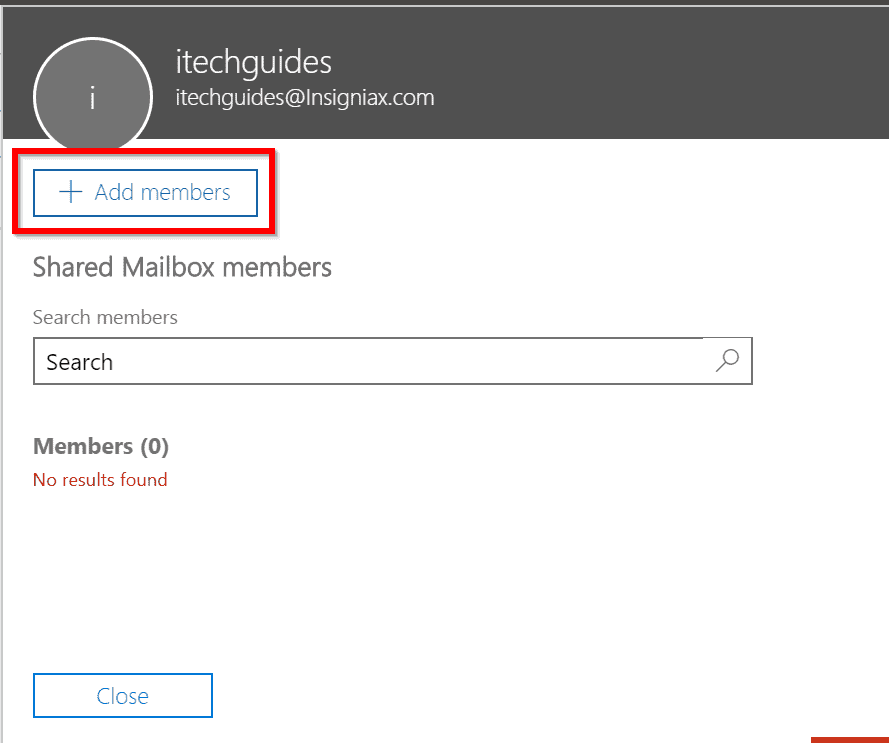
- Click Add members. Then check the box beside each member you wish to grant access to the shared mailbox. Click Save.
The new member is now in the list. See image below.
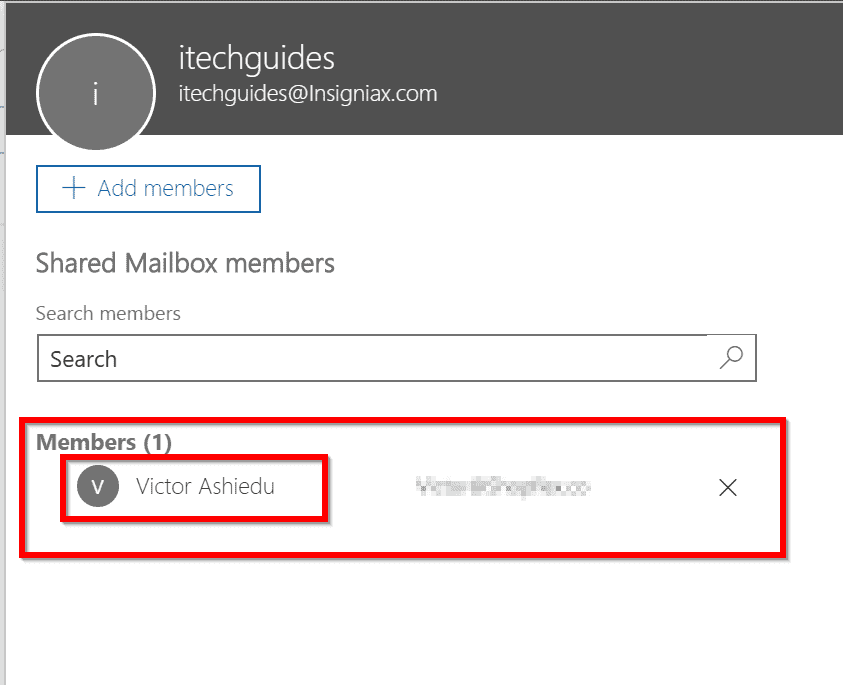
After you grant access to a shared mailbox in PortalOffice365, it could take up to 24 hours for the shared mailbox to appear in the user’s Outlook client. Also, the user may have to close and reopen Outlook for the mailbox to display.
Conclusion
There you have it. The guide you need to create and manage users and groups, create shared mailboxes, and more in PortalOffice365 (portal.office.com).
I hope you found this Itechguide helpful. If you found the guide helpful, kindly share the part of the guide you found most helpful using the “Leave a Reply” form at the bottom of this page.
Alternatively, you can respond to the “Was this page helpful?” question below.