The requirements for deploying Microsoft Office in an enterprise environment are different for single-PC deployments.
In this article, I have explained the steps required to deploy Office 2019 for volume licenses using an XML file.
Overview
There are two volume license versions of Microsoft Office 2019: Office Professional Plus 2019 and Office Standard 2019. If you’re installing these versions you must use the PerpetualVL2019 update channel.
In the next few sections, I have outlined the steps to use the Office Deployment Tool to download and install Office using this update channel.
Step 1: Download the Office Deployment Tool (ODT)
- Open the Office Deployment Tool download page and click the download link.
- Copy the downloaded file to the folder you created earlier
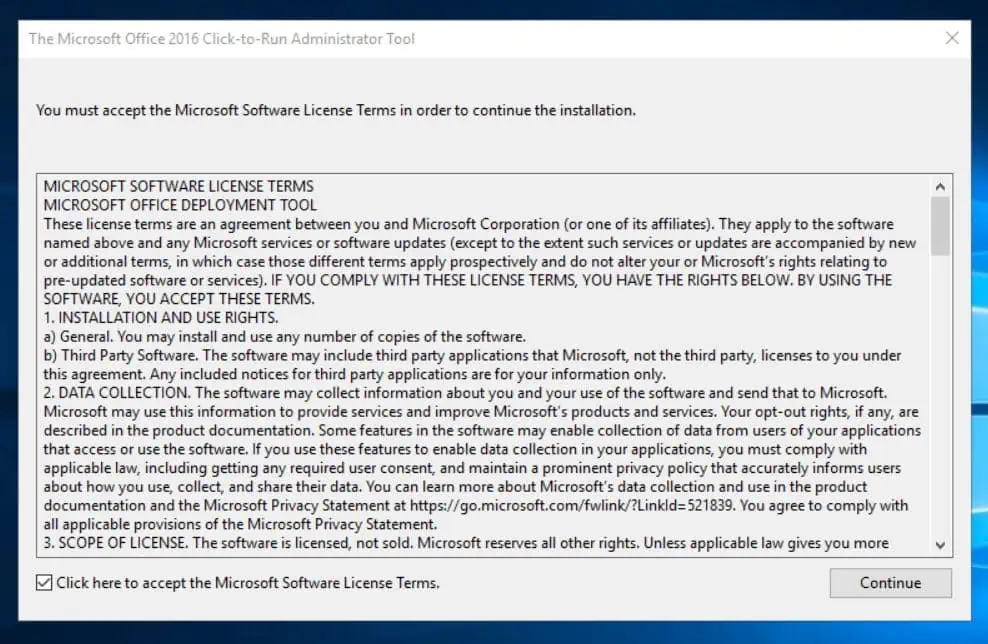
- Open the folder and double-click the downloaded ODT file. Then, accept the license agreement and click Continue.
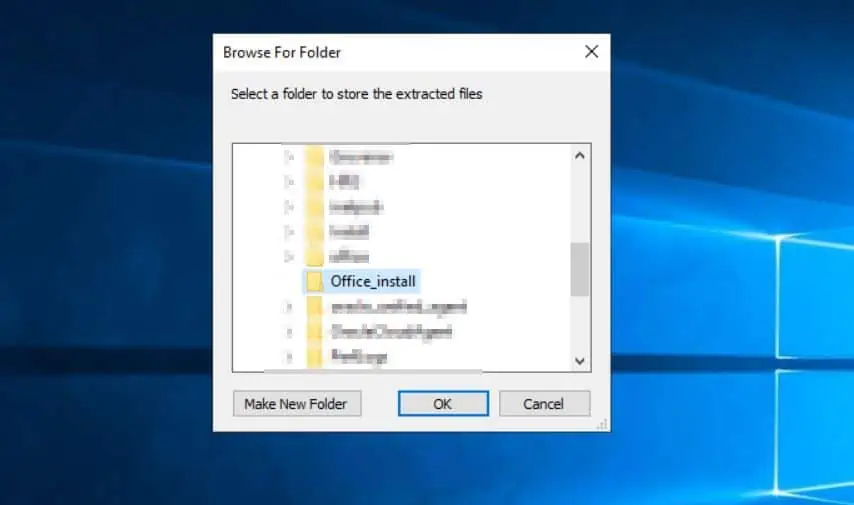
- Then, select the folder you created earlier as the location to extract the ODT files and click OK.
- Wait for the files to be extracted and proceed to the next step.
Step 2: Create the XML Configuration File
The installation of Microsoft Office is automated with an XML file. This is possible as you specify all the required information in this file.
I have created a sample XML file. The configurations are shown below.
See below for additional information about this config and actions you need to take.
<Configuration>
  <Add SourcePath="C:\Office_install" OfficeClientEdition="64" Channel="PerpetualVL2019">
   <Product ID="ProPlus2019Volume" PIDKEY="#####-#####-#####-#####-#####" >
     <Language ID="en-us" />
     <ExcludeApp ID="Publisher" />
     <ExcludeApp ID="Outlook" />
     <ExcludeApp ID="OneNote" />
     <ExcludeApp ID="Skype" />
     <ExcludeApp ID="OneDrive" />
     <ExcludeApp ID="Lync" />
     <ExcludeApp ID="Groove" />
     <ExcludeApp ID="Word" />
     <ExcludeApp ID="PowerPoint" />
     <ExcludeApp ID="Access" />
   </Product>
 </Add>
<Display Level="Full" AcceptEULA="TRUE" />
<Property Name="AUTOACTIVATE" Value="1" />
</Configuration>
a) Modify the Product ID setting as required.
If you’re installing Office Professional Plus 2019, use ProPlus2019Volume for the Product ID and PerpetualVL2019 for the Channel. Similarly, if installing Office Standard 2019, use Standard2019Volume and PerpetualVL2019 for the Channel.
For a detailed list of the configuration parameters for the XML file, see the table on the Microsoft documentation page – Create the configuration.xml.
b) Enter the volume license key for your organization in the PIDKEY section.
c) I added the ExcludeApp ID and listed Office apps I do not want to be installed. If you rather install all Office apps, delete these settings.
Alternatively, delete the lines for the apps you want to install.
d) Create a file called Configuration.xml and save the above configuration settings in the file.
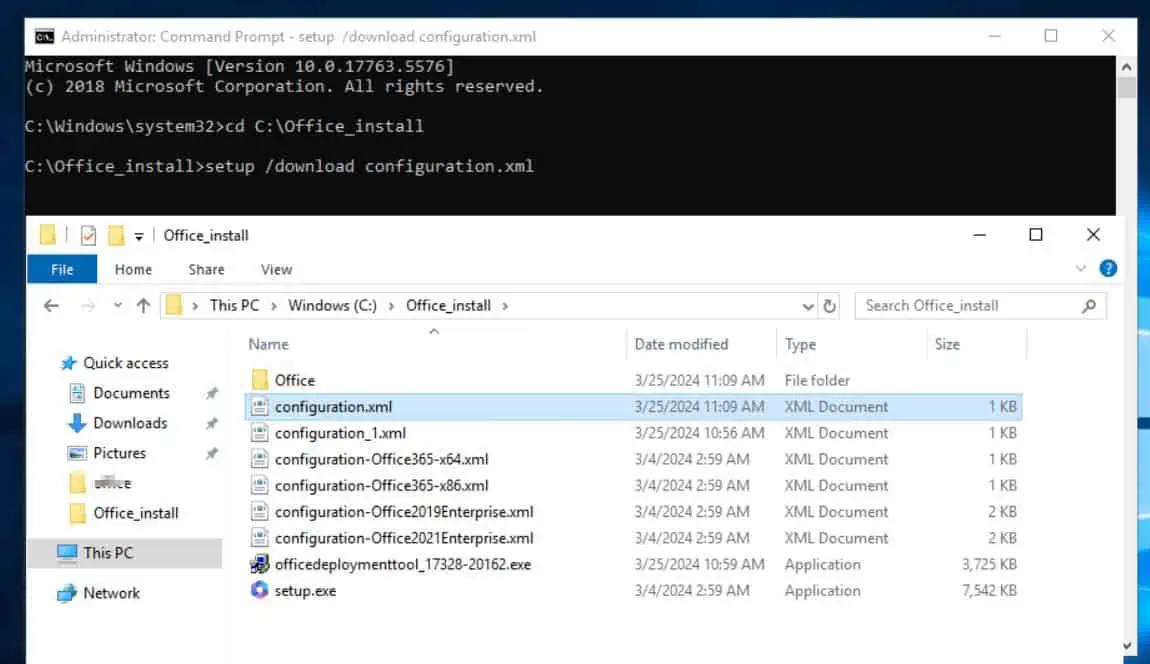
Step 3: Download the Office 2019 Installation Files
- Open Command Prompt as administrator.
- Then, cd to the folder you created the XML configuration file and run the command below:
setup /download configuration.xml
- When you run the command, a folder called “Office” will be created in the folder you specified in your configuration file. Additionally, the Microsoft Office versions you specified in your configuration file will start downloading into the Office folder.
- When the download is completed, proceed to step 4 below.
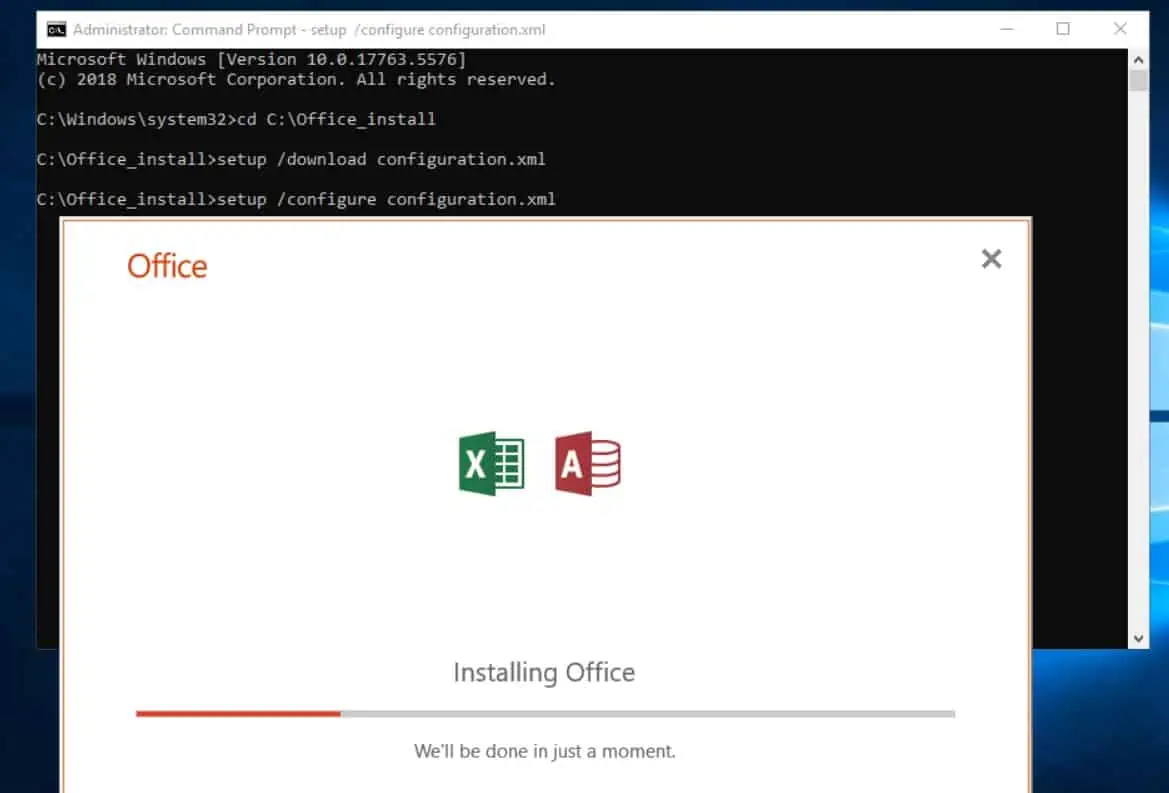
Step 4: Install Office 2019 with the XML File
On the same command prompt, run the command below to install the versions of Office you configured on the XML file
setup /configure configuration.xml
The installation will commence. The reason the GUI is displaying is that I specified “Full” in the Display level section of the configuration file.
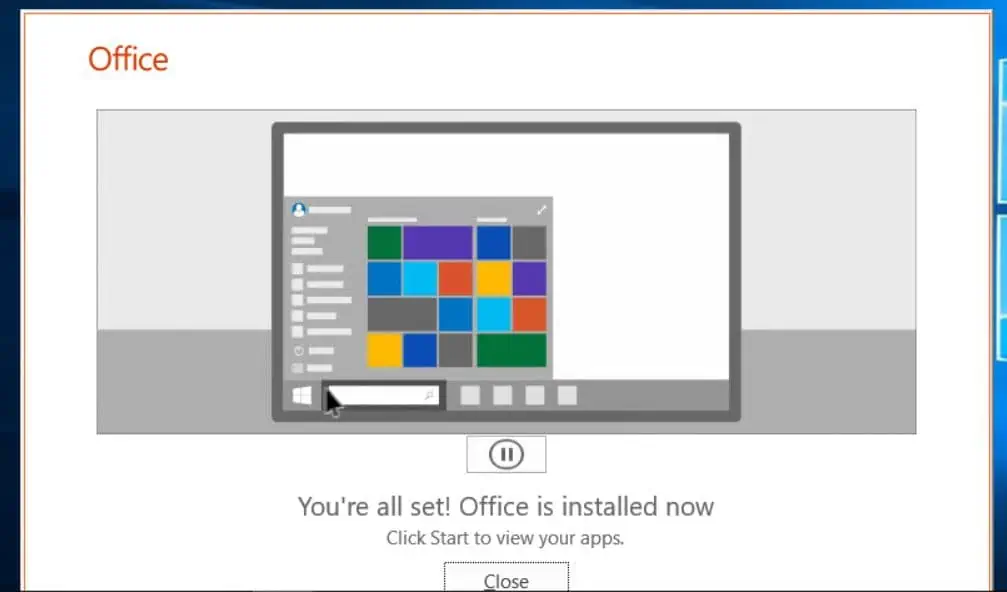
When the installation is completed, the image in the screenshot below will be displayed. This means that you’ve successfully installed Microsoft Office!
Step 5: Clean Up Downloaded Files
If you do not need to keep the downloaded Microsoft Office files, remember to delete them to save space on the server. Preferably, copy the files to a server share so you can use it for subsequent installations
Conclusion
Installing the volume-licensed versions of Microsoft Office Office 2019 is pretty straightforward. The tricky bit is getting the XML configuration bit right.
Hopefully, I have made the process simple for you. I am confident that you have successfully installed Office.
Kindly let me know how it went by responding to the “Was this page helpful?” question below.
I would like to mention that the entire steps discussed in this article can be automated using PowerShell or Group Policy.
Thank you for stopping by.
Before you go, you may want to browse our Microsoft Office How-to guides page – I’m confident that you will find other guides in this category helpful!