Do you need to disable the Windows Defender firewall in Windows Server 2016? Use one of the three methods in this guide.
Option 1: Disable Windows Defender From Server Manager
Here are the steps:
- Log on to the server you want to remove Windows Defender from and open Server Manager
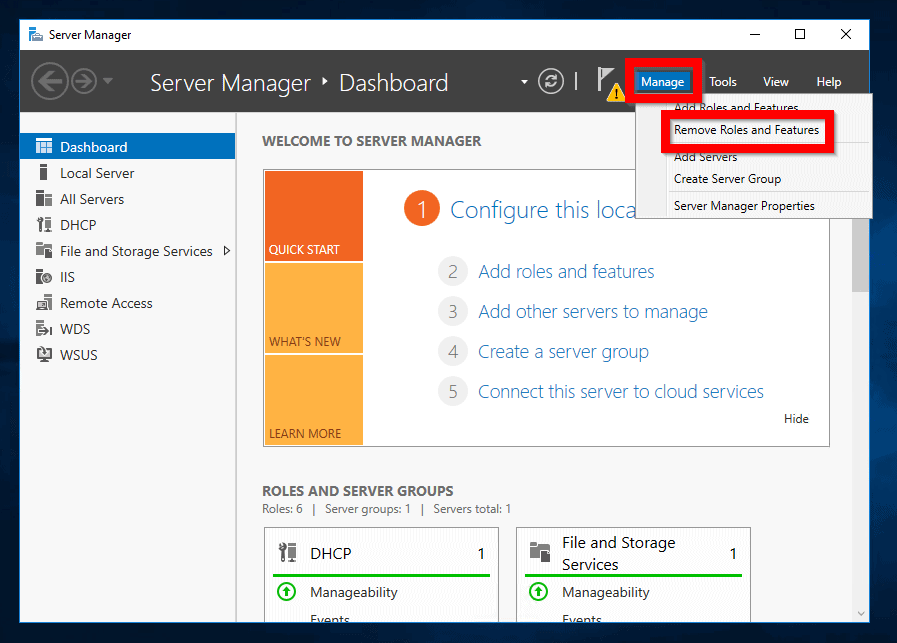
- From Server Manager, click Manage. Then select Remove Roles and Features
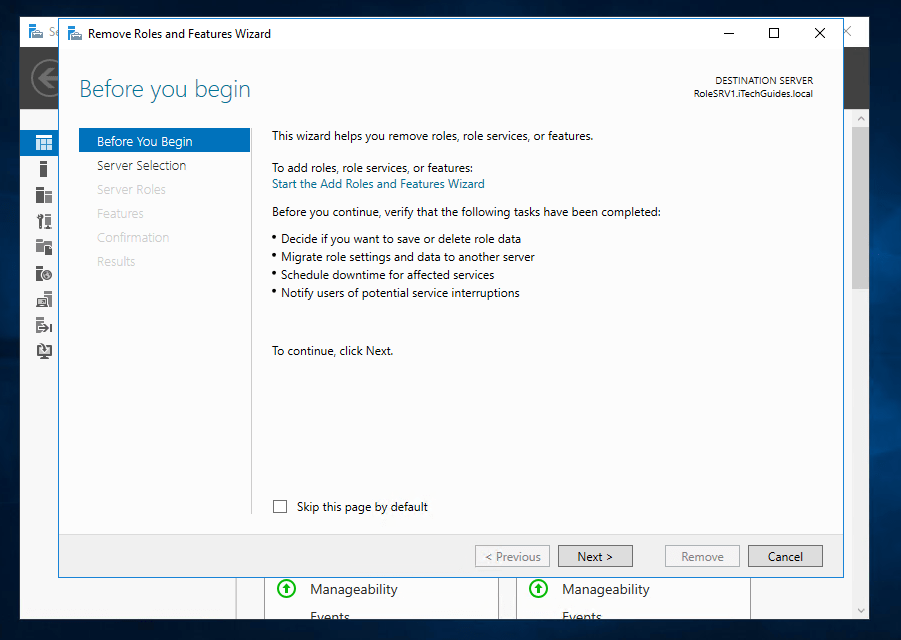
- At Before you begin, click Next.
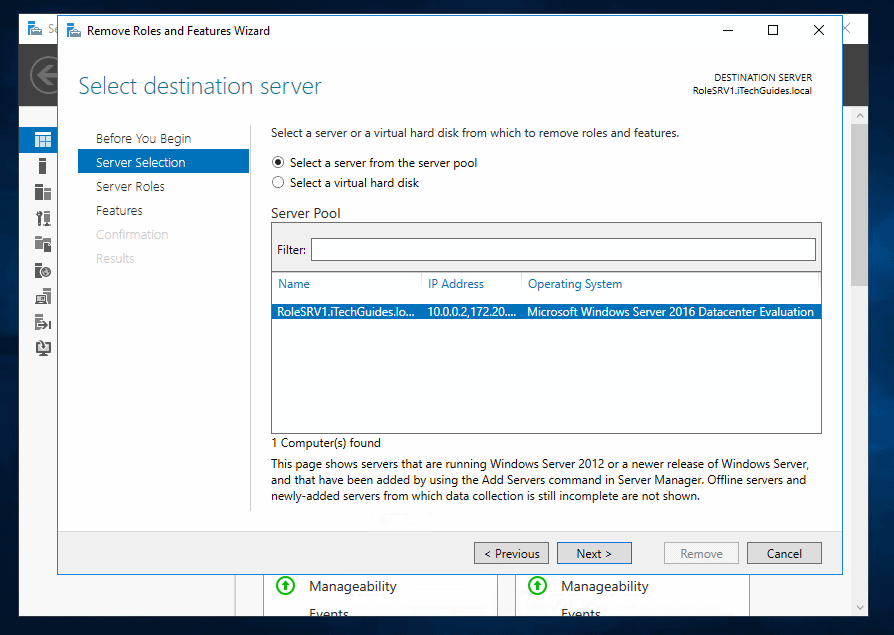
- Then, select the server and click Next.
- At Remove server roles screen, click Next.
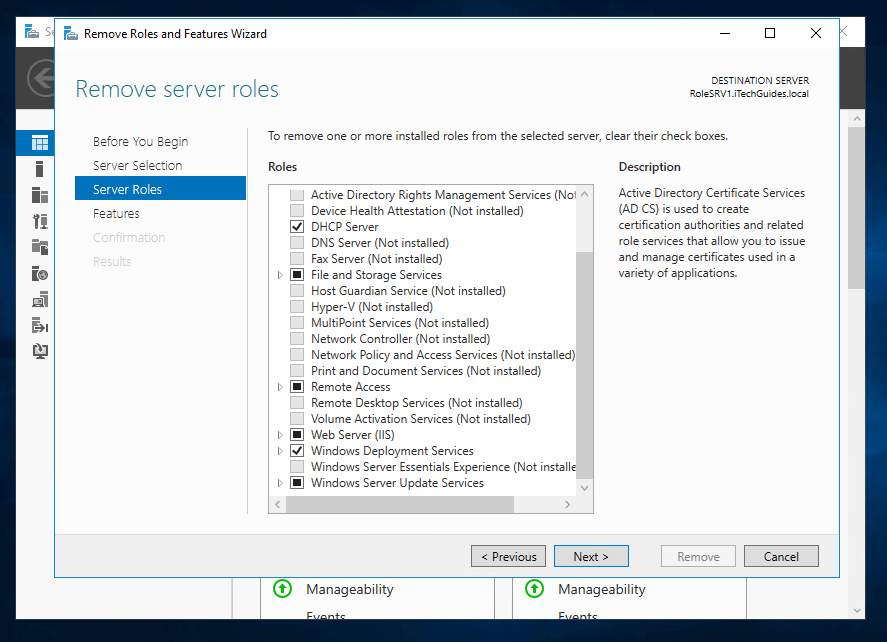
The next step is where you disable Windows Defender in Server 2016.
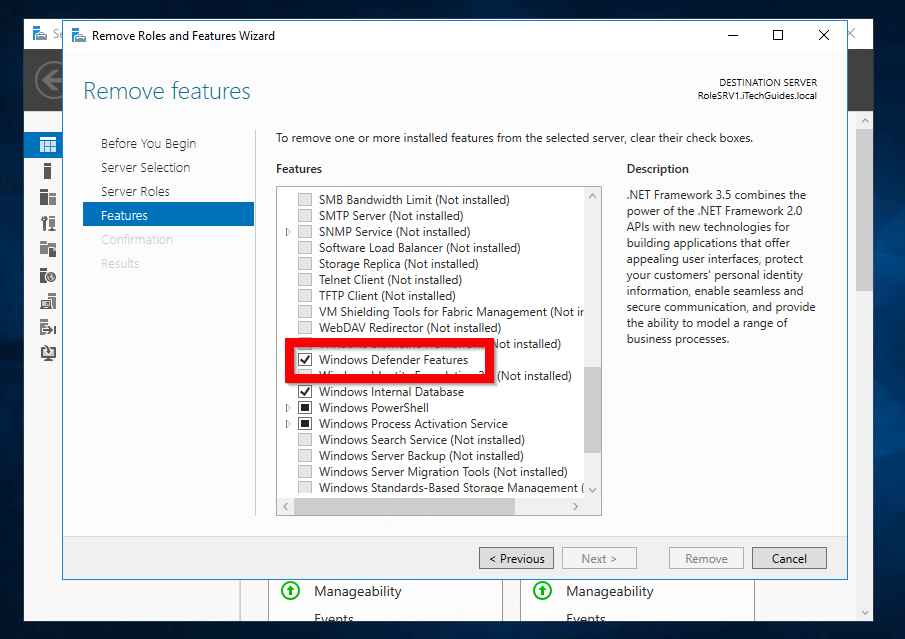
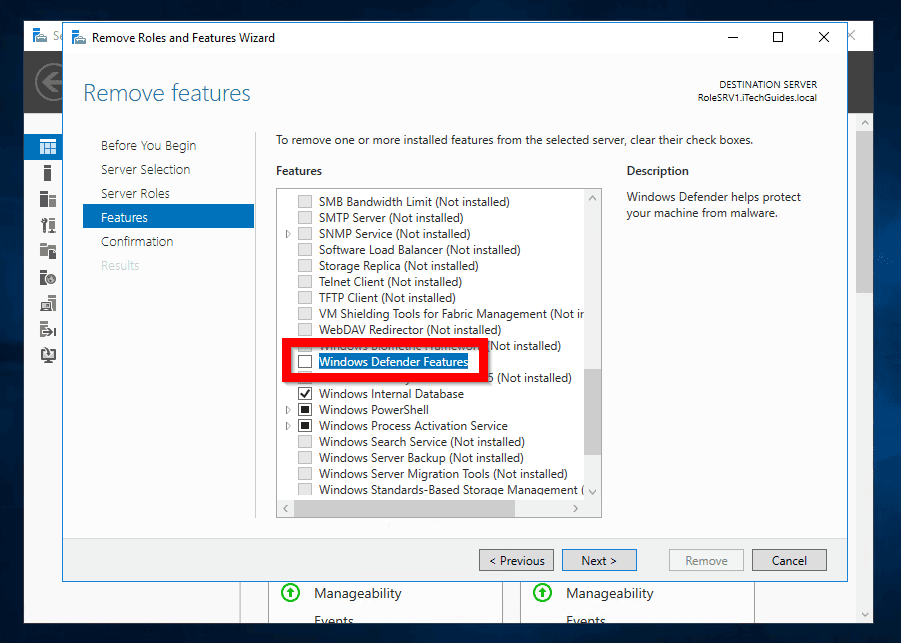
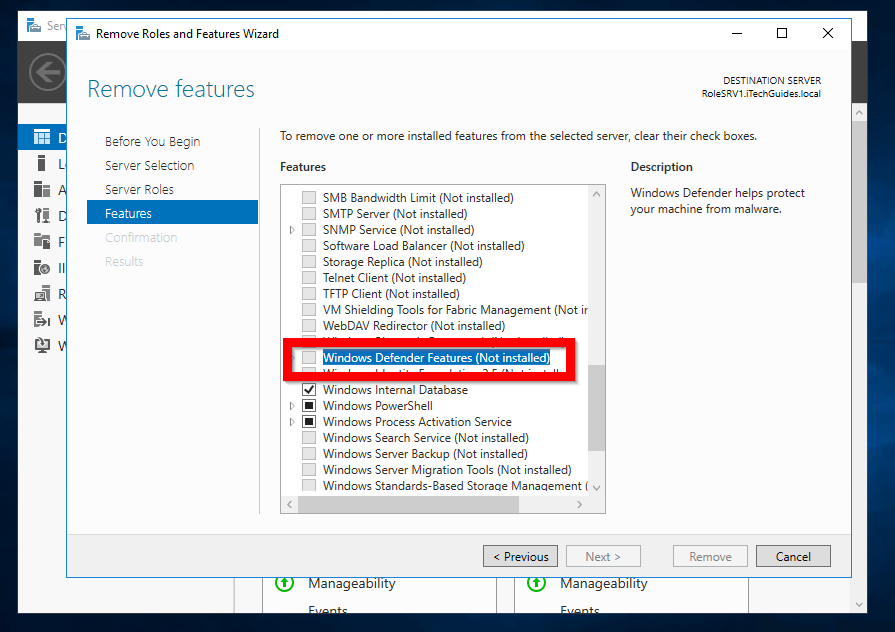
- When Remove features page opens, scroll down to and uncheck the box beside Windows Defender features. When you finish (see the second image below), click Next.
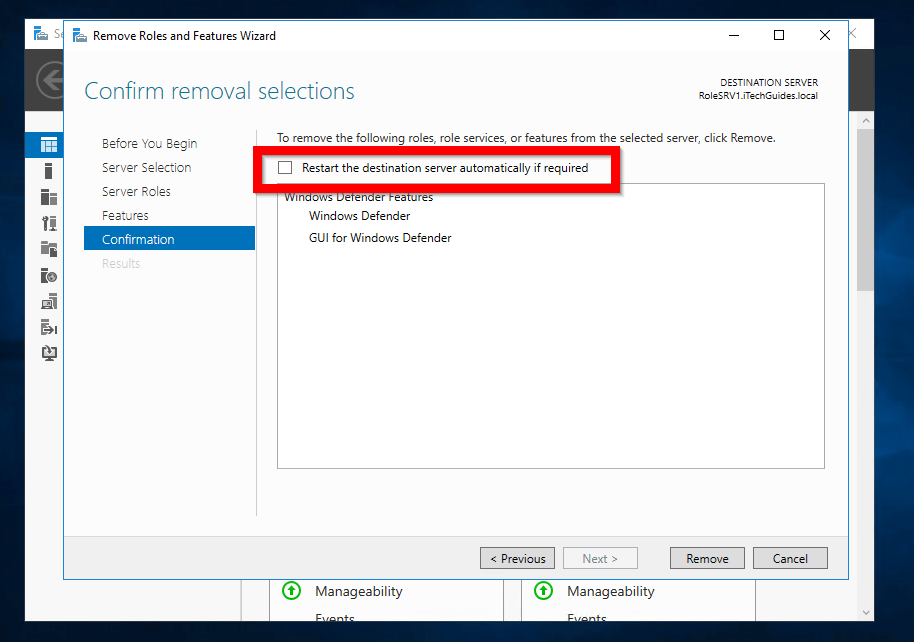
- Finally, at the Confirmation screen, check the box beside Restart the destination server automatically if required. Then click Remove.
Option 2: Disable Windows Defender with PowerShell
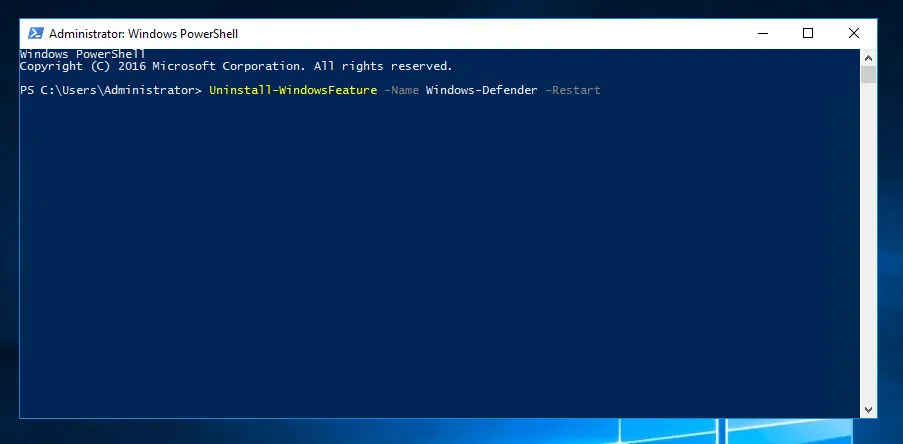
To disable Windows Defender in Server 2016 with PowerShell, use these steps:
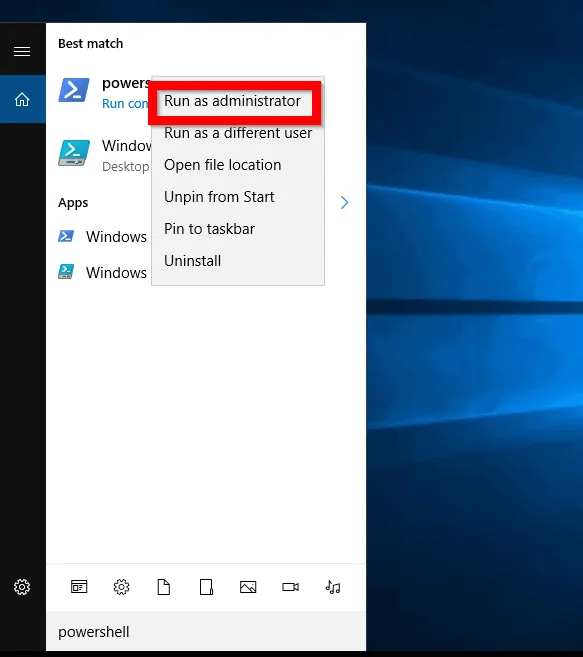
- Type PowerShell in the search bar. Then right-click Powershell and select Run as administrator.
- At PowerShell command prompt, type this command. Then press enter.
Uninstall-WindowsFeature -Name Windows-Defender -Restart
When the command completes the uninstall, it will restart the server automatically. If you wish to restart the server at a later time, remove the -Restart parameter.
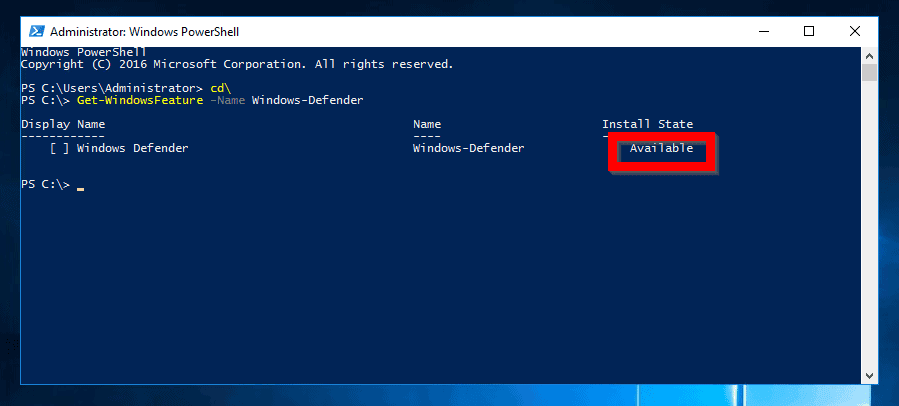
- When the server restarts, open Remove features in Server Manager. You will notice the status is now Not installed.
You can also confirm that Windows Defender is no longer installed by running this PowerShell command.
Get-WindowsFeature -Name Windows-Defender
The Install State is Available..meaning Not installed.
Option 3: Disable Windows Defender with Group Policy
The final method discussed in this guide is to disable Windows Defender with Group Policy. This method has 3 parts:
- Create a new Group Policy Object (GPO)
- Edit the GPO to Disable Windows Defender
- Link the GPO to an Active Directory Container
Step 1: Create a New Group Policy Object (GPO)
Here are the steps to create a GPO from the Default Domain GPO:
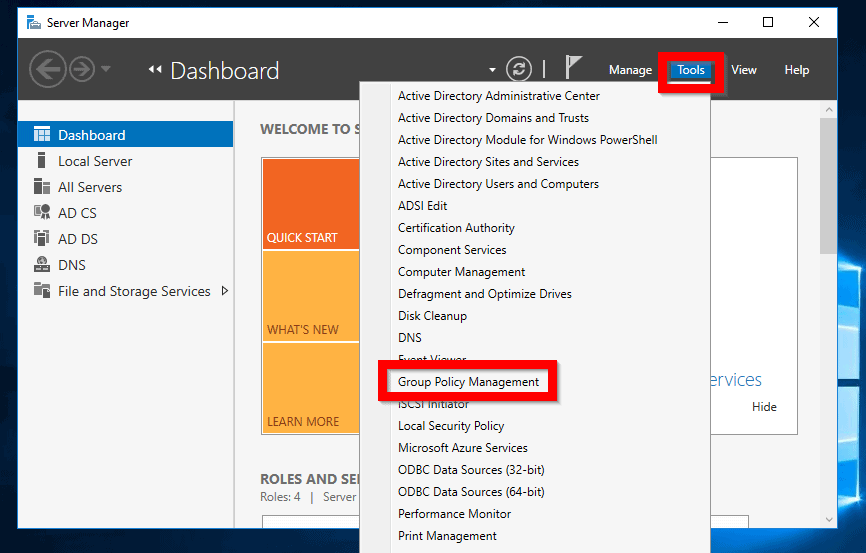
- Login to a Domain Controller in your domain and open Server Manager
- From Server Manager, click Tools. Then select Group Policy Management
- When Group Policy Management opens, expand your domain name. Then expand Group Policy Objects container.
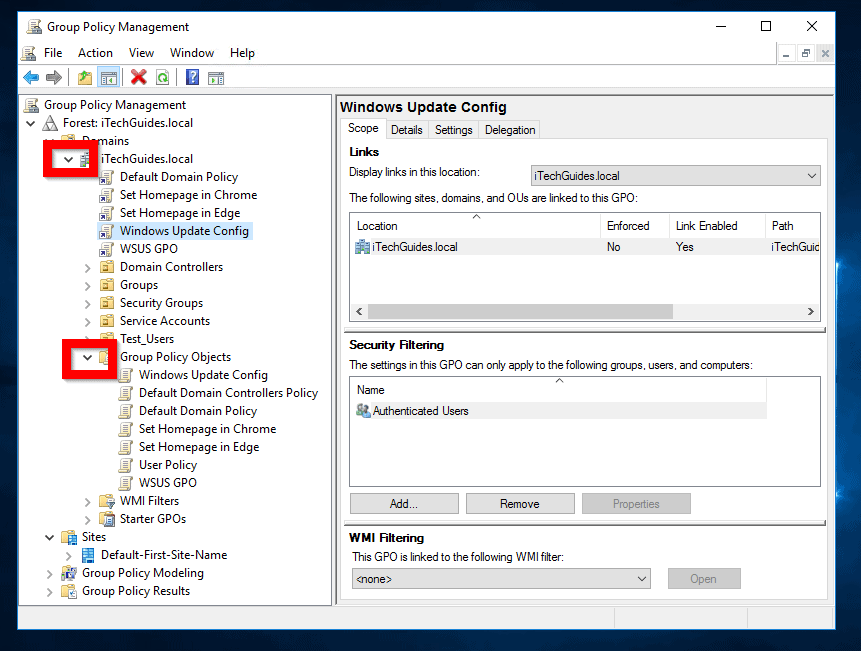
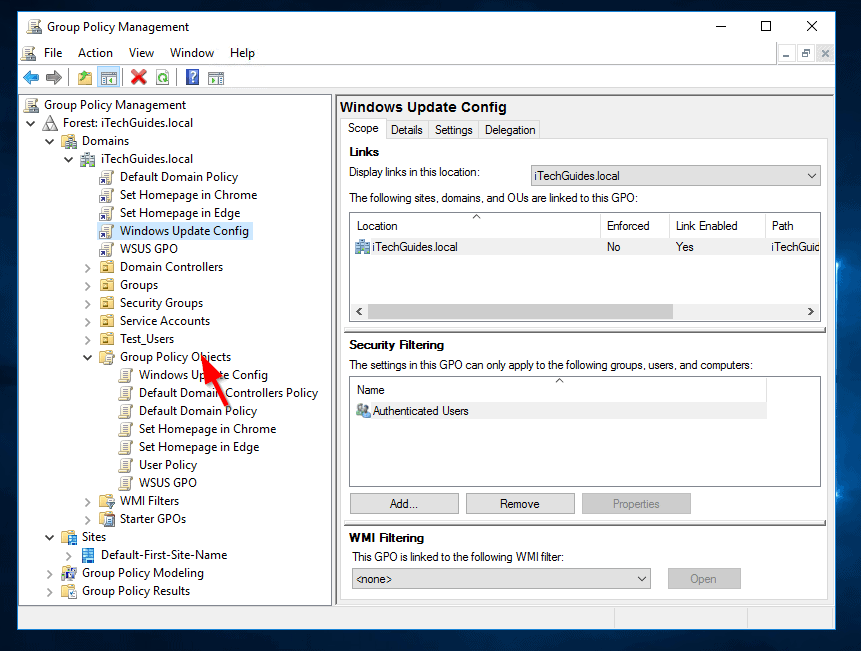
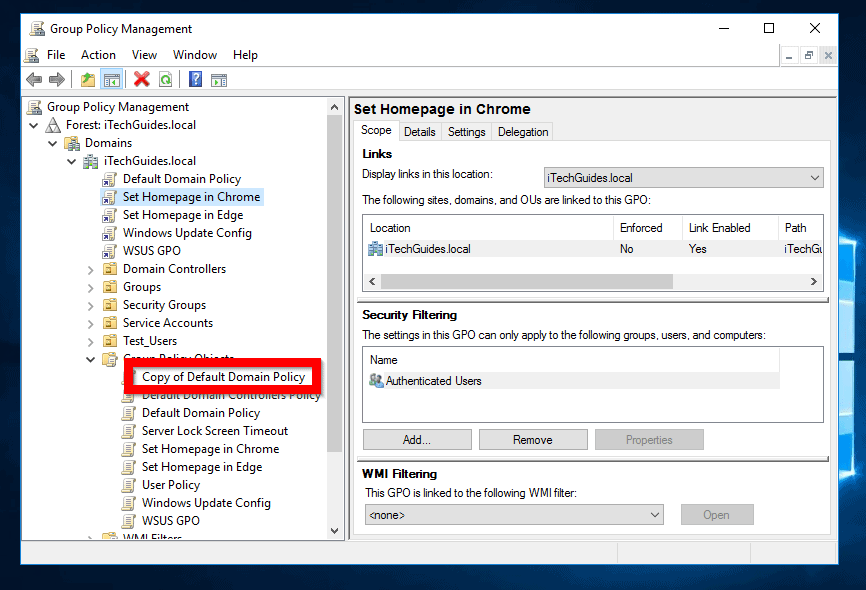
- To create a new GPO, drag and drop Default Domain Policy to Group Policy Objects container.
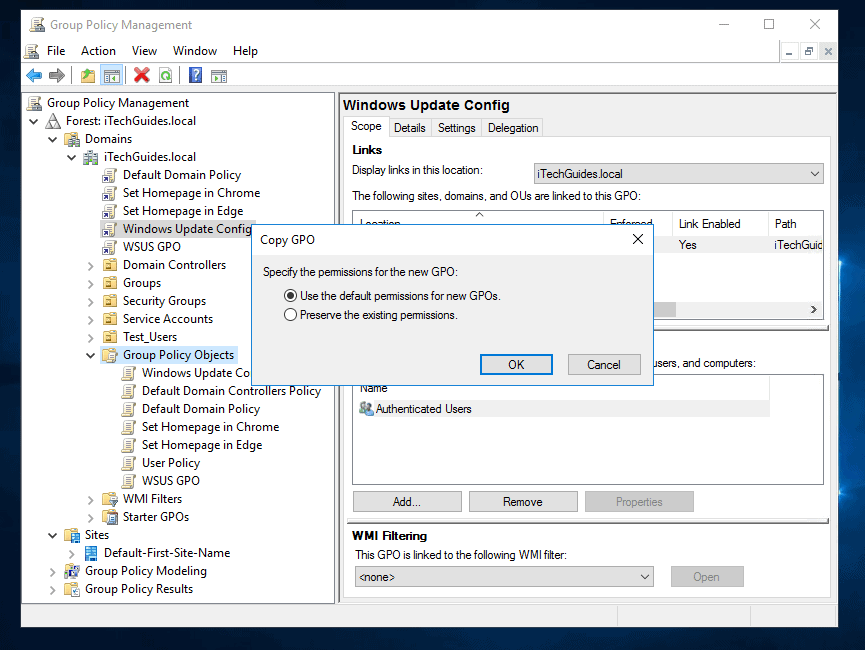
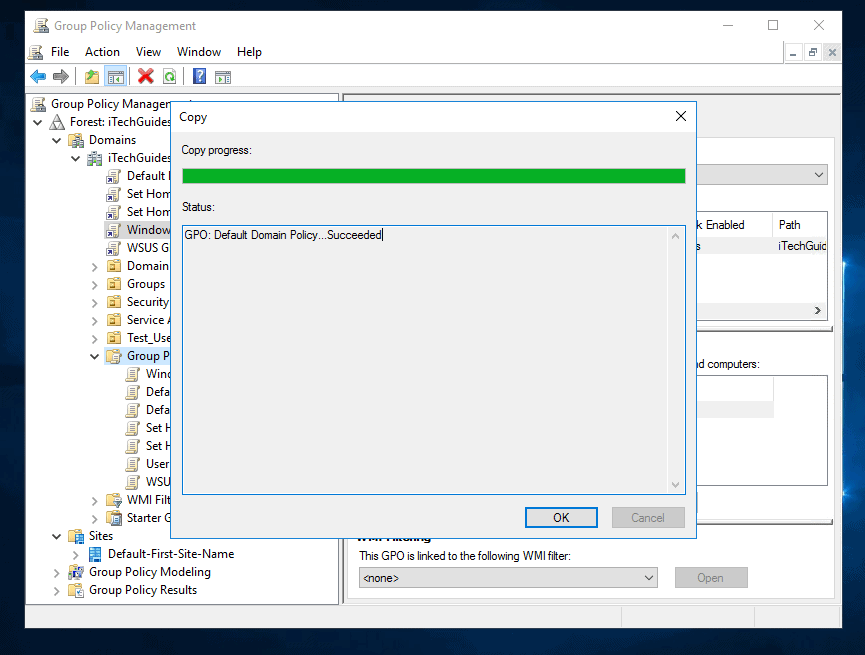
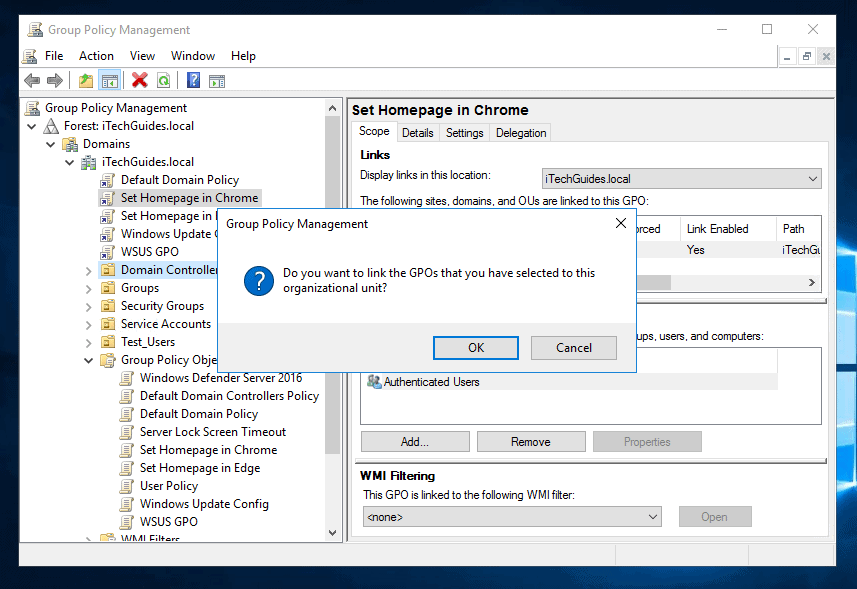
- When you drag the Default Domain Policy to the Group Policy Objects container, you will receive a Copy GPO prompt. Accept Use the default permissions for new GPOs option. Then click OK. When the copy is complete, click OK (see the second image below).
- A new GOP, Copy of Default Domain Policy will be created.
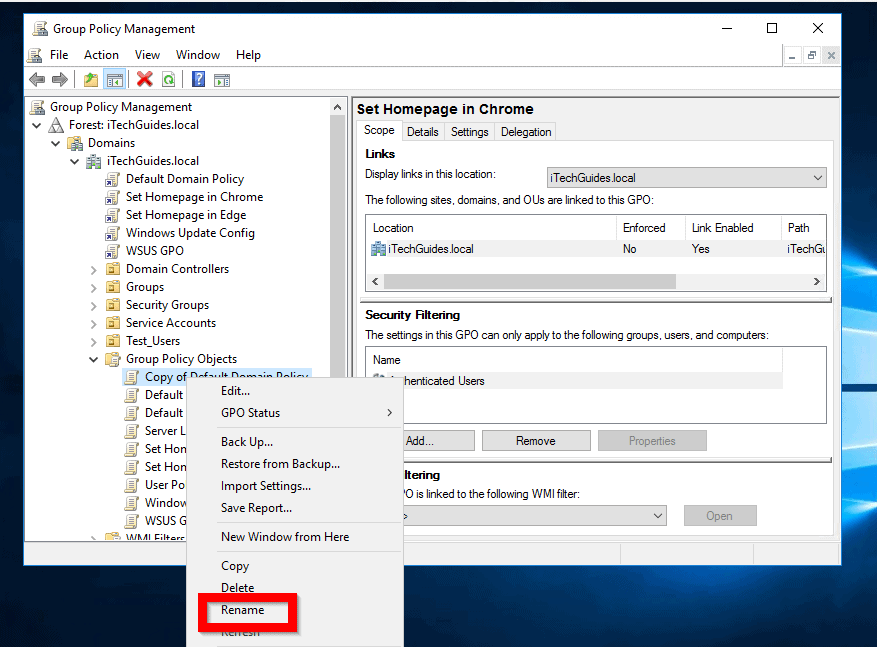
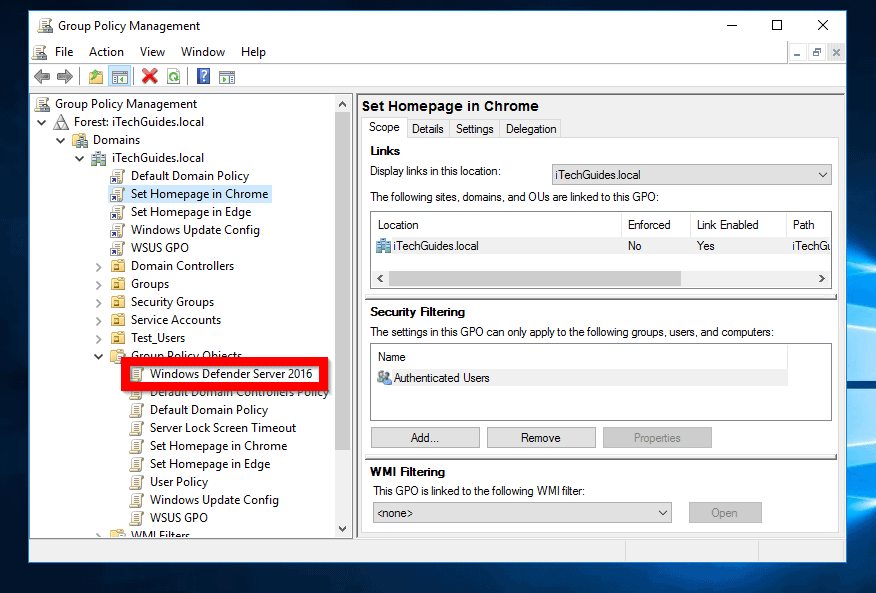
- To rename the new GPO, right-click it. Then select Rename. Then give the GPO a descriptive name (See mine in the second image below).
Step 2: Configure the GPO to Disable Windows Defender
After creating a new GPO, the next step is to edit the GPO and enable the desired policy.
Here are the steps:
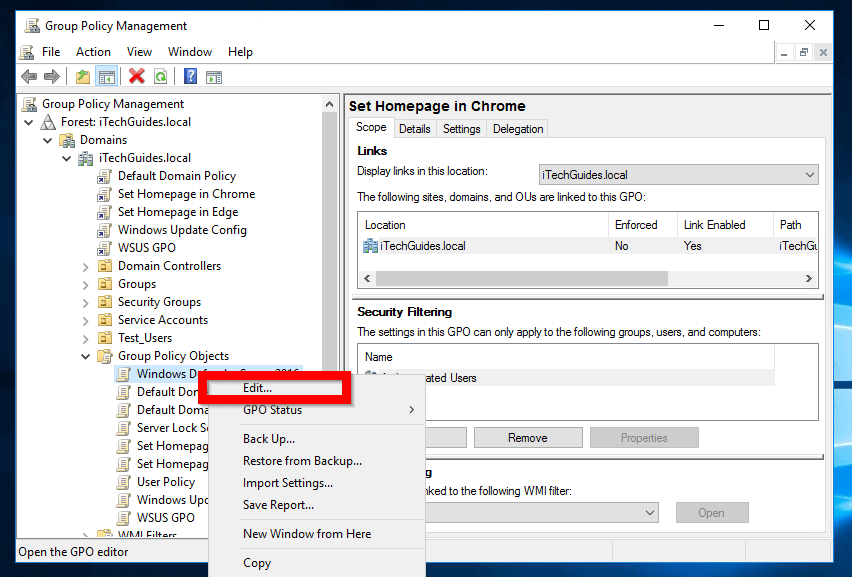
- Right-click the new GPO you created in the last section. Then select Edit.
- When the GPO opens for editing, navigate to Computer Configuration > Policies > Administrative Templates > Windows Components > Windows Defender Antivirus.
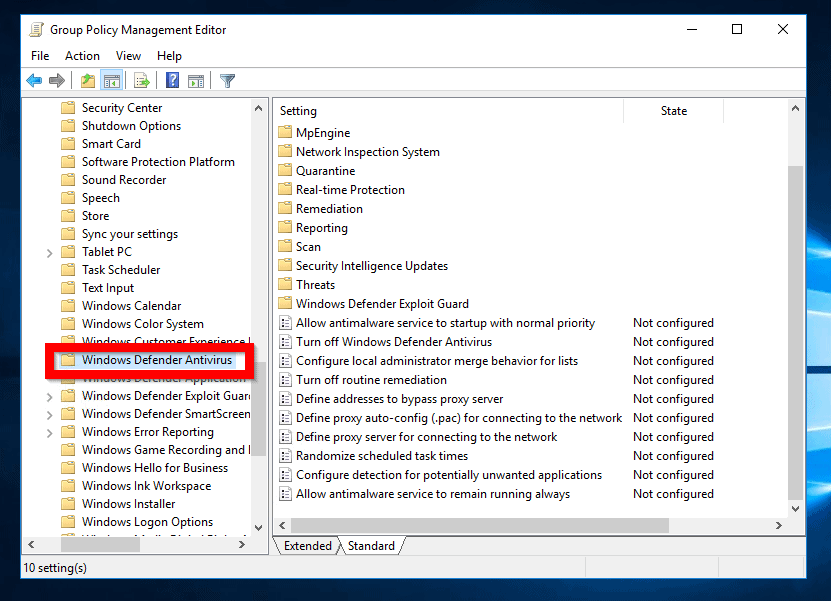
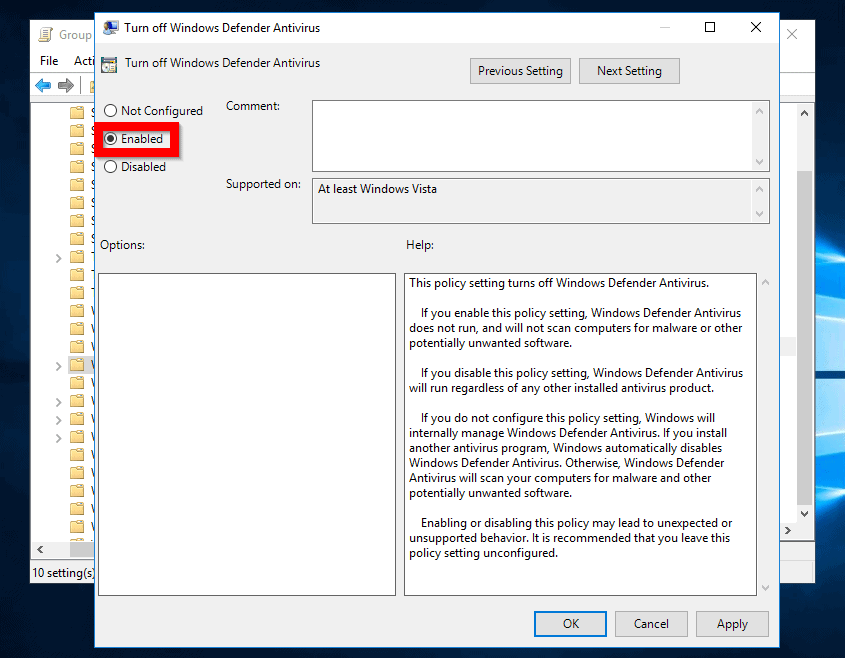
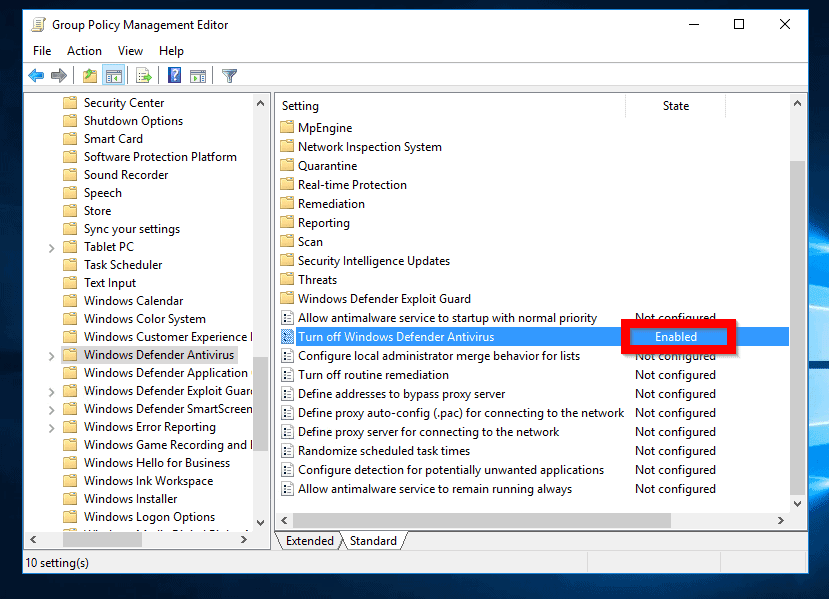
- On the details pane of Windows Defender Antivirus node, locate and double-click Turn off Windows Defender Antivirus policy. When the policy opens for editing, click Enabled. Then click OK. The State of the policy will change from Not Configured to Enabled (see the second image below).
- Close Group Policy Management Editor.
Step 3: Link the GPO to an Active Directory Container
The last part of this method is to link the GPO to an AD container. When you link a GPO to a container, all computers in that container will apply the policies in the GPO.
Here is how to link the new GPO to the Domain Controllers Organizational Unit:
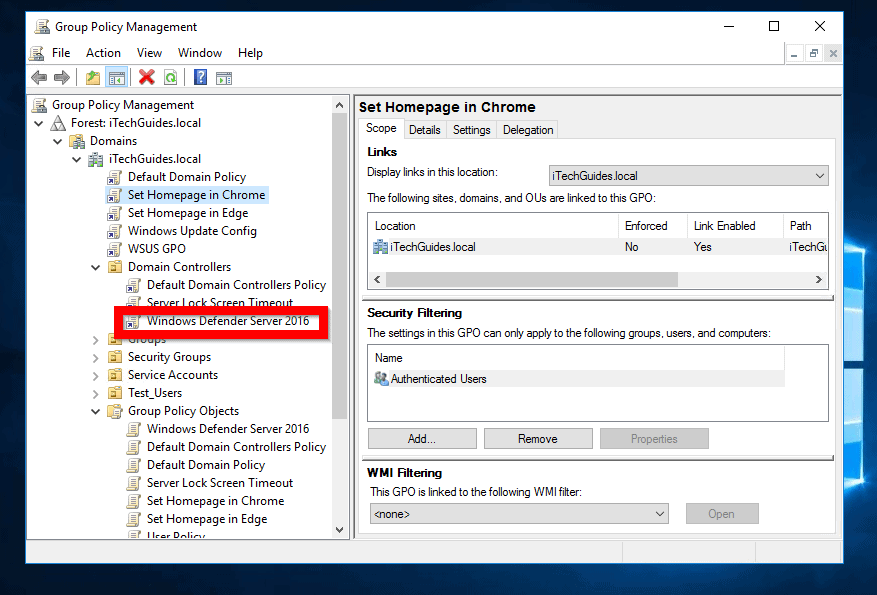
- Back to Group Policy Management. Drag the new GPO from Group Policy Objects container to the Active Directory Container you wish to link it to. In my example, I will drag mine to the Domain Controllers Organizational Unit.
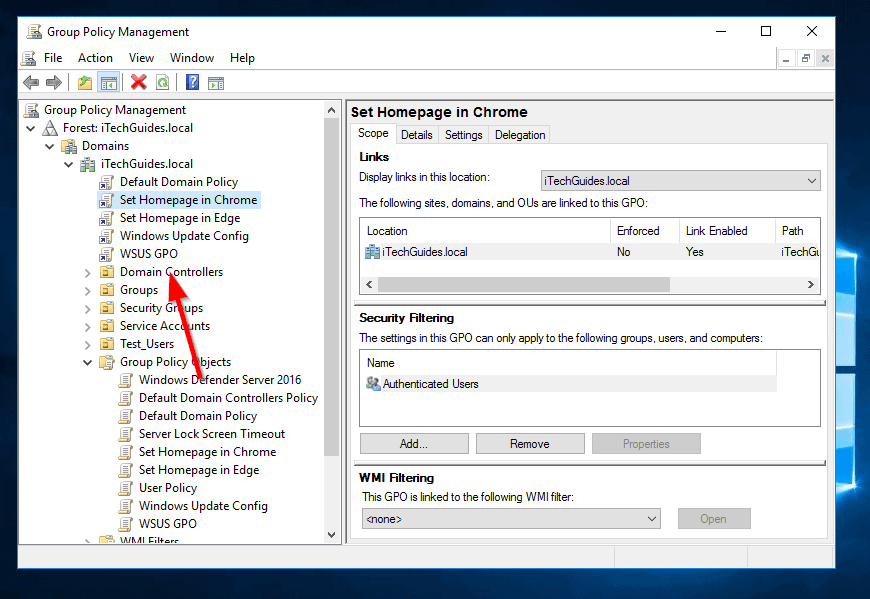
- When you drag the GPO to the container, you will be promoted to confirm that you wish to link the GPO to the container. Click OK. To confirm that the GPO is linked to the container, the new GPO will now appear beneath the AD container. See the second image below.
Conclusion
These are the 3 methods you can use to disable Windows Defender in Server 2016. The first 2 methods effectively uninstall (remove) Windows Defender. The last method (Group Policy) disables it.
For a large enterprise, the last method is recommended.
If you found it helpful, kindly take a minute or two to share your experience by responding to the “Was this page helpful?” question below.
For more Windows Server guides visit our Windows Server How Tos page.