Enabling parental control in Windows 10 is a two-step process – creating a Child account and enabling parental control in the Family Settings Online.
Step 1: Create a Child Account in Windows 10
To create a Child account in Windows 10, follow the steps below:
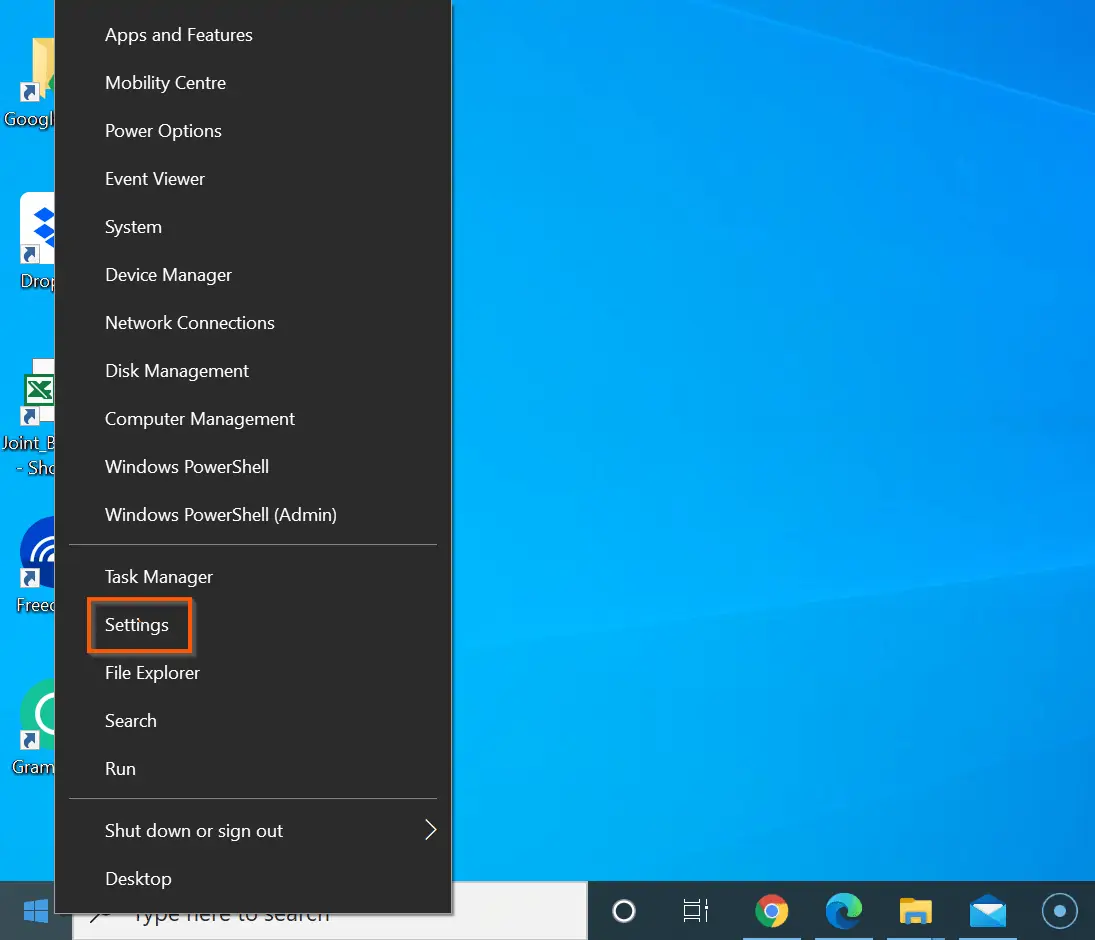
- Right-click Windows 10 Start menu and select Settings. This will open Windows 10 Settings.
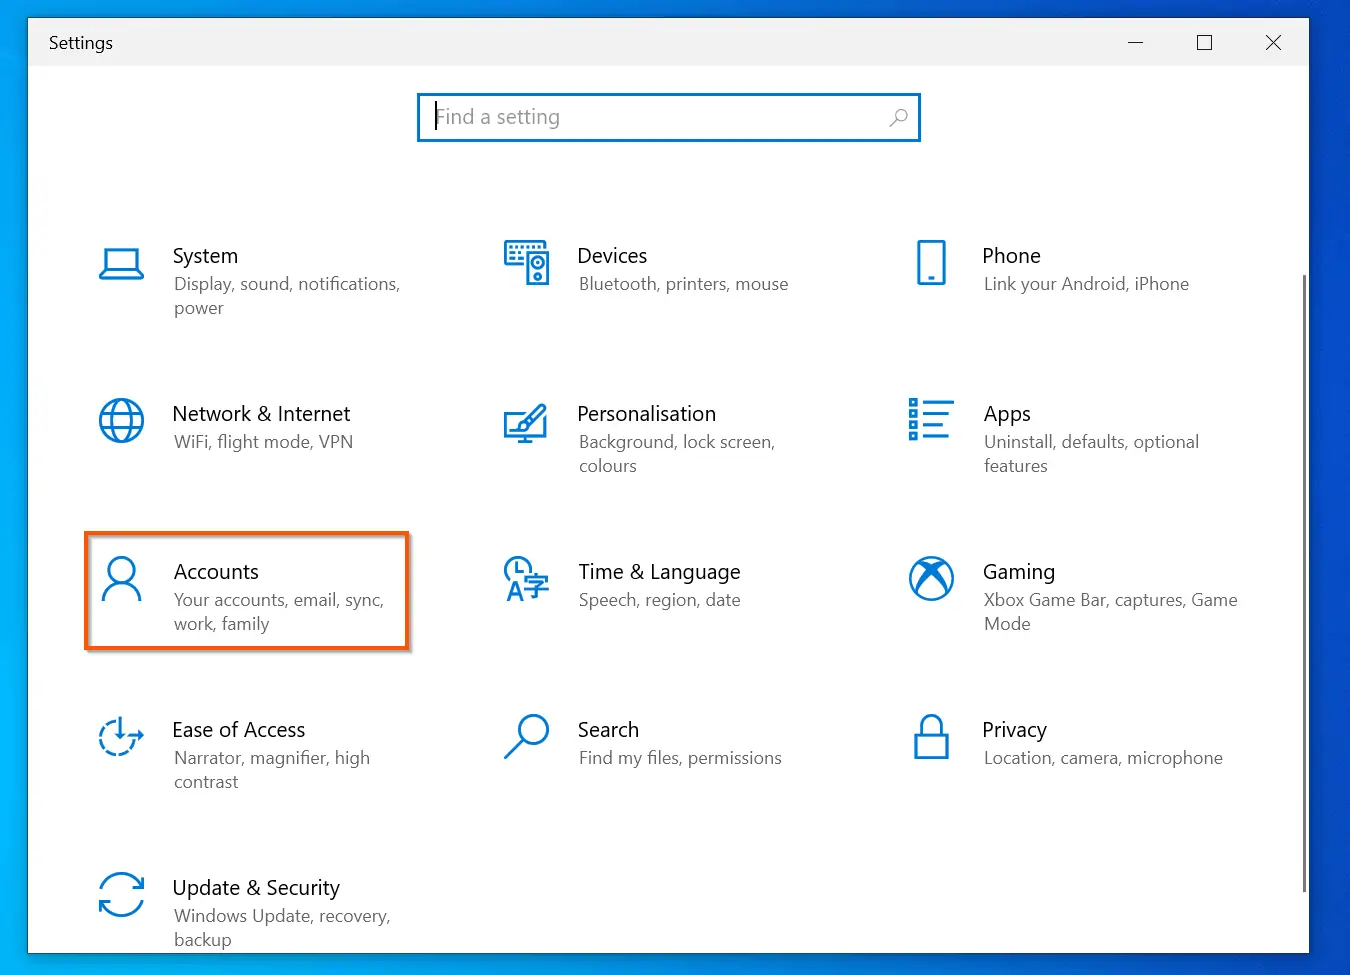
- Then, on the Windows 10 Settings, click Accounts.
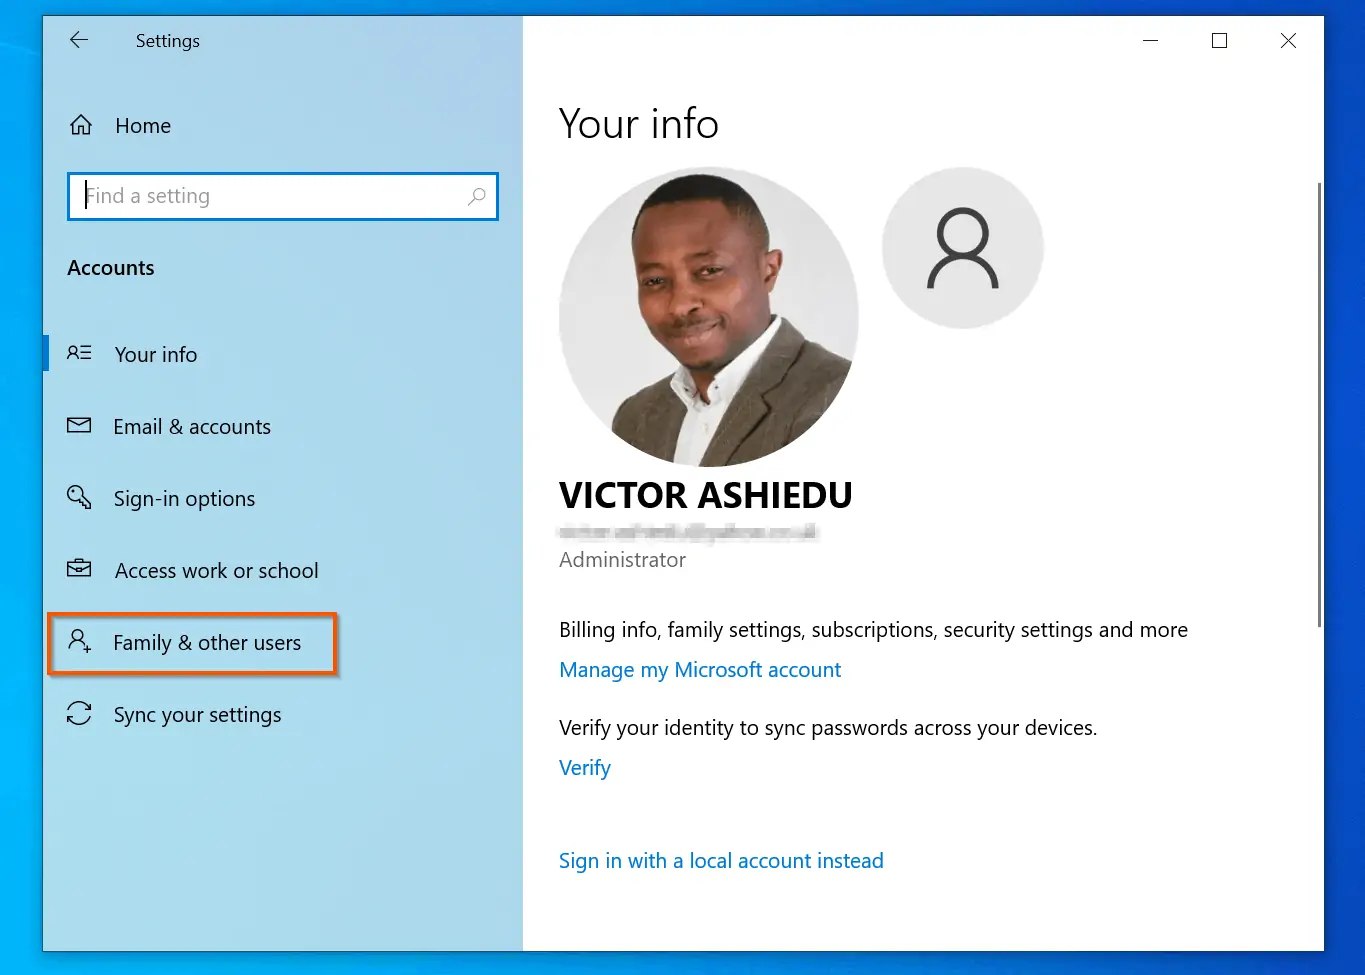
- Furthermore, when the Accounts settings opens, on the left pane, click Family & other users.
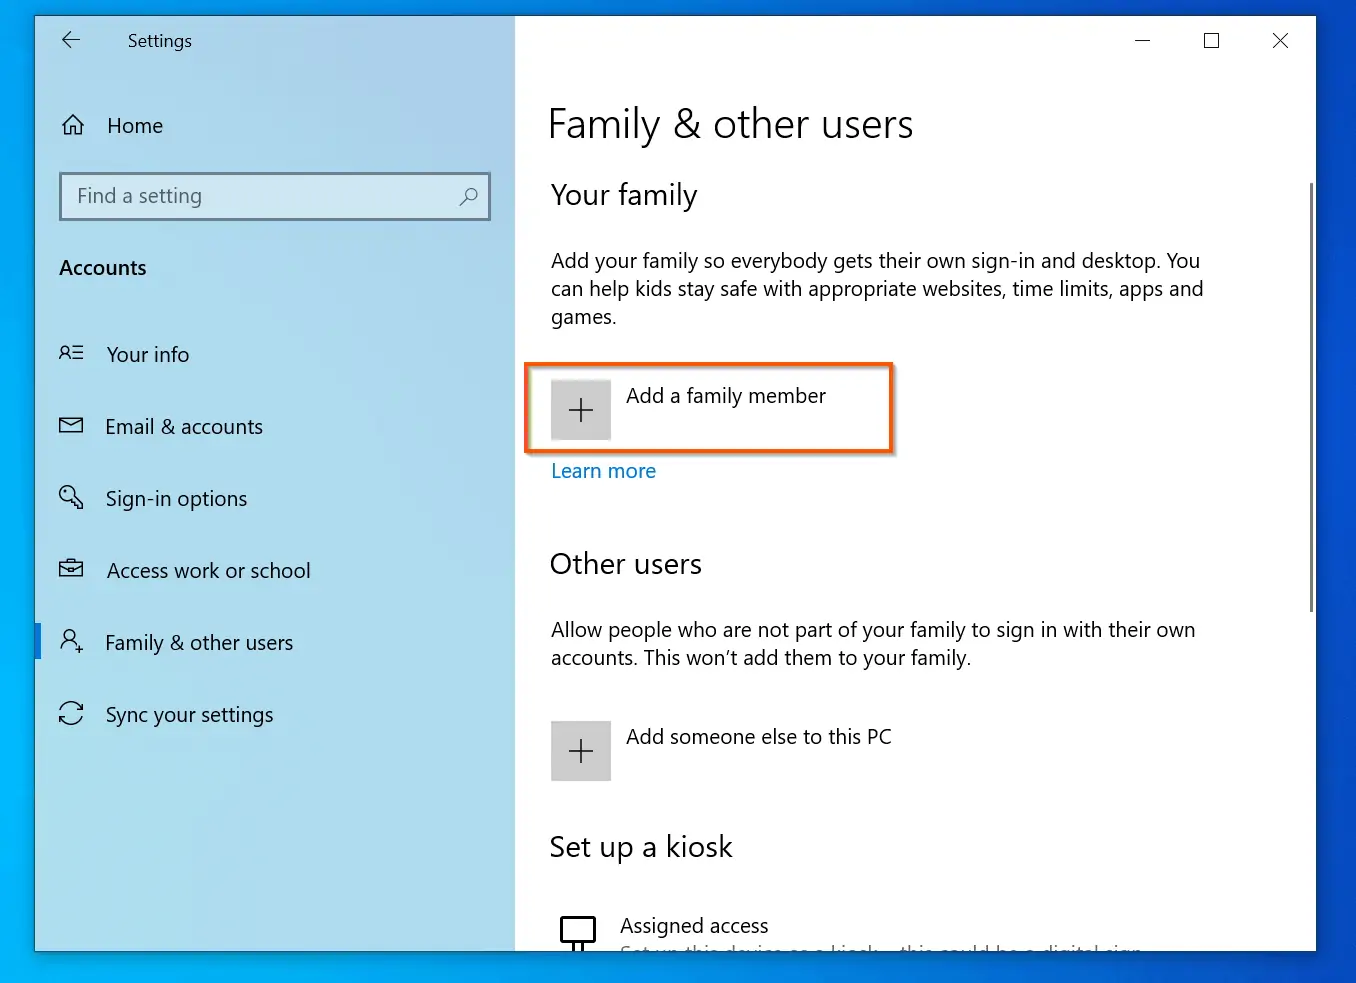
- Then, on the right pane, click Add a family member.
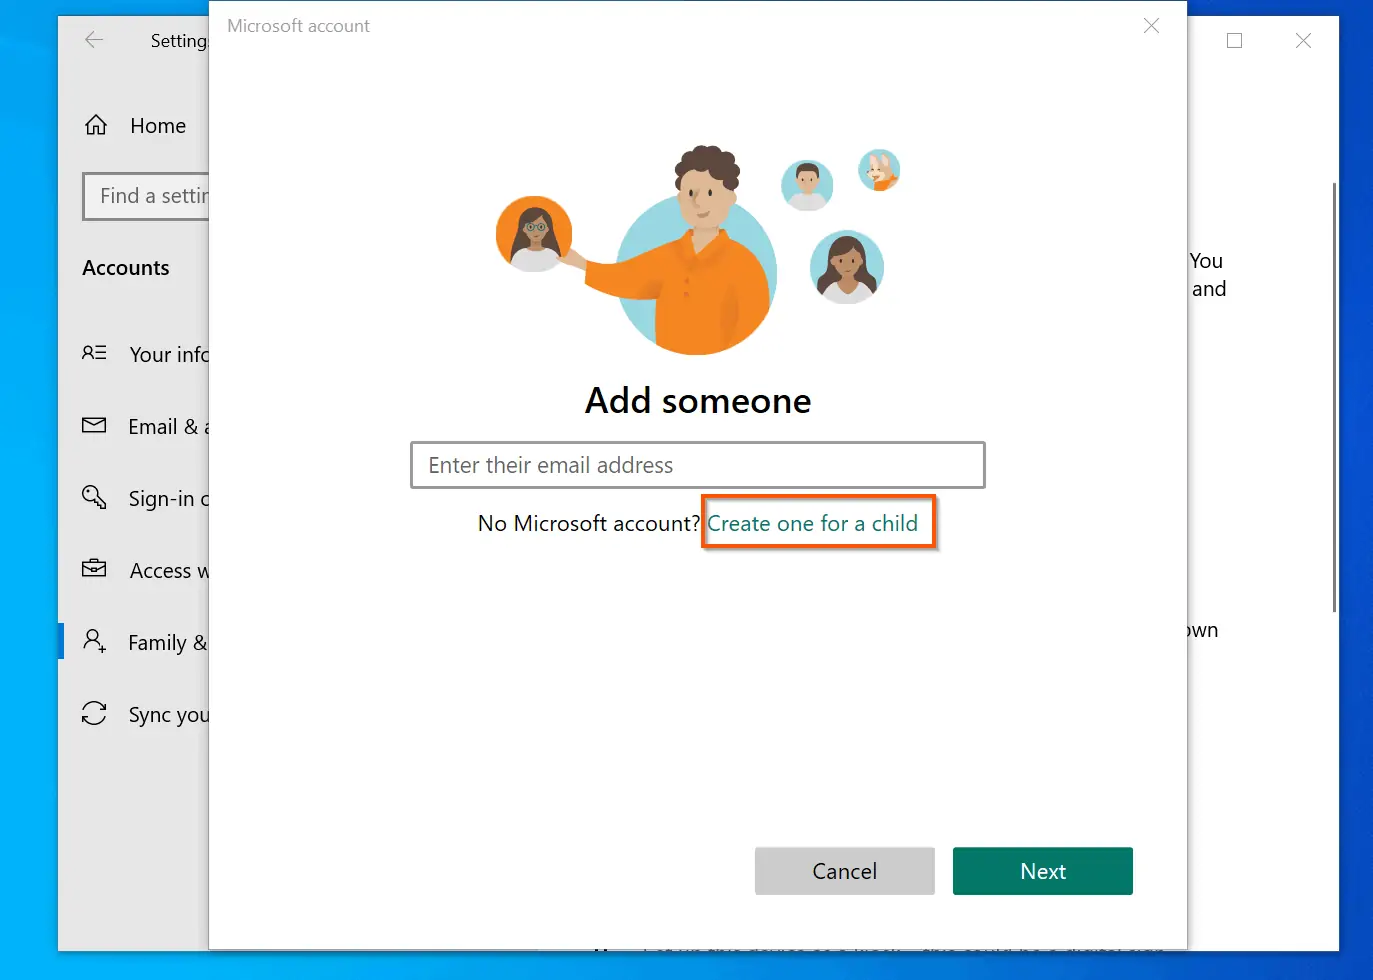
- Additionally, on the pop-up, click Create one for a child.
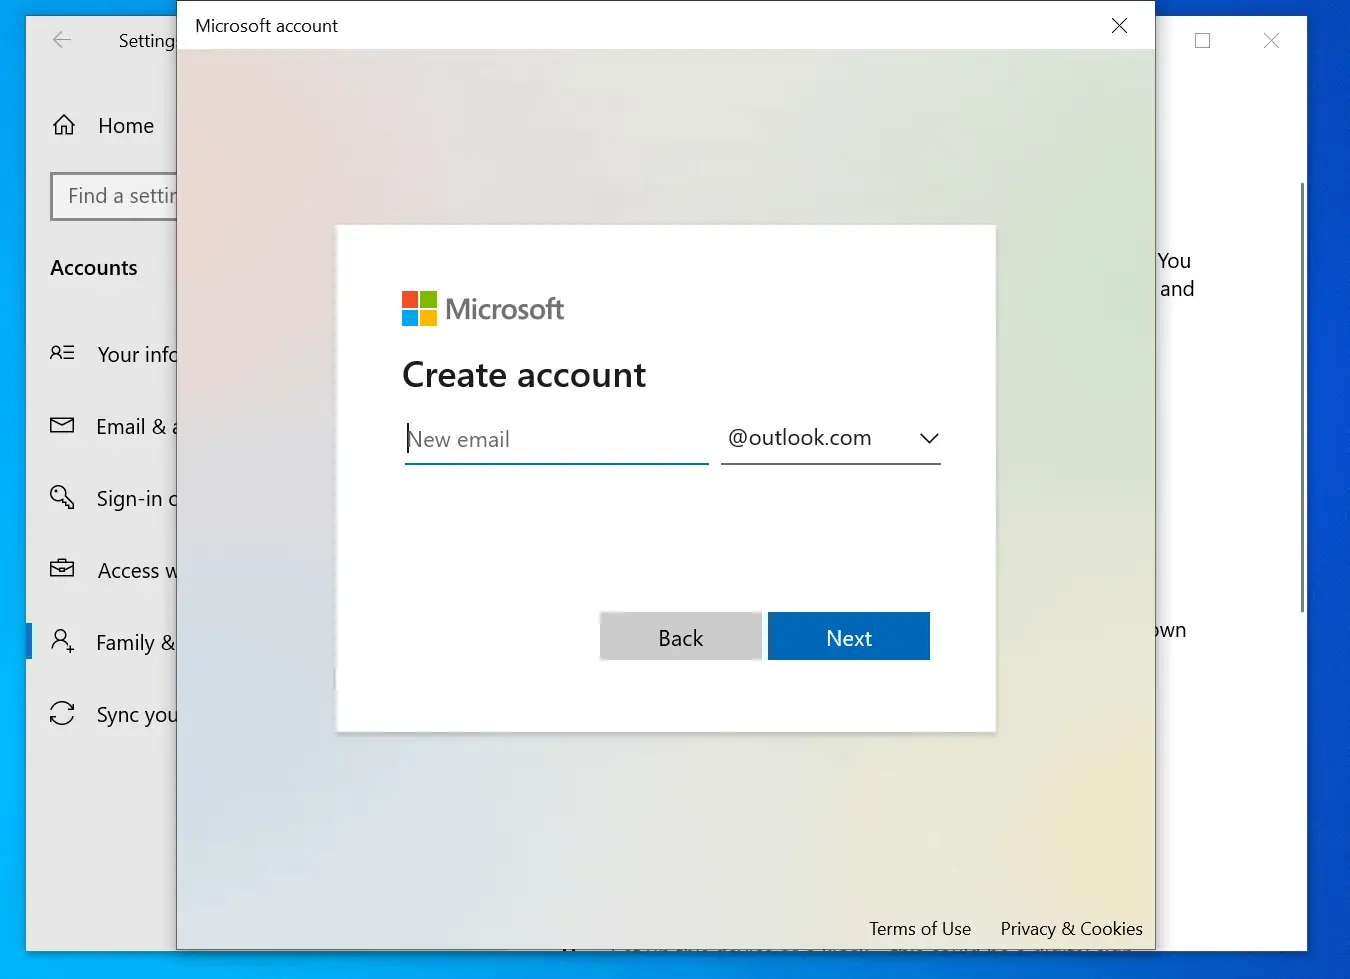
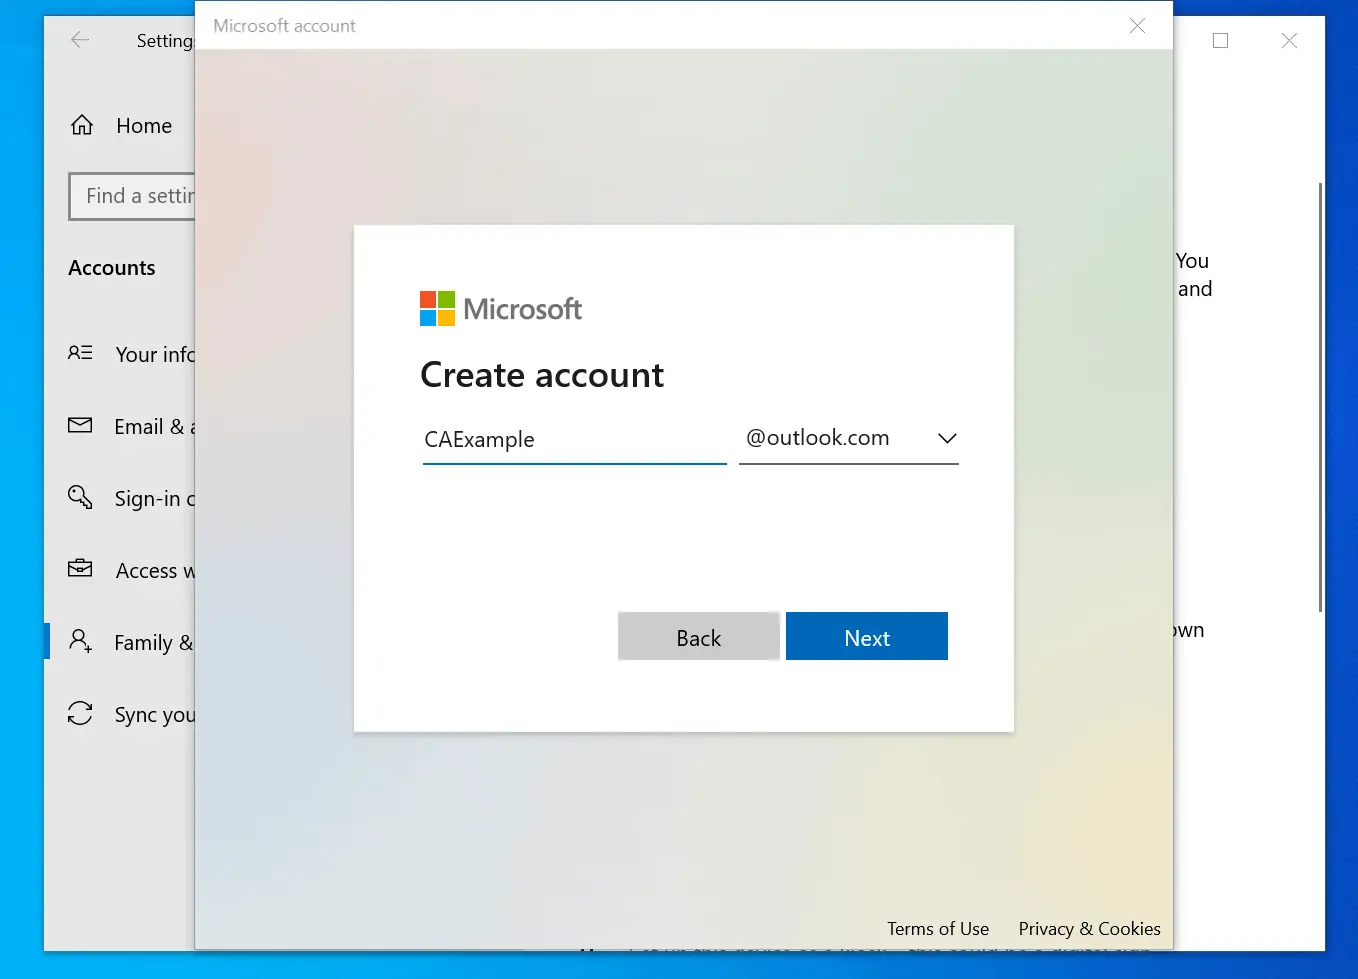
- On the New email field, enter a name for your child’s Microsoft account email address. Then, click Next.
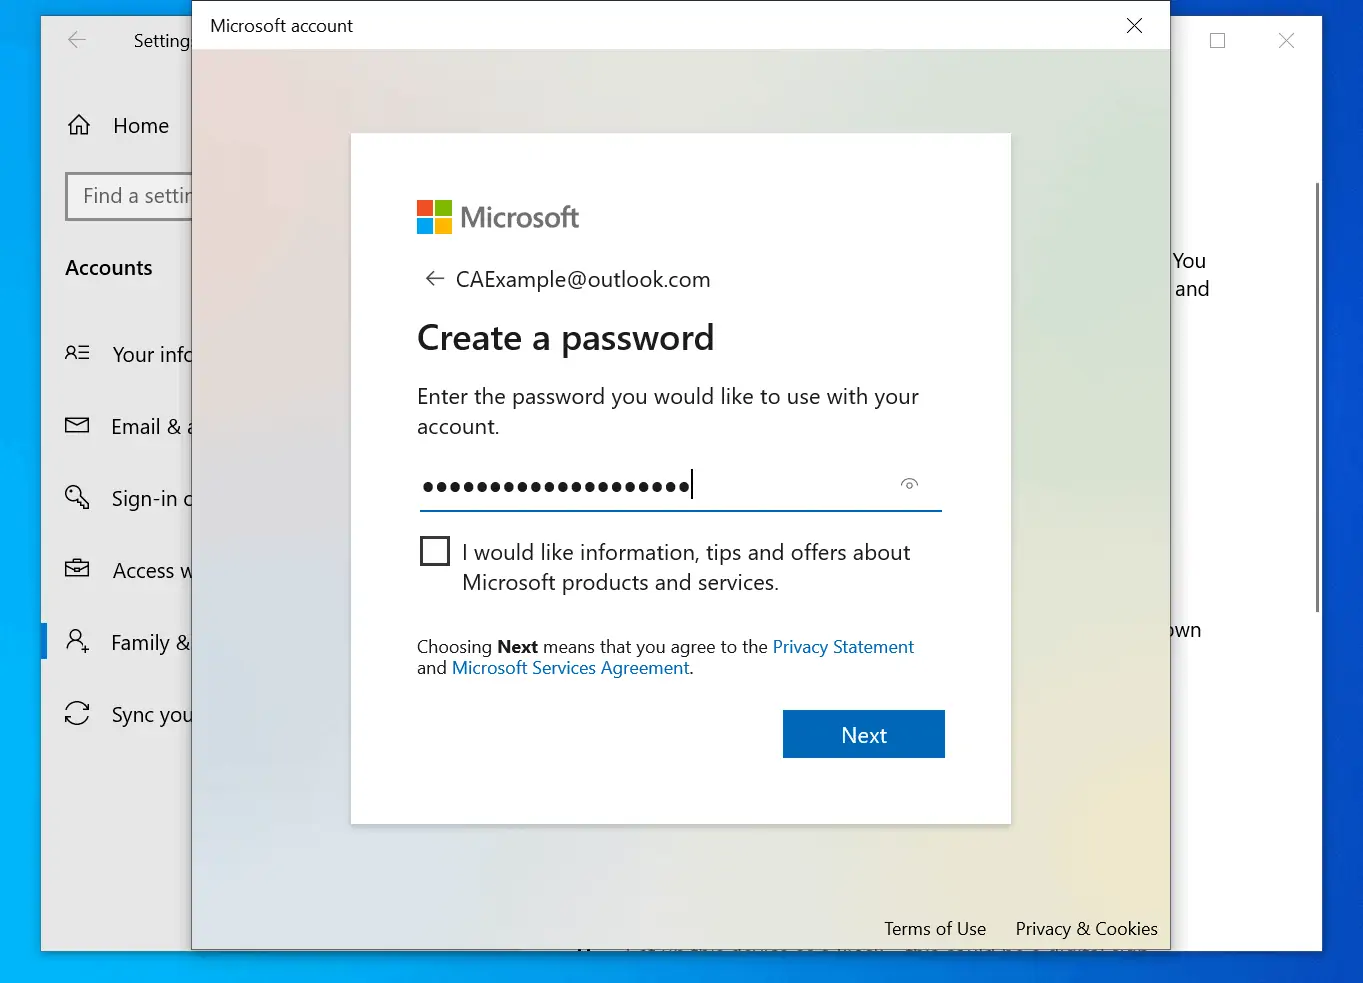
- On the next screen, type a password for your child account and click Next.
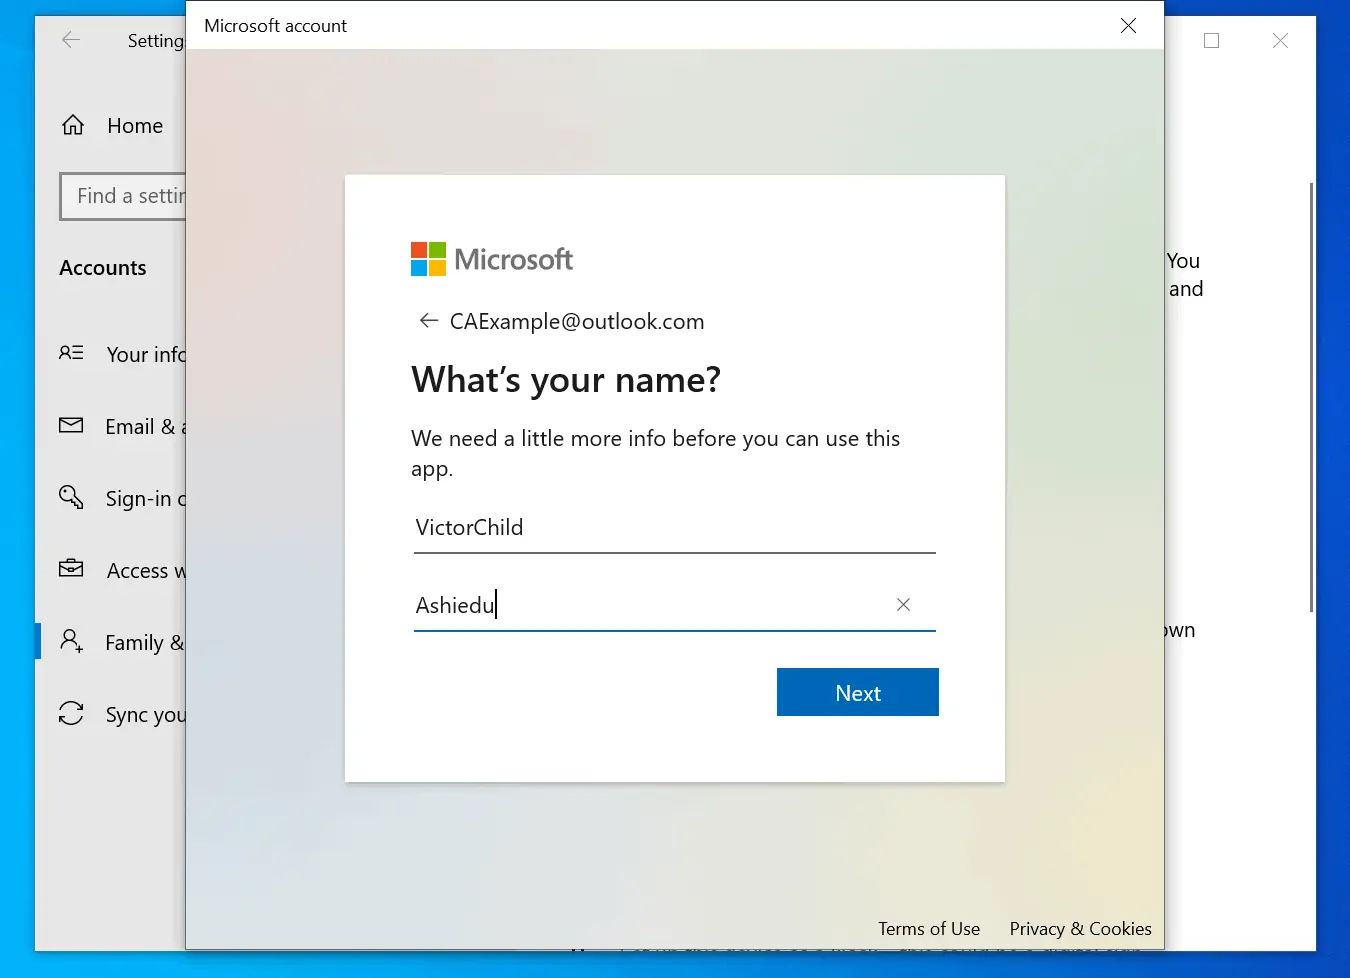
- Furthermore, on the next screen, enter your Child’s First and Family name and click Next.
- Then, enter your child’s date of birth, select your country and click Next.

Step 2: Enable Parental Controls in Family Settings
After creating a Windows 10 account for your child, the next step to enable parental controls is to manage your family settings online – part of managing family settings includes parental controls settings.
Follow the steps below to manage parental controls:
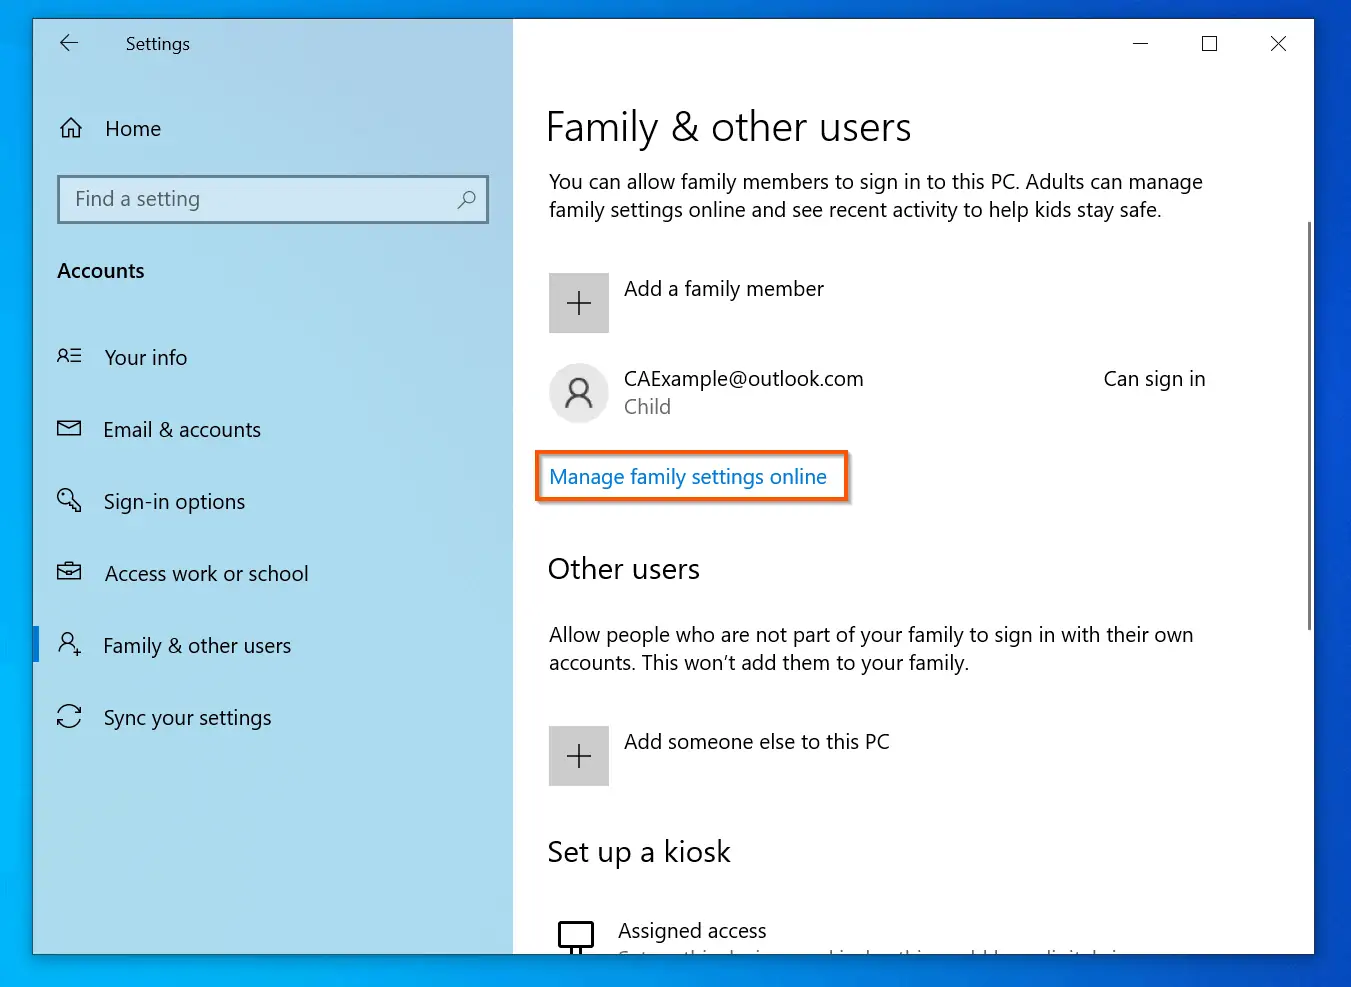
- Back on Windows 10 Family & other users settings, click Manage family settings online. The link will open in your default browser.
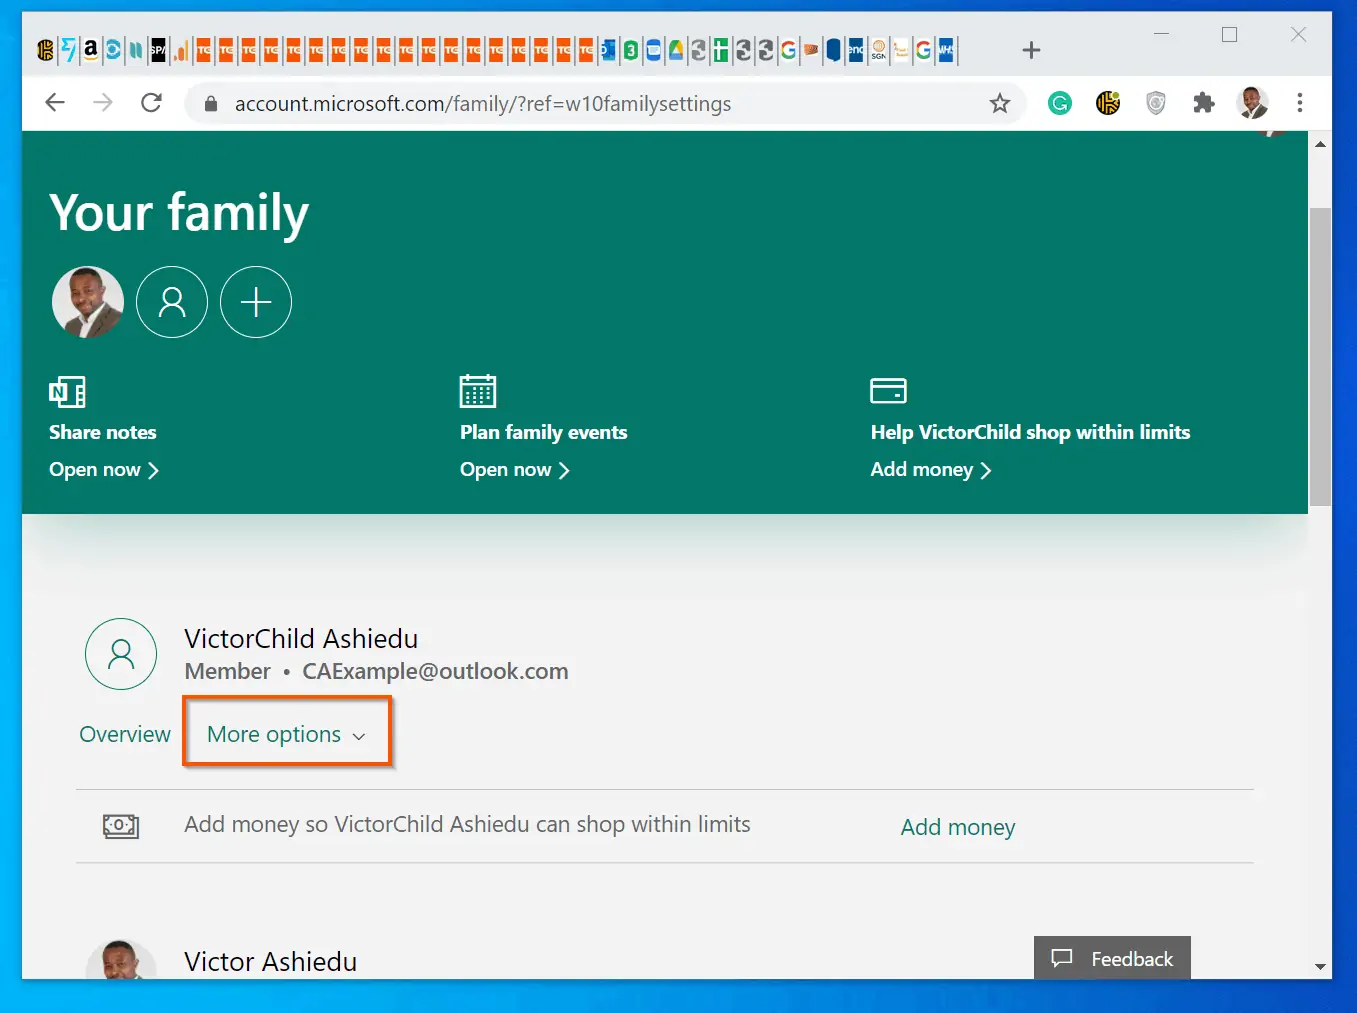
- To view parental controls options, beneath your child’s name, click More options. This will display additional parental controls for Windows 10 – see the second image below.

- Screen time – this setting allows you to schedule when and how long your child spends on devices like Xbox.
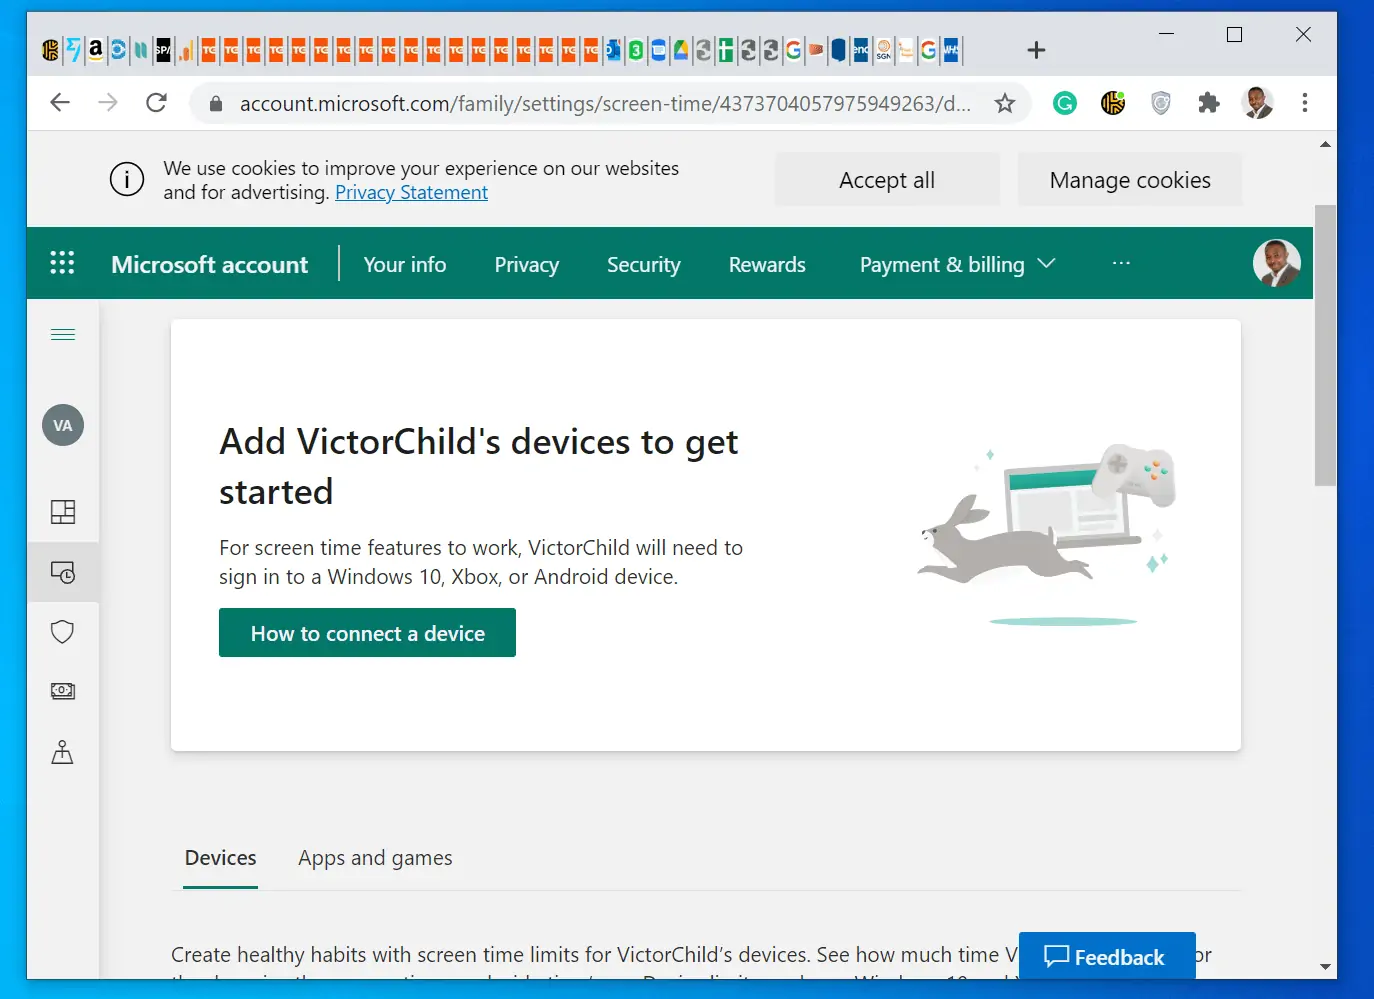
For steps to set screen time, click this link – Set screen time limits on your kids’ devices.
- Content filters – this is part of the More options drop-down. It is also a very important parental controls feature in Windows 10.

This feature allows you to control the websites that your child visits. You can also block mature content and enable SafeSearch on Bing.
Additionally, you can add specific websites that your child is allowed to visit. Moreover, Content filters give you the option to add blocked websites. Your child will not be able to visit sites on the blocked list.
- Spending – this setting gives you additional parental controls to set how your child spends money.
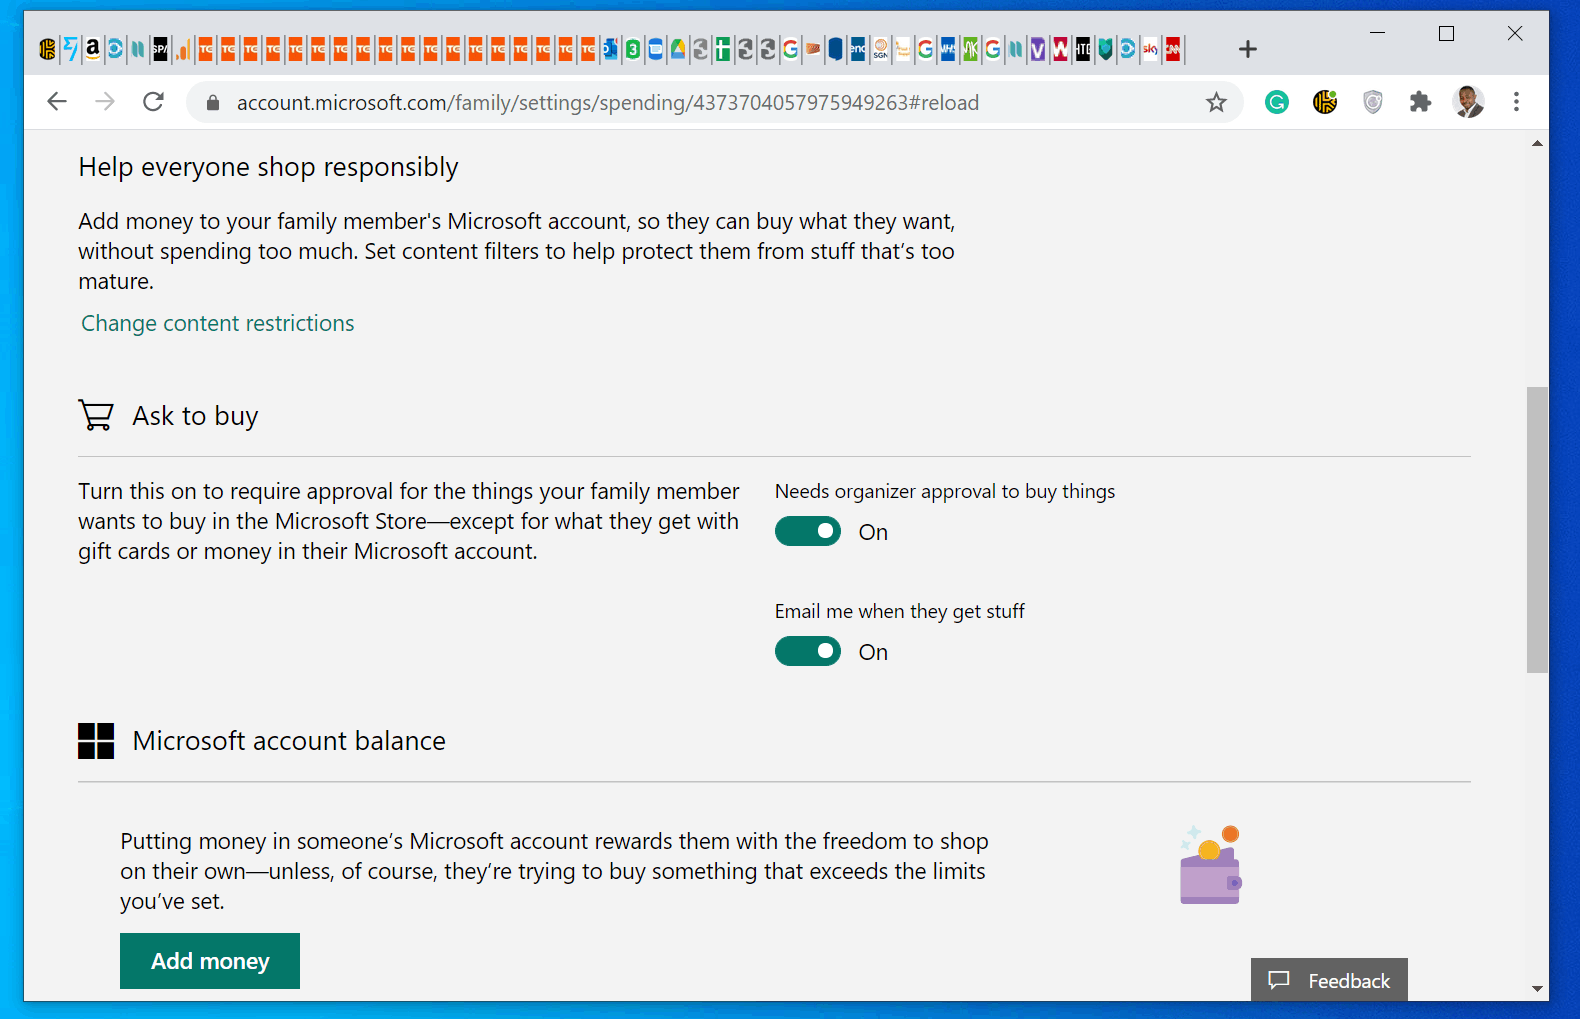
The Spending feature allows you to set whether you want to approve items before your child purchases them from Microsoft store. Moreover, you have the option to receive emails when your child makes a purchase.
Additionally, in this section, you can add money to your child’s account.
Conclusion
With so much concern for kids’ online safety, parents need all the tools they can get to help protect their children. The Windows Parental Control offers that to parents.
In this guide, I explained the two steps to enable this children-safety feature in Windows 10. Let me know how easy it is to use this guide by responding to the “Was this page helpful?” question below.
Finally, for more Windows 10 Itechguides, visit our Windows 10 How-to page. You may also find our Work from Home page very helpful.


![How To Run Sysprep (Generalize) In Windows 10 [2 Methods]](https://www.itechguides.com/wp-content/uploads/2022/05/8-2.webp)