
Do you want to use Hyper-V on your Windows 10 PC? You need to enable virtualization and this guide walks you through the steps.
Overview
To enable Hyper-V, your Windows 10 edition must be Enterprise, Pro, or Education. Windows Home, Mobile, or Mobile Enterprise do not support the Hyper-V feature.
In addition to meeting the above requirement, the PC must also meet the following hardware conditions:
- 64-bit Processor with Second Level Address Translation (SLAT)
- CPU MUST support for VM Monitor Mode Extension (VT-c on Intel CPU’s)
- Minimum of 4 GB memory. It should be higher, depending on the number of Virtual Machines you intend to run concurrently.
Finally, you need to enable Virtualization technology on the computer BIOS.
#1 Best Overall

- The world’s fastest gaming processor, built on AMD ‘Zen5’ technology and Next Gen 3D V-Cache.
- 8 cores and 16 threads, delivering +~16% IPC uplift and great power efficiency
- 96MB L3 cache with better thermal performance vs. previous gen and allowing higher clock speeds, up to 5.2GHz
- Drop-in ready for proven Socket AM5 infrastructure
- Cooler not included
For a full list of all the requirements visit this link – Windows 10 Hyper-V System Requirements.
Once you’ve confirmed that your Windows 10 PC meets the requirements outlined above, use one of these options to install Hyper-V.
Rank #2

- AMD Ryzen 9 9950X3D Gaming and Content Creation Processor
- Max. Boost Clock : Up to 5.7 GHz; Base Clock: 4.3 GHz
- Form Factor: Desktops , Boxed Processor
- Architecture: Zen 5; Former Codename: Granite Ridge AM5
Option 1: Enable Virtualization from Control Panel
To use this method, here are the steps below:
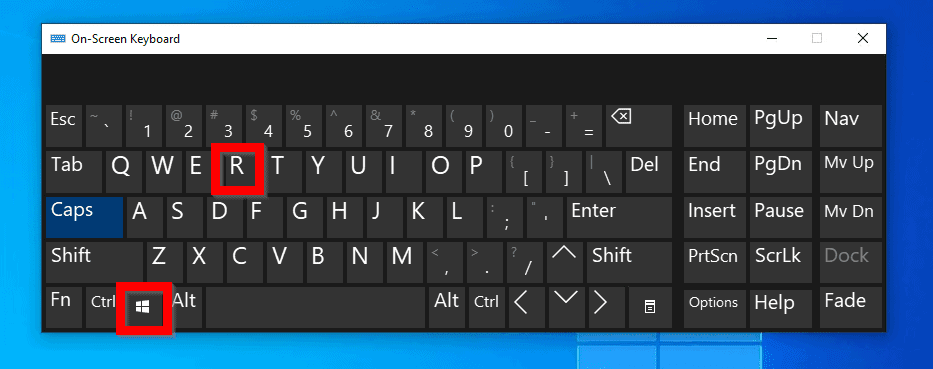
- Press Windows logo + R key to open Run command.
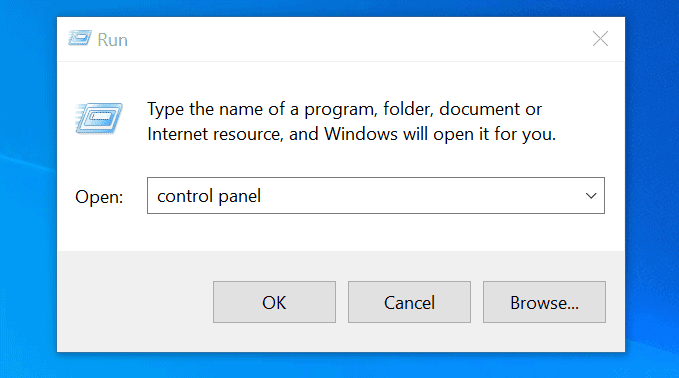
- At Run command, type control panel. Then press OK.
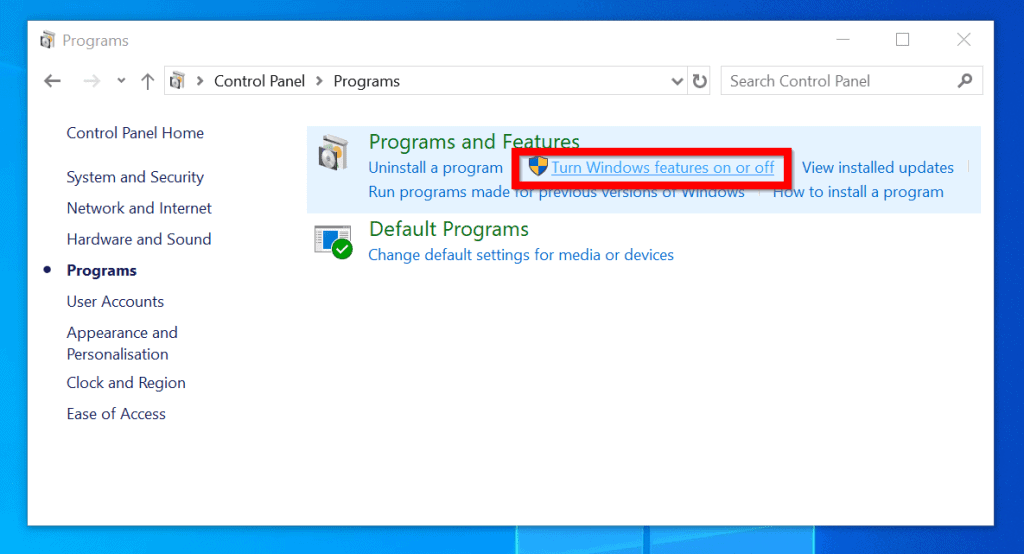
- When Control Panel opens, click Programs.

- Then click Turn Windows Feature on or Off.
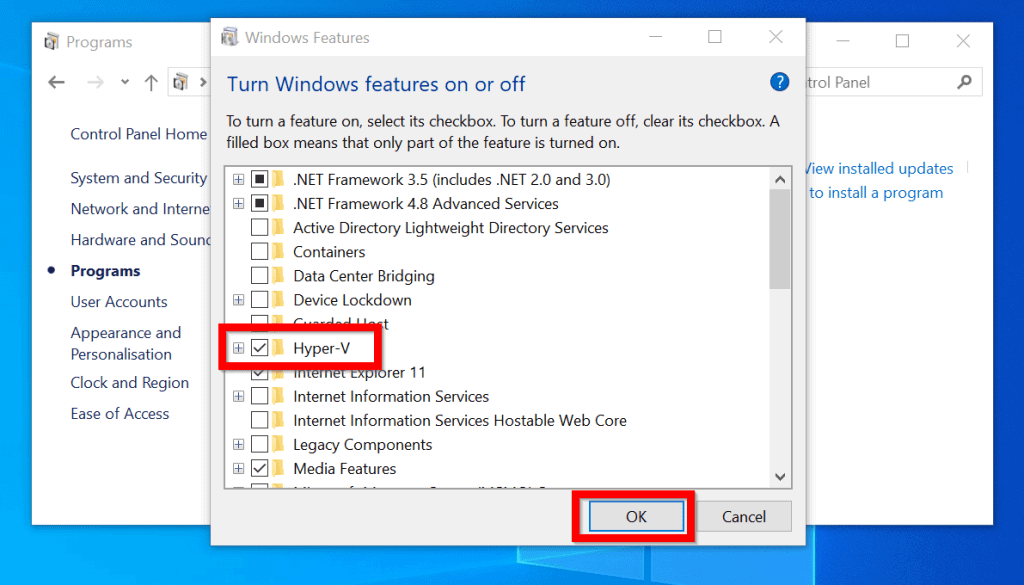
- Finally, to enable Hyper-V in Turn Windows feature on or off, check the box beside Hyper-V. Then click OK.
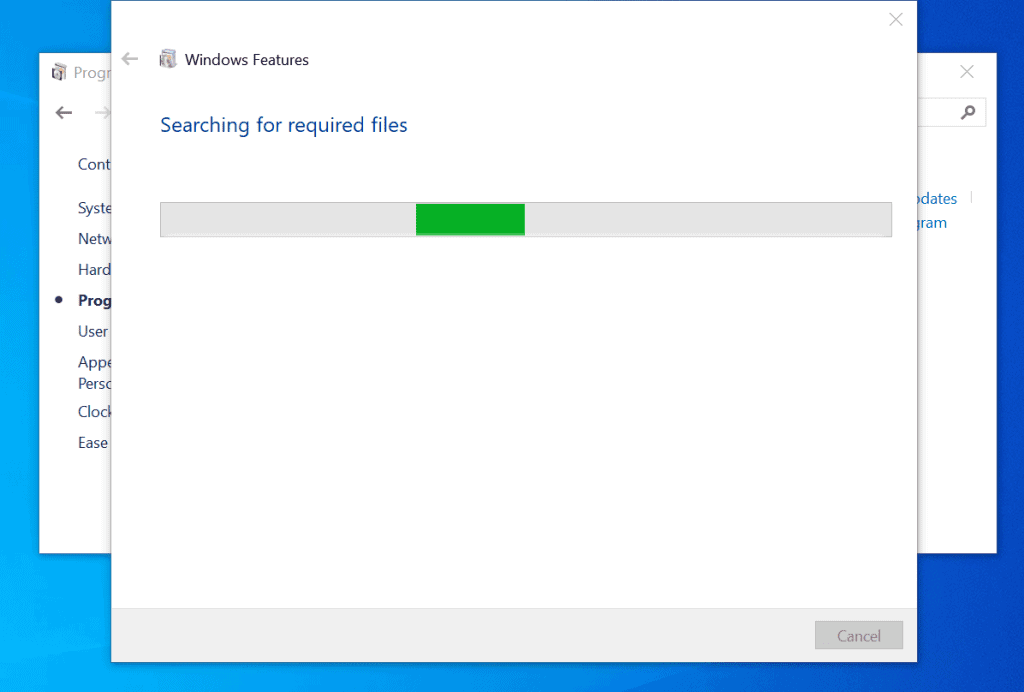
- The feature will begin to install…
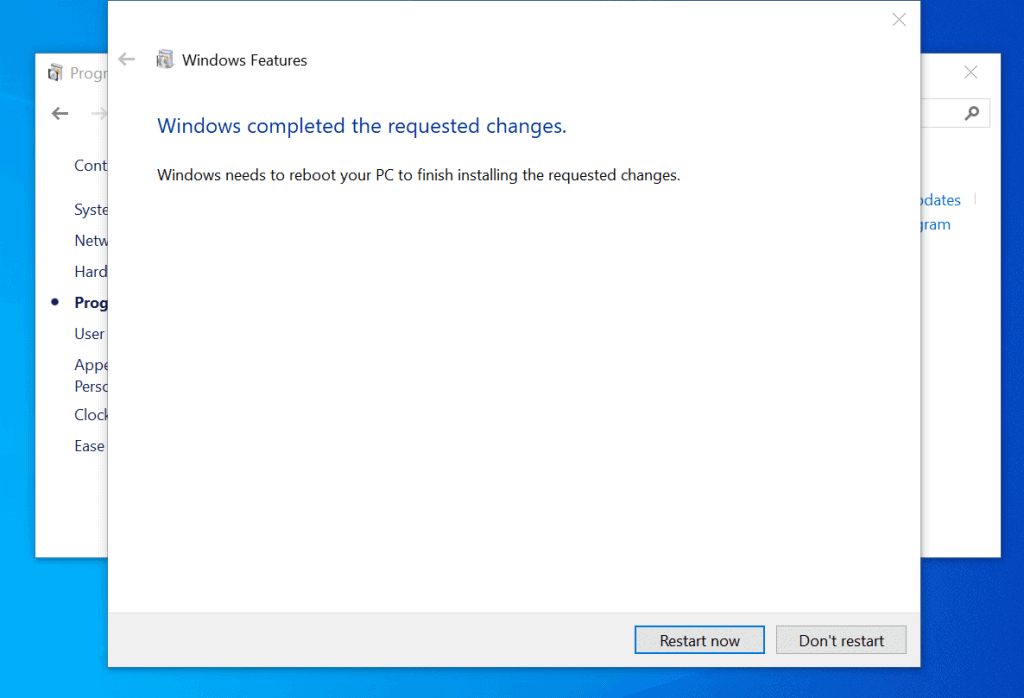
- Then you will be required to restart your PC to complete the installation. Click Restart now.
Option 2: Enable Virtualization with DISM
You can also enable Hyper-V (virtualization) on Windows 10 with DISM. Here are the detailed steps:
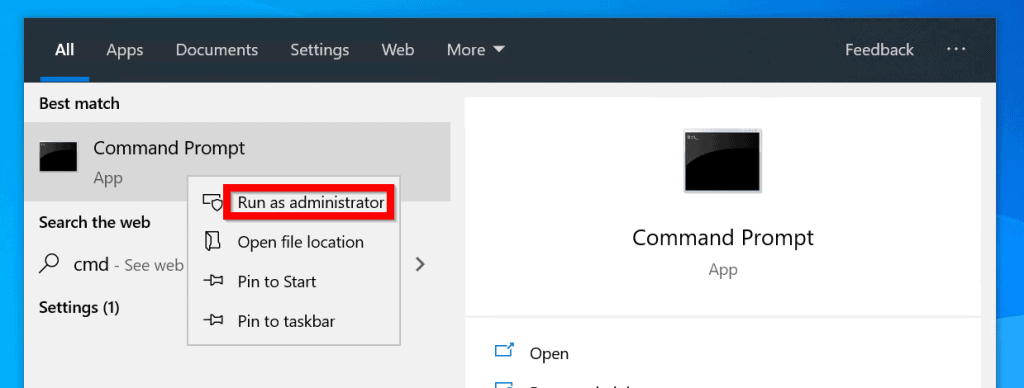
- Type cmd in the search bar. Then right-click Command Prompt and select Run as administrator.
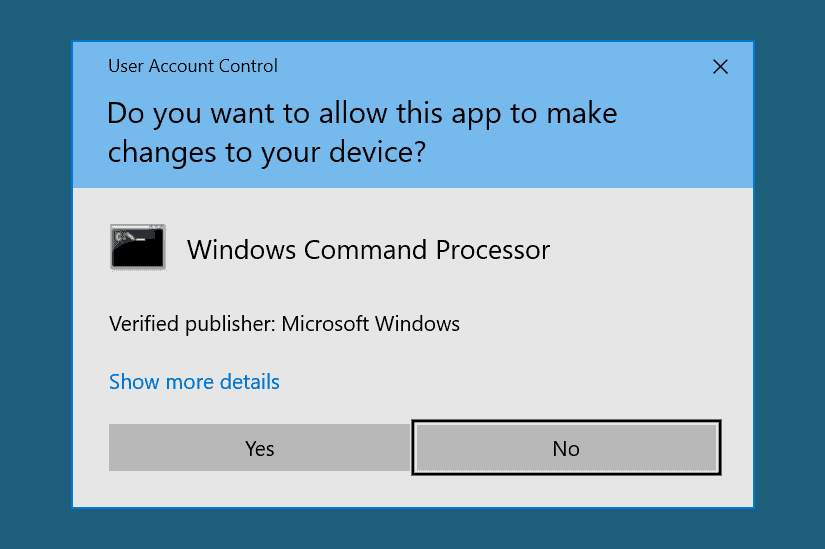
- If you receive User Account Control prompt, click Yes.
- On the command prompt, type this command. Then press enter.
Dism /online /Get-Features | find "Microsoft-Hyper-V"
The command lists all available Hyper-V features…
Recommended Free Tools
Rank #3

- Can deliver fast 100 plus FPS performance in the world's most popular games, discrete graphics card required
- 6 Cores and 12 processing threads, bundled with the AMD Wraith Stealth cooler
- 4.2 GHz Max Boost, unlocked for overclocking, 19 MB cache, DDR4-3200 support
- For the advanced Socket AM4 platform

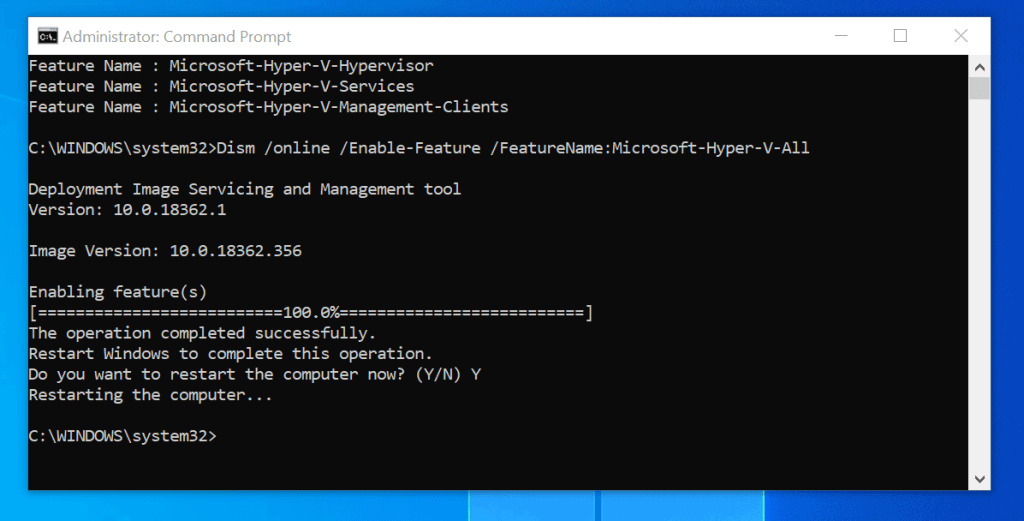
- To install all Hyper-V in Windows 10 (all features), type the command below. Then press enter.
Dism /online /Enable-Feature /FeatureName:Microsoft-Hyper-V-All
- The feature will initiate the installation. Then prompt for a restart. Type Y and press enter.
Option 3: Enable Virtualization with PowerShell
Here are the steps for this method:
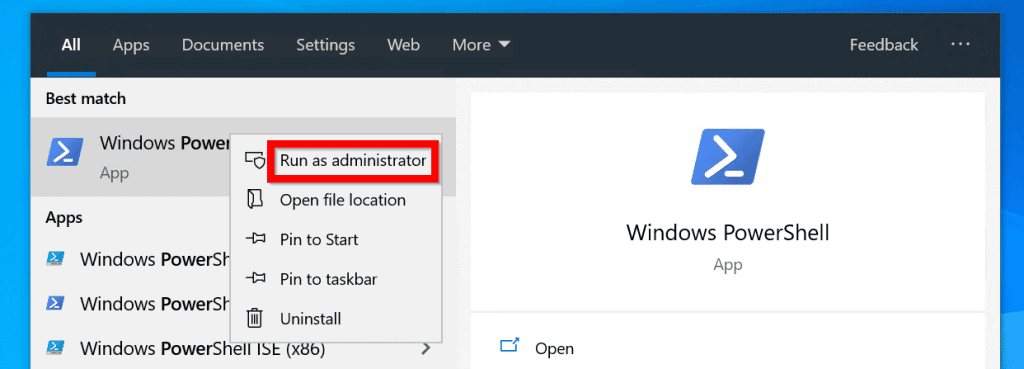
- Search PowerShell. Then right-click Windows PowerShell and select Run as Administrator.
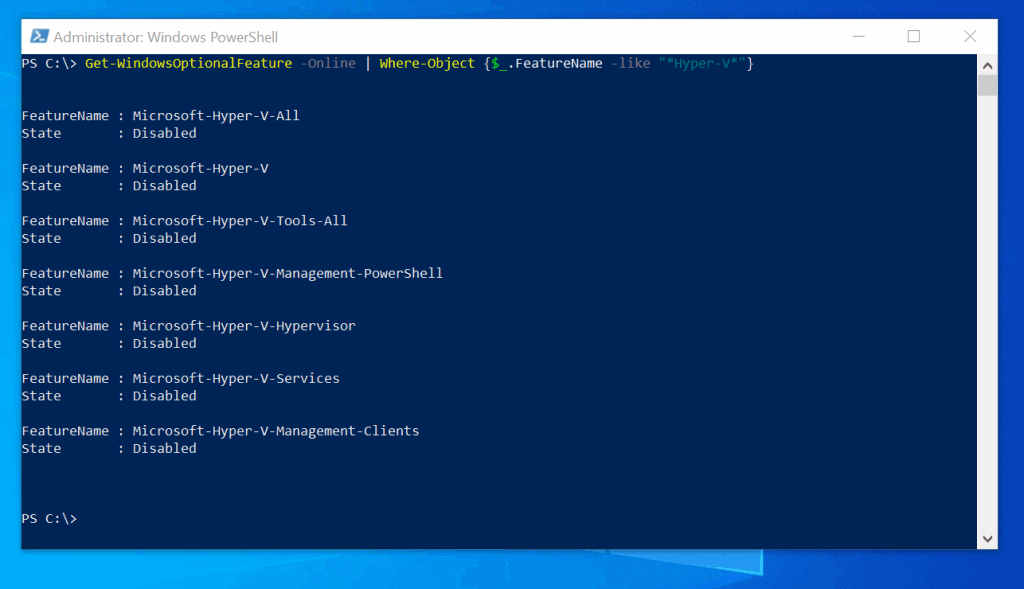
- At the PowerShell command prompt, to list available Hyper-V features, type the command below. Then press enter.
Get-WindowsOptionalFeature -Online | Where-Object {$_.FeatureName -like "Hyper-V"}
The command lists all available Hyper-V features…
- To enable all Hyper-V features, type this command. Then press enter.
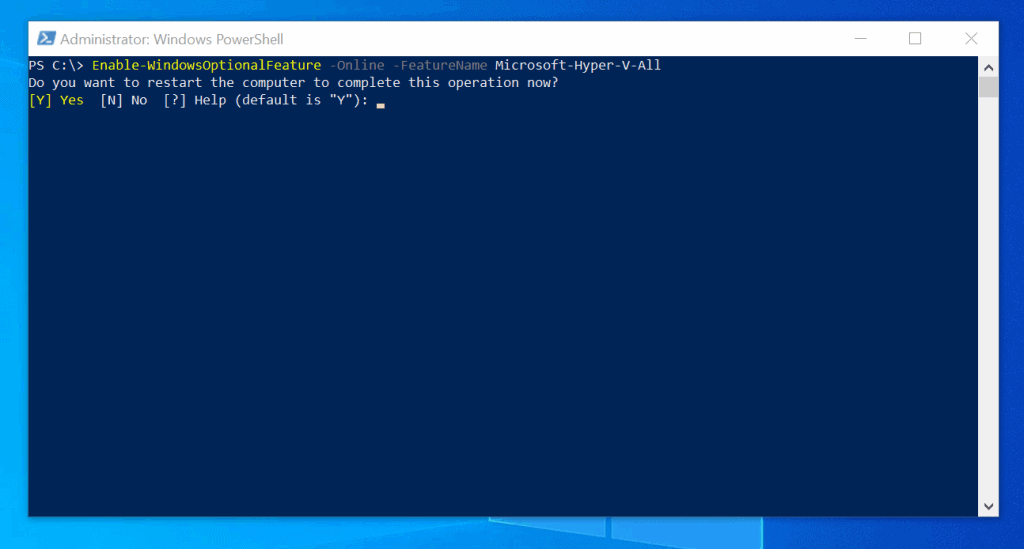
Enable-WindowsOptionalFeature -Online -FeatureName Microsoft-Hyper-V-All
- The command will install the features. Then prompt for a restart. Type Y. Then press enter.
Conclusion
Microsoft made it possible to run virtual machines on Windows 10 PCs that meet the requirements. As I pointed out in this guide, to run VMs on your Windows 10 computer, you must install the Hyper-V Windows optional feature.
Rank #4

- Pure gaming performance with smooth 100+ FPS in the world's most popular games
- 6 Cores and 12 processing threads, based on AMD "Zen 5" architecture
- 5.4 GHz Max Boost, unlocked for overclocking, 38 MB cache, DDR5-5600 support
- For the state-of-the-art Socket AM5 platform, can support PCIe 5.0 on select motherboards
- Cooler not included
In this guide, I shared three methods you can use to accomplish this task – via the GUI tool, DISM command, or Windows PowerShell.
Would you mind telling us the method you used to accomplish this task? To share your thoughts or ask questions, head over to the “Leave a Reply” comments form at the bottom of this page.
Quick wins for a faster PC:
Fix the driver behind crashes, sound loss and screen glitchesFind Drivers →Repair Windows errors before they cause bigger problemsFix Now →Scan for outdated or missing drivers - takes under a minuteDriver Scan →Best Value

- Processor provides dependable and fast execution of tasks with maximum efficiency.Graphics Frequency : 2200 MHZ.Number of CPU Cores : 8. Maximum Operating Temperature (Tjmax) : 89°C.
- Ryzen 7 product line processor for better usability and increased efficiency
- 5 nm process technology for reliable performance with maximum productivity
- Octa-core (8 Core) processor core allows multitasking with great reliability and fast processing speed
- 8 MB L2 plus 96 MB L3 cache memory provides excellent hit rate in short access time enabling improved system performance
Alternatively, you can respond to the “Was this page helpful?” question below.
Finally, for more Windows 10 Itechguides, visit our Windows 10 How-To page.
Quick Recap
Product prices and availability are accurate as of the date/time indicated and are subject to change. Any price and availability information displayed on Amazon at the time of purchase will apply.


Hello sir
Please I want to enable my virtualization tech but they requested for bios password of which I have no idea.
Can you please help me out
After coming across every issue or snag possible, I tried doing the command prompt option, and thankfully that seemed to work without a problem, and after the PC restarted I checked the Programs section in Control Panel and the checkbox for Super-V is checked, but when I try to run a 64bit instance on BlueStacks it tells me that I need to enable Virtualization. So I’m not sure what to do at this point.
I have not been able to get into my PC’s BIOS, I have disabled fast startup so I could have a better chance at seeing the prompt…but no luck, the prompts I do see come up don’t seem to take me into the BIOS.
I’m running a HP PC: Intel(R) Core(TM) i7-3770 CPU @ 3.40GHz, and it runs Windows 10 Pro.
Let me know if you can help me get into the BIOS, or if you know why else I may be having trouble with getting Virtualization to work.
Thanks for your time! 🙂
I have an HP Probook 6470b and have tried multiple times to remove the BIOS password but got nothing.I really need some help on this one
Thank you for the guide. I was able to enable hyper V. But I can’t find VT-x in my bios(maybe because is outdated) can you teach me on how to update Phoenix bios utility?
Hi Junior,
Thanks for the comment. Regarding the VT-x in my BIOS, there is a chance that the laptop does not support this feature.
Is the Hyper-V working?
Also, if you send me your laptop model I can check whether it supports VT-x
Thank you for the guide. I was able to enable Hyper V, but is there a way to enable VT-x through the command prompt?
I don’t have the password to my BIO.
Hi Albert,
Unfortunately, the only way to enable VT-x is to boot to the BIOS. There may be a way to remove the BIOS password? Check Google.