In this Itechguide, Victor teaches you how to stop skype from starting automatically on Windows 10. The guide covers 2 steps to stop skype from starting automatically on Windows 10.
Step 1: Disable Skype in Background Apps
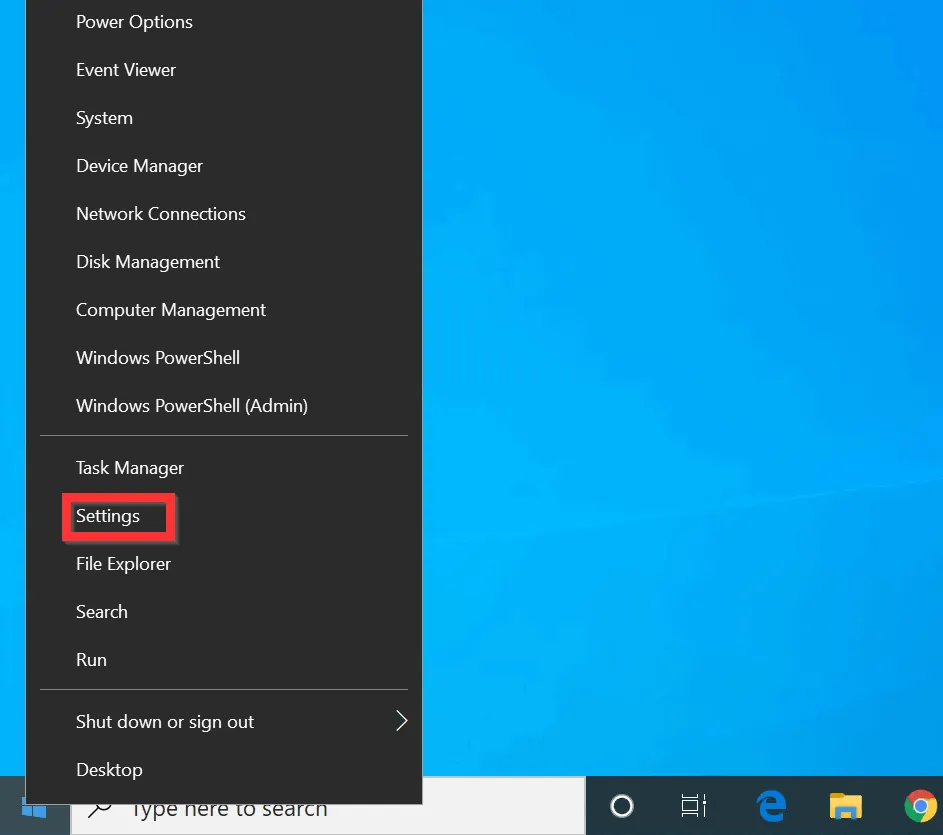
- Right-click the Windows 10 Start menu and click Settings.
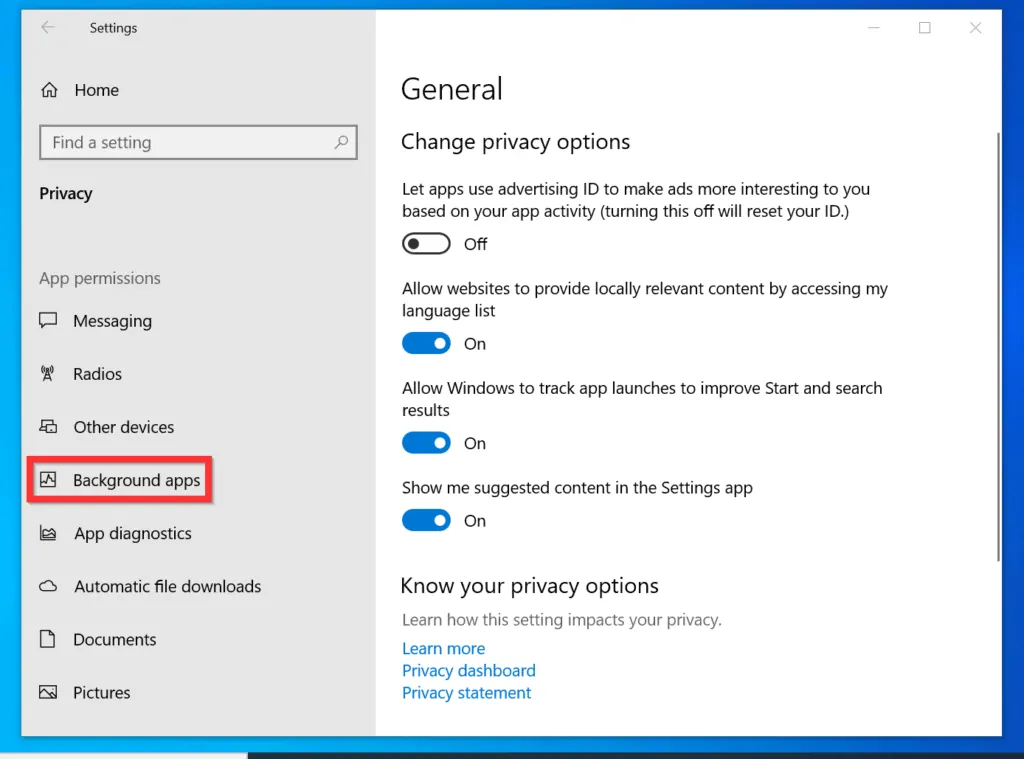
- On the Windows Settings screen, click Privacy.

- Then, scroll down the left pane of Privacy settings and click Background apps.
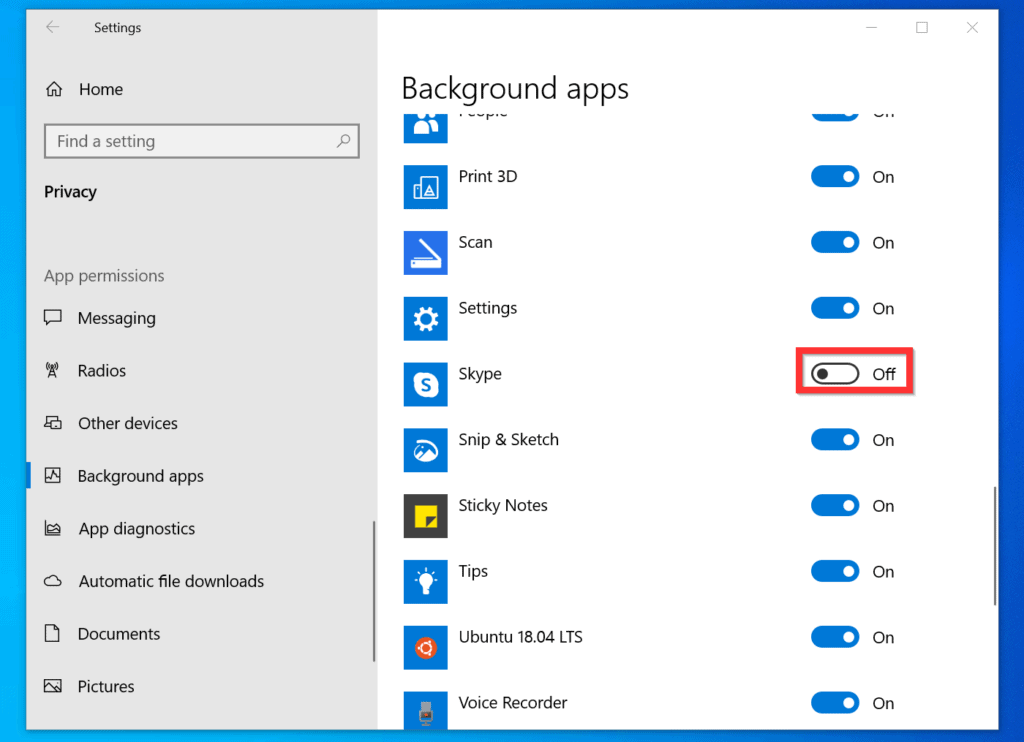
- Finally, locate Skype and toggle the button beside the app from On to Off.
- When you toggle the button Off, it will display Off. The background will also change from blue to gray.

Step 2: Remove Skype from System Tray and Sign Out
After removing Skype from running on the background, the next step to stop the app from starting automatically is to stop Skype from displaying on the System tray. Then, sign out of Skype. Here are the detailed steps…
How to Stop Skype Appearing on System Tray
- Open Skype via search.

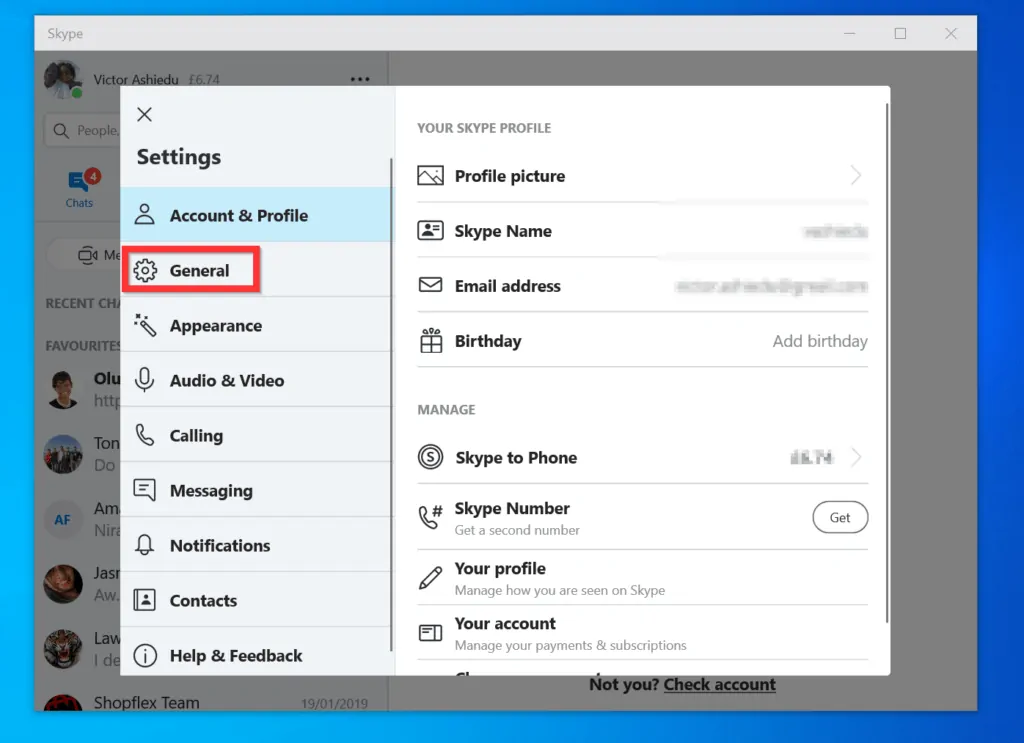
- Then, on the top left, click the app’s menu (3 horizontal dots) and select Settings.

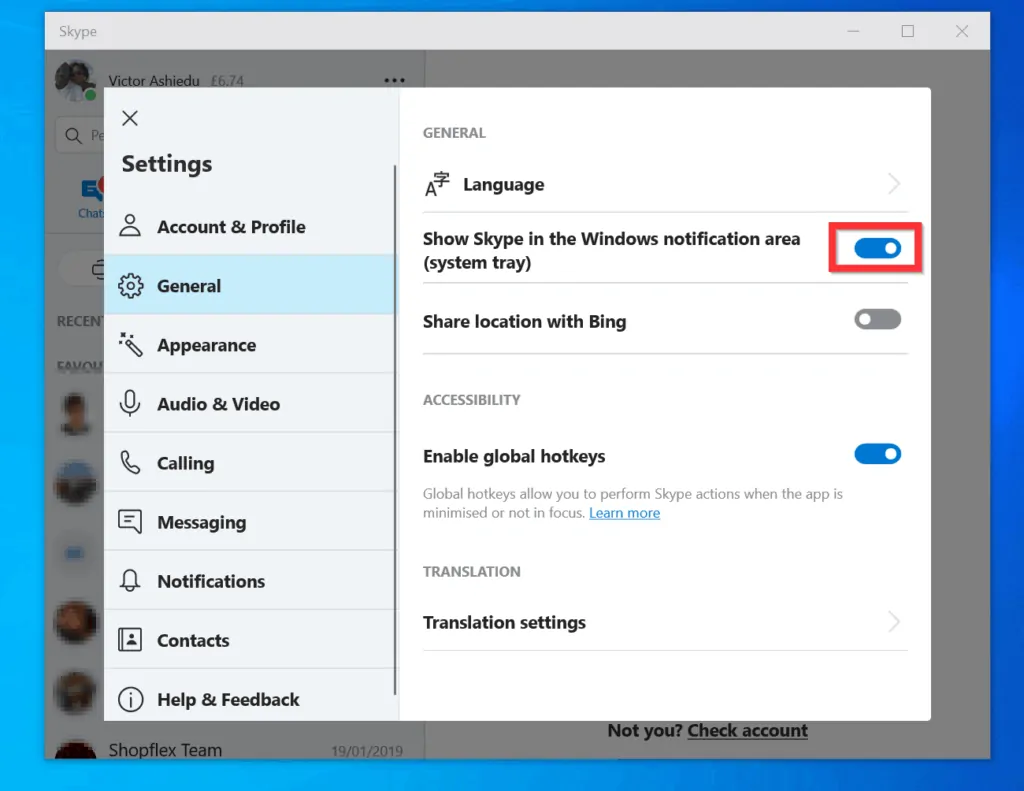
- On the left pane of Skype Settings, click General.
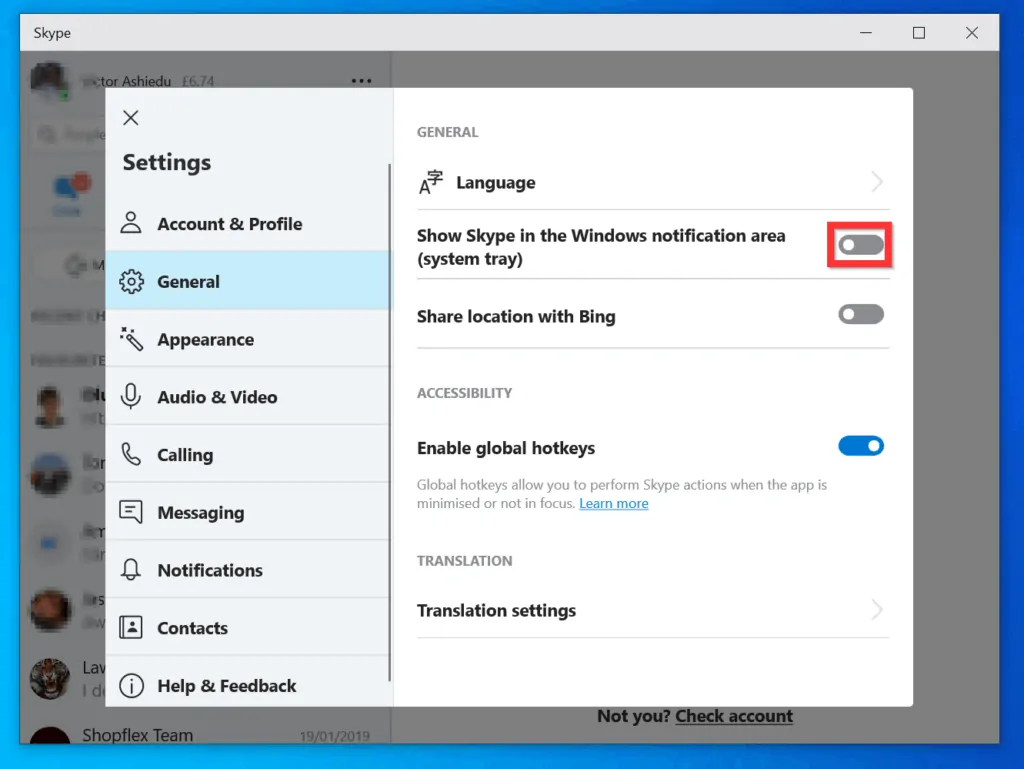
- On the Skype Settings general page, toggle the Show Skype in the Windows notifications area (system tray) button from On to Off.
- When the button is Off, the background will change from blue to gray – see the second image below.
Step 3: Sign Out of Skype
Once you have stopped Skype from appearing in the system tray, the final step to stop Skype from starting automatically on Windows 10 is to sign out of the app.
To sign out of Skype…
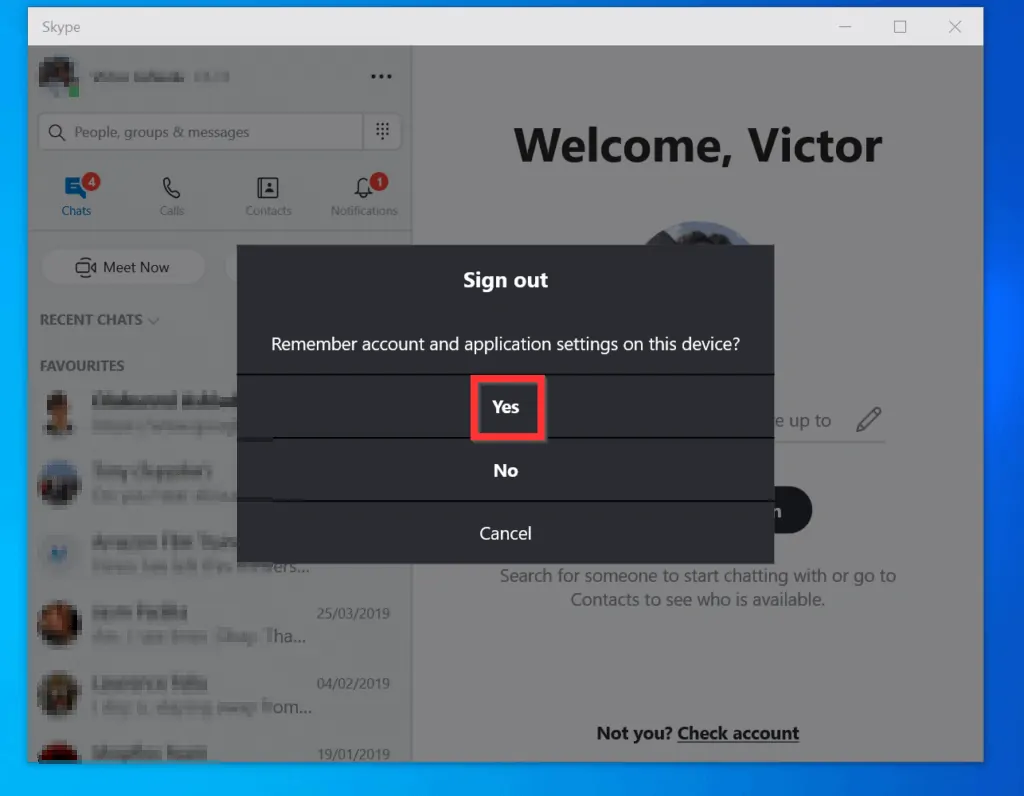
- On the top left, click the app’s menu (3 horizontal dots) and select Sign out. You will receive a final pop up window.

- On the Sign out pop up window, select Yes.
I hope you found this guide helpful. If you did, click on “Yes” beside the “Was this page helpful” question below.
You may also express your thoughts and opinions by using the “Leave a Comment” form at the bottom of this page.
Finally, for more Windows 10 Itechguides, visit our Windows 10 How-To page.


![How To Run Sysprep (Generalize) In Windows 10 [2 Methods]](https://www.itechguides.com/wp-content/uploads/2022/05/8-2.webp)