
Do these 3 things before closing this tab:
1Fix the driver behind crashes, sound loss and screen glitches2Clear out junk files and repair common Windows errors3Scan for outdated or missing drivers - takes under a minuteiTechGuides is reader-supported. When you buy through links on our site, we may earn an affiliate commission. As an Amazon Associate I earn from qualifying purchases. Learn more
You can run classic console games on a RISC‑V development board when the board boots a usable RISC‑V Linux distribution and has working display, audio, storage, USB or Bluetooth, and input drivers. The practical route is to install RetroArch, add the Libretro cores that emulate your target consoles, connect a Linux-compatible gamepad, and load ROM or disc images you are legally entitled to use.
Start with 8-bit and 16-bit systems such as NES, Game Boy, Master System, SNES, and Genesis. Verify one core at a time on your exact board before attempting more demanding systems. RISC‑V compatibility by itself does not guarantee full-speed emulation, hardware-accelerated graphics, low-latency audio, or even a working controller.
What the setup actually contains
A working installation has four separate parts: the RISC‑V board, its Linux operating system, the RetroArch frontend, and one or more Libretro emulator cores. Your game images and any required BIOS files are separate content that you provide.
The board and Linux
Choose a board that boots a maintained 32-bit or 64-bit RISC‑V Linux distribution. The board should expose a usable shell and have drivers for the display output, audio device, storage, USB or Bluetooth, and input devices. A board can boot Linux successfully yet still be unsuitable for emulation if its graphics or audio stack is incomplete.
Popular on Amazon

- Flexible MCU Board: Incorporate the ESP32-C3 32-bit RISC-V chip, operating up to 160 MHz, mounted multiple development ports,
- Developer Friendly: Compatible with Arduino IDE, MicroPython, CircuitPython, PlatformIO, ESP IDF, Zephyr, Matter, ESPNow, Meshtastic, WLED, ESPHome, Home Assistant, Ubidots
- Outstanding RF performance: Complete Wi-Fi functions and Bluetooth Low Energy, while supporting communication over 100m with anFL antenna
- Elaborate Power Design: 4 working modes as low as 44 μA in deep sleep mode, while supporting lithium battery charge management
- Thumb-sized Design: 21 x 17.5mm, Seeed Studio XIAO series classic form factor
RetroArch is the frontend
Libretro documentation describes RetroArch as a “frontend for emulators, game engines and media players.” RetroArch supplies generic video, audio, and input callbacks and presents the menus, configuration, save-state controls, and controller mapping. It does not itself contain every console emulator.
Cores provide the emulation
The actual console implementation is a loadable Libretro plugin called a core. The RetroArch documentation puts it plainly: these plugins are called “cores,” and you install them inside RetroArch. You need a core for each console family you want to emulate, and the core’s compatibility and performance are independent of the frontend.
Your content remains your responsibility
RetroArch is not a program that includes all consoles and games, and it is not a service for downloading copyrighted games. Copy ROM dumps, cartridge images, disc images, and BIOS files only when you have the legal right to use them in your jurisdiction. Keep those files on storage you control and do not assume a core can supply missing copyrighted content.
Check the RISC‑V board before installing anything
Board choice is the largest variable in this project. No general RISC‑V compatibility list can guarantee that a particular board will run a particular core well. Confirm the following in the board vendor’s and Linux distribution’s documentation before buying or flashing an image.
Also popular on Amazon
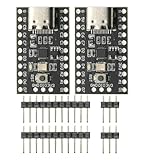
- CH32V003 Development Minimum System Board for Nano RISC-V CH32V003F4U6 Chip TYPE-C USB 22Pin
- on-board 24MHz Crystal oscillator
- Power by TYPE-C USB
- A maintained Linux image for the board’s exact processor and ABI, with either 32-bit or 64-bit RISC‑V userspace as appropriate.
- A display path that works at the resolution you intend to use, preferably with a documented accelerated video driver.
- Working audio output with a usable Linux sound device.
- Fast enough storage for the operating system, RetroArch, cores, BIOS files, and game images.
- USB host support or a Bluetooth stack for a gamepad, plus a way to test that Linux detects the device.
- Community documentation or package recipes that explain how to build software for the board.
- A power supply and thermal arrangement suitable for sustained CPU and GPU load.
After Linux boots, open a terminal and establish a baseline before adding emulation software. Commands such as uname -m, lsusb, and aplay -l can show the machine architecture, attached USB devices, and audio devices when those utilities are installed. Use your distribution’s own display and input diagnostics as well. If the board cannot show a stable desktop or play ordinary system audio, fix that layer first.
Install or build RetroArch on RISC‑V Linux
On platforms with packaged support, the simplest path is the distribution package manager. A RISC‑V distribution may not publish RetroArch or its cores, and its Online Updater may not list usable RISC‑V binaries. In that case, compile RetroArch and the required cores for the board’s RISC‑V ABI.
Path A: distribution packages
- Update the package index. Use the command prescribed by your Linux distribution, then install available RetroArch packages and their documented dependencies.
- Launch RetroArch without content. Confirm that its menu opens, the display remains stable, and the application can create its configuration directory.
- Check core availability. Open the core-management or Online Updater area if your package provides it. A missing updater or an empty RISC‑V catalog is a packaging limitation, not evidence that the board cannot run a core.
- Install only the cores you need. Keeping the first test small makes it easier to identify whether a failure belongs to RetroArch, a core, a driver, or a game image.
Path B: build from source
- Prepare a build environment. Install the compiler, linker, development headers, and graphics, audio, input, and menu dependencies required by the RetroArch build instructions for your distribution.
- Build RetroArch for the board. Use the project’s documented configuration for your Linux display and audio backends. Ensure the compiler targets the board’s RISC‑V ABI rather than producing binaries for the build machine.
- Build each core separately. Libretro cores are plugins. Compile the core for the same userspace and architecture, then place the resulting library where RetroArch can find it or select it through the frontend’s core directory settings.
- Start with a core-only smoke test. Load the core without a game and verify that RetroArch can initialize it. This separates a missing or incompatible plugin from a bad ROM, BIOS, or save file.
- Record the build details. Note the board model, Linux release, compiler, RetroArch version, core revision, video driver, and audio backend. Those details are essential when reproducing a working setup or diagnosing an update that breaks it.
Do not copy an x86 or ARM core into a RISC‑V installation and expect it to work. A core is native code for the host architecture unless you deliberately run it through another compatibility layer, which adds complexity and is outside the straightforward RetroArch workflow.
Quick wins for a faster PC:
Fix the driver behind crashes, sound loss and screen glitchesFind Drivers →Clear out junk files and repair common Windows errorsFree Scan →Connect and map a gamepad
A Linux-compatible USB or Bluetooth gamepad makes console-style input practical, but compatibility depends on the board’s kernel, firmware, USB host controller, and Bluetooth stack.
Also popular on Amazon

- The ESP32-C3 SUPERMINI is positioned as a high-performance, low-power, cost-effective IoT mini development board, suitable for low-power IoT applications and wireless wearable applications
- It is equipped with a rich set of interfaces, including 11 digital I/Os that can be used as PWM pins and 4 analog I/Os that can be used as ADC pins.
- It supports four serial interfaces, including UART, I2C, and SPI.
- The ESP32-C3 features a 32-bit RISC-V CPU, including an FPU (Floating Point Unit) capable of 32-bit single-precision
- Package: 2PCS ESP32-C3 MINI Development Board ESP32 SuperMini ESP32 C3 WiFi Module
- Connect the controller. Plug in a USB pad or pair a Bluetooth pad using the Linux tools supplied by your distribution.
- Confirm Linux sees it. Check the kernel’s input devices or use an installed event-testing utility. If no HID device appears, troubleshoot the cable, pairing, power, permissions, and board driver before changing RetroArch settings.
- Open RetroArch’s input settings. Select the detected device and map the directional controls, face buttons, shoulder buttons, start, select, and hotkeys. Save the controller profile only after every required button responds.
- Use a keyboard for initial testing when necessary. Keyboard input can prove that a core launches while you resolve a missing controller driver, but it is not a substitute for validating the final gamepad path.
- Test latency and disconnect recovery. Play a timing-sensitive section, then suspend, resume, or reconnect the controller. A device that maps correctly but drops after resume needs a Linux or Bluetooth fix rather than a different ROM.
Load legally obtained games and BIOS files
Copy your game images to local storage using the method supported by the board: removable media, a network share, or a secure file-transfer tool. Keep system-specific files organized in separate directories so that you can identify the console, region, revision, and dump format.
- Use a stable, readable filesystem. A nearly full or intermittently mounted card can look like a core failure.
- Place BIOS files exactly where the core’s documentation expects them and use the required filename and checksum when specified.
- Do not rename files casually if a core expects a particular BIOS name.
- Retain an untouched backup of your original dumps and keep save files in a separate backup location.
In RetroArch, select the installed core first, then choose the game image through the content browser. If the frontend reports that no suitable core exists, install or build the core rather than repeatedly opening the same file.
Test consoles in a sensible order
Testing from least demanding to more demanding gives you a clear baseline for video, audio, input, and timing. Begin with one game that is known to boot, then add another title only after the first has passed basic checks.
What’s actually slowing this PC down?
Pick the symptom - the matching free tool is one click away.
| Test group | Examples | What to verify |
|---|---|---|
| 8-bit consoles | NES, Game Boy, Master System | Core initialization, controller mapping, stable audio, correct aspect ratio, and save behavior. |
| 16-bit consoles | SNES, Genesis | Frame pacing during scrolling, audio without crackle, input latency, and performance with optional shaders disabled first. |
| Arcade | MAME-based content | Exact core and ROM-set compatibility, parent ROMs, BIOS files, and audio samples where required. |
| More demanding systems | Any later console core supported by your build | Board-specific CPU/GPU headroom, thermal behavior, driver stability, and whether the core’s requirements exceed the platform. |
The checks to perform for every first game
- Boot from a cold start and from a later launch.
- Play for several minutes while watching for dropped frames, uneven scrolling, audio crackle, or pauses when loading.
- Confirm every mapped control, including start, select, pause, and any core hotkeys you use.
- Create a save or save state, exit cleanly, and reload it.
- Suspend and resume the board if that is part of your normal use.
- Repeat the test at the output resolution and display connection you plan to keep.
Why MAME games fail to load
Arcade emulation is less forgiving than a typical cartridge-based console setup because a game is tied to a particular ROM-set structure. The Libretro guidance recommends matching the MAME core version to the corresponding ROM-set version.
Also popular on Amazon

- ESP32-C6 WiFi 6 microcontroller development board adopts ESP32-C6-WROOM-1-N8 module, which is equipped with RISC-V 32-bit single-core processor, up to 160MHz main frequency, built-in 8MB Flash
- Integrates WiFi 6, Bluetooth 5 and and IEEE 802.15.4 (Zigbee 3.0 and Thread) wireless communication, with superior RF performance
- Integrates rich peripherals including SPI, UART, I2C, I2S, LED PWM, SDIO and other interfaces, compatible with the pinout of ESP32-C6-DevKitC-1-N8 development board, more convenient to use and expand a variety of peripheral modules
- Onboard CH343 and CH334 USB HUB chips, supports USB and UART development at the same time via a USB-C port
- Comes with online examples and tutorials for ESP-IDF development environment
Parent, clone, BIOS, and sample dependencies
An individual archive may be a clone that omits ROM chips supplied by its parent set. Other machines require a separate BIOS archive, and some titles use audio-sample files. A file that appears complete in a file browser can therefore be missing data the core expects.
A repeatable MAME troubleshooting sequence
- Identify the exact MAME core version installed in RetroArch.
- Determine which ROM-set version that core expects.
- Use a set built for that version rather than mixing archives from different releases.
- Place the parent ROM, clone ROM, BIOS, and sample files in the locations required by the core, preserving the expected archive names.
- Launch the parent title first, then test the clone.
- If the core reports a missing file, treat the message as a set-composition problem before changing video or controller settings.
Updating only the core or only the ROM collection can create a mismatch. Keep the pair versioned together and document changes so that a working arcade setup can be restored.
Tune performance without masking the real problem
No independent benchmark establishes a universal “full-speed” RISC‑V board or core. Performance is specific to the board, Linux build, video driver, audio path, core, game, output resolution, and enabled enhancements.
The Tool Desk
Outbyte PC Repair FREEClear out junk files and repair common Windows errorsFree Scan →Outbyte Driver Updater FREEScan for outdated or missing drivers - takes under a minuteDriver Scan →- Establish a clean baseline. Disable shaders, overlays, run-ahead features, rewind, and other optional processing. Use the simplest stable video driver exposed by your build.
- Reduce output work. Lower the display resolution or choose an integer-scaled mode if the board struggles with composition.
- Remove background load. Stop unnecessary services and close desktop applications while testing. Sustained emulation can expose thermal throttling or power limits that are invisible during light workloads.
- Change one setting at a time. After each change, replay the same section and watch frame pacing and audio. Changing several options together prevents you from identifying the cause.
- Prefer core-appropriate options. A feature that improves one console may add substantial overhead to another. Keep enhancements off until the unmodified game runs reliably.
- Check audio separately. Crackle can come from buffer underruns or an audio backend problem even when video appears smooth. Adjust the distribution’s audio configuration and RetroArch’s buffer settings only after confirming the board’s audio device is healthy.
CPU performance and any SIMD or vector support matter, but they are not the only selection criteria. GPU and video-driver maturity, audio latency, display outputs, storage bandwidth, controller support, package availability, documentation, power, and thermal limits can determine whether a theoretically faster board is easier to use.
Also popular on Amazon

- Ample PSRAM Storage – The development board offers 8MB PSRAM, providing substantial extra memory for handling more complex tasks, large data buffers, and advanced processing.
- Enhanced Multi-Tasking Capability – With the additional 8MB PSRAM, the ESP32-C5-WIFI6-KIT can efficiently manage multiple protocol stacks simultaneously, ensuring smooth operation in multi-tasking IoT environments.
- Support for Medium-Load Applications – The 8MB PSRAM allows the ESP32-C5 to handle medium-load applications more effectively, making it ideal for scenarios requiring real-time data processing or continuous communication.
- Seamless Performance – The increased memory improves the overall performance and responsiveness of the device, particularly when running applications with larger memory footprints or more demanding computations.
- Future-Proof for Complex Projects – With 8MB of PSRAM, developers are better equipped to build scalable, high-performance solutions that support both current and future IoT use cases, offering flexibility for future-proofing designs.
How to compare two RISC‑V boards or two cores
The available evidence does not provide a measured board ranking, so compare candidates using the following practical axes rather than a generic processor label.
| Axis | Questions to answer |
|---|---|
| CPU and SIMD/vector support | Does the board provide enough sustained compute for the target core, and does the software toolchain expose useful instruction extensions? |
| Graphics stack | Is there a working accelerated driver, and does RetroArch’s chosen video backend initialize reliably at your display resolution? |
| Audio | Does Linux expose the output device, and can it maintain low-latency playback without underruns? |
| Display and storage | Are the required display connectors and storage interfaces available, and is loading content consistent? |
| Input | Do USB HID and Bluetooth controllers work after boot, suspend, and resume? |
| Software availability | Are RetroArch, your target cores, dependencies, and build instructions available for the exact distribution and ABI? |
| Power and thermals | Can the board sustain load without throttling, and is the power supply adequate for the board and peripherals? |
| Documentation | Can you find reproducible instructions for the board’s kernel, drivers, and package versions? |
Using RVVM as a RISC‑V-specific demonstration
RVVM is a Libretro core that implements a RISC‑V machine. Its documentation describes booting Linux, FreeBSD, OpenBSD, Haiku, and other systems from firmware and kernel images, with framebuffer, keyboard, mouse, NVMe, and networking support. An example configuration uses OpenSBI, a Linux kernel image, and NVMe disk images.
This is useful for understanding the RISC‑V/Linux execution model inside a Libretro frontend, but it is not proof that a particular physical development board will emulate a console at a given speed. RVVM is a virtual-machine core; its documented characteristics include a 60 FPS core-provided rate, 44.1 kHz audio, and a 640×480 base and maximum resolution. Those figures describe RVVM’s core configuration, not a performance guarantee for your board, display driver, or another console core.
Outdated Drivers Are Slowing You Down
One free scan finds every outdated or missing driver and matches the right update for your exact hardware.Free scan · exact hardware matchWindows Errors? Fix Them Before They Spread
Repair common Windows errors and clear accumulated junk for a smoother, more stable PC - no reinstall needed.Free scan · no reinstallTroubleshoot by symptom
RetroArch does not start
- Verify that the binary was built for the board’s RISC‑V ABI and userspace.
- Check missing shared-library dependencies reported by the shell.
- Try a simpler video or audio backend supported by the distribution.
- Confirm that the display session and permissions allow the application to open the chosen backend.
The core is missing or will not load
- Install a package built for RISC‑V or compile the core locally.
- Check that the plugin path points to the directory containing the core library.
- Launch the core without content to distinguish plugin initialization from a bad game image.
- Do not mix binaries from another architecture or incompatible build environment.
The game boots but runs poorly
- Disable shaders and other enhancements.
- Lower output resolution and test a simpler video driver.
- Close background services and check for thermal throttling.
- Try a less demanding console core to determine whether the problem is platform-wide or core-specific.
There is no sound
- Confirm that Linux lists an audio device and that ordinary system audio works.
- Select the correct RetroArch audio backend and output device.
- Check mute controls, volume, and permissions.
- If sound crackles rather than disappearing, investigate buffer underruns and system load.
The controller is not detected or buttons are wrong
- Check USB power, Bluetooth pairing, and Linux HID detection.
- Map the device manually in RetroArch and save its profile.
- Use a keyboard to verify the core while the controller issue is isolated.
- Retest after suspend or reconnect; resume failures often belong to the Linux input stack.
A MAME archive fails validation
- Match the archive to the installed core’s ROM-set version.
- Add the required parent ROM, BIOS, or sample files.
- Keep clone and parent archives together and preserve expected names.
- Avoid combining pieces from unrelated set revisions.
A practical first-session checklist
- Boot a maintained RISC‑V Linux image and verify display, audio, storage, and input drivers.
- Install RetroArch from a RISC‑V package or build it for the board.
- Install or compile one Libretro core for an 8-bit console.
- Connect a Linux-compatible gamepad and save its mapping.
- Copy one legally obtained game image and any required BIOS file.
- Launch the core without content, then load the game.
- Check video, audio, controls, save behavior, and suspend/resume.
- Only after that baseline works, add a 16-bit core, enhancements, arcade content, or more demanding systems.
The most reliable RISC‑V emulation projects treat every board-and-core combination as its own platform. Validate the Linux drivers and build, start with modest systems, keep core and content versions aligned, and tune one variable at a time. That method produces a usable classic-game setup without assuming that a generic architecture label guarantees compatibility.

