Do you want to make the mouse cursor on your Ubuntu PC bigger and need help with that? This guide demonstrates multiple methods to achieve that.
Option 1: Make the Cursor Bigger Through the GUI
One way to make the cursor on your Ubuntu computer bigger is through the settings in the GUI (Graphical User Interface). In order to accomplish that, carefully observe the following procedures, as well as the screenshot images below.
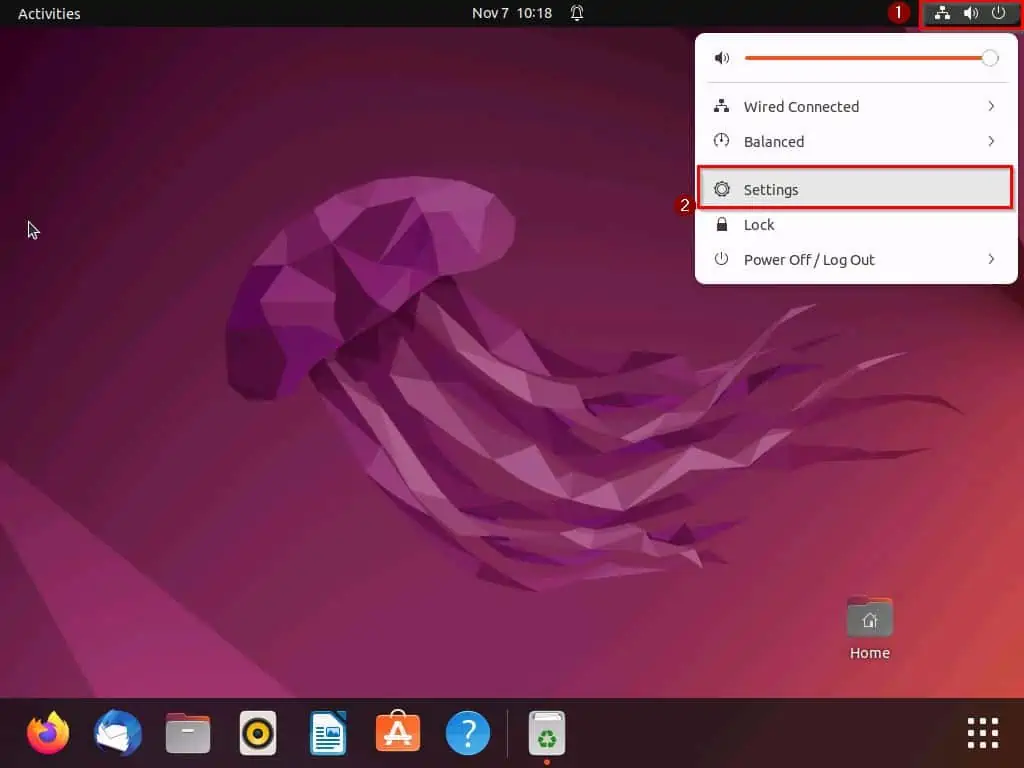
- Click the quick settings panel on the top right corner of the Ubuntu desktop. Then, select Settings from the options that appear.
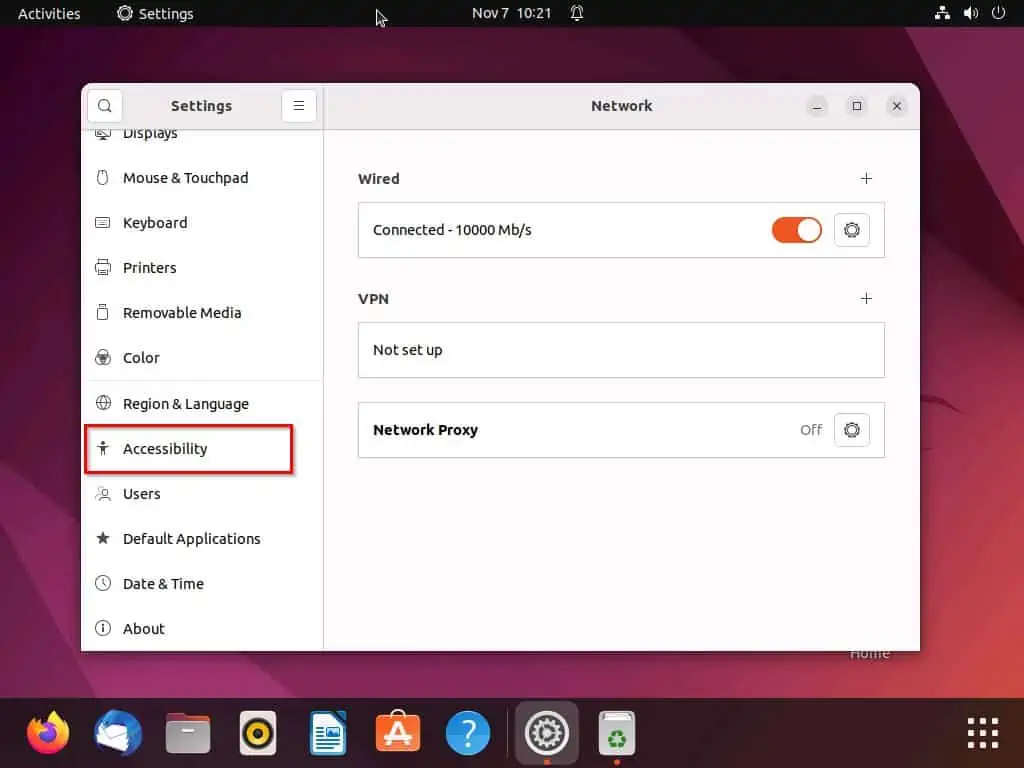
- In Settings, select Accessibility on the left pane.
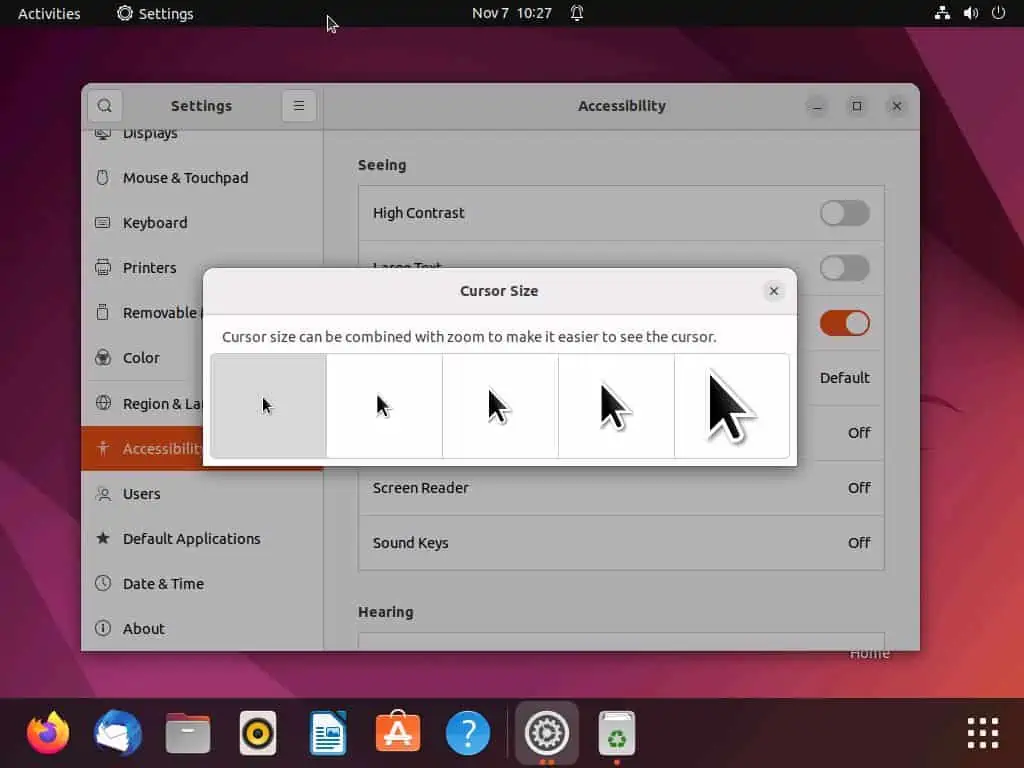
- On the right pane of the Settings window, click Cursor Size under the Seeing category.

- Finally, you can select a bigger cursor size for your Ubuntu computer from the Cursor Size window.
Option 2: Make the Cursor Bigger via the Terminal
As most people might expect, you can also make the mouse pointer of your Ubuntu computer bigger by running a certain command in the terminal. The following steps and screenshot demonstrate how to accomplish that.
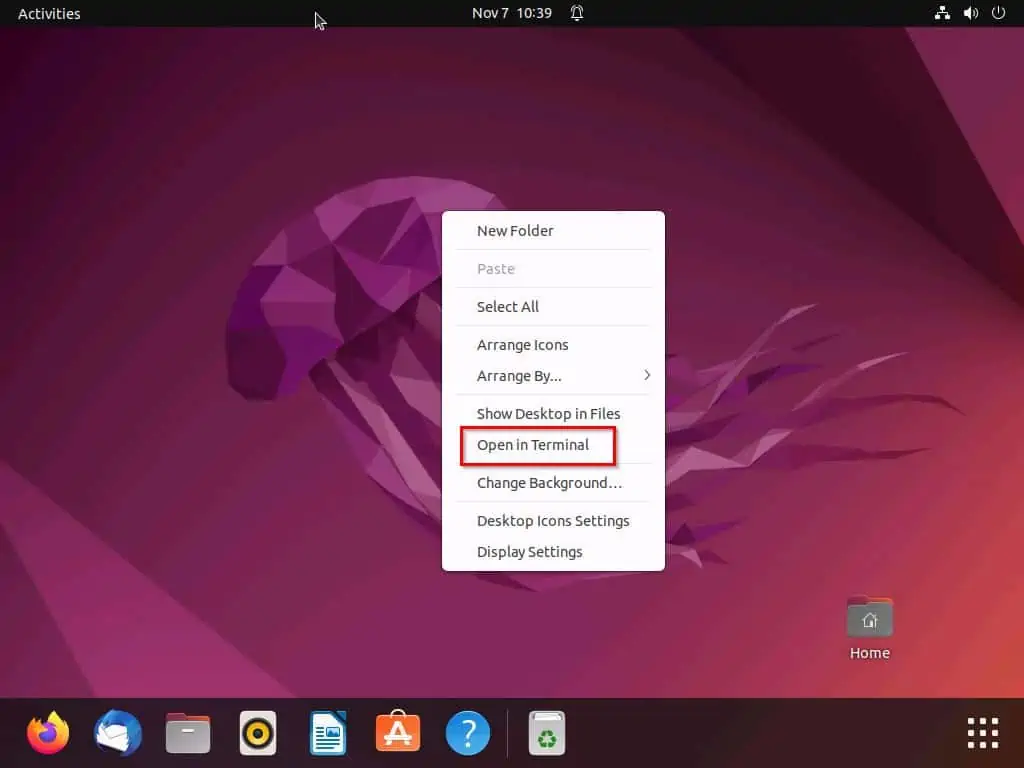
- Right-click any free area on your Ubuntu desktop, then select Open in Terminal from the options that appear. Alternatively, use the Ctrl + Alt + T shortcut to start the terminal in Ubuntu.
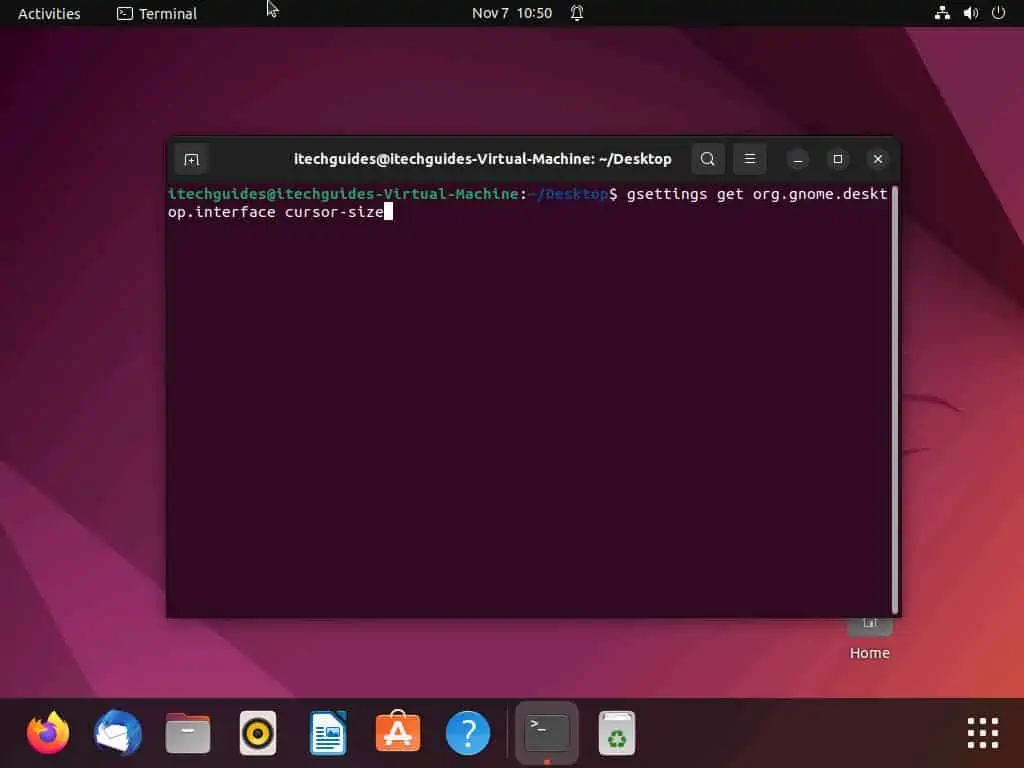
- In the Ubuntu terminal, type the following command and press the enter key to know the current size of the cursor.
gsettings get org.gnome.desktop.interface cursor-size
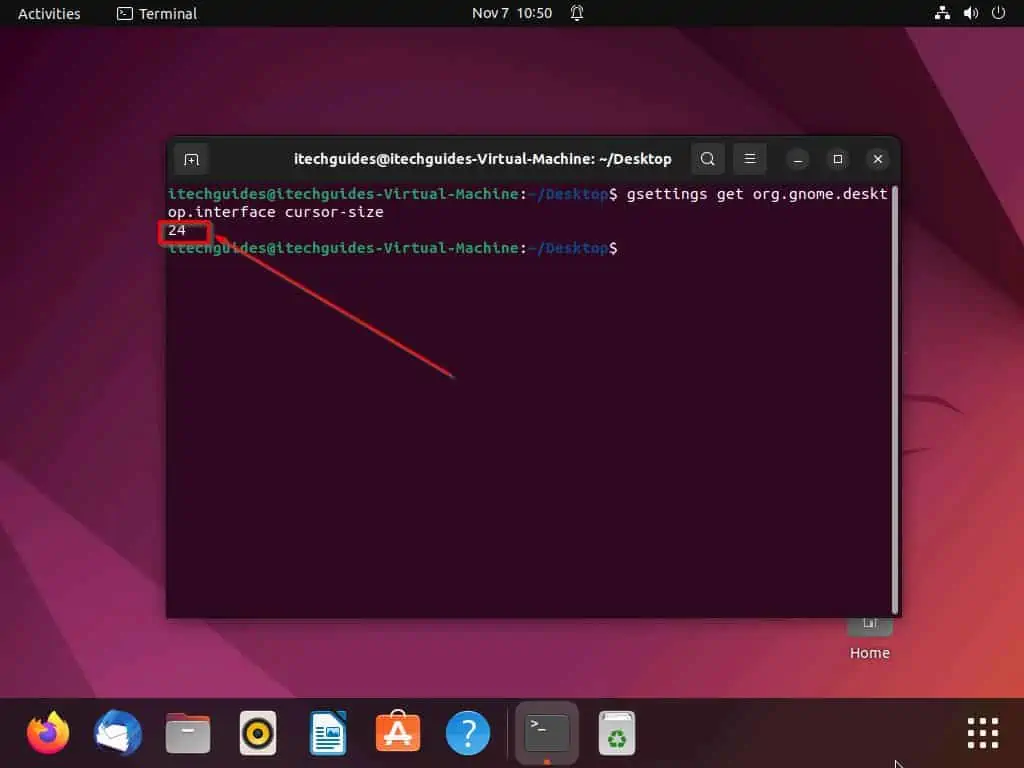
- Consequently, the current size of the cursor on your Ubuntu PC should appear. As shown in the screenshot below, the current size of my Ubuntu PC cursor is 24, which represents the smallest and default size in pixels.
- After knowing the current size of your Ubuntu PC cursor, execute the command below to make it bigger. However, replace “size in pixels” with the number of a bigger cursor size.
32 – Medium cursor size
48 – Large cursor size
64 – Larger cursor size
96 – Largest cursor size
gsettings set org.gnome.desktop.interface cursor-size "size in pixels"
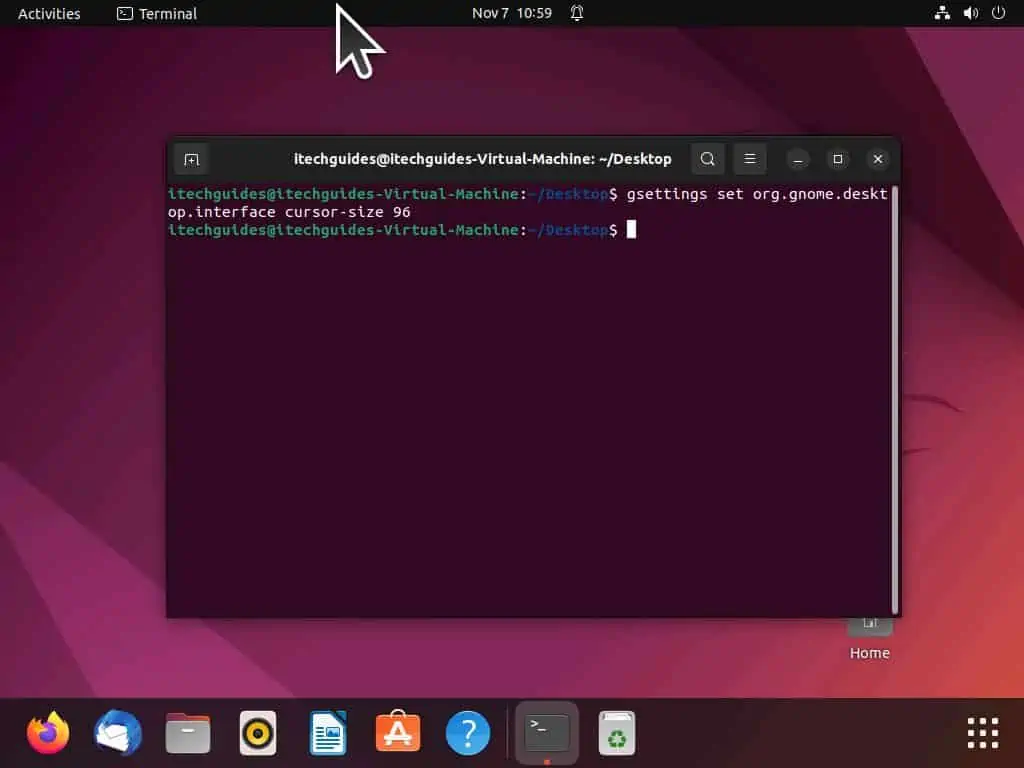
For example, If I want to change my cursor size to the largest, below is what the command should look like.
gsettings set org.gnome.desktop.interface cursor-size 96
Frequently Asked Questions
a) Click the quick settings panel on the top right corner of the Ubuntu desktop.
b) Then, select Settings from the options that appear.
c) In Settings, select Accessibility on the left pane.
d) On the right pane of the Settings window, click Cursor Size under the Seeing category.
e) Finally, select a bigger cursor size for your Ubuntu computer from the Cursor Size window.
You can check the current mouse pointer size of your Ubuntu computer through the terminal. To do that, follow the procedures below.
a) Use the Ctrl + Alt + T shortcut to start the terminal in Ubuntu.
b) In the Ubuntu terminal, type “gsettings get org.gnome.desktop.interface cursor-size” and press the enter key.
c) Consequently, the current size of the pointer on your Ubuntu PC should appear.
Yes, the Ubuntu operating system will work easily on a 2 GB RAM computer.
Yes, the Ubuntu operating system is free and open source.
Ubuntu 22.04 was released in April 2022.
Conclusion
Changing the mouse pointer size is one of the various ways you can customize your Ubuntu computer. Gladly, this guide demonstrated multiple methods to make the mouse cursor bigger in Ubuntu.
Essentially, I illustrated how to perform this task through the settings in the Ubuntu GUI (Graphic User Interface). This guide also taught us how to carry out the task by running a couple of command lines in the Ubuntu terminal.
I sincerely hope you found this guide and its methods helpful. If you found the guide helpful, click on “Yes” beside the “Was this page helpful” question below.
You may also express your thoughts and opinions by using the “Leave a Comment” form at the bottom of this page.
Finally, visit our Linux how-to page for more Linux guides.