In this Itechguide, Victor teaches you how to enable IPv6 on Windows 10.
Option 1: Enable IPv6 from Network Settings
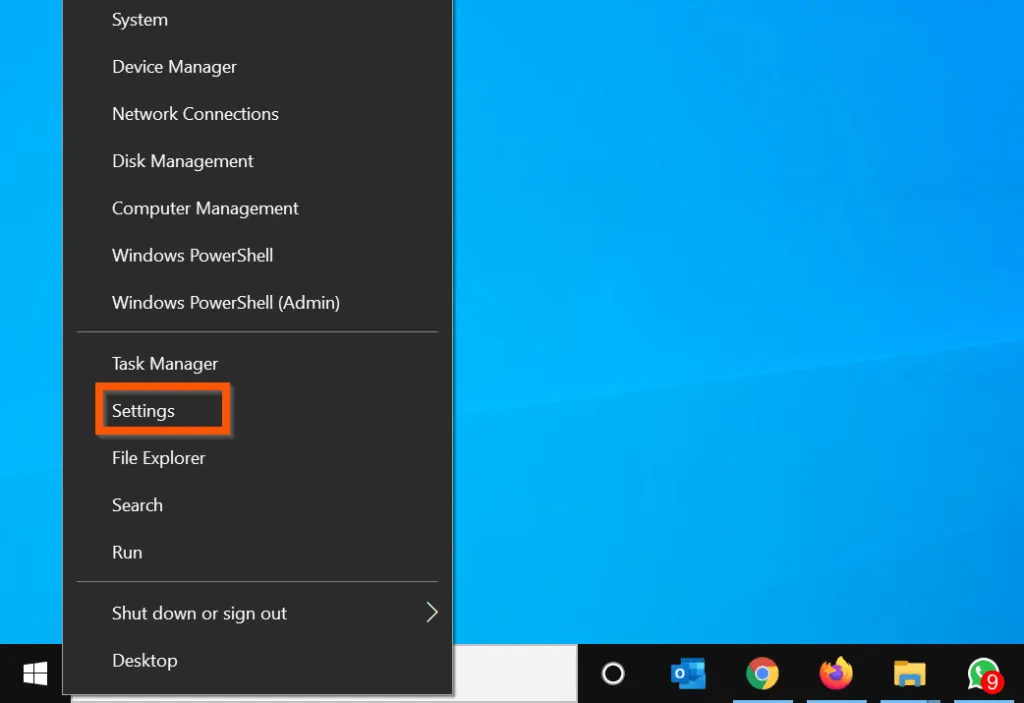
- Right-click Windows 10 Start menu and select Settings.
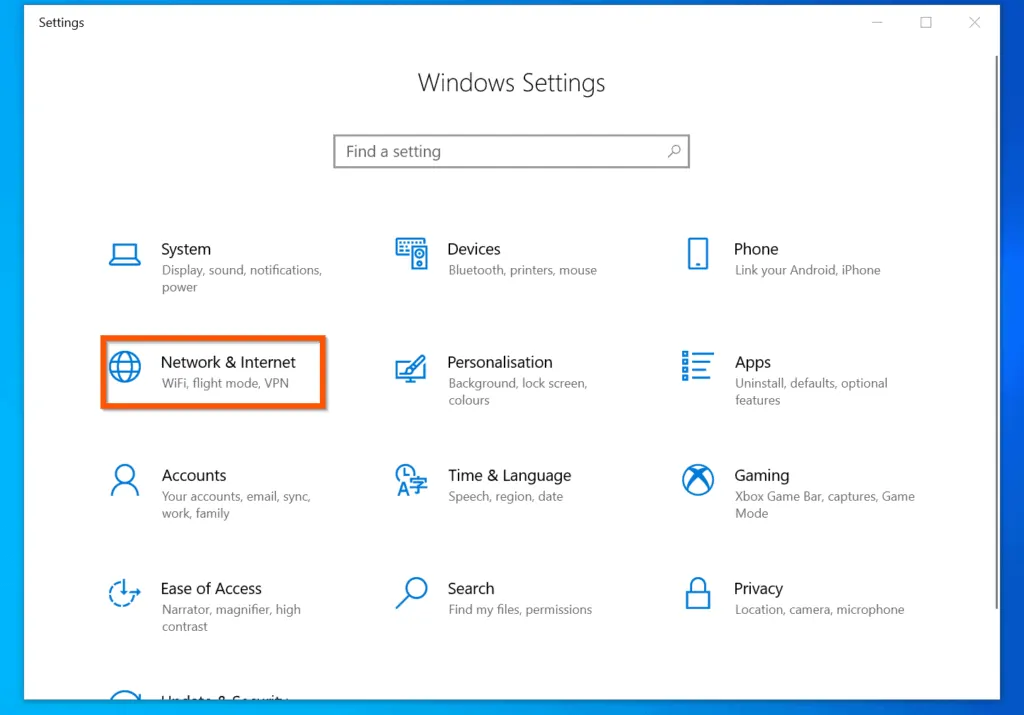
- Then, on Windows Settings, click Network & Internet.
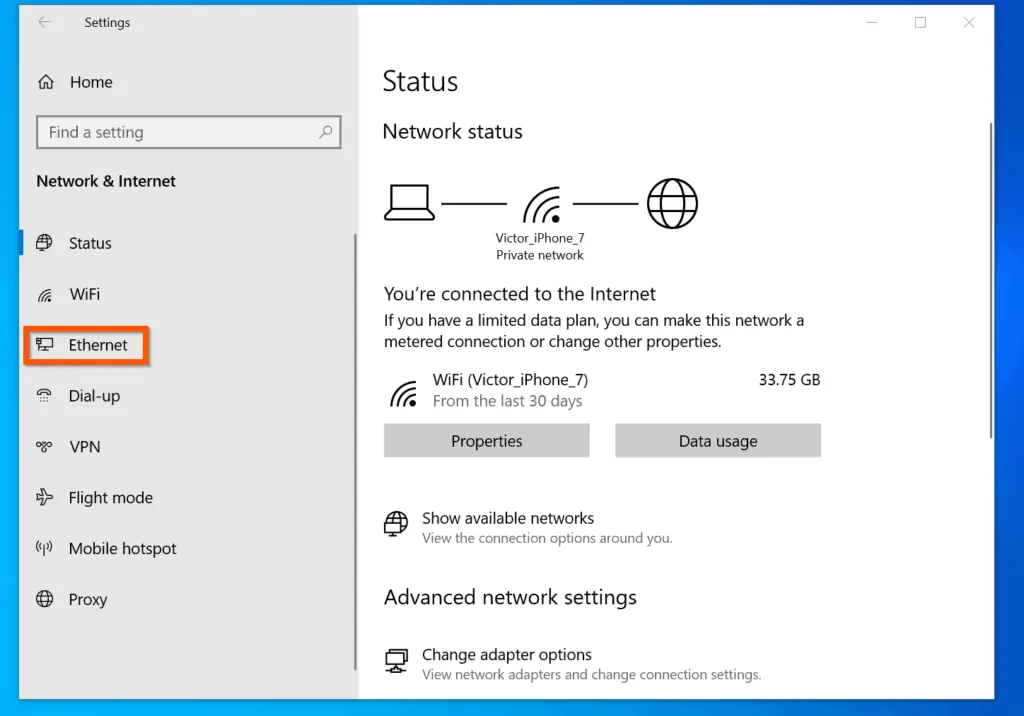
- On the left pane of Network & Internet settings screen, click Ethernet.
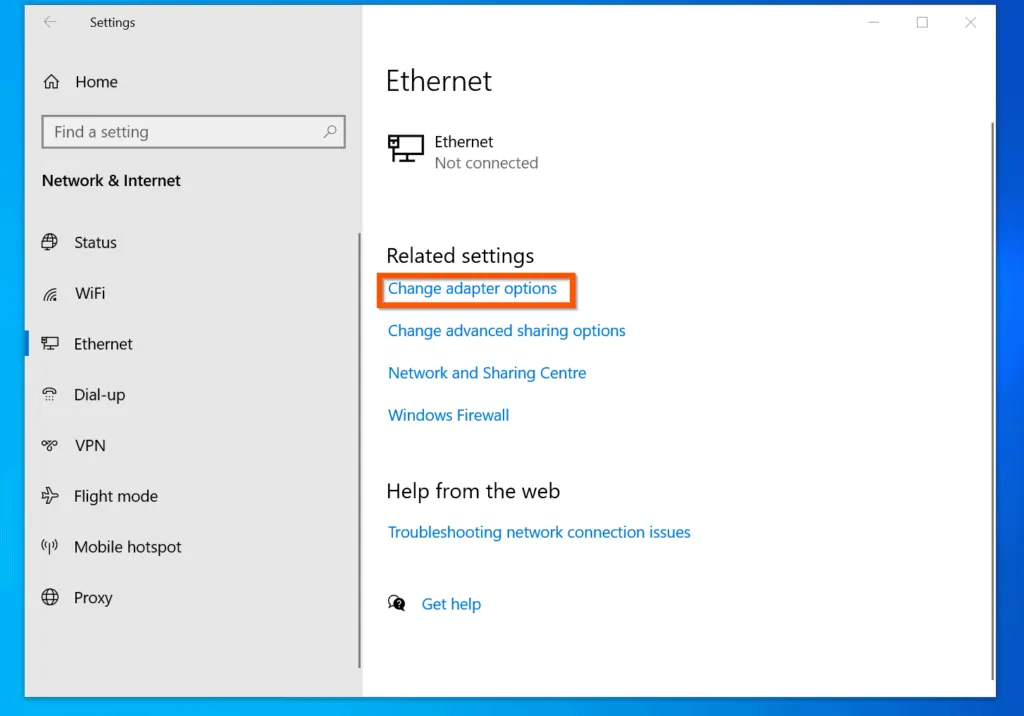
- Then, on the Ethernet settings screen – Related settings section, click Change adapter options.
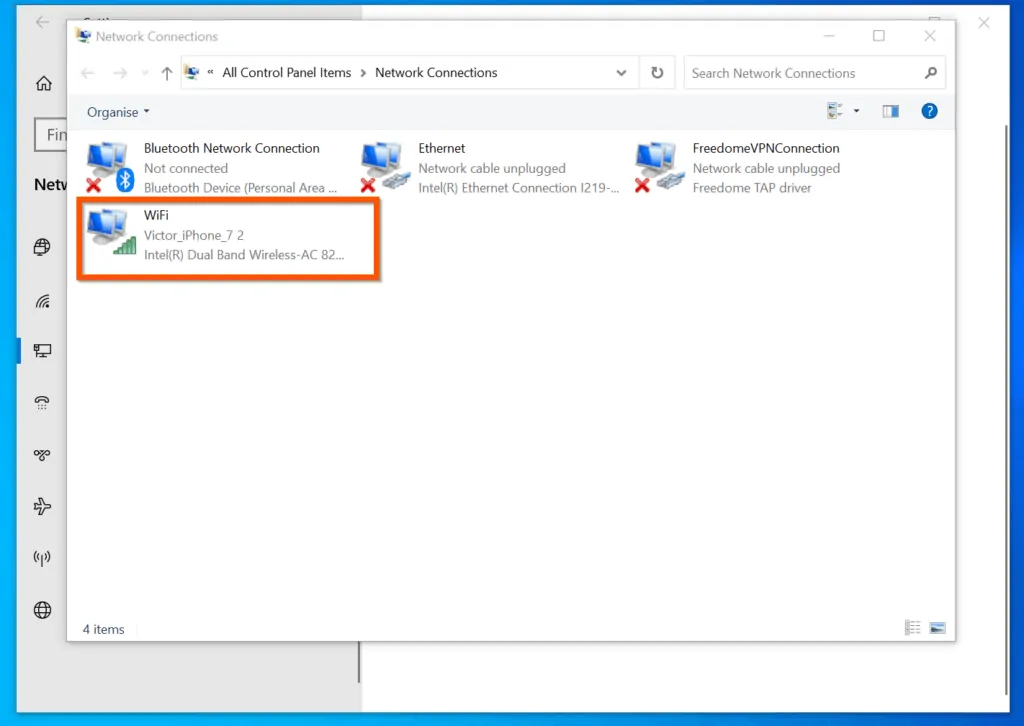
- On Network Connections screen, double-click on the network connection you want to enable IPv6 for. The status of the connection will open.
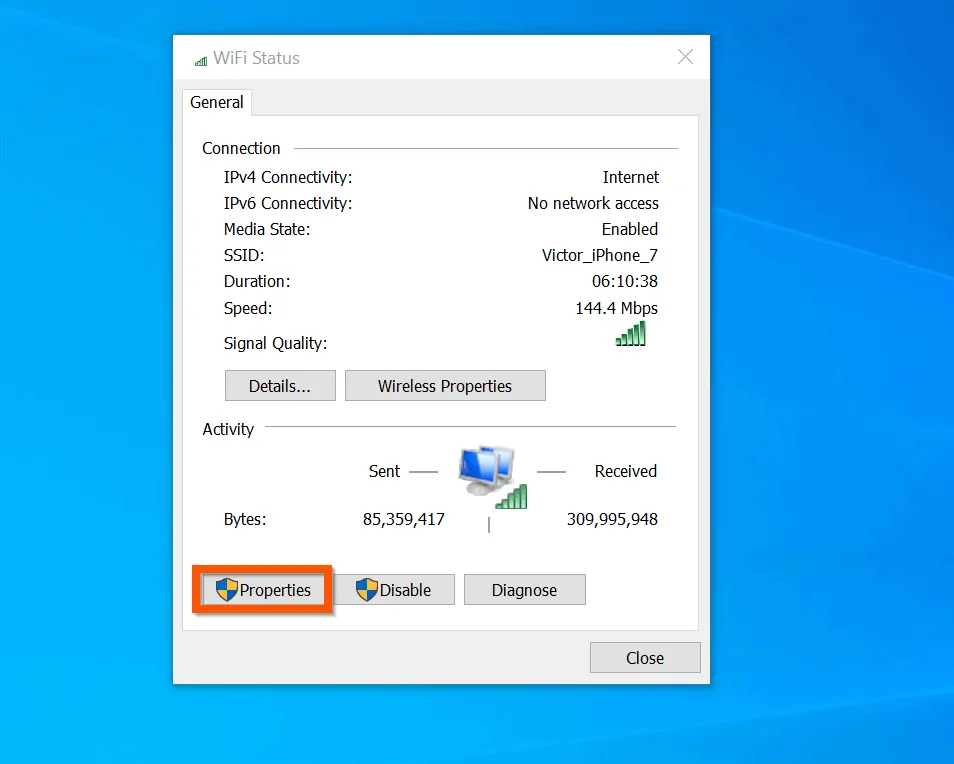
- On the adapter status screen, click Properties.
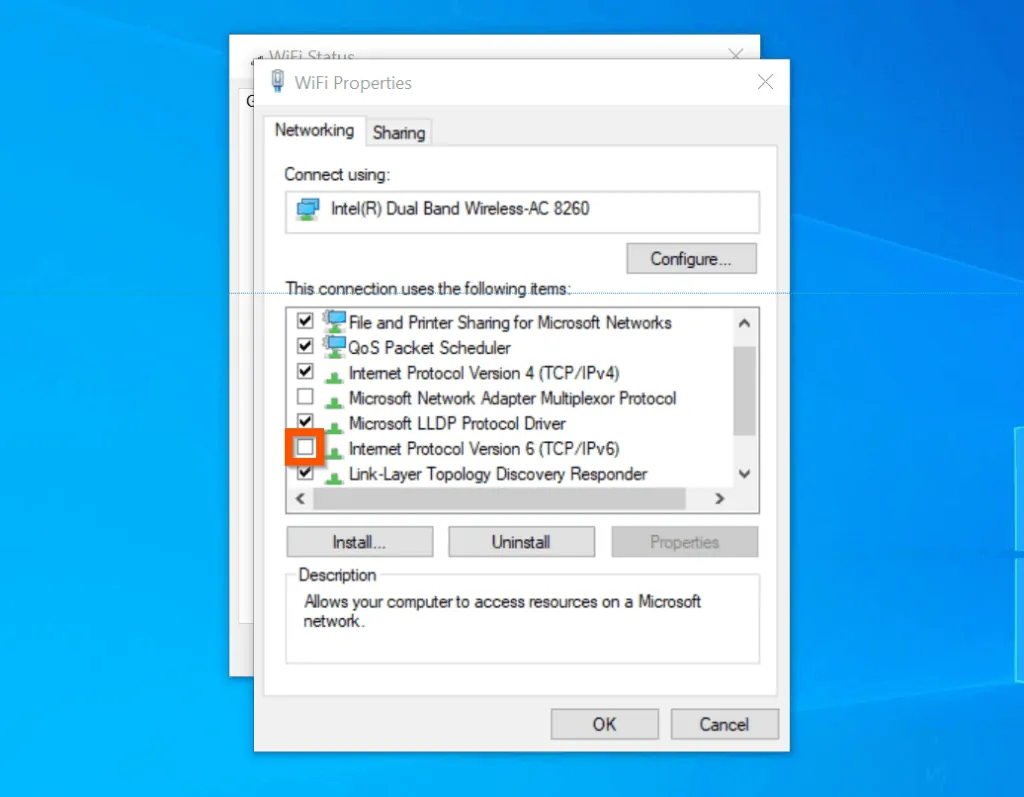
- Finally, on the properties of the adapter, locate Internet Protocol Version 6 (TCP/IPv6) and check the box beside it. When you finish, click OK.
Option 2: Enable IPv6 with PowerShell
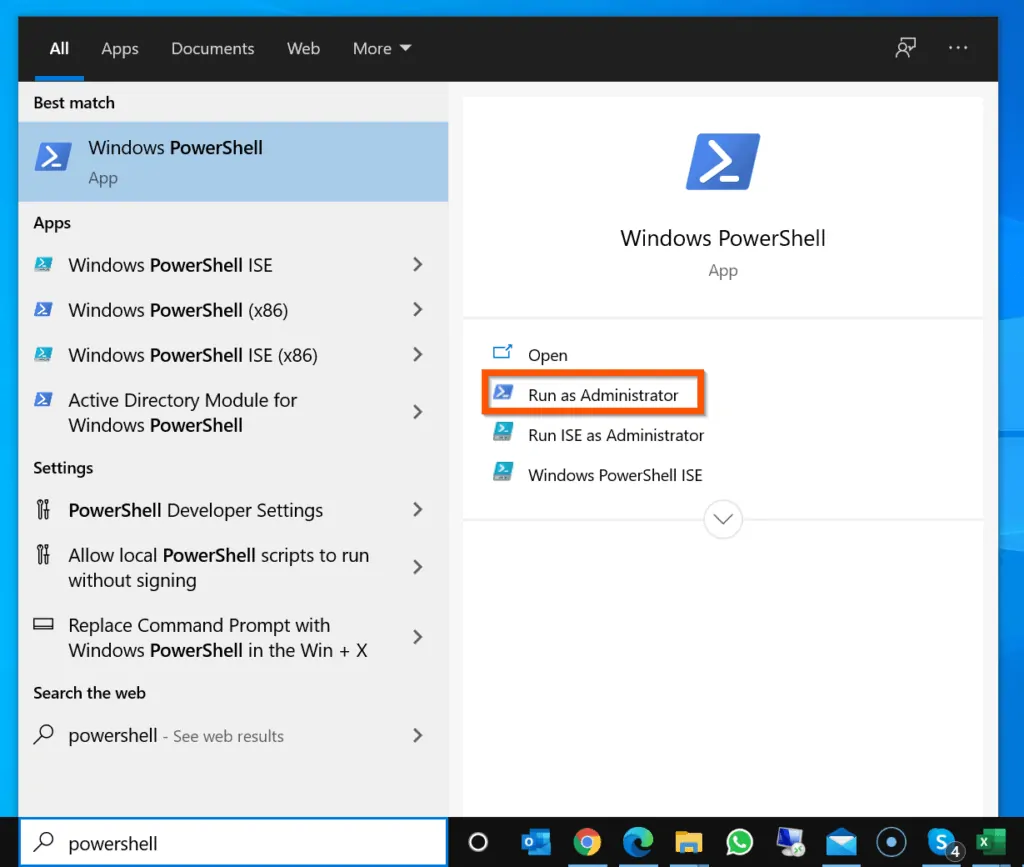
- Enter powershell in the Windows 10 search. From the search result, Windows PowerShell should be highlighted. On the right-pane, below Windows PowerShell, click Run as Administrator.
- You will be prompted by User Access Control, to confirm that you want the app to make changes to your PC – clicks Yes.
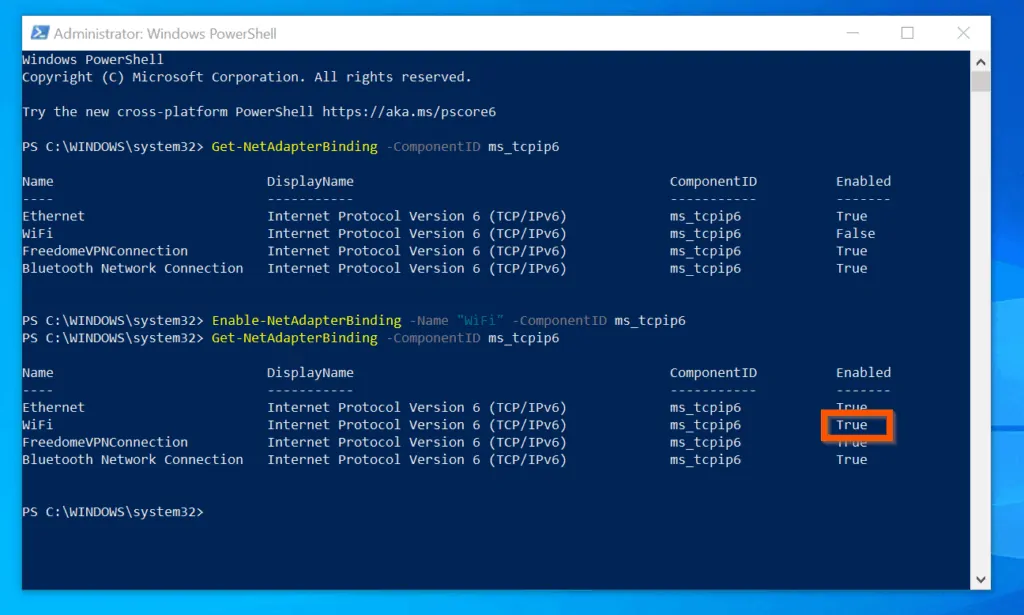
- Before you enable IPv6, confirm that it is not yet enabled. To do this, enter the command below and press enter.
Get-NetAdapterBinding -ComponentID ms_tcpip6
The command lists the status of IPv6 for all adapters on your PC. In this screenshot, IPv6 is disabled for the wifi adapter.

- To enable IPv6 for the adapter, enter the command below into PowerShell prompt and press enter.
Enable-NetAdapterBinding -Name "WiFi" -ComponentID ms_tcpip6
When the command completes, to confirm that IPv6 is enabled for the adapter, run the Get-NetAdapterBinding command again.
Conclusion
If you were able to enable IPv6 in Windows 10 with the aid of the steps in this guide, click on “Yes” beside the “Was this page helpful” question below.
You may also express your thoughts and opinions by using the “Leave a Comment” form at the bottom of this page.
Finally, for more Windows 10 Itechguides, visit our Windows 10 How-to page. You may also find our Work from Home page very helpful.


![How To Run Sysprep (Generalize) In Windows 10 [2 Methods]](https://www.itechguides.com/wp-content/uploads/2022/05/8-2.webp)