This Itechguide teaches you how to defrag Windows 10. The guide covers steps for 3 methods to defrag Windows 10 – Defragment Tool, Command Prompt, PowerShell.
Option 1: Defrag with Defragment Tool
The Defragment Tool allows you to perform one-time, manual defragmentation or scheduled, automatic defragmentation.
Method 1: Manual Defragmentation
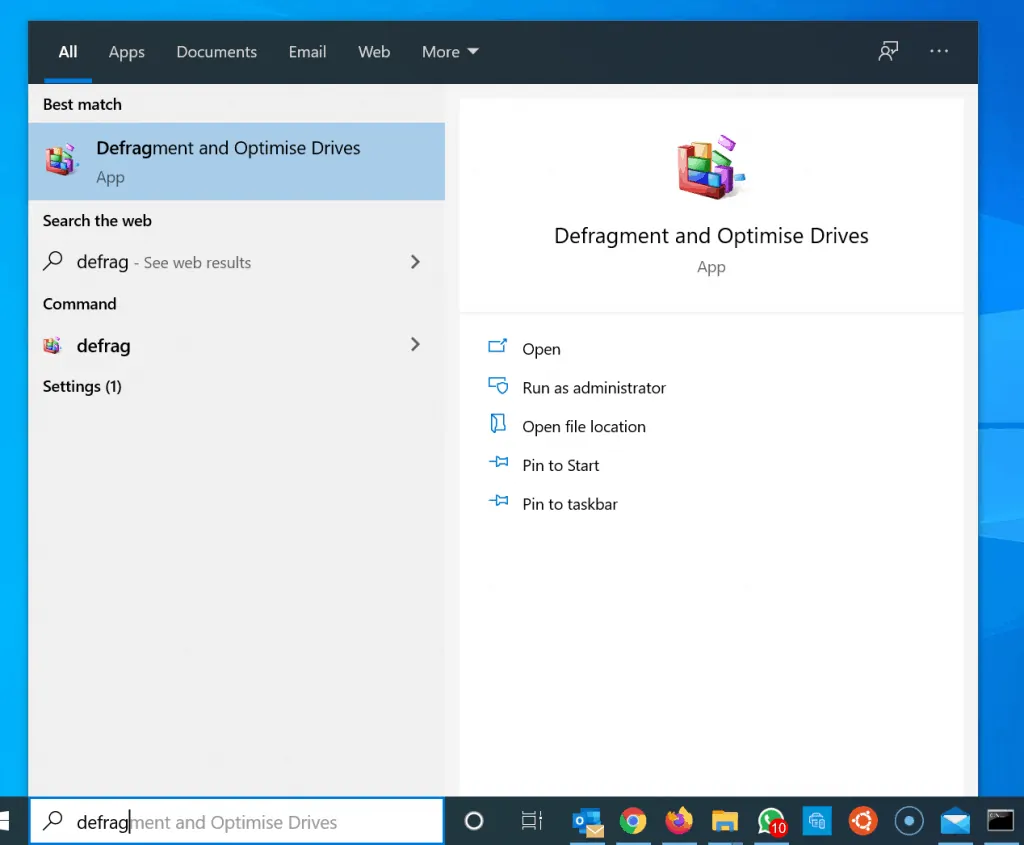
- Type defrag in the search box. Then select Defragment and Optimise Drives.
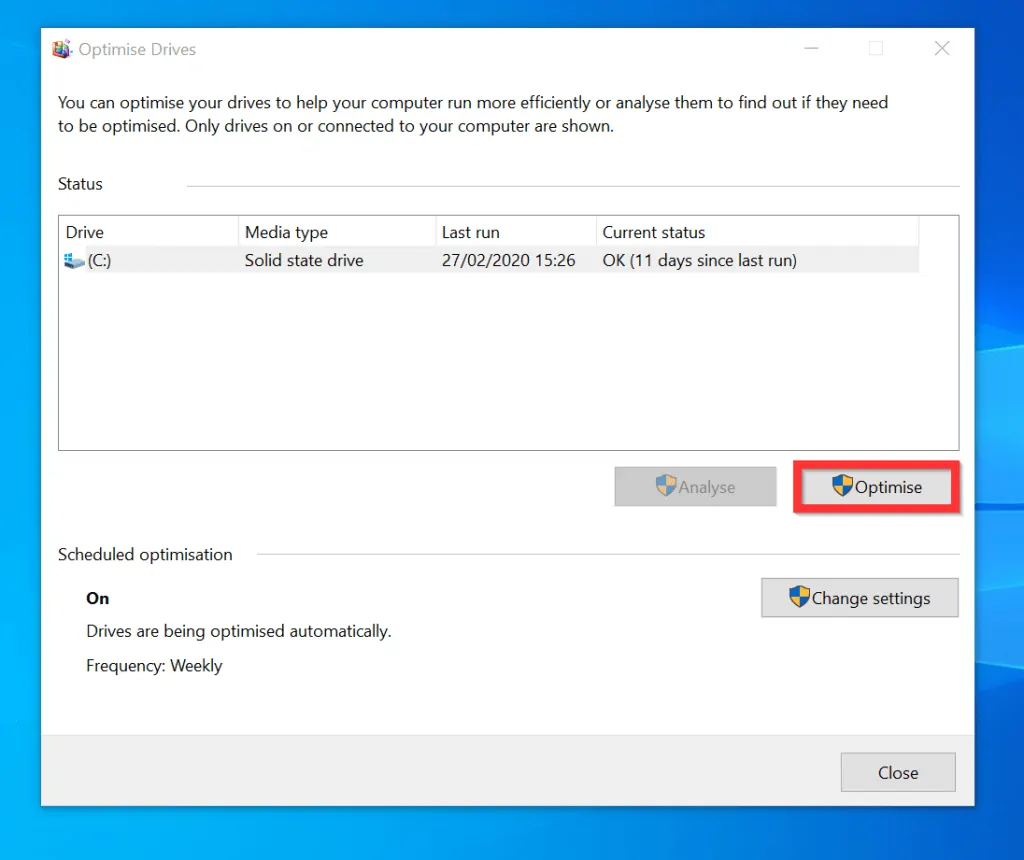
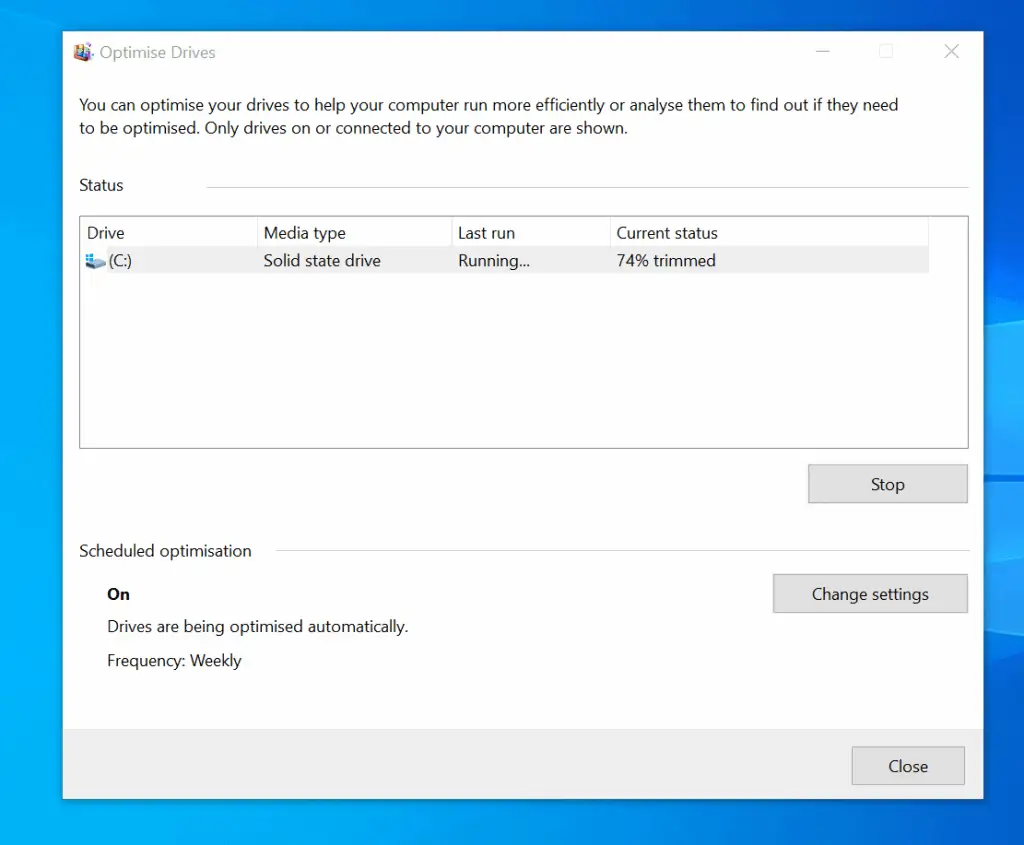
- When the Optimise Drives tool opens, select the drive you want to defrag. Then, on the bottom right of the tool, click Optimise.
Method 2: Scheduled Automatic Defragmentation
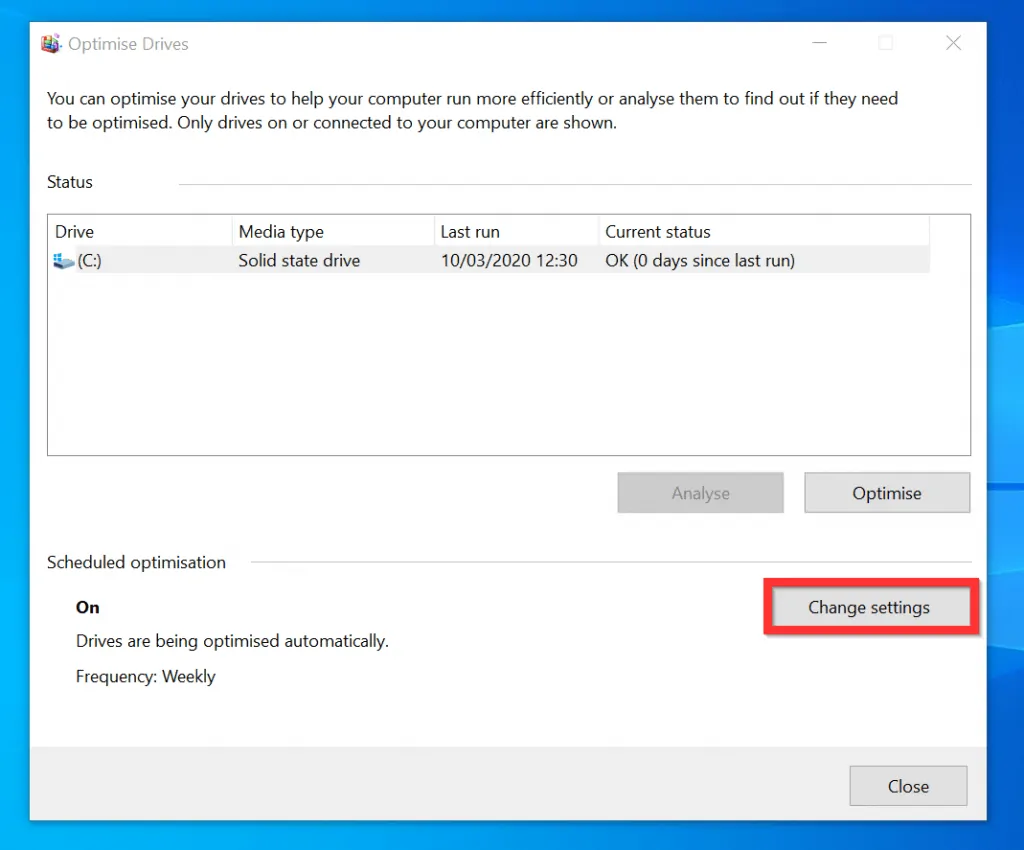
- You can also schedule your computer to defragment automatically. To manage the settings, beneath Scheduled optimization, click Change settings.
- To turn off scheduled automatic defragmentation, uncheck the checkbox beside Run on a schedule (recommended).
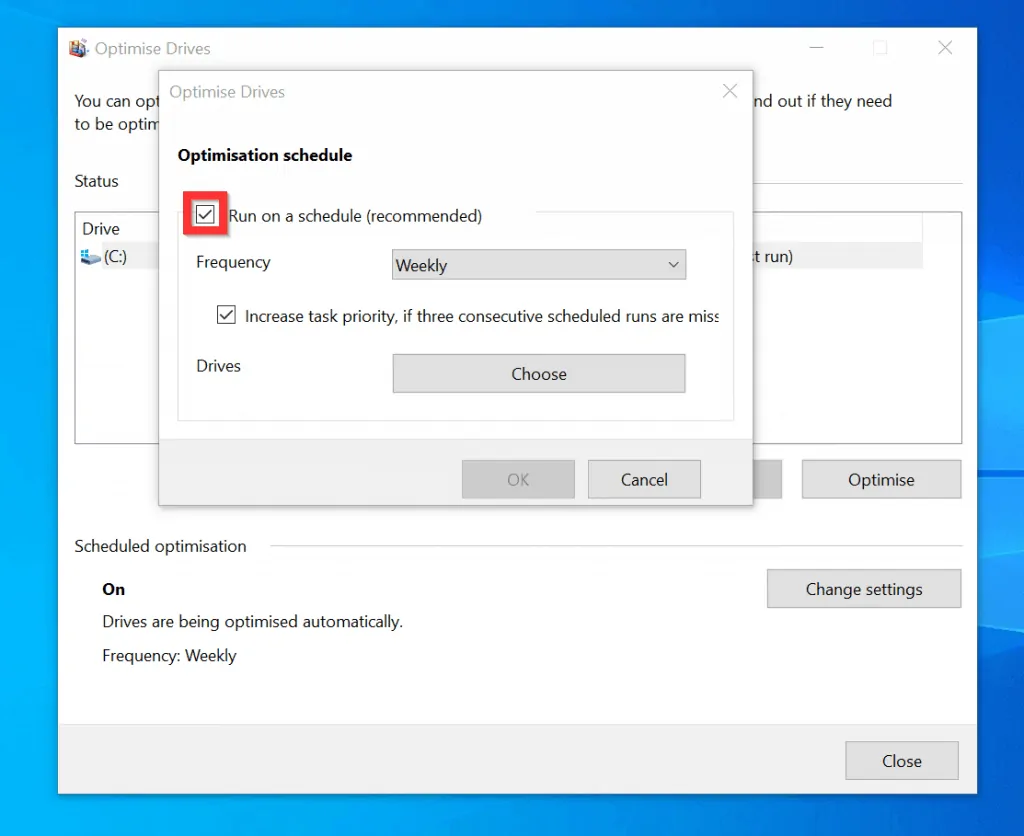
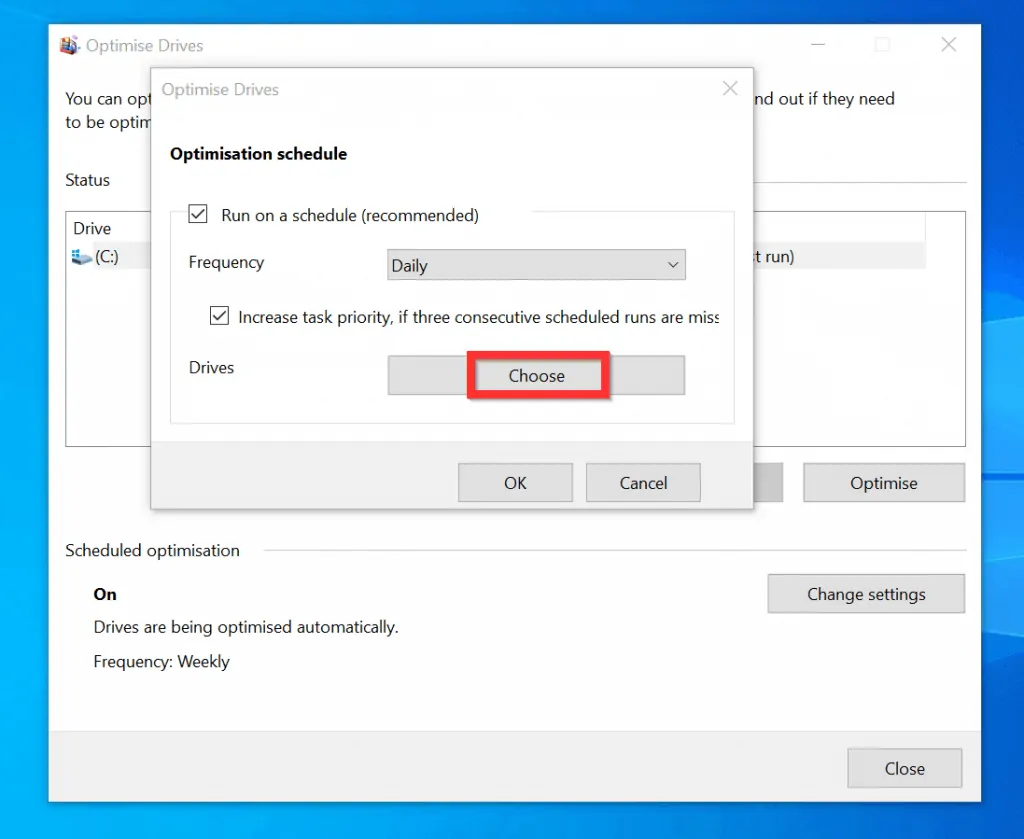
- Alternatively, leave the box checked and select how often (Frequency) you want the defragmentation to run.
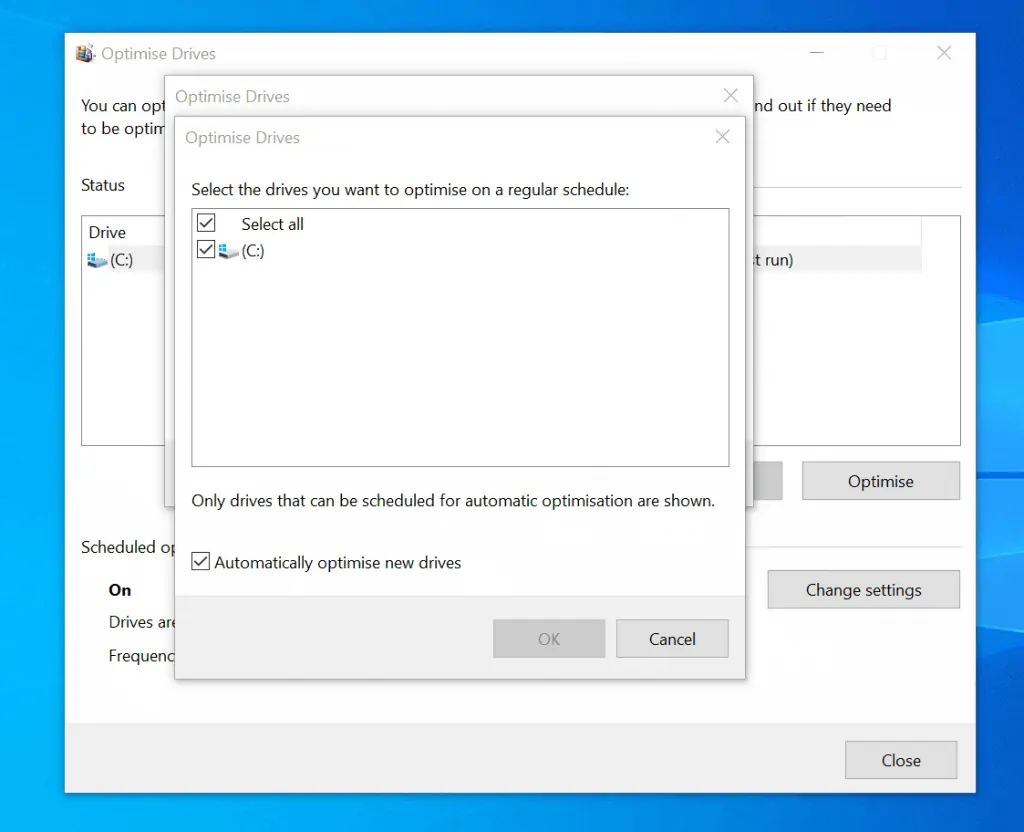
- Then, beside Drives, click Choose and select or deselect the drives you want to add to or remove from the automatic defragmentation schedule.
- When you finish click OK.
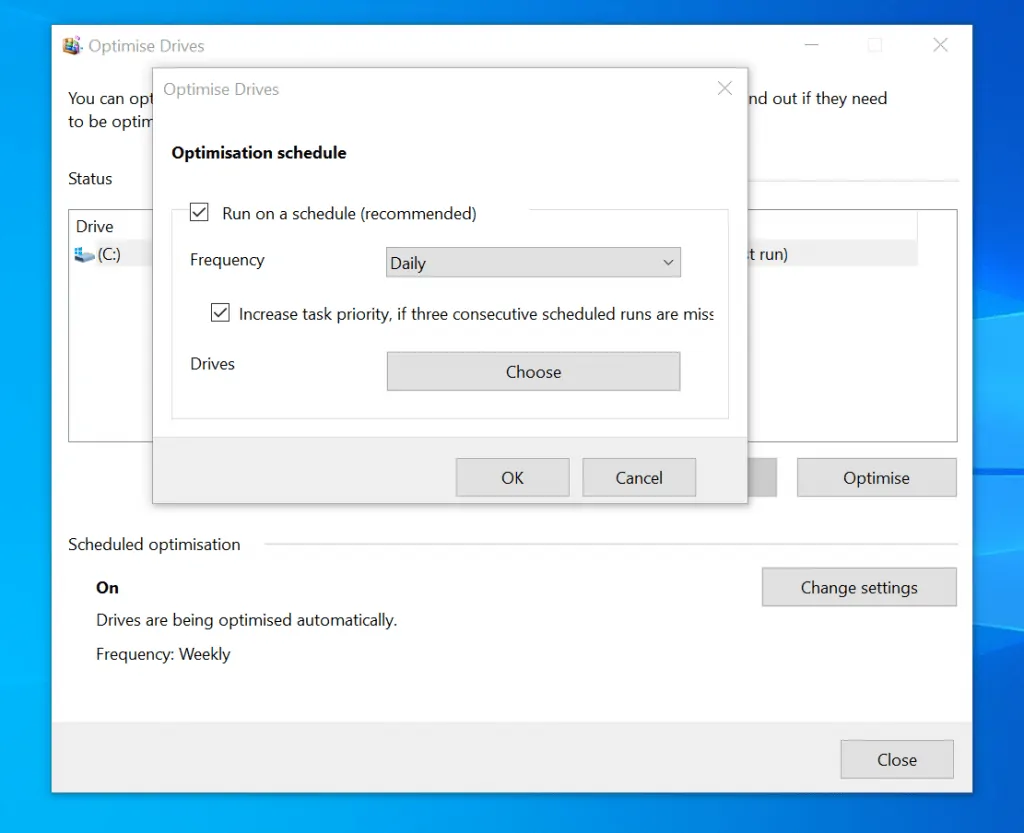
- Finally, on the Optimisation schedule screen, click OK.
Option 2: Defrag with Command Prompt
- Search command prompt and click Run as administrator.
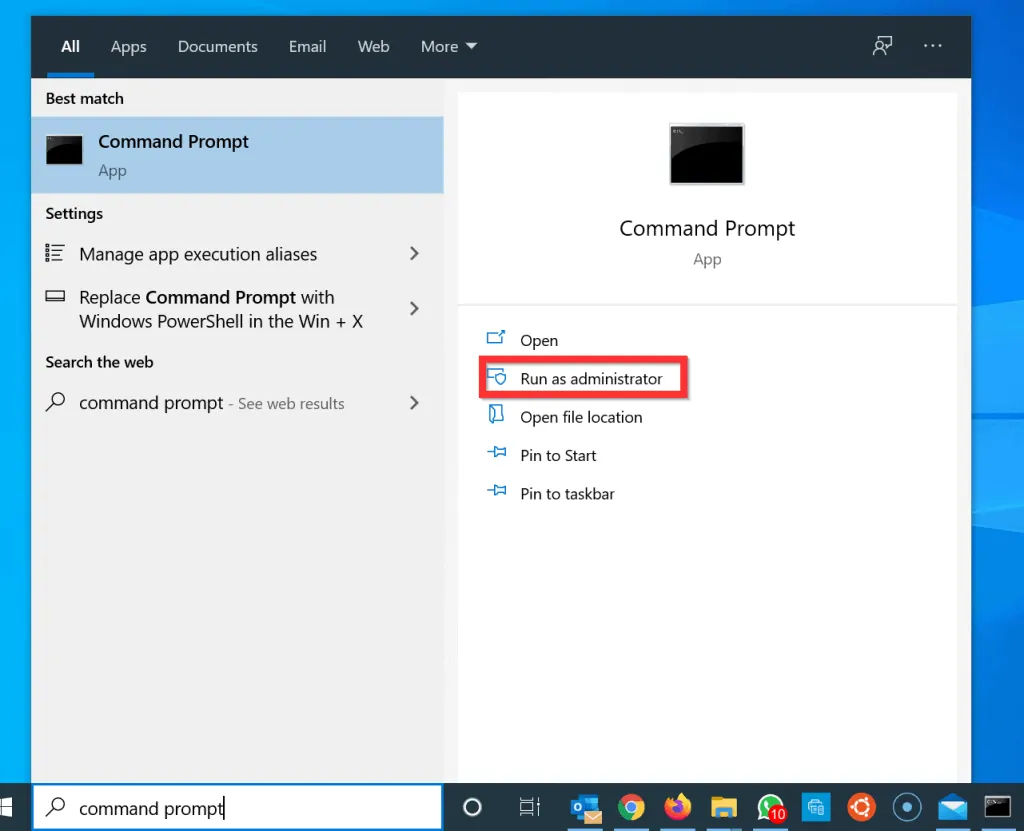
- If you receive the User Account Control tool prompting you to allow the app to make changes to your computer, click Yes.
- On the Command Prompt, type the command below and press enter
defrag /C /H /V /O
- Wait for the operation to complete. If everything goes well, you should receive “The operation completed successfully”. You should also receive a “Post Defragmentation Report”

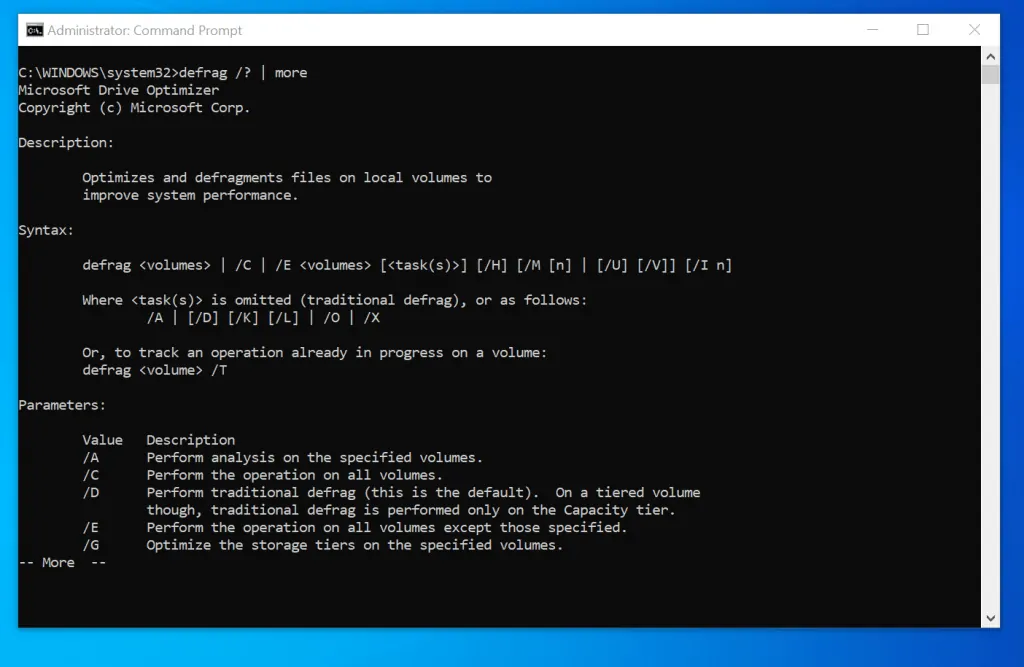
- To learn more about the defrag switches used in the previous command and other available switches, type the command below and press enter.
defrag /? | more
- Piping “defrag /?” to “more”, forces command prompt to display the results one page per time. To display more pages, press the enter key.
Option 3: Defrag with PowerShell
- Type PowerShell in the search box and click Run as Administrator.
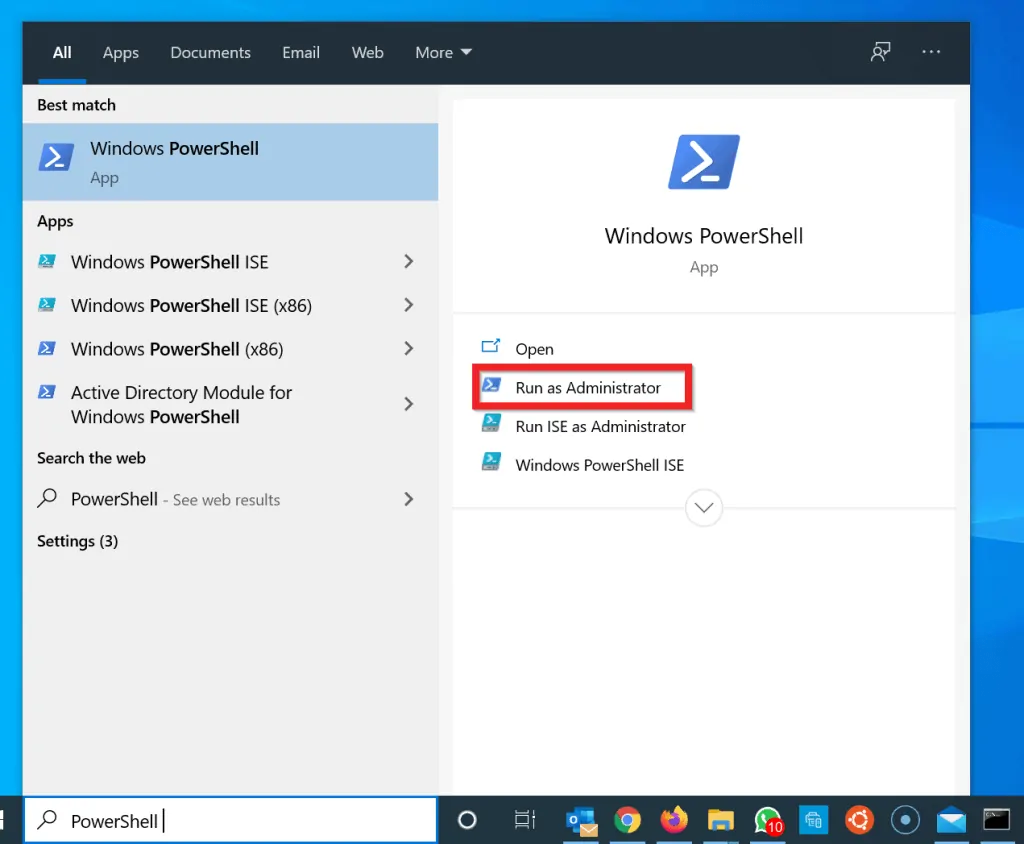
- If you receive the User Account Control tool prompting you to allow the app to make changes to your computer, click Yes.
- Then on the PowerShell command, type the command below and press enter:
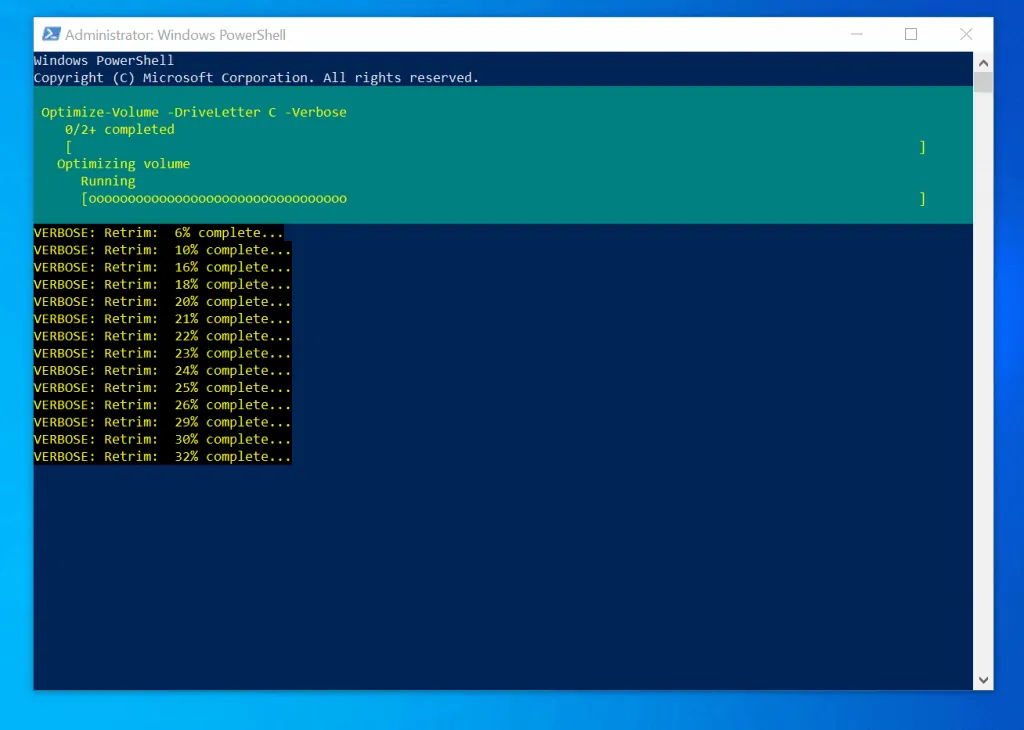
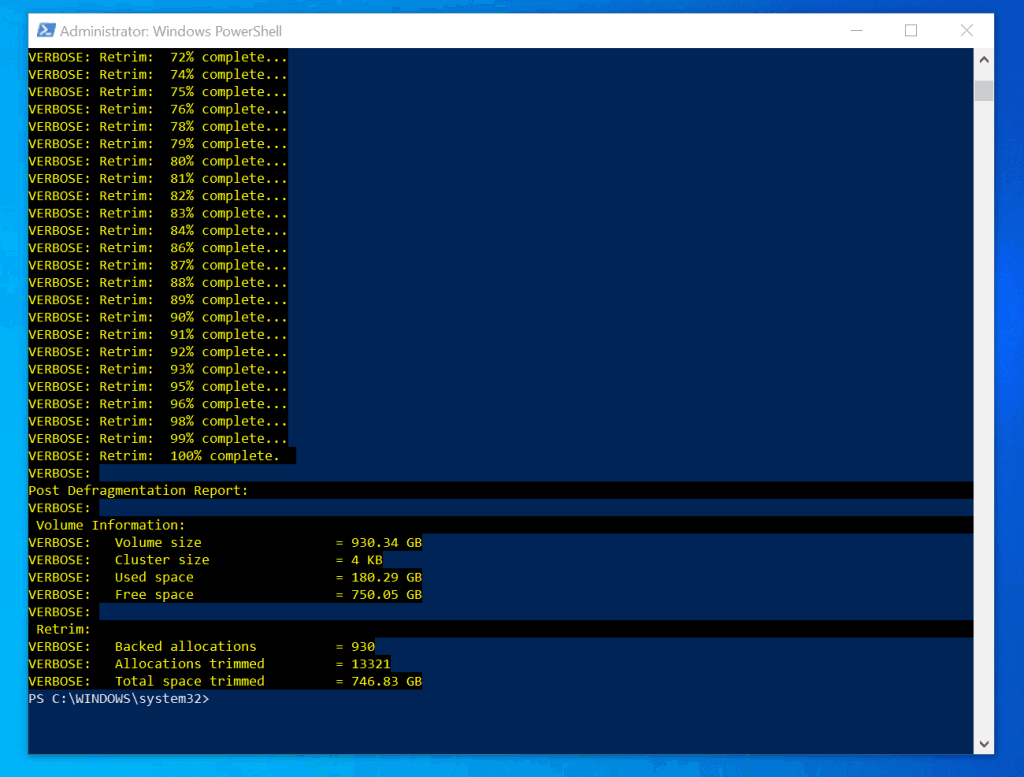
Optimize-Volume -DriveLetter <drive_letter> -Verbose
Change <drive_letter> to the drive letter for the drive you want to defrag. For example, to defragment drive C, change <drive_letter> to C. Here is a command to defrag drive C…
Optimize-Volume -DriveLetter C -Verbose
- When you press enter, the command will start running. Verbose switch forces PowerShell to display the progress of the command. The second image below shows the final result.
It is very easy to defrag Windows 10! I hope this Itechguide was helpful. If it was, click on “Yes” beside the “Was this page helpful” question below.
You may also express your thoughts and opinions by using the “Leave a Comment” form at the bottom of this page.
Finally, for more Windows 10 Itechguides, visit our Windows How-To page.


![How To Run Sysprep (Generalize) In Windows 10 [2 Methods]](https://www.itechguides.com/wp-content/uploads/2022/05/8-2.webp)